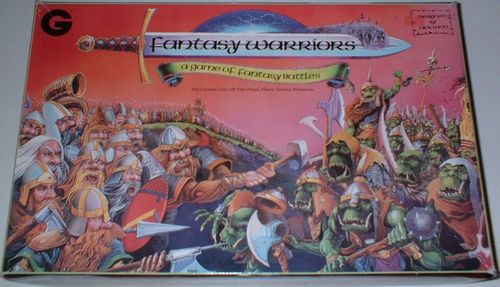
Fantasy Warriors
Fantasy Warriors Rulebook
Table of Contents
Table of Contents
- Introduction
- Game Components
- Counters and Dice
- Sequence of Play
- Preparing for Battle
- Preparing the Terrain
- Victory and Defeat
- Campaigns
- Multi-Player Games
- Before the Battle
- The Battle Turn
- Reactions
- Phase Two: Shooting
- Phase Three: Movement and Reorganisation
- Phase Four: Combat
- Phase Five: New Orders
- Phase Six: Influence
- Phase Seven: The Command Test
- Individuals in Battle
- Warchiefs and Battle Leaders in Battle
- Magic
- Talismans
- The Army Lists
- Sample Armies
- Army Game Sheet
Introduction
No matter whether you're a veteran or a novice warchief, you can always learn from the experts. Look out for tips as you read through these rules. We'll be giving you the benefit of our experience with hints and tips on how to be a better warchief.
Game Components
- 102 plastic miniatures
- 51 plastic shields
- 5 dice
- 150 order counters
- 1 rulebook and Quick Reference Sheet
Counters and Dice
Dice
The only dice required to play FANTASY WARRIORS are the standard, 6-sided type supplied with the game. Therefore all references to dice in the text mean 6-sided dice. Often the abbreviation 'D' will be used. If a number appears in front of the 'D' (eg '2D') it just tells you how many dice to throw. For example, 2D tells you to throw two dice. Sometimes you will need more than the 5D provided with the game. When this happens just keep rolling the dice until you have reached the required total. If you find it more convenient, you can buy extra dice - they're very cheap.
Counters
The counters are a way of displaying game information right where you need it most - on the battlefield. During the game, the status of units and some individuals will alter so, rather than having to memorise or make notes of, for example, how many volleys a missile unit has left or which unit is threatening which other unit or how many magic points a wizard has, you simply place the relevant counters next to the unit or individual in question and all the information is there in front of you. FANTASY WARRIORS is a visual spectacle so it makes sense to record changes of status with attractive counters.
At the start of a game, divide all counters (except magic points and volleys) equally between the two sides. Allocate magic and volley counters to the wizards and missile units as explained in the rules.
The counters are:
- Blue HOLD (x8)
- Yellow OPPOSE (x8)
- Red ATTACK (x8)
- Bloodlust (x9)
- Shaken (x9)
- Direction (x1)
- Threaten (x9)
- Command Test (x6)
- Disorganised (x9)
- Hourglass (x1)
- Volleys (x40)
- Magic Power (x31)
- Initiative (x10)
- Time Dial (x1)
Painting Miniatures
For advice on painting the FANTASY WARRIORS miniatures, see the side panels of the game box.
Sequence of Play
There are just three stages involved in playing a game of FANTASY WARRIORS:
- Preparing for Battle
- Before the Battle
- The Battle Turn
Let's take a look at each stage in more detail.
1. Preparing for Battle
- Organising an Army (page 7): Warriors are provided for you in the form of plastic FANTASY WARRIORS miniatures, over 100 of them crammed into the game box. You'll need to separate them from each other and group most of them into units. You'll also need Specials, Battle Leaders and a Warchief, which you will designate from the remaining figures. They will all then be given Profiles which determine their effectiveness in the game.
- Preparing the Terrain (page 10): The FANTASY WARRIORS battlefield, be it a large table or designated area of the floor, is not just a flat, empty plain. Scenery is used both tactically and for visual appeal. It is used in the game in pre-defined Terrain Features.
- Victory and Defeat (page 11): Like any competitive game, FANTASY WARRIORS usually ends with one side winning and the other losing. Draws are possible, but not very likely. Before you commence play, both sides will need to know what they have to do to secure victory.
- Multi-player Games (page 12): The most obvious way to play FANTASY WARRIORS is with two people, each with a Warchief at the head of an army, battling against one another. However, the game is eminently suitable for larger, multi-player battles involving several allied armies.
2. Before the Battle
- Scouting (page 13): Before any of the miniatures are actually placed on the battlefield, the players will need to decide if they wish to Scout. If they do, they allocate some of their units to this task and, if successful, they may gain an early advantage over their opponents by discovering their deployment and maybe even by deciding what time the battle starts.
- Establishing the Time (page 14): The players will need to find out what time of day the battle begins. As the game proceeds a record of the time is kept using the unique FANTASY WARRIORS Time Dial. Time is an important part of the game because the performance of many of the armies is affected by whether it is day or night.
- Laying out the Battlefield (page 14): This is when the Terrain Features are placed on the battlefield.
- Deploying the Armies (page 15): Sounds easy, but there are a few rules to make sure that no-one gains an unfair advantage.
- Boasts and Omens (page 16): Players make use of many factors in the pursuit of victory. Both psychological and supernatural advantages may be sought in the intriguing battle of wits which goes on throughout a game of FANTASY WARRIORS. Boasts can affect the morale of an army whilst Omens indicate whether or not an army enjoys the favour of the gods.
- Issuing Orders (page 17): The final responsibility of the player before committing his army to the vagaries of battle is to issue his Battle Leaders with their orders. Crucial decisions are made at this time. This is when the real tension begins! It's also a link with the next step because orders can be changed during the Battle Turn as well.
3. The Battle Turn
Like most games, FANTASY WARRIORS is played in turns. A typical game is likely to last for between 8 and 12 turns. To make playing the game as enjoyable and logical as possible, the turn is broken up into several phases. Each phase must be completed by both sides before play proceeds to the next phase. If, during any turn, there is nothing to do in a particular phase (for example if neither side wishes to threaten) then that phase is considered to have been completed and play proceeds to the next phase. Players will find that phases 5, 6 and 7 are used less than the others, particularly at the beginning of a game.
- Phase One: Threat (page 19): Not all battles are won by missiles or combat. In FANTASY WARRIORS you can literally frighten your opponents into defeat.
- Phase Two: Shooting (page 21): Many FANTASY WARRIORS are armed with missile weapons like bows and crossbows. Used properly, these warriors can shape the course of a battle.
- Phase Three: Movement and Reorganisation (page 26): Warriors don't just stand in one place on the battlefield. They move around, sometimes where the warchief wants them to go, sometimes where they want to go. Furthermore, different warrior types move at different speeds. This phase is not conducted simultaneously.
- Phase Four: Combat (page 30): Sooner or later, the opposing warriors come into violent contact. This is when the swords, battle-axes, spears and all the other fearsome paraphernalia of combat are put to good effect.
- Phase Five: New Orders (page 35): As the battle develops, the initial orders handed out by the warchief may need adjustment, either as part of an initial far-sighted plan or in response to unforeseen developments.
- Phase Six: Influence (page 33): As well as being the link between the warchief and the fighting units of warriors, battle leaders can also exert a controlling influence over the units under their command, steadying the faint-hearted and calming the over-eager.
- Phase Seven: Command Test (page 29): There are occasions in any battle when events put into question the willingness of an army (or part of an army) to carry on the fight. This is the time when that willingness is tested.
- Individuals in Battle (page 40): In FANTASY WARRIORS many extraordinary individuals from mighty heroes to mumbling soothsayers play their part in the ebb and flow of battle.
Preparing for Battle
All FANTASY WARRIORS armies, regardless of the troops that make them up, consist of the following: a warchief, battle leaders, commands, units, warriors, specials and individuals.
All of the above may be represented by the FANTASY WARRIORS miniatures and all have their own functions. Let's take a look at each in more detail.
Warchief
There is only one of these in each army. The warchief is in charge of the army and controls it by issuing orders to the next in the chain-of-command - the battle leaders.
Battle Leaders
Each battle leader heads a command. They receive orders from the warchief and attempt to carry them out at the head of their commands. There can be more than one battle leader in an army.
Commands
A command is a grouping of one or more units. In charge of each is a battle leader or the warchief. The command is used by its battle leader to carry out the orders he or she has received from the warchief. A command will only obey its own battle leader. The warchief may also directly control his own command.
(Diagram captions: "This army has two commands. Both are led by battle leaders who receive orders from the warchief." and "This army has two commands. One is led by the warchief in person, the other is led by a battle leader.")
Units
A unit is a group of one or more miniatures. Its main function in the game is to fight the opposing side's units. It normally consists of several warriors armed and armoured identically. At the start of a battle it must have a leader and it may have other specials within its ranks.
Warriors
Warriors are at the bottom of the army hierarchy and yet are also the most important members of it. Without warriors there would be no armies. Most of your FANTASY WARRIORS miniatures represent warriors.
Specials
These fight alongside the warriors in their unit and are armed and armoured identically to them. Their presence improves the performance of the unit they belong to and they cost more points than an ordinary warrior. There are four types of special:
- Leaders: At the start of a battle every unit must have a leader. Large individual creatures operating alone have leadership built into their profile.
- Champions: These represent individual warriors who, by their ferocity or skill-at-arms, set a stirring example to their comrades. They add to the fighting ability of their unit. Champions are optional and no unit may have more than one.
- Musicians: These improve the performance of their unit if it is threatening another. They also improve the ability of their unit to resist threat. The more of them there are in a unit, the greater their effect. Musicians are optional.
- Standard Bearers: These are always placed in the front rank of their units. The standard they carry increases the unit's morale. However, if it is captured, any benefits will be lost. Standard bearers are optional. No unit may have more than one.
(Diagram captions: "This unit has a compulsory leader special, but no other optional specials." and "This unit has a full range of specials: leader, standard bearers, champion and musician.")
Individuals
Individuals do not belong to units. They operate on their own and each type has unique characteristics:
- Priests: By seeking the favour of the gods, priests can attempt to favourably alter events that have already occurred or attack enemy wizards.
- Soothsayers: These can favourably influence the omens. If you have one or more in your army, you have a greater chance of good omens.
- Wizards: Wizards are practitioners of magic and have a number of powerful spells at their disposal. However, each time they cast a spell their power is reduced.
- Heroes: These are powerful fighters, capable of facing the most intimidating enemy. Their mere presence will inspire the rest of the army.
- Banner Bearers: These are the personal standard bearers of battle leaders. They extend their range of influence and can act as a temporary unit standard whilst the battle leader is with a unit.
- Heralds: Like banner bearers, these can extend the range of influence of a battle leader and act as a temporary unit musician if the battle leader is with a unit.
- Scouts: These are expert trackers, able to observe and assess enemy troop movements, who improve an army's scouting ability.
- Couriers: These are trained messengers who travel quickly and deliver orders clearly. A battle leader is more likely to understand an order carried by a courier than by an untrained messenger.
(Margin quotes in the source: "Champions give units extra power in combat, but they're wasted if you never get their units into hand-to-hand fighting." and "Think about how you deploy elite warriors. You don't want them getting picked off by missiles before they have had a chance to get into action.")
The Profile
Every warrior, battle leader, individual or war machine etc in your army will have a profile. The profile lists all the characteristics of a particular troop type:
| Name | QUA | TYP | STR | RES | WOR | ARM | WEA | MOV | SAV | TER | BAD |
|---|---|---|---|---|---|---|---|---|---|---|---|
| Orc Infantry | Average | Tribal | 1 | - | 1 | Md/Sh | Hd | 6ins | No | No | Day |
(The example profile above is the source's sample, shown as printed.)
Quality (QUA)
All troops from the lowliest Goblin to the mightiest Giant have a fighting quality. Quality is one of the most important factors in the profile and affects virtually everything your warriors will do in battle. The higher the quality, the more effective the warriors will be.
Quality is divided into five categories:
- Elite: The best possible warriors. Lethal in attack, immovable in defence, they are highly efficient and superbly motivated warriors. Elite troops are rare. Some races have none at all. The small Elven armies alone contain a high proportion of elite warriors.
- Veteran: Veteran warriors are more common. Experienced and seasoned fighters, they are steady warriors often capable of withstanding the worst the enemy has to offer. Dwarves are the best example of veteran warriors. The classic Dwarven army is small and slow moving, but with virtually every warrior in it of veteran or higher quality.
- Average: The vast majority of warriors fall into this category. Most Men, Orcs and Goblins are of average quality.
- Poor: This category represents troops who are inexperienced or who have had little or no training. It can also represent troops who are unwilling to fight or who have been forced to do so under duress. Peasants, militia and some rabble warriors are poor quality.
- Unpredictable: Many fantastic creatures and some of the wilder races fall into this category. They are untrained but still dangerous. It's not unknown for an unpredictable quality unit to fight to the bitter end. On the other hand it may rout from the battle at the first whiff of danger. Unpredictable warriors are just that... unpredictable. Trolls are unpredictable warriors.
Type (TYP)
All warriors fit into one of four major types, each type having its own strengths and weaknesses:
- Disciplined: Disciplined types are warriors who will always attempt to conduct themselves in a logical and established manner on the battlefield. Disciplined units are not easily goaded into rash actions. They are the steadiest of the four types.
- Tribal: The opposite of disciplined, tribal types are impetuous and volatile warriors who may become very aggressive when things go well but may not stay round if things go wrong.
- Fanatic: Fanatics are the ultimate attack troops. They have one purpose, to close with and destroy the enemy. Fanatics are easily goaded into rash attacks. During the fell hours of darkness some races (typically Goblins) become fanatics.
- Stupid: Most animals, and some races, fall into this category. Being stupid does not necessarily mean being ineffective, but don't expect stupid troops to operate like clockwork. They just don't have the brain power.
(Margin quote: "I've seen stupid types ram away before the fighting has begun, I've also seen them fight to the very last. It's worth remembering - using stupid types is always a gamble.")
Strength (STR)
Strength is a plus factor. It reflects above average brute strength. As a guide an average man has a strength of zero, whilst a War Troll has a strength of +3. The stronger the creature the more damage it's going to inflict in combat.
Resilience (RES)
Resilience is a minus factor and reflects above average ability to withstand the rigours of battle. The greater the minus factor the more resistant to damage a creature is. As a guide an average man has a resilience of zero, whilst a War Troll has a resilience of -1.
Worth (WOR)
Worth is the measure of any creature in terms of manpower. The average man has a worth of 1, whilst the War Troll has a worth of 3. Worth is used when calculating attacks. In short, the greater the worth, the more worthwhile the attack is going to be.
Weapons (WEA)
Weapons directly affect the fighting efficiency of a warrior. In the SHOOTING and COMBAT sections of the rules we shall deal fully with the effects of different types of weapon.
Armour (ARM)
Armour provides protection in battle, usually at the cost of slowing down the wearer. There are five main categories of armour. The ARMY LISTS give you details of the types of armour worn by particular races.
| Armour | Description |
|---|---|
| None | - |
| Light | Scraps, or fur, maybe some chainmail or a helmet etc. |
| Medium | Always body protection of some sort. Arms and legs covered, if not armoured. Often head protection. |
| Heavy | Head, body, limbs and hands protected, usually by chainmail or a combination of chainmail, leather, and metal plates sewn on. |
| Extra Heavy (X-heavy) | Full plate and chain mail covering body, limbs, hands and feet. Head protection usually an enclosed helmet. |
Movement (MOV)
Fantasy races move at very different speeds. For example, Dwarves move very slowly, encumbered by their traditional heavy armour, whilst Goblins are lightly armoured and move fast. Movement is always shown in inches. In the ARMY LISTS movement is always shown already adjusted for the encumbrance of armour.
The Saving Throw (SAV)
The saving throw is only available to more powerful or larger creatures, larger and heavier pieces of equipment or specially lucky individuals. It reflects the ability of these creatures and pieces to keep going, often after repeated hits. In the game the saving throw is always tested by rolling 2D and totalling the score. If the total is greater than the saving throw the creature is unaffected and keeps going.
Bad Light (BAD)
Some armies prefer to fight at night under cover of darkness, whilst others prefer to fight during the day. In FANTASY WARRIORS an army fighting at a time it doesn't like is said to be suffering bad light. Fighting in the wrong light will adversely affect the morale and fighting ability of an army. It's well worth getting the time and thus the light on your side when going into battle, possibly forcing your enemy to fight in bad light.
Amongst the races affected by bad light are Men, who are affected by darkness, and Goblins, who are affected by daylight, as are most Orcs. Dwarves and Elves are unaffected by bad light, as are some types of Giant.
In FANTASY WARRIORS a Time Dial and hourglass counter are provided to enable you to keep track of the time easily.
Terrible Creatures (TER)
The sheer size or the brute ferocity of some creatures can instil blind terror in lesser beings. Giants are classic terrible creatures, as are War Trolls and Ogres. A unit will need all the morale boosting it can get to stand up to terrible creatures for long. Fortunately for the lesser races the quality of most terrible creatures is not that good and there is always the chance that the creature's morale will break first. When opposing terrible creatures come into range of one another, the creature with the greatest strength is considered terrible to the other. The ARMY LISTS will show you which terrible creatures you can have in your army.
Warchiefs, Battle Leaders and Their Leadership Value
In addition to the profiles for rank and file warriors, warchiefs and battle leaders also have a leadership value. Leadership reflects the ability to control, command and influence large bodies of troops. The ARMY LISTS will give you details of battle leaders for the army you want to field. The leadership value ranges from zero, representing the very worst in leadership, to 5, the very best.
Assembling the Troops
You need to convert your 102 FANTASY WARRIORS miniatures into two armies. At the end of it you'll have an Orc army and a Dwarf army - one each from the two classic fantasy races.
(Margin note: "Look at page 53 and you will see two 1,000 point armies using the figures from the game set.")
Making Up Units
Take a look at the back of your FANTASY WARRIORS box. You'll notice that the big photograph of the game's contents shows the miniatures in units of ten or so. You will need to make similar units for your own armies. The ARMY LISTS will give you full details of the size and composition of units for Orc and Dwarf armies. FANTASY WARRIORS is a very flexible game, so remember that a variety of Orc or Dwarf armies is possible from the miniatures provided with the game.
The Warchief, Battle Leaders, Specials and Individuals
If you are using just the plastic figures from the game, you will need some way of distinguishing these figures from the warriors. If you intend painting your miniatures (and we strongly recommend that you do, so that you can appreciate them to the full) this problem is easily solved - the distinctions are made in the painting. A simple idea would be to give all leaders (and no-one else) red shields, all champions blue shields, all heroes green shields, etc. Battle leaders could have silver helmets and warchiefs gold helmets. A wizard could be denoted by carefully trimming the weapon off a figure.
Extra Miniatures and Different Armies
You don't have to be limited to Orc and Dwarf armies. The ARMY LISTS include many other races. Grenadier Models make a large range of FANTASY WARRIORS miniatures in metal, ranging from the huge Goblin War Giant to diminutive Goblin rabble. In between there are Elves, Barbarians, Hobgoblins, knights, Trolls, Ogres, many more Orcs and Dwarves, wolf-riders, special items like the Dwarf war cannon and an abundance of miniatures to represent specials and individuals.
The Points System
The ARMY LISTS cover various armies with a points value for each of the component types. This enables players to build armies of a total value agreed with their opponents. A favourite points value for many players is 1000. This enables armies of widely differing sizes in terms of numbers of figures to be reasonably equally matched. As a guide, a 1000 point Orc army contains about 70 figures including a warchief, battle leaders, individuals and specials.
Preparing the Terrain
FANTASY WARRIORS is best played on a table, although a floor will do. Whether you are using a table or floor, provide yourself with a playing area of at least 4ft x 4ft. If you can stretch to 6ft x 4ft so much the better. Remember, if your battlefield is not square, the armies are set up along the length of the table, one on each side, and move towards each other across the battlefield and not up and down it. OK, let's assume that we now have a battlefield ready for play. We'll assume that it's a table measuring 6ft x 4ft (incidentally, not many dining tables are this wide but two folding work-tables placed together are just the right size and are relatively cheap to buy). The battlefield is looking rather bare right now - positively uninspiring in fact. What is required is scenery.
The Scenic Battlefield
Fighting battles with FANTASY WARRIORS plastic miniatures is intended to be a very appealing visual experience. That's why we made the miniatures so detailed and attractive. So, it's important that your battlefield should not detract from the pleasing effect created by the miniatures. Therefore, we recommend that you provide yourself with some scenery when playing FANTASY WARRIORS.
Scenery also performs another function in FANTASY WARRIORS. It can slow down or disrupt movement and restrict visibility. These aspects are dealt with in more detail elsewhere but because scenery is not just scenic, it is known by a name which encompasses both its functions - terrain.
Making Terrain
You can spend a lot of money on beautiful scenic items such as model railway trees and after you've played FANTASY WARRIORS a few times and become hooked on fantasy battlegaming, you probably will. In the meantime, we want you to start playing right now. The first thing to do is to cover your bare tabletop with a sheet or blanket. If you've got a green or brown blanket, that is perfect. This serves to cover up the unsightly hardboard if you're using paste-tables or to protect the polished surface if you're using a dining table. It also provides a handy way of making hills. Hills are one of the two main terrain types (the other is woods). To make a hill, simply place a book or magazines under the blanket and the job is done. The size of the hill can obviously be varied by using different size books. Big hills are made by using several books. With a bit of practice, realistic hills with rounded contours and irregular shapes can be made by using a mixture of books and magazines. Experiment a little but not now! The priority at the moment is to get your first FANTASY WARRIORS battle under way so just stick to single-book hills. Woods are adequately represented by thin card shapes (ideally green card) laid on top of the blanket. Next time you pass a hobby shop, get some lichen. This is a lot cheaper than model trees but, scattered on top of your thin card 'wood', makes for quite a pleasing woodland canopy effect. Other terrain types used in FANTASY WARRIORS are: broken ground; swamps; marshes.
Terrain Items
- Big hill: At least 6ins x 4ins, not greater than 12ins x 8ins.
- Small hill: Smaller than above.
- Large wood: An area approximately 8ins x 8ins.
- Small wood: An area approximately 4ins x 4ins.
- Broken ground: Any size up to 12ins x 8ins.
- Swamp: An area approximately 8ins x 8ins.
- Marsh: An area approximately 8ins x 8ins.
The dimensions specified above give very regular shaped terrain items. It looks better if they are irregular. So don't make your woods perfect circles and don't make your hills neat squares or oblongs. More terrain items will be described in subsequent FANTASY WARRIORS publications.
Victory and Defeat
There are two types of FANTASY WARRIORS battle - the Bitter End game or the Restricted Turns game. Before commencing a game, the players must decide which type it is going to be. The Bitter End game employs the simplest method of adjudicating which side has won because it involves playing the game until one side has no units left on the battlefield. Because of FANTASY WARRIORS Command Test rule, this may not take as long as you think. It is also acceptable in a Bitter End style game for one player to capitulate if he feels he has no chance of avoiding defeat, even though that army may still have units left on the battlefield. A Restricted Turns game requires the players to agree that the game will only last for a specific number of turns. At the end of the final turn, victory is determined by a scoring system which reflects how successfully an army has fought.
The Scoring System
Before the Battle. Before the start of a battle total your army's score as follows:
- +2 The warchief
- +2 An army standard
- +2 A sacred item
- +2 Each beloved personage
- +1 Each battle leader
- +1 Each individual
- +1 Each unit
You now have a pre-battle value. It doesn't matter how big or small the number is at this stage. That comes later.
After the Battle. Total your army's score from the surviving battle leaders, units, individuals etc using the method described above. Then add any of the following:
- +2 Each enemy warchief killed or routed
- +2 Each enemy army standard wrecked
- +2 Each enemy sacred item defiled
- +2 Each enemy beloved personage killed or routed
- +1 Each enemy battle leader killed or routed
- +1 Each enemy individual killed or routed
- +1 Each enemy unit annihilated or routed
You now have your post-battle value. This, when compared to your pre-battle value, will determine whether, and to what degree, you have won, drawn or lost the battle:
Results
- Post-battle value is the same as pre-battle value: The battle has ended in stalemate. Both sides leave the field of battle with honour intact.
- Post-battle value up to 3 points greater than pre-battle value: You have won a minor victory. The enemy have suffered a small setback, but they can easily regroup and fight again.
- Post-battle value 4 to 6 points greater than pre-battle value: You have won a decisive victory. The enemy are defeated in this battle but their army is not broken.
- Post-battle value 7 to 8 points greater than pre-battle value: You have won a major victory. The enemy are defeated and scattered... it will be a long time before they can fight again.
- Post-battle value more than 8 points greater than pre-battle value: You have won a crushing victory. The enemy have endured a humiliating defeat. Their army is broken for good. If the enemy warchief survived, he should surely lose his head.
(Worked example in the source: a Dwarven army with pre-battle value 12 finishes with post-battle value 16, four points greater, which is a decisive victory against the Orcs.)
Campaigns
Campaigns are one of the most satisfying ways of determining victory. They involve playing a series of battles linked by rules covering movement of armies not actually battling on the table. They usually involve the use of maps to indicate the position of the various armies. Tabletop FANTASY WARRIORS battles are then fought out as a result of the map movements bringing armies into contact. Victory is not normally determined until several battles have been fought. Look out for Grenadier Models' forthcoming Campaign Supplement which will provide complete rules for the conduct of a fascinating fantasy campaign.
Multi-Player Games
Although FANTASY WARRIORS is most commonly played as a two-player game, it is also highly suitable for games with several players. In this case each player is in command of his own army with its own warchief. The armies should be worked out using the FANTASY WARRIORS points system (page 47) and each one should be the same points value. Ideally there should be the same number of armies on each side so that if there are six armies available, each side will have three. If there is an uneven number of armies available, make sure that the side with the smallest number has sufficient extra points allocated to each of its armies to bring its total points value up to that of its opponents.
Before the Battle
Scouting
Scouting is about searching for and attempting to gain a tactical advantage over the enemy before the battle has begun. If scouting is successful and you outscout the enemy you can oblige him to set up his army first on the battlefield, giving you the advantage of seeing where and how he has deployed.
If you scout in force there is a chance you can also outmanoeuvre the enemy. There are several advantages to be gained from this: you force him to set up first and you also get to choose the time the battle will begin, day or night.
Providing you have a good battle leader to lead the scouting command, the drawbacks to scouting are minor. The command will require reorganising and probably you will have to issue it with new orders during the battle. Having your scouting commands on HOLD orders at the start of the battle can be a problem if you're planning to advance. As long as nothing goes wrong there will be a short delay getting the command into battle.
Scouting is very easy to work out, requiring a couple of dice rolls and a few additions... the only difficult part is trying to outwit your opponent.
No scouting or no winner. If neither side scouts or succeeds in outscouting the other, players deploy their forces as described in Deploying the Armies (page 15).
Who can scout
- Scouting is done by commands.
- You may choose as many commands as you wish for scouting.
- Each command must be led by its own battle leader.
- To be eligible to scout any unit within the command must have a minimum headcount of 5 figures, or if less than 5 figures, a minimum worth of 5 per figure.
- Stupid types cannot scout.
- A warchief cannot scout, neither can any units in his own command.
Method
Don't forget to secretly note down which commands are for scouting.
- Throw 1D for each command that is scouting.
- Throw 2D for each scout individual in the army.
- Add the battle leader's leadership.
- +1 for each average quality unit in the command
- +1 for each mounted unit in the command
- +2 for each veteran quality unit in the command
- +3 for each elite quality unit in the command
- +3 for each flying unit in the command
You now have your scouting score. Both players now compare their scores.
Results
- The side with the greater scouting score has outscouted their enemy.
- If one side has a scouting score greater than twice that of the enemy they have outmanoeuvred them.
Outscouting the enemy
- The losing side has to deploy its units first.
- The winning side has a better chance of fighting the battle at the time it wants (page 14).
Outmanoeuvring the enemy
- The losing side has to deploy its units first.
- The winning side decides at what time, day or night, the battle will begin (page 14).
- The winning side places Terrain Features exactly where it wishes (page 15).
After scouting. All commands that have taken part in scouting set up on the tabletop as follows:
- They must be no further than 6ins from their base line (their table edge).
- All units in a scouting command must be set up at least 12ins away from their warchief.
- They start the battle operating under HOLD orders.
- Each unit in the command is disorganised.
For more information on setting up see Deploying the Armies (page 15).
Establishing the Time
In FANTASY WARRIORS time is very important. It is represented on the tabletop by the Time Dial which is divided into 'steps' of time. There are twelve steps in all, six steps of day and six steps of night. Each Battle Turn represents one step of time, so in a battle lasting seven turns time would have moved through seven steps. Keeping an eye on the time throughout a battle is important... you don't want to have your army fighting in bad light if you can help it.
A Time Dial and an hourglass counter are provided to enable you to keep track of time during the battle. At the end of every turn the hourglass counter is moved one step further round the Time Dial.
Finding the time at the start of a battle
If one side has outscouted or outmanoeuvred the other it will have some influence over the time at which they can bring their enemy to battle.
If neither side outscouts or there is a scouting draw. If neither side has outscouted the other, use this method to establish the starting time of a battle:
- Throw 1D: 1 to 3 = DAY; 4 to 6 = NIGHT.
- Throw 1D again. The score = the time step the battle starts on.
If one side outscouts. As before except the player who outscouts always rolls the first die. If he doesn't like the result he may re-roll... once. He must abide by the second roll even if it's worse than the first.
If one side outmanoeuvres the other. This is easy... the player that outmanoeuvres gets to choose exactly at what time the battle begins. He may place the hourglass counter on the Time Dial exactly where he likes.
Bad light. Several races are affected by the time of day. For example, by day Goblins are classed as being poor tribal types, but by night they turn into fanatic types, making them far more dangerous. When troops are affected by either night or day they are said to be enduring bad light. The Goblins mentioned above would be enduring bad light all through the steps of day. Bad light affects a unit's morale, its missile skill and its staying power in combat.
(Margin quote: "If your warriors suffer bad light it is worth trying to get time on your side. Either outscout the enemy or use magic during the battle. Always remember that if the enemy has wizards he is also capable of changing the time.")
Laying Out the Battlefield
Now comes the time to find out what the battlefield looks like. This section explains how to lay down the terrain on the tabletop ready for the coming battle.
This is where successful scouting can pay off. If you have outscouted or outmanoeuvred the enemy you will have a degree of control in choosing the terrain over which the armies will fight. You can set the terrain up in your favour, whilst at the same time making it as unfavourable as possible for the enemy.
Creating Terrain Features. Group all your available terrain into Terrain Features. A Terrain Feature is simply a few items of scenery grouped together.
- For each 12ins of the table's length create one Terrain Feature, e.g. a table 6ft x 4ft would require six Terrain Features.
Size of Terrain Features. The size of a Terrain Feature should be about 12ins x 12ins. Don't worry too much if you can't exactly fit this size, it is only a guideline and not a hard rule. If you have a really big hill, for example, you can always count it as two Terrain Features.
Rivers and streams. Rivers and streams are not Terrain Features and must be agreed on by players before a battle and must be laid across the battlefield first. If the model of the river is in sections all players can take turns to lay adjoining sections. If it's not, or taking turns is impractical, throw a dice to see who lays the river or stream... the highest score wins.
Placing Terrain Features
If neither side outscouts.
- Players roll 1D and add their warchief's leadership.
- The player with the highest score can lay down all the Terrain Features exactly where he wishes.
- The player with the highest score can also choose which side of the table his army will occupy.
- For each Terrain Feature placed the loser may roll 1D. If any dice come up 4, 5 or 6 the loser can remove the Terrain Feature or reposition it wherever he wishes.
If one side outscouts the other.
- The outscouting player can also choose which side of the table his army will occupy.
- The outscouting player places all or any other Terrain Features exactly where he wishes.
- For each Terrain Feature placed the loser may roll 1D. If any dice come up 5 or 6 the loser can remove the Terrain Feature or reposition it wherever he wishes. He may only roll once per Terrain Feature.
If one side outmanoeuvres the other.
- The winning player places all the Terrain Features exactly where he wishes.
- The winning player can also choose which side of the table his army will occupy.
Deploying the Armies
After the terrain has been laid and both sides know which side of the table they occupy, it's time to deploy the armies. Perhaps outscouting has given you the advantage of forcing the enemy to deploy first... that way you will see exactly what he is up to and you can react accordingly. Now is the time to spring a few nasty surprises.
- All armies are deployed no more than one foot from their own table edge.
- The distance between the two opposing armies should be no less than two feet. If your table is not big enough, shorten the distance from the table edge by an agreed amount.
(Diagram in source: Army A deployment zone and Army B deployment zone, at opposite table edges.)
Who deploys first
If neither side outscouts.
- Players roll 1D and add their warchief's leadership.
- The player with the lowest score will deploy his army first.
- The player with the highest score will then deploy his army.
- In the case of a draw the army with the greatest number of units will deploy first.
If one side outscouts or outmanoeuvres.
- The losing player will deploy his army first.
Deploying commands that have scouted. Commands that have taken part in scouting set up on the tabletop as follows:
- They are set up no more than 6ins from their baseline (the table edge).
- All units in the command must be set up at least 12ins from the warchief.
- Each unit in the command also starts off disorganised: place disorganised counters next to each unit.
- They start the battle operating under HOLD orders.
Distributing ammunition and magic power. At this point, ammunition in the form of volley counters is distributed to all missile units.
- All missile units start with 6 volley counters.
- Wizards receive magic power counters (see Cost of Magic, page 47).
Boasts and Omens
(Margin quote: "If you're worried about your army's morale (and I worry about mine, especially in daylight) making a boast can be useful. Reading the omens may help as well - but only if they're good.")
Boasts. Before the battle you have the option of stirring your entire army with magnificent boasts, proclaiming what their feared and beloved warchief will do in the coming fray. All the while the boast holds good the morale of the whole army will be improved, especially at critical times when the army's morale will need to be good. If the boast no longer holds up, then the morale of the army will be correspondingly lowered. Boasting is not compulsory but if you do decide to boast be sure to read and understand the implications of your particular boast.
The effects of boasting. Boasting will affect the whole army if it has to take a Command Test. If, when the test is taken, the current boast still holds good, there is a positive effect upon the whole army. If, however, the boast no longer holds good the effect upon the whole army is not so good (see Command Test, page 39).
Making a boast
- A boast can only be made before a battle.
- Only a warchief can boast.
- Players declare whether they wish to boast.
- If any do, they state clearly which boast they are making.
- Their opponent acknowledges any boasts.
The boasts and their effects
Boast 1: "I will stay upon this spot, immovable like a rock, for the entire battle."
- The player picks a spot and places his warchief there, not moving an inch throughout the course of the battle.
- All the while he remains there the boast holds good.
- If he moves the boast is broken.
Boast 2: "I have no need of a bodyguard, the enemy cannot harm me."
- The warchief cannot join any unit. His army would interpret it as seeking protection.
- The warchief can only be in base-to-base contact with a maximum of two other figures at any time.
- If he joins a unit for whatever reason, or is in base-to-base contact with more than two figures at any time, the boast is broken.
Boast 3: "We shall destroy the enemy by sunset/sunrise."
- For this boast to be proclaimed, sunrise/sunset must be less than 7 time steps away.
- If by that time the battle has not ended in total victory (i.e. the enemy is no longer upon the battlefield) the boast no longer holds good.
Boast 4: "Look for me in the thick of battle."
- When the warchief is actually in combat the boast is good.
- When the warchief is not in combat the boast does not hold.
(Example in the source: a worried Orc player facing a superior Dwarven army chooses Boast 4. Any time a Command Test is taken and the boasting warchief is actually in combat, the boast is good. At the same time the Orc player decides to read the omens; a soothsayer in his army adds +1 to the 1D roll of 3, giving 4, so the omens are good.)
Omens. What will the morrow bring? Are the gods with us today? Are the enemy doomed? There's only one way to find out - read the omens! Reading the omens is easy - just a simple dice roll. If you have any soothsayers, now is the time to use them.
The effect of omens. The omens may affect the whole army if it has to take a Command Test (see page 39). If, when the test is taken, the omens are good, there is a positive effect upon the whole army. If the omens are not good, the effect upon the whole army is bad.
Reading the omens
- Reading the omens is optional. If you don't want to know, don't bother.
- Reading the omens can only be done once, before a battle.
- Both players declare whether they wish to read the omens.
- To read the omens throw 1D.
- If the score is four or greater, the omens are good. If not, the omens are bad.
(Margin quote: "I always rely on at least two soothsayers to bring me good omens before battle. They are not much use afterwards and need to be protected but those good omens have helped me out more than once.")
Soothsayers (see page 41). If you have any soothsayers in your army, now is the time to use them.
- For each soothsayer add one to the omens dice roll.
- If one army has more soothsayers than another it can force them to read the omens.
- If a soothsayer gets killed the omens automatically turn bad for the army he or she belonged to.
Issuing Orders
Orders and understanding how they work are the most vital aspects of commanding a FANTASY WARRIORS army. Orders are instructions directing your troops to operate in a defined tactical manner. In FANTASY WARRIORS there are three possible orders: ATTACK, HOLD and OPPOSE. At the start of a battle you issue an order to each battle leader. A command can never have more than one order, which applies to all the units within that command. If a warchief leads his entire army personally (i.e. the whole army is organised as one command) or has his own command in a larger army, you must still issue that command with an order.
The three different orders (ATTACK, HOLD and OPPOSE) each have clearly defined functions and limits. Once you understand what each order does and does not permit, you will be able to command a FANTASY WARRIORS army effectively. The art of issuing appropriate orders and changing them when the time is right lies at the very heart of successful generalship in FANTASY WARRIORS.
All units in a battle leader's command operate under the same orders. A unit can sometimes be forced into acting contrary to its orders. This happens when a unit is governed by a reaction, in this case the unit will have the relevant reaction counter placed beside it, to tell you at a glance what condition it is in. (See Reactions, page 21.)
The rules for issuing and receiving new orders after the battle has begun are dealt with in New Orders (page 35).
The Orders
ATTACK (Red ATTACK counter). As the name tells you, ATTACK orders are used when you want to attack the enemy. Of the three orders, ATTACK is the most dramatic. A command under ATTACK orders will commit itself to closing with the enemy and bringing them into combat. Units with ATTACK orders receive a bonus in hand-to-hand combat.
Units with ATTACK orders:
- Must move at maximum speed towards the nearest enemy unit, contact it and engage it in hand-to-hand combat. If the nearest enemy unit is already engaged in hand-to-hand combat you may choose to contact the nearest unengaged enemy instead.
- Must move towards their nearest enemy unit by the most direct route, although they may deviate to avoid colliding with friendly units (see Collision, page 28).
- May slow down for difficult terrain to avoid becoming disorganised.
- May halt to reorganise themselves.
Missile units with ATTACK orders in addition:
- Must attempt to move into close shooting range, although they may start shooting at any range.
- Do not have to move into contact with the enemy for hand-to-hand combat but must stand their ground if themselves attacked. (Printed as the top bullet of page 18, continuing the ATTACK list.)
HOLD (Blue HOLD counter). If you want to stand your ground use HOLD orders. Commands with HOLD orders do not move. They remain in position until they receive a different order or rout. In hand-to-hand combat units with HOLD orders get a morale bonus. They have been told to hold their position and that's what they'll try to do.
Units with HOLD orders:
- Must remain at the halt in their current position.
- Can contract and expand as normal (see page 29).
Missile units with HOLD orders in addition:
- May shoot at any target they can see.
(Margin quote: "My Dwarves are slow-moving but tough fighters so I often use HOLD orders and let the enemy come to me. But I never forget that sometimes it pays to surprise your enemy.")
OPPOSE (Yellow OPPOSE counter). OPPOSE orders are the most flexible of the orders. If you want to manoeuvre into position, harass the enemy with missile units or are just not sure what the enemy is up to, give your commands OPPOSE orders. However a command with OPPOSE orders cannot move to contact the enemy and is not psychologically prepared for hand-to-hand combat. Consequently its morale will suffer if it is attacked by an aggressive enemy.
Units with OPPOSE orders:
- May move in any direction up to maximum speed or may choose not to move at all.
- May move backwards away from the enemy and end the move still facing them.
- Cannot move into contact with the enemy (although they may be contacted by enemy units with ATTACK orders).
Missile units with OPPOSE orders in addition:
- May shoot at the enemy at any range they wish.
(Margin quote: "If the enemy attacks me during daylight I'll hold. If he attacks me at night it's a different story. I'll attack him - hard.")
Order counters. On the tabletop battlefield, order counters are always placed next to a model of a battle leader. Only the battle leader has an order counter, not each unit in his command. Remember that the battle leader's order counter applies to all the units in his command. When the battle begins the order counters for all battle leaders are turned face up. Once a battle is under way, order counters are only ever face down when being carried by couriers or messengers.
The Battle Turn
Like most games, FANTASY WARRIORS is played in turns, and each turn is broken into the seven phases listed below. Each phase must be completed by both sides before play proceeds to the next phase.
Phase One: Threat
This phase of a battle is an optional form of bloodless combat. In it, units attempt to intimidate or incite the enemy into doing something rash.
When it is successful, threat can have devastating results, without the need to use up ammunition or commit your units to the risk of combat. It may even cause the enemy to flee the battlefield. If threat fails and the enemy responds with counter-threat, your plan may backfire. Be aware that threat can go badly wrong.
If you are playing your first few games you can agree before the battle to leave out the THREAT phase altogether if you want.
(Margin quote: "Add a couple of blaring musicians to one of my fearsome units and it starts to look really threatening. Sometimes the enemy ram away without fighting - but at other times they just got very angry.")
Sequence of the Threat phase. Working from left to right of the player who has the Time Dial on his left:
- Both players declare which eligible units wish to initiate threat.
- Players place threat counters in front of their threatening units, with the arrow pointing at the target unit.
- Any units that are being threatened then take the Threat Test.
- Place reaction counters (if any) next to threatened units.
- Place disorganised counters next to any disorganised units.
- Optionally counter-threaten with any eligible units.
- Place reaction counters (if any) next to counter-threatened units.
- Place disorganised counters next to disorganised units.
How threat works. During the THREAT phase of a Battle Turn the players may declare which, if any, of their eligible units wish to threaten an enemy unit. Where two opposing units both wish to initiate threat upon each other, the larger unit (i.e. the one with the greatest headcount) always becomes the initiator.
The threatened unit then takes a Threat Test. Providing it passes the Threat Test and is not governed by any adverse reactions, it may turn the tables and respond with counter-threat, thereby causing the original threatening unit to take the Threat Test.
Responding with counter-threat is entirely optional. Sometimes it is more prudent to put up with a threatening unit than run the risk of antagonising it.
Initiating threat
- Only tribal and fanatic units may initiate threat.
- Eligible units may be under any orders, but must not be governed by any reactions (i.e. shaken, bloodlust or rout).
- Enemy units must be visible and within 12ins.
- A unit can only threaten one enemy unit.
- Several units can threaten the same enemy unit.
Responding with counter-threat
- Tribal, fanatic and disciplined units may respond with counter-threat.
- Stupid units cannot respond with counter-threat.
- The unit can only counter-threaten the original threatening unit.
- When several enemy units have threatened the unit, it may choose which enemy it wishes to counter-threaten. It cannot counter-threaten them all.
(Margin quote: "If you can't take counter-threat then don't threaten, especially against a terrible creature.")
The Threat Test
The player wishing to initiate threat declares his intent by placing a threat counter in front of his threatening unit, pointing it in the direction of the target unit.
The threatened player then throws 1D and adds or subtracts for his unit's quality:
The Quality Throw box reads: "Roll 1D, modify according to the unit's QUALITY":
- Elite: +2
- Veteran: +1
- Average: 0
- Poor: -1
- Unpredictable: +3 with dice score 4 to 6; -3 with dice score 1 to 3
(As printed, the two dice-score modifiers sit on the Unpredictable line of the box. The source does not say whether they apply to that quality only; transcribed as laid out.)
Then apply any relevant modifiers:
- -1 Each musician with threatening unit.
- -1 Threatening unit has greater worth. In the case of a tie, the threatening unit has the greater worth.
- -1 Your unit is enduring bad light.
- -2 Terrible Creature within 6ins. A Terrible Creature is within 6ins of the testing unit. If there is also an allied Terrible Creature within 6ins, the one with the highest worth is terrible.
- -2 Your unit is shaken.
- +1 A hero is with your unit. A hero individual is currently in base-to-base contact with your unit.
- +1 Your unit has one or more musicians.
- +1 Your unit has allied Terrible Creature within 6ins. An allied Terrible Creature is within 6ins of the testing unit. If there is also an enemy Terrible Creature within 6ins, the one with the highest worth is terrible.
- +1 Your unit has a standard bearer.
- +1 Your unit has a leader.
- +2 Your unit is in bloodlust.
Threat test results. Find your final score under the unit's type, then read across to check for a reaction.
| Final score | Disciplined | Tribal | Fanatic | Stupid | Reaction |
|---|---|---|---|---|---|
| 10+ | 10+ | 7+ | 6+ | 6+ | BLOODLUST |
| 3-9 | 3-9 | 4-6 | 4-5 | 4-5 | OK |
| 1-2 | 1-2 | 2-3 | 2-3 | - | SHAKEN |
| 0 or less | 0 or less | 1 or less | 1 or less | 3 or less | ROUT |
(Table transcribed as printed. The source's first column header is "TYPE" and gives the score ranges per unit type.)
(Worked example in the source: at night, a unit of 10 average Orcs with a leader and a musician threatens a unit of 8 veteran Dwarves with a leader and a standard bearer. The Dwarves roll a 4 + 1 (veteran) = 5; modifiers -1 (Orcs have a musician), -1 (Orc unit has greater worth), +1 (Dwarf leader), +1 (Dwarf standard bearer) give a total of 5, an OK result for disciplined troops, so they are unaffected and may counter-threaten. The Orcs roll 5 with no modifiers (average), then +1 (musician) and +1 (leader) for a total of 7, which under tribal reads across to BLOODLUST. The Orcs gain a bloodlust counter and in the Movement and Reorganisation phase they surge forward.)
Reactions
In FANTASY WARRIORS a unit is normally described as having OK status. This means that it is happy to carry out its orders and behaves predictably for its type. The three reactions (bloodlust, shaken and rout) are indicators of the more extreme psychological states (or morale) of a unit.
As a result of vile insults, casualties from missile weapons, the excitement of combat, dread of magic or the influence of a battle leader a unit's morale may change. It may become nervous (shaken), run away (rout) or become frenzied (bloodlust). In FANTASY WARRIORS these reactions occur as the result of tests (the Threat Test, the Casualty Test or the Combat Test) or through the intervention of a battle leader or warchief (influence). Bloodlust and rout reactions cause a unit to ignore its orders and behave in more extreme ways. The shaken reaction shows that a unit is in danger of becoming more unreliable.
Tribal and fanatic troop types are particularly impetuous and are much more likely to react. This instability can be used to advantage as part of a battle plan or can cause a careful scheme to go disastrously wrong.
OK status. A unit with OK status is unaffected by any reaction and is free to carry on with its current orders.
Bloodlust. The unit goes into a killing frenzy, oblivious to danger, intent only on closing with and destroying the enemy. Units in bloodlust are almost impossible to control and as a result can wreck a careful battle plan, sometimes getting themselves wiped out in the process.
Units in bloodlust:
- When a unit gets a bloodlust reaction, place a bloodlust counter face up next to the unit. When the unit moves, don't forget to move the counter with it.
- The unit will remain in bloodlust until it gets a different reaction.
- It will advance at full speed towards its nearest enemy and engage it in combat.
- It will not slow for disorganising terrain.
- It will not halt to reorganise.
- The unit's battle leader may attempt to influence a unit in bloodlust back to OK status. If this happens, remove and/or replace relevant reaction counters.
Missile units in bloodlust:
- They will shoot all their ammunition at the maximum rate and then move forward at full speed. If the unit has missiles remaining it will shoot these off at the maximum rate during the next turn.
- Troops manning heavy missile pieces (cannons, catapults, ballistas, giant crossbows etc) will not move until all ammunition has been used up (at the maximum rate). They will then abandon their pieces and advance upon the nearest enemy.
Shaken. Troops become edgy, and for a moment a mild panic will ripple through the ranks, causing the unit to hesitate and lose cohesion. If the situation is not rectified quickly it can give way to rout at the first sign of trouble. If the unit's battle leader visits he can attempt to bolster their flagging morale.
Shaken units:
- A shaken counter is placed next to the unit.
- The unit becomes disorganised. A disorganised counter is placed next to the unit.
- The unit's battle leader may attempt to influence a shaken unit to OK status. If successful remove and replace relevant reaction counters. The unit will still remain disorganised until it is halted and reorganised.
Rout. Rout is a complete and irreversible collapse of a unit as a fighting force. Weapons are dropped, armour is discarded, cherished standards thrown aside and leaders bowled over. It's every man for himself in the frantic stampede to leave the battlefield.
Routing units:
- The unit and any warchief, battle leader or individuals currently with it are immediately removed from the tabletop. The unit ceases to exist as a fighting force.
All reactions. When a unit comes up with a reaction that particular reaction will replace any other reaction currently affecting the unit.
Phase Two: Shooting
In this phase of the battle both sides let fly at each other with any missile or throwing weapons they have. Shooting also deals with the effect on units of heavy casualties from missile shooting.
In FANTASY WARRIORS ammunition can be used up quickly by firing volley after volley in a single turn, known in the game as blackening the sky, or saved to be used as and when missile support may be needed. Knowing when best to use your missile troops can mean the difference between victory and defeat. Do you blast off all your volley counters in a couple of turns, hoping to wipe out a few enemy units in the process, or do you conserve your ammunition and pick off the enemy here and there, hoping to whittle them down until they finally break?
Ammunition and volley counters. A unit has a supply of ammunition represented by volley counters. Each counter represents one volley of missiles shot by the whole unit. Volley counters are kept beside, and moved with, the missile unit. Every time the unit shoots a volley it gives up one of its counters. It's quite possible for a unit to shoot several volleys in a turn. This is called blackening the sky.
- A volley counter does not represent a set number of missiles. It represents the unit's headcount (or missile worth) at the time of shooting, i.e. if a Goblin unit had a headcount of 12, each volley counter would represent 12 Goblin arrows; if the Goblin unit had a headcount of 19 then each volley counter would represent 19 Goblin arrows.
- Volley counters are not transferable between units.
- All missile units start with 6 volley counters.
Sequence of the Shooting phase. Work from left to right of the player who has the Time Dial on his left.
- Both players declare any missile units wishing to shoot, ensuring that shooting units have line-of-sight.
- Put down volley counters next to targets.
- Work out kills from shooting.
- Remove volley counters.
- Take the Casualty Test for any units that need to.
- Place reaction counters next to any units that have reacted as a result of the Casualty Test.
- Place disorganised counters next to disorganised units.
(Margin quote: "Keep a sharp eye out for possible sniping shots at the enemy's individuals and battle leaders. There's nothing quite like picking off an unwary wizard.")
Rules for Shooting
Establishing line-of-sight. To establish line-of-sight on the tabletop apply the following:
- If a straight line can be drawn from any part of the front edge of the base of any figure in the front rank of the missile unit to any part of its target without crossing difficult terrain (excluding sunken features) then line-of-sight is established.
- If the target is actually on difficult terrain (e.g. a hilltop) and the above rule applies, line-of-sight is established.
Range.
- There can be no measuring of distance before stating the number of volleys you are going to shoot.
- Distance is measured from the nearest shooting figure to the nearest target figure.
- When shooting on crew servicing war machines or equipment, the range is measured from the nearest shooting figure to the equipment model (not the crew figures).
| Weapon | Short range | Long range |
|---|---|---|
| Bow | 6ins | 18ins |
| Longbow | 8ins | 24ins |
| Crossbow | 8ins | 30ins |
| Giant Crossbow | 8ins | 30ins |
| Ballista | 8ins | 30ins |
| Handgun | 8ins | 22ins |
(Range table as printed on page 22. The Missile Weapons versus Armour table on page 23 gives the Handgun ranges as 6ins short and 12ins long; the two printed values differ and both are transcribed as printed.)
Movement and shooting
- A unit can move and shoot in the same turn.
- A unit can move and blacken the sky in the same turn.
Shooting in more than one rank. Units armed with bows or longbows are allowed to shoot from their second rank. In units with crossbows or handguns only the first rank is allowed to shoot.
Shooting from flying units
- A flying unit shooting at another flying unit or at a target on the ground always shoots as if at long range.
- A flying unit shooting whilst in the air cannot blacken the sky.
Shooting at flying targets. Any unit shooting at a flying target always counts the range as long.
(Margin quote: "If you can get in close, blackening the sky with volley after volley of arrows can do a lot of damage. Of course there's a problem - you can never be sure that your missile units will be able to get that close. A lot depends on their quality.")
Blackening the sky. Blackening the sky is when a unit shoots more than one volley in a Shooting phase. This represents faster but less accurate shooting.
- The maximum permitted volleys in a Shooting phase for the main missile weapons are shown below. For details concerning larger and exotic missile weapons look in the Army Lists (pages 47 to 54).
- All bows: maximum 4 volleys
- Crossbows: maximum 2 volleys
- Handguns: maximum 2 volleys
- Bolt throwers: maximum 2 volleys
Shooting Method
- Work across the table from the player who has the Time Dial on his left.
- Shooting is simultaneous.
- Don't remove any casualties until all shooting has been completed and any Casualty Tests have been taken.
Hit throw
- Throw 1D for each figure shooting. In the case of war machines (e.g. cannon or catapults) throw 1D for each point of worth.
- If blackening the sky throw a number of dice equal to the number of figures firing multiplied by the number of volleys fired.
- Any 6 thrown is an automatic hit so place it/them to one side. Any 1 thrown is an automatic miss so discard it/them.
- To the remaining dice (those that show 2, 3, 4 or 5) apply any relevant modifiers:
| Modifier | Condition |
|---|---|
| -1 | Poor troops: warriors in shooting unit are poor |
| -1 | Unpredictable troops: warriors in shooting unit are unpredictable |
| -1 | Long range: target is at long range. The Army Lists give details of more exotic shooting weapons. |
| -1 | Blackening the sky: when a shooting unit is blackening the sky fatigue sets in, things break, jam, explode etc. |
| -1 | Bad light: it is either too dark or too light to aim properly. |
| -1 | Disorganised: when a shooting unit is disorganised warriors are in each other's way and orders to start shooting are not received etc. |
| -1 | In bloodlust or shaken: everyone is far too excited or nervous to aim their weapons properly. |
| +2 | Elite troops: warriors in shooting unit are elite |
| +1 | Veteran troops: warriors in shooting unit are veteran |
Results (scores after modification). 4-6 hit; 1-3 miss. After working out the number of hits achieved after modification, don't forget to add any 'automatic' hits to find your total number of hits.
Kill throw
- Now that you know how many hits you've scored, it's time to find out if you've actually killed anyone. This depends on your weapon and the armour of your target.
- Throw 1D for each hit.
- Any 6 thrown automatically becomes a kill so place it/them to one side.
- Any 1 thrown is an automatic failure so discard it/them.
- To the remaining dice (those showing 2, 3, 4 or 5) apply the following modifiers:
- Add: the strength of shooter/machine.
- Subtract: the target's resilience.
- -1 the target carries a shield.
- -1 the target is in soft cover.
- -2 the target is in hard cover.
- Cross reference the shooting weapon against the armour of the target on the table below.
Missile Weapons versus Armour table (short and long range as printed on page 23)
| Weapon | Short | Long | None | Light | Medium | Heavy | Extra heavy |
|---|---|---|---|---|---|---|---|
| Bow | 6ins | 18ins | 3,4,5,6 | 4,5,6 | 5,6 | 6 | 6 |
| Longbow | 8ins | 24ins | 2,3,4,5,6 | 3,4,5,6 | 4,5,6 | 5,6 | 6 |
| Crossbow | 8ins | 30ins | 2,3,4,5,6 | 2,3,4,5,6 | 3,4,5,6 | 4,5,6 |
Results. If the final score is equal to any of the numbers shown on the Missile Weapons versus Armour table the target has been killed. If the target has a saving throw it can attempt it. This also applies to automatic kills.
(Worked example in the source: an average quality Orc unit of six figures shoots one volley at long range at unshielded heavy-armoured Dwarves. Hit throw 6D rolls 6, 5, 3, 3, 2, 1; the 6 is an automatic hit, the 1 is discarded, the -1 for long range gives 4, 2, 2, 1, so the 4 is one hit, which with the automatic hit gives 2 hits on the Dwarves. Kill throw rolls 5 and 3, with +1 for Orc strength giving 6 and 4; against heavy armour a 6 is needed to kill, so the Dwarf unit suffers one casualty.)
(Margin quote: "I insist on my missile warriors being of the highest quality - that way I make every shot count. I've seen missile units wiped out in combat before they've loosed a single shot. Make sure you look after them especially if they are any good.")
Cover
- Target behind soft cover: Any target behind or in cover that is not classed as hard cover. Pavises and other large shields can be counted as soft cover, as can terrain that can partially hide a figure, e.g. woods, bushes, windows, walls, equipment. For a unit to count soft cover over half the unit must qualify as being in cover. All players should agree before the start of battle what features will count as soft cover and hard cover.
- Target behind hard cover: Any target behind specially prepared and designated shooting places - the perfect example being arrow slits in a castle wall. For a unit to count hard cover the whole unit must qualify as being in hard cover. If only half (round down) are in hard cover, count soft cover instead.
Kills to Specials, Kills to Individuals and Saving Throws
Now that you know how many kills you have caused, it's time to find if there are any specials or individuals amongst them. For the majority of creatures making up the armies kills at this point are the same as kills actually caused. The exceptions are any creatures or items of equipment with saving throws. The following rules will cover kills to specials, individuals and those with a saving throw.
Kills to specials and individuals
- For every 3 kills (or part of), the shooting player throws 1D. If he throws a six he has killed a special or individual.
- Standard bearers may not be killed by shooting unless they are the only surviving figures or the unit is annihilated.
- The shooting player may choose which special he has killed.
- If there are any individuals, battle leaders or a warchief attached to the unit, the shooting player may choose one of them instead.
- If the special or other has a saving throw the target player can attempt it. If he succeeds the special, warchief, battle leader or individual has survived the missile hit and is free to carry on fighting.
- If the shooting player throws several sixes, he's free to choose the same special or individual more than once. This makes sense if the special or individual in question has a saving throw.
The saving throw
Warchiefs, battle leaders and individuals always have saving throws. Bigger creatures like Ogres, Trolls and cavalry, nearly always have a saving throw. Some larger pieces of war machinery may also have a saving throw. You'll find which creatures and machines have saving throws in the Army Lists.
When a larger creature/machine has kills inflicted upon it the defending player attempts the saving throw to see if the creature/machine actually becomes a casualty or not.
- For every casualty inflicted on a figure with a saving throw the defending player throws 2D. If the total is greater than the figure's saving throw then it fights on.
(Worked example in the source: a battle leader with a saving throw is with a unit of 12 figures that receives 16 kills from a hail of arrows. The unit is annihilated and the battle leader must make 4 saving throws to stay alive; 12 figures from 16 kills leaves 4 outstanding casualties, any one of which could be the battle leader.)
Annihilated units. If the number of kills suffered by a unit exceeds the total number of figures in that unit apply the following rules:
- First all warriors without a saving throw are killed.
- Next all specials or individuals without a saving throw are killed.
- Figures with a saving throw must attempt the save for each outstanding casualty that remains.
Shooting on single figures. It is possible to shoot on a lone figure like a courier or perhaps an unfortunate battle leader. To qualify as being alone the figure must not be in base-to-base contact with any other figure. To work out whether missile shots actually hit and kill the figure apply the following rules:
- For each kill on the figure throw 1D. If any dice comes up six then the figure is indeed killed.
- If the figure has a saving throw he is, of course, allowed to attempt it.
(Worked example in the source: a lone Elven courier is hit by 6 kills. The Goblin player rolls the six kill dice again, getting 6, 6, 3, 2, 2, 1. The two sixes kill the messenger. Had he a saving throw he could have attempted it, but he would have had to save for each 6 thrown against him.)
Death of warchief, battle leader, hero, wizard or priest. Should any of the above be killed, place a Command Test counter next to each friendly warchief, battle leader and command that has lost its battle leader. In Phase Seven the Command Test (see page 39) troops will react to the death of this figure. It's at times like these that battles can be won or lost. If things are not going well, something like the death of a battle leader can set off a chain reaction causing whole commands, even the entire army, to desert the battlefield.
The Casualty Test
If a unit suffers too many casualties from missile fire or any casualties from magic, it will have to check its morale. Either it can stand the hail of missiles, or it may react by going into bloodlust, becoming shaken or abandoning the battle altogether in rout.
- A unit will have to take the Casualty Test if it suffers over 25% casualties from missiles to its current tabletop total.
- If several enemy units are firing upon the same unit the losses are reckoned from the total number of casualties.
The Quality Throw. Roll 1D, modify according to the unit's quality:
- Elite: +2
- Veteran: +1
- Average: 0
- Poor: -1
- Unpredictable: +3 with dice score 4 to 6; -3 with dice score 1 to 3
(As printed, the two dice-score modifiers sit on the Unpredictable line of the box, as in the Threat Test.)
Procedure. The testing player throws 1D and adds or subtracts for his unit's quality.
Then apply any relevant modifiers:
- -1 Losses: the unit has suffered casualties this turn.
- -1 Your unit is enduring bad light: the unit is currently operating under the wrong light conditions for its racial type.
- -1 Enemy Terrible Creature within 6ins: an enemy Terrible Creature is within 6ins of the testing unit. If there is also an allied Terrible Creature within 6ins, the one with the highest strength is terrible.
- -2 Your unit is shaken: your unit is governed by a shaken reaction.
- -3 Over 50% losses this turn: the unit has suffered over 50% casualties to its current tabletop total this turn.
- +1 A hero is with your unit: a hero individual is currently in base-to-base contact with your unit.
- +1 Your unit has a standard bearer: unit standard bearer is still carrying standard.
- +1 Your unit has a leader: unit leader is still alive.
- +2 Your unit is in bloodlust: unit is governed by bloodlust reaction.
Cross check the score on the Casualty Test results table.
Casualty Test results table. Look across the TYPE column for your unit. Look down for your score and check across for any reaction.
| Final score | Disciplined | Tribal | Fanatic | Stupid | Reaction |
|---|---|---|---|---|---|
| 10+ | 10+ | 7+ | 6+ | 6+ | BLOODLUST |
| 3-9 | 3-9 | 4-6 | 4-5 | 4-5 | OK |
| 1-2 | 1-2 | 2-3 | 2-3 | - | SHAKEN |
| 0 or less | 0 or less | 1 or less | 1 or less | 3 or less | ROUT |
(Table transcribed as printed. The source notes a standard bearer on the unit can make all the difference.)
(Worked examples in the source: an elite Elven unit rolls 3 +2 = 5. An unpredictable Troll unit rolls 2, with -3 for a dice score of 1 to 3, total -1. A second unpredictable Troll unit rolls 4, with +3 for a dice score of 4 to 6, total 7. The Reaction example on page 26 is a veteran Dwarven unit of ten figures, with a leader and standard bearer, hit by a Goblin bow unit blackening the sky and losing 6 figures including the leader, over 25% of its tabletop total. Its Quality Throw is 3 +1 (veteran) = 4; then -3 (over 50% losses this turn) and +1 (carries a standard) give a total of 2, which on the Reaction chart under disciplined reads across to SHAKEN. The Dwarven player places a shaken counter next to the unit.)
Phase Three: Movement and Reorganisation
This is the phase in the Battle Turn when players can move any or all parts of their army. It is also the phase in which disorganised units can be reorganised and wizards can rest and perhaps regain some power.
Movement is affected by encumbrance (the weight of armour or a rider), orders or by bloodlust or shaken reactions. These factors determine how fast or how slowly a unit may move on the battlefield. Each type of creature has its own base movement rate. The Army Lists will give you full details of the movement rates for your particular army.
What happens during the Movement and Reorganisation phase
- Players dice for initiative.
- Players move their armies/commands by turn in accordance with results of the Initiative Test.
- At the same time as moving their armies/commands, players can reorganise units that are not moving in this phase as long as they are not in combat or governed by any reaction (bloodlust, shaken or rout). Any redundant disorganised counters are removed.
- At the same time as moving their armies/commands, players may rest any wizards and try to recoup spent magic power.
The Initiative Test. Unlike threat, shooting and combat, movement is not simultaneous. To find out who gets the advantage in movement players take the Initiative Test. The Initiative Test determines the order in which the players will move their respective armies. FANTASY WARRIORS includes two versions,
Initiative Test - two versions. The first is one very simple method where players take the test and then move their whole armies accordingly. The other, more tactical version, has players take the test and instead of moving their whole army in one go, they move by commands, the order determined by who wins the Initiative Test.
The first method is simple and suitable for multi-player games where there are several armies on the tabletop. The second method is much more tactically interesting and reflects the ability of your battle leaders to seize the advantage over the enemy. Deciding when to move a command can become critical, especially when you are trying to stay out of or quickly get into combat. Numbered initiative counters are supplied to remind you of when in the sequence you move a particular command.
First Method - Movement by Armies
- All players roll 1D. To the score add the warchief's leadership. Subtract 1 if the warchief is currently enduring bad light.
- The player with the highest score chooses when he will move his army. Remember, the winner may not always want to move first.
- In the case of a tie, the warchief with the highest leadership chooses first. If both are still equal, any warchief not enduring bad light chooses first.
- If it's still a tie, roll again.
Second Method - Movement by Commands
- Lay out a numbered initiative counter for each warchief and battle leader on the battlefield, also for any commands that have lost their battle leader.
- Players roll 1D for each warchief, battle leader or any command that has lost its battle leader. To the score add the leadership, providing the relevant warchief/battle leader is still on the battlefield. Subtract 1 if the warchief or battle leader is enduring bad light.
- The player with the highest score then takes the numbered counter of his choice and places it next to the relevant figure of the warchief or battle leader. If a command has lost its battle leader place the counter near to it.
- The player with the next highest score then chooses one of the remaining counters and places it as above.
- Continue until all the counters have gone and then move the commands in the numerical sequence of the counters.
- When the player has moved a command he discards its numbered counter.
Encumbrance
Whilst armour offers protection, it also encumbers the wearer. The greater the protection the more slowly the wearer moves. Similarly an animal will travel more slowly with a rider than without one. The profiles in the Army Lists give the movement for different troop types already adjusted for encumbrance.
Difficult Terrain
All Terrain Features (see page 15) are classed as difficult terrain. Other items may be classed as difficult terrain by agreement between players before a game.
- Moving over difficult terrain at any speed greater than half results in disorganisation.
- A unit is counted as being on difficult terrain if any part of it is in contact with the difficult terrain.
(Margin quote: "If you really need to move fast, ignore difficult terrain when you can but remember that disorganised troops are always at a disadvantage in a fight.")
Some Terrain Features are covered by special rules:
Swamps
- Only creatures with a strength greater than 1 can cross a swamp.
- No equipment can cross a swamp.
- No mounted figure can cross a swamp.
- No figures wearing heavy or extra-heavy armour can cross a swamp.
- Crossing a swamp will always be at half speed and will always result in disorganisation.
Marshes
- No infantry wearing extra-heavy armour can cross a marsh.
- No mounted warriors wearing heavy or extra-heavy armour can cross a marsh.
- Crossing a marsh will always be at half speed and will always result in disorganisation.
Rivers
Before a battle rivers should be given a strength, agreed on by all the players. The strength of a river can be anything from 1 to 10. For each 2ft of river length there should be at least one crossing point, either a bridge or a ford. There are three ways for warriors to cross a river: by bridge, by ford or by the risky method of wading.
Crossing by bridge
- The maximum width of a bridge is 2ins. Figures with a base size greater than 1in and less than 2ins will have to cross in single file. Figures with a base size greater than 2ins will have to cross by ford or wade across.
- Bridges count as difficult terrain.
Crossing by ford
- A ford is 4ins wide.
- When fording a river units must move at half speed and always become disorganised.
Wading across. For each unit about to wade into a river, roll 1D and add the troop type's strength. Deduct the strength of the river from your score and find your result below:
| Score | Result |
|---|---|
| 1 or greater | OK: cross the river at half speed and become disorganised. |
| 0 | Cross the river at half speed and become disorganised. Lose one quarter of the unit (round down). Check for specials as normal (see page 24, Kills to Specials). |
| -1 | Unable to cross. Quarter losses as above and become disorganised. |
| -2 | Unable to cross. Half losses (round down). Check for specials. Become disorganised. |
| -3 | Stuck in the middle. Half losses as above (round down). Check for specials. Become disorganised. Check again next Movement and Reorganisation phase. |
- Any saving throws are allowed.
- Individuals not in base-to-base contact with a unit must make a saving throw if their result on the above table indicates losses.
- A unit cannot shoot or conduct combat whilst wading a river.
- Individuals cannot use any of their powers whilst wading a river.
- Battle leaders cannot accept new orders whilst wading a river.
Orders and Reactions
The orders held by the command to which a unit belongs place restrictions on movement. A particular unit's movement may also be affected by a bloodlust reaction. For details of how orders affect movement see the following pages:
- HOLD orders - page 18
- OPPOSE orders - page 18
- ATTACK orders - page 17
Of the three reactions only bloodlust affects movement:
- A unit in bloodlust must advance at full speed towards its nearest enemy, cannot slow down to cross difficult terrain and cannot halt to reorganise itself (see page 29).
Manoeuvres
Units manoeuvre to change direction or to change their formation.
Direction (Direction counter illustrated in source)
- A unit can move straight ahead.
- A unit can move ahead up to an angle of 45 degrees either side of the direction it is facing. It must retain the original direction it was facing at the start of the move.
- A unit with OPPOSE orders may move backwards away from the enemy and end the move still facing them.
- To avoid any arguments use the direction counter provided. Place the direction counter at either end of your unit, ensuring the end of the arrow touches the corner of the last figure's base. You now have the angle of 45 degrees ahead. If you want 45 degrees in the other direction, just turn the counter round.
Units turning
- All terrain restrictions apply to units turning.
- A unit may turn up to 90 degrees and move. It can only turn once. It must turn before moving.
- A unit may wheel. To wheel a unit move the outer figure in the direction you wish the unit to face to act as a marker. Then place all the other figures in their original formation, facing in the new direction.
Interpenetration
- Two units with OPPOSE orders can interpenetrate each other provided neither is disorganised, and the rear unit starts its move in base-to-base contact with the forward unit.
- Interpenetration will count as a full move for both units.
- To achieve this on the tabletop just move the rear unit directly in front of the forward unit.
Collision. A unit with ATTACK orders or a bloodlust reaction, which cannot find any possible way around friendly units in its path, will collide with them. As a result of the collision the unit with ATTACK orders or a bloodlust reaction will break through and emerge immediately in front of the other unit. It will then halt and cannot move until next turn. Both units will be disorganised by the collision.
Expanding or Contracting Units
Expanding or contracting a unit can be crucial and is the most common method of getting troops into a position where they can be most effective.
- To expand or contract a unit throw 1D and add or subtract for that unit's quality. The final dice score is the number of figures you may expand or contract your unit by.
- You may choose to expand on one flank only at the rate shown above.
- Expansion and contraction can only take place before or after a move.
(Expansion and contraction diagrams in the source: an average quality unit wants to expand and then move, throws 1D = 3 (with no modifier for average quality), expands by 3 figures and moves as normal; an elite unit wants to move and then contract, after moving throws 1D = 2 +2 (for elite quality), and contracts by 4 figures.)
Movement in combat. Once combat is joined there is no moving out of it, unless a unit gets a rout reaction in which case it will be removed from the tabletop.
Expanding and overlapping units still involved in combat. Units in base-to-base contact with the enemy may expand as normal. This can give rise to overlapping, when one unit has more figures in its front rank than the other unit.
- The overlapping unit may wrap its surplus figures round the enemy unit so getting more of its warriors into the fray. All figures in the overlapping unit must remain in base-to-base contact.
- The enemy unit may turn any figures it can to face enemy figures that have 'wrapped round'.
- Wrapping round cannot take place in the first round of combat.
Flying
As long as they are in the air, flying units or individuals may ignore difficult terrain and may fly over friendly or hostile units. Their movement is affected by orders, reactions and encumbrance in exactly the same way as other units.
- Flying units may manoeuvre and expand or contract as other units. However they do not need to interpenetrate other airborne units, being assumed to fly over or under them without stopping.
- At the end of each flying move players must declare whether the unit or individual is still in the air or has landed. Any flying units which have landed become disorganised and disorganised counters should be placed next to them. They cannot be reorganised whilst on the ground. As soon as they take off again they count as reorganised and must discard their disorganised counters.
Reorganising Disorganised Units
- Only units with OK status may be reorganised. Disorganised units with reactions must first return to OK status before being reorganised (see Influence, page 38).
- Reorganisation is an alternative to movement. Only units which do not move may be reorganised.
- A unit which is currently in combat cannot be reorganised.
- To reorganise a unit simply remove its disorganised counter.
- Flying units always count as disorganised when on the ground.
Regaining Magic Power
If a wizard has six or fewer magic power points remaining, the player can elect to 'rest' him or her in the hope of regaining some magic power. There are two ways of regaining magic power:
The safe way. The wizard is not moved in this Movement and Reorganisation phase. Provided he has six or fewer magic power points remaining he can receive:
- 1 point back if he is enduring bad light.
- 2 points back if he is not enduring bad light.
The gamble. The wizard is not moved in this Movement and Reorganisation phase. Provided he has six or fewer magic power points he can attempt to double his power:
- Roll 1D.
- If the score is less than or equal to the wizard's remaining power he can double it.
- If the score is more than the wizard's remaining power, he loses another point of magic power trying to gain more.
Phase Four: Combat
A unit may have withstood missiles, magic and any amount of threat but sooner or later in most battles there comes the ultimate test... combat. This is the moment when warriors of both armies come down to the grisly act of standing face-to-face (or face-to-kneecap when fighting giants) and trying to kill each other in hand-to-hand combat. Combat is usually short and very sharp, one side's morale soon collapses and they rout from the scene of battle.
This phase of the battle is about hand-to-hand fighting, called in the game COMBAT. It deals with who can fight, different creatures in the same fight, capturing enemy standards, hitting the enemy, killing the enemy, kills, specials and individuals and finally with how the opposing units will react to the chaos and slaughter around them.
It's a good idea to set up a few of your figures, and, using the Quick Reference Sheet and this rulebook, run through a few combats. Once you get the feel of it, add in some specials and perhaps a hero.
Sequence of the Combat phase
- Check who is eligible to fight.
- Work out casualties inflicted by the attacking unit. Keep the casualties on the table where they fall.
- Work out casualties inflicted by defenders. Keep the casualties on the table where they fall.
- Attacker checks for and works out casualties to defender's specials and individuals.
- Defender attempts saving throws for any figures that have one.
- Defender checks for, and works out casualties to attacker's specials.
- Attacker attempts saving throws for any figures that have one.
- Both players take the Combat Test.
- Both players place any necessary reaction counters and disorganised counters alongside their units.
- Both players remove their casualties.
Rules for Combat
Who fights. Figures facing the enemy and in base-to-base contact are counted as fighting the enemy.
- Leaders, champions and standard bearers are always placed in the front rank and therefore fight the enemy.
- Warchiefs, battle leaders and individuals attached to a unit are also placed in the front rank and therefore fight.
Fighting in more than one rank. (Margin quote: "Provided you keep your spear armed units organised they can effectively stand up to larger creatures like ogres, trolls and giants. Your unit will occupy a small frontage but have the advantage of depth.")
- Fighting in more than one rank allows you to include in the combat, figures in other ranks (see below) of a unit whose front rank is in base-to-base contact with an enemy. If only part of the front rank qualifies to fight, the number of figures counted in each other rank cannot be greater than the number of qualifying front rank figures.
- Foot figures armed with spears may fight in two ranks, provided that they are not disorganised and are not governed by shaken or bloodlust reactions.
- Foot figures armed with polearms may choose to fight in two ranks using spear weapons factors, provided that they are not disorganised and are not governed by shaken or bloodlust reactions.
- Foot figures armed with pikes may fight in three ranks, provided that they are not disorganised and are not governed by shaken or bloodlust reactions.
- Mounted figures may never fight in more than one rank.
Troops with different profiles in combat. Sometimes during combat troops with different profiles end up fighting in the same unit. For example when a battle leader joins a unit and fights in the front rank, or when an individual is bigger or of a different race to the rest of the unit. When this happens apply the following rules:
- Only the worth of the different creature or individual is included in the combat. The rest of his profile is considered to be the same as the rest of the unit.
- If the different creature has a saving throw he is still allowed to use it.
Individuals in man-to-man combat. To qualify as fighting man-to-man neither individual can be in base-to-base contact with any other figure. The full profile is used.
Method: Run through the combat as normal.
Results:
- The individual who has the greatest number of failed saving throws is the loser and is killed.
- In the case of no kills, and therefore no saving throws for either individual, they are free to move away during the next Movement and Reorganisation phase.
- In the case of a draw (an equal number of failed saving throws) both individuals are killed.
Groups of individuals in combat
- If two groups of individuals (not in base-to-base contact with any units) meet, combat is settled by a series of man-to-man contests as above.
- Two or more individuals are not allowed to join together in combat to attack a single individual.
- When one group of individuals moves into contact with another, the attacker decides how to pair off the individuals for man-to-man combat. Any surplus individuals do not join in combat and are free to move away in the next Movement and Reorganisation phase.
More than one allied unit in the same combat. When you have more than one of your units fighting in the same combat apply the following rules:
- Treat the units as separate for the purposes of combat.
- During the Combat Test calculate suffered more kills than the enemy from the combined casualty total of the two allied units (see page 34).
Riders on beasts. Riders on beasts, such as Orc wolfriders or knights on warhorses, have the option of including the fighting power of their mounts in combat.
- If they choose this option use the bottom profile as shown in the Army Lists. The only drawback to this option is that the unit will become disorganised.
- If this option is not chosen the rider alone fights using the top profile. However the unit does not become disorganised.
- In the Army Lists some profiles for warchiefs, battle leaders and individuals are combined with those of their war beasts to produce a single mounted profile. Being extraordinary warriors these figures do not become disorganised when using their war beast in combat.
Flying units and individuals
- Flying units or individuals may fight other flying units or individuals in the air. Aerial combat is worked out in exactly the same way as combat on the ground.
- To enter combat with a unit on the ground a flying unit must already have landed. It will be disorganised.
Capturing a standard. Capturing the enemy unit's standard in combat is a good way to demoralise them quickly. It may not be easy as the enemy will fight that much harder to protect their beloved standard.
- Declare that you are going to attempt to capture the standard before combat is worked out for the units involved.
- If you win this phase of combat (i.e. kill more figures than you lose), you have captured the enemy standard.
- The figure of the enemy standard bearer is removed in addition to other casualties.
- If any standard bearer has a saving throw he can, of course, use it. If he is successful the standard has not been captured.
Combat Method
- Work across the table from the player who has the Time Dial on his left.
- Combat is simultaneous.
- Don't remove any casualties until all combat has finished and Combat Tests have been taken.
Hit throw
- Throw 1D for each point of worth in base-to-base contact with the enemy.
- Add 1D if the unit has a champion.
- If the unit has ATTACK orders add 1D for every 5 dice you already have.
- Any 6 thrown is an 'automatic hit' so place it/them on one side.
- Any 1 thrown is an 'automatic miss' so discard it/them.
- To the remaining dice (those that show 2, 3, 4 and 5) apply any relevant modifiers:
- -1 Your unit is of lesser quality.
- -1 Your unit is disorganised.
- -1 Your unit is fighting in 2 or more ranks.
- +1 Your unit is of better quality.
- +1 The enemy has no shield.
Results (score after modification)
- 1 to 3 = miss
- 4 to 6 = hit
- To any hits after modification add any 'automatic hits' to find your total number of hits.
The kill throw
- Now that you know how many hits you've scored, it's time to find out if you've actually killed anyone. This depends on your weapon and the armour of your target.
- Throw 1D for each hit.
- Any 6 thrown automatically becomes a kill so place it/them to one side.
- Any 1 thrown is an automatic miss so discard it/them.
- To the remaining dice (those showing 2, 3, 4 or 5) apply the following modifiers:
- Add: the strength of your unit.
- +1 Your unit is in bloodlust.
- +1 Your unit is defending its standard.
- Subtract: the enemy's resilience.
- Cross reference the weapon your unit is using against the armour of the enemy on the Weapon versus Armour table.
Weapon versus Armour table
| Weapon | None | Light | Medium | Heavy | X-heavy |
|---|---|---|---|---|---|
| Hand | 3,4,5,6 | 3,4,5,6 | 4,5,6 | 5,6 | 6 |
| Two-handed | 2,3,4,5,6 | 2,3,4,5,6 | 3,4,5,6 | 4,5,6 | 5,6 |
| Spear/lance | 3,4,5,6 | 4,5,6 | 5,6 | 6 | 6 |
| Pike | 3,4,5,6 | 4,5,6 | 5,6 | 6 | 6 |
- If the final score is equal to any of the numbers shown on the Weapon versus Armour table, the target has been killed.
- If the target has a saving throw it can attempt it. This also applies to automatic kills.
(Worked example in the source: an average quality Orc unit with ATTACK orders has six figures including a champion in base-to-base contact with the enemy. It rolls 8 dice: 6 for the figures in contact, +1 for the champion, and +1 for ATTACK orders (7 dice in hand divided by 5 = 1). The roll is 6,6,4,4,4,3,3,3: two automatic hits, and -1 for disorganised on the remaining dice gives 3,3,3,2,2,2, so no further hits, for two hits total. The two hitting dice roll 5 and 4; with +1 Orc strength they read 6 and 5. Hand weapons against medium armour need 4, 5 or 6 to kill, so the enemy suffers 2 casualties.)
Notes on Weapons
Miniatures. It is assumed that all the troops in a unit are identically armoured and equipped even though the miniatures may be more varied. As long as it is clear to your opponent how your unit is armed and armoured, you may include a few figures with different weapons or armour just to make the unit look more interesting.
Hand weapons. All weapons that can be carried in one hand and don't fall into any of the other categories will usually fall into this one. Swords, scimitars, axes, maces, morning stars and clubs are all hand weapons.
Two-handed weapons. Covers any weapon requiring two hands to wield, except for spears, lances and pikes. The most common examples are swords, axes and polearms. When a unit is using two-handed weapons it counts as unshielded.
Spears, lances and pikes. If a spear-armed unit is not governed by any reaction, and is not currently disorganised, it can fight in two ranks. Figures carrying pikes can fight in three ranks, provided they too are not governed by any reaction or disorganised. If the unit carries a shield it can count as shielded.
Polearms. Units armed with pole weapons (e.g. glaives and halberds) can count as either being spear armed or armed with two-handed weapons. They can shift between the two weapon types, but players must declare which weapon category they are going to use before combat. Pole armed troops are always counted unshielded, and if they choose the two-handed option cannot fight in two ranks. If they fight in two ranks they must not be governed by any reaction or be disorganised.
Tooth and claw. This category covers all animals and creatures that fight without weapons but instead rely on their own natural aggressive instincts of biting and clawing. Wolves, big cats and bears fall into this category. The Army Lists will give you details of which animals use tooth and claw in combat.
Horn and hoof. Horn and hoof covers creatures that use their bodies to trample, kick and gore in combat. A classic example would be a warhorse, whilst a more exotic example would be the Goblin War Giant or the War Rhino. The Army Lists and future publications will give you details of which animals use the horn and hoof attack in combat.
Kills to Specials, Kills to Individuals and Saving Throws (in combat)
Now that you know how many kills you have caused it's time to find if there are any specials or individuals amongst them. For the majority of creatures making up the armies, kills at this stage are the same as kills actually caused. The exceptions are any creatures or items of equipment with saving throws. The following rules will cover kills to specials, individuals and those with a saving throw.
Kills to specials and individuals
- For every 3 kills (or part of) the attacking player throws 1D. If he throws a six he has killed a special or individual.
- If the attacking player throws several sixes, he's free to choose the same special or individual more than once. This makes sense if the figure in question has a saving throw.
- Standard bearers may not be killed except by capturing the standard unless they are the only surviving figures or their unit is annihilated.
- The attacking player may choose which special he has killed.
- If there are any individuals, battle leaders or warchiefs attached to the unit, the attacking player may choose one of them instead.
- If the special or other has a saving throw the target player can attempt it. If he succeeds the special has survived the attack and is free to carry on fighting.
The saving throw
All individuals, warchiefs and battle leaders have a saving throw, as do bigger creatures like Ogres, Trolls and cavalry. Some larger pieces of war machinery may also have a saving throw. You'll find which creatures and machines have a saving throw in the Army Lists.
When a larger creature/machine has kills inflicted upon it the defending player attempts the saving throw to see if the creature/machine actually becomes a casualty or not.
- For every casualty inflicted on a figure with a saving throw the defending player throws 2D. If the total is greater than the figure's saving throw then it fights on.
Annihilated units. If the number of kills suffered by a unit exceeds the total number of figures in that unit apply the following rules:
- First all warriors without a saving throw are killed.
- Next all specials without a saving throw are killed.
- Figures with a saving throw must attempt the save for each outstanding casualty that remains.
Death of warchief, battle leaders, hero, wizard or priest. Should any of the above be killed, place a Command Test counter next to each friendly warchief, battle leader and command that has lost its battle leader. In Phase Seven the Command Test (see page 39) troops will react to the death of this figure. It's at times like these that battles can be won or lost. If things are not going well, something like the death of a battle leader can set off a chain reaction causing whole commands, even the entire army, to desert the battlefield.
The Combat Test
(Margin quotes: "This is where HOLD orders will pay off. Your warriors will be prepared to fight on just that little bit longer - it could make all the difference." and "Remember - don't get caught in combat if you are using OPPOSE orders.")
Only in extraordinary circumstances can units remain locked together in combat for very long. Sooner or later one side will break and flee the battle in rout. The Combat Test tests a unit's willingness to stand and slug it out in hand-to-hand combat.
The Combat Test is taken at the end of the combat phase, and will apply to any unit that has suffered casualties during this phase of combat.
Procedure. The testing player throws 1D and adds or subtracts for the unit's quality from the Quality Throw table:
- Elite: +2
- Veteran: +1
- Average: 0
- Poor: -1
- Unpredictable: +3 with dice score 4 to 6; -3 with dice score 1 to 3
Then apply any relevant modifiers:
- -1 Unit is operating under OPPOSE orders.
- -1 Unit has over 25% casualties: unit has suffered 25% casualties to total in this combat phase.
- -1 Greater losses: unit lost more casualties than its opponent this combat phase.
- -1 Unit has lost its standard.
- -1 Unit is enduring bad light.
- -1 Your unit is fighting a Terrible Creature.
- -2 Unit is shaken.
- -3 Unit has over 50% casualties: unit has suffered more than 50% casualties in this combat phase.
- +1 Unit has HOLD orders.
- +1 Unit has killed more figures than it has lost.
- +1 Hero with unit.
- +1 Leader with unit.
- +1 Unit carries a standard: standard bearer is alive and carrying the unit's standard.
- +2 Unit is in bloodlust: unit is subject to the bloodlust reaction.
Combat test results. Look across the column for your unit, look down the column for your score and then check across for any reaction.
| Final score | Disciplined | Tribal | Fanatic | Stupid | Reaction |
|---|---|---|---|---|---|
| 10+ | 10+ | 7+ | 6+ | 6+ | BLOODLUST |
| 3-9 | 3-9 | 4-6 | 4-5 | 4-5 | OK |
| 1-2 | 1-2 | 2-3 | 2-3 | - | SHAKEN |
| 0 or less | 0 or less | 1 or less | 1 or less | 3 or less | ROUT |
(Table transcribed as printed.)
Phase Five: New Orders
Maybe you're ready to strike the decisive blow or perhaps your opponent has caught you unawares. Now is the time to change the orders of one or all of your commands. It sounds easy, but in the confusion of battle there's plenty to go wrong. Will your warchief carry the order personally or will he send a courier? Will the battle leader accept the new order? Will he understand it? Or will he go wild and hack off the messenger's head?
Before the battle started all commands were given their initial orders (see Issuing Orders, page 17). This is the phase of the Battle Turn when warchiefs can issue new orders to replace them and battle leaders check to see how they respond.
(Margin quotes: "Brilliant battle plans usually mean changing orders. If you get it right, fame and fortune may be yours - but beware, battle leaders can be very unreliable." and "If your battle leaders are not that good keep your plans straightforward. Remember, couriers will deliver orders better than any messenger drawn from the ranks.")
Warchief no longer on the battlefield. If an army's warchief has been killed or has routed all commands must continue to carry out their existing orders. No new orders can be issued.
Commands with no battle leaders. A command whose battle leader has been killed or has routed off the battlefield must continue to operate under its current orders. The warchief cannot issue it with new orders.
Issuing new orders to battle leaders
- All new orders come from the warchief.
- Orders may be carried by messengers, couriers, by the warchief himself or transmitted by magic (see Eldritch Command, page 44).
- An order may be carried by any messenger or courier who is in base-to-base contact with the warchief.
- When an order is issued place the appropriate counter face down alongside the messenger or courier.
- If the warchief is carrying the order no counter need be chosen until the warchief has reached the battle leader and the battle leader has all his units in range.
(Margin quote: "Don't forget that magic is often the best way to get an order through quickly although it is no guarantee that the order will be understood.")
Messengers and couriers
- A courier is a specially trained individual who moves fast and adds a bonus in the Battle Leader's Test.
- A messenger is a figure with no special abilities who has been chosen to carry an order. A messenger may be a warrior figure taken from almost any unit. Messengers travel at normal speed for their type.
- Messengers and couriers move at the same time as their warchief.
- Messengers and couriers can carry only one order at a time.
- Once despatched a messenger or courier must try to deliver the order. They cannot be recalled.
- When delivering an order place the counter face down alongside the messenger or courier.
- To pass on an order the messenger or courier must be in base-to-base contact with the battle leader. The messenger or courier must then stay in base-to-base contact with the battle leader until dismissed (or killed).
- When a messenger or courier has been dismissed by a battle leader he will return at full speed to the warchief.
New order for warchief's own command. To change the order held by his own command (if he has one) the warchief must be in range (8ins) of all the units in that command. For each herald in base-to-base contact with the warchief add 2ins to his range. If he is in base-to-base contact with a banner bearer add 4ins. To count as being in range at least one figure from each unit in the command must be within range of the warchief.
- If all units are in range the order is automatically accepted. The old order counter is discarded and the new one placed face up alongside the warchief.
Battle Leaders and Leadership Value
As well as a normal warrior profile, every battle leader in an army has a leadership value (see the Army Lists for details). Leadership ranges from zero, representing the very worst type of general, to five - the very best. A battle leader's leadership is an important factor in determining how he responds to a change of order.
Response of Battle Leaders to New Orders
Before they can respond to new orders battle leaders must:
- Be in base-to-base contact with a messenger, courier or warchief with an order counter (or be sent a successful Eldritch Command).
- Be in range (8ins) of all remaining units in his command. For each herald in base-to-base contact add 2ins. If the battle leader is in base-to-base contact with a banner bearer add 4ins to his range. To count as being in range at least one figure from each unit in his command must be within range of the battle leader.
If both conditions are met the battle leader takes the Battle Leader's Test.
Order counters and the Battle Leader's Test
- If the battle leader tests and accepts the new order, the counter remains with the battle leader face up. Don't forget to remove the old order counter.
- If the battle leader tests and refuses, remove the messenger/courier's order counter.
- If the battle leader misunderstands the order, remove both the messenger/courier's counter and the battle leader's counter and replace them with the 'misunderstood' order counter (i.e. the order that the battle leader thinks he has).
Dismissing a warchief. A warchief who personally delivers a message cannot be dismissed. So, if the result of the Battle Leader's Test is IGNORED, IGNORED AND CONFUSION or CONFUSION AND MISUNDERSTANDING the warchief is not dismissed and may try again next turn (with a different order if he wishes).
Battle Leader's Test
Method
- Throw 1D.
- Add the battle leader's leadership.
Add
- +1 Battle leader is a fanatic receiving ATTACK orders.
- +1 Warchief delivers the message personally.
- +1 Message is delivered by courier.
Subtract
- -1 Battle leader is of a different race to the warchief.
- -1 Battle leader is currently enduring bad light.
- -1 If any units in battle leader's command are disorganised.
- -1 For each unit in the battle leader's command that is either shaken or in bloodlust.
- -2 Battle leader is in base-to-base contact with one of his units.
Result
| Score | Result | Effect |
|---|---|---|
| 6+ | OK | The battle leader understands and accepts the new order. |
| 5 | OK/confusion | The battle leader understands and accepts the new order but there is confusion getting it to the units. All units in the battle leader's command are disorganised. The messenger or courier is dismissed. |
| 4 | Delay | The messenger or courier remains with the battle leader and may try to deliver the order next turn when the battle leader must test again. |
| 3 | Delay and confusion | Confusion arises. All units in the battle leader's command are disorganised. The messenger remains with the battle leader and may try to deliver the order next turn when the battle leader must test again. |
| 2 | Ignored | The battle leader ignores the new order and the courier/messenger is dismissed. |
| 1 | Ignored and confused | Confusion arises over the new order and it is ignored by the battle leader. The messenger/courier is dismissed. All units in the battle leader's command are disorganised. |
(Worked example in the source: at night an Orc warchief sends an ATTACK order by courier to a Goblin battle leader with a leadership of 3. Once his units are reorganised and in range he rolls 1D = 3, +3 for his leadership value, -1 for being of a different race from the warchief, +1 for delivery by courier, total 6, so the order is accepted.)
Phase Six: Influence
Sometimes a unit can get a reaction that threatens the whole carefully planned strategy of an army. When this happens it's often a good idea if the battle leader of that unit pays it a visit and attempts to bring it back under his control. This is called using influence.
If the battle leader is good enough his influence usually works. If he's a poor battle leader things can become worse than they already are. When you are assembling an army it's worth assigning your more wayward units to the better battle leaders.
Using Influence
- The battle leader must be in base-to-base contact with a unit to be able to influence it.
- A battle leader can only influence a unit from his own command.
- Units in OK status cannot be influenced.
- Add 1 to the battle leader's leadership if he has a banner bearer with him.
- Subtract 1 from the battle leader's leadership if he is of a different race to the unit.
- If a warchief has his own command he may influence it in the same way as a battle leader. A warchief may not influence a unit which is not in his own command.
Method
- Throw 1D.
- If the score is equal to or under the battle leader's leadership he has succeeded. See Success below.
- If the score is greater than the battle leader's leadership he has failed. See Failure below.
- If the score is 6 or three greater than the battle leader's leadership, something has gone horribly wrong. See Horribly Wrong below.
Success
- Unit was in bloodlust. Can now return to OK status.
- Unit was shaken. May return to OK status, but will still remain disorganised until it is reorganised.
Failure. If the battle leader fails he may try again the next turn provided he remains with the unit.
Horribly wrong
- If the unit was in bloodlust the battle leader is set upon by the crazed unit and killed on the spot. If the battle leader has a saving throw he can attempt it once. If he fails, he is killed and a Command Test must be taken in the next phase. If he succeeds, he can try again next turn if he dares.
- If the unit was shaken it is now in rout. The battle leader will be carried along in the stampede to leave the battle and is now classed as routing himself. All figures involved are immediately removed from the tabletop and a Command Test must be taken. Place a Command Test counter next to each friendly warchief, battle leader and any command that has lost its battle leader.
Don't forget to remove/replace relevant reaction counters.
(Worked example in the source: a battle leader with a leadership value is accompanied by a banner bearer and tries to calm down a unit of Goblins which is in bloodlust. Its result is read against the success and failure rules above.)
Phase Seven: The Command Test
Bad news travels fast on the battlefield. Panic, if it gets a hold, travels quicker. What looks like a setback may turn out to be a disaster as your units pull out of the battle altogether. This is the time when a warchief's boasts (if they still hold good) and good omens can help you. If your army has any talismans they could make the difference between victory and defeat.
(Margin quotes: "This is where good omens can make the difference between victory and defeat." "Don't make boasts you don't think you can keep - it you could cost you the battle." "I always try to have at least one talisman in my army. They may require protection but it is at times like this that having them pays off.")
Who tests. Warchiefs and battle leaders take the test. A command that has no battle leader (i.e. he has been killed or has routed) will also take the test.
When to test
- When a warchief or battle leader is killed or routs.
- When a wizard, hero or priest is killed or routs.
- When a talisman is wrecked, killed, routs or is defiled.
Deciding who tests first. The results of the Command Test will have a knock-on effect on commands that have yet to test, therefore players may choose the order in which they test their commands.
Command Test Method
- Remove the Command Test counter. Then, for your warchief, each battle leader or command without a battle leader throw 1D.
- Add the warchief's or battle leader's leadership if they are alive and have not routed.
Add
- +1 The omens are good.
- +1 Warchief's boast still holds good.
- +1 Each talisman that is still functioning.
Subtract
- -1 The omens are bad.
- -1 Warchief's boast no longer holds good.
- -1 Each command that has routed or annihilated.
- -1 Testers suffering from bad light.
- -3 Warchief is dead or routed.
Score
| Score | Result |
|---|---|
| 7+ | The command is unaffected. |
| 6 | All units in the command become disorganised. |
| 5 | All units in the command become shaken. |
| 4 or less | The warchief or battle leader and any units in his command rout and are removed from the battlefield. If the warchief routs then all individuals will also rout and are removed. |
(Margin quote: "Don't make boasts you don't think you can keep - it you could cost you the battle.")
Individuals in Battle
To the chaos of battle add mighty heroes, powerful wizards, mumbling soothsayers, devout priests, speedy couriers and the brave warriors who carry the sacred banners of their armies. In FANTASY WARRIORS all these characters are called individuals, each one with a special role in battle. Will they find a place in your army?
General Rules for Individuals
- All individuals, except heralds and banner bearers, move at the same time as their warchief. Heralds and banner bearers move at the same time as the command to which they belong. Individuals in base-to-base contact with friendly units may choose to move with them.
- Individuals are not bound by orders and are free to move around the battlefield as they like. To be effective, however, heralds and banner bearers must stay in base-to-base contact with the appropriate warchief or battle leader.
- Individuals may join and leave units as they wish. Individuals are with a unit when they are in base-to-base contact with it.
- Individuals that are with a unit in combat add only their worth.
- Individuals that are with a unit that suffers casualties in combat or from shooting risk becoming casualties themselves (see page 33). They are always allowed a saving throw if they have one (see the Army Lists, pages 47 to 54).
- Individuals are not governed by any reactions unless they are with a unit that routs, in which case they will be removed from play with the unit.
- Individuals on their own or in a group cannot be disorganised.
- If the warchief routs all individuals (including all banner bearers and heralds) leave the table with him.
- If the warchief is killed all individuals, except wizards and heroes, automatically rout and are removed from play.
Heroes
(Margin quote: "I position my heroes carefully making sure they don't get picked off by enemy missiles or magic. They are fast moving and powerful warriors - I use them to add weight to my friendly units as and when required.")
Heroes are super-fighters, free to roam, adding support as and when needed.
- There can be no more than one hero per 500 points of an army.
- Heroes all have a minimum worth of 5 and so are very powerful in combat.
- If a hero is killed the army must take a Command Test. Place a Command Test counter next to each friendly warchief, battle leader and any command that has lost its battle leader.
- If a hero's warchief is killed throw 1D for each hero in the deceased warchief's army.
- +1 If the hero is in base-to-base contact with the enemy (i.e. in combat).
| Score | Result |
|---|---|
| 4-6 | The hero remains on the battlefield, overcome by the need to avenge the death of his beloved warchief. From now on the hero will move at maximum speed towards the nearest enemy and attack them in combat. During the Movement and Reorganisation phase he will always move after all friendly battle leaders have moved. During combat the hero will stand and fight until the enemy unit routs or is annihilated. If he survives he will seek out the next nearest enemy and so on. |
| 1-3 | The hero will rout from the battlefield and is immediately removed from play. In this instance no Command Test is taken. |
Wizards
See Magic, page 43, for full details of wizards and their use in battle.
- If a wizard is killed the army must take a Command Test. Place a Command Test counter next to each friendly warchief, battle leader and any command that has lost its battle leader.
- If a wizard's warchief is killed throw 1D for each wizard in the deceased warchief's army.
| Score | Result |
|---|---|
| 4-6 | The wizard will rout from the battlefield. Before he goes he can cast one more spell, now or never. If he overdraws his power the army must take the Command Test. Once he has cast the spell he routs and is immediately removed from play. Provided he has not overdrawn his magic power, no Command Test is taken. |
| 1-3 | The wizard will rout from the battlefield and is immediately removed from play. In this instance no Command Test is taken. |
Priests
Priests call for divine intervention in two forms. The first may alter events that have just taken place. The second may drain magic power from enemy wizards.
- If a priest is killed the army must take a Command Test. Place a Command Test counter next to each friendly warchief, battle leader and any command that has lost its battle leader.
Changing events. When the gods are successfully called upon to change an event the following will happen:
- One priest calling: the player can re-roll his last dice roll. He must exercise this option immediately after making the original, unsatisfactory roll (i.e. before performing any other action). He is bound by the re-rolled result.
- Several priests calling: the player can either re-roll his own last dice roll as above or force his opponent to re-roll his last dice roll. The re-rolls must come immediately after the original, unsatisfactory roll. The re-rolls are binding.
Rules for changing events
- The gods may be called upon to change an event at any time. The player simply announces that he is calling upon the gods.
- The priest must not be in base-to-base contact with any other figure. If several priests are involved each must be in base-to-base contact with at least one other involved priest but not with any other figure.
- Only priests of the same race may join together.
- No priest may be currently involved in combat.
Method. Roll 1D for each priest. If the total score is 6 or greater the gods will grant the request and the player may re-roll his last dice or, in the case of two or more priests, force his opponent to re-roll. If any of the dice shows 1 the gods will take the life of that priest. A saving throw is allowed. If it fails, the priest is killed and a Command Test must be taken. Place a Command Test counter next to each friendly warchief, battle leader or any command that has lost its battle leader.
Attacking enemy wizards. A successful attack against an enemy wizard will drain the wizard of magic power and perhaps kill him.
Rules for attacking enemy wizards
- The gods may be called upon to attack an enemy wizard at any time. The player simply announces that his priests are calling upon the gods.
- Rules regarding base contact with other figures are the same as in Changing Events (see above).
- The priest(s) must have line-of-sight to the wizard.
- The priest(s) must not currently be in combat.
Method. Roll 1D for each priest. If the total score is 12 or greater the gods will grant the request. If any of the dice comes up 1 the gods will take the life of that priest. A saving throw is allowed. If it fails, the priest is killed and a Command Test must be taken in the next Command Test phase. For each living priest roll 1D again. The total is then subtracted from the target wizard's magic power. If this causes the wizard's power to be overdrawn he must make a saving throw. If he succeeds, he survives with his magic power reduced to 1 point. If he fails, he is killed and his army must take a Command Test. Place a Command Test counter next to each friendly warchief, battle leader or command that has lost its battle leader.
Soothsayers
Reading the omens. When soothsayers are used to read the omens, they improve the chances of the omens being good.
- For each soothsayer add 1 to your dice score when reading the omens (see page 17).
- Each army can have a maximum of two soothsayers.
- Should a soothsayer get killed the omens automatically turn bad for the army to which he/she belonged.
- If an army has two soothsayers both must be killed for the omens to turn bad. If one of the two is killed, the omens are no longer good.
Sending a superstition. If one army has more soothsayers than another it can force the other army to read the omens if it has not already done so. It can only do this to one other army.
Couriers
Couriers are trained messengers. They know how to travel quickly and deliver orders clearly. When a warchief uses a courier to deliver a new order to a battle leader the player adds +1 to his dice roll when he tests to understand (see the Battle Leader's Test, page 37).
Scouts
The use of scouts before a battle improves your chances of outscouting and perhaps outmanoeuvring the enemy army.
- For each scout roll 2D and add that score to your scouting total.
Heralds and Banner Bearers
(Margin quote: "Heralds and banner bearers are a luxury but if you can afford it they're well worth having - especially if you have a slow moving army like mine.")
Heralds and banner bearers extend the range of a warchief or battle leader (see New Orders, page 35).
- Extend range by 2ins per herald. Maximum number of heralds per warchief or battle leader is two.
- Extend range by 4ins per banner bearer. Maximum number of banner bearers per warchief or battle leader is one.
- Heralds and banner bearers are only effective if in base-to-base contact with the warchief or battle leader.
Warchiefs and Battle Leaders in Battle
In FANTASY WARRIORS warchiefs and battle leaders move freely round the battlefield, giving and receiving orders, encouraging wavering troops, perhaps even plunging into combat.
General rules for warchiefs and battle leaders
- Warchiefs and battle leaders are not themselves bound by their current orders and are free to move round the battlefield as they like.
- They may join and leave units as they wish. Warchiefs and battle leaders are considered to be with a unit when they are in base-to-base contact with it.
- If they are with a unit that is involved in combat they add only their worth.
- If they are with a unit that suffers casualties in combat or from shooting they risk becoming casualties themselves (see page 33). They are always allowed a saving throw if they have one (see Army Lists, pages 47 to 54).
- They are not governed by any reactions unless they are with a unit that routs, in which case they will be removed from play along with the unit.
- They cannot themselves become disorganised.
- If a warchief or battle leader is killed or routs, his army must take a Command Test (see page 39). Place a Command Test counter next to each friendly warchief, battle leader or any command that has lost its battle leader.
(Margin quote: "Only in emergencies will I fight in combat. Sure, I can make a difference to the fight but the risk of getting killed, and throwing my army into confusion, are high.")
Other aspects of the role of warchiefs and battle leaders in FANTASY WARRIORS are dealt with in the appropriate sections of the rules. In the Battle Turn particularly important sections deal with New Orders (page 35) and Influence (page 38).
Magic
(Margin quotes: "A wizard with magic power is always a threat to the enemy. A drained wizard is virtually useless. It's easy to waste magic but use it carefully and it can be very powerful." and "A really powerful spell can be risky and kill the wizard that casts it. But if you are in a desperate situation it can be worth the risk.")
Magic is used by wizards. At the start of a battle a wizard has a set amount of magic power. The stronger the wizard the more power he has. When a spell is cast power is expended, the exact amount depending on how powerful the spell is. There is a strong random element to magic, so in FANTASY WARRIORS the wizard can never be sure how much the spell will drain him. Any wizard who overdraws on his power will surely kill himself and possibly throw the army into panic. Spells may be cast at any time during a battle, as many times as a player wishes, and in any order. The only constraints are the wizard's power and perhaps the opposition of enemy wizards.
What happens when magic is used
- The player declares his intent to use magic.
- He names the spell and states how much power he is going to use upon it.
- He finds out the effects and the actual power cost of the spell.
When to use magic. Magic can be used at any time during a battle, except during hit and kill calculations.
Magic power counters. Magic power counters are included in the game to give you a tally of your current magic power. When you cast a spell work out the power cost and hand in the appropriate number of magic power counters.
Expending power. Each spell has its own rules for working out its final cost. The stronger you make the spell the more power it will drain from the wizard. There is a strong random element in magic, so don't forget to take this into consideration when casting a spell, especially if you are using a lot of power.
Regaining power. Wizards who do not move during a Movement and Reorganisation phase may regain magic power (see page 29).
Overexpending power. If a spell turns out to cost more magic power than you have, you've blown it... one dead wizard!
- A wizard who overdraws his magic power kills himself.
- He has no saving throw.
- The spell does not succeed.
Dead wizards. If a wizard is killed for any reason the army must take a Command Test at the end of the turn (see the Command Test, page 39). Place a Command Test counter next to each friendly warchief, battle leader and any command that has lost its battle leader.
Spells
Hasten Day/Night. This spell allows the wizard to move the hourglass counter either backwards or forwards on the Time Dial.
- Magic power cost: 3D per time step moved.
- Method: declare Hasten Day/Night; decide how many steps you wish to change; throw 3D per time step changed; move the hourglass counter to its new position on the Time Dial.
Eldritch Command. This spell will allow you to send orders to your battle leaders more quickly, without the need to use a courier or messenger. To use this spell the wizard must be in base-to-base contact with the warchief. When the wizard casts the spell the battle leader must still test to see how he responds to the new order (see page 35). Whatever the results the magic power cost must be paid.
- Magic power cost: add 1 magic power point per 12ins (or part of) distance to the battle leader. Add 1D.
- Method:
- Declare an Eldritch Command.
- Measure the distance from the wizard to the battle leader in a straight line, ignoring all terrain and line-of-sight factors.
- Add 1 magic power point per 12ins (or part of).
- Throw 1D and add the score to the power cost.
- Then proceed with the Battle Leader's Test as normal. Any result worse than OK/CONFUSION means that the spell has failed.
Blast. Blast is a spell of destruction. It has variable potency enabling you to tailor it to your wizard's current power. Even at its most lethal Blast will not wipe out whole units. Blast comes into its own when it is used to pick off targets that would otherwise be out of range or impracticable to get at in any other way, such as couriers, battle leaders or even a warchief.
- Magic power cost: one magic power point per dice rolled, minimum 2D, maximum as many as you like or dare to use. One magic point per 12ins (or part of) range.
- The bad news: if any doubles are rolled, double the magic power cost. Only double it once, regardless of how many doubles are thrown. If any trebles are rolled, treble the magic power cost. Only treble it once, regardless of how many trebles are thrown.
- The wizard must be able to see his target. See line-of-sight (page 22).
- Method: roll the dice. Any 4, 5 or 6 thrown equals a kill. Casualties caused by Blast are worked out as if they have been caused by shooting (see page 25) with all the usual rules for specials, individuals and saving throws. Units damaged by Blast must take the Casualty Test as normal.
(Worked example in the source: a Goblin wizard with a magic power of 20 blasts a unit of Dwarven infantry 26 inches away, using 6 dice. The cost is 3 for range plus 6 for the dice, 9; he rolls 5, 4, 3, 3, 2, 2, killing two Dwarves, and since he rolled doubles the cost is doubled to a total of 18. The Goblin wizard may then check for specials in the Dwarven unit, and the unit must take an immediate Casualty Test.)
Banish Magic. This is one of the most powerful spells available. If it works it will prohibit the casting of further magic for 6 steps of time.
- Magic power cost: 10D.
- Method:
- Declare Banish Magic.
- Throw 10D to find the magic power cost.
- If the magic power cost is 35 or more the spell has succeeded and magic is now prohibited for six steps of time.
- The full magic power cost is paid even if the spell fails.
Portent of Doom. Will cause an immediate Command Test to all enemy commands, as if the enemy warchief was dead (see page 39).
- Magic power cost: 10D.
Arcane Eye. Will add extra scouting points.
- Magic power cost: 1D per each 3 extra scouting points.
Fudge the Omens. Will allow you to roll the omens dice again.
- Magic power cost: 2D to roll the omens dice again.
Spellbreak. Will break an enemy wizard's latest spell if cast immediately after he casts and works out his spell. Shout 'spell break' and continue. Spellbreak cannot be used to break a successful Banish Magic spell.
- Magic power cost: 5D.
- Result: if the dice score is over 15 the enemy spell has been broken. The enemy wizard must pay the full costs of his spell even if it is broken.
Finger of Death. Finger of Death will allow a wizard to attack an enemy with pinpoint accuracy. It can be used to attack specials, individuals, warchiefs and battle leaders; whether they are on their own or in base-to-base contact with other figures. Prior to working out the spell the wizard names his potential target.
To use the spell the wizard must have a clear line of sight (see page 22) to the target and the target must not be behind any sort of cover.
- Magic power cost: 1 magic power point per 12ins (or part of) of range to the target. Add the roll of 2D. (The range figure in the printed scan is overwritten by hand; it is transcribed as 12ins.)
- Method: roll the 2D. Any 6 rolled equals a kill on the target. If the target has a saving throw it can attempt it.
Protection. Protection will allow a wizard, or any figure in base-to-base contact with him, the chance to avoid death, or in the case of more powerful figures, the need to make a saving throw. Only one figure is affected by the spell; the player controlling the wizard must state clearly who he is casting protection on.
- Magic power cost: 5 magic power points. Add the roll of 2D.
- Method: if a wizard has a kill inflicted on him, and before he attempts a saving throw, roll 2D for the cost in magic power. If the score is greater than his saving throw, the wizard has protected himself.
- If the wizard is casting protection on another figure, that figure must be in base-to-base contact with him. The roll is taken before that figure would normally attempt its saving throw. In the case of figures without a saving throw, a score of greater than 8 on the roll of 2D will save them from death.
- If the spell fails the wizard or figure can still attempt their saving throw.
Talismans
In FANTASY WARRIORS superstitious troops often place their faith in their army's talismans. They may be inspired by an army standard that has been waved in many victorious battles. Perhaps their army is accompanied by an ancient and revered sacred item. They may even adopt a leader or unusual warrior as a mascot or beloved personage.
In FANTASY WARRIORS armies can take their talismans on to the field of battle. The presence of a talisman in battle will give the testing army a bonus during the Command Test. There are three types of talisman: an army standard, a beloved personage, a sacred item.
An army can have a maximum of one of each type of talisman.
The Army Standard
- There can be only one army standard per army.
- Army standards are not moved during a battle. They are raised prior to a battle and left in position for the whole army to see. While an army standard remains in position it will give the army a bonus if it has to take a Command Test.
Taking down a standard. An army standard can be taken down, for example, to avoid being wrecked by the enemy.
- If an army standard is taken down it cannot be raised again during the course of a battle and will no longer give a bonus during a Command Test.
- To take down an army standard the warchief and at least three other figures must be in base-to-base contact with it at the beginning of the Movement and Reorganisation phase. They must not be reacting, or involved in combat. During the Movement and Reorganisation phase the player declares he is taking down his standard. The figures must spend the entire phase in base-to-base contact with the standard. The army standard is removed from play and is now considered safe for the duration of the battle.
Wrecking an army standard. An army standard can be wrecked by the enemy. If at the end of the Movement and Reorganisation phase there are no friendly figures in base-to-base contact with the army standard, but there are enemy figures in base-to-base contact with it, then the enemy can wreck it.
- The army standard is removed from play and the army that lost it must take a Command Test this turn. Place a Command Test counter next to each friendly warchief, battle leader and any command that has lost its battle leader.
Beloved Personages
- There can be only one beloved personage per army. Any warchief, battle leader, individual or special can be a beloved personage. The profile for the particular figure remains unchanged.
- Whilst a beloved personage is alive and remains on the battlefield they will give a bonus to an army during a Command Test.
- Should a beloved personage get killed or rout from the battlefield the army must take a Command Test this turn. Place a Command Test counter next to each friendly warchief, battle leader and any command that has lost its battle leader.
- A beloved personage costs 100 points in addition to the basic points cost of the figure.
Sacred Items
Almost any inanimate object can be a sacred item, e.g. a Dwarven war cannon, an Orc battle drum, an altar or a shrine. Details of these will be found in future Grenadier Models publications.
- There can be only one sacred item per army.
- A warchief, battle leader or individual must remain in base-to-base contact with a sacred item at all times. Whilst base-to-base contact is maintained the sacred item will serve as a bonus during a Command Test.
- Should base-to-base contact be broken the sacred item will be considered to have been abandoned and the bonus will not be applicable.
- A sacred item costs 100 points in addition to the points cost of the item.
Defiling a sacred item. A sacred item can be defiled by the enemy.
- If at the end of the Movement and Reorganisation phase there are no friendly figures in base-to-base contact with the sacred item, but there are enemy figures in base-to-base contact with it, then the enemy can defile the sacred item.
- The enemy player announces that he is defiling the sacred item, and the allied army must then take a Command Test this turn. Place a Command Test counter next to each friendly warchief, battle leader and any command that has lost its battle leader.
- Once a sacred item has been defiled it is no longer sacred.
The Army Lists
How to Use the Army Lists
Included in this section are detailed lists for six different FANTASY armies. The lists are designed to give you as much choice as possible when planning your army, whilst making sure that each one has a clear and 'realistic' personality. They will also help you choose suitable models from the vast range of Grenadier miniatures. Your army must include a warchief model, but other than this you are free to choose whatever troop types you want from the appropriate list. Each troop type has its strengths and weaknesses, so it's up to you to create an army that can deal with any opponent.
The points system. To help you build armies which are evenly matched, so that the skill of the player can decide the outcome of the battle, each troop type, special or individual has been given a points value. This points value represents the 'cost' of each component of your army and must be paid for out of your allowance of points. For example, you and your opponent might decide to spend 1000 points each on your armies, so that when they meet in battle, you know that they will start off evenly balanced. Of course, spending the same number of points does not mean that you will have the same number of miniatures in each army - a fully armoured knight is a powerful fighter and costs more than an unarmoured goblin. Once again, it's up to you to build the army that you want.
Cost of specials. Leaders, champions, musicians and standard bearers each cost 10 points more than their unit's ordinary warriors. The extra cost of specials is the same for all armies.
Cost of leadership. Each warchief or battle leader has a leadership value. The cost of this must be added to the basic cost given in the appropriate army list:
- Leadership of 1 costs 10 points
- Leadership of 2 costs 20 points
- Leadership of 3 costs 35 points
- Leadership of 4 costs 50 points
- Leadership of 5 costs 80 points
Upgrading troop quality (UPG). By paying extra points it is often possible to upgrade troop quality by one step (e.g. from poor to average or veteran to elite). It is not possible to upgrade troop quality by more than one step. The army lists give details of possible upgrades and their costs.
Cost of magic. When working out the points costs of your wizards, don't forget that each magic power point you allocate them has to be paid for.
- One magic power point costs 35 points.
- A wizard must start the battle with a minimum of 15 magic power points.
Army List Abbreviations
| Abbreviation | Meaning |
|---|---|
| QUA | Quality: Elite, Vet (Veteran), Av (Average), Poor, Unpred (Unpredictable) |
| TYP | Type: Dise (Disciplined), Tri (Tribal), Fan (Fanatic), Stu (Stupid) |
| STR | Strength |
| RES | Resilience |
| WOR | Worth |
| ARM | Armour: X/H (Extra Heavy), H (Heavy), Md (Medium), Lt (Light), None, Sh (Shield) |
| WEA | Weapon: Hd (Hand), 2-Hd (Two-handed), Pol (Polearm), La (Lance), Pk (Pike), T&C (Tooth & Claw), H&H (Horn & Hoof), B (Bow), Lb (Longbow), Cb (Crossbow), Gb (Giant Crossbow), Hg (Handgun) |
| MOV | Movement |
| SAV | Saving throw |
| TER | Terrible Creature |
| BAD |
(The abbreviation table is transcribed from the source. The cell values in the army lists below are transcribed from the page images; where a value in the scan could not be read with certainty it is marked "?" and noted.)
Barbarians
In the wild lands beyond civilisation live the warlike and primitive Barbarian tribes. Strong and contemptuous of softer races whose rich farmlands they constantly raid, the Barbarians also pursue an endless struggle with Orc and Goblin hordes for possession of the arid wastes. Wearing little or no armour, Barbarians are at their best in the hack-and-slash of hand-to-hand combat.
Details
- Barbarian armies can have one allied command of warriors from any of the following races: Orcs, Trolls, Men, Dwarves and Elves.
- The allied command cannot outnumber the rest of the army and must have an allied battle leader to lead it.
- The allied command can consist of units made up of several of the above races.
- Dwarves will not fight in a command containing any Trolls or Orcs, neither will Elves.
- The allied command cannot have any individuals.
- A Barbarian army can have one of each type of talisman at a cost of 100pts each.
Base sizes are 1in x 1in unless specified otherwise.
| Unit | QUA | TYP | STR | RES | WOR | ARM | WEA | MOV | SAV | TER | BAD | PTS | UPG | MIN | MAX |
|---|---|---|---|---|---|---|---|---|---|---|---|---|---|---|---|
| Barbarian Infantry |
Bodyguard: maximum of 2 units per warchief, and they must be in the warchief's own command.
| Battle leaders and warchiefs | QUA | TYP | STR | RES | WOR | ARM | WEA | MOV | SAV | TER | BAD | PTS | UPG | MIN | MAX |
|---|---|---|---|---|---|---|---|---|---|---|---|---|---|---|---|
| Warchief | Elite | Fanatic | +2 | - | 2 | Lt | 2-Hd | 8ins | 7 | No | Night | 31+L | n/a | n/a |
| Individuals | QUA | TYP | STR | RES | WOR | ARM | WEA | MOV | SAV | TER | BAD | PTS | UPG | MIN | MAX |
|---|---|---|---|---|---|---|---|---|---|---|---|---|---|---|---|
| Hero | Elite | Fanatic | +2 | -1 | 5 | Lt | 2-Hd | 8ins | 7 | No | Night | 81 | n/a | n/a |
(In the Barbarian Berserkers Bloodlust row, the scan shows the BAD cell as "No" and the PTS, UPG, MIN and MAX cells as blank; they are transcribed as printed and not filled in.)
Dwarves
The proud race of Dwarves looks out from its forbidding, mountain strongholds, ready to fight for gold, glory or revenge. Slow moving they may be, but disciplined and well-armoured Dwarves often fight to the last. Their accurate crossbows and fearsome cannon can help make their enemies pay heavily for any attack.
Details
- Dwarven armies can have one allied command of warriors from any of the following races: Men, Barbarians and Elves.
- The allied command cannot outnumber the rest of the army, and must have an allied battle leader to lead it.
- The allied command can consist of units made up of several of the above races.
- The allied command cannot have any individuals.
- A Dwarven army can have one of each type of talisman at a cost of 100pts each.
Base sizes are 1in x 1in unless specified otherwise.
| Unit | QUA | TYP | STR | RES | WOR | ARM | WEA | MOV | SAV | TER | BAD | PTS | UPG | MIN | MAX |
|---|---|---|---|---|---|---|---|---|---|---|---|---|---|---|---|
| Dwarven Infantry |
Dwarven Ursine Cavalry (base size 2ins deep x 1ins frontage)
| Unit | QUA | TYP | STR | RES | WOR | ARM | WEA | MOV | SAV | TER | BAD | PTS | UPG | MIN | MAX |
|---|---|---|---|---|---|---|---|---|---|---|---|---|---|---|---|
| Cavalry | Veteran | Disc | +1 | -1 | 1 | H/Sh | La/Cb | 7ins | 6 | No | No | 45 | +12El | 3 |
Dwarven Battle Leaders and Warchiefs (base sizes 1in x 1in on foot, 2ins x 1in mounted)
| Unit | QUA | TYP | STR | RES | WOR | ARM | WEA | MOV | SAV | TER | BAD | PTS | UPG | MIN | MAX |
|---|---|---|---|---|---|---|---|---|---|---|---|---|---|---|---|
| Warchief | Elite | Disc | +1 | - | 2 | H/Sh | Hd | 4ins | 7 | No | No | 34+L | n/a | n/a |
Dwarven Individuals (base sizes 1in x 1in on foot, 2ins x 1in mounted)
| Unit | QUA | TYP | STR | RES | WOR | ARM | WEA | MOV | SAV | TER | BAD | PTS | UPG | MIN | MAX |
|---|---|---|---|---|---|---|---|---|---|---|---|---|---|---|---|
| Hero | Elite | Disc | +1 | -1 | 5 | H/Sh | Hd | 4ins | 7 | No | No | 84 | n/a | n/a |
Dwarven Giant Crossbow (base size 1½ins deep x 1ins frontage)
| Unit | QUA | TYP | STR | RES | WOR | ARM | WEA | MOV | SAV | TER | BAD | PTS | UPG | MIN | MAX |
|---|---|---|---|---|---|---|---|---|---|---|---|---|---|---|---|
| Crew | Veteran | Disc | - | - | 1 | Md | Hd | 5ins | No | No | No | Below |
Total point cost for giant crossbow and two crew: 28 points.
Use the bottom profile when shooting the giant crossbow, or when it is moved. Use the top profile if the crew are shot at, or fight in combat. It takes 2 crew to fire a giant crossbow; if there is only one, then blackening the sky is not possible. The giant crossbow can be moved at 2ins per living crew member (maximum 4ins). On the Weapons vs Armour table during shooting, use the crossbow weapon. Don't forget to add the extra strength due to the giant crossbow.
Goblins
Creatures of darkness, at night they fight like fanatics making their enemies dread the sunset. By day they are more wary, although still dangerous. From powerful hobgoblins to scurrying rabble, Goblin warriors are foes to be feared, stinging with arrows and slashing with blades.
Details
- Goblin armies can have one allied command of warriors from any of the following races: Orcs, Trolls, Ogres, Barbarians.
- The allied command cannot outnumber the rest of the army, and must be led by an allied battle leader.
- The allied command can consist of units made up of several of the above races.
- The allied command cannot have any individuals.
- A Goblin army can have one of each type of talisman at 100pts each.
- Goblins can freely use Trolls in their armies. The Trolls do not have to form separate commands and in all respects are treated as belonging to the Goblin army.
Base sizes are 1in x 1in unless specified otherwise.
| Unit | QUA | TYP | STR | RES | WOR | ARM | WEA | MOV | SAV | TER | BAD | PTS | UPG | MIN | MAX |
|---|---|---|---|---|---|---|---|---|---|---|---|---|---|---|---|
| Goblin Rabble Infantry (by night Goblin rabble become fanatics) |
| Battle leaders and warchiefs | QUA | TYP | STR | RES | WOR | ARM | WEA | MOV | SAV | TER | BAD | PTS | UPG | MIN | MAX |
|---|---|---|---|---|---|---|---|---|---|---|---|---|---|---|---|
| Warchief | Elite | Fanatic | +2 | - | 2 | Md/Sh | Hd | 8ins | 7 | No | Day | 34+L | n/a | n/a |
| Goblin individuals | QUA | TYP | STR | RES | WOR | ARM | WEA | MOV | SAV | TER | BAD | PTS | UPG | MIN | MAX |
|---|---|---|---|---|---|---|---|---|---|---|---|---|---|---|---|
| Hobgoblin Hero | Elite | Fanatic | +3 | -1 | 5 | Md | 2-Hd | 8ins | 7 | Yes | Day | 97 | n/a | n/a |
Men
The settled lands of men are divided between many squabbling nobles, owing nominal allegiance to petty kings. Civil war is almost constant and the armies of men will only unite to face the threat of invasion. An array of warriors, from almost unstoppable knights to steady longbowmen, make their armies varied and deadly.
Details
- Human armies can have one allied command of warriors from any of the following races: Barbarians, Dwarves, Elves.
- The allied command cannot outnumber the rest of the army and must have an allied Battle Leader to lead it.
- The allied command can consist of units made up of several of the above races.
- The allied command cannot have any individuals.
- A human army can have one of each type of talisman at 100pts each.
Base sizes are 1in x 1in unless specified otherwise.
| Unit | QUA | TYP | STR | RES | WOR | ARM | WEA | MOV | SAV | TER | BAD | PTS | UPG | MIN | MAX |
|---|---|---|---|---|---|---|---|---|---|---|---|---|---|---|---|
| Men-at-Arms |
Knight Cavalry (base size 2ins deep x 1ins frontage)
| Unit | QUA | TYP | STR | RES | WOR | ARM | WEA | MOV | SAV | TER | BAD | PTS | UPG | MIN | MAX |
|---|---|---|---|---|---|---|---|---|---|---|---|---|---|---|---|
| Knight Cav | Elite | Disc | +1 | -1 | 1 | X/H | La | 11ins | 7 | No | Night | 66 | n/a | 3 |
Mounted Men-at-Arms (base size 2ins deep x 1ins frontage)
| Unit | QUA | TYP | STR | RES | WOR | ARM | WEA | MOV | SAV | TER | BAD | PTS | UPG | MIN | MAX |
|---|---|---|---|---|---|---|---|---|---|---|---|---|---|---|---|
| Mtd M-at-A | Average | Disc | +1 | -1 | 1 | H | Sp/Hd | 12ins | 7 | No | Night | 25 | +4Vet | 3 |
Human Warchiefs and Battle Leaders (base size 1in x 1in; 2ins deep x 1in frontage mounted)
| Unit | QUA | TYP | STR | RES | WOR | ARM | WEA | MOV | SAV | TER | BAD | PTS | UPG | MIN | MAX |
|---|---|---|---|---|---|---|---|---|---|---|---|---|---|---|---|
| Warchief | Elite | Disc | +1 | - | 1 | X/H | Hd | 4ins | 7 | No | Night | 32+L | n/a | n/a |
Human Individuals (base size 1in x 1in; 2ins deep x 1in frontage mounted)
| Unit | QUA | TYP | STR | RES | WOR | ARM | WEA | MOV | SAV | TER | BAD | PTS | UPG | MIN | MAX |
|---|---|---|---|---|---|---|---|---|---|---|---|---|---|---|---|
| Hero | Elite | Disc | +1 | -1 | 5 | X/H | Hd | 4ins | 7 | No | Night | 76 | n/a | n/a |
(In the Human Individuals list, the "Mtd" rows are the mounted versions of the individual named above them; the scan gives the name only as "Mtd" for these rows, transcribed as printed.)
Orcs
Bred for war, the Orcs are despoilers and polluters of everything that is good. Spearheaded by wolf-riders, allied with all that is evil, their brutal armies march on. Although unstable in battle, their many different weapons make them a threat to all they encounter.
Details
- Orc armies can have one allied command of warriors from any of the following races: Goblins, Ogres, Trolls and Barbarians.
- The allied command cannot outnumber the rest of the army, and must be led by an allied battle leader.
- The allied command can consist of units made up of several of the above races.
- The allied command cannot include any individuals.
- An Orc army can have one of each type of talisman, costing 100 points each.
Base sizes are 1in x 1in unless specified otherwise.
| Unit | QUA | TYP | STR | RES | WOR | ARM | WEA | MOV | SAV | TER | BAD | PTS | UPG | MIN | MAX |
|---|---|---|---|---|---|---|---|---|---|---|---|---|---|---|---|
| Orc Infantry |
Orc Giant Wolf Riders (base size 2ins deep x 1ins frontage)
| Unit | QUA | TYP | STR | RES | WOR | ARM | WEA | MOV | SAV | TER | BAD | PTS | UPG | MIN | MAX |
|---|---|---|---|---|---|---|---|---|---|---|---|---|---|---|---|
| Rider | Average | Tribal | +1 | -1 | 1 | Md/Sh | Sp/Hd | 10ins | 7 | No | Day | 30 | +12Vet | 3 |
Orc Battle Leaders and Warchiefs (base size 1in x 1in on foot; 2ins deep x 1in frontage mounted)
| Unit | QUA | TYP | STR | RES | WOR | ARM | WEA | MOV | SAV | TER | BAD | PTS | UPG | MIN | MAX |
|---|---|---|---|---|---|---|---|---|---|---|---|---|---|---|---|
| Warchief | Elite | Tribal | +2 | - | 2 | H/Sh | Hd | 6ins | 7 | No | Day | 32+L | n/a | n/a |
Orc Individuals (base size 1in x 1in on foot; 2ins deep x 1in frontage mounted)
| Unit | QUA | TYP | STR | RES | WOR | ARM | WEA | MOV | SAV | TER | BAD | PTS | UPG | MIN | MAX |
|---|---|---|---|---|---|---|---|---|---|---|---|---|---|---|---|
| Hero | Elite | Tribal | +2 | -1 | 5 | Md/Sh | Hd | 6ins | 7 | No | Day | 77 | n/a | n/a |
Orc Ballista (base size 1½ins deep x 1ins frontage)
| Unit | QUA | TYP | STR | RES | WOR | ARM | WEA | MOV | SAV | TER | BAD | PTS | UPG | MIN | MAX |
|---|---|---|---|---|---|---|---|---|---|---|---|---|---|---|---|
| Crew | Average | Tribal | 1 | - | 1 | Md | Hd | 6ins | No | No | Day | Below |
Total points cost for ballista and 2 crew: 18 points.
Use the top profile when shooting the ballista, or when it is moved. Use the bottom profile if the crew are shot at, or are in combat. It takes 2 crew to fire a ballista. If there is only one, then blackening the sky is not possible. The ballista can be moved at 2ins per living crew member (maximum 4ins).
Wood Elves
Deep in their forest fastnesses the Wood Elf clans jealously guard their independence, fighting fiercely against any invaders, but seldom venturing beyond their own borders. The accuracy of their archers and their weapon skill in combat more than compensate for their lack of armour and their small armies.
Details
- Wood Elf armies can have one allied command of warriors from any of the following races: Barbarians, Dwarves, Men.
- The allied command cannot outnumber the rest of the army and must have an allied battle leader to lead it.
- The allied command can consist of units made up of several of the above races.
- The allied command cannot have any individuals.
- The source text for this list reads "A human army can have one of each type of talisman at 100pts each." (as printed).
Base sizes are 1in x 1in unless specified otherwise.
| Unit | QUA | TYP | STR | RES | WOR | ARM | WEA | MOV | SAV | TER | BAD | PTS | UPG | MIN | MAX |
|---|---|---|---|---|---|---|---|---|---|---|---|---|---|---|---|
| Wood Elf Infantry |
Wood Elf Cavalry (base size 2ins deep x 1in frontage)
| Unit | QUA | TYP | STR | RES | WOR | ARM | WEA | MOV | SAV | TER | BAD | PTS | UPG | MIN | MAX |
|---|---|---|---|---|---|---|---|---|---|---|---|---|---|---|---|
| Cavalry | Veteran | Tribal | +1 | - | 1 | Lt | B | 15ins | 7 | No | No | 25 | +3El | 5 |
Wood Elf Eagleriders (base size 1½ins x 1½ins)
| Unit | QUA | TYP | STR | RES | WOR | ARM | WEA | MOV | SAV | TER | BAD | PTS | UPG | MIN | MAX |
|---|---|---|---|---|---|---|---|---|---|---|---|---|---|---|---|
| Rider | Veteran | Tribal | +1 | -1 | 1 | Lt | B | 15ins | 7 | No | No | 27 | +12El | 2 |
Wood Elf Warchiefs and Battle Leaders (base size 1in x 1in on foot; 2ins deep x 1in frontage mounted)
| Unit | QUA | TYP | STR | RES | WOR | ARM | WEA | MOV | SAV | TER | BAD | PTS | UPG | MIN | MAX |
|---|---|---|---|---|---|---|---|---|---|---|---|---|---|---|---|
| Warchief | Elite | Tribal | +1 | - | 2 | Lt/Sh | Hd | 8ins | 7 | No | No | 31 | n/a | n/a |
Wood Elf Individuals (base size 1in x 1in on foot; 2ins deep x 1in frontage mounted)
| Unit | QUA | TYP | STR | RES | WOR | ARM | WEA | MOV | SAV | TER | BAD | PTS | UPG | MIN | MAX |
|---|---|---|---|---|---|---|---|---|---|---|---|---|---|---|---|
| Hero | Elite | Tribal | +1 | -1 | 5 | Lt | Hd | 8ins | 7 | No | No | 81 | n/a | n/a |
Wood Elf Shapechangers
| Unit | QUA | TYP | STR | RES | WOR | ARM | WEA | MOV | SAV | TER | BAD | PTS | UPG | MIN | MAX |
|---|---|---|---|---|---|---|---|---|---|---|---|---|---|---|---|
| Changer | Veteran | Fanatic | - | - | 1 | Lt/Sh | Hd | 8ins | No | No | No | 30 | +8El | 5 |
If a shapechanger unit gets a bloodlust reaction it will change into bear form and stay in that form for the duration of the battle. Use bottom profile for the shapechangers in bear form.
Trolls
Trolls are large powerful creatures used by many armies to add weight to their ranks and inspire terror in their enemies. Trolls can be unpredictable, requiring skilful handling in battle; they can just as easily rout as fly into bloodlust. Elite War Trolls are more than a match for most opponents and worth having if your army can tolerate them.
Details
- Trolls cannot be warchiefs, battle leaders or individuals.
- Trolls cannot be used as messengers.
Base sizes are 1½ins x 1½ins unless specified otherwise.
| Unit | QUA | TYP | STR | RES | WOR | ARM | WEA | MOV | SAV | TER | BAD | PTS | UPG | MIN | MAX |
|---|---|---|---|---|---|---|---|---|---|---|---|---|---|---|---|
| War Trolls |
Ogres
Ogres, like trolls, are used by armies to add weight and cause terror. They are tougher than trolls and not as volatile. They make good warriors, with their huge size, strength and ability to cause terror. Ogre linebreakers are specialist troops used by warchiefs to disrupt the enemy prior to attack. Ogre berserkers, if they get the chance, can be very destructive during combat... it's not unknown for a handful to go through several enemy units during the course of a battle.
Details
- Ogres cannot be warchiefs, battle leaders or individuals.
- Ogres cannot be used as messengers.
Base sizes are 1½ins x 1½ins unless specified otherwise.
| Unit | QUA | TYP | STR | RES | WOR | ARM | WEA | MOV | SAV | TER | BAD | PTS | UPG | MIN | MAX |
|---|---|---|---|---|---|---|---|---|---|---|---|---|---|---|---|
| Ogres |
Ogre Linebreakers: if a unit of Ogre Linebreakers wins the first round of combat it will disorganise the enemy. If the enemy are already disorganised they will become shaken, regardless of any other Combat Morale Test result, except rout. This applies to the first round of combat only.
Sample Armies
1000 point Dwarven army using the figures in the box
Warchiefs command
- Warchief, leadership 5: 34 + 80 = 114
Units
- 10 Crossbows, including leader and champion specials: 10 x 11 + 20 = 130
- 7 Crossbows, including leader and champion specials: 7 x 11 + 20 = 97
Infantry command
- Battle leader, leadership 4: 34 + 50 = 84
Units
- 8 Elite quality Dwarves with axes, including leader, champion and standard bearer specials: 8 x 15 + 30 = 150
- 8 Elite quality Dwarves with axes, including leader, champion and standard bearer specials: 8 x 15 + 30 = 150
- 16 Elite quality Dwarves with axes, including leader, champion and standard bearer specials: 16 x 15 + 90 = 270
Total figures = 51. Total points = 995.
1000 point Orcish army using the figures in the box
Warchiefs command
- Warchief, leadership 5: 32 + 80 = 112
- Wizard individual, 28 magic power points: 11 + (28 x 5) = 151
- Hero individual: 77
- Soothsayer: 45
Units
- 8 Orc archers including leader and champion specials: 8 x 10 + 20 = 100
- 9 Orc archers including leader and champion specials: 9 x 10 + 20 = 110
Infantry command
- Battle leader, leadership 5: 32 + 80 = 112
Units
- 16 Orc spears including leader, champion and standard bearer specials: 16 x 8 + 30 = 158
- 13 Orc spears including leader, champion and standard bearer specials: 13 x 8 + 30 = 134
Total figures = 51. Total points cost = 999.
Army Game Sheet
The final page of the source is a blank army game sheet (a grid of columns for NAME, QUA, TYP, STR, RES, WOR, ARM, WEA, MOV, SAV, TER, BAD and NOTES). Its printed instructions read:
You'll need to make a note of the composition of your army so that: you know how many points it has cost; you can refer to the profiles of each unit and individual during the game. All that is required is to write down a list of what is in your army. Copy the profiles from the Army Lists onto this sheet.