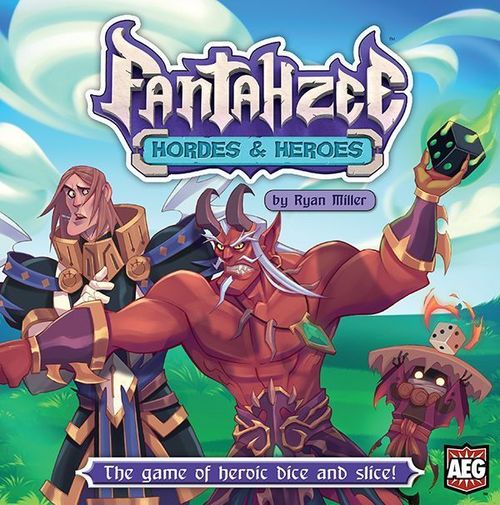
Fantahzee: Hordes & Heroes
Fantahzee: Hordes & Heroes Rulebook
Table of Contents
Table of Contents
Game Overview
Each player takes on the role of commander to a party of heroes trying to prevent the most important parts of the town from being destroyed, and defeat the hordes trying to raze Devil's Burden.
But you will have to lead wisely. It is likely that many of the heroes you choose will perish as the battle rages, and you will need to constantly inspire the city guard's warriors, the powerful mages, or the crafty artificers to step into the breach. Each hero brings their own talents as part of your party. Each monster a player defeats adds to their experience point (XP) total, which represents their overall notoriety and fame. At the end of the day how much of the town will you have saved, and who will be crowned the savior of Devil's Burden?
Goal
Players gain XP by defeating monsters. The game ends after three Boss Monsters have been defeated, and the player with the most XP wins.
Components
For 2-5 players, ages 14 and up.
- 95 Hero deck cards: 75 Heroes and 20 Actions
- 60 Horde deck cards: 30 Level 1 monsters, 25 Level 2 monsters, 5 Boss Monsters
- 10 Town cards
- 9 Treasure cards
- 20 Six-sided dice
- 4 tokens: 1 Last Player token, 3 Doom tokens
- 1 Rulebook
Card Anatomy
There are five types of cards: action cards, hero cards, horde cards, town cards, and treasure cards.
Action cards
Action cards represent the tactics that your party can use during their struggle against the invaders. An action card has an action card symbol, a title and an ability (for example, "Negotiations": Move a horde stack to any position in the horde line).
Hero cards
Hero cards represent the bold souls who will form your party. Your party is the team that you assemble in order to defend the town and fight the monster in the horde stacks. A hero card shows its strength, class symbol, title, ability and activation cost (dice). There are three types of heroes:
- Artificers - The dwarves of Oakle, come to this area to produce mighty steam creations and fabulous armor. They say that steam heated by the rocks of the area has an almost magical property.
- Mages - Mages are able to harness the magical energy of the glen; early on in their training they are limited to illusions and minor spells. But the most powerful can unleash havoc that may rival the original wizard of legend!
- Warriors - Warriors come from far and wide to the fighting academy and there is barely a town guard or noble family in the land that does not have a captain or lieutenant trained in Devil's Burden. Although they do not have the mystical power that the dwarves and mages can harness, they are trained to work as a unified team, with each sword-arm adding strength to that of the next.
Example: Archmage, strength 8. "Activate: Put any monster with strength 6 or less into your victory pile (ignoring Counterattack)."
Horde cards
Horde cards are the monsters of evil that are attacking Devil's Burden. Each individual horde card is a monster. Monsters attack in five armies, or horde stacks, each led by a Boss Monster. They come in two levels:
- Level 1 monsters - The minor minions that lead each of the five armies. They are the initial wave that the heroes will have to combat, the expendable minions, driven on by the horrors behind them… but do not underestimate them! (Example: Orc Mage, strength 3, XP 1, with a treasure symbol.)
- Level 2 monsters - The real terror of the armies attacking the town, they are generally harder to defeat, and are more dangerous in combat. (Example: Ice Giant, strength 9, Ambush 2, XP 5. "When you defeat this monster, put any monster with strength 6 or less, from another stack, into your victory pile.")
A monster card shows its strength, title, ability, level symbol, experience points (XP) and, on some, a treasure symbol.
Treasure cards
Some of the horde are carrying magical treasures with them – when defeated you can harness these treasures to aid in your defense of the town. Each treasure card has a title, a Level 1 ability and a Level 2 ability (for example, Magic Bow – Level 1: "Activate: Get an extra die this turn."; Orb of Power – Level 2: "Activate: Get Shield 1, an extra roll, and an extra die this turn.").
Town cards
Town cards represent the different areas of the town that the vanguard of the army is trying to seek. If the vanguard goes unchecked during your turn, and a building is razed, your reputation will be tarnished. A town card shows a title, an ability and an experience point value (negative; for example, Marketplace: "Move the front horde stack to the back of the horde line.", -2 XP).
Setup
- Set Up Treasures: Shuffle the treasure cards and place them facedown. These form the treasure deck.
- Set Up Boss Monsters: Find the five Boss Monsters and randomly lay them facedown to form five stacks.
- Set Up Level 2 Monsters: Shuffle the level 2 monsters and deal out a card to each stack facedown, until all of the level 2 monsters have been dealt. Then shuffle each of these five stacks separately.
- Set Up Level 1 Monsters: Shuffle the level 1 monsters and deal out a card to each stack facedown until all of the level 1 monsters have been dealt. Do NOT shuffle the stacks. You should now have five stacks of cards, each with six random level 1 monsters as the top six cards, and six random level 2 monsters as the bottom of the stack made up of a Boss Monster and five other level 2 monsters. These form the horde stacks. Now flip over the top card of each horde stack face up. The rightmost stack is called the vanguard.
- Set Up Town: Shuffle the town cards and place them facedown to the right of the horde stacks. These form the town deck.
- Set Up Hero Deck: Shuffle the hero and action cards and place them facedown to the left of the horde stacks. These form the hero deck.
- Draw Cards: Each player draws a hand of 5 cards from the hero deck.
- Determine Starting Player: Determine the starting player randomly, such as the player who rolls the highest result on a die. Give the player to the right of that player the Last Player token.
Players are now ready to begin the game!
(Layout: hero deck to the left, then the five horde stacks forming the horde line with the vanguard at the right end, the town cards to the right, the treasure deck nearby, and each player's hand in front of them.)
How to Play
The starting player takes the first turn of the game. When a player finishes their turn, the next player clockwise around the table takes a turn. Players continue taking turns until the end of the game.
Taking a Turn
During your turn, you must take the following phases in order: 1. Action Phase, 2. Dice Phase, 3. Horde Phase, 4. End Phase.
1. Action Phase
You may recruit up to 2 heroes to your party and play up to 2 action cards from your hand. You may do this in any order you choose. For example, you may play an action card from your hand, then recruit a hero, then play another action card, then recruit another hero.
Recruiting Heroes
Choose a hero from your hand and place it face up in your play area, next to any other heroes you have. These heroes form your party.
You can only have up to five heroes in your party. If you want to recruit a hero and you already have five heroes, you must discard one hero of your choice from your party, face up next to the hero deck (this forms the discard pile).
Playing Actions
Choose an action from your hand and apply its effect. After the action's effects have been fully resolved, the card is discarded face up into the discard pile.
2. Dice Phase
During the Dice Phase, you will roll dice and activate the heroes in your party in order to defeat monsters. You resolve your Dice Phase using the following steps in order:
A: Roll
Take five dice and roll them. You now get two rerolls. You may reroll any or all of your dice during each reroll. You may also activate any heroes in your party at any time during your Roll Step. Any hero that you activate is considered an active hero during this turn. You may choose to keep some dice and not reroll them, and then subsequently change your mind on a second reroll, and reroll those kept dice. However, you may only do this with dice that have not been used to activate a hero - those dice are locked (see "Activating Heroes" on page 18). Once you have finished your rerolls and activating heroes, proceed to the Attack Step.
B: Attack
First add up the total strength of all the heroes you activated during your Roll Step. Heroes in your party that you did not activate do not add their strength. After your total strength is determined, you may attack monsters on top of the horde stacks.
In order to defeat a monster, your total strength must be equal to or greater than the monster's strength. Place the defeated monster next to your play area face up. Subtract that monster's strength from your total strength. Do not flip any facedown monster cards at this point.
If you have any strength remaining after defeating a monster, you may continue to attack monsters on the top of the other horde stacks.
Alternatively, if you have already defeated a monster on top of a horde stack, you may still attack the top monster of that stack by flipping the card face up. Once you choose to flip over a monster card, you must attack it; you cannot change your mind and attack another monster instead. If you defeat that monster, you can continue to flip and attack the monster below it in the same stack. You are not obliged to flip subsequent monsters if you do not wish to. Once you have flipped one or more monsters in a single stack you cannot go back to attacking the top cards of other stacks later.
If you chose to pass on flipping an additional monster or if a newly flipped over monster has a strength value that is greater than your remaining total strength, and you cannot defeat it, your Attack Step immediately ends. After you have finished attacking, proceed to the Counterattack Step.
C: Counterattack
Add up the Counterattack values from all of the monsters that you defeated this turn. If your active heroes have any shields, subtract them from the Counterattack total. Your active heroes must then take an amount of damage equal to the remaining Counterattack total (see "Taking Damage" on page 19). After you have finished taking damage, proceed to the Treasure Step.
D: Treasure
For each monster you defeated that has a treasure symbol, draw the top card of the treasure deck and attach the treasure to one of your active heroes.
Each treasure card has a level 1 and a level 2 ability. Place the treasure under the hero so that the level indicated by the defeated monster is showing. For example, if you defeated a monster with a level 1 treasure, place the treasure card under your hero so that the level 1 ability is showing.
Each hero can only have one treasure attached to it. If you want to attach a treasure to a hero who already has one, you must discard the previously attached treasure first.
After you have finished gaining treasure (if any), place all of the defeated monsters into your victory pile facedown and proceed to the Horde Phase.
Important: You cannot attach treasures to heroes that you did not activate this turn. If you draw a treasure card and do not wish to place it on an active hero, simply discard the treasure instead. If you do not have active heroes at the start of the Treasure Step, you cannot draw any treasure cards.
3. Horde Phase (Ambush)
If there is a face up monster in the vanguard (the rightmost horde stack next to the town deck) at the start of your Horde Phase, it "destroys" a town card. Reveal the top card of the town deck to all players and resolve any effects, then place the town card into your victory pile facedown. Destroyed town cards subtract from your total XP at the end of the game.
If any horde stacks have a facedown card on the top, flip the top card face up so that it reveals the monster on top of the stack.
Now add up the Ambush values from all of the face up monsters on each horde stack. If your active heroes have any Shields, subtract them from the Ambush total. Your active heroes must then take an amount of damage equal to the remaining Ambush total (see "Taking Damage" on page 19).
After you have finished taking damage (if any), proceed to the End Phase.
4. End Phase
Draw four cards from the hero deck and add them to your hand. If you have more than five cards in your hand after drawing, you must discard down to five (unless you have an effect that increases your maximum hand size). If the hero deck runs out of cards, shuffle the cards in the discard pile to make a new hero deck.
Remove all dice from the heroes in your party.
Your turn now ends and the next player clockwise around the table takes their turn.
End of the Game
Each horde stack has one Boss Monster lurking in it. Whenever a Boss Monster is defeated, flip over a doom token to its active side.
After the third doom token is flipped to its active side, the game ends when the player with the last player token ends their next turn. If the last player flips the third doom token, the game ends after their turn is finished.
Once the game ends, each player adds up the XP from all of the cards in their victory pile. If a player has any destroyed town cards in their victory pile, they must subtract the value of those cards from their total XP. The player with the highest total XP is the winner. If two or more players are tied, the player with the most defeated monsters in their victory pile wins. If there is still a tie, the player with the most heroes in their party wins. If there is still a tie, then players share the win.
Example: Andre has a total at the end of the game of 50 XP from monsters he defeated in the horde stacks. However, he also has -2 XP as he was unable to defeat the monster in the vanguard horde stack on one of his turns and much to everyone's consternation, the Tavern fell! So his total is 48 XP.
Other Rules
This section covers additional explanations beyond the basic rules required to play.
Activating Heroes
During your Roll Step, you may activate heroes in your party by using dice to pay for their activation cost. When you pay a hero's activation cost, place the dice on the hero card. These dice are now considered to be locked. Locked dice cannot be rerolled and they cannot be used to activate other heroes.
- A single "X" die symbol: this can be any number.
- Two or more "X" die symbols: if there is more than one, this represents a pair, three-, four-, or five-of-a-kind. The numbers must be the same (2 fours, 3 sixes, 4 fives, etc.).
Example: the Paladin (strength 4; "Activate: Activate one of your heroes with strength equal to or less than this hero.") has an activation cost of four X symbols, i.e. four-of-a-kind.
Steam
Steam appears on heroes and action cards in two ways. Some heroes, and the action card "Under Pressure", say, "Get [steam]". Where a card uses the word "get", it means that card generates steam when that card is activated.
Other cards have the steam symbol followed by the word "or" and the normal dice activation cost. In this case steam generated by the other cards can be used to activate these cards instead of activating them with dice.
You must pay the total steam in each hero's activation cost separately, in order to activate them with steam (i.e. steam cannot be carried over from hero to hero). You cannot pay for a card with part steam and part dice. It must be one or the other. Steam never carries over from turn to turn; at the end of your turn, lose all unused steam you generated that turn.
Example: Steamsmith (strength 3): "Activate: Get 4 [steam] this turn." Forge Titan (strength 8) costs 5 [steam] or its normal dice cost.
Each hero may only be activated once per turn. If you already activated a hero for example, you cannot pay its activation cost again to use its ability.
You may only activate heroes in your own party; you cannot activate heroes in other players' parties.
Using Treasures
When you activate a hero with a treasure attached to it, you may activate the treasure's ability in addition to the hero's ability. Treasure abilities do not activate during the turn that you attach them to heroes.
Taking Damage
Whenever you are about to take damage, remember to first reduce the total damage by the total Shield value from any active heroes or abilities (see "Shields" on page 20).
When you take damage, you must choose and discard one of your active heroes (a hero you activated this turn). Then reduce the total damage you are taking by that hero's strength. Repeat this process until the total damage is reduced to zero or until you have no active heroes remaining. If you must take damage and have no active heroes remaining, the remaining damage is ignored (your non-activated heroes cannot take damage).
If a discarded hero has an attached treasure card, place the treasure card back in the box.
Counterattack
During the Counterattack Step of the Attack Phase you total the Counterattack value of monsters you have defeated. If you fail to defeat a monster (by flipping it face up on a stack), it does not apply its Counterattack value. This is the amount of damage your party will take, minus any Shield value, during the Attack Phase.
Ambush
During the Horde Phase you total the Ambush value of monsters that are face up, including those that were flipped face up this turn. Ambush does not cause any damage during the Attack Phase, only during the Horde Phase. This is the amount of damage your party will take, minus any Shield value, during the Horde Phase.
Note: heroes that were lost to Counterattack damage still include their Shield value against Ambush.
Shields
Whenever you are about to take damage, either from Counterattack or Ambush, first subtract the total Shield values from any activated heroes (or their treasures) from the total damage. Shield values can be used more than once in a turn, i.e. if your party takes Counterattack damage, and then Ambush damage later, your shield value counts against both.
Example: Active heroes with a total shield value of 3 (Steam Cannon: "Activate: Get 1 [steam] and Shield 1 this turn."; Steam Engineer: "Activate: Get 3 [steam] and Shield 1 this turn."; Captain: "This hero costs 1 less to activate for each of your active heroes. Activate: Get Shield 1 this turn.") defeat a Shrewd Rakshasa with Counterattack 4 and a Bone Warrior with Counterattack 1. The party of heroes only take 2 damage from the Counterattack (5 damage - 3 shields = 2 damage remaining). In the Horde Phase the only monster with Ambush is a Wicked Spinner with Ambush 1. This is more than covered by the Shield value of 3, so the party takes no further damage.
Example (Ambush): John has defeated three monsters, from three different horde stacks. During the Horde phase he reveals three new monsters from each stack. Unfortunately for John during his Horde Phase he reveals two Dark Assassins (Ambush 1 each) and a Wicked Spinner (Ambush 1), for a total Ambush of 3! John activated an Alchemist ("Activate: Get 2 extra dice and an extra roll this turn.", strength 0), two Sergeants ("Activate: Choose a hero. They cost less to activate this turn.", strength 2) and a Steam Brute (strength 4). So he has no Shield to offset the damage. He must take all 3 damage. He could choose to lose a Sergeant. But this would only account for 2 points of damage with its 2 strength, so he would still need to account for one more, which would mean losing his other Sergeant or the Steam Brute. Note, he could lose his Alchemist but with strength of 0 this would not help him at all. In the end John decides to take the damage on his Steam Brute which has 4 strength. This absorbs the full 3 points, so John discards it to cover all his losses and moves on to the End Phase.
Example (no strength): During Gill's turn, she has it a lot worse. She goes into the fray with two Alchemists. She activates them both on her first roll, in the hope of getting her Archmage fired up, but fails on her rolls. During her Horde Phase, she has two active heroes with a total of 0 strength. The Ambush total of 3 has not changed, because she could not defeat any monsters, so she must take damage. The first Alchemist falls, accounting for 0 damage. And then of course so does the second. Gill still has 3 outstanding damage, but no more active heroes. The Archmage cannot take damage because he is not active, so Gill loses her Alchemists and moves to the End Phase.
Example Turn
Maureen has a party made up of Steamsmith (strength 3), Paladin (strength 4), and Steamasaur (strength 6).
Action Phase
In her Action Phase, she can play two more heroes so she adds Alchemist (strength 0) and Sergeant (strength 2). She also decides to play "By the power of…" ("Get an extra die this turn.") to gain an extra die this turn and "Where'd you go?" ("Your party gets Shield 2 this turn.") to give her party Shield 2.
Dice Phase
On to her Dice Phase. She picks up her six dice and rolls – 6, 5, 4, 3, 2, 1! Not a great roll. She decides to activate the Alchemist, giving her two more dice and an extra roll. So she places the die with a 6 on the Alchemist to show it is locked. She also decides to keep the 5, so that she has a better chance of getting the Steamsmith activated to pay for her Steamasaur with steam.
She now has 6 more dice and three more rerolls (thanks to the Alchemist). This time she rolls 6, 4, 3, 3, 2, 1. The luck is against her this turn! She toys with keeping the 5 (from her previous roll), as well as the two 3s, but in the end decides that her best chance is to use the 3s to activate the Sergeant and try for another 3 and another pair. Note that although she is showing a pair of 6s, one of those is locked on the Alchemist and cannot be used with any other dice. Maureen has a plan, and decides that keeping the 5 is no longer the best idea. Although she could activate the Sergeant now, she does not have to, so she decides to wait and see what her next roll is. It might turn out to be better to use the two 3s she has kept for the Steamasaur, who knows?
She rolls her five remaining dice 6, 4, 3, 2, 2, 1. That's more like it! She surveys the possibilities and realizes she is set for the turn.
She locks the pair of 2s, activating the Sergeant. When he is activated, he can reduce the activation cost of another hero by one any-number die. This won't work on the Steamsmith or the Steamasaur, as these require a specific number and the Sergeant only removes an any-number die, not a specific number. However, it will work on the Paladin. The Paladin now only requires three any-number dice (three-of-a-kind). With the two 3s she saved from last roll, Maureen has the three 3s which she uses to activate the Paladin locking them.
The Paladin has the ability to use his inspirational leadership to activate any other hero with equal or lower strength. So, he fires up the Steamsmith, who has only 3 strength, but also has the ability to create 4 steam. Which in turn can fire up the Steamasaur. Everyone is active! The total strength of the party is 15 and she is ready to move to the Attack Step.
Attack
Maureen surveys the horde stacks. The vanguard has a Bone Warrior. She knows that monsters with Counterattack tend to be worth more XP, and defeating it will prevent her possibly losing XP by having a town card destroyed. She looks at the other horde stacks and also notices there is currently no Ambush showing. Realizing that many of the stacks are getting close to the point that the level 2 monsters will starting showing, she decides that she is going to focus on the vanguard, and hopefully minimize the chance of Ambush monsters getting flipped from attacking multiple stacks.
She attacks and defeats the Strength 3 Bone Warrior (Counterattack 1), and decides to press on in the vanguard. The next card is a Rock Monster (strength 4). She can also defeat this and still have 8 strength left. So she presses again. This time she hits a Blighter (strength 3, Counterattack 1), she has unleashed the level 2 monsters! Nonetheless she can defeat it. She can now press on with her 5 remaining strength, but if she were to reveal a monster she could not defeat, she runs the risk of losing points from having a town card destroyed. So she decides to stop there. She cannot use her 5 remaining strength on any of the other horde stacks, as she cannot do this after delving into a single stack.
Counterattack
Now she moves on to her Counterattack step. She has a total of 2 Counterattack in front of her. But she also has Shield 2 from "Where'd you go?". This means she has zero damage to take, and so there are no casualties. At this point she is ready to move to the Horde Phase.
Horde Phase
Maureen now flips the top card of the vanguard to reveal... a Vampire Lord (strength 7, Ambush 3)! Her well laid plan of trying not to flip over a lot of Ambush values seems to have gone awry. There is now 3 Ambush on the table and she only has Shield 2, so she must take 1 damage. She eyes up her party and decides that unfortunately the newly recruited Sergeant must be the one to perish in the defense of Devil's Burden (mainly because she has another one left in hand to replace him next turn).
End Phase
In her End Phase she draws 4 more cards, and does not need to discard as she only has 5 cards. She clears up her dice and starts planning for the next turn.
Game Tips
Tips on getting the best out of your party…
- At the start, try to put out one or two expendable heroes on the first and second turn that allow you to attack early without compromising your overall goals. You can always change them out later.
- Your overall goal should be to try and find one or two more powerful heroes and give them a support cast that makes them shine.
- If your heroes have specific numbers, try to avoid the same number on all your heroes.
- Don't activate heroes and lock your dice too early. Depending on the hero's ability it might be better to keep the dice and only activate them at the end; it gives you more reroll options as your turn develops.
- Don't underestimate the power of Shields!
- Think about what you are leaving behind for other players, as well as what the impact of your battles will have on the possible Ambush values in the Horde Phase.
- Be ready to take casualties late in the game and still be able to adapt, as there are many XP to be gained in the last few turns.
FAQ
What happens if we run out of town cards? Nothing. You just stop taking them if the monster in the vanguard is undefeated.
What happens if a horde stack runs out of cards? Simply move all the stacks behind it forward one space. If it was the vanguard, the stack behind now becomes the vanguard.
If I defeat the Ice Giant, can I flip a facedown card to see if it is strength 6 or less? No.
If I take damage from, say, Counterattack, but my Shield reduces it to zero, do I "take" zero damage and therefore have to lose an active Alchemist? No, once damage is reduced to zero from either Shield or from discarding other heroes, there is no longer any damage to take.
If I take 1 damage and only have 0 strength heroes active, would I lose all of them? Yes, you would!
If I use the Ice Giant or the Archmage abilities to put a monster into my victory pile, and I then choose to attack the facedown monster from that monster's stack, would that lock me into only attacking that stack in the same way as if I had defeated the monster? Yes, once you flip over a facedown monster in a horde stack in order to attack it, you are locked into that stack.
If I use the Ice Giant or the Archmage to put a monster into my victory pile that has Counterattack, do I take damage from the counterattack? No, you do not. That monster goes straight into your victory pile and is not set aside for the Counterattack step.
Can Sergeant or Hero reduce the cost of any die, including those with a specific number, or only those with an [any-number] activation cost? They may only reduce those with an [any-number] activation cost, not those with a specific number.
May I attack a monster on one horde stack, then attack a second on another horde stack, and then decide to flip the next card down in the second stack? Yes, you may. You can attack any number of face up monsters on horde stacks, but once you have chosen to flip and attack a facedown monster after defeating the one above it, you cannot subsequently attack a monster on another stack.
Turn Quick Reference
- Action Phase: Recruit up to two heroes and play up to two actions, in any order.
- Dice Phase:
- A. Roll: Roll 5 dice, with two rerolls. Dice may be kept and/or rerolled in any way as long as they have not been locked. Heroes can be activated by locking appropriate dice.
- B. Attack: Compare the total strength of the active heroes in the party with a monster in a horde stack. If the strength is equal or higher the monster is defeated and set aside. This can be repeated until all of the party's strength has been used.
- C. Counterattack: Add up the value of Counterattack from all monsters set aside, subtract the party's total Shield and take damage.
- D. Treasure: If any monsters have treasure draw a treasure card for each such monster and attach the appropriate side to an active hero in the party (limit of one per hero). Place all set aside monsters in your victory pile.
- Horde Phase: If there is a face up monster in the vanguard horde stack, reveal the top town card, carry out any instructions on it and place it into your victory pile. Flip up the top card of any horde stack that does not have a face up monster. Add up the value of Ambush from all monsters on top of the horde stacks, subtract the party's total Shield and take damage.
- End Phase: Draw 4 cards and discard down to your maximum hand size (normally 5). Pass the dice and end your turn.