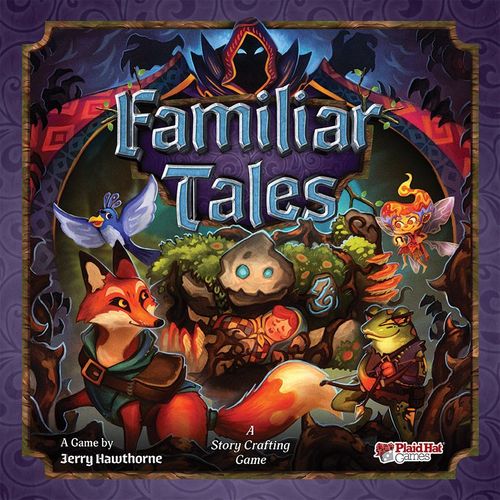
Familiar Tales
Familiar Tales Rulebook
Table of Contents
Table of Contents
Components
- 1 Location Book
- 1 Side Board
- 1 Campaign Journal Pad
- 1 Banished Deck Box
- 2 Era Deck Boxes
- 1 Chance Die
- 6 Character Figures
- 4 Familiar Deck Boxes
- 4 Familiar Character Cards
- 4 Familiar Dashboards
- 5 Child Character Cards
- 86 Skill Cards
- 41 Item Cards
- 11 Artifact Item Cards
- 14 Fatigue Cards
- 3 Discontent Key Cards
- 32 Resource Tokens
- 20 Affliction Tokens
- 8 Marks of Devotion
- 10 Completed Tokens
- 5 Objective Tokens
- 1 Root Bridge/Log Token
- 8 Enemy Life Markers
- 20 Enemy Figures
- 9 Enemy Tokens
- 3 Horchid Standees
- 1 Baby Token
- 2 Door Tokens
Skill Cards
Skill cards have the following anatomy:
- Name
- Icon Effect
- Icon Effect Type
- Might Skill Value
- Agility Skill Value
- Resilience Skill Value
- Insight Skill Value
- Move Point Value
- Special Action
- Power Cost
- Familiar Starting Card
- Era Number
Item Cards
Item cards have the following anatomy:
- Name
- Type
- Damage Value
- Equipment Slot
- Effect
- Icon Effect
- Keywords
- Familiar Starting Card
- Resource Cost
- Era Number
Familiar Dashboard & Card
The familiar dashboard has the following anatomy:
- Life Dial
- Power Dial
The familiar character card has the following anatomy:
- Name
- Size
- Special Ability
- Starting Weapon
Sideboard
The sideboard has the following anatomy:
- Misfortune Dial
- Discontent Dial
- Discontent Key Slot
Deck Boxes
- Era Deck Boxes
- Banished Deck Box
- Familiar Deck Boxes
Other Components
- Chance Die
- Campaign Journal
- Fatigue Skill Card: When this card would be discarded, instead return it to the fatigue pile. This card cannot be banished.
- Child Character Card: Carry: When a familiar that shares a space with the baby performs a move action, they may choose to carry (move) the baby along with them. When carrying the baby, all skill cards played for that move action are treated as if they have only 1 move point.
- Discontent Key Card: Perform a Care action while sharing a space with the baby to resolve the effect that matches the discontent dial. Instructions found on this card include soothing the baby (make a skill test, difficulty 6; pass reduces discontent), feeding the baby (spend 1 food to reduce discontent), cleaning the baby (spend 1 material to reduce discontent), and finding a way to warm the baby (one way to do so is by interacting with a fire space).
- Resource Tokens
- Completed Token
- Objective Token
- Artifact Item Card: When making a skill test as part of a Care action, decrease the difficulty by 2.
- Marks of Devotion
- Affliction Tokens
- Baby Token
First Time Playing Setup
Assembling Dials
Before playing for the first time, assemble all of the dials on the sideboard and familiar dashboards as shown below.
NOTE: Familiar Dashboards should be matched with dials of the same back color.
Assembling Deck Boxes
Before playing for the first time, assemble all of the deck boxes and put the following cards in them:
FAMILIAR DECK BOXES
- Each familiar's starting skill cards. (A familiar's starting skill cards have that familiar's image in the bottom right corner.)
- Each familiar's starting item card. (Each familiar's starting item has their portrait on the back of that card.)
ERA 2 DECK BOX
- All Era 2 Skill Cards.
- All Era 2 Item Cards.
- Two Era 2 Child Character Cards (Depicting child Milly A and B.)
- One Era 2 Discontent Key Card.
ERA 3 DECK BOX
- All Era 3 Skill Cards.
- All Era 3 Item Cards.
- Two Era 3 Child Character Cards (Depicting teen Milly A and B.)
- One Era 3 Discontent Key Card.
NOTE: All skill and item cards have an Era identifier to the right of their name.
Starting a Campaign
Familiar Tales is played as a series of chapters that tell an ongoing story. Decisions the players make in one chapter can affect the story in later chapters. As such, we recommend that the same players who start a campaign together return to play future chapters together.
Before playing the first game of a campaign, do the following:
- Each player chooses their familiar(s). If playing with:
- 4 players, each player chooses 1 familiar.
- 3 players, one player must choose 2 familiars and the others choose 1 each.
- 2 players, each player chooses 2 familiars.
- 1 player, you will control all 4 familiars.
- Each player must then setup their skill deck by collecting their familiar(s) starting skill cards (located in each familiar's deck box). Each player will form 1 skill deck, no matter how many familiars they control. If you control:
- 1 familiar, shuffle all of your familiar's starting skill cards together to form your skill deck. Return your new skill deck to that familiar's deck box.
- 2 familiars, collect the starting skill cards for both of your familiars and banish the following cards (banished cards are placed in the banished deck box): 2x Reckless, 2x Assist, 1x Focus. Shuffle all of the remaining skill cards of both familiars together to form your skill deck. Choose 1 of your familiars and return your new skill deck to its deck box.
- 4 familiars, collect the starting skill cards for all of your familiars and banish the following cards: 4x Reckless, 4x Assist, 2x Focus. Shuffle all of the remaining skill cards from all 4 familiars together to form your skill deck. Choose 1 of your familiars and return your new skill deck to its deck box.
- Set all dials on the sideboard to 0.
- Set each familiar's power dial to 0 and life dial to its highest number (outlined in red).
Game Setup
To setup a game of Familiar Tales, do the following:
- Set the location book and chance die in the center of the play area. (Leave room for the book to lay flat when opened.)
- Place the sideboard to the right of the location book. (The dials on the sideboard should remain wherever they were at the end of your last game session. If this is the first game of a campaign, they should all be set to 0.)
- Set the discontent key card on its designated slot on the sideboard.
- Place the child character card next to the sideboard.
- Create a face up pile of artifact item cards. (Artifact item cards have a symbol on the back of them.)
- Create a face up pile of Fatigue skill cards.
- Shuffle all other available skill cards (those not in a deck box) to form a training deck. Place it face down in reach of all players. Reveal the top 4 cards of that deck and place them face up next to the deck to form the training row.
- Shuffle all of the available item cards (those with the crafting symbol on back and not in a deck box) to form a crafting deck. Place it face down in reach of all players. Reveal the top 4 cards of that deck and place them face up next to it to form the crafting row.
- Sort the various tokens into separate supply piles within reach of all players.
- Each player collects the character card, dashboard, figure and deck box for each of their familiars. (The dashboard dials should remain wherever they were at the end of your last game session. If this is your first time playing, power should be set to 0 and life should be set to the highest number.)
- Each player removes the skill cards from their familiar deck boxes, shuffles them to form their skill deck's draw pile and draws up to a hand of 5 cards.
- Each player removes all of the item cards from their familiar deck boxes and equips them to their respective familiars or places them in their respective familiars' stashes. If this is your first time playing, each familiar will have only 1 item (a Weapon) that must be equipped. It is equipped by placing it face up next to that familiar's character card.
- If this isn't your first time playing, familiars may also have affliction tokens, marks of devotion, and/or resource tokens in their deck boxes. Any affliction tokens or marks of devotion are applied to that familiar and any resource tokens belong to that familiar.
Traveling & Locations
The Familiar Tales App
Familiar Tales is a game played inside a book, but it also features an app that performs a few of the game's functions for the players, leaving you free to play the game and be immersed in its story. Think of it as an automated gamemaster and storyteller.
During your adventure you will be given numerical codes to enter into the app. When directed, type these codes into the field provided on the home screen of the app and push 'Go'. This will lead to story moments, game instructions, and sometimes important choices to make.
The app also tracks which familiar's turn it is, has a danger button (used to add or subtract danger when danger symbols are rolled on the dice during a skill test), a rules button (that allows you to quickly search the game's rules), and a history button (that allows you to view the codes you've entered previously).
The Travel Map
Familiar Tales is an epic narrative campaign that plays out across three different eras. Each era has its own campaign journal sheet where players record information about their journey and plot their progress on a travel map. Each era's travel map depicts the region of Principalia that era takes place in.
Each era's travel map is made up of a collection of named locations that are connected by travel routes. The named locations are the important places you'll visit on your travels.
At the start of each game session, you will enter the code of the last location bubble that was filled in on the travel map. The last location visited will always be the numerically highest code among all filled in location bubbles. As mentioned in the game setup section, if this is your first time playing, that code will be '101'. After you enter the code, your story will begin and the app will guide you with further instructions, which will include charting your course along the travel map, and turning to pages in the location book.
The Location Book
The location book is where a lot of the action of a game will play out. While on a location book page, players will take turns exploring, interacting, foraging for supplies and often fighting evil.
When the app instructs you to go to a page in the location book, remove any figures or tokens from the current page of the location book (if you were already on a page), open the book to the new page, lay it flat on the table and follow the page's Starting Setup instructions.
Enemy Encounters
Players will often encounter enemies on a location book page. Whenever instructed to generate an enemy encounter, do the following:
-
The app or location book will instruct how many of which enemies you are to generate an encounter with. Collect the figures/standees/tokens for those enemies.
-
Unless instructed otherwise, place those enemies on the enemy entry space on the page map. If there is more than one enemy entry space, divide the enemies as equally as possible between each enemy entry space.
-
Review the encounters section of the page. If any of the enemy figures being put into play have life tracks in that section, place an enemy life marker on the highest numbered space of those tracks.
NOTE: The shape of the bases of each of the figures will match up with one of the life tracks, so that you can track how much life each figure has. Occasionally, you will be instructed to generate a number of enemies that is less than the number of life tracks for that enemy type. In these cases, always start at the top most enemy life track and work your way down, placing the enemy figures with the base shapes that correspond to those life tracks.
-
Continue playing. You will not resolve an enemy turn until instructed to.
Dials
Some game effects will cause the dials on the sideboard or on a familiar's dashboard to be raised or lowered.
A dial cannot be raised above the maximum value on the dial, or lowered below 0.
If an effect would add to a dial that is at its maximum value or subtract from a dial that is at 0, ignore that effect.
The Location Book Anatomy
Each location book page has the following anatomy:
-
Starting Setup Section: These are instructions on what players need to do when first turning to this page, before they start taking turns.
-
Special Rules Section: These are rules, outside the standard game rules, that apply only to this page. Players should read these rule before taking turns.
-
Victory Objectives Section: Some pages have a Victory Objectives section. It instructs players on what must be done on this page to advance. Players should read these objectives before taking turns.
-
Spaces: Spaces are defined by dotted and solid lines. Each space also has a dot in its approximate middle, used for determining line of sight.
NOTE: There is no limit to the number of figures that can be on a space.
-
Gear Spaces/Sections: When a familiar moves onto a space with a gear symbol, read the corresponding section for instructions on how to interact with that space.
-
Encounters Section: If the familiars encounter any enemies, their information will be listed here along with tracks to manage their life points.
-
Exit Section: This section lists any instructions for leaving this location, and usually has a matching symbol on the page map that indicates where the familiars need to gather to leave.
-
Fire Space/Section: When on a space with this symbol, refer to the corresponding section for instructions on how to light a campfire and the effects of doing so.
Skill Tests
Through the course of the game, the familiars will have to make a variety of skill tests. Skill tests will always have a skill type and a difficulty number. A player can only make a skill test with a familiar they control if they have 1 or more skill cards in their hand. To resolve a skill test for a familiar you control, follow these four steps in order:
Skill Types: Might, Insight, Agility, Resilience.
1. Play Cards
Play any number of skill cards from your hand, one at a time, placing them face up in front of you.
As you play each skill card, resolve its icon effect. A card's icon effect is determined by the symbol in the upper left corner of that card. Some cards also have an additional effect that is resolved if the card is being played into a specified kind of skill test.
NOTE: Card effects that have the word Action or Acquire in front of them are NOT triggered when they are played into a skill test. Those cards can still be played into a skill test, the special action or acquire effect is simply ignored.
Skill Card Icon Effects
There are two types of icon effects. ! icon effects are triggered immediately without any additional cards needed. Item Power icon effects are only triggered when you have an item card with a matching symbol.
- Danger (!): Increase the danger level in the app by 1.
- Heal (!): Increase your familiar's life dial by 1. (Cannot be increased above its maximum.)
- Draw (!): You may acquire 1 Fatigue (put a Fatigue skill card in your discard pile) to draw 1 card.
- Reroll (!): After rolling the chance die for this skill test, you may reroll it. You must keep the new result.
- Link (!): If playing in solo mode, draw 1 card. If playing with other players, this card can be played face up in front of you when another player is making a skill test, to help them with that test.
- Item Powers: For each of these played, you may choose 1 effect with a matching symbol on 1 item card the familiar has equipped and resolve that effect.
2. Tally Skill
After playing all of the skill cards you want to play (and any other player have played any skill cards with Link icon effects they want to play to help you) add together the following:
- The values on each of the cards played for the skill type being tested. (Example: If making a might skill test you would add up all of the might values on the cards.)
- Any relevant bonuses granted by the testing familiar's item cards or marks of devotion.
3. Roll & Resolve
Roll the chance die.
- If you roll a positive number, add it to your total.
- If you roll a negative number, subtract it from your total.
- If you roll a danger symbol, push the + button under the danger total in the app to increase danger by 1.
- If you roll a power symbol and go on to pass this test, increase the familiar's power dial by 1.
If your total is now equal to or higher than the skill test's difficulty number, the familiar has passed the test. Resolve the test's pass effect. Otherwise, resolve the test's fail effect. If no fail effect is listed, failing the test has no negative effect.
NOTE: When the game instructs players to roll the chance die, it will identify which die results are relevant and what their effects are. Any other result is ignored.
Example: Jenna is making a might skill test with Chalk. She plays 2 cards from her hand for a total of 3 might. Another player assists her by playing a Link card from their hand, adding 2 might. Jenna then rolls a +2 on the chance die, bringing her total to 7 might.
4. Discard
Discard all cards played into that skill test. Discarded cards go into your discard pile next to your skill deck. (Players who played Link cards should also discard those.)
DRAWING SKILL CARDS: If you would ever need to draw a skill card but your draw pile is empty, shuffle the skill cards in your discard pile and form a new draw pile.
Player Turns
Resolving a Player Turn
After turning to a location book page, and resolving the starting setup instructions for that page, players will begin taking turns with their familiars (the app will tell you which familiar's turn it is). A familiar's turn consists of 2 phases that must be completed in order:
1. Action Phase
You may have your familiar(s) perform any number of actions during your action phase. There are several kinds of actions you may have them perform:
- Move
- Forage
- Care
- Equip
- Trade
- Melee Attack
- Ranged Attack
- Craft
- Train
- Special Actions
These actions are described in detail beginning on the next page.
CONTROLLING MORE THAN 1 FAMILIAR: A player that controls more than 1 familiar will conduct separate turns for each familiar they control. The player uses only 1 skill deck and has only 1 hand of 5 Skill Cards no matter how many familiars they control. Any skill card in a player's hand can be used by any familiar that player controls.
2. Draw Phase
Draw back up to a hand of 5 cards.
Remember: If you would ever need to draw a skill card but your draw pile is empty, shuffle the skill cards in your discard pile and form a new draw pile.
NOTE: Even if a player is controlling multiple familiars, they will still only draw 5 cards.
End Turn
At the end of a familiar's turn, push the End Turn button on the app. The app will then show which familiar's turn is next, or have players instead resolve negative effects (like resolving an enemy turn) before moving on to the next familiar's turn.
It becomes increasingly likely players will have to resolve negative effects the higher the danger level gets.
In addition to gaining danger after rolling a danger symbol on the chance die, certain entries will automatically adjust the danger level and certain special rules in the location book will instruct players to add danger.
Example: Player Turn — Jerry starts his turn by taking a move action. He plays two cards with a total of 4 move points and uses 3 of them to move Blaze 3 spaces (1 move point for each line crossed). Blaze is now on a forage space so Jerry decides to take a forage action (foraging on this page is an insight skill test, difficulty 3). He plays one card worth 2 insight and rolls a +1 on the chance die, bringing his total to 3 insight. Since he passed the skill test, he takes a food resource token from the supply and covers the resource icon with a completed token. Jerry decides not to take any more actions, so he draws back up to 5 cards and presses the end turn button in the app.
Actions
Move Action
To perform a move action with a familiar you control:
- Play any number of skill cards, placing them face up in front of you. Resolve the icon effect of each of those cards as you play them, but do not resolve any other effect of those cards and do not roll the chance die (this is not a skill test).
- Total up the move points provided by each of those cards.
- Move the familiar across a number of dashed white lines equal to or less than that number of move points. Familiars cannot be moved across solid white lines.
- Discard all cards played into that move.
DOUBLE DASHED LINES: Sometimes there are two dashed lines running parallel to each other. Two move points are required to move across both of those lines to the next space.
NOTE: Two spaces separated by a double dashed line are still adjacent to one another. Determining the distance between two spaces is NOT the same as determining how many move points would be required to move between those two spaces.
Example: Spaces A, B, & C are all adjacent to each other. It would cost 2 move points to move from space A to space B or from space A to space C. It would only cost 1 move point to move from space B to space C.
Forage Action
To perform a forage action with a familiar you control:
- That familiar must be on a space with one or more uncovered resource symbols.
- Make an insight skill test. The difficulty number for that skill test is located in the upper right corner of the current location book page.
- If the familiar passes the skill test, cover one of the resource symbols on the familiar's space with a completed token and collect one of the matching resource tokens from the supply. If there are no matching resource tokens remaining in the supply, that resource cannot be foraged.
Care Action
To perform a care action with a familiar you control:
- That familiar must be on a space with the child.
- Consult the discontent dial and its key card (located on the sideboard). The instructions for how to care for the child and reduce her discontent are on the key card. Follow the instructions that match with where the discontent dial is currently at.
- If you successfully complete those instructions, reduce discontent by 1.
Example: The player controlling Chalk is on the same space as the baby token and decides to perform a Care action. The discontent dial is at level 3, so he discards a material token to reduce the dial to level 2.
Equip Action
To perform an equip action with a familiar you control, retrieve any number of items from its stash and equip them to that familiar.
EQUIPPED ITEMS: To show that a familiar has an item equipped, place it face up near that familiar's character card.
An item's bonus and effect are only active when it is equipped.
STASH: A familiar's stash is a face down pile of item cards placed near that familiar's character card. A familiar's stash is where item cards are kept that the familiar has acquired but that they do not currently have equipped. There is no limit to the number of items a familiar can have in their stash.
EQUIPMENT LIMITS: A familiar can only have up to 1 Weapon (melee or ranged), up to 1 Armor, and up to 1 Accessory equipped at a time. When equipping a Weapon, Armor or Accessory to a familiar, if that familiar already has that same item type equipped, first place the equipped item face down in that familiar's stash (so that it is no longer equipped), then equip the new item.
There is no limit to the number of Consumable items a familiar can have equipped at a time.
Item Types: Weapon (Ranged, Melee), Armor, Accessory, Consumable.
Melee Attack Action
A familiar with a melee weapon equipped, may perform a melee attack action. To do so:
- Target an enemy that shares that familiar's space.
- Make a might skill test. The difficulty number for that skill test is that enemy's defense value.
- If skill test is passed, reduce the target enemy's life. The amount the enemy's life is reduced by is equal to the damage value on the familiar's equipped weapon, plus any bonus damage gained by card or item powers.
Example: Rene' decides to perform a Melee Attack action targeting an Unsavory that is on the same space as her familiar, Blaze. She makes a might skill test by playing two skill cards worth 5 might and rolls a +1 on the chance die, bringing her total to 6 might, which exceeds the Unsavory's defense value of 5. Rene' moves the Unsavory's enemy life marker down 1 space on his life track, because the weapon she has equipped (Vicious Bite) has a damage value of 1.
REDUCING ENEMY LIFE: An enemy that has more than 1 life, will have a life track printed on the current location book page. If an enemy has no life track, that enemy has only 1 life.
Each enemy figure's life track has a shape next to it that matches the shape of that figure's base.
To reduce an enemy's life, move that enemy's life marker backward the appropriate number of spaces on its life track.
If you would need to move an enemy's life track backward, and there are no spaces left to move it to, that enemy is defeated.
DEFEATED ENEMY: When an enemy is defeated, do the following:
- Remove its life marker from its life track.
- Remove its figure from the page map.
- The familiar that defeated it gains any loot that enemy has.
Ranged Attack Action
A familiar with a ranged weapon equipped, may perform a ranged attack action. To do so:
- Target an enemy that is in that familiar's line of sight.
- Make an agility skill test. The difficulty number for that skill test is that enemy's defense value.
- If skill test is passed, reduce the target enemy's life. The amount the enemy's life is reduced by is equal to the damage value on the familiar's equipped weapon, plus any bonus damage gained by card or item powers.
Example: Owen decides to perform a Range Attack action targeting an Unsavory that is within line of sight of his familiar, Gribbert. He makes an agility skill test by playing three skill cards worth 5 agility and rolls a +2 on the chance die, bringing his total to 7 agility. Owen moves the Unsavory's enemy life marker down 1 space on his life track, because the weapon he has equipped (Lashing Tongue) has a damage value of 1.
LINE OF SIGHT: Each space on a page map has a dot printed in roughly the center of that space. An attacker has line of sight to its target if an imaginary line can be drawn from the dot on the attacker's space to the dot on the target's space without crossing a double solid line.
Trade Action
To perform a trade action, first gain danger +1. Then the familiar performing the trade action can give items and resource tokens to, and receive items/resources from, any familiar that shares its space. Items traded in this way must either be immediately equipped or stored in a familiar's stash.
Example: The player controlling Chalk moves into the same space as Gribbert and presses the '+' button under the danger level in the app. He then gives Gribbert his Leaf Cloak in return for a material and food resource.
Craft Action
To perform a craft action with a familiar you control:
- Choose a card from the crafting row.
- Acquire the chosen card by paying its resource cost (located at the bottom of that card) and equipping it to your familiar or adding it to its stash.
- Draw a new card from the crafting deck and add it to the crafting row, replacing the card just acquired. (If there are no more cards in the crafting deck, shuffle any cards in its discard pile and form a new crafting deck.)
PAYING RESOURCE COSTS: To pay a resource cost, return the corresponding resource tokens to the supply. If the familiar doesn't have enough of the right resources to pay the cost, that card cannot be acquired.
Example: Jenna decides to perform a Craft action. She chooses the Rainbow Shield from the crafting row and pays its resource cost of a mushroom and a material. She equips the shield to her familiar and draws a new card to add to the crafting row.
Train Action
To perform a train action with a familiar you control:
- Choose a card from the training row to acquire.
- Pay the chosen card's power cost by reducing the familiar's power dial by that much. If the familiar doesn't have enough power to pay the cost, that card cannot be chosen for a train action.
- Resolve any Acquire effect that may be listed on the card.
- Place the chosen card in your skill deck's discard pile. (Unless it is a Bond or Story Craft Card, see below.)
- Draw a new card from the training deck and add it to the training row, replacing the card just acquired. (If there are no more cards in the training deck, shuffle any cards in its discard pile and form a new training deck.)
BOND AND STORY CRAFT CARDS: Bond and Story Craft cards work differently than other cards that can be acquired from the training row. They can only be acquired by a specific familiar. The Bond and Story Craft cards describe what to do upon acquiring them.
Special Actions
Special actions are actions that are only sometimes available and include:
- An action granted by a skill card in your hand.
- An action available to remove a status effect.
- The action listed on the familiar life dials.
- Actions that are available when a familiar is on a gear space or a space with an objective token on it. These actions are always described in the location book.
SKILL CARD ACTIONS: Some skill cards have effects that are preceded by the word 'ACTION'. These are special actions that a familiar can perform by playing that card, resolving that action effect and then discarding the card. When playing a card as a special action to trigger that card's action effect, that card has no other effect. Its icon effect is NOT triggered.
Some skill cards have special actions that effect a specific familiar, as indicated by the card's text. Those effects always affect the indicated familiar, regardless of which familiar played that card.
Enemy Turn
Resolving an Enemy Turn
Sometimes the app will instruct players to resolve an enemy turn and give you a list of steps to follow. Those steps will often involve moving and attacking with the enemies.
Moving an Enemy
When directed to move an enemy a number of move points, follow all the same rules as when moving a familiar.
When directed to move an enemy toward the nearest familiar, and there is more than 1 familiar that is equally near, the players choose which of them the enemy will move toward.
Attacking with an Enemy
MELEE ATTACK: When directed to resolve a melee attack with an enemy, that enemy will target a familiar that it shares a space with. If it shares a space with more than 1 familiar, the players choose which of them the enemy will target.
RANGED ATTACK: When directed to resolve a ranged attack with an enemy, that enemy will target a familiar that it does not share a space with and that it has line of sight to. If more than 1 familiar meets this criteria, the players choose which of them the enemy will target.
Defending with a Familiar
When a familiar you control is targeted by an attack, if you have 1 or more skill cards in your hand, you may have that familiar defend by doing the following:
- Make a resilience skill test with that familiar. The difficulty of the test is equal to the enemy's melee attack value, if it was a melee attack, or equal to its ranged attack value, if it was a ranged attack.
- If the familiar passes the skill test, it does not lose any life. If the familiar fails the skill test, subtract the skill test's result from the enemy's attack value and reduce the familiar's life by the difference, using the life dial on its dashboard.
If a familiar cannot, or chooses not to defend, reduce that familiar's life by an amount equal to the enemy's attack value.
Defeated Familiar
If the life dial on a familiar you control ever reaches 0, that familiar has been defeated and flees. Do the following in order:
- Remove that familiar's figure from the board and place it on its character card.
- Misfortune +2.
- Acquire 2 Fatigue.
- Set that familiar's life dial to its maximum value.
- That familiar becomes Badly Injured. (Place a Badly Injured affliction token on its card.)
RETURNING TO PLAY: At the start of a defeated familiar's next turn, return it to play by placing it on any space containing another familiar. If there are no other familiars in play, place it on a starting space or a fire space.
Fatigue Cards
In addition to the regular skill cards, there will also be a face up pile of Fatigue skill cards. When you are instructed to acquire one or more Fatigue cards, draw them from the face up pile of Fatigue cards and place them in your discard pile. When playing a Fatigue card, instead of discarding it normally, return it face up to the Fatigue card pile.
NOTE: If a player would acquire a Fatigue card, but none remain in the pile, the player does not acquire a Fatigue.
Ending a Game
At the end of each chapter the app will guide you through a short step-by-step process to save your progress in the story and prepare you for your next game. At the end of the third and sixth chapter, you will be completing an era, and the app will provide additional end of era steps.
Saving your Progress
Periodically throughout a chapter, the app will ask you if you would like to save the game and return to it later. This is usually at a natural stopping point in the adventure, and allows you some control over the length of your game session. If you choose to save the game, the app will guide you through the step-by-step process to preserve your progress until your next game session.
Afflictions and Marks of Devotion
Afflictions
Some game effects cause a familiar or enemy to become On Fire, Poisoned, Trapped, Badly Injured or Knocked Down. When this happens, place the corresponding affliction token on that familiar's character card or under that enemy's figure. If no affliction tokens of that type remain, ignore the effects of that affliction.
NOTE: The effects of these afflictions can also be found on the back of this rulebook.
ON FIRE: When a familiar becomes On Fire, banish any items equipped to it that have the Flammable keyword.
At the start of an On Fire figure's turn, reduce its life by 1, then roll the chance die. If a positive number is rolled, remove this affliction. If a danger result is rolled, danger +1.
If an On Fire figure enters a water space, remove this affliction from it. As an action, an On Fire familiar may make a resilience skill test, difficulty 4.
PASS: Remove this affliction.
POISONED: At the start of a Poisoned figure's turn, reduce its life by 1, then roll the chance die. If a positive number is rolled, remove this affliction. If a danger result is rolled, danger +1.
When a Poisoned familiar is healed (its life is increased), remove this affliction from it.
TRAPPED: A Trapped figure cannot move from its current space. When a Trapped figure loses 1 or more life, it loses 1 additional life.
As an action, a Trapped familiar may make a might skill test, difficulty 4.
PASS: Remove this affliction.
BADLY INJURED: When a Badly Injured figure loses 1 or more life, it loses 1 additional life.
When a Badly Injured figure is healed (its life is increased), remove this affliction.
KNOCKED DOWN: When a figure becomes knocked down, lay it on its side. The next time that figure moves, 2 of its move points must be used to stand it up before it can move. Enemies represented by tokens cannot be knocked down.
Marks of Devotion
Some game effects allow a familiar to gain a mark of devotion. When this happens, choose a mark of devotion token and place it on that familiar's character card. There are 4 different marks of devotion, matching the 4 different skill types: Might, Insight, Resilience and Agility. When a familiar has a mark of devotion, it adds 1 to all skill tests of the associated type.
NOTE: There is a limit of 2 marks of devotion of each type. When the supply of marks of devotion of a particular type is depleted, that type cannot be gained.
Merilious & His Familiars
The kingdom of Principalia was host to a fair number of wizards over the long ages. At times wizards were rare, and at other times they were numerous, but never so numerous as to not attract a great deal of attention due to their relative strangeness. Some were famous practitioners of the magical arts, such as Mistress Dodia of Mundu or the Ruby Duke Feloro. Those wizards garnered much respect and amassed great wealth with their entertaining shows full of pomp, illusion, and dazzling light. Most wizards, however, preferred a quiet life of study and contemplation, for the burden of mystical power was considerable. Merilious was one such wizard.
In his prime, he was Master Merilious, Adviser to the King of Principalia. But after a forced retirement, he was content to become just plain old Merilious, a recluse that lived in a modest cottage, south of the Silvering River. And that's pretty much all you need to know about him, for this is not his story. No, this is a story about familiars. More precisely it is about the four familiars who lived with Master Merilious.
What is a familiar? Well, familiars are creatures, spirits, fairies, or whatnot, linked to a wizard through magical bonds. Of course there are wizardly details regarding those bonds, with contractual clauses and sub-clauses, but that's secret wizardy stuff and terribly boring. What was interesting about the familiars in question was that there were four of them, when most wizards have but one. Most familiars bond with a wizard out of love and gratitude, and that is precisely how our familiars came to bond with Merilious. Each of them came to him in need, and Merilious, being unusually softhearted for a wizard, welcomed them gladly. The familiars had their own special relationship with the wizard, and their own special role to play within his household.
Flicker the fairy was a Candletinder. She helped Merilious satisfy his thirst for obscure knowledge. She kept his scrolls rolled, and his books stacked. She cleaned his spectacles, filled his inky wells, and dusted his artifacts. Most importantly, she illuminated his cottage and tended his candles late into the night when Merilious did his best studying. That might sound tedious to you, but to a Candletinder, this was a delight. Merilious adored Flicker's tender heart, and he entrusted her with more magic than any familiar he had before.
Chalk the golem was a creature held together by magic. Merilious created Chalk from nature itself to help him build his cottage, but the wizard beheld a spark of life within the golem, so Chalk became a quiet companion. Part plant, part rock, Chalk was an expression of the living earth. It carried heavy loads for Merilious, built and fixed fences and furniture, even tended the wizard's herb garden. Perhaps the creature's greatest gift was its willingness to listen to Merilious' rambling, repetitious stories, or his gripes, worries, and petty grievances. Chalk was an excellent listener, and any secret that was told, was safe with the golem.
Blaze the vulpine spirit was found by Merilious, half frozen and far from home. Merilious warmed her, tended to her injuries, and nursed her back to health. Once she was able to hunt again, she stayed on as a familiar, earning her keep by hunting for small game like pheasant, quail, and even an occasional hare. Blaze was the fierce guardian of her new family, demanding to escort the wizard on every excursion, and even protecting his pantry from those rats and voles foolish enough to resort to larceny.
Gribbert the frog had been a human in his former life. He had been a notorious highwayman and one day went too far. A witch turned him into a frog for his troubles, and the new amphibian struggled to say safe in his new position on the food chain. Merilious had recognized the altered human for what he was, and took him in out of pity. He wasn't much of a help around the house, but Merilious found the frog lively and entertaining. He sang, told stories, and taught the other familiars about the world of humans from the perspective of somebody who had loved being human more than most.
Together they were not just familiars, they were a family, and just like any other family, they cared for each other and had each other's backs. And that is where all good stories begin. With a family.