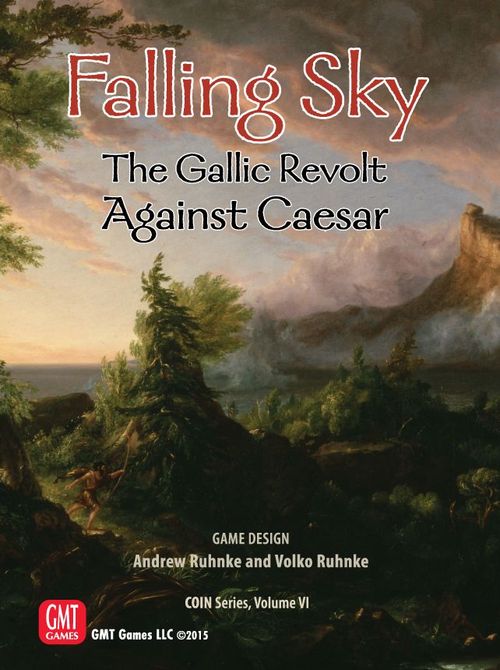
Falling Sky: The Gallic Revolt Against Caesar
Falling Sky: The Gallic Revolt Against Caesar Rulebook
Table of Contents
Table of Contents
1.0 Introduction
Falling Sky is a board game about the latter part of the Roman conquest of Gaul, when numerous tribes rose in revolt. It adapts GMT Games' "COIN Series" system about modern insurgencies to depict the political, military, and economic affairs of ancient Gaul. An Ariovistus expansion to Falling Sky, sold separately, adds the early years of the Gallic War.
In Falling Sky, one to four players each take the roles of one or more Factions in Gaul: the Roman Republic seeking to secure Julius Caesar's recent conquests; an anti-Roman confederation led by the Celtic Arverni tribe and its young king Vercingetorix; its Celtic rival, the generally pro-Roman Aedui confederation; and fierce Belgic tribes of the north led by the chieftain Ambiorix. Germanic warbands from across the Rhine may intervene, sometimes in cooperation with a Faction, sometimes alone.
Issuing commands and exploiting their Factions' special abilities and various events, players build and maneuver forces to influence or control the tribes of Gaul, extract resources, and achieve their Factions' aims. Cards regulate turn order, events, and victory checks. The game's most important functions are summarized on several aid sheets. This Second Edition rule book explains (on pages 28-34) how to set up the scenarios, and also lists key terms in an index near the end (pages 35-36). Players seeking gradual instruction should start with the tutorial in the Playbook.
Second Edition: This edition of Falling Sky updates five Event cards, marked "2nd Ed", and the Non-player rules, section 8.
1.1 General Course of Play
In Falling Sky, cards are played from the deck one at time, with one card ahead revealed to all players. Each Event card shows the order in which the Factions become Eligible to choose either that Event or from a menu of actions. Executing an Event or Command renders that Faction Ineligible to do so on the next card. Winter cards mixed in trigger periodic victory checks and other activities.
1.2 Components
A complete set of Second Edition Falling Sky includes:
- A 17" x 22" mounted board (1.3).
- A deck of 77 playing cards (5.0).
- 200 wooden Forces pieces, cylinders, and pawns (1.4, 1.8, 2.2, 3.1.1).
- A sheet of markers.
- Five heavy-cardboard Available Forces displays (1.4.1).
- Four Faction player aid foldouts (3.0, 4.0, 7.0).
- Two Sequence of Play and Germanic Tribes sheets (2.0, 3.4, 6.0, 6.2).
- One Battle Procedure (3.2.4) and Non-Player Guidelines/Instructions foldout (8.1-8.4).
- Two Second Edition Non-Player flowchart foldouts (8.5-8.8).
- Four 6-sided dice—red, green, blue, yellow.
- A background playbook.
- This Second Edition rule book.
1.3 The Map
The game board shows a map of Gaul and environs, with several tracks around the edge.
MAP FEATURES: Victory and Senate Thresholds; Regions; Adjacency arrow; Tribe; Tribe with City; Overflow Holding Box; Control Value and Control marker box for this Region; Sequence Track; Rhenus (river border); Edge Track; Home Region: This Faction Rallies easier here; Parts of Gaul; Tribe with Special Stacking; Borders; Cisalpina (not in play); Senate and Legions Track; Space for indestructible Roman Fort; Fallen Legions box.
1.3.1 Regions. Borders delineate Regions of the map, with certain Regions grouped as Celtica, Belgica, or Germania. Each Region is home to one or more Tribes, some of which have Cities (1.3.3). Each Region includes a Control marker holding box that also shows the Region's Control Value for Belgic Victory (7.2).
NOTE: Regions go by the name of the highlighted Tribe there—any with a City, or the upper-left Tribe if no City there—or "Britannia" or "Provincia". Colors of Control Value shields correspond to groups of Regions.
Faction symbols and the word "Rally" or "Recruit" show Home Regions where that Faction enjoys an advantage for those actions (3.2.1, 3.3.1, 3.4.1).
1.3.2 Tribes. Colored circles within the Regions show named Tribes whose status—Subdued, Allied to a Faction, or Dispersed (1.4.2, 4.2.3)—influences victory (7.0). NOTE: There are 30 such Tribes, listed alphabetically on the back of the Playbook.
1.3.3 Cities. Gray diamonds around some Tribe circles show that those Tribes have Cities (named in capital letters) that can be fortified into Citadels. (1.4.2, 3.3.1)
1.3.4 Britannia. The Britannia Region is treated as adjacent to the three coastal Regions of Gaul across from it—as shown by white arrows—for all purposes except for restrictions in Marching (3.2.2, 3.3.2, 4.1.3) or Scouting (4.2.2) across it.
1.3.5 Rhenus. Germania's border with Gaul is a river that halts March (3.2.2, 3.3.2). NOTE: The Morini Region borders Germania across the Rhenus.
1.3.6 Overflow Box. The board features a holding box for the occasional case of a Region becoming too crowded with pieces. Place some or all of the pieces in the Overflow box and the "Overflow" marker into their Region.
1.4 Forces
Wooden pieces represent the Factions' Leaders (tall cylinders, if any), Roman Legions (cubes), Roman Auxilia or Gallic or Germanic Warbands (hexagonal cylinders), Allied Tribes (also called "Allies", discs), and Roman Forts and Gallic Citadels (squares and diamonds).
TYPES OF FORCES (Pieces):
- Leaders: Caesar/Roman Successor; Vercingetorix/Arverni Successor; Ambiorix/Belgic Successor.
- Roman Legion.
- Roman Auxilia (Hidden/Revealed).
- Warbands: Arverni, Belgic, Aedui, Germanic (Hidden/Revealed).
- Allied Tribes (Allies): Roman, Arverni, Belgic, Aedui, Germanic.
- Roman Fort.
- Gallic Citadels: Arverni, Belgic, Aedui.
NOTE: Available Forces displays and the back of the Playbook show each Faction's complete pool of wooden Forces pieces.
1.4.1 Available Forces, Placement, and Removal. Each Faction (1.5) has a separate Available Forces display showing an inventory of Forces, including spaces for its Allied Tribes and Citadels. These Force pools limit the number of pieces that a Faction may have in play. Keep a Faction's Forces not on the map on its Available Forces display, within easy view of all players. Place Allies and Citadels in the highest-numbered empty spaces—including Ally discs in any empty Citadel spaces—revealing the number of them that are on the map, in order to help track Resource earnings (6.4) and victory (7.0).
- Placement: Pieces other than Legions may only be placed from or replaced with those on the Available Forces displays—ignore any instructions to place pieces if the appropriate type is not Available (a piece to be replaced by a piece that is not Available is simply removed).
- Removal: When removing pieces other than Legions from the map, put them on their Available Forces display.
- Legions: Legions not on the map start out on the Legions track, on the lowest rows, up to four per row. Unless otherwise specified, place Legions onto the map from the Legions track (not from the Fallen Legions box) via Event (5.0) or the Senate Phase (6.5), and Legions removed from a Region into the Fallen Legions box. Some Events (5.0) and voluntary removal (below) instead remove Legions to the Legions track. Legions move from the Fallen box to the Legions track during the Winter (6.5.2, 6.6).
- Voluntary Removal: A player Faction while executing a Command or Event by the Sequence of Play (2.3.4, 3.0, 5.0) may remove its own pieces from the map to Available, or to the Legions Track if a Legion (but see permanent Fort, 1.4.2; Belgic Enlist, 4.5.1). Also, a Faction at such time may replace any of its Citadels with its Allied Tribes (discs).
PLAY NOTE: Voluntary removal allows placement into a Region when all Available pieces are already elsewhere on the map.
1.4.2 Stacking. Any number of Forces may occupy a Region, except:
- Allied Tribes may occupy only Tribe circles, one per circle.
- Citadels may occupy only City diamonds, one per diamond, taking the place of any Allied Tribe there.
- Only one Roman Fort may be in each Region.
- Provincia always has one Roman Fort piece in it. Set up and always keep one of the wooden Fort pieces in the red square space there. That piece cannot be removed.
- No Allies or Citadels may occupy a Dispersed Tribe's circle (1.7, 3.2.3).
- A few Tribe circles and Cities may hold only certain Allies or Citadels—the Aedui Tribe circle/Bibracte City may hold only an Aedui Allied Tribe/Aedui Citadel (blue); the Arverni circle/Gergovia may hold only an Arverni Ally/Citadel (green); and the two Suebi circles may hold only Germanic Allies (black).
- Cisalpina and Aquitania are non-playable areas. They are not Regions and may hold no pieces (except by Event, 5.1.1).
1.4.3 Flipping. Warbands and Auxilia are either Hidden—symbol end down—or Revealed—symbol end up, affecting their abilities. Actions, Events, and the Spring Phase (6.6) flip them from one to the other state. All other pieces are always Revealed, not Hidden. Revealed Warbands can be marked Scouted (4.2.2); whenever they are to be flipped to Hidden, remove the marker instead of flipping. Always set up and place new Warbands and Auxilia Hidden (including if replacing a Revealed or Scouted piece, 4.2.2).
- Leader pieces symbol end up are Caesar (red, Roman), Vercingetorix (green, Arverni), or Ambiorix (yellow, Belgic), symbol down that person's Successor. A removed Leader piece will return as a Successor that Winter (6.6).
NOTE: Hidden Auxilia help Scout (4.2.2), Harass Vercingetorix's March (3.3.2), and block enemy Ambush (4.3.3). Hidden Warbands can Raid (3.3.3), Harass Roman March (3.2.2) and Seize (3.2.3), Retreat from Roman Battle within a Region (3.2.4), Ambush (4.3.3), Entreat (4.3.1), Suborn (4.4.2), and Rampage (4.5.2).
1.5 Players & Factions
Falling Sky is playable by one to four players. Player Factions are the Roman Republic (red), the Arverni Confederation (green), the Aedui Confederation (blue), and the Belgic Tribes ("Belgae", yellow-orange). The game rules—and sometimes players—guide a 5th Faction, the Germanic Tribes ("Germans", black).
- The Arverni, Aedui, and Belgic Factions collectively are also called "Gallic" or "Gauls".
PLAY NOTE: Romans and Arverni may require more intricate play to achieve their potential and should go to more confident players.
1.5.1 Spare Factions. With two or three players, the players run leftover Factions:
- With three players, one player runs Arverni and Belgae or, if preferred, Romans and Aedui.
- With two players, one player runs Arverni and Belgae, the other Romans and Aedui.
A player running two Factions uses the lower victory margin of the two (7.1-.3) and only causes play to end on a victory check (6.1) if both Factions are meeting their conditions.
EXCEPTION: A player running both Arverni and Belgae in "The Great Revolt" scenario uses the higher of those Factions' victory margins and ends play if one has met its condition (2.1).
Non-Player Option: If playing solitaire, or as an alternative to the above with two or three players, use the Non-player rules in section 8 to govern leftover Factions.
1.5.2 Negotiation. All negotiations are open. Players may make any mutual arrangements within the rules, binding only as follows: once a player agrees to something within the execution of a Command or Event, or Quarters Phase, that agreement holds during that action. A player failing to obtain agreement at the outset of an action may cancel the action.
- A Faction may transfer Resources (1.8) to another during either's execution by the Sequence of Play (2.3.4) of a Command or Event—a maximum of four Resources per such execution between two Factions run by the same player (1.5.1).
- Factions may transfer any Resources to any non-German Factions during the Quarters and Harvest Phases of the Winter Round (6.3-6.4).
1.6 Control
Any Faction (including Germanic) that has more Forces (pieces, 1.4) in a Region than all other Factions combined Controls that Region. If no Faction does, the Region has No Control. Control affects a number of Faction actions as well as Belgic victory (7.0). Place and adjust Control markers in a Region's Control box at setup and as Commands (3.0), Special Abilities (4.0), Events (5.0), or Winter (6.0) alter Control.
NOTE: Mark uncontrolled Regions with "No Control" markers, or by leaving the Control box empty, showing "No Control".
1.7 Subdued and Dispersed Tribes
As the map shows, an empty Tribe circle (1.3.2) is Subdued: subservient to Rome and not at war. Roman Seize actions (3.2.3) can Disperse a Subdued Tribe (place a marker on it), blocking placement of Allies there (1.4.2) and negating its value for Belgic Victory (1.3.1, 7.2).
Subdued and Dispersed Tribes, along with Roman Allies, add to Roman victory (7.0).
1.8 Resources
At any moment, each Roman and Gallic Faction has between 0 and 45 Resources that they use to pay for Commands (3.0). Mark Resources along the 0-45 board edge track with a short round wooden cylinder of the Faction's color (1.5). NOTE: The Germans do not track Resources.
1.9 Victory Markers
Use markers as follows to track various totals that affect Roman or Gallic victory (7.0).
- Track Roman victory—the sum of Subdued, Dispersed (1.7), and Roman Allied Tribes—on the edge track with the red "Subdued Dispersed + Allies" victory marker.
- Similarly track Belgic victory—the sum of Belgic Controlled (1.6) Tribes plus Belgic Allies and Citadels—on the edge track with the orange "Control + Allies" victory marker.
- Track a part of Arverni victory—off-map Legions, meaning those in the Fallen Legions box, plus on the Legions track, plus removed by Event (1.4.1, 5.0, 6.5)—on the edge track with the green "Off-Map Legions" marker. The other part of Arverni victory—total Arverni Allied Tribes and Citadels—is shown by the highest uncovered number on the Arverni Available Forces display.
- Track Aedui victory on the Aedui Available Forces display with the "Other Most Allies" marker. Place the marker at the number of Allied Tribes and Citadels of whatever other (non-Aedui) Faction has the most (including Romans or Germans). Comparing the highest Aedui Ally number showing to the "Other" number indicated will show how close the Aedui are to victory.
EXAMPLE: Aedui Available Forces display showing three Aedui Allies and Citadels are on the map, compared to five for whatever other Faction has the most.
2.0 Sequence of Play
2.1 Set Up
Follow the instructions on pages 26-29 of this rule book to choose a scenario, assign Factions to players, prepare the deck, and set up markers and Forces.
2.2 Start
Begin play by revealing the top card of the draw deck and placing it onto a played cards pile face up. Then reveal the next card on top of the draw deck. The card on the played card stack is played first; the card on top of the draw deck will be played next.
NOTE: All players will see one card ahead into the deck (2.3.7). All played cards and the number of cards in the draw deck are open to inspection.
RECORD STEPS: As the steps of each Event card play are completed, place short round Eligibility cylinders corresponding to the Factions involved (1.5) into appropriate boxes of the Sequence of Play track. During Winter Rounds (6.0), place the Winter marker in the current phase's box.
2.3 Event Card
When playing an Event card, up to two Factions will execute a Command or the Event.
- Factions whose cylinder is in the "Eligible" box receive these options in the left-to-right order of Faction symbols shown at top of the card.
- Factions with cylinders in the "Ineligible" box do nothing.
2.3.1 Eligibility. Factions that did not execute a Command or Event on the previous card are Eligible (their cylinders will start the turn—that card—in the "Eligible" box per 2.3.6). Factions that did are Ineligible. (All Factions start the game Eligible.) See also Free Actions, 3.1.2.
2.3.2 Faction Order. The Eligible Faction with the leftmost symbol in its color (skipping any Ineligible Factions) is the 1st Eligible to execute a Command or Event or to Pass. The next leftmost is the 2nd Eligible. NOTE: Ignore any gray details around the Faction symbols unless using Non-player rules (8.2.1).
2.3.3 Passing. If a currently 1st or 2nd Eligible Faction opts to Pass, it remains Eligible for the next card and receives +1 Resource if a Gallic Faction or +2 Resources if Roman. The next leftmost Eligible Faction then replaces the Passing Faction as the new 1st or 2nd Eligible Faction and receives the same options to execute or Pass. If the last (rightmost) Eligible Faction Passes, adjust cylinders (2.3.6) and play the next card. NOTE: Ineligible Factions or those that do not become 1st or 2nd Eligible may not Pass.
2.3.4 Options for Eligible Factions.
FIRST ELIGIBLE: If the 1st Eligible Faction does not Pass (2.3.3), it may execute either:
- A Command (3.0) in one or more Regions—with or without a Special Ability (4.0)—or
- The Event shown on the card.
OPTIONS FOR 2ND ELIGIBLE: If the 2nd Eligible Faction does not Pass (2.3.3), it also may execute a Command or possibly the Event, but its options depend on what the 1st Eligible Faction executed per the above:
- Command Only: If the 1st Eligible Faction executed a Command, the 2nd Eligible Faction may execute a Limited Command (2.3.5).
- Command & Special Ability: If the 1st Eligible Faction executed a Command with a Special Ability, the 2nd Eligible Faction may execute either a Limited Command or the Event.
- Event: If the 1st Eligible Faction executed the Event, the 2nd Eligible Faction may execute a Command, with a Special Ability if desired.
NOTE: The game board and Sequence of Play aid sheet also show these options.
2.3.5 Limited Command. A Limited Command is a player Command selecting just one Region with no Special Ability. A Limited Command counts as a Command.
2.3.6 Adjust Eligibility. After the 1st and 2nd Eligible Factions complete all execution of Commands, Special Abilities, and Events (or after all Eligible Factions instead have Passed), adjust cylinders on the Sequence of Play track as follows:
- Any Faction that did not execute a Command or Event (and was not rendered Ineligible by an Event) to the "Eligible" box.
- Any Faction that executed a Command (including Limited Command) or Event to the "Ineligible" box (EXCEPTIONS: Events 5.0, free Actions, 3.1.2. 5.4).
2.3.7 Next Card. After adjusting Eligibility, move the draw deck's top card onto the played card pile face-up and reveal the draw deck's next card (even if the played card is Winter, 2.4). Play the played card, proceeding with the appropriate sequence.
2.3.8 Frost. On the last Event card before each Winter card (2.4), Commands by the Sequence of Play (2.3.4, including Germanic Commands via Belgic Enlist, 4.5.1) may not use March (3.2.2, 3.3.2).
NOTES: Place the "Frost" marker on the played Event card as a reminder. Events may still allow March (5.1.1).
Frost does not affect the Germans Phase (6.2.2).
Sudden Frost Option: For less foreknowledge, if all players agree at Setup (2.1), upon the last Event card before each Winter, instead switch the places of the two showing cards and conduct an immediate Winter Round (6.0). The switched Event card will be the first card of the next Year (unless the game ends that Winter).
2.4 Winter Card
If playing a Winter Card, conduct a Winter Round (6.0), marking each phase on the Sequence of Play with the "Winter" marker. NOTE: Set aside Winter cards (or turn them sideways) to show how many have gone by. Each series of Event cards up to a Winter Round is called a "Year".
2.4.1 Final Winter. If the last Winter card's Victory Round (6.2) is completed without a victory, the game ends anyway: determine victory by 7.3.
3.0 Commands
3.1 Commands in General
A Faction executing a Command chooses one of the four Commands listed on its Faction sheet and selects one or more Regions to be involved. Commands usually cost Resources per Region selected; the executing Faction must have the Resources to pay. Select a given Region only once for a given Command.
The executing Faction chooses the order in which the Command's Regions are selected, resolved, and paid for, and chooses own pieces to be affected or other Factions or pieces targeted. Some Commands may target only one Faction per Region, others several Factions.
3.1.1 Pawns. Mark Regions selected for various actions such as Commands and Special Abilities with white and gray pawns. The pawns are an aid, not a limit on play.
3.1.2 Free Actions. Certain Events (5.4) grant free Commands or Special Abilities: they cost no Resources and, if executed by a Faction other than the one playing an Event, do not affect its Eligibility (2.3.6). Other requirements and procedures still apply unless modified by Event text (5.1.1).
3.2 Roman Commands
The Romans choose from Recruit, March, Seize, or Battle Commands.
3.2.1 Recruit. Recruiting places Auxilia and Roman Allied Tribes. Select any Regions that are not Devastated (4.3.2) and (to have effect) that have either Roman Control or a Roman Leader, Ally or Fort. Select just one such Region if this is a Limited Command (2.3.5). Pay two Resources per Region selected; if the Region is a part of (within) a Supply Line, instead pay 0.
SUPPLY LINE: A Supply Line is a chain of adjacent Regions reaching a border with Cisalpina (1.4.2), each Region in the chain—including where the action is to occur—either having No Control or under Control (1.6) of a Faction that agrees to the Supply Line at the moment that the action's Region is selected. Germans never agree (3.4.5). NOTE: The Ubii, Sequani, and Provincia Regions border Cisalpina. One of them alone under friendly or No Control would qualify. Supply Lines affect Roman Build (4.2.1), Aedui Trade (4.4.1), and Roman Quarters (6.3.3). See example below.
PROCEDURE: Romans select Regions desired for Recruit and Supply Lines. Factions declare whether or not they agree to have the Supply Line include Regions they Control. (The Romans may call off the Recruit if unhappy with any disagreement, 1.5.2.) Then, in each Recruit Region, Romans may do one of the following (adjusting Control, 1.6)—
- If under Roman Control, or if Caesar is there, place one Available Roman Ally piece at a Subdued Tribe (not the Aedui, Arverni, or Suebi, 1.4.2, nor at a Dispersed Tribe, 4.2.3).
- If the Region already has a Roman Leader, Allied Tribe, or Fort, place Available Auxilia (Hidden, 1.4.3) up to the number of Roman Allied Tribes plus one per Leader and Fort there.
HOME REGION: If placing Auxilia in the Provincia Region, place one extra, if desired.
PLAY NOTE: The Romans can Recruit to move Auxilia or Allied Tribes from one Region to another, in effect, by first removing such pieces to Available (1.4.1), then placing them.
SUPPLY LINE EXAMPLE: Arverni Control blocks Supply in the Arverni Region. In the Bituriges Region, no one has Control, so a Supply Line would be allowed—but only if the Aedui agree.
3.2.2 Roman March. Marching moves Roman Forces and hides Revealed Auxilia. Romans may not March upon Frost (2.3.8). Select any Regions as origins. Pay two Resources per origin Region, four if Devastated (4.3.2). Form Marching groups as desired from Roman pieces that begin together in an origin Region—the groups may include a Leader, Legions, and Auxilia but not Allied Tribes nor Forts. Pieces within a Region may make up multiple groups. March no piece more than once. If this is a Limited Command (2.3.5), select just one origin Region (with multiple groups, if desired).
PROCEDURE: Origin Region by origin Region, flip all Revealed Auxilia to Hidden; then, as desired, move each Marching group one by one together into an adjacent Region and, if desired, March into a 2nd Region that is now adjacent to the group.
- Caesar and any Legions or Auxilia moving with him may March into a 3rd such Region.
- Any of a group's pieces may drop off in a Region before the rest move on, or split off to move by accompanying Scout (4.2.2).
- Upon moving into or out of Britannia (1.3.4) or Germania (crossing the Rhenus, 1.3.5), and whenever entering (as opposed to beginning in) a Devastated Region (4.3.2), the group must stop for that March (even with Caesar).
MARCH EXAMPLE: The Romans select Provincia as a March origin. Caesar, four Legions, and three Auxilia there will March out as group, and another two Auxilia form a 2nd group. The Romans pay two Resources total for the single March origin Region. Caesar's group first moves into the Aedui Region, where the Aedui have four Hidden Warbands. The Romans state that one Auxilia will drop off, and that the rest of the group will move on into another Region. The Aedui could cause one Loss to the departing Roman Forces, but decide not to do so. Caesar's group moves on into the Mandubii Region, which is Devastated. Even though Caesar would like to continue into Belgica, he and his group must stop because of the Devastation. Finally, the group of two Auxilia enters the Arverni Region and decides to stop to avoid any removal by Hidden Warbands there.
BRITANNIA: If any group moves into or out of Britannia, no Special Ability may accompany this March Command (1.3.4, 4.1.3); if a Special Ability has already been added, no pieces may move into or out of Britannia on this March.
HARASSMENT: If any part of a group both enters and then leaves a Region during a single March Command, any Factions with enough Hidden Warbands there may opt to inflict Losses on the moving pieces as those pieces depart (not on any dropped off pieces). Announce and inflict Losses in the Faction Order shown on the currently played Event card (2.3.2), then do so with Germans (3.4.5). Any agreement earlier that Command not to Harass applies (1.5.2). (For every three Hidden Warbands that the Faction has there (rounded down), the Romans must either remove one departing Auxilia or—if any Legions or Leader remain with the group—may instead roll a die. If the roll is a 1, 2, or 3 (only), the Romans must remove the Legion or Leader.
3.2.3 Seize. Seizure extracts Resources from Subdued Tribes, and can disperse them to keep them in submission. Select any Regions that have Roman pieces. Pay no Resources.
PROCEDURE: In each selected Region, a Region at a time—
- Dispersal. If the Region has Roman Control, as the Romans desire, and as long as Dispersed markers remain available (there are fewer than four on the map), place a Dispersed Tribe marker (not yet Gathering, 6.6) onto one or more Subdued Tribe circles in the Region.
- Rally. For each Tribe just Dispersed (receiving a Dispersed marker), the Arverni then the Belgae each roll a die and, on a 1, 2, or 3, may free Rally in each Region possible (3.3.1, not in Devastated) adjacent to that Dispersed Tribe's Region.
- Forage. Then, only if the selected Region has no Devastated marker (4.3.2), add +2 Roman Resources for each Subdued or Roman Allied (not Dispersed) Tribe in the Region, and +6 Roman Resources for each Dispersed marker that was just placed per the above.
- Harassment. Lastly, each Faction with Warbands in the selected Region may opt to inflict Losses on Roman pieces there. Announce and inflict Losses in the Faction Order shown on the currently played Event card (2.3.2), then do so with Germans (3.4.5). For every three Hidden Warbands that the Faction has there, Romans select and remove one Auxilia or Roman Ally or—if any Legions, Leader, or Fort there—may instead roll a die. If the roll is a 1, 2, or 3 (only), the Romans must remove a Legion, Leader, or Fort. NOTE: This Harassment works the same as that of Marching Romans (3.2.2).
NOTE: Keep unused Dispersed markers on the Roman Forces display. Dispersal temporarily blocks placement of Allies (1.4.2) and cancels the Belgic Control Value of that Tribe for Belgic Victory (7.2), as the "-1" on the marker reminds.
DESIGN NOTE: The free Rally represents the resentment of Roman brutality, the Harassment attacks on Roman foraging parties.
3.2.4 Roman Battle. Battle destroys enemy Forces, including Subduing enemy Allied Tribes and Citadels. Select any Regions with both Roman and non-Roman Forces. Romans pay two Resources per Region, four if Devastated (4.3.2). NOTE: A Battle play aid sheet shows the procedure below as a flowchart.
PROCEDURE: In each of the selected Regions at a time, execute Battle in the following order.
- Step 1 Target—The Attacker selects exactly one enemy Faction with pieces in the Region as the Defender.
- Step 2 Declare Retreat—Unless the Defender is Germanic or has only Allied Tribes (discs) and/or Citadels, it declares whether or not it will Retreat after the Attack. Germans never Retreat. Allied Tribe and/or Citadel pieces alone may not Retreat. If the Retreat is to be to a Region Controlled by another Faction, the Defender must obtain that Faction's agreement during this Step. The Germans never agree. NOTE: Agreement is binding for the rest of the Battle in this Region.
- Step 3 Attack—Roman Forces in the Battle cause Losses to the Defending Faction's Forces as specified under "LOSSES" below.
- Step 4 Counterattack—If the Defender declared a Retreat, skip this step. If not, surviving Defending Forces cause Losses to Roman Attackers per below.
- Step 5 Reveal—If a Retreat, skip this step also. If not, flip all Hidden Warbands and Auxilia of both the Attacker and Defender in the Region that survived to Revealed.
- Step 6 Retreat—If the Defender did declare a Retreat, the Defender selects one adjacent Region (it may be across the adjacency arrows in and out of Britannia). The Region must be under Control of the Defender or of a Faction that agreed at Step 2 above (not No Control). The Defender must either move all its surviving Leader and Warbands to that Region or remove them.
EXCEPTION: The Defender may opt to have any Retreating Leader and/or Hidden Warbands stay put. All Allied Tribes and Citadels stay in the Region.
LOSSES: The Faction suffering Losses to its Forces, when an option, chooses which of its own pieces to remove and whether to roll a die to possibly remove a piece, or to instead automatically remove other pieces, as follows.
- A Faction must either remove pieces or roll dice, in a sum equal to ½ for each enemy Warband or Auxilia, plus one per enemy Leader, plus one per enemy Legion in the Battle. A Defender taking such Losses when Caesar is Attacking must take two per Legion instead of just one per Legion.
- The above sum is cut in half for Defenders who Retreat or started with a Citadel in the Region (even if removed by Besiege, 4.2.3).
- After determining Losses per above, round any fractions down.
- While a Faction has at least one Legion, Citadel, Fort, or Leader in the Battle, and that piece is able per the bullets below to absorb a Loss, the Faction may roll a die instead of removing a piece. If the roll is a 1, 2, or 3 (only), the Faction must remove the Legion, Citadel, Fort, or Leader (Legion to Fallen, 1.4.1). If the roll is a 4, 5, or 6, the Loss is absorbed without removing any piece. Such a piece that survives on a roll of 4-6 may be the target of more rolls to absorb further Losses, until removed on 1-3.
- If the Faction taking Losses is a Defender who has opted to Retreat, the first Losses taken must be any Allied Tribes and (via die rolls) any Citadel. In all other cases, any Allied Tribes, Citadel, or Fort may only take Losses after all other pieces of that Faction in the Region have already been removed. (Thus, Germans remove their Warbands before any of their Allied Tribes, see 3.4.5.) NOTE: The Roman Besiege Special Ability allows easier removal of Allies and Citadels (4.2.3).
- The Provincia Fort never absorbs Losses (1.4.2).
NOTE: In general, Leaders and Legions cause one enemy Loss each, Warbands and Auxilia ½ each; a Loss removes an enemy piece, except for certain hard targets—Leaders, Legions, Forts, and Citadels—which instead roll and are removed only on a 1-3.
PLAY NOTE: When taking Losses, roll no more dice at a time than your total Legions, Leaders, Citadels, and Forts, in case all rolls are 1-3.
NOTE: No Control blocks Retreat (unlike for Supply Line, 3.2.1)—under pressure of enemy cavalry, a retreating force needs cover from friendly Forces to make it to sanctuary.
NOTE: It is possible for Defenders to Retreat into a Region, then immediately Battle again.
BATTLE EXAMPLE: Caesar is in the Arverni Region with six Legions and three Auxilia facing Vercingetorix with 17 Warbands, Cadurci Ally, and Gergovia Citadel. Two Aedui Warbands are nearby. The Romans have a Limited Command and pay two Resources to Battle, selecting the Arverni to Defend—the Aedui will be unaffected. The Arverni declare that they will not Retreat.
a) Attack—Caesar doubles Losses by Legions on the attack, for 12; the three Auxilia cause ½ Loss each for 1½; Caesar himself adds one, for a total of 14½ Losses. The defending Citadel halves that total, rounded down to seven. The Arverni remove seven Warbands, leaving plenty of buffer before forcing any roll against Vercingetorix or the Citadel.
b) Counterattack—The remaining 10 Warbands plus Vercingetorix now cause the Romans to remove or roll a total of six pieces or dice, respectively. They opt first to roll three dice against Legions, to see how the losses go before deciding how to absorb the remaining three losses. The rolls are "4", "1", and "3", so two Legions are removed. The Romans decide not to risk any more Legions and instead take the remaining losses by removing their three Auxilia.
c) Reveal—As there was no Retreat, all Hidden survivors (10 Arverni Warbands) flip to Revealed.
3.3 Gallic Commands
The Arverni, Aedui, and Belgae choose from Rally, March, Raid, or Battle.
3.3.1 Rally. Rally places own pieces. Pay one Resource per Region selected. Select any Regions that are not Devastated (4.3.2) and (to have effect) with that Faction's Control, Ally, Citadel, Arverni Leader, or "Rally" Symbol.
EXCEPTIONS:
- The Belgae outside Belgica (1.3.1) pay two Resources per Region, not one.
- The Arverni can select a Region with Vercingetorix in it for Rally even if that Region is Devastated, paying two Resources.
PROCEDURE: In each selected Region, the executing Faction may do one of the following—
- If it Controls the Region (1.6), place one of its Ally pieces (not a Citadel) at a Subdued Tribe there (only Aedui at Aedui [Bibracte] and Arverni at Arverni [Gergovia], none at Suebi, 1.4.2, nor at Dispersed, 3.2.3).
- If Aedui or Belgae and the Region already has at least one of that Faction's Allied Tribes or Citadels, place its Warbands up to the number of its Allied Tribes and Citadels there.
- If Arverni and the Region has an Arverni Allied Tribe, Citadel, or Leader, place Arverni Warbands up to the number of Arverni Ally, Citadel, and Leader pieces there plus one.
- If the Faction has an Allied Tribe at a City, replace the Ally with that Faction's Citadel.
HOME REGION: A Faction that Rallies in a Region marked with its symbol and "Rally"—Arverni in the Arverni Region, Aedui in the Aedui Region, or Belgae in any Belgica Region—may place at least one of its Warbands there even if it has no Ally, Leader, or Citadel there.
VERCINGETORIX: The Arverni may Rally even in a Devastated Region if that Region has Vercingetorix. Arverni Rally in a Region that has Vercingetorix may place an Ally even without Arverni Control. Finally, it may place either an Ally or Citadel and also place Warbands, in either order; placement must otherwise be per the above procedures.
DESIGN NOTE: Placing Citadels represents the readying of existing fortified places for war by gathering arms, provisions, and warriors.
PLAY NOTE: Gauls can Rally to exchange a Citadel and Ally between two Cities by first replacing the Citadel with an Ally disc (1.4.1).
3.3.2 March. Marching moves and/or hides Gallic Forces. Gauls may not March upon Frost (2.3.8). Select and pay one Resource for each origin Region, two if Devastated (4.3.2) at the moment selected. Form groups of the executing Faction's pieces—groups may include a Leader and Warbands but not Allied Tribes nor Citadels. Pieces within a Region may make up multiple groups. March no piece more than once. If this is a Limited Command (2.3.5), select just one origin Region.
PROCEDURE: Origin Region by origin Region, flip all the Marching Faction's Revealed Warbands there to Hidden; or, for Scouted Warbands (4.2.2), instead remove the Scouted marker and leave them Revealed; then move each Marching group one by one together into an adjacent Region, if desired.
BRITANNIA: If any group moves into or out of Britannia, no Special Ability may accompany this March Command (1.3.4, 4.0); if a Special Ability has already been added, no pieces may move into or out of Britannia on this March.
VERCINGETORIX: Vercingetorix and any group of Warbands Marching with him may enter a 2nd adjacent Region at no added cost. Restrictions are the same as Roman March into a 2nd Region (3.2.2), including drop off, Harassment, Devastated, Rhenus, and Britannia. Romans may use Hidden Auxilia in the 1st Region to Harass (inflict Losses on) the Arverni passing through.
3.3.3 Raid. Raids add Resources, including stealing from enemies. Select any Regions where the executing Faction has Hidden Warbands. Pay no Resources.
PROCEDURE: In each selected Region, the executing Faction flips one or two of its Hidden Warbands to Revealed. For each Warband that flipped, it either:
- Adds one Resource, but only if the Region is not Devastated (4.3.2), OR
- Takes one Resource from a non-Germanic enemy that has pieces in the Region but neither Citadel nor Fort.
3.3.4 Gallic Battle. Battle destroys enemy Forces, including Subduing enemy Allied Tribes and Citadels. Select any Regions with both own and other Forces. Pay one Resource per Region, two if Devastated (4.3.2). NOTE: Gallic Battle repeats much of the Roman Battle Procedure (3.2.4). See also the Battle play aid.
PROCEDURE: In each of the selected Regions at a time, execute Battle in the following order.
- Step 1 Target—Attacker selects one Faction with pieces in the Region as the Defender.
- Step 2 Declare Retreat—Unless the Defender is facing an Ambush (3.4.4, 4.3.3, 4.4.3, 4.5.3), is Germanic, or has only Allied Tribe (disc), Citadel, or Fort pieces, it declares whether it will Retreat. Defenders may not Retreat from Ambush. Germans never Retreat. Allied Tribe, Citadel, and Fort pieces alone may not Retreat. If the Retreat (in Step 6) is to be to another Faction's Control, that Faction must agree (1.5.2) during this Step. The Germans never agree.
- Step 3 Attack—Attacking Forces in the Battle cause Losses to the Defending Faction's Forces as specified under "LOSSES" below.
- Step 4 Counterattack—If the Defender declared a Retreat, skip this step. If not, surviving Defenders cause Losses to Attackers per below. NOTE: Ambush can block Counterattack (3.4.4, 4.3.3, 4.4.3, 4.5.3).
- Step 5 Reveal—If a Retreat, skip this step. If not, flip all Hidden Warbands and Auxilia of both the Attacking and Defending Factions in the Region that survived to Revealed.
- Step 6 Retreat—If the Defender did declare a Retreat, the Defender selects one adjacent Region that is under Control of the Defender or a Faction that has agreed (not No Control). The Defender must either move all its surviving Leader, Warbands, Auxilia, and Legions to that Region or remove them. Allied Tribes, Citadels, and Forts stay in the Region. NOTE: Unlike in a Roman Attack, no Retreating Leaders nor Warbands may stay.
LOSSES: The Faction suffering Losses to its Forces, when an option, chooses which of its own pieces to remove and whether to roll a die to possibly remove a piece, or to instead automatically remove other pieces, as follows.
- A Faction must either remove pieces or roll dice, in a sum equal to ½ for each enemy Warband or Auxilia, plus one per enemy Leader, plus one per enemy Legion in the Battle. A Defender taking such Losses when Ambiorix (yellow, Belgic Leader) is Attacking must take one for each Belgic Warband, not just ½.
- The above sum is cut in half for Defenders who are either Retreating or have a Citadel or Fort. NOTE: Roman Forts in Battle work the same as Gallic Citadels.
- After totaling Losses, round fractions down.
- While a Faction has at least one Legion, Citadel, Fort, or Leader in the Battle, and that piece is able per the bullets below to absorb a Loss, the Faction may roll a die instead of removing a piece. If the roll is a 1, 2, or 3 (only), the Faction must remove the Legion, Citadel, Fort, or Leader (Legion to Fallen, 1.4.1). If the roll is a 4, 5, or 6, the Loss is absorbed without removing any piece. Such a piece that survives on a roll of 4-6 may be the target of more rolls to absorb further Losses, until removed on 1-3. (See Ambush, 3.4.4, 4.3.3.)
- If the Faction taking Losses is a Defender who has opted to Retreat, the first Losses taken must be any Allied Tribes and (via die rolls) any Citadel or Fort. In all other cases, any Allied Tribes, Citadel, or Fort may only take Losses after all other pieces of that Faction in the Region have already been removed. (Germans always remove their Warbands before any of their Allied Tribes, see 3.4.5.)
- Provincia Fort never absorbs Losses (1.4.2).
3.4 Germanic Commands
The Germanic Tribes Faction during the Germans Phase (6.2) or when guided by another Faction via Enlist (4.5.1) or Event (5.0) uses Commands similar to those of the Gauls (3.3), but costing 0 and differing as follows.
3.4.1 Germanic Rally. Place a Germanic Ally only if the Region already has Germanic Control (1.6, and never at Aedui [Bibracte] or Arverni [Gergovia], 1.4.2). Then place Germanic Warbands up to the number of Germanic Allied Tribes—even if an Ally was just placed in that Region on the same Rally.
HOME REGION: In Germania Regions, Germanic Rally places at least one Warband even if no Germanic Ally is present.
NOTE: Similar to Gauls, Germans may not Rally in Devastated Regions (3.3.1, 4.3.2).
3.4.2 Germanic March. Germanic Warbands within a March origin Region may form at most a single moving Group to enter one adjacent Region (any Warbands may stay behind). All Warbands in Regions selected for March flip to Hidden (or remove their Scouted marker, 4.2.2), whether or not they move.
3.4.3 Germanic Raid. The target of Germanic Raid is always a Faction. The target reduces its Resources, but the Germans do not receive them, as Germanic Resources are not tracked (1.8).
3.4.4 Germanic Battle and Ambush. Germans only initiate Battle when they can Ambush—the Germans' only Special Ability (4.1, 4.3.3, 6.2.4)—and always Ambush when they Battle. Therefore, they only opt for Battle where they have more Hidden pieces than an enemy. NOTE: Germanic Battle repeats Gallic Battle Procedure (3.3.4), minus Steps 2 and 6.
PROCEDURE: Execute Germanic Battle in each applicable Region as follows.
- Step 1 Target—Germans select one non-German Faction with pieces in the Region (usually randomly, 6.2.4) as the Defender.
NOTE: Skip Step 2; there will be no Retreat.
- Step 3 Attack—The Defending Faction takes Losses as specified below. (If the Romans are Defending with Caesar, they roll to determine how they may absorb Losses.)
- Step 4 Counterattack—If and only if Caesar rolled a 4-6 in Step 3, Germans take Losses.
- Step 5 Reveal—Reveal surviving German and Defending Hidden Warbands and Auxilia.
NOTE: Skip Step 6; there is no Retreat.
LOSSES: The Defender, when an option, chooses which of its own pieces to remove. Unlike normal Battle and as in other Ambush (4.3.3), the Defender must remove a piece for each Loss suffered, including Leader, Legion, Citadel, or Fort without first rolling a 1-3.
- The Defender must remove pieces in a sum equal to ½ per Germanic Warband there, or half that sum if Defenders have a Citadel or Fort (then round down).
- The Defender must remove a piece for each Loss suffered, including Leader, Legion, Citadel, or Fort without first rolling a 1-3. EXCEPTION: Romans Defending in the same Region as Caesar on a die roll of 4, 5, or 6 may absorb Losses by rolling a die and removing Legion, Caesar, or Fort only on 1-3.
- Any Defending Allied Tribes, Citadel, or Fort may only take Losses after all other Defending pieces there have been removed.
- Germans Counterattacked by Caesar (on a 4-6) remove Warbands then Allies (3.4.5) equal to ½ per Auxilia (round down), plus one for Caesar, plus one per Legion in the Battle.
3.4.5 Germanic Losses, Harassment, and Agreement. Germans suffering Losses in Battle (3.2.4, 3.3.4) remove their Scouted, then their other Revealed, then Hidden Warbands; finally they remove their Allies, from Cities last (if any), otherwise chosen at random. Germans always Harass (3.2.2, 3.2.3, 3.3.2) and never agree to Supply Lines or Retreat in Regions with German Control (3.2.1, 3.2.4, 3.3.4).
4.0 Special Abilities
4.1 Special Abilities in General
When a Faction per the Event card sequence of play (2.3) executes a Command in at least one Region (3.0), it may also execute one type of its Special Abilities (EXCEPTION: Limited Commands, 2.3.5). The Germanic Tribes have only one Special Ability—Ambush—which they use each time they initiate Battle (3.4.4, 6.2.4). Some Special Abilities (Build, Entreat, Suborn) cost Resources. Events may grant free Special Abilities (they neither cost Resources nor further affect Eligibility, 3.1.2, 5.4). As with Commands, the executing Faction selects Regions, Tribes, Factions, or pieces affected and in what order. Select a given Region only once for a given Special Ability.
- A Faction may execute its Special Ability at any one time immediately before, during, or immediately after its Command. EXAMPLE: The Aedui run out of Resources while Rallying, Trade to gain Resources (4.4.1), then continue Rally in additional Regions.
- Certain Special Abilities—Besiege (4.2.3) and Ambush (4.3.3, etc.)—modify the procedures of accompanying Battle Commands rather than interrupting them with separate actions.
NOTE: If the 1st Eligible Faction uses a Special Ability, the 2nd Eligible will have the option to execute the Event, and vice versa (2.3.4).
4.1.1. Accompanying Commands. Some Special Abilities specify that they may only be added to certain Commands (3.0), some only whether the Special Ability and Command may or must select the same Regions.
4.1.2 Leaders and Special Abilities. As noted in each case below, most Roman, Arverni, and Belgae Special Abilities may select only Regions within one Region of the Faction's named Leader (same Region or adjacent), or the same Region that has its Successor Leader (1.4, 1.4.3, 6.6). Roman Scout and Besiege are less restrictive in the requirement for a Leader (4.2.2, 4.2.3). Aedui have no Leader; their Special Abilities are limited to a maximum number of Regions (4.5). Germanic Ambush requires only enough Hidden Warbands (3.4.4).
NOTE: "Within 1 Region of" means in the same and/or adjacent Regions (1.3.1).
4.1.3 Britannia. No Special Ability may accompany March into or out of Britannia (1.3.4, 3.2.2, 3.3.2).
4.2 Roman Special Abilities
The Romans may choose from Build, Scout, or Besiege Special Abilities.
4.2.1 Build. Building constructs forts or public works to subdue or ally with tribes under Roman control. It may accompany Recruit, March, or Seize Commands (3.2.1-.3), not Battle (but see restriction below on Seize Regions). Select Regions for Build that both:
- Have a Roman Ally in them already, or are part of a Supply Line to Cisalpina (3.2.1) and have any Roman piece in it.
- Are within one Region of Caesar (the same Region as Caesar is in, or adjacent to him) or is the Region that the Roman Successor Leader (1.4) is in.
PROCEDURE: The Romans select Regions desired for Build and Supply Lines. Factions declare whether or not they agree to have the Supply Line include Regions they Control. In each Build Region, the Romans do one or both:
- Place a Fort (if none already there, 1.4, 1.4.2).
- And/or, if the Region is now under Roman Control (1.6, including due to the new Fort) and if that Region is not selected for a Seize that accompanying Command (3.2.3, 4.1.1), either Subdue (remove) any one Gallic or Germanic Allied Tribe there (a disc, not a Citadel), or place a Roman Ally at an already Subdued Tribe there (not at Aedui [Bibracte], Arverni [Gergovia], or Suebi, 1.4.2).
The Romans must pay two Resources for each Fort and each Ally placed or removed above.
PLAY NOTE: A Roman tactic is to March into an enemy's Region and immediately Build a Fort. Doing so requires enough Forces to cancel enemy Control in order to establish a Supply Line, or already having a Roman Ally there.
4.2.2 Scout. Scouting can move Auxilia, Reveal Hidden Warbands, and keep them Revealed longer. It may accompany any type of Command. Select any Regions with Auxilia (even if no Leader nearby).
PROCEDURE: Move Auxilia as desired from any Regions to adjacent Regions, but not into or out of Britannia (Revealed stay Revealed, Hidden stay Hidden; no piece may move more than once). Then, in any Regions desired that are within one Region of Caesar or with his Successor in it, each Hidden Auxilia piece may flip to Revealed in order to Reveal up to two Warbands (flip from Hidden to Revealed, or leave Revealed, 1.4.3) in that Region and place Scouted markers on them (if none already).
NOTE: Scout movement may combine with accompanying March movement (3.2.2).
SCOUTED: Scouted markers delay Revealed Warbands flipping back to Hidden: whenever an action (such as March, 3.3.2, 3.4.2) or an Event (5.0) would flip a Scouted Warband to Hidden, instead remove the Scouted marker and keep the Warband Revealed. (Scouted markers are removed and all Warbands go Hidden at the end of Winter, 6.6.)
Warband states: Hidden; Revealed; Revealed & Scouted.
NOTE: Put a single Scouted marker on each group of Scouted Warbands of the same Faction in a Region.
4.2.3 Besiege. Besieging helps subdue enemy tribes, especially Citadels. It may only accompany Battle (3.2.4). Once announced, it may modify any Battle Regions during that Command that both have at least one Legion and a Defender who has a Citadel or Allied Tribe. NOTE: Besiege does not have a Special Ability's usual need of a nearby Leader (4.1.2).
PROCEDURE: In those Battles, before and in addition to any Losses (even 0 Losses) inflicted on the Defender, the (Roman) Attacker may automatically remove (Subdue) a Defending Citadel or Allied Tribe (no roll, Attacker's choice which), regardless of whether or not the Defender is Retreating. NOTE: A Defender with a Citadel still suffers only half Losses that Battle, even after the Citadel is removed (3.2.4).
4.3 Arverni Special Abilities
The Arverni choose from Entreat, Devastate, or Ambush Special Abilities.
4.3.1 Entreat. Entreaties sponsor betrayals of allegiance from the enemy to the Arverni. They may accompany any type of Command. Select Regions that have a Hidden Arverni Warband, and are either within one Region of Vercingetorix or the same Region as his Successor.
PROCEDURE: Pay one Resource per Region selected to replace either any one non-Arverni Warband or Auxilia there or—only if the Region is already Arverni Controlled—one Aedui, Belgic, or Germanic Allied Tribe there (not a Citadel, Roman Ally, or Subdued Tribe) with their Arverni counterparts (one Arverni Warband for each enemy Warband or Auxilia, one Allied Tribe per enemy Allied Tribe). If the specified Arverni piece is not available or could not stack (such as at Aedui [Bibracte] or Suebi), remove rather than replace the target piece (1.4.1, 1.4.2).
4.3.2 Devastate. Devastation starves armies and hinders many actions. It may accompany any Commands. Select any Arverni-Controlled Regions that either are within one Region of Vercingetorix or have his Successor in it.
PROCEDURE: In each Region, the Arverni remove one in four of their Warbands there, and each other Faction removes one in three of its total number of Warbands, Auxilia, and Legions there (round down; owners choose which pieces among candidates; Legions to Fallen). Place a Devastated marker in each selected Region that does not already have one. A Region may have only one Devastated marker.
NOTE: Devastated markers block Recruit (3.2.1) and Rally by all except Vercingetorix (Arverni Leader, 3.3.1), double the Resource costs of many Commands (3.2.2,-.4; 3.3.1,-.2,-.4), halt Roman and Vercingetorix March (3.2.2, 3.3.2), block Roman Seizure of Resources (3.2.3), hinder Raid (3.3.3), and make it harder for Forces to Quarter in a Region over Winter (6.3).
4.3.3 Ambush. Ambush improves the attacker's prospects in battles about to be fought. It may only accompany Battle. Once announced, it may modify any Battle Regions during that Command that both begin with more Hidden Arverni than Hidden Defenders and occur either within one Region of Vercingetorix or in the same Region as his Successor.
PROCEDURE: Battles modified by Ambush alter their procedure (3.2.4, 3.3.4, 3.4.4) thus—
- The Defender may not Retreat (but may use any Fort or Citadel normally).
- The Defender must remove a piece for each Loss suffered, including Leader, Legion, Citadel, or Fort without first rolling a 1-3. EXCEPTION: Romans Defending in the same Region as Caesar on a die roll of 4, 5, or 6 retain the usual ability to absorb Losses by rolling a die and removing only on 1-3.
- There is no Counterattack (Attacker takes no Losses) except if Caesar rolled a 4-6 above.
4.4 Aedui Special Abilities
The Aedui choose from Trade, Suborn, or Ambush Special Abilities.
4.4.1 Trade. Trade garners Aedui Resources, representing profit from the distribution of imported Roman goods. It may accompany any type of Command. It occurs in Regions that are part of any Supply Lines to Cisalpina (3.2.1).
PROCEDURE: Player Factions declare whether or not they agree to Supply Lines in Regions they Control; the Romans declare regardless of whether they Control any relevant Regions. (The Aedui may call off the Trade if unhappy with any disagreement, 1.5.2.) The Aedui then receive +1 Resource—or, if the Romans agreed above, +2 Resources—for each of the following within Supply Lines:
- Each Aedui Allied Tribe and Aedui Citadel.
- Where Aedui Control only—each Subdued Tribe and, only if the Romans agreed above, each Roman Allied Tribe.
PLAY NOTE: The Aedui can offer some of the added Resources to gain agreement.
4.4.2 Suborn. Suborning buys allegiance to the Aedui or others, greater or less subservience to Rome, or neutrality. It may accompany Rally, March, or Raid and occur in any one Region with a Hidden Aedui Warband.
PROCEDURE: Pay two Aedui Resources per Ally and one Aedui Resource per Warband or Auxilia to remove and/or place a total of up to three such pieces in the Suborn Region (in any combination). A maximum of one of the three pieces removed or placed in the Region may be an Allied Tribe (no Citadels). Any Faction's pieces may be involved. Place Allies only at Subdued Tribes (place only Aedui at Aedui [Bibracte], only Arverni at Arverni [Gergovia], only Germanic at Suebi, 1.4.2).
NOTES: Control is not needed to Suborn Allies. The Convictolitavis Capability (5.3) would enable the Aedui to Suborn a total of six pieces (at most two Allies), three in each of two Regions.
4.4.3 Ambush. Aedui Ambush works the same as Arverni Ambush (4.3.3) except using Aedui instead of Arverni pieces. No Leader is required, but the Aedui may only Ambush in a maximum of one Region per Battle Command.
4.5 Belgic Special Abilities
The Belgae choose from Enlist, Rampage, or Ambush Special Abilities.
4.5.1 Enlist. Enlist invites help from Germanic kinsmen. It may accompany any Command and affect Regions in or adjacent to Germania or Regions that are further from Germania but have Germanic pieces in them. The affected Regions also must be within one Region of Ambiorix or have the Belgic Successor in it.
PROCEDURE: Choose one of two options below.
- Either, in the affected Regions desired, the accompanying Belgic Command treats Germanic Warbands (black) as if they were Belgic Warbands (yellow), including for placing new Warbands by Rally, Marching groups out of an affected Region into adjacent Regions (whether the destination is affected by Enlist or not), flipping Marching Warbands to Hidden, resolving Raid or Battle, or determining Belgic Control. Command costs and other Command restrictions and procedures apply normally. The Belgae may not voluntarily remove the Germanic Warbands, however (1.4.1). As soon as execution of the current Belgic Command is completed, so is Enlist, and all Germanic Warbands again are treated as Germanic (adjust Control).
- Or, execute one free Limited Command with Germanic pieces (per 3.4, making choices as if a Germanic player; no March upon Frost, 2.3.8). The Region need not be one selected for the Belgic Command, but must be in the usual vicinity of the Belgic Leader for a Special Ability. Marching Germans must begin in but need not stay within the affected Regions; they may enter or leave Britannia. Battling Germans must be able to Ambush (3.4.4), and Ambush whenever they Battle.
ENLIST EXAMPLE: The Belgae, with Ambiorix in the Nervii Region, Rally (3.3.1) and Enlist to place two Germanic Warbands there, plus one Germanic Warband in the Treveri Region (as if placing Belgae), for three Resources total (3.3.1).
4.5.2 Rampage. Rampaging demonstrates Belgic ferocity, in order to frighten enemy Forces out of one or more Regions and sometimes to compel their surrender. It may accompany Rally, Raid, or Battle. It may occur in any Regions both with Hidden Belgic Warbands present and either within one Region of Ambiorix or with the Belgic Successor present.
PROCEDURE: In each Rampage Region, a Region at a time—
- Select one target Roman or Gallic Faction (not Germanic) that has neither a Leader, nor a Citadel, nor a Fort in the Region.
- That target Faction must either remove or Retreat one of its Warbands, Auxilia, and/or Legions (no roll) per Hidden Belgic Warband in the Region that the Belgae flip to Revealed. Removed Legions go to Fallen (1.4.1).
- Retreat per the Battle procedure (3.2.4 & 3.3.4)—into one adjacent Region where the targeted Faction or a Faction that agrees at that moment has Control (not No Control nor Germanic Control).
4.5.3 Ambush. Belgic Ambush works like Arverni Ambush (4.3.3), but uses Belgic instead of Arverni pieces (including Ambiorix instead of Vercingetorix), and Caesar must roll a 5 or 6 for Romans to roll for Losses and Counterattack.
5.0 Events
Each Event bears a Faction Order (2.3), title, italicized flavor text, and Event text. Flavor text adds historical interest; it has no effect on play.
5.1 Executing Events
When a Faction executes an Event, it carries out the Event text literally and in the order given (sometimes involving actions or decisions by other Factions). Unless otherwise specified, the executing Faction makes all selections allowed for in implementing the text, such as which pieces are affected. Some Events with lasting effects have markers as aids to play. NOTE: Instructions to place pieces, unless otherwise specified (such as by "any"), mean the placing Faction's pieces.
EVENT CARD ANATOMY: Laurels (regards Non-players, 8.2.1); Faction Order; Title; Italicized Flavor Text; Event Text; Capability Indicator (5.3); Shaded Text (see Dual Use 5.2).
5.1.1 Events vs Rules. When executing Event text, follow normal rules, such as restrictions and procedures for free actions granted (5.4), unless otherwise specified. Where Event text contradicts rules, the Event takes precedence, except that:
- Events never place pieces that are not Available (1.4.1); they remove rather than replace if the replacement is not available. NOTE: The executing Faction can remove own pieces to make them Available (1.4.1).
- Events may not violate stacking (1.4.2) unless their text explicitly changes stacking rules. NOTE: The only Events that do so are Colony, Gallia Togata, and Gobannitio. Events remove rather than replace pieces if the new piece would violate stacking.
- Events do not raise Resources above 45; any excess Resources are lost (1.8).
- Instructions to Reveal or Hide pieces affect only Warbands and Auxilia (1.4.3). Events that flip Scouted Warbands to Hidden instead remove the Scouted marker (4.2.2).
- Events that shift the Senate when Firm (toward the opposite end) instead flip the Senate marker (regardless of boxes to be shifted, 6.5.1) and that shift up from Uproar or down from Adulation instead set it to Firm.
EXAMPLE: Event text that says "free March" allows March even upon Frost (2.3.8).
NOTE: For help executing a particular Event, see the "tips" in the Playbook Event Notes.
5.1.2 Dueling Events. If two Events contradict, the currently played Event takes precedence.
5.1.3 Partial Execution. All of an executed Event's text that can be carried out (within any selections that the text allows, 5.1), must be; if not all can be, carry out that which can.
5.1.4 Event Markers. A few Events with lasting effects note in their text to place or flip reminder markers on the map. (See also Capabilities, 5.3.)
5.2 Dual Use
Most Events have both shaded and unshaded Event text. The executing Faction may select either the unshaded or shaded text to carry out (not both). While the shaded text often favors various Gauls, a player may select either text option regardless of Faction.
DESIGN NOTE: Dual-use events represent opposed effects of the same cause, alternative interpretations, or forks in the historical road.
5.3 Capabilities
Events marked "CAPABILITY" have lasting effects that either help or hurt one or more Factions. When executing such text, put the card near the most affected player and place a "Capability" marker on its appropriate side (shaded or unshaded) onto the card. The Event's effects last for the rest of the game (unless altered by a later Event, 5.1.2).
NOTE: "CAPABILITY" marked on the boundary between unshaded and shaded Dual-use text (5.2) means that both versions are Capabilities.
5.4 Free Actions
Many Events allow the Executing or other Factions immediate Commands or Special Abilities that interrupt the usual sequence and are free: they cost no Resources and do not further affect Eligibility (3.1.2, 2.3.1). Other aspects such as location requirements remain, unless modified by Event text (5.1.1). Events granting an unspecified "Special Ability" may only select Besiege (4.2.3) and Ambush (4.3.3) if an accompanying Battle Command (3.2.4, 3.3.4, 4.1.1) is also occurring as part of the Event. Events stating "Ambush" alone grant an inherent accompanying Battle Command.
EXAMPLE: Aedui free Rally (3.3.1) would cost 0 Resources and not affect Aedui Eligibility but still could not occur in Devastated Regions unless otherwise specified, such as by allowing "Rally in any Region". Aedui free Suborn (4.4.2) would allow placement and/or removal of three pieces in one Region at 0 cost.
NOTE: Free March or Scout "in" a Region allows Forces there to move out to other Regions (3.2.2, 4.2.2).
6.0 Winter
As each Winter card is played, conduct a Winter Round in the sequence of phases below. The Sequence of Play sheet and game board also list this sequence.
NOTE: The next card may be viewed normally during resolution of a Winter card (2.3.7).
6.1 Victory Phase
If any Faction has met its Victory condition, the game ends now (EXCEPTIONS: Spare Factions, 1.5.1; 54BC scenario, 2.1; and 1-Player, 8.9); see Victory (7.0) to determine winner and rank order. If it is the final Winter card (2.4.1), the game also ends; determine victory per 7.3. If neither, continue the Winter Round.
6.2 Germans Phase
Germanic Forces Rally, March, Raid, and Battle with Ambush as follows.
NOTE: Individual Germanic pieces may participate in several types of Commands during the course of a single Germans Phase.
6.2.1 Germanic Rally.
- First, Rally to place as many Germanic Allied Tribes as possible per the Rally procedure (3.3.1, 3.4.1), starting with Suebi, then others in the Germania Regions, then elsewhere.
- Then Rally in those and other Regions to place as many Germanic Warbands as possible (including where Allies were just placed, and in un-Devastated Germania Regions even if no Germanic Allies there).
- Choose among otherwise equal locations randomly (using an equal chance die roll).
- Adjust Control as needed.
6.2.2 Germanic March.
- Next, form a group of Germanic Warbands to March out of each Region that has at least one Germanic Warband beyond the pieces needed for Germanic Control (1.6), regardless of any Rally there. NOTE: Germans where no Germanic Control or where exactly enough for such Control therefore would not move.
- March out with as many Warbands as possible without losing Germanic Control. Move the largest Warband groups first.
- Move into at most one Region with each group (3.3.2, 3.4.2). Select destination Regions first so that the moving groups can add Germanic Control (so, not yet German-Controlled), then (among such Regions if possible, otherwise among others) Regions that are Controlled by player Factions (not Non-players, 8.0), then other Regions. Choose among equal candidate locations randomly.
- Adjust Control as needed.
- Flip all Germanic Warbands to Hidden (or remove their Scouted markers, 4.2.2). (Warbands that did not move in effect Marched within their Regions.)
6.2.3 Germanic Raid.
- Then, Raid (3.3.3, 3.4.3) with as many Germanic Warbands as able per below, only against Factions.
- Raid only against Factions that have more than 0 Resources (and no Fort or Citadel) and only until they reach 0 Resources.
- Raid against player before Non-player Factions (8.0). Otherwise, choose randomly among target Factions within a Region.
6.2.4 Germanic Battle with Ambush.
- Finally, Battle with Ambush (3.3.4, 3.4.4, 4.1) in each Region where the Germans currently are able to do so (only wherever Hidden Germanic Warbands are with another Faction with fewer Hidden pieces) and would cause an enemy Loss. Adjust Control as needed.
- Battle player before Non-player Factions (8.0).
- Choose the order of the Battles and among otherwise equal candidates in each randomly.
6.3 Quarters Phase
Each Faction relocates its Forces on the map as follows (adjusting Control as needed, 1.6).
NOTE: Factions may transfer Resources during the Quarters and Harvest Phases (1.5.2).
6.3.1 Germans. All Germanic Warbands in Devastated Regions (4.3.2) without German Allies and outside Germania relocate to Germania. Roll a die and relocate all of them to the Sugambri Region on 1, 2, or 3, or the Ubii Region on a 4, 5, or 6.
6.3.2 Gauls. First the Belgae, then the Aedui, then the Arverni relocate and roll for their own Warbands and Leaders on the map as follows:
- They may relocate any such pieces to any adjacent Regions without Devastated markers (4.3.2) and under Control (1.6) of their Faction or a Faction that agrees (not No Control nor German Control).
- Then they must roll a die for each Warband they have in Devastated Regions in which they have neither Allied Tribe nor Citadel and remove the Warband on a roll of 1-3.
6.3.3 Romans. The Romans may relocate any Legions, Auxilia, and Roman Leader on the map to adjacent, un-Devastated Regions under Roman Control or Control of a Faction that agrees (not No Control nor German Control, 1.6). Then, the Romans may relocate any Legions and Auxilia from Supply Line Regions (3.2.1, determined at this time for the rest of the Quarters Phase) and then the Roman Leader from any Region to Provincia. Finally, for each Legion and Auxilia piece in Regions outside Provincia, the Romans must choose one:
- Pay to keep it in place—one Roman Resource if the Region has a Roman Allied Tribe, or two Roman Resources if not, or twice that amount (two or four total) if it is Devastated (4.3.2). One such piece per Roman Ally and per Fort may stay in that Region without such payment.
- Roll a die and remove the piece on a 1-3 (Legion to Fallen).
NOTE: Getting the Roman Leader to Provincia adds Auxilia during the Senate Phase (6.5.3).
QUARTERS RELOCATE EXAMPLE: Romans Control the Mandubii Region, the Aedui Control the Sequani Region, and the Aedui player agrees to allow a Roman Supply Line there, reaching Cisaplina (3.2.1). The Romans relocate two Legions from Mandubii to Provincia; Arverni Control of Provincia does not block the Supply Line so is ignored.
6.4 Harvest Phase
Add to each Faction's Resources, to a maximum of 45 each (1.8), as follows.
6.4.1 Roman Earnings. The Romans receive Resources equal to their current Victory score (Subdued plus Dispersed plus Roman Allied Tribes, 7.2).
6.4.2 Gallic Earnings. The Arverni, Aedui, and Belgae each receive Resources equal to twice the number of that Faction's Allied Tribes and Citadels.
6.4.3 River Tolls. The Aedui receive a further +4 Resources.
6.5 Senate Phase
The Roman Senate weighs in on the Gallic campaign and sends reinforcements to Gaul.
DESIGN NOTE: The Senate marker embodies all political affairs in Rome affecting the Gallic war.
6.5.1 Senate Marker. Various Events (5.0) and this Senate Phase shift the Senate marker up or down or flip it between "Firm" and not:
- Any shift toward "Uproar" (or "up") when the Senate marker is already at Uproar instead flips it to Firm (if not already Firm); any shift toward "Adulation" (or "down") when already at Adulation, also flips it to Firm instead. Any other shift (toward the opposite end) when Firm instead flips the marker back to normal (without moving it).
- In this phase, if the current Roman Victory score is below 10, shift the Roman Senate marker by one box (row) toward Uproar (or flip the marker per above). If Roman Victory is anywhere from 10 to 12, shift Roman Senate toward Intrigue. If Roman Victory exceeds 12, shift Roman Senate one row toward Adulation (or flip per above). EXCEPTION: Do not shift down (toward Adulation, including to Intrigue from Uproar) if any Legions are in the Fallen box.
6.5.2 Legions. One half (rounded down) of Legions in the Fallen Legions box will remain unavailable to reenter the map this Winter. Move the rest from Fallen to the Legions Track, filling lowest rows first. Then place into Provincia all Legions that are on the same row as the Roman Senate marker or above that row.
NOTE: The Roman player may not decline these Legions, nor are any Legions removed from the map in this phase. Adjust Control of Provincia, if needed.
6.5.3 Auxilia. If the Roman Leader is in Provincia, place the following number of Auxilia from Available into that Region: three Auxilia if the Senate is in Uproar, four if Intrigue, five if Adulation.
6.6 Spring Phase
Prepare for the coming year as follows:
- Factions place any Successor Leaders (symbol end down, 1.4.3) that they have in Available Forces onto the map where that Faction has a piece or a Home Region "Rally" or "Recruit" symbol (1.3.1).
- Move any remaining Fallen Legions to the Legions Track (1.4.1).
- Remove all Scouted markers (4.2.2), then flip all Revealed Warbands and Auxilia to Hidden (1.4.3). (All such pieces end the phase Hidden.)
- Remove all Devastated markers (4.3.2).
- Remove all Dispersed-Gathering markers (only), then flip all Dispersed Tribes to Dispersed-Gathering (1.7, 3.2.3). (Do not remove or flip Razed marker from the Sacking Event, 5.0)
- Mark all Factions Eligible (2.3.1).
- Play the next card from the draw deck and reveal the draw deck's new top card (2.3.7).
7.0 Victory
Each Roman and Gallic Faction has unique victory conditions, covered below and on the Faction aid sheets.
NOTE: The Germanic Faction does not track or achieve victory.
7.1 Ranking Wins and Breaking Ties
Whenever any Non-player Faction passes a victory check (7.2), all players lose equally. Otherwise, whenever any player does so or if none does by game end, the Faction that reached the highest victory margin (7.3) comes in 1st place, 2nd-highest comes in 2nd place, and so on. Ties go to any Non-players (8.0), then the Romans, then the Arverni, then the Aedui.
NOTE: If a player runs two Factions, see 1.5.1. If playing solitaire, see 1-Player Victory, 8.9.
7.2 Exceeding Victory Threshold
Check victory upon each Victory Phase (6.1), comparing the various victory totals (in some cases, victory markers, 1.9) to the thresholds noted on the Faction foldouts or below. Victory conditions are—
- Romans: Subdued plus Dispersed plus Roman Allied Tribes exceeds 15.
- Arverni: Off-map Legions (Fallen, plus on the Legions Track, plus removed by Event) exceed six and Arverni Allied Tribes plus Arverni Citadels exceeds eight.
- Aedui: Aedui Allied Tribes plus Citadels exceeds those of each other Faction (Gallic, Germanic, and Roman; do not count Forts).
- Belgae: Total Belgic Control Value (Tribe spaces under Belgic Control, regardless of Allies, and neither Dispersed nor Suebi) plus Belgic Allies and Citadels exceeds 15.
PLAY NOTES: To check the Roman score, add up the numbers of non-Roman Allies and Citadels on the map—as shown on the four Gallic and Germanic Available Forces displays (1.4.1)—and subtract that sum from 30 (the total number of Tribes on the map, or from 31 if the Colony Event added a Tribe).
The Arverni, unlike the other Factions, must fulfill both of two separate conditions.
Belgic Control Value equals the sum of the Control Value of all Regions under Belgic Control (1.3.1, 1.6), including +1 for a Region with the "Colony" Event marker (5.0), and -1 for any non-Suebi Dispersed Tribe (3.2.3). For example, if the Belgae had Control of the Morini Region with both Tribes there as Belgic Allies, that would add four to Belgic victory, two each for the Control and the Allies.
DESIGN NOTE: A Region's Control Value equals the number of Tribes in the Region, except for Germania's two Suebi Tribes, a guide to that Region's value to the Belgae. Belgic victory derives in part from Control, to depict their more warlike nature than that of Gauls in closer Roman contact—the Belgae seek to dominate regions' inhabitants not only via alliance but militarily, by presence of warriors.
7.3 During the Final Winter
If play reaches the final Winter Round (2.4.1, including game end via the Optimates Event) and no Faction has met its condition set forth in 7.2, the Faction with the highest victory margin wins. A victory margin is the amount a Faction is beyond or short of its condition—
- Romans: Subdued plus Dispersed plus Roman Allied Tribes – 15.
- Arverni: Lower of off-map Legions – 6 or Arverni Allied Tribes and Citadels – 8.
- Aedui: Aedui-Allied Tribes and Citadels – those of the other Faction with the most.
- Belgae: Belgic Control Value + Belgic Allied Tribes and Citadels – 15.
NOTE: The margin will be positive if the Faction has reached its goal, negative or zero if not.
STOP! You have read all rules needed to play with four players, or with two or three players running spare Factions among them (1.5.1).
8.0 Non-Players
This section governs Roman and Gallic Factions as an option to substitute for players when fewer than four players are available, including for solitaire (1.5). NOTE: If players among themselves are running the Romans and the three Gallic Factions, this entire section is not needed! "Non-players" can substitute for any of the four player Factions, but the following combinations are recommended:
- With three players, use either the Belgae or Aedui Non-player and play the other three Factions.
- With two players, play Romans and Arverni and use the Belgae and Aedui Non-players.
- With one player, play Romans or Arverni and use the remaining three Non-players
NOTE: The Germanic Tribes Faction is not a player and has its own rules in sections above, especially 3.4 and 6.2. The term "Non-player" refers to a substitute for a Gallic or Roman Faction typically run by a player.
The following four subsections (8.1-8.4) apply to all Non-player Factions. They are summarized on the "Non-Player Guidelines" aid sheet.
8.1 Non-Players and Sequence of Play
A Roman or Gallic Faction run by rules section 8 is a Non-Player. Whenever such a Non-Player Faction has an opportunity to act by the Sequence of Play (2.3), consult its Non-Player flowchart sheet and the corresponding rules herein (8.5-8.8) to determine its actions, such as which Command it will execute, or whether it will opt for an Event, or will Pass. Non-players follow the same rules as players—normal Resource costs, requirements, and procedures apply—except as specified in rule 8.1.2 (Limited Commands).
8.1.1 Command or Event? When a Non-player has a choice between Event and Command, the flowchart will show which it selects. In general, Non-players decline the following Events:
- Ineffective Events—those that, in the current situation and following any relevant Non-player instructions (8.2.1), either would have no effect or would merely Reveal (1.4.3) own pieces (EXAMPLE: Battle that cannot cause an enemy Loss). Adding or removing a Capability is an effect.
- Capabilities (5.3) during the last year of the game (when the next Winter will be final).
- "No" Events listed at the bottom of each Non-player flowchart sheet (and on the Non-player Instructions sheet) and noted by crossed swords at that Faction's symbol on that Event card (8.2.1).
INEFFECTIVE EVENT EXAMPLE: Non-player Belgae are Eligible to play shaded Flight of Ambiorix. Ambiorix is on the map, so nothing would happen. The Belgae opt for a Command and Special Ability instead.
8.1.2 Non-Player Commands Not Limited. When a 2nd Eligible Non-Player by the Sequence of Play is to execute a Limited Command (2.3.4-.5), the Non-player instead receives a full Command plus a Special Ability option. NOTE: A Limited Command by Event, such as Druids, remains Limited (5.1.1).
DESIGN NOTE: Non-players receive this benefit to aid them against cleverer human players.
8.1.3 Reading the Flowcharts. The Second Edition Non-Player flowcharts show priorities with circled numbers (e.g., black-circled 1 and 2, white-circled 1 and 2) and colored letters (e.g., A, B) to indicate their order and nature:
- Numbered priorities (e.g., black-circled 1, white-circled 1) are sequential priorities. Execute the instructions in each sequential priority to the maximum extent before moving to the next sequential priority (8.3). Some top-level sequential priorities (black circles; e.g., 1, 2) contain further sequential priorities (white circles; e.g., 1, 2) that are parts of and sequential steps to that top-level priority.
- Lettered priorities (e.g., A, B) are nested priorities. Nested priorities act as tie breakers within the sequential priorities to which they are ordained. Each nested priority further narrows the thus-far selected set of spaces or targets. For readability, nested priorities have a shaded background.
8.2 Executing Events
When a Non-player by their flowchart is to execute an Event, apply the following.
8.2.1 Instructions. Certain Events have instructions for certain Non-player Factions. The cards for these Events have gray symbols at the edges of that Faction's symbol as a cue:
- Laurels indicate that the Event has a special instruction for that Non-player Faction on the Non-Player Instructions sheet, about how that Non-player will execute the Event. Some Instructions call for treating the Event as a "No" Event (8.1.1), under certain circumstances—return to the flowchart to determine a Command.
- Swords indicate that that Non-player Faction will decline the Event and execute Command and Special Ability instead (8.1.1). Such Events are listed as "No" Events on both that Faction's flowchart and that Faction's section of the Event Instructions sheet.
- A Carnyx (Celtic battle trumpet) at the Arverni symbol indicates that the Non-player Arverni will automatically execute the Event without first rolling a 1-4 (8.7.2). Such Events are listed as "Auto 1-4" on both the Arverni flowchart and section of the Event Instructions sheet.
When a Faction executes an Event that gives actions to another, Non-player Faction, the 2nd Faction's Event special instructions (if any) apply to how it executes them.
EXAMPLE: An Aedui player executes unshaded Germanic Chieftains, causing a Non-player Roman to March Germans; the Event has laurels at the Roman symbol—check the Roman Non-player Event instructions for Germanic Chieftains.
8.2.2 Dual Use. As noted on the Non-player flowcharts, Non-player Arverni and Belgae opt for shaded Event text (5.2), if any, Roman and Aedui unshaded.
NOTE: Instructions (8.2.1) may reverse this guidance for certain Events.
8.2.3 Event-Driven Actions. Unless Non-player Instructions (8.2.1) for a given Event specify otherwise:
- When Non-players by Event text are to carry out Commands and/or Special Abilities (free actions, 5.4; or Winter Campaign), follow that Faction's Non-Player flowchart to implement them (unless otherwise specified in Event Instructions, 8.2.1), applying the flowchart's conditions and priorities to the relevant Regions (including for Commands with Germans, such as shaded Surus). For multiple free Non-player Commands (such as "March then Battle"), use the priorities for the first. NOTE: If a choice among Commands, use the Faction's flowchart to select one. If there is a choice among Special Abilities alone, follow the flowchart to see which Command and Special Ability is selected, but ignore the Command. For free March when the flowchart does not point to a particular March box, use the bottom one.
- When there is a choice of who gets Event benefits (such as free actions, Capabilities, Resources, or pieces), Non-players select themselves only. If not possible, treat the Event as Ineffective and select a Command instead (8.1.1). EXAMPLE: Non-player Arverni are up for shaded Dumnorix Loyalists but have no Warbands Available; the text offers a choice of replacing enemy pieces with "any Warbands"; in order to carry out the Event fully (5.1.3), Arverni would have to select and place another Faction's Warbands, so they execute Command & Special Ability instead.
- Within the above (if applicable), select Event spaces to ensure that as many Legions, then Citadels, then Allies, then other pieces as possible are placed, removed, or replaced (8.3.1). Within that, use the priorities in 8.4.1.
- When a Non-player executing an Event has a choice that is not otherwise prioritized, choose randomly among the possibilities (8.3.4).
8.3 Selecting Regions, Tribes, or Targets
When executing Non-player actions, select Regions, Tribes, or target Factions per Command and Special Ability priorities on the Non-Player flowcharts and corresponding rules below (8.5-8.8), and per specific Event Instructions (8.2.1) if any, and otherwise general Event guidelines above (8.2.3), as applicable. Do so for each individual listed priority in order, until there are no more legal candidates or actions for that priority, or until any space limit within that priority is reached. Then move on to the next priority and do the same, until any overall limit for the Command or Special Ability is reached, or until the Faction runs out of Resources (if applicable). Sometimes, priorities will provide a precedence of what should be selected first; if not, select equal candidates randomly per below (8.3.4).
8.3.1 Event Location Selection. Within above guidelines for Event-driven actions (8.2.3) and Event Instructions (8.2.1, if any), Non-players select Event Regions and Tribes (including for use of Capabilities) to benefit themselves first; then to ensure that Event text "places" the most own or "removes" or "replaces" the most enemy Legions, then Citadels, then Allies, then other pieces possible (net by Faction); then randomly. Unless otherwise specified, carry out actions as fully as possible in the selected Region before moving on to select others.
8.3.2 Placing Leaders. Place Leaders as soon as able (by Event, Spring, or scenario special rule) where the most own pieces.
8.3.3 Using Capabilities. Non-players use Capabilities that they have received that apply to a limited number of Regions in the first Regions that apply, unless otherwise specified.
8.3.4 Random Selection. Similarly to Germanic actions during the Germans Phase (6.2), whenever equal candidate Regions, Tribes, or target Factions are offered to a Non-player, select using an equal-chance die roll.
PLAY NOTE: In the rare case of more than six candidates, split them into multiple groups of six or less, as evenly as possible; roll to select a group; then roll within the group, spare numbers calling for a full reroll. For example, with seven candidates, a roll of 1-3 selects the first four, 4-6 the last three; then a roll of 1-4 if the first set, 1-3 if the second selects the final candidate; any other second roll requires a reroll of the first die.
8.4 Other Guidelines
Unless otherwise specified, Non-players carry out whatever actions apply to the maximum extent (such as in the most Regions or with the most pieces allowed, and only as long as needed pieces and Resources are Available).
8.4.1 Placing, Moving and Removing Pieces. Unless otherwise specified, once spaces involved are selected (8.2.3), Non-players as possible:
- Place and move own and target or remove enemy Leaders, then Legions, then Citadels or Forts, then Allied Tribes in Cities or at Remi, then other Allied Tribes, then Hidden before Revealed before Scouted enemy Warbands or Auxilia; take Losses on or remove own pieces in the reverse order.
- Within that, if Belgae or Arverni, target Romans, then Aedui, then each other, then Germans; if Roman or Aedui, target Arverni, then Belgae, then Germans, then each other.
- As they are able, move their own pieces to end the move with at least four of their own Warbands or Auxilia in the same Region as their Leader.
- Remove pieces to be replaced even if no pieces are Available to replace them.
- Never voluntarily remove own pieces (1.4.1).
NOTE: See also Placing Leaders, 8.3.2 above.
8.4.2 Transfer, Agreement, Harassment. As specified on their flowcharts:
- Non-player Belgae and Arverni never voluntarily transfer Resources (1.5.2), nor agree to have Regions they Control be part of a Supply Line (3.2.1) or used for another Faction's Retreat (3.2.4) or Quarters (6.3). Non-player Aedui and Romans sometimes do so, for Romans or Aedui (8.6.6, 8.8.6).
- Non-player Belgae and Arverni Harass Roman March and Seize (3.2.2, 3.2.3) wherever they can. Non-player Aedui and Romans Harass Vercingetorix March (3.3.2).
8.4.3 Non-Player Retreat. Non-Players Retreat (3.2.4) from enemy Battle as follows:
- When needed to ensure the survival of their last Defending piece.
- If Roman, when needed to lower the number of forced Loss rolls against Legions.
- If defending without a Fort or Citadel and a Retreat itself would not remove any defending pieces, when they cannot guarantee inflicting at least half the Losses against the Attacker that they will suffer (regardless of how many pieces might be removed by the Losses).
Gauls Retreating from Romans leave all Hidden Warbands in place. Retreating Non-players join their Leader with the greatest number of own pieces possible (in place or adjacent).
8.4.4 Frost and Player Victory. While a Winter card is showing (2.3.8), Non-players take no action that could directly (through that Non-player's actions alone) advance any player Faction above or any further beyond its victory threshold (7.2), including via any die roll outcome or player agreement. The Non-player instead moves on to the next candidate target or priority.
NOTE: This restriction applies to one player games, even though the player does not win before the final Winter (8.9). It does not apply to advancing other Non-players.
8.5 Non-Player Belgae Actions
This subsection governs actions by the Belgae Faction when a Non-player, as shown on the "Non-Player Belgae" flowchart sheet.
NOTE: It is not necessary to master the lengthy rules below before playing; use the flowcharts and refer here only as needed for clarification of the charts' shorthand. Also, see the Playbook for examples and illustrations.
8.5.1 Battle or March under Threat? Non-player Belgae, when Eligible, check for threats or Battle opportunities and, if any, either Battle against or March away from those threats. If the Belgae have Ambiorix or a group of at least four Belgic Warbands in any Region where any non-Germanic enemy (Romans, Arverni, or Aedui) has an Ally, a Citadel, a Legion, or separately at least four pieces, the Belgae may Battle, as follows.
The Belgae will Battle (maybe with Ambush or Enlist, or after Rampage, see below) only in Regions where they will inflict more Losses on the enemy (3.3.4) than they will suffer, and no Loss on Ambiorix, presuming all Defender Loss rolls result in Defender removals (the best possible case for the Belgic Attack), and taking into account any Special Ability such as Ambush, and so on:
- First, check whether Ambiorix meets the initial Battle-or-March condition above (he is with a non-German enemy that has at least four pieces, an Ally, Citadel, or a Legion). If he does but nevertheless will not Battle (because he could not guarantee enough enemy Losses, would suffer a Loss himself, or is outnumbered—see below), the Belgae do not Battle at all, but instead March per below.
- Next, check whether the first Battle Region will result in Ambush and, if not, whether Rampage will precede Battle, or whether instead any Battles will include Enlist. (See the relevant sections below.)
- Now the Belgae Battle the enemies triggering the Battle condition above. Within that, first Ambiorix fights against such an enemy that has fewer mobile pieces (Leader, Legions, Auxilia, Warbands) than the Belgae do (if it is possible within the Loss requirements above).
- Finally, the Belgae next Battle non-German enemies where they can (where the Belgae are able to inflict more Losses than they will suffer). (Set order or targets among equal candidates randomly, 8.3.4). They select applicable Battle Regions until they run out of candidate Regions or of Resources. NOTE: Non-player Belgae do not Battle against Germans.
If no Battle occurred per the above priorities, the Belgae instead March as follows:
- March all mobile Belgic Forces out of each Region that either meets the "Battle or March under Threat" condition above or has the Belgic Leader but not the single largest group of Belgic Warbands on the map. Keep Marching groups from each origin together. March first with the Belgic Leader (and the Belgic Warbands with him) then with other groups.
- The above Marching groups move into at least one destination Region and up to the number of destinations equal to the number of origin Regions. They do not enter any of the above Regions that other Belgae are departing. Within those restrictions, they March so that each Marching group ends within a distance of one Region of (same or adjacent to) the most Regions that have Belgic pieces possible. Within that objective, they choose Regions that have no Belgic Control so as to add the most Belgic Control (victory score, 7.2) possible (if any, and otherwise random).
IF NONE: If no Battle or March occurred (including because Belgae have 0 Resources, or because Frost blocked March per 2.3.8), proceed to 8.5.2 below to consider whether the Belgae will Pass or play the Event.
AMBUSH: If the Belgae are Battling per above, can Ambush in any of those Battles, they do so—but only where the enemy's Retreat out of that Region could lower the number of pieces it would remove, or Battle could allow a Counterattack to inflict at least one Loss on the Belgae (3.3.4). NOTE: A defending Legion or Leader would meet the 2nd requirement, because it could survive multiple die roll Losses to then inflict one Loss in Counterattack.
- If they Ambushed in the 1st Battle per above, they also do so in each other Battle possible.
- If no such Ambush is possible, the Belgae instead Rampage before Battle—or, if that is not possible, Enlist—per below.
RAMPAGE: The Belgae Rampage before the Command if Battle or after if Rally or Raid. They do so with whatever Hidden Warbands possible and as needed to remove or Retreat enemies—
- First, to force removal of pieces, assuming no Faction grants Retreat to their Control (4.5.2).
- Then, to add the most Belgic Control value.
- Then elsewhere, first to Retreat or Remove as many Romans as possible, then Aedui, then Arverni.
- However, the Belgae do not Rampage against the last target piece in any Battle Region (so that there will always still be a Battle).
- If no such Rampage is possible—or if the Command was March—the Belgae instead Enlist per below.
ENLIST: If there is any already selected Battle Region in which the Belgae could Enlist Germanic Warbands to add to enemy Losses and/or absorb Losses from a possible Counterattack, the Belgae do so (absorb Losses with Germanic Warbands before Belgic Warbands). If not, the Belgae instead Enlist to add a free Germanic Command in (or from) one Region, after executing their Command.
- If possible to inflict any Loss on an enemy, they cause the Germans to Battle against a player Faction or, if none, another Non-player.
- If not possible, they cause a Germanic March with at least two Warbands and the most Warbands able as follows. If able, move them out of a Belgica or Germania Region and into a Region Controlled by a player then Non-player enemy (Romans, Arverni, or Aedui). If not, March within a Region in order to Hide or remove Scouted markers from at least two Revealed Warbands and the most possible.
- If not able to so March, and if a German Rally could place a piece, they cause a Rally to place an Ally if able then most Warbands able.
- If not able to so Rally, they cause a German Raid against a player (only) who would lose at least one Resource to the Raid.
- If none apply, or if the Command was a March into or out of Britannia, the Belgae instead add no Special Ability (Command only, 2.3.4).
8.5.2 Pass or Event? If the initial Battle-or-March condition above is not met—or if no such Battle or March was possible—the Belgae might Pass in order to be 1st Eligible on the next card, or might play the Event.
- Check the Faction order (2.3.3) on the currently played and next showing cards. If the Belgic symbol is first of the four symbols on the next upcoming card but not on the currently played card (regardless of Faction Eligibility cylinders), roll a die to see if the Belgae Pass (2.3.3): on a roll of 1-4, they Pass. NOTE: Thus, they do not Pass if 1st on both cards or if Winter is showing.
- If the Belgae do not Pass, check whether they have the option to execute the Event (because they are 1st Eligible, or because the 1st Eligible Faction used a Special Ability, 2.3.4). If not, proceed to 8.5.3 below to consider whether the Belgae will Rally. If so, check whether the Event would be Ineffective, would add a Capability during the game's final year, or is listed as "No Belgae" (8.1.1; the Belgae symbol on the card would have gray crossed swords, 8.2.1)—if any apply, proceed to 8.5.3 Rally.
NOTE: If the Belgae symbol on the Event card has gray laurels, see the Non-player Belgae section of the Event Instructions sheet (8.2.1).
- If none of the above applies to the Event, the Belgae execute it per 8.2. NOTE: Any Non-player Belgae Event Instructions (8.2.1) may render the Event Ineffective or "No Belgae"; if so, proceed to 8.5.3.
8.5.3 Rally? If the Belgae have neither Battled, Marched, Passed, nor executed the Event, they Rally if doing so would place a Belgic Ally, a Citadel, or at least three Belgic Warbands total, or if it would add to Belgic Control. NOTE: If the Belgae have 0 Resources, a normal (not free, 5.4) Rally would not place any pieces.
- First, replace a Belgic Ally in a City with a Citadel.
- Then, place all Belgic Allies possible.
- Finally, place all Belgic Warbands possible, first where they would add any Belgic Control.
RAMPAGE OR ENLIST: After Rallying, the Belgae Rampage or Enlist per 8.5.1 above.
8.5.4 Raid? If no other Command, Pass, or Event conditions were met, the Belgae will either Raid to replenish Resources or March. Check the Belgae's Resources—if fewer than four Resources, roll a die and on a roll of 1-4, they attempt to Raid. If Raiding per below would gain the Belgae at least two Resources total, they Raid wherever they can, in the following order.
- First, Raid to take Resources from players; within that, Romans then Aedui then others.
- Then Raid in non-Devastated Regions without taking Resources from any Faction (do not take Non-players' Resources).
IF NONE: If the Belgae are to Raid but cannot gain enough Resources per above, they Pass.
RAMPAGE OR ENLIST: After Raiding, the Belgae Rampage or Enlist per 8.5.1 above.
8.5.5 March to add Control? If the Belgae did not Battle, March, Rally or play the Event per the above, and they have at least four Resources or have fewer Resources but rolled a 5 or 6, they March into up to three Regions to claim Control and to join their Leader with a larger group of Warbands.
- First, March Warbands to add Control to one Region—a Belgica Region if possible; within that, where the movement of the fewest Warbands is needed to do so.
- If the above destination is in Belgica, move in with the most Warbands able, but leaving one Belgic Warband behind per origin Region and enough not to remove any Belgic Control; if not in Belgica, move in the fewest Warbands to take Belgic Control.
- Then, March into a 2nd Region per the above priorities, if able.
- Finally, March the Belgic Leader alone into one of the destination Regions above if needed to join him with the largest number of Belgic pieces able, or alone to another Region if needed to end the Command with a group of at least four Belgic Warbands. NOTE: The Leader's move may result in the removal of Belgic Control from a Region.
IF NONE: If the Belgae cannot so March (for example, during Frost, 2.3.8), they instead Raid per 8.5.4 above.
ENLIST: After Marching, the Belgae Enlist per 8.5.1 above. (If they Marched into or out of Britannia, they add no Special Ability, 4.1.3.)
8.5.6 Quarters. During Quarters Phase (6.3.2), Non-player Belgae first leave Devastated Regions where they have no Ally or Citadel for random adjacent Regions that they Control (if they can). They then (or thereby) move their Leader and/or one group of Warbands, so as to join the Leader with the largest group of Belgic Warbands able and, within that, to get or keep the Leader within one Region of the most Regions with Belgic Forces able. They leave behind at least one Warband and at least the number Warbands needed to retain any Belgic Control.
8.6 Non-Player Aedui Actions
This subsection governs actions by the Aedui Faction when a Non-player, as shown on the "Non-Player Aedui" flowchart sheet.
8.6.1 Event? Unlike other Non-players, the Aedui first check about either Passing to be 1st Eligible on the next card or playing the Event.
- Check the Faction order on the currently played and next showing cards. If the Aedui symbol is 1st on the next upcoming card but not on the currently played card (regardless of Faction Eligibility cylinders), roll a die: on a roll of 1-4, the Aedui Pass (2.3.3).
- Otherwise, check if the Aedui have the option to play the Event (because they are 1st Eligible, or the 1st Eligible Faction used a Special Ability, 2.3.4); if not, they proceed to 8.6.2 below to consider doing Battle.
- If they do have that option, check whether the Event would be Ineffective, would add a Capability during the game's final year, or is listed as "No Aedui" at the bottom of the flowchart (8.1.1; the Aedui symbol on the card would have swords, 8.2.1)—if so, proceed to 8.6.2.
NOTE: If the Aedui symbol on that card has laurels, see Aedui on the Event Instructions sheet (8.2.1).
- If none of the above applies, the Aedui execute the Event per 8.2. NOTE: Any Non-player Aedui Event Instructions (8.2.1) may render the Event Ineffective or "No Aedui"; if so, proceed to 8.6.2 Battle.
8.6.2 Battle? If the Aedui do not play the Event, they next check for an opportunity to harm key enemy pieces in Battle. If Aedui Battle in any Region would be sure to inflict a Loss on an enemy Leader, Ally, Citadel, or Legion (accounting for which enemy the Aedui would Battle, any Aedui Ambush, a possible enemy Retreat, Aedui Resources, and so on), the Aedui Battle.
- Battle against other Gauls or Germans; Battle against Romans only if the Aedui are at that moment exceeding their victory threshold (the Aedui have more Allies plus Citadels than any other Faction, 7.2).
- Battle first to inflict Losses on such enemies' Leaders, Allies, Citadels, or Legions. Then Battle in additional Regions where the Aedui are sure to inflict at least one Loss and at least as many Losses on the enemy as they will take (again accounting for Ambush and so on).
AMBUSH: If the Aedui are Battling per above, they Ambush in the first of those Battles in which the enemy's Retreat out of that Region could lower how many pieces it would remove, and/or a Counterattack could inflict at least one Loss on the Aedui (3.3.4).
- If no such Ambush is possible, the Aedui instead Trade after Battle per 8.6.3 below.
8.6.3 Rally? If the Aedui did not play the Event nor Battle, they Rally if they have fewer than five Warbands on the map, or if Rallying (alone, without any Suborn) would place a Citadel, Ally, or at least three pieces (Warbands) total.
- First, replace any Allies in Cities with Citadels.
- Then, place all Allies possible.
- Finally, place all Warbands possible.
IF NONE: If the Aedui have fewer than five Warbands but were unable to Rally any pieces, they instead Raid per 8.6.4 below.
TRADE: Then, if either the Aedui just Battled (8.6.2), or Aedui Resources are at that moment below 10, or if Aedui plus Roman Resources together add up to less than 15, the Aedui might Trade. They Trade only if either the Aedui are currently acting as the 2nd Eligible Faction (2.3.4) or if Trading would earn the Aedui more than two Resources, accounting for which other Factions agree to a Supply Line (4.4.1); players must now say whether they agree or not (Non-player Romans always agree, 8.8.6). If the Aedui Trade, they do so for all the Resources they can obtain.
- If no such Trade is possible, the Aedui instead Suborn per below or—if the Command was a Battle or included March into or out of Britannia—they add no Special Ability.
SUBORN: In one Suborn Region, or in each of two Suborn Regions if the unshaded Capability Convictolitavis is in effect, the Aedui:
- Place an Aedui Ally, if possible.
- If not able to do so, instead remove an enemy's Ally—first, from the Faction that currently has the most Allies plus Citadels total (and therefore is most hindering Aedui victory); within that priority, remove a Non-player Roman's Allies only when no other enemy Ally can be removed.
- Once no more Allies can be affected, continue by placing all Aedui Warbands able; then by removing most Arverni, then Belgae, then Germanic Warbands able; finally, by removing Auxilia.
- If none of the above is possible, add no Special Ability (executing a Command only).
8.6.4 Raid? If Rallying would not be able to place the required pieces, check Aedui Resources. If they have fewer than four Resources and roll 1-4 on a die, they attempt to Raid. Otherwise, they will attempt to March per 8.6.5 below. If attempting to Raid, they carry through only if doing so would gain them at least two Resources total (otherwise Pass per below). They Raid wherever they can, in the following order.
- First, Raid to take Resources from any player Factions currently at 0 or better victory margin (7.3), then from any other non-Roman enemies, then in non-Devastated Regions from no Faction (only; do not take Resources from Romans unless player at 0+ victory).
IF NONE: If the Aedui have fewer than four Resources and rolled a 1 through 4 but cannot gain enough Resources per above, they Pass.
8.6.5 March? If the Aedui did not Battle, Rally, Raid, nor play the Event, have at least four Resources, or have fewer Resources but rolled a 5 or 6, they March to spread their Suborning emissaries into enemy territory and perhaps to claim Control of a new Region.
- Move Warbands to achieve the following only as possible without removing last Aedui Warband or Aedui Control from any Region.
- First, they move out of just one Region to add one Hidden Aedui to each of up to three adjacent Regions that has no Hidden Aedui Warband at the moment. Select as the first destinations, Regions with Allies or Citadels of the enemy Factions that currently have the most Allies or Citadels total.
- Then, if possible, they move Warbands to add Aedui Control to one Region (possibly in addition to Control just added, or to add Control to a destination above). They do so by moving fewest Warbands possible.
IF NONE: If the Aedui cannot so March (for example, because of Frost, 2.3.8), they instead Raid per 8.6.4 above.
TRADE OR SUBORN: After Marching, the Aedui Trade or Suborn per 8.6.3 above (unless the March moved into or out of Britannia, 4.1.3).
8.6.6 Resources, Supply Lines, Retreat. Non-player Aedui do not voluntarily transfer Resources (1.5.2) to Arverni or Belgae, nor agree to Arverni or Belgae movement into Aedui-Controlled Regions in Retreat (3.2.4) or Quarters (6.3). However, the Non-player Aedui will transfer 10 Resources to the Romans at each instant that Roman Resources drop below two while the Aedui have more than 20 Resources; will allow Roman Retreat or Quarters into Aedui Control, and will agree to a Supply Line (3.2.1) in Aedui-Controlled Regions during Roman actions if any of the below apply.
- The Roman is a Non-player.
- The Roman is a player and has a victory score (Subdued+Dispersed+Allies, 7.2) of less than 10.
- The Roman is a player and has a victory score of 10, 11, or 12, but only on a die roll of 1-4.
If Non-player Aedui failed to agree to a Roman Supply Line because the above roll was a 5 or 6, the Roman player may rechoose the current action (Recruit, 3.2.1; Build, 4.2.1; or Quarters relocation, 6.3.3), if desired.
NOTE: Non-player Aedui do not so transfer Resources to Roman players—nor agree to a Roman Supply Line/Retreat/Quarters—while the Roman score is above 12. They never Harass Roman March or Seize; they Retreat the same as other Non-players (see 8.4.2-.3).
8.6.7 Quarters. During the Quarters Phase (6.3.2), Non-player Aedui move only to leave Devastated Regions where they have no Ally or Citadel, if they can.
8.6.8 Diviciacus. While the unshaded Capability Diviciacus is in effect, the Non-player Aedui agree to have Aedui Warbands act as Auxilia during Roman Command or defense only while the Roman victory score (Subdued+Dispersed+Allies, 7.2) is 12 or less and never where Romans are Battling or Scouting against Aedui. During their own Commands, Non-player Aedui use Auxilia as Aedui Warbands to the maximum degree that Romans agree (including removing Auxilia instead of Warbands), except that they place Auxilia by Rally only if the Roman is a Non-player and no Aedui Warbands are Available.
8.7 Non-Player Arverni Actions
This subsection governs actions by the Arverni Faction when a Non-player, as shown on the "Non-Player Arverni" flowchart sheet.
8.7.1 Battle or March under Threat? Non-player Arverni, when Eligible, check for threats calling for either fight or flight, especially involving Vercingetorix. If the Arverni have Vercingetorix or a group of at least ten Arverni Warbands in any Region where the Romans or Aedui have an Ally, a Citadel, a Legion, or separately at least four pieces, the Arverni Battle (maybe with Ambush or after Devastate or Entreat, see below).
The Arverni do so only in Regions where they will force at least one Loss (roll or removal) on a Legion and/or will inflict more Losses on the enemy (3.3.4) than they will suffer—and only if no Loss on Vercingetorix is possible, presuming all Defender Loss rolls result in Defender removals (the best possible case for the Arverni Attack), and taking into account any Special Ability, Capability, and so on:
- First, check whether Vercingetorix meets the initial Battle-or-March condition above (he is with Romans or Aedui who have a Citadel, Ally, Legion, or at least four pieces). If he does but nevertheless will not Battle (because he could not guarantee enough enemy Losses, would suffer a Loss himself, or does not have enough Forces against Caesar—see below), the Arverni do not Battle at all, but instead March per below.
- For all Battle Regions, pay Resources as soon as selected, so that any Devastate or Entreat will occur after Battles are paid.
- Next, check whether the first Battle Region will result in Ambush and, if not, whether Devastate or Entreat will precede resolution of any Battles. (See those sections below.)
- Now the Arverni Battle the enemies triggering the Battle condition above. Within that, first Vercingetorix fights Romans. If Vercingetorix is with Caesar, he Battles only if the Arverni have more than twice as many mobile pieces (Warbands plus Vercingetorix) in the Region as do the Romans (Legions plus Auxilia plus Caesar) there.
- Finally, the Arverni next Battle against Romans or Aedui or player Belgae (only) in spaces that did not trigger the Battle Command above (and where the Arverni also meet the overall Loss restriction above). NOTE: Non-player Arverni do not Battle against Non-player Belgae or Germans.
If no Battle occurred per the above priorities, the Arverni instead March (if with Vercingetorix, within Harassment restriction below) thus:
- For all March origins, pay Resources as soon as selected, so that any Devastate or Entreat will occur after Marches are paid.
- First, Vercingetorix and all of his Warbands March out of his current Region into another Region, to join the most Arverni pieces able (resolving movement after any Special Ability, if possible, see below).
- Then, move all other Warbands possible to get them closer to Vercingetorix (counting by adjacent Regions), but leave one Arverni Warband behind in each origin Region.
VERCINGETORIX MARCH AND HARASSMENT: Arverni with Vercingetorix March into a 2nd Region (3.3.2) as needed to fulfill March priorities, by routes that will inflict the fewest possible Harassment Losses on them (3.2.4, including because a player Faction agrees that it will not Harass that March, 1.5.2), and only to Regions that they can reach suffering no more than three Losses that March and none on Vercingetorix.
IF NONE: If no Battle or March occurred, proceed to 8.7.2 below to consider the Event.
AMBUSH: If the Arverni are Battling per above and can Ambush in the first of those Battles, they do so—but only if the lack of Ambush would allow the enemy's Retreat out of that Region to reduce its pieces removed, or would allow a Counterattack to inflict at least one Loss on the Arverni (3.3.4). NOTE: A defending Legion or Leader would meet the 2nd requirement, because it could survive multiple die roll Losses to then inflict one Loss in Counterattack.
- If they Ambushed in the 1st Battle per above, they also do so in each other Battle possible.
- If no such Ambush is possible, the Arverni instead Devastate before Battle—or, if not possible, Entreat before Battle—per below.
DEVASTATE: The Arverni, if able, Devastate immediately before they move (after paying for the Command) during a March away from a threat per above. If able to Devastate only after they move, they do that instead. They Devastate before a Battle Command, or after other March, Rally, or Raid.
- They Devastate wherever they can that will force removal of a Legion or two Auxilia or of at least one enemy piece and as many Roman plus Aedui pieces combined as it will Arverni pieces from the Region.
- If no such Devastate is possible, the Arverni instead Entreat per below.
NOTE: Executing Devastate (or Entreat, below) immediately before Vercingetorix's March away can save paying a 2nd Resource for selecting a now Devastated Region as March origin (3.3.2, 4.3.2), and ensures that Arverni with just one Resource spend it on the March rather than on any Entreat.
ENTREAT: As with Devastate, the Arverni Entreat immediately before moving (after paying for the Command) during a March away from a threat, if they can; if they can Entreat only after Moving, they do that. As with Devastate, they Entreat before a Battle Command, or after Rally, Raid, or other March.
- They Entreat first to replace (not just remove) any Aedui, then Belgic, then Germanic Allies possible with Arverni Allies.
- Then, they replace Auxilia where possible, then Aedui Warbands with Arverni Warbands.
- Then, (once no Arverni Warbands are Available) they remove Auxilia then Aedui Warbands. Finally. they remove (Subdue) Allies of player Factions (in the unlikely case that they had no Arverni Allies Available to replace them).
- If no such Entreat is possible (or if the Arverni Marched into or out of Britannia, 4.1.3), they add no Special Ability.
NOTE: In the rare case that Entreat prevents Battle by removing a lone target piece, instead March and Entreat per above.
8.7.2 Event? If the Battle-or-March condition above is not met—or if no such Battle or March was possible—the Arverni might play the Event.
- If the Arverni have no option to play the Event (because they are 2nd Eligible, and the 1st Eligible Faction executed the Event or a Command only, 2.3.4), proceed to 8.7.3 below to consider whether the Arverni will Rally.
- If they do have that option, check whether the Event would be Ineffective, would add a Capability during the game's final year, or is listed as "No Arverni" (8.1.1; the Arverni symbol on the card has swords, 8.2.1)—if any apply, proceed to 8.7.3 Rally.
- If none of the above applies, check whether the Event is listed as "Auto 1-4" (the Arverni symbol on the card would have a Carnyx battle trumpet, 8.2.1). If not, roll a die. If so, or if the die roll is a 1-4, the Arverni execute the Event per 8.2. If the die roll was a 5 or 6, instead proceed to 8.7.3.
NOTE: If the Arverni symbol on that card has laurels, see Arverni on the Event Instructions sheet (8.2.1). Also, any Non-player Arverni Event Instructions may render the Event Ineffective or "No Arverni"; if so, proceed to 8.7.3.
8.7.3 Rally? If the Arverni did not Battle, March, nor play the Event, they Rally if they have fewer than nine Warbands on the map, or if Rallying (alone, without any Entreat) would place at least two Citadels and/or Allies total, or at least six pieces.
- First, replace any Allies in Cities with Citadels.
- Then, place all Allies possible.
- Finally, place the most Warbands possible.
IF NONE: If the Arverni have fewer than nine Warbands but were unable to Rally any pieces, they instead March per 8.7.4.
DEVASTATE OR ENTREAT: After Rallying, the Arverni Devastate or Entreat per 8.7.1.
8.7.4 March to Spread? If no other conditions have yet been met, the Arverni might March to spread their ability to gain Allies. They do so if they have fewer than six Allies and Citadels total on the map, or if they have at least six Warbands in Available. If so (and it is not Frost, 2.3.8), the Arverni March from the fewest Regions they can and still achieve the following (if with Vercingetorix, avoiding Harassment per 8.7.1), leaving at least one Warband and any Warbands needed to keep any Arverni Control.
- First, add one Hidden Arverni to each Region possible that currently has no Hidden Arverni (without removing the last from any origin).
- Then, move the Arverni Leader with all Warbands from his Region to take Arverni Control of one Region with Roman or Aedui Control. Choose the Region that is within a distance of one Region from the most Regions possible that have Arverni pieces. This destination may not be Bibracte (the Aedui Home Region).
IF NONE: If the Arverni cannot so March, they instead Raid per 8.7.5 below.
DEVASTATE OR ENTREAT: After Marching to spread, Arverni Devastate or Entreat per 8.7.1.
8.7.5 Raid? If none of the above conditions were yet met, the Arverni either Raid to replenish Resources or March to mass their army, especially against the Legions. If Arverni have fewer than four Resources, roll a die and on a roll of 1-4, they attempt to Raid. If Raiding per below would gain them at least two Resources total, they Raid wherever they can, in the following order.
- First, Raid to take Resources from Romans, then Aedui, then Belgae, (whether player or Non-player) then in non-Devastated Regions from no Faction.
IF NONE: If the Arverni have fewer than four Resources but cannot gain enough Resources per above, they Pass.
DEVASTATE OR ENTREAT: After Raiding, Arverni Devastate or Entreat per 8.7.1.
8.7.6 March to Mass? If no other Command or Event conditions were met (including if the Arverni have at least four Resources, or have fewer Resources but rolled a 5 or 6), the Arverni try to March to mass a larger army around their Leader and approach the Romans in the field. The Arverni Leader Marches, along with as many Arverni Warbands as can reach his destination while achieving the following (avoiding Harassment per 8.7.1).
- Add Arverni Control to one Region that does not yet have it and contains at least one Legion. Select a Region with Caesar only if only the Arverni will end the move with more than twice as many mobile pieces (Warbands plus Vercingetorix) there as the Romans (Legions plus Auxilia plus Caesar).
- If the above is not possible, instead move the Arverni Leader and all Warbands possible to gather the largest number of Arverni pieces possible into one Region that is adjacent to at least one Legion. In this case, leave one Arverni Warband behind in each origin Region.
IF NONE: If the Arverni cannot so March (for example, because of Frost, 2.3.8, or because their Leader is not on the map), they instead Raid per 8.7.5 above.
DEVASTATE OR ENTREAT: After Marching to mass, Arverni Devastate or Entreat per 8.7.1.
8.7.7 Quarters. During the Quarters Phase (6.3.2), the Non-player Arverni first leave Devastated Regions where they have no Ally or Citadel for adjacent Regions that they Control, if they can. They then (or thereby) move their Leader and/or one group of Warbands, so as to join the Leader with the largest group of Arverni Warbands able (if any) and, within that, to get or keep the Leader within one Region of the most Regions with Arverni Forces able. They leave behind at least one Warband and up to those needed to retain any Arverni Control.
8.7.8 Vercingetorix's Elite. If the shaded version of the Vercingetorix's Elite Event is in effect, Non-player Arverni take Battle Losses first by rolling against their Warbands that take Losses as Legions, if they can.
8.8 Non-Player Roman Actions
This subsection governs actions by the Roman Faction when a Non-player, as shown on the "Non-Player Roman" flowchart sheet.
8.8.1 Battle or March under Threat? Eligible Non-player Romans check whether they should fight or flee from threats to Caesar or to Legions, or should subdue enemy allies. If Caesar or any Legion is in a Region where any Gaul (including Aedui) or Germans have an Ally, a Citadel, a Leader, or Control, or a Region where an immediate enemy Attack in Battle or Rampage (with any relevant Special Abilities or Capabilities) against the Romans would force a Loss roll against a Legion or against Caesar (3.3.4, 4.5.2), the Romans might Battle there (maybe with Besiege). They do so only in such Regions where that Defender would inflict less than half the Losses (die rolls or removals) on the Romans as the Romans would inflict, and no Losses at all against Caesar, presuming all Defender Loss rolls result in Defender removals (the best possible case for the Roman Attack), and taking into account any Special Ability, Capabilities, and so on:
- First, check whether Caesar meets the initial Battle-or-March condition above (he is with the listed enemy pieces, enemy Control, or a potent enough enemy to threaten a Legion Loss or his own person). If he does but nevertheless will not Battle (because he could not guarantee enough enemy Losses, or would suffer a Loss himself), the Romans do not Battle at all, but instead March per below.
- Next, check whether any Battle Regions will include Besiege at the outset of the Battles. (If not, Scout may follow; see the relevant sections below.)
- The Romans attack enemies who have—within the Regions triggering the Battle Command—first, any Leaders; within that, the most Warbands; then players first; then, most Allies plus Citadels; finally, highest victory margins (7.3).
IF NONE OR IF ENEMY AT VICTORY: If the condition above caused the possibility of Battle, but no Battle occurred—or if the condition did not apply but an enemy Faction currently has a victory margin of 0 or better (7.3) while Caesar is in a Region with at least two Legions and at least four Auxilia—the Romans instead March (from a maximum of three origin Regions) as follows:
- The Romans will March out with their Leader; with as many Legions as able; and with at least one Auxilia per origin (if any there), plus with the most Auxilia there that are able to leave without Roman Control or adding enemy Control (not already caused by departure of other Roman pieces).
- First, the Romans will March out of one Region that met the "Battle or March under Threat" condition above (Caesar or a Legion is with an enemy Ally, Citadel, Leader, Control, or threatened Loss).
- Then, they will March out of a second such Region (if any)—but only if that second Region will not be the destination of the Roman group departing the first origin Region above (so check per below where that group will be going).
- Finally, they also will March out of one Region (first with their Leader, then with the most Legions not yet Marching) that is free of enemy Allies and Citadels.
The above Roman Forces March to two Regions, each of which has an enemy Ally or Citadel; however, if just six or fewer Legions are on map and it is possible for all on-map Legions and the Roman Leader (if on map) to reach a single such destination, they do so (March to just one Region). The Romans choose their destination enemy Allies or Citadels as follows, within the Harassment restrictions noted below.
- First, to Allies or Citadels of enemies with a victory margin of 0 or higher (7.3)—if tied, players before Non-players, then randomly.
- Then, if the above does not apply, roll a die: on a roll of 1 or 2, March to Germanic Allies—but only if there are at least two Germanic Allies total on the map.
- Or—if the roll is a 3 or 4—March to the Allies or Citadels of any players before those of other Factions.
- If neither of the above applies, including on a roll of 5 or 6, March first to Allies or Citadels of whichever enemies have most Allies plus Citadels on the map.
- Within any of the above priorities, March first to Regions where the most damaging possible enemy Battle (including any applicable Special Ability or Capability) immediately after that March would force the fewest Losses on the Romans; then where the most of that enemy's Allies and Citadels; then so as to end in a Region with a Supply Line (3.2.1); then where the route results in the least possible Harassment.
- If Marching to two Regions, move Forces so as to end with more mobile Romans by each type (Leader, Legions, and Auxilia) in the first destination Region than in the second destination, to the degree possible (such as within any need to use Caesar to enable Forces to reach priority destinations per all the above).
ROMAN MARCH AND HARASSMENT: Romans March by routes that will inflict the fewest possible Harassment Losses on them (3.2.4, including because a player Faction agrees that its Warbands will not Harass that March, 1.5.2), and only to Regions that they can reach suffering no more than one Loss per group per destination Region and 0 on a Legion or piece moving alone. (See also first Scout section below.)
IF NONE: If no such Battle or March can occur, proceed instead to 8.8.4 below to Recruit.
BESIEGE: If the Romans are Battling per above, they Besiege at the start of Battle in any Region where they can Besiege and doing so is needed to ensure removal of an enemy Ally, and/or of a Citadel that might suffer fewer than three Loss rolls in that Battle.
- If the Romans would Besiege in any Battle Region per the above, they also do so in each other Battle possible.
- If no such Besiege is possible, the Romans instead Scout after Battle, per below.
SCOUT OUT HARASSING WARBANDS: If the Romans Marched, they Scout as needed and as able to diminish Harassment so as to reach March destinations (by Revealing Hidden Warbands in intervening Regions). If so, they continue to Scout with other Auxilia as detailed below (instead of Building).
BUILD: If the Romans Marched without Scouting against Harassment (or Seized, 8.8.5), they afterwards Build, spending no more Resources once Roman Resources drop below six (and not where any Seize occurred). (If the Romans are Recruiting, they Build before executing the Recruit, 8.8.4).
- First, place all Forts possible, first wherever Arverni, Belgae, or Germans have Warbands.
- Then, Subdue all Allies possible—first any Allies of Gallic Factions that have the highest victory margins (7.3); if tied, the Allies of players before others.
- Finally, place all Roman Allies possible.
- If no Build occurred, instead Scout per below.
SCOUT: If the Romans did not Besiege or Build, they Scout if doing so would have any effect (Auxilia would move, or any Warbands would be Revealed or have a Scouted marker placed on them, 4.2.2). Move Auxilia only so as to keep Roman Control, add no enemy Control, and lose no Supply Line from any Region that has Roman pieces.
- First, move Auxilia to end with at least four Auxilia in Caesar's Region (and keep at least four there for all of this Scout).
- Next, move Auxilia to adjacent Regions so as to add guaranteed Supply Lines (by removing Arverni, Belgae, player Aedui, or Germanic Control) to the most Regions possible that already have Roman pieces.
- Then, move pieces to join Auxilia not yet with Legions to the most Legions that they can reach in equal number by Region (and without diminishing the number of Regions with guaranteed Supply Lines per the above).
- Scout against as many Warbands as able, flipping Hidden Warbands to Revealed (and placing markers on them) before placing markers on already Revealed Warbands. If it is Frost (2.3.8), Scout against Germanic Warbands before any others.
- If no such Scout is possible (or if the Romans Marched into or out of Britannia, 4.1.3), the Romans add no Special Ability.
8.8.2 Event? If the initial Battle-or-March condition above is not met, the Romans might play the Event.
- If the Romans have no option to play the Event (because they are 2nd Eligible, and the 1st Eligible Faction executed the Event or a Command only, 2.3.4), proceed to 8.8.3 below to consider whether the Romans will March.
- If they do have that option, check whether the Event would be Ineffective, would add a Capability during the game's final year, or is listed as "No Romans" (8.1.1)—if any apply, proceed to 8.8.3 March.
- If none of the above applies, the Romans execute the Event per 8.2. NOTE: See the Non-player Roman Event Instructions (8.2.1)—they may render the Event Ineffective or "No Romans"; if so, proceed to 8.8.3.
NOTE: Check the Roman symbol on the Event card—gray swords mean that the Event is "No Romans", gray laurels that it has special Instructions for Non-player Romans (8.2.1).
8.8.3 March? If the Romans checked for the possibility of executing the Event but did not play it, they may March after all. Check the number of Auxilia on the Romans' Available Forces display—if eight or fewer, the Romans March per 8.8.1 above, including Build or Scout.
8.8.4 Recruit? If the Romans have more than eight Auxilia Available, they Recruit if doing so enables them to place at least two Roman Allies or at least six Roman pieces (Allies plus Auxiliaries) total, as follows (if possible, Building per 8.8.1 before Recruiting).
- First, place all Romans Allies possible, first in Regions that are part of a Supply Line (3.2.1, in order to save Resources).
- Then, place all Auxilia possible, again first in Regions that are part of a Supply Line.
- If Recruit would not place enough pieces, instead Seize per below.
BUILD OR SCOUT: Before Recruiting, the Romans Build per 8.8.1; or—if no such Build is possible—Scout per 8.8.1.
8.8.5 Seize? If the Romans executed none of the above Commands or an Event, they Seize—but only where no Harassment Losses will occur.
- First, the Romans Disperse as many Tribes as they can except the Helvii (in Provincia)—starting with those in Regions that have any players' pieces; within that, first in Belgica (then elsewhere).
- Then, the Romans Seize without Dispersing only so as to add all further Resources possible (without suffering any Harassment).
BUILD OR SCOUT: After Seizing, the Romans Build or—if not possible—Scout, per 8.8.1.
IF NONE: If the Romans executed no such Seize, other Command, or Event, they Pass.
8.8.6 Resources, Supply Lines, Retreat. Non-player Romans do not voluntarily transfer Resources (1.5.2). They allow other Factions' Retreat, Supply Lines (3.2.1), and Quarters (6.3) in Roman-Controlled Regions only for Non-player Aedui. (For Non-player Roman Retreat from Battle, see 8.4.2.)
8.8.7 Quarters. During the Quarters Phase (6.3.3), the Non-player Romans keep one Auxilia at each Fort and Roman Ally. The Roman Leader, all Legions, and all other Auxilia that are able to reach Provincia—including by first moving to an adjacent Supply Line Region—move to Provincia. The Romans then pay Resources for all pieces necessary to avoid removal rolls, starting with those at Roman Allies, then those where no Devastation, finally those at Devastation last.
8.8.8 Diviciacus. While the unshaded Capability Diviciacus is in effect, the Non-player Romans agree to have Auxilia act as Aedui Warbands during Aedui Commands only while the Aedui are not exceeding their victory threshold (7.2) and never where Aedui are Battling or Raiding Romans. During their own Commands, Non-player Romans use Aedui Warbands as Auxilia to the maximum degree that Aedui agree (including removing Aedui instead of Auxilia), except that they never place Aedui Warbands by Recruit. They do not agree to use of Auxilia during Aedui defense in Battle. (They do during Roman defense.)
8.9 1-Player Victory
The player in a 1-player game never wins before the final Winter. To succeed, the player must both avoid any Non-player exceeding its victory threshold during any Victory Phase (which would end the game then, 7.1-7.3) and have the highest victory margin upon the final Victory Phase.
1-Player Easy Option: Player Faction can win by exceeding its threshold any Victory Phase.
1-Player Difficult Option: Player Faction loses at any Victory Phase in which any Non-player has a higher victory margin.
NON-PLAYER VICTORY: Unless the player wins, the Non-player with the highest margin (ties per 7.1) takes Gaul:
- If Belgae—Lugdunensis Limit. Rome with difficulty incorporates Celtica into its empire, but reconsiders the wisdom of expansion into the inhospitable northern wilderness, leaving Belgica free of that yoke.
- If Aedui—Client State. The Romans remain, but they influence Gaul only through their powerful agent, the Aedui Confederation, which uses its friendship with the Senate and control of Roman trade to rule all rival tribes.
- If Arverni—Imperium Rebuff. As the Romans withdraw to lick their wounds and sort out their civil affairs, the victorious Arverni govern a Gaul that is finally unified under the Celts ...at least for a time.
- If Romans—Subject Gaul. Rome divides all Gaul into imperial Roman provinces, which Romanize and remain so for five centuries.
PLAYER VICTORY: If the player does survive to the final Winter and has the highest victory margin, subtract the highest Non-player margin from the player's to find the degree of success:
- 1 or 2—In Gallia Bella! Gaul remains restive for another generation, with Rome one of several potent factions, each of which retains the arms to defend its particular interests.
- 3 or More, Player as Roman—Imperator! Caesar and his successors cement their dominance as first citizens of Rome, and Gallia's position firmly within the Roman orbit.
- 3 or More, Player as Gaul—Galli ipsi gubernandi sunt! Out of Caesar's adventure, a single Gallic confederation emerges as the strongest and exploits the exhaustion of the others to rule Gaul, as the Romans turn inward, for now.
Setup (2.1)
General
Choose a scenario and any Sudden Frost (2.3.8) and Non-player (if fewer than four players, 1.5, 8.0, 8.9) options desired. Prepare the deck per the instructions below and per the scenario. Give each player a Faction foldout, and assign players their Factions (1.5, or see 8.0 Non-player option):
- 2-player—Romans and Aedui versus Arverni and Belgae.
- 3-player—Romans versus Aedui versus Arverni and Belgae, or Romans and Aedui versus Arverni versus Belgae.
- 4-player—A Faction each player, Romans, Arverni, Aedui, and Belgae.
Place each player's Available Forces display(s) near them and in view of all players (1.4.1). Place the Germanic Forces display near the east edge of the map. Put the wooden Forces pieces on their displays and all markers in a pile or receptacle within easy reach. Keep remaining aid sheets at hand. Set up the game board per the scenario, placing Forces and markers onto the board as listed. NOTE: Colors in the scenario setups highlight the setup of Forces for each Faction.
Deck Preparation
Separate out the five Winter cards. Shuffle the Event cards and randomly deal them into a number of facedown piles of five cards each as specified in the scenario. Shuffle one Winter card into certain five-card piles, as the scenario specifies. Stack the first pile onto the second onto the third, and so on, to form a single facedown draw deck in easy view of all players. Set aside any remaining Event and Winter cards—they will not be used and may not be inspected.
Scenarios (2.1)
Players and Victory
If a player is running only the Belgae, or if a single player is running the Romans and Aedui, at setup flip the Belgic Successor to Ambiorix (representing Ambiorix's return or the advent of a great successor).
A single player running the Arverni and Belgae uses the highest of the two Factions' victory margins rather than the lowest (1.5.1, 7.3).
The Great Revolt
52 BC, Spring: The crisis of the Gallic War nears. Belgic rebel king Ambiorix has fled Roman reprisal. But young Vercingetorix has turned all Celtica but the Aedui against Caesar. Will this final uprising throw the Romans out at last?
This short scenario begins with the Arverni already mobilized, and the Belgae just beaten back. Caesar is free to concentrate on Vercingetorix, while the Aedui play pivot. The scenario is well suited for three players, with either the Arverni or the Non-player system running the Belgae. Rules below adjust the historical situation to the number of players.
Deck
Deal 45 Events into nine piles of five Events each. Shuffle one Winter card each into the 3rd, 6th, and 9th piles. Stack the piles, 1st pile on top, 9th at the bottom. (Or, if preferred for a shorter game, deal 30 Events into six piles with two Winter cards, one each in the 3rd and 6th piles.)
Edge Track
- Resources: Belgae 10, Aedui 15, Arverni 20, Roman 20
- Off-Map Legions: (Arverni Victory) 2
- Control+Allies: (Belgic Victory) 5
- Subdued+Dispersed+Allies: (Roman Victory) 12
Senate and Legions Track
- Intrigue
- 2x Legions on bottom row
Aedui Available Forces Display
- Other Most Allies: (Aedui Victory) 8+
(All Factions Eligible. All on-map Warbands and Auxilia start Hidden)
BELGICA
Morini Region — Belgic Control
- Morini: Belgic Ally
- 4x Belgic Warbands
Nervii Region — Roman Control
- Eburones: Dispersed – Gathering
- Roman Fort
- 2x Auxilia
- 1x Belgic Warband
- 1x Germanic Warband
Atrebates Region — Roman Control
- Bellovaci: Belgic Ally
- 1x Belgic Warband
- Remi: Roman Ally
- 2x Auxilia
GERMANIA
Sugambri Region — Belgic Control
- Belgic Successor (or Ambiorix: see "Players and Victory" above)
- 4x Belgic Warbands
- Sugambri: Germanic Ally
- Suebi (north): Germanic Ally
- 2x Germanic Warbands
Ubii Region — Germanic Control
- Suebi (south): Germanic Ally
- 1x Germanic Warband
CELTICA
Treveri Region — Roman Control
- 2x Germanic Warbands
- Roman Fort
- 2x Legions
- 2x Auxilia
Veneti Region — Arverni Control
- Namnetes: Arverni Ally
- 2x Arverni Warbands
Carnutes Region — Arverni Control
- Vercingetorix
- Carnutes
: Arverni Ally (no Citadel) - Aulerci: Arverni Ally
- 10x Arverni Warbands
Mandubii Region — Roman Control
- Senones: Arverni Ally
- 4x Arverni Warbands
- Mandubii
: Aedui Ally (no Citadel) - 4x Aedui Warbands
- Lingones: Roman Ally
- Roman Fort
- 8x Legions
- 2x Auxilia
Pictones Region — Arverni Control
- Pictones: Arverni Ally
- Santones: Arverni Ally
- 2x Arverni Warbands
Bituriges Region — Aedui Control
- Bituriges
: Aedui Ally (no Citadel) - 4x Aedui Warbands
Aedui Region — Aedui Control
- Aedui
: Aedui Citadel - 6x Aedui Warbands
Sequani Region — Arverni Control
- Sequani
: Arverni Ally (no Citadel) - Helvetii: Arverni Ally
- 1x Arverni Warband
Arverni Region — Arverni Control
- Arverni
: Arverni Citadel - Cadurci: Arverni Ally
- 10x Arverni Warbands
PROVINCIA — Roman Control
- Caesar
- 6x Auxilia
- Helvii: Roman Ally
- Roman Fort (permanent)
(BRITANNIA is empty)
Reconquest of Gaul
53 BC, mid-Winter: Belgic warbands have suddenly massed around the legions' dispersed winter garrisons, while defection from Roman rule stirs in Celtica. Can Caesar and the Aedui get north to beat back Ambiorix, before Vercingetorix unifies the Celts in resistance?
This main scenario begins with the Belgae having sprung a trap and close to victory. To the south, Vercingetorix is on the scene but has yet to rally the tribes he needs to challenge Caesar. While Rome's position appears strong in subdued tribes, the Arverni are about to undo that. The Romans must balance the Belgic emergency with pruning the budding Arverni rebellion, while their Aedui friends weigh how much and how long to help them do so.
Deck
Deal 60 Events into 12 piles of five Events each. Shuffle one Winter card each into the 3rd, 6th, 9th, and 12th piles. Stack the piles, 1st pile on top, 12th at bottom. (Or, if preferred for a shorter game, deal 45 Events into nine piles with three Winter cards, one each in the 3rd, 6th, and 9th piles.)
See setup illustration on back cover.
Edge Track
- Resources: Arverni 10, Belgae 10, Aedui 15, Roman 20
- Off-Map Legions: (Arverni Victory) 4
- Subdued+Dispersed+Allies: (Roman Victory) 14
- Control+Allies: (Belgic Victory) 15
Senate and Legions Track
- Intrigue
- 4x Legions on bottom row
Aedui Available Forces Display
- Other Most Allies: (Aedui Victory) 7
(All Factions start Eligible. All on-map Warbands and Auxilia start Hidden)
BELGICA
Morini Region — Belgic Control
- Morini: Belgic Ally
- Menapii: Belgic Ally
- 4x Belgic Warbands
- 1x Legion
- 1x Auxilia
Nervii Region — Belgic Control
- Ambiorix
- Nervii: Belgic Ally
- Eburones: Belgic Ally
- 4x Belgic Warbands
- 1x Germanic Warband
- Roman Fort
- 2x Legions
- 2x Auxilia
Atrebates Region — Belgic Control
- Atrebates: Belgic Ally
- Bellovaci: Belgic Ally
- 3x Belgic Warbands
- Remi: Roman Ally
- 1x Auxilia
GERMANIA
Sugambri Region — Germanic Control
- Sugambri: Germanic Ally
- Suebi (north): Germanic Ally
- 4x Germanic Warbands
Ubii Region — Germanic Control
- Suebi (south): Germanic Ally
- 4x Germanic Warbands
CELTICA
Treveri Region — Belgic Control
- Treveri: Belgic Ally
- 4x Belgic Warbands
- Roman Fort
- 1x Legion
- 2x Auxilia
Veneti Region
- Veneti: Dispersed – Gathering
Carnutes Region — Arverni Control
- Carnutes
: Arverni Ally (no Citadel) - 4x Arverni Warbands
Mandubii Region — No Control
- Senones: Arverni Ally
- 3x Arverni Warbands
- Lingones: Aedui Ally
- 3x Aedui Warbands
Bituriges Region — Aedui Control
- Bituriges
: Aedui Ally (no Citadel) - 3x Aedui Warbands
Aedui Region — Aedui Control
- Aedui
: Aedui Citadel - 3x Aedui Warbands
Arverni Region — Arverni Control
- Vercingetorix
- Arverni
: Arverni Ally (no Citadel) - 6x Arverni Warbands
PROVINCIA — Roman Control
- Caesar
- 4x Legions
- 6x Auxilia
- Roman Fort (permanent)
(BRITANNIA, Pictones Region, and Sequani Region are empty)
Pax Gallica?
54 BC, late Summer: For two years, the Gauls have remained pacified, allowing Caesar to probe first Germania, then Britannia. Three of his legions back on the mainland are busy building replacement ships and guarding harbors and provisions; they soon will need quarters among friendly Belgae to cope with a bad harvest. Drought and political calm mean little corn is stocked for war. While constant intrigues simmer in Rome, pre-Civil War machinations against Caesar are yet to boil. But chieftains of the Eburones, Treveri, Senones, and others are plotting—how long can peace in Gaul last?
This long scenario offers an extended buildup and a wider range of diversion from the story as it happened to play out historically.
Deck
Deal 70 Events into 14 piles of five Events each. Shuffle one Winter card each into the 2nd, 5th, 8th, 11th, and 14th piles. Stack the piles, 1st pile on top, 14th at bottom.
1st Winter Special Rules
Winter Track Setup:
- Winter marker in Quarters box
- 3x Legions in Harvest Phase box
- Senate marker in Senate box
- Vercingetorix in Spring box
During the 1st Winter Round:
Skip that Victory Phase (the game continues) and that Germans Phase. NOTE: The pre-position of the Winter marker in the Quarters box is a reminder.
At the start of that Harvest Phase, the Romans place the three Legions from the Winter Track into any Belgica Region(s).
At the start of that Senate Phase, instead of shifting the Senate, put its marker at Intrigue (not Firm).
Beginning that Spring Phase, the Arverni may at any time place Vercingetorix from the Spring box into any Region (symbol up).
Edge Track
- Resources: Arverni 5, Aedui 5, Belgae 5, Roman 8
- Off-Map Legions: (Arverni Victory) 7
- Control+Allies (Belgic Victory): 9
- Subdued+Dispersed+Allies: (Roman Victory) 20
Senate and Legions Track
- 4x Legions on bottom row
NOTE: During the first year, the Senate is not in Uproar, nor Intrigue, nor Adulation and does not shift.
Aedui Available Forces Display
- Other Most Allies: (Aedui Victory) 4
(All Factions start Eligible. All on-map Warbands/Auxilia start Hidden)
BRITANNIA — Roman Control
- Caesar
- 5x Legions
- 1x Auxilia
BELGICA
Morini Region — Belgic Control
- Menapii: Belgic Ally
- 1x Belgic Warband
Nervii Region — Belgic Control
- Ambiorix
- Eburones: Belgic Ally
- 2x Belgic Warbands
- 2x Germanic Warbands
- Roman Fort
Atrebates Region — No Control
- Bellovaci: Belgic Ally
- 2x Belgic Warbands
- Atrebates: Roman Ally
- Remi: Roman Ally
- 1x Auxilia
GERMANIA
Sugambri Region — Germanic Control
- Sugambri: Germanic Ally
- Suebi (north): Germanic Ally
- 4x Germanic Warbands
Ubii Region — Germanic Control
- Suebi (south): Germanic Ally
- 4x Germanic Warbands
CELTICA
Treveri Region — Belgic Control
- Treveri: Belgic Ally
- 1x Belgic Warband
Veneti Region
- Veneti: Dispersed Tribe
Mandubii Region — Arverni Control
- Senones: Arverni Ally
- 3x Arverni Warbands
- 2x Aedui Warband
Aedui Region — Aedui Control
- Aedui
: Aedui Ally (no Citadel) - 2x Aedui Warbands
Arverni Region — Arverni Control
- Arverni
: Arverni Ally (no Citadel) - 2x Arverni Warbands
PROVINCIA — Roman Control
- 2x Auxilia
- Roman Fort (permanent)
(Carnutes Region, Pictones Region, Bituriges Region, and Sequani Region are empty)
Key Terms Index
Accompanying—Command required for a Special Ability. (4.1.1)
Actions—Commands, Special Abilities, Events, and decisions in the Winter Round. (1.5.2, 3.0-6.0)
Adjacent—Regions next to each other for actions or Events, Britannia being a special case. (1.3.4)
Adulation—The bottom status of the Senate, best for Roman Faction. (6.5)
Aedui Confederation (Aedui)—A Gallic Faction. (1.0, 1.5)
Agreement—Negotiation binding during a Faction's action. (1.5.2, 8.4.2)
Allied Tribe (Ally)—Static Forces piece, a Tribe mobilized for war. (1.4)
Ambiorix—Named Belgic Leader. (1.4)
Ambush—Gallic and Germanic Special Ability to improve prospects in Battle. (4.3.3, 4.4.3, 4.5.3, 3.4.4)
Aquitania—Non-playable area. (1.4.2)
Arverni Confederation (Arverni)—A Gallic Faction. (1.0, 1.5)
Attack/Attacker—Step/Faction in Battle inflicting Losses on targeted Faction. (3.2.4, 3.3.4)
"Auto 1-4"—Event that Non-player Arverni opt for without a roll. (8.7.2)
Auxilia—Roman mobile Forces piece with aspects distinct from Legions and somewhat similar to Gallic and Germanic Warbands. (1.4)
Available—Forces in holding boxes, waiting to be placed. (1.4.1)
Battle—Command that removes enemy pieces. (3.2.4, 3.3.4, 3.4.4)
Belgic Tribes (Belgae)—A Gallic Faction. (1.0, 1.5)
Belgica—A cluster of three Regions in northern Gaul. (1.3)
Build—Roman Special Ability to place Forts or Subdue Tribes. (4.2.1)
Besiege—Roman Special Ability to Subdue Citadels. (4.2.2)
Britannia—A Region across the sea from Gaul but adjacent to it for most purposes. (1.3.4, 3.2.2, 4.2.2, 4.1.3)
Caesar—Named Roman Leader. (1.4)
Capabilities—Lasting Events that help or hurt a Faction's actions. (5.3)
Celtica—A cluster of Regions forming the larger part of Gaul. (1.3)
Cisalpina—An area bordering Ubii, Sequani, and Provincia that becomes playable as a Region only by Event. (1.3, 1.4.2, 3.2.1, 4.2.1, 4.4.1, 5.1.1)
Citadel—A static Forces piece, a Gallic-allied City fortified for war. (1.4, 3.3.1)
City—Tribe space that can receive a Citadel. (1.4.2)
Command—Core action that a Faction takes with its Forces. (3.0)
Control—Possession of more pieces in a Region or Region than all other Factions combined. (1.6)
Control + Allies—Belgic victory marker. (1.9, 7.2)
Control Value—Numeral in a Region showing what Belgic Control there adds to Belgic Victory. (1.3.1, 7.2)
Cost—Resources spent on an action. (3.1, 4.1, 6.3.3)
Cylinder—Token to mark a Faction's Resources or Eligibility. (1.8, 2.2)
Defend/Defender—Act as target/targeted Faction in another Faction's Battle. (3.2.4, 3.3.4)
Devastate—Arverni Special Ability to starve enemies. (4.3.2)
Devastated (Devastation)—Marker on a Region that has been acted upon by the Arverni Devastate Special Ability to hinder various actions there for the year. (3.2.1, 3.2.2, 3.3.1, 4.3.2, 6.6)
Dispersed—Marker placed on a Tribe by Roman Seize to block Ally placement or its Control for Belgic Victory. (1.4.2, 1.7, 3.2.3, 6.6, 7.2-.3)
Down—Senate shift toward Adulation. (6.5.1)
Dual Use—Event with two alternative sets of effects. (5.2)
Edge Track—Record of Resources and some Victory. (1.8, 1.9)
Eligible—Faction able to execute Event or Command: per Faction order, 1st and 2nd Eligible. (2.3, 2.3.1)
Enemy—Of a different Faction involved in an action such as Battle. (3.2.4)
Enlist— Belgic Special Ability to gain command of German Forces. (4.5.1)
Entreat—Arverni Special Ability to switch Tribal, Warband, or Auxilia allegiance. (4.3.1)
Event—Card with Faction order and text a Faction may execute. (2.3, 5.0)
Execute—Implement Event or conduct Command or Special Ability, for the latter, in one or more Regions. (2.3)
Faction—Role: Romans, Arverni, Aedui, Belgae, and (Non-player) Germans. (1.5)
Faction Order—Card symbols determining Eligibility. (2.3.2)
Fallen—Removed Legions temporarily held in a box. (1.4.1, 6.5.2, 6.6, 7.2-.3)
Final—Last Winter card. (2.4.1, 7.3)
Firm—Senate less prone to shifts. (6.5)
Flip—Switch a Warband, Auxilia, or marker to its opposite side. (1.4.3)
Forage—The aspect of the Seize action that gains Roman Resources. (3.2.3)
Forces—Warbands, Auxilia, Leaders, Legions, Allied Tribes, Citadels, Forts (pieces, not markers). (1.4)
Fort—Static Roman Forces piece representing fortifications in a Region. (1.4, 4.2.1)
Frost—Ban on March Commands during last card before Winter. (2.3.8)
Free—Command or Special Ability via Event that does not cost Resources or affect Eligibility. (3.1.2, 4.1, 5.4)
Friendly—Of the same Faction or another Faction that has agreed, such as to use of its Control. (1.5.2)
Gallic (Gaul)—Arverni, Aedui, and Belgic Factions. (1.0, 1.5)
Gathering—The back of a Dispersed marker, still Dispersed but only until the next Winter Round. (1.7, 6.6)
Germania—Regions east of Gaul. (1.3)
Germanic Tribes (German)—A 5th Faction, typically run by the game system. (1.5, 3.4, 6.2)
Group—Mobile pieces beginning together in a Region and moving together. (3.2.2, 3.3.2, 6.3.3)
Harassment—Losses caused by Hidden enemy Warbands during March or Seize. (3.2.2, 3.2.3, 3.3.2)
Harvest—A Winter phase during which Factions receive Resources. (6.4)
Hidden—Warband or Auxilia piece with symbol side down, affecting certain actions such as Scout, Retreat, Raid, and Ambush. (1.4.3, 4.2.2, 3.2.4, 3.3.3, 4.3.3, for example)
Hide—Flip Revealed Warband or Auxilia to Hidden. (1.4.3)
Home—Regions where Factions Recruit or Rally more easily. (1.3.1, 3.2.1, 3.3.1, 3.4.1)
Ineligible—Faction skipped in Faction order. (2.3.1-.2)
Instructions—Non-player Event execution guidance. (8.2.1)
Intrigue—The middle status of the Senate, neither most nor least favorable to the Roman Faction. (6.5)
Leader—Roman, Arverni, and Belgic mobile Forces pieces with numerous special aspects. (1.4; for example 3.2.1, -.2, -.4; 3.3.1, -.4; 4.1.2)
Legion—Roman mobile Forces piece with great hitting power and resilience. (1.4)
Legions—Track for Legions neither on the map nor Fallen. (1.4.1, 6.5)
Limited Command—Command in one Region with no Special Ability. (2.3.5, 8.1.2)
Loss—Automatic or possible die-roll-based removal of own piece from Battle or Harassment. (3.2.2, 3.2.3, 3.2.4, 3.3.2, 3.3.4, 3.4.4)
March—Command to move and hide Forces. (3.2.2, 3.3.2)
Mobile—Pieces that can move during March, Retreat, Quarters, etc.: Leaders, Legions, Auxilia, Warbands. (1.4, 3.2.2, 3.2.4, 3.3.2, 3.3.4, 6.3)
Next—Upcoming card. (2.2, 2.3.7)
No Control—Region not under any Faction's Control (uncontrolled). (1.6)
"No [Faction]" Event—Event that that Non-player Faction will decline. (8.1.1)
Non-Player—Gallic or Roman Faction run by the game. (1.5.1, 8.0)
Off-Map (Legions)—Not in any Region; Arverni victory marker. (1.9, 7.2)
Other Most Allies—Aedui victory marker. (1.9, 7.2)
Overflow Box—Area to help manage cases of overcrowding. (1.3.6)
Pass—Decline to execute an Event or Command when Eligible. (2.3.3)
Pawn—Token to designate Regions selected for actions. (3.1.1)
Phase—Part of a Winter Round. (6.0)
Piece—Warband, Auxilia, Legion, Leader, Allied Tribe (Ally), Fort, or Citadel (not markers like Dispersed). (1.4)
Place—Put a piece from off the map into a Region on the map. (1.4.1, 6.5)
Played—Pile with current card. (2.2)
Provincia—A Roman Home Region in the southeast of Gaul. (1.3.1)
Quarters—Winter phase forcing pieces to move or Resources to be paid. (6.3)
Raid—Gallic or Germanic Command to take Resources. (3.3.3, 3.4.3)
Rally—Gallic or Germanic Command to place pieces. (3.3.1, 3.4.1)
Rampage—Belgic Special Ability to frighten enemies away. (4.5.2)
Recruit—Roman Command to place pieces. (3.2.1)
Region—Map area. (1.3.1)
Remove—Take from map, for most Forces, to Available; for Legions, to Fallen or the Legions track. (1.4.1)
Replace—Place a piece in another's stead. (1.4.1, 4.3.1 for example)
Resources—Player Factions' wherewithal for Commands. (1.8)
Retreat—Move away from Battle or Rampage. (3.2.4, 3.3.4, 4.5.2)
Retreat Region—A Region to which Retreat from Battle or Rampage is allowed. (3.2.4, 3.3.4, 4.5.2)
Reveal—Flip Hidden Warband or Auxilia to Revealed. (1.4.3)
Revealed—Warband or Auxilia symbol up; other Forces always. (1.4.3)
Rhenus—River bordering Germania slowing Roman March (1.3.5, 3.2.2)
River Tolls—Added Aedui revenue during Harvest. (6.4.3)
Roman Republic (Romans)—A non-Gallic player Faction. (1.0, 1.5)
Round—Series of phases comprising Winter. (6.0)
Scout—Roman Special Ability to move Auxilia and Reveal Warbands. (4.2.2)
Scouted—Marker and Warband status caused by Scout Command. (4.2.2)
Seize—Roman Command to garner Resources, Disperse Tribes. (3.2.3)
Select—Choose an action's locations or targets. (3.1, 4.1, 5.1)
Senate (Roman Senate)—Marker showing Rome's political posture toward Caesar. (1.4.1, 6.5)
Sequence of Play—Order of activities for either an Event card or Winter. (2.0, 6.0)
Shaded—2nd choice of Dual-Use Event, often anti-Roman. (5.2)
Shift—Move Senate up (toward Uproar) or down (toward Adulation). (6.5)
Special Ability—Faction-specific action accompanying a Command. (4.0)
Spring—Winter Phase at to ready for the coming year and next card. (6.6)
Stacking—Limits on pieces that can occupy a space. (1.4.2)
Subdue—Remove Ally or Citadel from a Tribe circle. (1.3.2, 1.7)
Subdued—Tribe that is neither Allied nor Dispersed. (1.7)
Subdued + Dispersed + Allies—Roman victory marker. (1.9, 7.2)
Suborn—Aedui Special Ability. (4.4.2)
Successor—Leader that replaces a removed named Leader. (1.3, 6.6)
Sudden Frost—Alternative Frost rule option. (2.3.8)
Supply Line (Supply)—Chain of Regions affecting Recruit, Build, Trade, and Quarters. (3.2.1, 4.2.1, 4.4.1, 6.3.3)
Target—Enemy Faction or piece that is the object of an action. (3.1, 4.1)
Trade—Aedui Special Ability that garners Resources. (4.4.1)
Transfer—Move Resources among Factions. (1.5.2, 1.8)
Tribe—Named space that can hold an Ally disc. (1.3.2, 1.7)
Unshaded—1st choice of Dual-Use Event, often pro-Roman. (5.2)
Up—Senate shift toward Uproar. (6.5.1)
Uproar—The top status of the Senate, adverse to the Roman Faction. (6.5)
Vercingetorix—Named Arverni Leader. (1.4)
Victory Margin—Calculation of a Faction's closeness to its victory condition. (7.3)
Voluntary Removal—Ability of a Faction to remove or replace its own pieces. (1.4.1)
Warband—Gallic and Germanic mobile Forces piece. (1.4)
Winter—Cards triggering Rounds that include victory checks and several other periodic functions. (2.4, 6.0)
Within one Region—In that Region and/or adjacent Regions. (4.1.2, etc.)
Year—Event card series leading up to a Winter Round. (2.4)