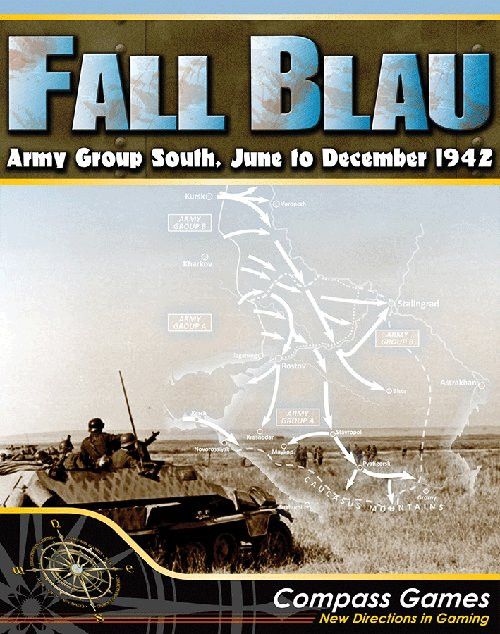
Fall Blau: Army Group South, June to December 1942
Fall Blau: AGS, June-December 1942 Rulebook
Table of Contents
Table of Contents
- [1.0] Introduction
- [2.0] Key Game Terms
- [3.0] Counter Examples
- [4.0] Sequence of Play
- [5.0] Air Power
- [6.0] Stacking
- [7.0] Zones of Control
- [8.0] Supply
- [9.0] Support
- [10.0] Movement
- [11.0] Special Tactical Movements
- [12.0] Prepared Assault
- [13.0] Soviet Command Delay
- [14.0] Soviet Special Abilities
- [15.0] Dynamic Units
- [16.0] Replacements
- [17.0] Reinforcements
- [18.0] Man-Made Terrain Features
- [19.0] Environmental Effects
- [22.0] One Map Scenarios
- [23.0] Multi-Map Campaigns
- [24.0] Reference List
[1.0] Introduction
[1.1] Game Vision
Above all, this is designed to be a fun and entertaining game. It models the actual campaigns with actual units on a relatively accurate map of the area in 1942. However, this is not intended to be a pure simulation as there are many abstractions.
[1.2] Full Map Layout
There are three main maps aligned from north to south respectively: A, B, & C; plus two expansion maps labeled K & G which mate to map C as shown.
[1.3] Game Scale
Each hexagon on the map represents just over 10 kilometers (6.5 miles) from side to side. Each Game Turn represents 3 days of real time. The game of Fall Blau uses one ten sided die (results 0-9) for all die rolls called for in the rules.
[2.0] Key Game Terms
[2.1] Nationalities
Each nationality has its own base color to differentiate between units of each side. All Axis units are considered friendly to each other (Exception: 6.14).
[2.2] Unit Size
Unit size is important for identification purposes, stacking, and combat. When the symbol is bracketed, each counter represents more or less than the unit size shown, but is treated as that size for all game functions. If the symbol backed with white, it counts as half a unit for combat, but still counts as an individual unit for movement (6.2, 10.0, 11.0). Unit size used in Fall Blau from smallest to largest:
Company = I, Battalion = II, Regiment = III, Brigade = X, Division = XX, Corps = XXX
Headquarters: Corps = XXX, Army = XXXX
In Fall Blau, the Soviet 17th (Kuban) Cavalry Corps is comprised of two physical units (a & b). Formation structure allowed it to operate normally over a larger area. For the German mechanized divisions, they have counters based on their individual schuetzen regiments. When attacking or defending together, combined assets from the division were available, thus boosting their combat ability, shown by the white behind the unit size symbol allowing both units to participate in one combat when stacked. Note that the German 5 SS 'Wiking' Motorized Division is a special formation with three regiments.
Designer's Note: Technically, all German mechanized regiment units should have brackets as they represent the attached armor battalions and support troops as well as the normal regiment. In that vein, the Italian "Barbo" unit should also have brackets. However, this has no effect on game play.
[2.3] Hex Ownership
The idea of possessing a hex—which side "owns" which hexes at any given instant—is important for rail hexes as well as towns and cities (10.4, 22.0, 23.0). At the start of play, the Axis Player owns all hexes west of the start line, while the Soviet Player owns all those hexes to the east of the start line. The ownership status of a hex switches from one side to the other whenever a ground unit from the other side enters it. This switching is immediate and may occur and reoccur in the same hexes any number of times during play. Note that supply status has no effect on a units' ability to change possession of a hex. On the same token, simple possession of a hex has no effect on tracing of supply.
[2.4] Zone of Control
In Fall Blau, most units exert a Zone of Control. The six hexagons immediately surrounding a unit compose that unit's Zone of Control (ZOC). These Zones of Control affect movement, combat, supply, and possibly displacement. Hexes upon which units exert Zones of Control are called "controlled hexes." All units which possess a Zone of Control exert it into all six surrounding hexes at all times, unless specifically noted that something (like terrain or enemy unit) negates it. Only small battalions, cadre units, and Headquarters units do not exert a Zone of Control. The combat units limited as such, are designated with a white band across their counter. The term EZOC stands for Enemy Zone of Control.
[2.5] Unit Type Classes
There are two classes of units in Fall Blau. Mechanized units are either tank/assault gun or mechanized/motorized infantry units. Non-mechanized units consist of regular/mountain/naval infantry, air landing, security, commandoes, regular/motorized cavalry, and HQ units.
[2.51] Units of different Classes (as defined above) pay different Movement Point costs for each hex entered and have different advance after combat restrictions. Their movement costs vary depending on the type of terrain in the hex moved into (or hexside moved across). See the Terrain Effects Chart for a complete explanation of Movement Point costs by terrain and by Class.
Example: During a Clear turn, an infantry unit need only expend one Movement Point to enter a Woods hex. However, a tank/panzer unit must expend two Movement Points to enter the same type of hex.
[2.52] Units of different Classes also have different abilities and use separate Replacement Points.
[2.6] Strength Chits
Some units have a letter which represents the fighting ability of a larger unit based on the relative size and quality of manpower. This letter (Combat Rating) indicates which value to use on its corresponding Strength Chit. When a unit with a Combat Rating is about to perform combat for the first time (or for a step loss due to a combat result to the stack), the owning Player picks a Strength Chit for that unit. This is nothing more than a counter with a set of numbers on both sides, one number of which will represent the Combat Strength of the unit in question. These are placed in an open container (like a bowl, hereafter called the Strength Chit Pool) for easy selection during the game. Note the reduced side of a Strength Chit is the lighter colored side. From the moment the Strength Chit is picked, it must remain underneath its "parent" combat unit until that unit is eliminated due to combat, reduced to cadre status, or receives replacements. Strength Chits are never eliminated, they are always returned to the Strength Chit Pool when not attached to a parent unit.
[2.7] Unit Steps
The following is a summary of the number of steps possessed by each unit in the game of Fall Blau:
(a) Generally, a unit with a Combat Rating has three steps of strength. When such a unit takes a step loss, it flips its Strength Chit over to its reduced side to indicate this loss (obviously, its new Combat Strength will be smaller than the original). When the unit takes a two-step loss (or the unit takes a step loss after having taken a previous step loss), the Strength Chit is put back in the appropriate chit pool and the parent combat unit is flipped to its cadre side. This cadre is now considered a combat unit with a Combat Strength of one (and worth one step). If it loses three steps in combat, the Strength Chit is returned to the pool and the parent combat unit is eliminated.
(b) Axis-Satellite divisions, Soviet Guards or NKVD rifle divisions, and some other smaller units have just two steps. When such a unit takes a step loss, it is flipped to its cadre side. If it takes a loss of two steps in combat, the unit is eliminated. They never possess a Strength Chit.
(c) All HQ units, cadre units, breakdown units, Soviet rifle divisions, and most units smaller than a division (including German security divisions), consist of one step only. If any of these units are ever forced to lose a step in combat, they are immediately removed from play (see 16.3). They never possess a Strength Chit.
Important Note: A unit's Combat Strength may never be halved more than once, even if it is subject to more than one penalty. Also note that in Fall Blau, after all modifiers and adjustments, a unit may never have less than a Combat Strength of one.
[2.71] When a unit is in its cadre state, it is considered to be badly battered due to previous combat. All cadre units have a Combat Strength of one and a Movement Point Allowance based on its type. Cadre units are always considered to have one step of strength and never exert Zones of Control. All cadre units may freely stack and will not count against stacking limitations (6.0).
[2.72] Optional Soviet Hidden Strength
Soviet rifle divisions consist of one step, but are printed on their reverse side with an 'Untried' status. To add further uncertainty to the quality of Soviet forces, players may utilize this status instead of the predetermined strengths matched to each unit ID. When setting up the game, place all rifle divisions, except reserve (R) and GRG/MRG (17.23) units, in the Replacement Pool and randomly select units for setup. As reinforcements enter the game they are randomly selected for entry from the pool.
[2.8] Command Range
The Command Range is the maximum distance (in hexes) a unit may be from the HQ unit and still receives its effects. When a HQ unit is Unsupported or Uncommitted it has no Command Range and therefore, cannot be used as a conduit for any game related function (9.3 & 11.4). Axis-satellite Corps HQ units have both a Command Range, and a Secondary Limit which denotes how many individual hexes they may give full support.
Note: If using the Optional Soviet Hidden Strength Rule (2.72), only units within an army's setup area will be considered part of that army for commitment purposes.
[2.9] Armor Band (AB)
Units that possess Armored Fighting Vehicles (AFVs) have an Armor Band. If it is blue, the unit consists of almost all AFVs. If it is yellow, the unit has a mix of AFVs and infantry. Proper combinations of these units will give a Combined Arms Bonus.
[3.0] Counter Examples
Refer to the Player Aid charts for additional examples. Multi-step units have their upper edge highlighted as a reminder.
The magenta letter(s) denotes which scenarios the unit appears in. A mechanized unit's Armor Band behind the strength or Combat Rating and Movement Point Allowance, is blue or yellow. White behind the unit size symbol makes a unit count as half for combat stacking purposes (i.e., two such units would count as one multi-step unit for an attack or defense). A black number in a white circle on the upper right portion of the counter denotes the turn of arrival during the full campaign. If the reinforcement turn is a white number in a black circle; this means it replaces a unit that is already in play (if available). A black number in a white hexagon signifies the Secondary Limit of an Axis-satellite HQ unit (9.33). Units with a white stripe across middle of counter have no Zone of Control. Units with only a silhouette have certain restrictions as outlined in the rules. A black box 'Opt' will signify an optional unit.
Both Soviet and Axis units which are available during the first 6 turns of the campaign have either a colored icon or a specific color circle to reflect their parent army or start group. This color coding assists in their proper use with regards to Commitment and Support. For the Soviet Player, after all units are Committed, these colors have no further effect on play. For the Axis Player, after turn 3 or 6 depending on the scenario, these color circles have no further effect on play.
[4.0] Sequence of Play
[4.1] Game-Turn Sequence Outline
Fall Blau is played in Game-Turns. Each Game-Turn is comprised of one independent Preparation Stage plus two Player-Turns. The player whose Player-Turn is in progress is termed the Phasing Player.
The following detailed Game-Turn Sequence Outline is an explanation of the flow of play. Strictly follow the Sequence of Play, Phase by Phase, until the end of the scenario being played.
Note: Scenario specific rules will always take precedence if there is a conflict.
A. Preparation Stage
- Weather Phase (19.0): Consult the Turn Record Track and place the appropriate marker for the weather condition. On turns 27-38, the Soviet Player rolls a die each turn to see if Mud conditions apply. (19.1)
- Air Allocation Phase (5.0): a. The number of Air Points available to each player is determined from the Turn Record Track or scenario rules. They are placed in the "At Base" box. (5.11) b. Each player allocates their Air Points to the appropriate "Available for Sortie" boxes, according to the restrictions described in the rules. (5.11) c. Axis Player may then place up to three of these Air Points for Interdiction. (5.3)
- Mutual Supply Determination Phase (MSDP) (8.0): Both players determine the general supply status of all their units on the map. Supply lines are traced by Friendly units to a Friendly supply source. Units are determined to be in one of the following states: 'Operational', 'Out of Supply', or 'Isolated'. Axis aerial supply marker may be placed if possible. (5.4) Players must roll for Pocket Attrition as needed. (8.4)
- Axis Maintenance Phase (9.0, 15.2): a. Axis Player may breakdown or re-combine eligible divisions. b. Axis Player determines how many Support Points are received for this turn. (One map scenarios have a set number of Support Points available, as noted in their specific rules.) Add the new Support Points to the Replacement & Support Track. Support Points may then be expended through flipping HQ units to their Supported side as they are counted down. (9.2) c. All 'Operational' German mechanized regimental units of named divisions then check that they receive full support from a supported HQ unit by tracing within its Command Range. (9.3) If they cannot trace, a 'Limited Support' marker is placed on them. (9.4) d. 'Pontoon Bridge' markers may be placed if available. (18.2)
- Mutual Reinforcement, Replacement, and Withdrawal Phase (MRRWP) (16.0, 17.0): a. Axis Player may place his eligible reinforcements for this turn, on the map near an eligible HQ (if delayed from a previous turn) or in their entry hex. (17.11, 17.3) b. Soviet Player may place this turn's eligible reinforcements in their Entry Area or hex. (17.2) Soviet Player places any rifle corps or Guards rifle divisions scheduled for such entry, into the Soviet Upgrade Pool. (17.12) c. Each player uses replacements to rebuild eligible units, marking units that receive replacements with a 'Repl' marker. (16.2) d. Soviet Player, through the use of Replacement Points, may return units to the map (16.32) and Soviet rifle divisions may be converted to Soviet rifle corps or Guards divisions (16.23) e. Either player may return one HQ unit to the map (16.33) and the Axis Player may return silhouette units to the map (16.34). f. Each player must place units scheduled to replace other units. (17.12) g. Each player must remove units scheduled for withdrawal. (17.4)
B. Axis Player Turn
- Axis Movement Phase (10.0, 11.0): Axis Player may move all, some or none of his eligible units by using Tactical or Strategic Movement using all appropriate movement rules. A unit may not use both Tactical and Strategic Movement in the same phase. Units may be moved in any order desired by the player. Mobile Assaults (11.2) and Overruns (11.3) may be conducted by eligible moving units.
- Axis Combat Phase (12.0): a. Axis Player places Prepared Assault markers on all his designated attacking stacks which have been given full support. (12.1) Attacks may be conducted in any order, following b. through e. for each combat. b. Naval assets and Air Points are allocated. (15.4, 5.2) c. Draw Strength Chits for units that require them. (2.6) d. Remove the Prepared Assault markers for this combat. Determine combat ratio and roll the die. e. Determine combat results, performing any retreats and advances called for. (12.7-12.9) f. Remove 'Disorganized' (11.28) markers from Axis units bearing them.
C. Soviet Player Turn
- Soviet Command Phase (13.0): a. Soviet HQ units with 'Auto Commit' markers become committed. b. Roll for each uncommitted HQ unit with a Commit Roll marker against the Army Commitment Number (ACN). If the die roll is less or equal to the ACN, the HQ unit is committed. If the die roll is more than the ACN, place an "Auto Commit" marker on the HQ unit. (13.21) Place a "Commit Roll" marker on the HQ unit of any army whose area is adjacent to one that is committed or has an 'Auto Commit' marker. (13.24) c. If there is an ACN for a Reserve Army, roll for it. (13.22) If the die roll is less or equal to the ACN, the HQ unit is committed. Some reserves are committed as outlined in scenario rules. d. During turns 3-10, the Soviet Player may declare the Strategic Withdrawal of one committed HQ unit. (11.4) e. Optional Rule: Soviet Player checks his units for command & control (15.17).
- Soviet Construction Phase (18.1): a. If an Axis unit is within 20 hexes of Stalingrad (orange line on map), the Soviet Player may flip one Stalingrad FZ marker. (18.14) b. 'Pontoon Bridge' markers may be placed if available. (18.2) c. Optional Rule: Soviet non-mechanized units may build FZ by placing or advancing the marker now. (18.15)
- Soviet Movement Phase (10.0, 11.0): a. Soviet Player may use Rail Movement for units starting the turn occupying or entering from an Entry Area into, friendly rail hexes. Mark such units with a 'Railed' marker. (10.4) b. Soviet Player may use Black Sea Transport (BST) from one friendly port to another. Retain the BST marker on the moving unit. (10.5) c. Soviet Player may move all, some or none of his eligible units using Tactical or Strategic Movement using all appropriate movement rules. A unit may not use both Tactical and Strategic Movement in the same phase. Units may be moved in any order desired by the player. Overruns (11.3) (and Mobile Assaults (11.2) after the Soviet Counter-offensive (14.1) is declared) may be conducted by eligible moving units.
- Soviet Combat Phase (12.0): a. Soviet Player places Prepared Assault markers on all his designated attacking stacks. (12.1) Attacks may be conducted in any order, following b. through e. for each combat. b. Naval assets and Air Points are allocated. (15.4, 5.2) c. Draw Strength Chits for units that require them. (2.6) d. Remove the Prepared Assault markers for this combat. Determine combat ratio and roll the die. e. Determine combat results, performing any retreats and advances called for. (12.7-12.9) f. Remove 'Disorganized (11.28)' markers from Soviet units bearing them.
D. End Turn Phase
- Remove Railed, BST, 'Repl', 'OOC' (Optional 15.17), and Air Point markers (including the Aerial Supply marker).
- Return all Axis HQ units to their unsupported side and German mechanized units have any 'Limited Support' markers removed.
- Advance the Game-Turn marker to indicate the start of a new Game-Turn.
[5.0] Air Power
Both sides can possess a certain number of Air Points. These are not historical units per se; rather, they are abstract counters representing an indeterminate number of airplanes of varying types. Each Air Point may be used for only one mission per Game-Turn. Note that Air Points are only considered to be markers – under no circumstances should they be considered combat units. Air Points have no Zones of Control and do not affect stacking.
[5.1] Availability of Air Points
[5.11] Total Air Point availability is given in the scenario rules or printed on the Turn Record Track. These are placed first in the 'At Base' box and then moved by the player to the desired zone of the 'Available for Sortie' boxes. The map is split into three Air Zones: Voronezh, Stalingrad, and Caucasus. Within each Air Zone there is a maximum number of Air Points which can be designated 'Available for Sortie' by each player. The Air Point maximums for each zone are: Voronezh – 8, Stalingrad – 8, Caucasus – 4. This maximum applies whether the points are later used for Ground Support, Interdiction, or Resupply.
[5.12] Air Points may never be eliminated during the course of play of a game of Fall Blau.
[5.13] Each Air Point may only be used once per Game-Turn and must come from the proper 'Available for Sortie' box. Air Points are used from the Air Zone box that the defender's hex is located in. If the defender occupies hexes in more than one Air Zone, Air Points may be selected from either box. Any Air Points placed on the map or remaining in the boxes are always removed at the conclusion of the End Turn Phase.
[5.2] Ground Support
Ground Support is a means by which Friendly attacks may be increased in effectiveness or Enemy attacks reduced in effectiveness. Both players' Air Points may be utilized for Ground Support in either a friendly or enemy phase.
[5.21] After an attack is designated, the Phasing Player must declare if he is allocating any of his available Air Points to his attack. Next, the non-Phasing Player must declare if he is using any of his available Air Points for the combat in which his units are being attacked.
Mobile Assault - One Air Point from each side may be committed to Ground Support. An Air Point so committed will adjust the die result as shown on the Mobile Assault Table.
Prepared Assault - For each Air Point allocated by the Phasing Player, "shift" the final ratio column one to the right on the same terrain line on the Combat Results Table. For each Air Point allocated to a defense by the non-Phasing Player, "shift" the final ratio one column to the left on the same terrain line on the Combat Results Table. A maximum of two Air Points may ever be allocated to support a single attack. A single Air Point is the maximum amount that may be allocated per defense. Air Points are simply placed directly on top of the unit(s) that is the subject of this attack.
[5.22] Immediately after performing Ground Support, all participating Air Points are returned to the 'At Base' box and may not be allocated again until the next Game-Turn.
[5.3] Air Interdiction (Axis Player Only)
Only the Axis Player is permitted to use Air Interdiction. During the Air Allocation Phase of the Axis Player-Turn, the Axis Player may place a maximum of three Air Points (total, not per zone) on any hexes traversed by a road or railroad on the map within 20 hexes of any 'Operational' (8.31) Axis HQ unit.
[5.31] When being placed, a maximum of one Air Point may be placed in the same rail hex per Game-Turn. The hex in which the Air Point is placed must be in the same zone as the HQ unit and that zone must have an Air Point available to use (5.13).
[5.32] Axis Air Points used for Interdiction only affect the ability of Soviet units to move by Rail or Strategic Movement. Any interdicted Rail hex may not be entered by a Soviet unit utilizing Rail Movement; the Soviet Player must stop in an adjacent hex. Any interdicted Road hex may not be entered by a Soviet unit utilizing Strategic Movement; the Soviet Player must stop in an adjacent hex. The interdicting Air Point prohibits units starting in the hex from using Rail or Strategic Movement this turn. They have no other effect; units using Tactical Movement may freely use the hex as normal.
[5.33] Axis Air Points used for Interdiction may be placed in Soviet-occupied hexes.
[5.4] Air Resupply (Axis Player Only)
The aerial supply marker may be committed to aid Axis units within 20 hexes of any 'Operational' (8.31) Axis HQ unit by using one Air Point from the respective zone the HQ unit is in. The marker provides a limited amount of supply to any 'Isolated' Axis units in its hex of placement and in the six surrounding hexes. Units receiving aerial supply are now considered 'Out of Supply'; change their marker.
[5.41] The marker may be placed at any time during the Mutual Supply Determination Phase and its supply effects are immediate, but it may never be committed to more than one hex per Game-Turn. The marker may never be placed on an enemy unit. Enemy ZOCs (7.0) have no effect on placement or function. Once placed, it cannot be moved. It is automatically removed at the end of the turn.
[5.5] Rubble
The cities of Voronezh, Rostov, and Stalingrad were the site of multi-day battles that waged for control of the city. The Germans succeeded in capturing two but not the other, at least not fully. Part of the reason was massive aerial bombardment turns the city itself into a veritable fortress. This rule represents those unintended consequences.
[5.51] If two Air Points are used against an enemy unit or stack in a city hex, a Rubble marker is placed. The marker is placed in the city hex immediately upon resolution of the combat and has no effect on that particular combat; it will affect subsequent combat and movement.
[5.52] The Rubble marker has no effect on stacking.
[5.53] A unit may not use a Road or Railroad within a hex containing a Rubble marker.
[5.54] Any unit defending in a hex containing a rubble marker receives an additional one-column shift to the left on the Combat Results Table.
[6.0] Stacking
There may never be more than three combat units stacked in the same hex at the end of a Friendly movement phase. (Exception: 6.12). Combat units are defined as any unit which may initiate combat by themselves. In addition, there are certain rules which regulate the number of combat units that may perform combat out of a given hex. (6.2)
[6.1] General Restrictions
[6.11] During a movement phase, Friendly units may freely enter and pass through stacks – as long as the stacks comply with the restrictions of this section at the end of that Friendly movement phase. If stacks of units exceed these restrictions at that time, the excess must be immediately eliminated by the owning player.
[6.12] Cadres may freely stack with any number of friendly units; the stacking limit does not affect cadre units. Headquarters units are not combat units and normally do not count against the stacking limit, but neither player may stack more than one HQ unit in a single hex.
[6.13] A maximum of two Axis infantry division or corps units may occupy the same hex as part of a stack. No more than two Soviet corps units may stack together.
[6.14] Axis-satellite units may not stack with certain friendly units. They can only stack with units of their own specific nationality and German units. German units may stack with any other Axis units.
[6.2] Stacking and Combat
[6.21] Regardless of the physical stacking limitations listed, there are further restrictions when it comes to units that may actually perform combat from within a single hex during a particular Combat Phase. Only one multi-step combat unit (2.7) may participate in combat out of a hex during a Combat Phase. However, units with their size symbol on white count as half a multi-step unit (2.2) and Soviet Guards or NKVD rifle divisions will count as having only one step for purposes of this rule. One step units (e.g., cadres, HQ units, battalions, etc.) may freely participate in any combat out of a hex.
[6.22] The choice of which units in a stack will participate in a combat during a particular Combat Phase (after following the prior restriction) is left entirely to the owning player. The units that do not participate in a combat are still affected by the results of the combat, whether it succeeds or not. The non-participating units may also be used to fulfill other requirements.
[6.23] The stacking restrictions concerning combat apply to both attacker and defender.
[6.24] Since stacking restrictions apply at the end of a Friendly movement phase, units may retreat as a result of combat onto Friendly stacks in violation of stacking restrictions. However, this situation must be corrected by the end of the next Friendly movement phase.
Designer's Note: It may seem odd that only one and half panzer divisions can stack in a hex, but two infantry divisions and a regiment may. This was a concession I had to make to keep things like stacking simple and not allow panzer divisions to become more powerful for breakthroughs than they already are. The balance made by the stacking rules has been carefully thought out and tested. Within the framework of the game, the proper feel of the units is there.
[7.0] Zones of Control
[7.1] Effectiveness of a Zone of Control
[7.11] If an Enemy unit and a Friendly unit, both of which exert Zones of Control, are adjacent to each other, each unit is affected by the other unit's ZOC.
[7.12] There is no additional effect in having more than one unit exert its ZOC into a given hex. Both sides may exert a ZOC into an empty hex and it would be 'controlled' (2.4) by each side.
[7.13] A stack consisting of units with and without a ZOC will exert a ZOC.
[7.14] Units in a city hex lose their ability to exert a ZOC.
[7.15] During turns with Mountain Snow, a ZOC may not extend into a Rough hex. Exception: Mountain units (19.21).
[7.16] Impassable and Volga River hexsides always block a ZOC. Therefore, a ZOC never extends through these hexsides into hexes on the other side. Exception: Pontoon Bridges (18.22).
[7.2] Zone of Control and Movement
[7.21] All units must initially stop movement upon entering an EZOC. Certain units have the ability to perform a Mobile Assault (11.2) and thereby possibly continue movement. All others must finish their movement after entering.
[7.22] Units exiting an Enemy Zone of Control must pay a special Movement Point penalty of two Movement Points plus the terrain cost of the hex entered.
[7.23] A unit may move freely and without penalty into and through hexes that are adjacent to units that do not exert Zones of Control.
[7.24] For the purposes of movement, Friendly units do not negate Enemy Zones of Control in the hexes they occupy.
[7.3] Zone of Control and Combat
[7.31] During a combat phase, a unit's ZOC may not extend across a Major River hexside without a bridge.
[7.32] During retreats, Friendly units negate the presence of EZOC in the hexes they occupy.
[7.4] Zone of Control and Supply
[7.41] An Enemy-controlled or Enemy-occupied hex blocks the tracing of Friendly supply through that hex.
[7.42] Friendly units negate the presence of Enemy Zones of Control in the hexes they occupy for the purposes of tracing supply lines.
Zone of Control Example: Units which possess a Zone of Control will exert it at all times. However, in certain cases it will be negated by terrain or enemy units. Axis units exert a ZOC into hexes D, E, F, H, J, K, L, M, N, and O. Note that if hex K was a city hex, hexes F, L, and O would not be Axis controlled (7.14). Soviet units exert a ZOC into hexes B, C, E, G, K, L, N, P, S, and T. This is true except during the Mutual Supply Determination Phase, the retreat from a Mobile Assault, and the Combat Phase. During those three conditions the Axis units will negate the Soviet ZOC in hex K, and Soviet units will negate Axis ZOC in hexes F and O (7.32 & 7.42). Also, during the entire Combat Phase, there would be no Axis ZOC into hex N (7.31).
[8.0] Supply
Each side has three possible general supply states which a unit may enter during the Mutual Supply Determination Phase (MSDP 4.1, A, 3): Operational (8.31), Out of Supply (8.32), and Isolated (8.33). A unit that is considered to be in a certain supply state is in that state until the next MSDP (Exception: 8.34). The state of an individual unit does not affect the supply of the rest of the stack, and vice versa.
[8.1] Supply Lines
A supply line is defined as a path of continuous hexes from a combat unit to the destination.
[8.11] Path of a supply line may never pass through Enemy-occupied or Enemy-controlled hexes (unless they are occupied by Friendly units). (7.4) A supply line may only cross a Major or Volga River hexside, by bridge (Road, Rail, or Pontoon) or a Major River by being the first hexside crossed (i.e., unit is adjacent to the Major river). Units may not trace a supply line through a Mountain Pass hexside (except the Krestovy Pass (G3009/G3109) on the Georgian-Military Highway), unless checking for Isolated status (i.e., if the only supply line a unit can trace is through said pass, the unit remains Out of Supply). Other than these three stipulations and there may be no trace through prohibited hexes or impassable hexsides, terrain has no effect on tracing a supply line.
[8.12] Supply lines are never directly affected by the weather condition (Exception: 19.22).
[8.2] Supply Sources
Supply sources are defined within the scenario rules. A supply source may provide supply for any number of units. Supply sources for each side are listed in the scenario rules.
[8.3] Supply States
[8.31] Operational - When units are able to trace a supply line of any length to a supply source during the Mutual Supply Determination Phase, they are considered to be 'Operational'. Units begin the game 'Operational' unless stated otherwise. Units that enter play after the MSDP are also considered 'Operational'. Being 'Operational' is not designated by any markers.
[8.32] Out of Supply (OOS) - Place an 'OOS' marker on all units that are unable to trace a supply line of any length to a supply source during the MSDP.
All units that are considered 'Out of Supply' have their combat and movement abilities modified as noted below:
(a) If eligible to attack, their Combat Strengths are halved (round down).
(b) If the units are defending, their Combat Strengths remain the same.
(c) If the units are mechanized, their Movement Point Allowance is considered to be three MP.
(d) If the units are non-mechanized, their printed Movement Point Allowances are halved (round down).
(e) Units may not move using Strategic Movement (10.3) or execute an Overrun (11.3).
[8.33] Isolated - Place an 'Isolated' marker on all units that already have an 'OOS' marker at the beginning of the MSDP and are still unable to trace a supply line of any length to a supply source during the MSDP. This replaces the 'OOS' marker. An 'Isolated' marker may only be removed from a unit when it becomes 'Operational' or receives Aerial Resupply (5.4).
All units that are considered to be 'Isolated', have their combat and movement abilities modified as noted below:
(a) If eligible, they may attack with a maximum Combat Strength of one.
(b) If the unit is defending, its Combat Strength is halved (round fractions down).
(c) If the unit is mechanized, its Movement Point Allowance is considered to be one MP.
(d) If the unit is non-mechanized, its printed Movement Point Allowances is halved (round down).
(e) Units may not move using Strategic Movement (10.3), conduct Mobile Infiltration (11.1), or execute an Overrun (11.3).
[8.34] Whenever the two units of the same parent formation end the friendly movement phase stacked together, they assume the same general supply state, whichever is most beneficial (i.e., if one is in 'Out of Supply' and the other is 'Operational', they become both 'Operational').
[8.4] Pocket Attrition
All hexes with units that are determined to be 'Isolated' during the MSDP, which already had an 'Isolated' marker from the previous turn, must roll one die on the Attrition Table. One roll is made for each stack no matter how many 'Isolated' units are present in it. Units which are simply 'OOS' in the hex, are not affected by the roll. Results are immediately applied.
[9.0] Support
The German Fall Blau offensive which began on 28 June 1942 was not a massive assault launched by every unit on the eastern front. Before this major offensive could be supported, Soviet pockets had to be removed and units rebuilt, thereby causing a delay as units made their way back to the frontlines. Then during the campaign itself, many units had to stop for sometimes days awaiting fuel and supplies to continue the advance. After the results of 1941, the Germans never had enough material to attack across the expansive Eastern Front. Commanders had to pick and choose among meager resources to carry the advance into 1942. Here the player is given the ability to decide easily which units will be ready for the fight within the overall restraints of the situation.
Only the Axis Player is required to provide support. By allocating Support Points (SP), the Axis Player is dictating which of his corps or army HQ units will receive priority in terms of fuel and attack-potential in the upcoming Game-Turn. Axis Player must determine which of his HQs will be "in support", and which will be "unsupported" for the following Game-Turn (Note that during historical Fall Blau play, support points are assigned via a special rule.). All Axis units must have full support in order to conduct a Mobile Assault (11.2) or Prepared Assault (12.0). Support only applies to a unit's ability to attack; it may conduct any other game function no matter what its support condition (see 9.4). At the end of the turn, all Axis HQ units are returned to their unsupported side and 'Limited Support' markers removed.
[9.1] When to Determine Support
Axis Player must determine support every Game-Turn. Note that there is a specific Axis Maintenance Phase in the Sequence of Play (4.1, A, 4). No aspect of Axis HQ support may be changed except in the Axis Maintenance Phase. Units of mechanized divisions check for full support at the end of this phase, while all other units check at the beginning of the Combat Phase, if they wish to attack.
[9.2] How to Determine Support
During every Game-Turn after turn 3 (except the last turn: 60), the Axis Player must roll on the Support Table. On turns with a Mud condition, subtract one from the die roll. He receives this number of Support Points to add to his total which he may allocate in any way he sees fit. In this instance, the Axis Player is limited only by the zone maximums and any applicable scenario rules. A running total is maintained with markers on the Replacement & Support Track. Support Points may be saved and used in subsequent turns.
Optional Historical Support – If both players agree, the Axis Player may consult the Turn Record Track for the historical amount of Support Points acquired. No roll is made on the Support Table.
[9.21] Support Points are distributed among the German or Axis-Satellite HQ units in any way the Axis Player desires. He does this by flipping a German PanzerKorps or Axis-Satellite Army HQ unit to its Supported side for each Support Point expended from the track. A Support Point may also be expended to allow up to two German ArmeeKorps or Axis-Satellite Corps HQ units to flip.
[9.22] Support from an expended Support Point can only be given to a HQ unit that is 'Operational' (8.31).
[9.23] There is a maximum allocation of 4 SP to HQ units in the Caucasus Air Zone and each of the other zones has a limit of 8 SP.
[9.24] As the Axis Player captures oil derrick hexes, he is awarded extra support capability. Each turn, for every four oil derrick hexes the Axis Player owns, he receives one additional Support Point.
[9.25] Optional Historical Limitation – To reflect the true limit of the German supply network, no more than two PanzerKorps HQ units within the Caucasus Air Zone and an overall total of no more than three PanzerKorps HQ units, may be given support during a single turn. This rule is highly recommended except in the case where an inexperienced Axis Player faces a very good Soviet Player.
[9.3] Full Support
All 'Operational' German units of mechanized divisions (e.g., 3 Motor, 14 Panzer, Gross Deutschland, etc.) must check at the end of the Axis Maintenance Phase whether they receive full support for the entire turn. Those unable to receive full support will only receive limited support and are marked with a 'Limited Support' marker. All other Axis units will check for full support at the moment of Prepared Assault attack declaration (12.1).
[9.31] To receive full support, a combat unit must be able to trace a supply line (8.1) to a supported HQ unit of its nationality equal to or less than the Command Range (2.8) of the HQ unit providing the support. Those HQ units must then trace a supply line of three or less hexes to any hex traversed by a road which in turn leads along a continuous series of road hexes of any length (although note that once this path begins to trace along the road, it may never leave a road) to a supply source.
[9.32] Each supported German PanzerKorps HQ units may provide full support for mechanized units from up to three mechanized divisions within its Command Range. German mechanized divisions (including any in a cadre state) may only receive support from a German PanzerKorps HQ.
[9.33] Supported German ArmeeKorps HQ units may provide full support for German units that are within its Command Range and supported Axis-Satellite Corps HQ units may provide full support to units of its nationality in up to the number of individual hexes of its Secondary Limit that are within its Command Range.
[9.34] Each supported Axis-Satellite Army HQ unit may provide full support for any number of units of their own nationality that are within its Command Range.
[9.35] Certain scenarios and campaigns give the Axis Player access to various optional divisions (e.g., 17 Panzer, 19 Panzer, SS LAH, etc.). If optional units are being used, each supported German PanzerKorps HQ unit may provide support for one optional division over and above its usual limit of 3 mechanized divisions.
[9.36] For game purposes, Slovak Motorized Division is permanently assigned to 57th PanzerKorps (LVII PK) and may only receive full support from that one HQ unit. This does not count as one of its maximum three divisions and does not prevent the HQ unit from supporting an additional optional division.
### [9.4] Lack of Full Support
Unsupported headquarters may not be used to distribute full support (they have no ranges, just a 'U' as a reminder). Axis units with a 'Limited Support' marker may never attack (Mobile or Prepared Assault) and they have their Movement Point Allowance halved (round up). They may function normally in all other respects. Exception: Cadre units with a 'Limited Support' marker may still use their full MPA if moving closer to a friendly supply source or HQ unit. Mechanized units with limited support or no support may not be present in a hex which declares a Prepared Assault (having these units in a stack therefore limits the actions of the others and is especially important for following cases 10.74 & 12.1).
[10.0] Movement
During a normal movement phase, the Phasing Player may move as many or as few of his units as he desires, as many or as few hexes as long as its Movement Point Allowance is not exceeded in a single movement phase. Players should note that movement is divided into four types: Tactical, Strategic, Rail, and Sea Movement. Each type of movement has its own set of restrictions.
Procedure: The Phasing Player's units may be moved in any order he desires. Eligible units are moved individually, tracing a path of contiguous hexes through the hex grid. Once a player begins moving a particular unit, he must complete its movement before any other unit can be moved. Units expend Movement Points from their Movement Point Allowance for each hex entered during movement, according to the terrain in the hex (or a crossed hexside) whose costs are summarized on the Terrain Effects Chart based on the type of unit. Only one type of movement (Tactical, Strategic, Rail, Sea) can be utilized during a single movement phase.
[10.1] Effects of Other Friendly Units on Movement
A Friendly unit may move through hexes occupied by other Friendly units at no additional cost in Movement Points. There is no limit to the number of Friendly units that may be moved through a particular hex in a single movement phase.
[10.2] Tactical Movement
Tactical Movement is deployed movement in the proximity of Enemy forces.
[10.21] Tactical Movement is movement close to enemy units which allows entering and exiting an Enemy ZOC.
[10.22] A unit using Tactical Movement which enters a hex through a hexside crossed by a road may ignore the normal Movement Point cost of that hex (and hexside, if applicable), and treat that hex as a Road hex. Exception: 10.64 or 11.2 Procedure.
[10.3] Strategic Movement
Strategic Movement is exclusively moving via transport, and as such, is somewhat faster than when deployed in the proximity of the enemy.
[10.31] A unit may move by Strategic Movement only if it did not use any other type of movement during the current movement phase.
[10.32] A unit may only use Strategic Movement if it remains at least three hexes away from Enemy units while moving (including at the start and at the end of the move). Basically, two hexes between the Enemy unit's hex and the moving unit's hex.
[10.33] Units using this type of Movement can utilize the bonuses provided by Roads as listed on the Terrain Effects Chart.
[10.4] Rail Movement (Soviet Player Only)
In order to move a unit by Rail, the unit must start the Movement Phase in a Rail hex (or an Entry Area connected to a Rail hex) and it must finish that phase in a Friendly owned Rail hex. The unit using Rail Movement may only move along friendly owned and connected Rail hexes.
[10.41] When moving a unit by Rail, place a 'Railed' marker directly on top of the unit in question. The marker shows the player which of his units have moved by Rail during this turn. Units with a 'Railed' marker may not attack.
[10.42] A unit moving by Rail does not use its printed Movement Point Allowance. Rather, all units moving by Rail may move up to 60 hexes in a single movement phase.
[10.43] Terrain has no effect on Rail Movement, other than the unit must follow the rail lines. Because the unit is not expending Movement Points, it does not have any penalty for leaving an EZOC. Axis Air Interdiction (5.3) may influence the movement of Soviet units by Rail. As with all movement, units must stop upon entering an EZOC.
[10.44] Soviet Player is allowed to move units (of any size or type) in this fashion within a single movement phase, up to the limit for that turn (the table is found on Map A and the Soviet Play Aid). Tank and mechanized corps count as two units toward this limit. Further, a maximum of one unit may start its Rail Movement from within the Caucasus Zone each turn. Reinforcements entered by rail will also count against this limit.
Designer's Note: Yes, Soviet units may use Rail Movement from Entry Areas M, P, and O. Only one unit per turn may use it and any others would have to use Strategic Movement. Also, because of the Caucasus rail limit, a Soviet tank or mechanized corps may not start Rail Movement from the Caucasus Air Zone (but may end there if started elsewhere).
[10.45] Normally units may not use Rail Movement to exit the map. However, one unit per turn may use the Rail between hexes A3734 and A2539 in either direction to move at a cost of 15 of its maximum 60 hexes.
[10.5] Sea Movement (Soviet Player Only)
During a campaign scenario which uses Map C and K, the Soviet Player is allowed to move up to three (only non-mechanized or silhouette) units via Sea Movement within any single movement phase. There are three Black Sea Transport (BST) markers for this purpose; when moving a unit by Sea, place a BST marker directly on the unit in question. A unit, so designated, moves from one port to another Soviet owned port as its movement for the turn. The unit must start the phase in a port hex. Ports are defined with a white anchor symbol.
[10.51] Enemy Zones of Control have no effect on this movement.
[10.52] Units with a BST marker may not attack.
[10.53] Only two BST markers may be used during Mud turns and only one BST marker may be used during Freeze turns.
[10.6] Effects of Terrain on Movement
[10.61] The standard Movement Point costs for entering hexes or crossing hexsides are influenced by unit type. Mountain units use the cost in parenthesis.
[10.62] If more than one terrain exists in a particular hex, use the highest cost for movement. Exception: 10.42.
[10.63] All types of bridges (Road, Railroad, or Pontoon) negate the cost of crossing a river hexside during movement.
[10.64] Rough and High Woods hexes are considered to be high elevation hexes. Roads within these hexes may not be used by mechanized units during Tactical Movement; they are only available for a Strategic Movement bonus.
[10.7] General Movement Restrictions
[10.71] A Friendly unit may never enter a hex occupied by an Enemy unit. Exception: Overrun 11.3.
[10.72] A unit that enters an EZOC must stop movement completely and move no further during that movement phase. Exception: Mobile Assault 11.2.
[10.73] A unit which started a movement phase in an EZOC may leave an Enemy-controlled hex only if it moves immediately into a hex that is not Enemy-controlled. Units may never move directly from one Enemy-controlled hex to another Enemy-controlled hex. Exception: Mobile Infiltration 11.1.
[10.74] A unit which crosses a Major River hexside (bridged or un-bridged) into an empty hex within the EZOC of an enemy unit adjacent to the same side of the river as the hex to be entered must attack that unit in the following combat phase. Place a 'Prepared Assault' marker on the unit. Note: Any Axis units which fail to receive full support in the Combat Phase must retreat back across the river (all normal retreat rules apply).
[10.75] A unit may not expend more Movement Points than its total Movement Point Allowance in a single movement phase. Any unit may expend all, some, or none of its Movement Points in a given movement phase. A unit may not save Movement Points for another Game-Turn, nor may any unused Movement Points be transferred to another unit.
[10.76] Units may conduct movement only during their friendly movement phases, although some moving may occur as a result of attacks (in terms of advances or retreats). These are not considered movement and do not require the expenditure of Movement Points.
[10.77] Units may have their movement capabilities restricted to some degree as per the supply or support rules (8.0 & 9.4).
[10.78] One-Hex Movement
A unit may always move at least one hex per friendly movement phase, even if it does not possess enough Movement Points to accomplish this movement, except where prohibited by terrain or Enemy Zones of Control.
[11.0] Special Tactical Movements
[11.1] Mobile Infiltration
[11.11] German mechanized units which are not 'Isolated' have the ability to ignore EZOC for purposes of a One-Hex Movement (10.78). This may not be done to cross a Major or Volga River into an empty hex or enter an empty Fortified Zone hex.
[11.12] After a Soviet Counteroffensive (14.1) is announced, all Soviet mechanized and cavalry units which are not 'Isolated' may also utilize this move ability. This may not be done to cross a Major or Volga River into an empty hex.
[11.2] Mobile Assault
Each fully supported German mechanized multi-step unit has the ability to conduct one attack (Mobile Assault; MA) during Tactical Movement against certain target hexes. Each unit may continue moving following a successful attack, but cannot make a subsequent attack during the same movement phase. After a Soviet Counteroffensive (14.1) is announced, 'Operational' Soviet tank or mechanized corps units may also utilize this ability. In order for a unit to conduct a Mobile Assault, it must currently reside in an EZOC that is exerted from only the target hex (i.e., no other enemy stacks may be exerting a ZOC on the friendly unit) or a non-controlled hex adjacent to enemy units without ZOC. Note: A unit may not conduct a Mobile Assault in the same movement phase as Mobile Infiltration (11.1).
Procedure: An attack is initiated by the friendly unit expending two Movement Points plus the cost of entering the target hex (any roads or railroads are ignored). If the unit doesn't have enough Movement Points available, the Mobile Assault may not be conducted. Each player may commit up to one Air Point (5.2) to the attack (attacker choice then defender). Combat Strengths are tallied (chits drawn if needed) for the attacking unit and for the entire defending hex (Note: This ignores any stacking restrictions on combat as it takes place during the movement phase). An odds ratio is found as in a normal combat. A die is rolled and compared to the Mobile Assault Table. The die result may be modified by any and all conditions that are applicable which are listed on the table. If the target hex is vacated, the attack is considered successful and the friendly unit is moved into that hex. It may continue movement if it has Movement Points left and is not currently in an EZOC.
[11.21] If the ratio is less than 1-1, the attack cannot be made and simply place a 'Disorganized' marker on the attacking unit (Air Points are considered used) (11.28).
[11.22] Mobile Assault may not be made into a town or city hex, high elevation hexes (10.64), sand hexes, from or into a Marsh hex, or across a Major or Volga River.
[11.23] Mobile Assaults are not allowed during Mud turns. (19.1)
[11.24] A single hex can only be used to initiate from or be the target of a Mobile Assault twice in a friendly movement phase.
[11.25] A unit may be the target of Mobile Assault any number of times within the enemy movement phase.
[11.26] Results - A result of 'Dr3' requires the target units in the hex retreat three hexes as per normal retreat rules (i.e., steps may not be lost in exchange for these hexes). If this result is 'D(1)r3', the stack retreats and also loses one step. Note: In both cases, this retreat is conducted by the attacking player.
[11.27] Results - Any 'AD' or 'A(n)D' result ceases movement for the attacking unit. Place a 'Disorganized' marker on the unit. If this result is 'A(n)D', the attacking unit also loses n number of steps.
[11.28] Disorganized - When a unit has been designated as 'Disorganized', its strength is halved (round down) for any combat during the immediately following friendly combat phase. Markers are removed at the end of that combat phase. Disorganization only affects Combat Strength and there is no effect on their ability to advance or retreat.
Designer's Note: It is important for players to acknowledge the differences in resolving the two kinds of attacks allowed during the game. A Mobile Assault is a mechanized 'Blitz' attack which is more successful against a smaller number of defenders. It uses a table based on defender's strength utilizing applied Die Roll Modifiers. A Prepared Assault is more of a set-piece attack which may take the entire turn to develop. It uses a standard odds table with supporting factors applied as shifts to the odds column. These are made this way to highlight the appropriate results given by using the different attacks.
[11.3] Overrun
[11.31] Multi-step combat units (i.e., those with a stripe at the top of the counter) may move into or through a hex occupied by a lone enemy HQ or cadre, or any other lone unit without a ZOC. This may occur during Tactical Movement at the cost of one extra Movement Point for entering the hex. This is the only time a unit may enter an Enemy occupied hex. Note: A unit may not conduct an Overrun in the same movement phase as Mobile Infiltration.
[11.32] Units that are 'overrun' in this manner are removed to the Replacement Pool (if appropriate) or eliminated. An exception is made in the case of the defending unit also in a friendly (to the displaced unit) ZOC; that unit may move to the hex of the unit exerting the ZOC. If more than one friendly hex is available, the owning player may choose which one to use. Note that this may cause stacking limits to be exceeded, but remember the restrictions apply only at the end of a Friendly movement phase. This exception is called Forced Displacement.
[11.33] Overruns may not be made against a unit in a city hex, hex with a town, high elevation hexes (10.64), or across a Major or Volga River.
[11.34] 'Isolated' and 'OOS' units may not conduct an Overrun. Full support (9.3) is not required as an Overrun is considered movement. An Overrun may be conducted as part of a One-Hex Movement (10.78).
[11.4] Soviet Strategic Withdrawal
[11.41] At the end of the Soviet Command Phase of turns 3 through 10, the Soviet Player may declare any one committed army HQ capable of giving itself and other units this ability. Place a marker on the HQ unit. All units (including other HQ units) within the Command Range of that army HQ unit at placement of the marker are eligible for Strategic Withdrawal in the ensuing movement phase. Note: Enemy units and ZOC do not interfere with this determination.
[11.42] Units using Strategic Withdrawal have their Movement Point Allowance increased by 3 for Tactical Movement after all other adjustments. These units must start their move within three hexes of enemy units and must end their move closer to a supply source, at least three hexes from any enemy units. All units not meeting these conditions use normal movement rules and are not utilizing Strategic Withdrawal.
Mobile Tactical Movement Example: German mechanized unit X wants to gain an Encirclement Bonus on the adjacent stack of Soviet units. It has two options. One, it could conduct a Mobile Infiltration into hex C, but this would require the Soviet unit Z to also be attacked because of the rules of Attack Determination (12.1). Or two, it could leave their ZOC by entering hex A at the cost of 3 MPs. Then move into hex B, expending another 1 MP and entering the ZOC of Soviet unit Z which requires it to stop. Because this is a German mechanized unit and in the EZOC of only the adjacent unit, it may conduct a Mobile Assault against Soviet unit Z. The unit expends 3 more MPs for a total of 7, and conducts the Mobile Assault. If successful and the Soviet unit survives, it may be retreated into either of the R3 hexes. The German panzer unit would then be allowed to continue movement to encircle the enemy stack.
German unit W may cross the Major River by entering hex D or E, but if it enters hex E within the EZOC of the Soviet tank corps adjacent to the same river, it will have to attack that stack in the combat phase. German unit Y is prohibited from entering hexes F or G because you cannot conduct Mobile Infiltration across a Major River into an empty hex. However, if there was an Axis unit in hex G, the infiltration would be permitted.
[12.0] Prepared Assault
Friendly units which are adjacent to Enemy units during a Friendly Combat Phase may attack those Enemy units subject to the stacking restrictions. A given unit possesses a Combat Strength which is used when attacking or defending. This strength may not be divided among different combats either on the attack or defense. No unit may attack more than once per Combat Phase, and no unit may be attacked more than once per Combat Phase. The Phasing Player is termed the attacker and the non-phasing Player is termed the defender regardless of the overall strategic situation.
Procedure: All attacks are determined and designated before any are resolved (i.e., before the die is cast). Each Axis stack must receive full support (9.3) in order to be designated. Separate combats may be resolved in any order the Phasing Player desires, so long as all of his necessary combats are resolved at some time during the current Combat Phase. Follow these steps in order to resolve each combat. Assign any naval assets (15.4), followed by attacker and then defender Air Points (5.2). Total the Combat Strengths of all units participating in combat against a specific defender by examining the Strength Chits possessed by the applicable units (drawing new ones if necessary) or the Combat Strength printed on the counter while keeping in mind the multiple unit rules (6.2). Next, the defending player does the same for all of his units participating in the defense. Compare the total Combat Strength of the Attacker to the total Combat Strength of the Defender and state this comparison as a probability ratio: Attacker's strength to Defender's strength. Round the ratio in favor of the Defender to conform to the simplified ratio columns found on the Combat Results Table. Next, determine the terrain in the hex occupied by the Defender. Make whatever cumulative "shifts" in the ratio column necessary for this combat based on terrain and bonuses. Cross index this terrain line with the proper ratio column on the Combat Results Table. The attacker rolls one die. Read the result on the appropriate terrain line under the proper ratio. Apply the result immediately, before resolving any other attacks (Exception: 12.23.).
[12.1] Attack Determination
The Phasing Player places Prepared Assault markers on all eligible units he wishes to attack with. Every non-phasing unit which exerts a ZOC on a Phasing unit, which is designated to attack, must be attacked by some Phasing unit during that Combat Phase.
Attack Determination Example: Stacks 4 & 5 may declare an attack on stack B. If stack 6 declares an attack, then stack A must also be attacked by someone as stack 6 is in its ZOC. Because both multi-step units have a white size symbol, the Axis Player could split and attack both A & B, each with one unit from stack 6 (or all 6 on A, and 4 & 5 on B). With stack D in a city hex and therefore not exerting a ZOC, both stacks 2 & 3 may attack stack C. If stack 2 declared against D, stack C would have to be attacked by someone (stack 3 in this case). Stack 1 may declare against either stack D or stack E as the ZOC of stack E does not extend across the Major River during the combat phase. Note, however, if stack 1 does attack stack E, the AG battalion may not participate as silhouette units may not attack into marsh hexes without crossing a road hexside.
[12.2] Multiple Unit and Multi-Hex Combat
[12.21] Units in two or more different hexes may combine their Combat Strengths to attack a single, adjacent hex. Units in two or more different hexes may be attacked from a single adjacent hex. A single attack may involve numerous attacking or defending units. For an attack to be resolved as a single combat, however, all attacking units must be adjacent to all defending units.
[12.22] All units in a given hex must be attacked as a single Combat Strength. The defender may not withhold a unit in a hex under attack, except as called for in the stacking restrictions (6.2). When more than one unit occupies a single hex, those units may not be attacked individually. An attack on a hex involves all possible combat units in that hex.
[12.23] When a single hex contains more than one unit, each of those units may attack a different hex at the owning player's discretion subject to the stacking restrictions. Note that any combat results will have to take effect after all attacks from a single hex have been rolled for. If units in a single hex are attacking different hexes, no combat results may be applied until all attacks have been resolved. These units will only follow results from the combat they participated in or if not designated as attacking, one result of owning player's choice.
[12.24] If the multiple units subject to a single attack are defending in more than one hex, use the terrain from the hex which is most favorable to the defender.
[12.3] Terrain Effects on Combat
[12.31] All units attacking across Major River hexsides (bridged or un-bridged) have their Combat Strengths halved (round fractions down).
[12.32] If all attacking units are attacking across Minor River hexsides or a combination of Minor and Major River hexsides, shift the odds one column to the left. Exception: 19.33.
[12.33] Mechanized units which attack into a Marsh hex have their Combat Strength halved (round fractions down). Silhouette only mechanized units are prohibited from attacking into Marsh hexes unless the hexside being attacked across is also crossed by a road or railroad. Exceptions: 19.33.
[12.34] If any defending units are in a hex with a Town, shift the odds one column to the left.
[12.35] During turns with Mountain Snow, units attacking into Rough hexes have their Combat Strength halved (round down). Exception: 19.21.
[12.36] No attacks may be made across an Impassable hexside.
[12.37] No attacks or retreats may be made across a Volga River hexside (Exception: 18.2 and 19.34).
[12.4] Combined Arms (CA) Bonus
[12.41] A unit with an Armor Band (2.9) will make an attacking or defending stack eligible for a Combined Arms Bonus if one of the following conditions is met:
- The unit has a yellow AB (Automatic).
- The unit has a blue AB and there is a motorized infantry or non-mechanized unit (including cadres, but excluding HQs) in the stack which is not participating in a different attack.
[12.42] German motorized divisions always have at least a panzer battalion attached. Therefore, if the two regiments of the same division are both participating in the same combat (need not be in the same hex and either or both may be cadre) they qualify for a CA Bonus. German SS divisions were a special case, as noted by their yellow AB.
[12.43] For each attack that qualifies for a CA Bonus, the player may shift the odds one column to the right. (One bonus per combat)
[12.44] If a defending stack of units is also eligible for a CA Bonus, then the attacking player is denied any CA Bonus against those defending units during the Combat Phase. This is known as a Combined Arms Defense. However, it is purely defensive, meaning that nothing may ever be awarded to the defending player if the attacker does not also possess such a Bonus.
[12.45] CA Bonus is never allowed against a Fortified Zone (18.11), high elevation hexes (10.64), a city or sand hex, or across a Major River.
[12.5] Encirclement Bonus
When the defender is comprised of a single stack in a hex and all adjacent usable hexes are occupied by an enemy unit or an EZOC at the time of combat resolution, the attacker receives an Encirclement Bonus of one shift to the right. This bonus may not be granted against defenders in a city hex or if the defender has friendly units in any adjacent hexes. (Also remember 7.31.)
[12.51] Non-mechanized units which benefit from an Encirclement Bonus may only advance one hex as a result of that combat, no matter the result. Think of this as time spent taking care of prisoners of war.
[12.6] Winter Combat Bonus
After a Soviet Counteroffensive (14.1) is announced, Soviet tank or mechanized corps units will have their attacking Combat Strength doubled after all other adjustments. Note: This does not apply to Mobile Assaults (11.2). Cadre units may not use this bonus.
[12.7] Combat Resolution
After the die is rolled, the combat's Prepared Assault markers are removed and combat results are applied. All combat results are expressed in terms of a number of steps lost and/or hexes retreated. The letters "A" and "D" on the Combat Results Table stand for attacking force and defending force, respectively.
[12.71] All numbers in the combat result which are parenthesized indicate mandatory step losses for the affected player's force.
[12.72] All numbers in the combat result which are preceded by an 'r' signify that the affected unit(s) must either retreat the indicated number of hexes and/or take a step loss which equals the number result. Whichever side receives a result with an 'r' is considered the loser; the other side is the victorious side. The losing side will always resolve their result first, then the victorious side.
Example: A defending Axis force receives a 'D(2)r2' result. The Axis Player reduces two units in a stack by one step each (12.71). (Alternatively, he could choose to reduce any one unit by two steps instead.) Next, the Axis Player must choose one of the following options:
1. He may take two more step losses and not retreat (only, of course, if he has these steps available to him in the rest of his units);
2. He may retreat two hexes as normal (12.8); or
3. He may lose one more step and retreat the rest one hex.
[12.73] All units in a stack are affected by any combat result (unless participating in a different attack). However, the first step loss must be from a unit directly participating in the combat (if attacker, mechanized units lose the first step) and the other units in a stack may take losses if more than a one-step loss is called for (i.e., except for the first step loss, distribution of loses is entirely up to the owning player). Remember that distributed step losses are calculated not per unit, but per attacking or defending force (a force could consist of multiple stacks and units).
[12.74] All combats conducted at odds of 12-1 or greater (after all shifts are applied) are considered to be a 'D(3)r4' without an actual roll of the die. Combats conducted at odds of 1-6 or less (after all shifts are applied) are considered to be a 'A(3)r2' without an actual roll of the die.
[12.8] Retreats
[12.81] Retreats are expressed in hexes, not Movement Points. Terrain has no effect on retreats. Stacks forced to retreat off the map or into hexes they could not normally go (e.g., across Impassable hexsides, enemy occupied hexes, etc.), instead must lose one step for each unfulfilled hex of the retreat result.
[12.82] Retreats are conducted by the owning player (Exception: 11.2). When a retreat is called for, he moves the stack as a whole (not each unit individually) one hex at a time into a hex which is free of EZOC (remember 7.32) toward a hex that is closer to a Friendly supply source, or if that is not possible, to a hex that is closer to a Friendly HQ unit. The player has the choice of where to retreat the units as long as no retreating unit or stack enters the same hex more than once, and they end the retreat in a hex that is the maximum possible distance from all Enemy unit(s) that participated in the attack, given the combat result. When a stack is forced to retreat as a result of combat, it will leave a path of vacant hexes behind it called the Path of Retreat.
[12.83] A stack may retreat into or through Enemy Zones of Control. However, for each Enemy-controlled hex entered during a retreat, the owning player must remove one step of strength from a single unit of the retreating stack. If those Enemy-controlled hexes are occupied by Friendly units, no loss is taken. If the defending stack contains a unit(s) which is capable of Mobile Infiltration (11.1) which loses the combat and must retreat through an EZOC, that stack will be allowed a Breakout Attempt. Roll one die and consult the Breakout Table. This is entirely optional and results may always be applied normally.
[12.84] If the only possible end hex of the retreat is either Enemy-controlled (remember EZOCs are negated by Friendly units), or adjacent to Enemy units which have Prepared Assault markers, the stack must continue its retreat until a free hex is found (note these extra hexes have no effect on the enemy advance).
[12.9] Advances After Combat
Any victorious units which participated in the combat (or which are stacked with units which participated) are allowed to advance along the chosen Path of Retreat and sometimes deviate from it. They can advance up to the number of hexes taken as a retreat, which may differ from the original combat result. A units' supply status never effects whether it may advance or not.
[12.91] If all defending or attacking units are eliminated due to combat, the victorious unit(s) may advance the number of hexes remaining in the eliminated unit's retreat obligation. In this case, the victorious player decides the Path of Retreat according to the retreat criteria.
Example #1: If two one step units received a 'D(1)r3' result and the owning player wishes to satisfy the result by eliminating the two units, the victorious unit(s) could advance only two hexes, since that is the number remaining in the defender's numbered retreat obligation.
Example #2: If a full strength multi-step unit alone in a hex received a 'D(1)r2' and the owning player wishes to convert the 'r2' into step loss, thereby eliminating the unit, the victorious unit(s) may not advance. Consider the defending unit to have fought a delaying action with heavy casualties.
[12.92] Advances after combat are conducted in the following sequence:
Step 1 - Move each victorious unit individually. The first hex entered must be the hex formerly occupied by the retreating units. If the retreating units occupied more than one hex, the advancing player may choose which to enter and its corresponding Path of Retreat to follow. If this first hex is a city hex, high elevation hex, or the hex is entered by crossing a Major River hexside, no further advance is permitted.
Step 2 - All non-mechanized units not currently in an Enemy Zone of Control (after Step 1) may continue their advance the permissible number of hexes along the Path of Retreat just conducted by the defeated Player. This move is conducted hex-by-hex, and may not deviate from the Path of Retreat. They must stop their advance immediately upon entering any Enemy Zone of Control. If currently in an EZOC or having utilized an Encirclement Bonus during combat, these units may advance no further.
Step 3 - Mechanized units may now continue their advance the permissible number of hexes, ignoring any EZOC in their current hex (from Step 1). However, they must stop their advance immediately upon entering any other EZOC. These units may deviate from the Path of Retreat - they are not obligated to strictly follow it.
Important Note: Victorious units may cease their advance at any point during execution. They are never required to advance.
[12.93] Units may never advance across a Major River hexside after the first hex of the advance, unless that hexside is traversed by a bridge (Road, Rail, or Pontoon). Units may never advance across a Volga River hexside, unless that hexside has a Pontoon Bridge (Exception: 19.34). Units must stop their advance immediately upon entering a city or high elevation hex (10.64).
Combat Example: Axis Player wishes to attack three Soviet units in stack C. To ensure their destruction, he decides to add stack 3 to the Prepared Assault. Because of the rules for Attack Determination, Soviet stack D must also be attacked. The breakdown regiment is tasked with the soak-off against them.
No air is assigned for either side, so chits are pulled as shown. Axis Player decides to resolve the main attack first. Odds are 29:5 or 5:1. The German 60 Motorized Division gains a CA Bonus and there is also an Encirclement Bonus against the stack from being surrounded by enemy units and ZOC. Note that if Soviet stack D was instead in hex B, there would have been no Encirclement Bonus. Defender in clear terrain with final odds of 7:1, a die roll of 4 results in a 'D(1)r2'.
Because the two units in stack 3 are conducting two different attacks they both must be resolved before any results are applied. Therefore, the soak-off regiment with a Combat Strength of 3 against the Guards rifle division and tank brigade gives an odds ratio of 3:6 or 1:2. Die is rolled a '6' with a result of 'Ar1'. The Axis Player decides to accept the retreat vice being eliminated, and the regiment must retreat into hex 2 as hex 1 still has an EZOC.
Soviet Player, as losing side, now applies the results of the main combat. One step (unit) must be eliminated to satisfy the 'D(1)' and will be permanently removed because the surrounding enemy units and ZOC block any supply lines. He can either permanently remove the remaining units to satisfy the retreat hexes of the 'r2' allowing no advance; or retreat the two hexes through the EZOC. A retreat into either hex A or B will cause one unit to be eliminated by the step loss, but because those two hexes can trace a supply line, the unit (if one of the rifle divisions) would be placed in the Replacement Pool for possible return on a later turn (16.31). However, this option also allows the Axis mechanized units to advance two hexes, and may not be the best choice given the situation.
Once this is done, units in stacks 3, 4, & 5, may advance. However, due to the retreat of the breakdown regiment, if the infantry division in stack 3 chooses to advance, the Soviet stack D would be allowed to advance into the now vacated hex!
[13.0] Soviet Command Delay
There was an element of surprise in the Soviet command when the main effort was launched. The following rules simulate their delayed reaction.
All Soviet units are normally considered 'uncommitted' at the start of the game. Units that begin in Reserve status (they have the letter 'R' as their reinforcement turn) are always committed.
[13.1] Commitment Status Effects
[13.11] Uncommitted units may not move or perform combat during their Player Turn. They do not trace supply and supply effects do not apply to them until they are Committed. As a reminder, HQ units of uncommitted armies are flipped to their commander's name side until they become committed.
[13.12] Uncommitted Soviet units normally may be committed in one of these four ways:
- An Axis attack (Mobile or Prepared Assault) on a Soviet unit or an Axis unit moving into its setup area will commit all Soviet units within that unit's parent army setup area immediately.
- A Soviet Player die roll less than or equal the current Army Commitment Number for a Soviet HQ unit with a 'Commit Roll' marker will commit all Soviet units within that army setup area during the Soviet Commitment Phase of a turn.
- An 'Auto Commit' marker on the HQ unit at the beginning of the Soviet Command Phase will commit all Soviet units in that parent army setup area immediately.
- On turn seven, all Soviet units become committed (Exception: The 47th & 51st (Kuban) Armies, 13.23).
[13.13] Committed units can move and function normally for the duration of the game. Units are considered 'Operational' on the turn of commitment. Soviet units that enter as reinforcements are considered committed the moment they enter the map.
[13.2] Commitment Procedure
[13.21] During the Soviet Command Phase (4.1, C, 1), the Soviet Player takes the following steps to check the commitment status of his headquarters: Soviet Headquarters with an "Auto Commit" marker become committed. Roll for each uncommitted headquarters bearing a "Commit Roll" marker against the Army Commitment Number (ACN). This will determine whether they will become committed. The player may roll in any order. Cross-reference the current turn with the line for that particular Army to find the Army Commitment Number (ACN) for that roll. If the roll is less than or equal to the ACN, all units of that army area are committed, remove the marker and flip the HQ unit. If the Army fails to be committed, place an 'Auto Commit' marker on the HQ unit to remind the player that it will be automatically committed in the following turn. Place a "Commit Roll" marker on every HQ unit which is in an adjacent set-up area to a HQ unit that is committed or has an "Auto Commit" marker.
[13.22] Reserve Armies which have an ACN for that turn will cross-reference the current turn with the line for that particular army to find the ACN for that roll. If the roll is less than or equal to the ACN, all units of that Reserve Army are committed, flip the HQ unit. If the army fails to be committed, it must wait until the next turn to roll again or for its release condition to be met.
[13.23] The Soviet 47th and the 51st Army have no ACN and are committed as per scenario rules. These units were garrisoning the Kuban peninsula against a possible Axis invasion across the Sea of Azov and Kerch Strait.
[13.24] The instant each Army is committed by any means or receives an 'Auto Commit' marker, all uncommitted HQ units in adjacent setup areas will receive a 'Commit Roll' marker.
Designer's Note: Following 13.24 is very important for there to be at least one Commit Roll in the first Soviet Command Phase.
[14.0] Soviet Special Abilities
[14.1] Soviet Counteroffensive
At the beginning of the Soviet Player Turn of any turn after 45, the Soviet Player may declare a Counteroffensive. When declared, place the 'Soviet Counteroffensive Ends' marker on the TRT as a reminder, four turns from the present turn.
[14.11] During these five turns, from the current one to the one in which the marker resides, Soviet initiated Prepared Assaults have their column shifted one to the right. Soviet Player also receives two extra Air Points each turn, over and above what is available via the TRT.
[14.12] From the moment a Counteroffensive is declared until the end of the game, all Soviet mechanized and cavalry units may ignore EZOCs during a one hex move (Mobile Infiltration 11.1). Units of a Soviet tank or mechanized corps can claim a Winter Combat Bonus (12.6) during combat and are eligible to conduct Mobile Assaults (11.2).
[14.13] Optional SCO Build-Up Rule
Most games will see the Axis Player notice any Soviet build up along his front prior to declaring SCO. Obviously, that is not the most realistic situation. This rule will help recreate the surprise suffered by the historical Germans when Operation Uranus began.
On turns 28-44, the Soviet Player may place any rifle divisions and silhouette units upon which he spends Replacement Points to return them to the map, instead into a "Stavka Reserve". On the turn that he declares a Counteroffensive, all these units may be placed at once with eligible HQ units or in Entry Areas. Remember, the Caucasus restriction is still in effect. (16.32)
[14.2] Soviet NKVD "Recruits"
A NKVD unit of any type in a town or city hex has its strength doubled when defending.
[15.0] Dynamic Units
[15.1] Headquarters (HQ) Units
[15.11] Headquarters units never exert Zones of Control and may never attack by themselves. Any HQ unit alone in a hex that is declared as being attacked defends with a strength of one.
[15.12] If stacked with other units, HQ units will add one to the total Combat Strength. HQ units do not count as the non-mechanized unit for a CA Bonus. All HQ units are affected by any combat results suffered by the stack.
[15.13] If taken as a step loss, HQ units are placed on the TRT, five turns from the current turn. They become eligible for return on that turn (16.33).
[15.14] HQ units can function normally for support and supply purposes even when in an Enemy-controlled hex.
[15.15] Axis combat units may only conduct attacks if they have full support via a friendly HQ unit. To facilitate this, Axis HQ units must be supported and be within the limitations given on each HQ unit. (9.3)
[15.16] Soviet HQ units may allow itself and other units to use Strategic Withdrawal (11.4) if designated during turns 3 through 10.
[15.17] Optional Soviet Command & Control Rule
For simplicity, in Fall Blau only the Axis Player is given the burden of maintaining coordination with his HQ units. However, the Soviets did have their own share of struggles. Some of this is reflected in the Command Delay rules (13.0), but following this optional rule will add a little more to their woes. This may give the Soviet Player too much of a headache, but is recommended when using any Historical Limitations with a novice Axis Player.
Soviet combat units that are Committed (13.0) and within three hexes of an enemy unit at the end of the Soviet Command Phase, must be within the Command Range of a friendly committed HQ unit in order to function normally for the Soviet turn. Note: Enemy units and ZOC do not interfere with this determination. Any Soviet units which meet the first two criteria, but are not within a Command Range, must roll on the Soviet Command & Control Table. Each hex in this situation rolls one die and resulting actions are applied to the entire stack.
[15.2] German Breakdown Regiments
[15.21] During the Axis Maintenance Phase (4.1, A, 4), German 'A-6' infantry (not Le or Mountain) divisions which are not in an EZOC, may breakdown or re-combine. A division is only eligible for breakdown when it either has no Strength Chit or has a full strength chit. When breakdown occurs, the original parent unit is removed to the Breakdown Pool (any Strength Chit is returned to the Strength Chit Pool) and three breakdown regiments are placed in the hex.
[15.22] Also during the Axis Maintenance Phase, three German breakdown regiments stacked in the same hex, not in an EZOC, may reform into a full strength infantry division. These regiments are removed from the map and the division is returned from the Breakdown Pool to the hex formerly occupied by the regiments. Breakdown regiments are generic so any division may be brought back, but there must be an available division unit in the Breakdown Pool.
[15.23] Cadres and units which are 'Isolated', cannot breakdown or re-combine. If less than three regiments are on the map, no divisions may be brought back (Exception: 16.24).
The maximum number of breakdown regiments is defined by the counter mix and scenario special rules.
[15.3] Commandos
Each side has a special commando unit which is treated as a cadre for stacking purposes. When in a stack attacking across a Major River, commando units allow the stack to attack full strength across the river. When in a stack attacking a town hex, commando units allow the attack to ignore the column shift for the town. (Exception: An enemy commando unit in the defending hex negates this ability.) If used in this way, they must take the first step loss, if applicable. These units do not count for a CA Bonus. (12.4)
[15.4] Soviet Black Sea Fleet
[15.41] Soviets have two naval assets (generically represented by the ships Krasniy Krim and Krasniy Kavkaz) which can be used to benefit the Soviet Player during the combat phase. When a defending stack is in a coastal hex south of the designated line on Map K, one of the Soviet ships may assist with the combat. Soviet naval assets may be used for both attack and defense (in the same turn, if eligible).
[15.42] If the Axis Player commits any Air Points (5.2) to the combat, a roll is made on the Soviet Naval Loss Table before any shifts are applied. On a result of "Sunk", the Soviet ship is eliminated (combat is resolved normally); a result of "Abort", the support is unsuccessful and the ship returns to port (combat is resolved normally). Any other result means the support was successful and the Soviet Player receives a favorable column shift. Subtract two from the above roll for each Soviet Air Point also used in the combat.
[15.43] If no Axis Air Points are assigned to the combat, the support is automatically successful and the Soviet Player receives a favorable column shift.
[16.0] Replacements
Each side in Fall Blau has Replacement Points available to rebuild units that have suffered losses during the Mutual Reinforcement, Replacement, and Withdrawal Phase (MRRWP 4.1, A, 5). Soviet Replacement Points are available only for the turn they are received. They cannot be saved for future turns. A total number of Axis Replacement Points available are listed in the specific scenario or campaign rules. Each Axis nationalities' Replacement Points may be spent or saved at the discretion of the Axis Player.
[16.1] Eligibility
To be eligible for receiving replacements, the unit must not be adjacent to an enemy unit and be able to trace a supply line of any length to a supply source.
[16.2] Process
[16.21] Units which receive RPs will normally do so with one RP equal to one step. A unit with a reduced Strength Chit takes one RP to remove the chit and return the unit to full strength (no Strength Chit needed). When a cadre for a unit with a Combat Rating receives replacements, the cadre takes two RPs to become a full strength unit. Note: This kind of cadre may not receive only one RP (because of the increased reorganization needed for such an action). All other cadre will be flipped to their full strength side by using one RP.
[16.22] Units which receive steps through the use of RPs are immediately marked with a 'Repl' marker, they may not attack or move for that turn. This effect shows the reduced effectiveness of incorporating replacements during combat operations.
[16.23] Two 'Operational' Soviet rifle divisions may become a single Soviet rifle corps or one 'Operational' Soviet rifle division may become a single Guards rifle division (if available, one per turn). Simply swap the unit(s) with an appropriate rifle corps or Guards rifle division from the Soviet Upgrade Pool during the MRRWP and expend a non-mechanized Replacement Point. Normal restrictions apply (i.e., must not be adjacent to an enemy unit) and they must be stacked in the same hex. Note that in this case, the division units are not placed in the Replacement Pool, they are considered to be eliminated from the game.
[16.24] Starting with turn 28 and every turn thereafter, the Axis Player may expend two non-mechanized Replacement Points and replace one breakdown regiment on the map with a German infantry division from the Breakdown Pool. Only one division can be returned each turn. A 'Repl' marker is placed as above.
[16.3] Returning Units
[16.31] Whenever a Soviet rifle (not Guards rifle) division or Soviet silhouette mechanized unit is eliminated, determine if it can trace a supply line of any length to a supply source. If it can, it is placed in the Replacement Pool for possible return later in the game (remember to flip all Soviet rifle divisions to their 'Untried' side and silhouette mechanized units to their 'Tank Repl' side whenever placed in the Replacement Pool). If unable to trace, it is permanently eliminated. Units with "No Repl" printed on their reverse side may not be replaced and are always considered permanently eliminated.
[16.32] One Soviet rifle division in the Replacement Pool may be brought into play in exchange for two non-mechanized Replacement Points. One Soviet silhouette mechanized unit may be bought into play in exchange for one mechanized Replacement Point. These units are placed in a hex with an eligible HQ unit which is not adjacent to an enemy unit. The HQ unit must be Committed (13.0), and 'Operational' (8.31). Only one unit, can be of any type (mechanized, non-mechanized, or HQ), may be brought into play within the Caucasus Air Zone.
[16.33] One eligible HQ unit from each nationality may be returned to play from the TRT, each turn during the MRRWP. The returning HQ unit is placed in any friendly Entry Area (for Soviets) or city hex (for Axis and Soviets). If there are more HQ units available, they are moved forward on the TRT for possible entry in the next turn.
[16.34] Whenever a German silhouette mechanized unit is taken as a loss it is placed on the TRT five turns ahead as is done with eliminated HQ units (15.13). They also return in the same manner as friendly HQ units (16.33) with a limit of three per turn (any more than three are permanently eliminated).
Designer's Note: This represents the ability of the Germans to reclaim their AFVs and have more ready to return to service at a later date. The Soviets would simply have to build more…
[16.35] Units with a Combat Rating, those with two steps, and those labelled 'No Repl', are placed in the Permanent Dead Box when eliminated. They cannot be restored to play by expending Replacement Points.
[17.0] Reinforcements
Both players may receive reinforcements. These units appear during the Mutual Reinforcement, Replacement, and Withdrawal Phase (MRRWP 4.1, A, 5) on the Game-Turn indicated, in the Entry Area or in a hex on the map that is designated.
[17.1] General Parameters
[17.11] When placed on the map, all units are considered 'Operational' (8.31), Axis mechanized units have received full support (9.3) from an off-map HQ unit, Soviet units are Committed (13.0), and Axis HQ units are Unsupported (unless the scenario rules specify otherwise). It is permissible for reinforcements to use Strategic Movement (10.3) or Rail Movement (10.4) in their Game-Turn of entry, as long as they follow the rules for the chosen movement.
[17.12] Units on the Reinforcement Chart scheduled to replace other units may do so no matter where a unit may be on the map and will assume the same condition as the replaced unit (i.e., a supported HQ unit will remain supported). The unit or any part of the formation, designated to be replaced, must not be 'Isolated' (8.33) or previously eliminated. If these two requirements cannot be met, then a substitute unit or formation must be replaced instead. The substitute must be of the same unit size and type as the unit or formation that was to be replaced. A Soviet HQ unit designated to be replaced that is currently on the TRT will be permanently removed from play and the replacement HQ unit will enter immediately as per 16.33. Designated Guards rifle divisions and rifle corps are placed into the Soviet Upgrade Pool on the turn they arrive.
[17.2] Soviet Reinforcements
Entry Areas are strictly holding boxes for Soviet reinforcements and there can be no combat into or out of them as they do not represent space on the playable map. Soviet units may enter from an Entry Area using Strategic or Rail Movement as long as the actual entry hex is three hexes from an enemy unit. Axis units may freely exit through them to satisfy victory conditions even if occupied by Soviet units (these Soviet units would immediately be subject to 17.21 and placed on the TRT for later arrival).
[17.21] Reinforcements may not leave an Entry Area for an entry hex that is currently occupied by an Enemy unit or an Enemy Zone of Control. Therefore, if all of an Entry Area's entry hexes are occupied by Enemy units or in an Enemy Zone of Control, the Soviet Player may not use that Entry Area and must shift his reinforcements to any adjacent open Entry Area (Example: from B to C or K to L). However, such an action entails a one Game-Turn delay in the entry of these units. Remember that some units have more than one Entry Area which the owning player may choose from. The Soviet Player may not voluntarily delay his reinforcements, shifting and delays may only take place via enemy action.
[17.22] If their specified entry hex is occupied by Enemy units or in an Enemy Zone of Control, Soviet units will be delayed one Game-Turn and enter via the closest Entry Area to the original hex.
[17.23] Soviet Player has three special release groups that arrive only when the following conditions are met:
- Bryansk Front Release Group (BFRG) consists of the 5th Tank Army and other reserves of STAVKA and the Bryansk Front which were sent to protect/recapture Voronezh when the offensive began. These come into play if the Bryansk Front is threatened or after everybody is responding to the attack. Triggering forces on the map are the 13th and 40th Armies. Therefore, this group is placed during the Soviet Command Phase after one of these two armies is committed, but not before the turn indicated on the counter. Once triggered, units with later turns indicated arrive during their respective MRRWP as normal.
- Groznyy Release Group (GRG) arrives via one or both of the Release Entry Areas (southeast corner of Map G) the MRRWP after any Axis unit moves within 5 hexes of Groznyy. Two units of the GRG arrive as normal on turns 47 & 50 if not previously triggered by the above condition.
- Makhachkala Release Group (MRG) arrives via one or both of the Release Entry Areas (southeast corner of Map G) the MRRWP after any Axis unit moves within 5 hexes of Makhachkala.
Note: The fact that all BFRG units are placed during the Soviet Command Phase is how the "1*" units would be able to enter play on turn 1 when they cannot be triggered prior to the first MRRWP.
[17.3] Axis Reinforcements
[17.31] If their entry hex is occupied by Enemy units or in an EZOC, Axis units may be purposefully delayed by the owning player for as long as he wishes.
[17.32] Axis units have the option of being delayed two Game-Turns and then placed near any HQ unit of their nationality instead. The HQ unit may not be 'OOS' or 'Isolated', but does not need to be supported. The unit(s) is placed in or adjacent to the nearest Axis owned town or city hex to the eligible HQ unit that is also closer to a supply source than that HQ unit, and at least three hexes from an enemy unit. Place these units on the TRT as a reminder. Note that units still follow 17.11 when using this option (i.e., mechanized units will be placed already in full support).
[17.33] Axis units arriving in the Kerch Entry Area must enter from that area as soon as the entry hex is free of enemy units or ZOC. If the hex is not free, they may be delayed indefinitely. If the entry hex is Soviet owned, but not occupied or controlled, the units may enter, but must stop movement in the entry hex. Exception: Option K.
[17.4] Withdrawals
The Turn Record Track also indicates withdrawals. On the turn that a withdrawal is indicated, that unit(s) is immediately removed from play during the MRRWP. The unit or formation to be withdrawn must not be 'Isolated' (8.33), cadre, in the Breakdown Pool (15.2), or previously eliminated. Divisions or corps comprised of two physical units must meet the requirements with both units. If these requirements cannot be met, then a substitute unit or formation must be withdrawn in its place. The substitute must be of the same unit size and type as the unit or formation that was to be withdrawn.
[18.0] Man-Made Terrain Features
[18.1] Fortified Zones (FZ)
Fortified Zones represent foxholes with cleared fields of fire, some basic slit trenches, sighted artillery coordinates, light barbed wire entanglements, a scattering of mined approaches, etc. Some of these hexes are clearly marked on the map (or designated in the scenario rules) and may never be destroyed; additionally, others can be made during the course of play and may be destroyed by enemy occupation. A Fortified Zone may only benefit the Soviet Player.
[18.11] Any stack in a FZ has the final column shifted one to the left when attacked. Stacks are not eligible for a CA Bonus (12.4) when attacking a Fortified Zone.
[18.12] All units within an FZ exert a ZOC no matter what type of unit is actually in the hex. The supply state of occupying units has no effect on any function of a FZ. Any unit in an FZ may attack adjacent Enemy units during a Friendly Combat Phase, but if they do all normal combat rules apply.
[18.13] German units may not use Mobile Infiltration (11.1) to enter a Fortified Zone hex.
[18.14] Stalingrad Zone: All hexes of the marked Fortified Zone surrounding Stalingrad were built during the course of the campaign by residents and militia of the city of Stalingrad. During any campaign which uses Map B, place the Stalingrad 'building' markers in every hex of this zone to show their incomplete status. Starting on the turn an Axis unit comes within 20 hexes of Stalingrad (orange line) and every turn afterward (until all markers are flipped or removed by becoming Axis owned), the Soviet Player flips one of these 'building' markers of his choice, and that hex functions as a FZ for the remainder of the game. If any of these hexes become Axis owned before being built or after, the marker is removed permanently from play. The Axis Player may never receive benefits from these hexes.
[18.15] Optional FZ Rule
For players who don't like to see sections of Soviets sitting around and not digging in, the following rule is included. This may give the Soviet Player too much of an advantage, so it's left up to the players.
[18.15.1] Soviet non-mechanized units (not cadre units) that are Committed (13.0) and 'Operational' (8.31) may build a Fortified Zone. If eligible, place a 'Building 3' marker during the Soviet Construction Phase (4.1, C, 2) on the unit. If there is already a 'Building n' marker present and conditions are still met, advance the marker down one step until complete. Example: 'Building 3' marker would be flipped to its 'Building 2' side and next turn replaced by a 'Building 1' which is then flipped to a completed 'FZ' marker on the following turn.
[18.15.2] A Fortified Zone may not be built in a hex with a town, any Marsh, high elevation, or city hex.
[18.15.3] If at any time, the unit building a FZ is determined to be 'OOS' (8.32), is attacked, or leaves the hex, building ceases immediately and the marker is removed. If a completed FZ hex is occupied by an Axis unit, it is removed from the map. Supply situation of the occupying units never affects a completed FZ hex.
[18.15.4] The number of FZ which may be built during a game of Fall Blau is determined by the counter mix. The Soviet Player may voluntarily remove a building or completed FZ marker at any time to account for this limitation.
[18.2] Pontoon Bridges
[18.21] Soviet Player has six Pontoon Bridges and the Axis Player has one which he may place during certain scenarios. 'Pontoon Bridge' markers may be placed during the Axis Maintenance Phase or Soviet Construction Phase in friendly occupied hexes adjacent to Major or Volga River hexsides. The marked hexside adjacent to each marker is considered to be bridged. A Volga River hexside so designated is treated as a Major River hexside crossed by a bridge (i.e., a ZOC may extend across it, plus movement and combat across is allowed). Once placed, Pontoon Bridges can be used by either player for all purposes.
[18.22] Either player may permanently remove a marker from the map at any time during a turn, if one of the hexes adjacent to the marked hexside is occupied by one of his units and the other is not enemy occupied.
[18.23] Pontoon bridges are only available for scenarios 22.5, 22.6, 23.1, and 23.2.
[18.3] Unfinished Railroad
The Railroad running east from north of Gudermes started the game unfinished and may not be used. It is only on the map for accuracy.
Historical Note: When the Germans threatened to cut the rail line that runs through Sal'sk, the Soviets quickly built this replacement line. However, it was built so quickly that many parts were just laid right on the hard desert floor. All records indicate that most troop movement still occurred by sea via Astrakhan and Makhachkala.
[18.4] Kuban Landbridge
Running from Anapa to Taman is a land bridge between hexes K1415 and K1514. This hexside is treated like a bridged Major River (i.e., units attacking across it will be halved).
[19.0] Environmental Effects
During the Weather Phase (4.1, A, 1) of each Game-Turn, the players consult the Turn Record Track and possibly roll a die in order to determine if any weather exists for this Game-Turn. Adjust the marker in the Weather box if necessary. Weather conditions affect the number of Air Points and certain terrain effects. The degree to which units are affected by weather is covered in this section.
There are three possible weather conditions: Clear, Mud, and Freeze.
In addition, on some turns Mountain Snow will affect movement and combat in the Caucasus Mountains. The Clear weather condition has no effect at all, play proceeds normally.
[19.1] Mud
[19.11] The Rasputitsa (Rainy Season) applies to any time from September until the snows come in November. This weather is represented in the game by rolling a Mud result on the Weather Table. The die is rolled each turn 27-38 to see if it is clear or mud for that turn only. Mud is in effect automatically on turn 39 and ends after turn 45.
[19.12] When Mud is in effect, place the marker in the Weather box to indicate this condition.
[19.13] During Mud turns the movement point costs of some hexes and hexsides are increased (see the TEC). Air points (5.0) are reduced for Mud turns. No Mobile Assaults (11.2) are allowed. Only two Soviet BST markers (10.5) may be used.
[19.2] Mountain Snow
[19.21] During turns with Mountain Snow, a ZOC does not extend into a Rough hex. Also, any unit attacking into a Rough hex has its Combat Strength halved (round down), units defend as normal. Exception: Mountain units extend a ZOC into Rough hexes at all times and their Combat Strength is only affected by supply.
[19.22] Starting on Turn 42, all Mountain Passes (except the Krestovy Pass (G3009/G3109) on the Georgian-Military Highway) become closed due to snow fall. No movement, combat, or supply tracing is allowed across a closed Mountain Pass.
[19.3] Freeze
Freeze is a combination of snowy weather and ground conditions.
[19.31] Freeze is called for on the Turn Record Track; place the marker in the Weather box to indicate this condition. Freeze starts on turn 46 and is considered to remain in effect until the end of the game.
[19.32] During Freeze turns Attrition rolls are raised by one (highest possible roll is still a 9). Also, only one Soviet BST marker (10.5) may be used.
[19.33] Freeze allows all Marsh hexes in Air Zones Voronezh and Stalingrad to be treated as clear terrain. The movement and combat effects of crossing a Minor River in Air Zone Voronezh are ignored. Also, the movement effects of crossing a Minor River in Air Zone Stalingrad are ignored.
[19.34] Volga Freeze - On 17 December 1942, the Volga River froze over. Therefore, the following additional effect is instituted from turn 58 to the end of the game. Volga River hexside B2949/B3049 and all hexsides north of it are ignored for all purposes.
[22.0] One Map Scenarios
Learning (Introductory) Scenario
[22.1] Attack of the First PanzerArmee - (F)
The attack by units of the 1st Panzer Armee in the direction of Starobel'sk from 7-12 July 1942.
Use Map B. Play area is defined as south and west of the line of hexes running from B4301 to B4305 to B4808 (inclusive) and the hexrow running from B3516 to B4816 (inclusive). Any hex south of B35xx is out of play. Play starts at the beginning of turn 4 and ends at the conclusion of turn 5.
Setup:
Axis - 295 Infantry Div (B4105), 1 Mountain Div (B4205), 97 Jaeger Div (B4304), 76 Infantry Div (B4007), 94 Infantry Div (B3908), 111 Infantry Div (B3608), 68 Infantry Div (B4204), Pasubio Infantry Div (B3507), Torino Infantry Div (B3507), StuG Abt.(AG Bn) 210 (B3708), 14 Panzer Div (103/14P & 108/14P)(Stack with any German infantry unit), 22 Panzer Division (129/22P & 140/22P)(Stack with any German infantry unit), 4th ArmeeKorps HQ (B3904), 44th ArmeeKorps HQ (B4302), 14th PanzerKorps HQ (Stack with any German panzer unit), Italian Expeditionary Corps HQ (B3506), 52nd ArmeeKorps HQ (B3606), and 370 Infantry Div (B3708).
Soviet - 318 Rifle Div (B4406), 275 Rifle Div (B4306), 295 Rifle Div (B4207), 230 Rifle Div (B4108), 218 Rifle Div (B4010), 261 Rifle Div (B3810), 4 Rifle Div (B3610), 74 Rifle Div (B3610), 176 Rifle Div (B3612), 353 Rifle Div (B3509), 121 Tank Brigade (B3911), 75 Tank Bn (B3911), 349 Rifle Div (B3911), 102 Rifle Div (B4310), 12th Army HQ (B3711), and 37th Army HQ (B4309).
Reinforcements:
Axis: 9 Infantry Division (Turn 4, B3701).
Soviet: None.
Scenario Specific Rules:
Every Soviet HQ unit is Committed (13.0) for the entire scenario. Axis Player receives two Support Points (9.0) each turn. There are no replacements for this scenario. Axis Player receives three Air Points (5.0) each turn for this scenario. Soviet Player gets one Air Point each turn. Axis supply sources are hexes B3701 and B4001. Soviet supply sources consist of hexes B4815, B4416, or B3816. (8.2)
Balance Option: This scenario should be a walk over for the Axis, as it historically was. For those players who want to give the Germans a little heartburn, the following units which were in the area but did not participate and can be added: 216 Rifle Div (B3612), 73 Rifle Div (B3713), 140 Tank Brigade (B3713), and 5 Cavalry Corps (B4707) (pull Strength Chit and use reduced side, unit has only two steps). These units from Kharkov Battles may be included by mutual consent using the initial setup hexes as follows: 74 FR – B4711, B4412, B4112
Victory Conditions:
Axis Player gains points in the following manner:
Eliminating seven or more Soviet units (HQs do not count) = +5 VP.
Owning and able to trace a supply line to a friendly source, the following hexes: Starobel'sk (B4614) = +10 VP. Voroshilovgrad (B3714) = +10 VP.
Owning, but unable to trace a supply line to a friendly source, the following hexes: Starobel'sk (B4614) = +5 VP. Voroshilovgrad (B3714) = +5 VP.
Axis Player loses points in the following manner:
Soviet Player exerts control (ZOC) over Lisichansk (B4309) = -5 VP.
For each eliminated unit of a German mechanized division = -15 VP.
NOTE: Units that are unable to trace a supply line to a friendly source at the end of the game are considered eliminated as well as those eliminated by normal combat. However, they would still exert their ZOC as normal.
At the end of the game, victory is determined as follows: Axis Player has 15 or more VPs: German Major Victory. Axis Player has 10 or more, but less than 15 VPs: German Minor Victory. Axis Player has more than 0, but less than 10 VPs: Soviet Minor Victory. Axis Player has less than 0 VPs: Soviet Major Victory.
Comment: The historical result was a German Minor Victory.
[22.2] Drive to Voronezh - (V)
German drive for Voronezh from 28 June to 9 July 1942.
Use Map A. Any hex south of row A30xx (inclusive) is out of play. Play starts at the beginning of turn 1 and ends at the conclusion of turn 4.
Setup:
Voronezh Setup Chart shows available units. Soviet units (except reserve (R) units) may be placed anywhere within their respective army area as long as all hexes adjacent to the Startline are controlled or occupied by a Soviet unit. Soviet reserve (R) units may be placed anywhere east of, but not adjacent to, the Startline and west of hexrow xx19 (inclusive).
Axis Fourth PanzerArmee & Second Armee (Purple) and 2nd Hungarian Armee (Orange) units available at start are placed in any hex of their respective starting areas as long as every hex adjacent to the Startline is occupied or controlled by an Axis unit. One Sixth Armee unit, 57 Infantry Division, is in hex A3203. Note: Units of one color may not move into the starting area of another color during the first turn of the scenario.
These units from Kharkov Battles may be included by mutual consent using the initial setup hexes as follows: 75 FR – A4317, A4019, A3617; 53 FR – A3316
Historical Setup Variant: All units may setup according to the Voronezh Setup Chart to fully recreate the actual campaign. Use of the Optional Historical Limitation (below) is highly suggested.
Scenario Specific Rules:
All Soviet HQ units are committed (13.0) for this scenario. All German HQ units are considered supported (9.0) for the duration of this scenario. The two Hungarian HQ units are always unsupported. There are no replacements for this scenario. Axis Player receives six Air Points (5.0) for turns 1 and 2, 5 AP for turn 3, and 4 AP for turn 4. Soviet Player receives two for each turn of this scenario.
Axis supply sources are marked on the map. Soviet supply sources are any hex along the northern, eastern, and southern edges of the area of play between A4811-A3112 hexes (inclusive). (8.2)
Given the limitation of scale, only the portion of the USSR covered by the Fall Blau offensive is shown on the maps. Therefore, it must be noted that each side's front line continues north of Map A. This is simulated by mandating a friendly ZOC must be maintained on at least one hex along the northern map edge of Map A.
Soviet tank corps (4 & 24) arriving on turns 1 and 2, may only move half their Movement Point Allowance (round down) during the turn of entry.
For Soviet Players who are less experienced than their Axis counterpart, or just to explore options, it is suggested that the 17th Tank Corps actually start on the map at full strength instead. This assumes that enough fuel supplies had made it to the formation prior to the German attack.
Optional Historical Limitation: Soviet commanders were under orders to counterattack any major advance. Given hindsight, most Soviet Players will not follow this doctrine. To keep things closer to history, the Soviet Player must make at least one Prepared Assault on turns 1 and 2.
Star Hexes: Axis units may never enter hexes with a red star. German command had given orders to take Voronezh and go no further.
Victory Conditions:
Axis Player gains points in the following manner:
Owning Voronezh (A3621) and able to trace a supply line that exactly follows the road from Voronezh to Kursk through Tim (A3720 to A3613 to A3908 to A4103, inclusive) at the end of the scenario = +10 VP.
Owning Staryy Oskol (A3412) at the end of the scenario = +5 VP.
Owning Voronezh (A3621) but unable to trace a supply line that exactly follows the road from Voronezh to Kursk through Tim (A3720 to A3613 to A3908 to A4103, inclusive) at the end of the scenario = +5 VP.
Eliminating more than 10 Soviet division or corps units = +5 VP.
Axis Player loses points in the following manner:
For each eliminated unit of a German mechanized division = -10 VP.
For each eliminated German infantry division (this includes any excess divisions in the Breakdown Pool - take the number of breakdown regiments left on the map and divide by 3, round up for the number of divisions) = -3 VP.
NOTE: German units that are unable to trace a supply line to a friendly source at the end of the game are considered eliminated as well as those eliminated by normal combat.
At the end of the game, victory is determined as follows: Axis Player has 15 or more VPs: German Victory. Axis Player has more than 5 but less than 15 VPs: Soviet Minor Victory. Axis Player has 5 VPs or less: Soviet Major Victory.
Comment: The historical result was a German Victory.
[22.3] Clearing the Don Bend - (D)
The pocket and counterattack of the 1st Tank Army before Kalach-na-Donu from 22 July to 2 August 1942.
Use Map B (or separate Trio Map). Play area is defined as between column B26xx to B40xx (inclusive) and the hexrow running between Bxx33 to Bxx47 (inclusive). Play starts at the beginning of turn 9 and ends at the conclusion of turn 12.
Setup: See Don Setup Chart.
Scenario Specific Rules:
Every Soviet HQ unit is Committed (13.0) for the entire scenario. Axis Player receives two Support Points (9.0) on the first turn (9), and each turn after that receives only one Support Point. There are no replacements for this scenario. Axis Player receives two Air Points (5.0) each turn. Soviet Player receives one Air Point each turn.
Axis supply sources are hexes B3033 & B4033 and Soviet supply sources consist of hexes B3547, B3947, B2643, and edge hexes between B2647 and B3247. (8.2)
Germans were approaching a known and established Soviet defensive line. Axis units may not use Strategic Movement (10.3) during the first turn (9) of the scenario. The Soviet Player may not designate a HQ for Strategic Withdrawal (11.4) during this scenario.
14th PanzerKorps: The HQ unit which arrives on the first turn of this scenario must enter Supported (9.0) (it uses one of the two SP allocated for this turn). The five Axis units (100J, 8/3M, 29/3M, 92/60M, 120/60M) entering via B4036 have their Movement Point Allowance reduced by two on this turn of entry. All units that arrive on turn 9 with this HQ are fully supported for the entire turn. They were advancing from just off map and spearheaded the advance toward Kalach-na-Donu.
Soviet 22 Tank Corps enters the map with only 2 MPs available for Tactical Movement (10.2) only.
Historical Limitation: Soviet commanders were under orders to counterattack. The Soviet Player must make at least one Prepared Assault at any time during the first three turns of the scenario (9-11).
Balance Option: By the end of July, the Germans had come to the end of their supply tether and it should be very difficult to pull off a victory. If balance tends to favor the Soviet Player too much, the following is suggested. All Axis HQ units will remain supported throughout the scenario.
Victory Conditions:
Axis Player wins immediately if he occupies Kalach-na-Donu (B3143).
At the end of the game, either player can win in the following manner:
Major Victory: If he owns and is able to trace a supply line to a friendly source for all three of the following hexes.
Minor Victory: If he owns and is able to trace a supply line to a friendly source for at least two of the following hexes.
Surovikino (B3239). Novogrigoryevskaya (B4045). Don River Railroad Bridge (B2941).
If at the end of the game neither player has fulfilled a victory, final victory is a DRAW.
Comment: The historical result was a Soviet Minor Victory.
[22.4] The Nal'chik-Ordzhonikidze Operation - (N)
The attempt by the III PzKorps to take Ordzhonikidze from 25 October to 9 November 1942.
Use Map G. Play area is defined as west of hexrow Gxx14 (inclusive). Play starts at the beginning of turn 40 and ends at the conclusion of turn 45.
Setup: See Nalchik Setup Chart.
Scenario Specific Rules:
Axis Player receives two Support Points (9.0) each turn for turns 40-43 and one Support Point each turn during turns 44-45. Both Soviet HQ units are Committed (13.0) for the entire scenario.
Rumanian units may receive full support (9.3) from any German HQ unit during this scenario. There are no replacements for this scenario. Axis Player only receives one Air Point (5.0) each turn during turns 40-42 and no Air Points for the remainder of the scenario. The Soviet Player receives no Air Points for turns 40-43 and one Air Point each turn during turns 44-45.
Axis supply sources are either hex G4803 or G4806. Soviet supply sources consist of any hexes on the west, south, or east edges of play area. (8.2)
Soviet 351 Rifle Division was guarding the mountain pass and hesitated to move even when the battle had turned in their favor. Thus, this unit may not move or attack unless attacked. If attacked, it is treated as a normal unit for the remainder of the scenario.
Soviet units on the ridge facing the German 52nd ArmeeKorps were heavily dug-in by this point in time. Consider these units as occupying a completed Fortified Zone. (18.1)
Balance Option: Time is not on the Axis Player's side and it should be very difficult to pull off a victory. If balance tends to favor the Soviet Player too much, the following is suggested. As an exception to the general rule against being in an EZOC, German infantry divisions (111 & 370) may breakdown (15.2) during set up even within an EZOC (allowing them more flexibility). Plus, both Axis HQ units will remain supported (9.0) throughout the entire scenario.
Victory Conditions:
Axis Player gains points in the following manner:
Owning and able to trace a supply line to a friendly source, the following hexes: Ordzhonikidze (G3611) = 4 VP. Beslan (G3811) = 1 VP. Mozdok (G4412) = 1 VP. Prokhladnyy (G4508) = 1 VP. Nal'chik (G4304) = 2 VP.
Owning, but unable to trace a supply line to a friendly source, the following hexes: Ordzhonikidze (G3611) = 2 VP. Mozdok (G4412) = 1 VP. Nal'chik (G4304) = 1 VP.
Axis Player loses points in the following manner:
For each eliminated unit of a German mechanized division = -3 VP.
NOTE: German units that are unable to trace a supply line to a friendly source at the end of the game are considered eliminated as well as those eliminated by normal combat.
At the end of the game, victory is determined as follows: Axis Player has more than 7 VPs: German Major Victory. Axis Player has 5 - 7 VPs: German Minor Victory. Axis Player has 4 VPs: Soviet Minor Victory. Axis Player has less than 4 VPs: Soviet Major Victory.
Comment: The historical result was a Soviet Minor Victory.
[22.5] Operation Uranus - (U)
The encirclement of Stalingrad by the Soviet Operation Uranus from 19 to 25 November 1942.
Use Map B (or separate Trio Map). Play area is defined as between column B19xx to B47xx (inclusive) and east of the hexrows running between B4731 to B3131 to B1937 (inclusive). Play starts on turn 49 and ends at the conclusion of turn 51. There is no Axis Player Turn of turn 49 (skip directly to the Soviet Player Turn).
Setup: Axis Player must setup first. See Uranus Setup Chart.
Scenario Specific Rules:
Every Soviet HQ unit is Committed (13.0) for the entire scenario. For turn 50, all Rumanian HQ units are considered supported (9.0). For turn 51, the Axis Player receives two Support Points to allocate as normal. There are no replacements for this scenario. Axis Player receives one Air Point (5.0) for each turn 49 and 50, and two Air Points on turn 51. The Soviet Player receives two Air Points for each turn for this scenario. Remember that the Soviet Counteroffensive (14.1) adds 2 Air Points to this total.
Axis supply sources are any hex on the western edge of the playing area, south of column B42xx (inclusive). Soviet supply sources are any hex on the northern edge of the playing area or eastern edge of Map B. (8.2)
Stalingrad is a shell of its former self, place a Rubble (5.5) marker in hex B3050 and B3049. STAVKA orders were to pocket the Germans; Soviet units may not attack any hex of Stalingrad.
For this scenario, Pontoon Bridges (18.2) are placed in the following hexes (Soviet Player chooses which hexside is bridged): B2849, B2850, B2950, B3648, B4141, and B4536. The Axis Player does have a pontoon bridge available (though it is doubtful it will ever be needed).
For this scenario, all hexes north of the Don River and west of hexrow Bxx34 (inclusive) are Fortified Zone (18.1) hexes, place markers as appropriate. All Stalingrad FZ hexes are considered to have been built. Only B2349 and B2649 are still complete and Soviet owned.
Soviet Counteroffensive (14.1) is declared on turn 49.
Soviet units of 62nd Army will setup anywhere east of the Volga and may not cross the Volga River for any reason.
Hitler will not allow Stalingrad to be abandoned! Axis Player must have at least one full division (i.e., cadres do not count) in each Stalingrad hex throughout the scenario. No German units on or east of hexrow Bxx48 may move west, except as a retreat result.
Balance Options: This scenario should be a walk over for the Soviets, as it historically was. For those desiring a greater chance at winning while playing the Axis, the following two options may be used alone or together, depending on how much help the player needs.
- For Turn 50, give the Axis Player two Support Points instead of just the Rumanian HQ support.
- Remove the German westward movement restriction from around Stalingrad.
Victory Conditions:
Axis Player wins if he can trace a supply line (of any length) from Stalingrad (B3050) to a friendly source at the end of the game. Soviet Player wins if the Axis Player fails to achieve his victory condition.
[22.6] To the Gates of Stalingrad – (S)
Final approach to the city and beginning of the assault on Stalingrad from 3 August to 12 September 1942.
Use Map B (or separate Trio Map). Play area is defined as between column B19xx to B47xx (inclusive) and east of the hexrows running between B4731 to B3131 to B1937 (inclusive). Play starts at the beginning of turn 13 and ends at the conclusion of turn 26. Use the main Turn Record Track to track turns for this scenario.
Setup: Soviet Player must setup first. See Gates Setup Chart.
Scenario Specific Rules:
Every Soviet HQ unit is Committed (13.0) for the entire scenario. Axis Player receives two Support Points (9.0) for each turn. There are no Withdrawals (17.4) during this scenario. Axis silhouette and HQ units return to the map via B3032. (16.33)
Axis Player is allowed mechanized replacements (16.0) up to a total of 4 for this scenario. The mechanized replacements can be used for any Axis nationality. Axis Player is allowed German non-mechanized replacements up to a total of 4. Axis Player is allowed only 1 Italian and 2 Rumanian non-mechanized replacements for this scenario. Any number of replacements can be taken during a single MRRWP.
Soviet Player receives two non-mechanized Replacement Points each turn. Soviet Player receives one mechanized Replacement Point every other turn starting with turn 16 (i.e., 16, 18, 20, 22, etc.).
Axis Player receives 5 Air Points (5.0) for each turn during this scenario. Soviet Player receives 3 Air Points each turn until turn 22. He then receives only 2 Air Points for each turn (starting on 22) during the rest of the scenario.
Axis supply sources are any hex on the western edge of the playing area, south of column B42xx (inclusive). Soviet supply sources are any hex on the northern edge of the playing area or eastern edge of Map B. (8.2)
48th PanzerKorps: The HQ unit which arrives on the first turn of this scenario must enter Supported (9.0) (it uses one of the two SP allocated for this turn). All mechanized units that arrive with this HQ unit are fully supported, but have their MPA reduced by two on this turn of entry. They were advancing onto the map from Tsimlyansk.
Star Hexes: The moment an Axis unit enters any hex with a small red star, the number of Soviet Replacement Points and Air Points for each turn until the end of the game is doubled. Soviet Player rolls one die. On a result of 1-5, that number of Soviet Star Optional units may enter as reinforcements through Entry Area H (B4742/B4744). On a result of 6-9, all Soviet Star Optional units may enter as reinforcements through Entry Area H (B4742/B4744). On a result of 0, nothing happens and play just continues.
Optional Historical Limitation: To recreate the delay in getting fuel experienced by the historical Sixth Armee commanded by Paulus (between August 1-6), its four HQ units (8, 17, 51, 14Pz) may not be allocated any Support Points on the first turn of the scenario.
Optional Historical Limitation: If the above option is chosen, it is recommended the following rule also be observed. Stalin issued his "No Step Back" order on 28 July. Prudent Soviet play will remove units from a potential pocket against the Don on the first turns of the scenario. This would, of course, be directly counter to Stalin's order and likely get you shot. So to balance things out and keep in the historical feel, no Soviet unit on the west side of the Don River may leave an EZOC (except through retreat) until turn 16 (when Stalin has calmed down). HQ units are exempt from this rule.
Balance Option: For inexperienced Axis Players or more balanced play, up to three Support Points may be used each turn for this entire scenario.
Victory Conditions:
If at any time, the Axis Player fulfills one of the following conditions, he wins a Strategic Victory immediately:
(a) Axis exits three multi-step mechanized units through either Entry Area H (B4742/B4744) or I (B4352). Units must be able to trace a supply line (of any length) from the exit hex to a friendly source at the time they exit.
(b) Axis owns Stalingrad (B3049 & B3050). Supply is not considered for this automatic condition.
NOTE: After exiting, no unit may return to the map. If the required number is not met, those that exited are simply lost.
If neither condition is fulfilled by the end of turn 26, the Soviet Player wins.
Comment: The historical result was a Soviet Victory.
[23.0] Multi-Map Campaigns
[23.1] "Fall Blau"
Full campaign stretching from 28 June to 25 December 1942.
Use Maps (A, B, C, K, & G). Play starts at the beginning of turn 1 and ends at the conclusion of turn 60.
Setup:
Use the Campaign Setup Chart to sort units. Soviet Trans-Caucasus Front units (red icon - 47A & 51A), units of the reserve armies (63A, 6A, & 7RA), and Soviet HQ units (including 24A) must be placed as per the Campaign Setup Chart. Units of those armies with HQ units placed on the map may setup anywhere within their respective army area as long as all hexes adjacent to the Startline are controlled or occupied by a Soviet unit.
Axis Fourth PanzerArmee & Second Armee (Purple), 2nd Hungarian Armee (Orange), Sixth Armee (Green), First PanzerArmee (Yellow), and Seventeenth Armee (Blue) units available at start are placed in any hex of their respective starting areas as long as every hex of the Startline is occupied or controlled by an Axis unit. Note: Units of one color may not move into the starting area of another color during the first turn of the scenario.
Finally, Soviet reserve (R) units may be placed anywhere east of, but not adjacent to, the Startline and west of hexrow xx19 (inclusive).
These units from Kharkov Battles are optional using the initial setup hexes as follows: 75 FR – A4317, A4019, A3617; 53 FR – A3316, A2816; 117 FR – A2515, A2115, A1715; 118 FR – A1513, A1213; 74 FR – B4711, B4412, B4112
Historical Setup Variant: All units may setup exactly according to the Campaign Setup Chart to fully recreate the actual campaign. Use of all Optional Historical Limitations is highly suggested.
Scenario Specific Rules:
Soviet reserve (R) units may not use Strategic Movement during turn 1.
The Soviet units that start as part of the 51st Army, are committed (13.0) when an Axis unit moves within 3 hexes of Rostov, or adjacent to a Don River hexside south of row B30xx (inclusive) (i.e., cross grey line on Map B). However, after they are committed they may not move north of the Don River or row B30xx (inclusive) until one of their units is eliminated, an Axis unit moves south of the Don River (south of B30xx), or turn 14, whichever comes first.
The Soviet units of 47th Army are committed when an Axis unit moves within 5 hexes of any one of them or turn 14, whichever occurs first. NOTE: Soviet 83 Naval Brigade entering on turn 8 enters Novorossiyzk (K0917) and remains there until committed with the rest of the army.
All other Soviet units are committed as per the Soviet Command Control rules. Soviet HQ units which enter as reinforcements are Committed. (13.0)
For support purposes during turns 1-3: Axis HQ units of up to two different colors are automatically supported (9.0). Axis units may only receive full support (9.3) via a supported HQ unit of the same color. Starting on turn 4, Support Points are acquired and used normally.
Axis Player is allowed mechanized replacement points (16.0) up to a total of 9 for this scenario. The mechanized replacements can be used for any Axis nationality. Axis Player is allowed German non-mechanized replacement points up to a total of 12 for this scenario. Axis Player is allowed 2 Hungarian, 3 Italian, and 4 Rumanian non-mechanized replacement points for this scenario. Any number of replacements can be taken during a single MRRWP.
Optional Historical Limitation: Use this instead of previous paragraph. Axis Player gains a mechanized replacement point every six turns starting with turn 6. These mechanized replacements can only be used on German regimental units. Axis Player gains one German non-mechanized replacement point every fourth turn starting with turn 4. Axis Player is given one each Hungarian, Italian, and Rumanian non-mechanized replacement point every time a Hitler Goal chit is drawn (i.e., turns 10, 28, 46). Any number of replacements can be taken during a single MRRWP limited to the totals recorded on the track.
As the Axis Player captures oil derrick hexes, he is rewarded. In the MRRWP following the Axis capture of each derrick hex, the Axis Player gains one mechanized replacement point. This only happens once per derrick hex, if the Axis Player loses ownership and then captures them again, no action is taken. Use control markers to denote which hexes have been captured and which have not.
Axis supply sources are as printed on the map. Soviet supply sources are as printed, plus any hex off the eastern edge and along the northern edge east of the Startline. (8.2) In addition, the ports of Taman (K1711) and Temryuk (K1716), once captured, may be used as Axis supply sources for the remainder of the game.
Given the limitation of scale, only the portion of the USSR covered by the Fall Blau offensive is shown on the maps. Therefore, it must be noted that each side's front line continues north of Map A. This is simulated by mandating a friendly ZOC must be maintained on at least one hex along the northern map edge of Map A.
If the Axis Player owns Novokhoperskiy (A2435), the Soviet Player may no longer use Entry Area F.
Soviet naval assets may be used on Map C and south of column K12xx (inclusive). (15.4)
Star Hexes: The moment an Axis unit enters any hex with a small red star, Soviet reserve units east of the Don (63A, 6A, & 7RA) are automatically committed and the Bryansk Front Release Group (ignore normal entry turn limitations) will enter the following MRRWP, if it hasn't already entered. Once the Axis Player has moved three or more different units into these hexes, Soviet Replacement Points for each turn until the end of the game are doubled and all Soviet Star Optional units may enter as reinforcements through Entry Areas C-G.
Optional Historical Limitation: To recreate the delayed start experienced by the historical Sixth Armee commanded by Paulus, all units with a green color circle may only use half (round down) their printed Movement Point Allowance on the first turn.
Optional Historical Limitation: Soviet commanders were under orders to counterattack any major advance. Given hindsight, most Soviet Players will not follow this doctrine. To keep things closer to history, the Soviet Player must make at least two Prepared Assaults on turn 1 and at least one PA on turn 2. The restrictions are lifted from turn 3 on as most commanders realized their situation and soon began Strategic Withdrawals (11.4).
Optional Historical Limitation: Stalin issued his "No Step Back" order on 28 July. A prudent Soviet Player will constantly retreat units from any potential pockets. This would, of course, be directly counter to Stalin's order and likely get you shot. So to balance things out and keep in the historical feel, no Soviet unit may leave an EZOC (except through retreat) during game turns 11 through 15. HQ units are exempt from this rule.
OKH Options:
Option K - Krim Garrison
Eleventh Armee: Axis units labeled with an 'Opt K' are part of the German 11th Armee. Historically this army was sent north after it secured the Black Sea port of Sevastopol. Some units were left in the Crimea and later brought into the area covered by Fall Blau. With this option their normal arrival turn is ignored. This option must be exercised by turn 10; it is not available after that turn.
If this option is taken by the Axis Player, he has two different choices of entry. If choice A is selected, all these units enter play on turn 10 through entry hex B3303 only (the HQ placement option is not available as their entire Armee enters together). If choice B is taken by the Axis Player, all these units enter play on turn 18 through either Taman (K1711) or Temryuk (K1716) hexes only (the HQ placement option is not available as their entire Armee enters together). If those hexes are occupied by Soviet units or Soviet owned, the hexes must be attacked by the first unit to be placed, as if from a hex off-shore. Soviet owned (but not occupied) hexes are considered to have an inherent Combat Strength of one. This procedure is a Prepared Assault with automatic full support. The German units may advance one hex into the port on any result which includes a defender retreat (Soviet units must retreat at least one hex). Any units that receive an 'A' result, without a corresponding 'D' result, are considered eliminated and removed from play. A result of 'A(1)/D(1)' would be rolled again until one of the other options is rolled. These units may not be delayed.
Once these units enter the map, the Axis Player is granted one extra Support Point each turn for the rest of the game. All Soviet withdrawals after turn 32 and arrival of 2nd Guards Army are cancelled. The Axis Player loses 30 VP.
Sub-Option AIR22 - (Only available if Option K is exercised)
The German 22 Luftlande Division is an additional 'Opt K' unit which was sent to Crete after Sevastopol fell. This option may only be taken along with Option K. If this sub-option is exercised, some other division has been sent to Crete for garrison duty. This unit has a special ability: On turn 10, the Axis Player may elect to use it in its landing role instead of as regular infantry. If the Axis Player chooses to use it in this role, it is placed off-map and may land by air during the MRRWP of any subsequent turn. To conduct a landing, simply place the division in any unoccupied or Axis occupied town or city hex within 20 hexes of an 'Operational' Axis HQ unit. This hex may be Soviet controlled, but not occupied by Soviet units. The division is considered 'Operational' and fully supported for the entire turn following its placement. If the special ability is not used, this unit enters with the rest of the 11th Armee as per Option K rules. Using this division causes the Axis Player to lose an additional 5 VP.
NOTE: The following options must be announced by the Axis Player prior to start of the game.
Option EP - Early Panzer Release
These panzer divisions were kept in reserve until late in the campaign. One division was sent against Zhukov during Operation Mars and the other to attempt relief of Stalingrad. If the Axis Player wishes to use alternate resources to release them early, the 17 and 20 Panzer Division will be available starting on turn 8 (20 Panzer is later withdrawn on turn 22, as per 17.4). They must be exercised together and the Axis Player loses 15 VP. If this option is not exercised, the units of the 17 Panzer arrive as normal on turn 55.
Option P19 – Reserve Use
The German 19 Panzer Division was not used in the actual campaign, being left in reserve and then used for Operation Wirbelwind and later against Mars. It can be made available for reinforcement on turn 4 (and then later withdrawn on turn 22, as per 17.4) with the Axis Player losing 5 VP.
Option LAH – Local Refit
The German SS 'LAH' ("Leibstandarte Adolf Hitler") Motorized Division was sent to France in early July and did not participate in any fighting within the scope of this game. However, with this option it can be made available at start. Simply place the two units of this division within the Seventeenth Armee area and subtract from the Axis Player 10 VP.
Victory Conditions:
Soviet Player wins a Strategic Victory automatically if at any time he owns Rostov (B2114), Voronezh (A3621), Stalingrad (B3050), Groznyy (G3718), and either Stalino (B3303) or Kursk (A4102). Supply is not considered for this automatic condition.
Axis Player wins a Strategic Victory automatically if at any time he owns Kursk (A4102), Stalino (B3303), Rostov (B2114), Voronezh (A3621), Stalingrad (B3050), Tuapse (C2302), Groznyy (G3718), and Makhachkala (G2832). Supply is not considered for this automatic condition.
Axis Player secretly draws one Hitler Goal chit at the beginning of the game which marks one of the options as a current automatic victory condition. At the beginning of turns 10, 28, and 46, another chit is drawn and then it becomes a current condition. When drawing a new Hitler Goal chit, remove the previously drawn chit from play. If at any time, the Axis Player fulfills this current condition, he wins a Strategic Victory immediately. For realism, the Soviet Player must not know what chit is drawn. Axis Player uses the following condition details:
Moscow: Axis owns Rostov (B2114), Voronezh (A3621), and exits six multi-step mechanized units through any of Entry Areas C-E. Units must be able to trace a supply line (of any length) from the exit hex to a friendly source at the time they exit.
Volga: Axis owns Rostov (B2114), Stalingrad (B3050), and exits three multi-step mechanized units through either Entry Area H or I. Units must be able to trace a supply line (of any length) from the exit hex to a friendly source at the time they exit.
Caucasus: Axis owns Rostov (B2114), Novorossiysk (K0917), Tuapse (C2302), Groznyy (G3718), and Makhachkala (G2832). Supply is not considered for this automatic condition.
NOTE: After exiting, no unit may return to the map. If the required number is not met, those that exited are simply lost and not counted as eliminated.
Optional Historical Limitation: On turns when a new Hitler Goal chit is chosen (i.e. turns 10, 28, 46), before the player chooses a new chit, if the Axis Player does not own at least one of the named hexes listed in the current Hitler Goal, consider him replaced by Hitler. He immediately loses the game. This is a more realistic historical outcome.
Otherwise, at the end of the game, Victory Points are totaled to determine victory.
Axis Player gains points in the following manner:
Owning and able to trace a supply line to a friendly source, any of the town or city hexes on the Victory Point Chart.
Axis Player loses points in the following manner:
For each eliminated unit of a German mechanized division = -10 VP.
For each selected OKH Option taken by the Axis Player during the game = -?? VP.
For each town hex west of the startline which Soviet units have control = -10 VP.
Victory is determined as follows: Axis Player has 150 or more VPs: German Major Victory. Axis Player has 100 but less than 150 VPs: German Minor Victory. Axis Player has 55 but less than 100 VPs: Soviet Minor Victory. Axis Player has less than 55 VPs: Soviet Major Victory.
Comment: The historical result was a Soviet Minor Victory.
[23.2] Historical July Campaign
This campaign scenario represents the initial historical attack up to the fall of Rostov in late July.
Use Maps A & B. Play starts at the beginning of turn 1 and ends at the conclusion of turn 10.
Setup:
See Campaign Setup Chart (ignore units which setup on Map C or K).
These units from Kharkov Battles are optional using the initial setup hexes as follows: 75 FR – A4317, A4019, A3617; 53 FR – A3316, A2816; 117 FR – A2515, A2115, A1715; 118 FR – A1513, A1213; 74 FR – B4711, B4412, B4112
Scenario Specific Rules:
Soviet reserve (R) units may not use Strategic Movement during turn 1.
The Soviet units that start as part of the 51st Army, are committed (13.0) when an Axis unit moves within 3 hexes of Rostov, or adjacent to a Don River hexside south of row B30xx (inclusive)(i.e., cross grey line on Map B). However, after they are committed they may not move north of the Don River or row B30xx (inclusive) until one of their units is eliminated or an Axis unit moves south of the Don River (south of B30xx).
All other Soviet units are committed as per the Soviet Command Control rules. Soviet HQ units which enter as reinforcements are Committed. (13.0)
Ignore any Soviet Campaign Reinforcement units scheduled to enter via Entry Areas M through Q, they are not part of this scenario.
For Support Point (9.0) allocation purposes during this scenario, use the following restrictions: Turn 1-3 = All German HQ units of the Second Armee/Fourth PanzerArmee (Purple) and Sixth Armee (Green) only, are supported. Turn 4-6 = Six Support Points may be applied to German HQ units of the First PanzerArmee (Yellow) and Sixth Armee (Green) only. One PanzerKorps HQ of the Fourth PanzerArmee (Purple) may be considered part of the Sixth Armee (Green) for purposes of this rule only. Turn 7-10 = Six Support Points may be applied to any HQ units of any color.
On turns 1-6, Axis units may only receive full support (9.3) via a supported HQ unit of the same color.
Axis Player is allowed mechanized replacement points (16.0) up to a total of 4 for this scenario. Axis Player is allowed German non-mechanized replacement points up to a total of 6 for this scenario. Axis Player is not allowed any Hungarian, Italian, or Rumanian non-mechanized replacements for this scenario. The mechanized replacements can be used for any Axis nationality. Any number of replacements can be taken during a single MRRWP.
Axis supply sources are as printed on the map. Soviet supply sources are as printed and any road hex off the southern edge of Map B. (8.2)
Given the limitation of scale, only the portion of the USSR covered by the Fall Blau offensive is shown on the maps. Therefore, it must be noted that each side's front line continues north of Map A. This is simulated by mandating a friendly ZOC must be maintained on at least one hex along the northern map edge of Map A.
If the Axis Player owns Novokhoperskiy (A2435), the Soviet Player may no longer use Entry Area F.
For purposes of this scenario, the railroad that leaves the map from B1025 and the railroad that leaves at B1027 are connected. Soviet units may use Rail Movement between these two points in either direction at the cost of two hexes of movement.
Historical Limitation: To recreate the delayed start experienced by the historical Sixth Armee commanded by Paulus, all units with a green color circle may only use half (round down) their printed Movement Point Allowance on the first turn.
Historical Limitation: Soviet commanders were under orders to counterattack any major advance. Given hindsight, most Soviet Players will not follow this doctrine. To keep things closer to history, the Soviet Player must make at least two Prepared Assaults on turn 1 and at least one PA on turn 2. There are no restrictions for turn 3 through 10 as most commanders realized their situation and soon began Strategic Withdrawals (11.4).
Historical Limitation: Stalin would not allow reserves designated for protecting Moscow be sent too far south. Given hindsight, most Soviet Players will send his strong tank corps south once the threat has shifted from Voronezh to Stalingrad. This just didn't and wouldn't have happened. To keep things closer to history, the Soviet Player must keep all units of the Bryansk Front Release Group (those with asterisks) north of hexrow A30xx (inclusive). If forced to retreat south of this line they must move north of it as soon as possible. Units of this group are never placed in the Replacement Pool, they are always permanently eliminated (this is an important exception to 16.31).
Star Hexes: The moment an Axis unit enters any hex with a small red star, Soviet reserve units east of the Don (63A, 6A, & 7RA) are automatically committed and the Bryansk Front Release Group (ignore normal entry turn limitations) will enter the following MRRWP, if it hasn't already entered. Once the Axis Player has moved three or more different units into these hexes, Soviet Replacement Points for each turn until the end of the game are doubled and all Soviet Star Optional units may enter as reinforcements through Entry Areas C-G.
Victory Conditions:
Axis Player gains points in the following manner:
Owning and able to trace a supply line to a friendly source, any of the town or city hexes on the Victory Point Chart.
Axis Player loses points in the following manner:
For each eliminated unit of a German mechanized division = -10 VP.
For each town hex west of the startline over which Soviet units have control = -10 VP.
Victory is determined as follows:
Axis Player wins a Strategic Victory automatically if he owns Voronezh (A3621), Stalingrad (B3050), and Rostov (B2114) at any time during the game. Supply is not considered for this automatic condition.
Otherwise, at the end of the game, Victory Points are totaled to determine victory.
Axis Player has 52 or more VPs: German Major Victory. Axis Player has 38 but less than 52 VPs: German Minor Victory. Axis Player has 15 but less than 38 VPs: Soviet Minor Victory. Axis Player has less than 15 VPs: Soviet Major Victory.
Comment: The historical result was a German Minor Victory.
[23.3] Caucasus Campaign - (C)
Covers the drive into the Caucasus aimed at the oilfields of Maikop and Groznyy, 25 July to 9 November 1942.
Use Maps B, C, K, & G. Play area is defined as south and west of the hexes running from B2701 to B2732 to C4632 to C4653. Any hex north or east of that line of hexes (including the line itself) is out of play. Play starts at the beginning of turn 10 and ends at the conclusion of turn 45.
Setup: See Caucasus Setup Chart.
Scenario Specific Rules:
All Soviet units except those of the Trans-Caucasus Front (TCF) and 47th Army are Committed. (13.0) The Soviet units of the TCF are committed when an Axis unit moves within 5 hexes of any one of them, adjacent to Sal'sk (C4726), or Turn 12, whichever occurs first. The Soviet units of 47th Army are committed when an Axis unit moves within 5 hexes of any one of them, adjacent to Krasnodar (C3506), or Turn 14, whichever occurs first. Soviet HQ units which enter as reinforcements are Committed.
Axis Player receives five Support Points (9.0) on turn 10. Afterwards, the Axis Player uses the Caucasus Campaign Support Table to determine Support Points for the current turn.
Optional Historical Support: If both players agree, the Axis Player may use the historical parenthesized Support Points for this campaign.
Rumanian mountain units may receive full support (9.3) via any German supported HQ unit as well as the Rumanian HQ unit. If it enters the game, the Italian HQ unit is always considered supported for this scenario and does not require Support Point expenditure.
Axis Player is allowed German non-mechanized replacement points (16.0) up to a total of 6 for this scenario. Axis Player is allowed mechanized replacement points up to a total of 4 for this scenario. Axis Player is allowed 2 Rumanian non-mechanized replacement points for this scenario. These can be taken in any MRRWP during the game. The Slovak unit uses German mechanized replacements. There are no Italian replacement points.
As the Axis Player captures oil derrick hexes, he is rewarded. In the MRRWP following the Axis capture of each derrick hex, the player gains one mechanized replacement point. This only happens once per derrick hex, if the Axis Player loses ownership and then captures them again, no action is taken. Use control markers to denote which hexes have been captured and which have not.
Soviet Player receives only two non-mechanized Replacement Points each turn (including turn 10). During this scenario, Soviet rifle divisions returned from the Replacement Pool do not have to be placed with a HQ, but may also enter via any available Entry Area. Soviet Player receives one mechanized Replacement Point every fourth turn starting with turn 16 (i.e., 16, 20, 24, 28, etc.).
Whenever the Axis Player moves units into one of the five town hexes: Makhachkala (G2832), Groznyy (G3718), Ordzhonikidze (G3611), Tuapse (C2302), and Novorossiysk (K0917) for the first time, the Soviet Player may bring back one extra rifle division from the Replacement Pool during the immediately following MRRWP.
Both sides use the parenthesized totals for available Air Points. (5.0) Axis Player may not use Air Resupply (5.4) during this scenario.
Axis supply sources are any road hex along the northern or western boundary of the scenario (B2301, B2602 to B2627) or Taganrog (B2209). Once they become Axis controlled, Taman (K1711) and Temryuk (K1716) port hexes may be used as supply sources for the remainder of the game. Soviet supply sources are as printed on the map. (8.2)
Soviet Sea Movement is allowed as per the rules. (10.5) Naval assets may be used south of the line on Map K. (15.4)
German Gross Deutschland Motorized Division and 94 Infantry Division are withdrawn on turn 12. Soviet 51st Army (HQ, 91RD, 156RD, 302RD, 135TB, 155TB, 110CD) must be withdrawn permanently from the map at the beginning of turn 12, note these units are never placed in the Replacement Pool. Soviet 12th Army HQ unit is withdrawn on turn 30. None of these withdrawals require substitutions if these specific units fail to meet the withdrawal criteria, they are withdrawn no matter what.
The Soviet Player may designate a HQ unit for Strategic Withdrawal (11.4) on turn 10.
Optional Historical Limitation: German 13 Panzer Division was waiting for the bridgehead to be cleared before advancing, it may not move on the first turn of the scenario. Historically, it didn't begin crossing the Don until late on 27 July.
Optional Historical Limitation: German 16 Motorized Division was sent to patrol the Kalmuyk Steppe east of Elista on the road to Astrakhan. This put a key offensive force out of the fight in the Caucasus. If you don't mind Hitler in your back pocket, withdraw 16 Motorized Division on turn 21. Obviously, in this case there would be a substitution if needed.
Optional Historical Limitation: Stalin issued his "No Step Back" order on 28 July. Good Soviet play will retreat units from any potential pockets on the first turns of the scenario. This would, of course, directly counter Stalin's order. To keep in this historical feel, no Soviet unit may leave an EZOC (except through retreat) during turns 11 and 12. HQ units are exempt from this rule.
Option K (Eleventh Armee): This option must be exercised at the start of the scenario; it is not available after that. For realism, the Soviet Player must not know whether this is active. If this option is taken by the Axis Player, all 'Opt K' units (ignore any normal arrival turn) enter play on turn 18 through either Taman (K1711) or Temryuk (K1716) hexes only (the HQ placement option is not available as their HQ units enter with them). If those hexes are occupied by Soviet units or Soviet owned, the hexes must be attacked by each unit as if from a hex off-shore. Soviet owned (but not occupied) hexes are considered to have an inherent Combat Strength of one. This procedure is a Prepared Assault with automatic full support. The German units may advance one hex into the port on any result which includes a defender retreat (Soviet units must retreat at least one hex). Any units that receive an 'A' result, without a corresponding 'D' result, are considered eliminated and removed from play. A result of 'A(1)/D(1)' would be rolled again until one of the other options is rolled. These units may not be delayed. The Axis Player receives one extra Support Point each turn for the remainder of the game. With this option, the Axis Player must attain some victory level; a draw is considered a Soviet victory.
Italian Alpine Corps: If the Axis Player does NOT exercise Option K, he has the option of trying to convince Hitler that the Italian mountain troops are needed in the Caucasus. On turn 14 (with no Option K), roll one die and the following results are immediate. With results of 1-6, no effect. With results of 7-9, all three Italian mountain divisions and the Alpine Corps HQ unit enter play this turn at hex B2612 (the HQ placement option is not available as their Corps HQ unit enters with them). With a result of 0, Alpine Corps does not enter play and all units scheduled to enter via Kerch are cancelled by Hitler (they do not enter play).
Victory Conditions:
Axis Player wins in the following manner:
Major Victory – If he owns and is able to trace a supply line to a friendly source for all three of the following hexes.
Minor Victory – If he owns and is able to trace a supply line to a friendly source for at least two of the following hexes.
Makhachkala (G2832). Tuapse (C2302). Novorossiysk (K0917).
Soviet Player wins in the following manner:
Major Victory – If he owns and is able to trace a supply line to a friendly source for all three of the following hexes.
Minor Victory – If he owns and is able to trace a supply line to a friendly source for at least two of the following hexes.
Groznyy (G3718). Ordzhonikidze (G3611). Novorossiysk (K0917).
If at the end of the game neither player has fulfilled a victory, final victory is a DRAW.
If at the end of the game both players have fulfilled a victory, final victory is determined as follows: Player who owns Elista (C4142) is given his victory level.
Comment: The historical result was a Soviet Minor Victory.
[24.0] Reference List
Related Games
Drive On Stalingrad. SPI & SPI/TSR Games, 1977 & 1985.
Edelweiss. CoA Games, 1989.
48th Panzer Korps. PRP, 1991.
Campaign to Stalingrad. Rhino Games, 1992.
Stalingrad Pocket I & II. The Gamers, 1992 & 1996.
Taman '42. Just Plain Wargames, 1993.
Wintergewitter. ATO/LPS, 2007.
Case Blue. MMP/Gamers, 2007.
Caucasus Campaign, The. GMT Games, 2009.