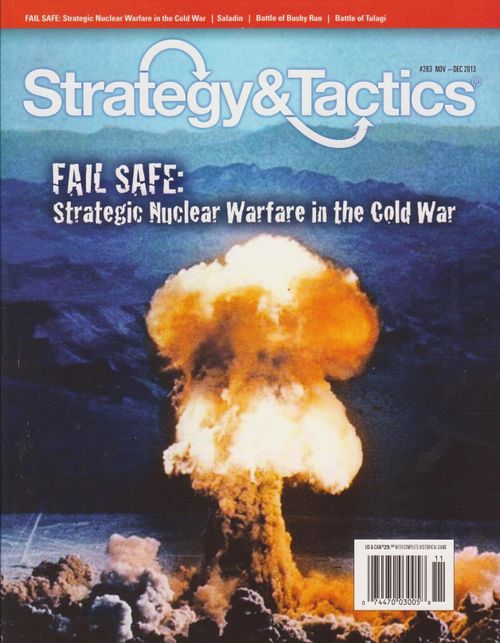
Fail Safe: Strategic Nuclear Warfare in the Cold War
Fail Safe: Strategic Nuclear Warfare in the Cold War Rulebook
Table of Contents
Table of Contents
- 1.0 INTRODUCTION
- 2.0 PLAYERS
- 3.0 THE MAP
- 4.0 COMPONENTS
- 5.0 HOW TO SET UP THE GAME
- 6.0 HOW TO WIN THE GAME
- 7.0 HOW TO PLAY
- 8.0 COLD WAR CRISIS TABLE
- 9.0 BUILDING AND DEPLOYING FORCES
- 10.0 DEFCON
- 11.0 REFIT
- 12.0 STACKING
- 13.0 SORTIES
- 14.0 HOW TO FLY UNITS
- 15.0 AIR COMBAT
- 16.0 ATTACKING BASES
- 17.0 AIR DEFENSE FIRE
- 18.0 WEAPONS SYSTEMS
- 19.0 NUCLEAR BOMBING
- 20.0 AIR TO GROUND MISSILES (AGM)
- 21.0 ATOMIC INTERCEPTOR ROCKETS (AAM)
- 22.0 EXPLANATION OF COMBAT RESULTS
- 23.0 MUSHROOM CLOUD AND EMP MARKERS
- 24.0 FOG OF WAR & REVEAL
- 25.0 RADAR
- 26.0 GROUND UNITS
- 27.0 SPECIAL UNITS
- 28.0 OPTIONAL RULES
- 29.0 COMMAND CONTROL
- 30.0 EFFECTS OF STRATEGY ON COMBAT
- CHARTS & TABLES
- Terrain Chart (first version, as printed)
- Victory Points Chart (first version, as printed)
- Terrain Chart (second version, as printed)
- Victory Points Chart (second version, as printed)
- Air Combat Results Table
- Air Defense Results Table
- Bomb Run Combat Results Table
- Free World Cold War Crisis Event Table
- East Bloc Cold War Crisis Event Table
1.0 INTRODUCTION
In 1957, the Soviet Union wins the space race, using an intercontinental ballistic missile to put a satellite into Earth orbit—Sputnik. The leaders of both the Free World and the East Bloc realize that the space race will open up a new arms race, as both sides plan to build arsenals of nuclear weapon equipped ICBMs against which there will be no defense in the near future. Accordingly, both sides make a crash effort to build up existing strategic bomber forces and make plans to launch a preemptive strike before the other side can get its ICBM arsenal into place. International tensions rise. And then someone pushes a button, nuclear armed bombers fly to their kick-off coordinates for strikes deep into enemy territory: the world has gone beyond the point of Fail Safe.
FAIL SAFE is a wargame of a hypothetical strategic nuclear air war sometime in the late 1950s. There are two players, the East Bloc and the Free World. Each player has cardboard pieces, called “units”, representing formations of aircraft, weapons systems, and air defense forces. Players move their units, conduct air to air battles, and bomb ground targets. The objective of the game is to inflict sufficient damage on the other side in order to prevent them from eventually dominating the world.
2.0 PLAYERS
2.1 Sides
There are two players in the game, the East Bloc and the Free World:
East Bloc: These units and bases are printed in red.
Free World: These units and printed bases are in blue, with the exception that NATO units are green. Most units are US, but the following are NATO allies:
RCAF: Royal Canadian Air Force
NATO: North Atlantic Treaty Organization
3.0 THE MAP
The game map shows the area of operations, which encompasses much of the northern hemisphere, centered on the North Pole. The map has the following features:
Hexes: These are the hexagonal grids. The specific types of hexes are shown in the Terrain Effects Chart. Units are placed in these hexes and moved via them.
3.1 Map Details:
Target hexes: These are hexes with cities and/or airbases. If a hex has both a city and an airbase, then treat it as both types.
East Bloc: This consists of the USSR plus Eastern Europe. Eastern Europe may be treated differently owing to the Crisis Table.
Free World: This includes the USA, Canada, NATO countries (Western Europe), and peripheral countries and islands, such as Japan.
Cuba: This may be either Free World or East Bloc depending on the Crisis Table.
DEFCON Track: This is used to show the starting Alert Level for each side at the start of a scenario.
Refit Box: Place units here that have received Abort results in combat, or short range units which have conducted a mission. They can be recycled back onto the map.
The Deadpile: Place units here that have been permanently destroyed and out of action for the scenario.
4.0 COMPONENTS
The square cardboard pieces are called units.
4.1 Air Units
The numbers are, from top left to right:
Intercept value: This is the number in a black rectangle. This is the relative ability of a unit to find other air units, or avoid detection. It is based on a combination of the air unit’s speed and electronic warfare capabilities.
Air Combat value: This is the number of combat dice the unit can “fire” when engaged in air-to-air combat. It is based on the number of guns and short ranged air-to-air missiles.
Payload Value: This is printed as a number of bomb icons. It is the number of Weapons Systems counters it can carry.
Speed: This is how many hexes the air unit can move in one turn. If the number is green text on a white background, then the unit is short ranged. It can take off but must land on the next turn. Otherwise, the unit is assumed to be long ranged.
Backprinting: The reverse of the counter shows the air unit when it is based (on the ground).
4.2 Identification
This is the unit type. These are:
B: bomber
NB: nuclear powered bomber
D: decoy
EB: escort bomber
F: fighter
FE: fighter escort
VB: carrier based bomber
RC: electronic warfare/recon
Note: The US VB-1 and VB-2 bomber units are printed as “B” types, but are actually considered “VB” types for all game purposes.
Units will have a number following the type, representing the unit’s historical formation or an ahistorical numbering system.
4.3 Weapons Systems
Weapons Systems represent the major payloads that can be carried by an aircraft type. These include:
Nuclear device
These represent atomic and hydrogen bombs. They are backprinted with a mushroom cloud symbol. The “atom” symbol means the unit is a nuclear weapon. These units are backprinted with a mushroom cloud to place when the weapon is detonated.
Air to ground missile (AGM)
These represent short range missiles carried by aircraft, armed with atomic warheads, to be used against enemy ground targets.
The “atom” symbol means the AGM is a nuclear weapon. These units are backprinted with a mushroom cloud to place when the weapon is detonated.
Atomic interceptor rocket (AAM)
These represent rockets armed with atomic warheads carried by aircraft, to be used against enemy aircraft.
The “atom” symbol means the AAM has a nuclear warhead. These units are backprinted with an EMP symbol.
The “Radiation” symbol means EMP, an electromagnetic pulse weapon. These units are backprinted with an EMP symbol to place when the weapon is detonated.
4.4 Ground Units
Ground units represent various anti-aircraft defenses of various types. The numbers are, from left to right:
Radar Range: This is the same as the intercept number printed in the black rectangle.
Anti-Air Combat Value: This is the number of combat dice the unit can “fire” when firing at enemy flying units.
Payload Value: This is always zero.
4.5 Air Defense Unit
These represent concentrations of surface to air missiles, anti-aircraft artillery (AAA), radars and command control centers.
4.6 Command Control (C2) Unit
These represent centers for communications and control. They enhance certain other game functions.
4.7 Super-Carrier (CVN) Unit
This represents a planned but never deployed US Navy aircraft carrier class that would have based nuclear armed strike aircraft.
4.8 Ground Unit Backprinting
The reverse side shows the ground unit in its fog of war status.
4.9 Game Markers
Air Battle: Indicates a hex in which an air combat is taking place.
DEFCON: Indicates a player’s Defense Readiness Condition.
Strategy: Provides victory bonuses for certain types of actions.
Turn: Indicates current turn.
4.10 Definitions
The following terms are defined:
Aborted: Air units that have been temporarily taken out of action.
Adjacent: A hex is adjacent if it is connected to another hex by a side of the hexagon.
Based: An air unit that is on the ground in an airbase. This is indicated by the unit being flipped to its Based side.
Destroyed: Air units which have been shot down and permanently destroyed, and ground targets and airbases which have been successfully bombed.
Enemy: All units belonging to the other player.
Flying: An air unit that is in the air flying, indicated by placing it on the side with its icon.
Friendly: All units belonging to you.
Functional: Ground targets and airbases which have not been bombed.
Phasing Player: The player who is currently taking their turn. The other player is the Non-phasing player.
Range: The number of hexes from a unit to a target hex. This is measured along the shortest path of grids. For ex: an Air Defense unit with a Radar Range of zero could only attack into its own hex. A unit with a range of one could attack into any one adjacent hex. A unit with a range of two could fire up to two hexes away, etc.
Select: Deliberately choose a unit.
4.11 Game Chits
Cold War Crisis Tables: Used for the optional pre-game events check.
Combat Results Tables: These are used to resolve combat. They include:
Air Combat: Used for attacking aircraft in the air. They include Fighter offensive fire, Bomber defensive fire, and AIR Weapon System.
Air Defense: Used for Air Defense units attacking aircraft in the air.
Bomb Run: Used for attacking targets on the ground.
DEFCON (Defense Condition): Each player has a DEFCON track, representing their starting Alert Level.
Explanation of Combat Results: Details effects of the various combat results are explained as follows.
Strategy: Each player has a Strategy track. This shows the general approach to your planned air campaign.
Terrain Effects Chart: Shows the effects of various terrain on the map.
Turn Record Chart: Shows the current turn.
4.12 The Die
Players will need at least one die to play the game. A flight helmet full would be useful.
Players will also need a pencil and paper to record various game functions.
5.0 HOW TO SET UP THE GAME
-
Cold War Crisis Event: Each player rolls on their Crisis Table and implements the result.
-
Determine a Strategy: Each player, secretly and simultaneously, chooses one strategy. Place the marker on that space. (Place a piece of paper over the chart so the other player does not see your choice.)
-
Determine DEFCON Level: Each player, secretly and simultaneously, chooses one DEFCON Level by paying the Resource Points (RP) for it. Place a piece of paper over the DEFCON track to hide this from the other player.
Note: One idea is to take a cardboard tube and then cut it in half (width-wise), and place it over each track.
-
Build: Players, secretly and simultaneously, expend RPs to build their units. Place these units aside, out of view of the other player.
-
Reveal DEFCON Levels:
- Both players show their DEFCON levels.
- The player who has the lower (nearer to 1) DEFCON becomes the First Player. The player with the higher (nearer to 5) DEFCON becomes the Second Player. In the event of a tie, roll a die to see who is First Player.
-
Deploy units:
- The Second Player (the side with the higher DEFCON!) deploys first, then the First player.
- Each player examines their units, then place them face down on the map. See the Deployment rule for details.
-
FAIL SAFE Move: Each player now gets a free move. Each player may move a number of air units equal to the roll of one die, minus their DEFCON Level (or a minimum of one), plus all of your NB air units. This is done within the following parameters:
- The Second Player moves his air units first, then the First player.
- The selected air units can be moved up to their speed. They may not cross the enemy Radar Line, nor may they launch weapons systems or engage in combat.
- All normal rules of movement are otherwise followed.
Example: If you roll a "6", but your DEFCON Level is 3, then you could move any three air units plus all NB units you have built.
6.0 HOW TO WIN THE GAME
-
Each player gains Victory Points (VP) for certain game actions. Players keep track of VP as they are gained throughout the game. At the end of the game, players compare VP. The player with fewer points subtracts his VP from the player with more points. This gives the level of victory.
-
Levels of victory:
- 101 or more = Strategic (best)
- 67 to 100 = Operational
- 34 to 66 = Tactical
- 0 to 33 = Draw
-
VP Chart: This details the number of VP players get for destroying enemy units and bombing ground targets.
-
Strategy:
- If you chose the Counterforce Strategy, then you get double points for destroying enemy units.
- If you chose the Countervalue Strategy, then you get +5 total points for destroying enemy cities, and +1 for destroying enemy airbases.
- If you chose the Civil Defense Strategy, then the enemy receives one half total points for destroying your cities and airbases.
- If you chose Countervalue and the other player chose Civil Defense, then these cancel each other out and you receive normal points for destroying enemy cities and airbases.
7.0 HOW TO PLAY
- Turns
The game is played in Turns. Each Turn represents one hour of operations. There are 12 turns in the game. These are recorded on the Turn Record Track.
- Sequence of Play
During each turn, players must follow the Sequence of Play. Each Turn consists of the following:
A. First Player Turn.
The First Player does all of the following, in this order:
a) Refits: expends RPs to move units from the Refit box to friendly functional airbases.
b) Short range sortie removal: Friendly short range aircraft which are in the air (flying) are placed in the Refit box.
c) Flying: Moves air units.
d) Air Combat: Initiates any air to air combat.
e) Air Defense: The non-phasing player fires Air Defense at phasing aircraft in range.
f) Weapons Systems Launch: The phasing player can drop bombs, and launch AAM and AGM. Place them on the map.
g) Bomb Run: The phasing player uses nuclear bombs and AGM to attack targets in the ground; and also uses AAM to attack air units in the air.
B. Second Player Turn.
The Second Player does all of the following, in this order:
a) Refits: expends RPs to move units from the Refit box to friendly functional airbases.
b) Short range sortie removal: Friendly short range aircraft which are in the air (flying) are placed in the Refit box.
c) Flying: Moves air units.
d) Air Combat: Initiates any air to air combat.
e) Air Defense: The non-phasing player fires Air Defense at phasing aircraft in range.
f) Weapons Systems Launch: The phasing player can drop bombs, and launch AAM and AGM. Place them on the map.
g) Bomb Run: The phasing player uses nuclear bombs and AGM to attack targets in the ground; and also uses AAM to attack air units in the air.
C. End of Turn
If this is the last turn of the scenario, the game comes to an end and players evaluate victory. Otherwise, advance the Turn marker one space. Players can also end the game by mutual agreement if they have landed all aircraft and do not intend to fly any more.
8.0 COLD WAR CRISIS TABLE
-
Prior to start of play, each player must roll one die on their respective Crisis Table. They then implement the results.
-
The die rolls are made openly, and each player can examine the other player’s result.
9.0 BUILDING AND DEPLOYING FORCES
During the Build Phase of initial Set Up, each player receives 150 Resource Points (RPs). The Crisis Tables may also add additional RPs. As such, players can expend RPs to:
-
increase their starting DEFCON Level above “5”; or...
-
Purchase units; or..
Note: Some units have fractional costs. For example, a player could expend one RP to build two units of ½ (one half) RP cost each.
- Save them for use as Refits during the play of the game.
Note: The only time you can change the DEFCON level or build new units is during initial setup.
9.1 Deployment (both players):
Deploy forces per the following parameters:
-
Air units must be set up in airbase hexes in friendly territory within capacity.
-
Ground units must be set up in ground hexes in friendly territory.
-
Weapons systems must be loaded on air units.
9.2 Deployment (Free World Parameters):
Additionally, deploy the Free World forces per the following parameters:
-
US air units can be set up in any Free World airbases. Each US unit which is set up outside of the United States costs 1 additional RP to place.
-
RCAF units can be deployed only in Canada.
-
NATO air units can be deployed only in NATO countries.
-
Super-carrier units may be set up in any ocean or coastal hexes (except hexes that are adjacent to a Soviet coastal hex), at no RP cost.
-
Carrier air (VB) units must be placed on aircraft carriers, at no RP cost.
10.0 DEFCON
You set your DEFCON Level at the start of play by expending RP. Note that if you do not expend any RP, it is automatically set to Level Five. Once set, it remains there for the rest of the game.
10.1 DEFCON effects:
-
Determines who is First Player.
-
Allows each player to move a number of his units equal to his DEFCON level without cost prior to start of play.
The following rules are in the general order of when they are used in play:
11.0 REFIT
11.1 Refit Box
Various game events will call for Air units to be placed in the Refit box. Such units are out of play until they Refit. Only air units may be Refitted. Refitting occurs during the friendly Refit phase.
11.2 Procedure
Expend the listed number of RPs to refit the air unit. Then place it on any friendly functional airbase on its Based side.
Note: This is one RP per unit being Refit.
11.3 Restrictions
-
US units refit on any Free World bases.
-
RCAF units refit on any Canadian or US bases.
-
NATO units refit on NATO bases.
-
East Bloc units refit on East Bloc bases.
12.0 STACKING
12.1 Stacking Situations
Stacking is having more than one unit in a hex. You can place your units in a stack in any order:
-
Ground units: Ground units may be placed in any type of ground hexes. You may have up to two ground units in a hex.
-
Naval Units: Naval units may be placed in all sea hexes. You may have up to two naval units in a hex.
-
Air units (on the ground): Air units that are based on the ground must be on functional airbases. You can stack up to two air units on an airbase. Note that some cities also have airbases on them.
-
Air units (in the air): There may be an unlimited number of air units in a hex.
-
Ground Units: Ground units do not count against air unit stacking, and vice versa. Air units may enter hexes containing enemy ground units. They can move through them with no restrictions. (But—see the Air Defense rule.)
-
Mutuality: Friendly and enemy air units may be in the same hex.
-
Engaging: Air units may enter hexes containing enemy air units. They must stop.
13.0 SORTIES
13.1 Scrambling
A based air unit goes into the air by flipping it face up. It can then move a number of hexes equal to its speed (or simply stay in place over the airbase).
13.2 Basing
An air unit lands by placing it in an airbase, and flipping it over. Air units can land at any friendly functional base. (They do not have to land on the base they started from.)
Based air units may never use their combat strengths, nor may they move. They be attacked by bombers or fighters. They cannot fire back.
13.3 White or Green Speed Value
Air units have either white (short ranged) or green (long ranged) parenthesized speed value.
Short Range Aircraft:
These have a green text on a white background. They fly from a base in one turn. At the end of the movement phase, they can then do one of two things:
-
Stage. The air unit lands at another friendly base that is within range, at which point they are flipped back to their Based side. On an ensuing turn, they can take off again (or remain on the base); or...
-
Remain in Air. The air unit remains in the air. During the ensuing Air Combat and Weapons Systems Launch phases, they can engage in combat normally.
Short Range Sortie Removal. Short-range units flying under (2) remain in the air during the ensuing enemy player turn (where they can engage in defensive combat, etc.). During the ensuing friendly Short Range Sortie Removal phase, all friendly short range aircraft which are flying are removed from the map and placed in the Refit box. They may be restored to the map via the Refit phase of that player’s next game turn. Any Weapons Systems they may have been carrying remain with them.
Example: A US F-106 takes off on Turn 1 and engages in combat. During the East Bloc turn 1, it remains in the air, and if a Soviet air unit were to enter its hex, it would stop it and combat could ensue. During the Free World Short Range Sortie Removal phase of Turn 2, the F-106 is removed from the map and placed in Refit.
Long Range Aircraft
These have a white number on a green background. These can stay in the air any number of turns. They may land, at which point they are flipped back to their based side. On an ensuing turn, they can take off again (or remain on the base).
14.0 HOW TO FLY UNITS
14.1 Procedure
During a Flying phase, you move your air units per the following stipulations:
You can move some, none or all of your units each flying segment. You can move your air units in any direction, up to their speed value. Air units are either short ranged (printed on a white rectangle) or long ranged (printed on a green rectangle).
You can move only via the sides of hexes, not through vertexes.
Each air unit can move a number of hexes from zero up to its speed.
You can move units together as stacks or individually.
Note: After you have moved an air unit and then withdrawn your hand from it, you may not move it again in the same phase.
14.2 Engagement (Air)
Air units can enter a space containing enemy air units. Those air units must stop and this will trigger Air Combat.
14.3 Engagement (Ground)
Air units can enter spaces containing enemy ground units. If the ground unit has a radar range of “1” (one) or more, then the air unit must stop. An air unit can exit a hex containing a ground unit regardless of its range value. If the ground unit has a range of zero (either printed or owing to EMP) then the air unit may move through it without stopping.
Designer’s Note: The movement stoppage models the air unit taking evasive action against enemy radar and SAMs.
14.4 Ground units
Ground units cannot ever move during any Flying segment. Once placed, they stay in their hex for the rest of the scenario.
15.0 AIR COMBAT
15.1 When Air Combat Occurs
Air Combat occurs during a player’s Air Combat segment. This occurs only in hexes where both sides have aircraft flying. The phasing player must have fighters in order to initiate Air Combat.
15.2 Attacking Player/Defending Player
Air combat is at the phasing player’s option. He may initiate air combat in some, none or all hexes in which he has air units capable of initiating combat with enemy air units. The phasing player is deemed the “attacker” while the non-phasing player is the “defender”.
15.3 Combat Resolution
The attacker resolves each combat individually, and finishes each battle before proceeding to the next one. The combats are resolved in any order the attacker chooses.
15.4 Fighters
Only fighters may initiate an attack. Bombers may not, even if they have an air combat factor (they may fire defensively). The non-phasing force must defend, regardless of the type of aircraft it contains.
15.5 Air Combat Procedure
Each combat must go through the following stages:
-
Reveal. Place all flying air units in the hex to one side.
-
Organization of Intercept Groups. The attacker designates which fighters will be attacking which enemy aircraft (see below).
-
Determine First Fire. For each of the above Intercept groups, compare the Intercept values of aircraft in it. The side with the single highest Intercept value in each group fires first. In the event of ties, the defender gets first fire.
-
First Fires. The side that has First Fire consults the Air Combat CRT. Roll one die for each firing air combat factor. Apply the results immediately.
-
Second Fires. Any surviving enemy units may now fire back at enemy aircraft in the same engaged group.
15.6 Intercept Groups
The players form Intercept Groups within the following parameters:
-
The defender lines up all aircraft in any order he chooses.
-
The attacker now lines up his fighters (and only fighters), within the following parameters:
a) At least one fighter must attack each defending unit in the order they were lined up. b) Each attacking fighter may attack only one enemy unit.
-
More than one fighter can engage a single enemy aircraft. In this case, total their air combat strength. Use only the intercept value of the single highest unit to determine which side fires first.
-
If a defending aircraft is attacked by more than one enemy aircraft, it may shoot back at only one of them.
-
Units in one Intercept group cannot fire at other groups, even if all enemy units opposing their own group are eliminated by other units.
15.7 Strictures
If the attacker has non-fighter units, they do not count for engagement and may not be shot at by the defender. If a revelation shows that the attacker has no fighters, then no air combat takes place.
Each unit fires only once per air combat
phase.
Note: Fire is sequential, not simultaneous. One side shoots first and any enemy aircraft which are destroyed or aborted cannot return fire.
15.8 Loss Extraction
Air combat ‘kills’ are effectuated according to the following parameters
-
Priorities: A “Kill” result must be taken before any Abort.
-
Excess losses: If a player is called for to take more losses than he has units involved in an individual engagement, there is no additional effect.
-
Defensive fire: If a single aircraft is being attacked by more than one enemy aircraft, then the defending player designates which one of the attacking units is being targeted.
15.9 After Combat
If there are any surviving air units in a hex, they remain in place. There is only one “round” of combat per each Air Superiority segment. Air units can move off or reengage in their following Flying phase.
Note: See the special aircraft rules for exceptions to the above.
16.0 ATTACKING BASES
16.1 Strafing Prohibition
Fighters cannot use their Air Combat factor to attack based enemy air units (or other units on the ground).
16.2 Bombing Run
A fighter which is armed with nuclear bombs or AGM may use them to attack airbases (and cities), which may destroy enemy ground and based air units.
17.0 AIR DEFENSE FIRE
17.1 Firing Air Defenses
During the Air Defense Phase, the enemy (non-phasing) player may use Air Defense units to fire at enemy air units. Air Defense units can fire up to the limit of their range.
17.2 Range
The range is the value printed in a white (for short range) or green (for long range) box. If this is zero, then the unit can only fire against aircraft flying in its own hex.
17.3 Air Defense Procedure
-
The defender reveals any Air Defense units he wants to fire.
-
For each air defense unit, designate one target hex. It must contain flying enemy aircraft. Reveal all enemy air units in that hex.
-
Each air defense unit firing targets ALL enemy aircraft in that hex. Use the air defense unit’s full combat strength for each fire, and make a separate die roll for each.
-
Use the Air Defense CRT to determine losses. For each enemy air unit in the hex, roll one die for each combat factor of Air Defense that is being fired.
-
Determine the column to be used. This will be based on the printed range of the Air Defense unit being greater than, or equal to, or less than, the targeted air unit’s Intercept value.
-
Roll one die for each attack. Extract any losses.
Note: Unlike Air Combat, Air Defense fire is not one-on-one. It is against each and every enemy flying unit in the hex. For example: if an air defense unit is firing at a hex with three flying enemy air units, then the air defense fires three times and rolls for each target air unit on the CRT. Determine the column separately for each unit.
17.4 Multiple Air Defense Units
If more than one air defense unit is firing at a hex, then each fires separately. If all enemy units in a hex are destroyed by air defense fire, then any excess air defense combat factors, once committed, cannot be applied against other hexes.
17.5 Strafing Invulnerability
Air units cannot fire at Air Defense units (though they can bomb them if they have weapons systems capable of attacking them).
17.6 Phase
Air Defense may fire only in this phase. They may not be fired during movement at air units that pass through a hex.
18.0 WEAPONS SYSTEMS
18.1 Weapons
Weapons systems are a special class of units. Each must be carried by an air unit that has sufficient payload for them. This is indicated by placing their counter underneath the counter of that air unit.
18.2 Payload
Certain air units have a payload capacity, indicated by the number of bomb symbols on the counter. A unit can carry a number of weapons systems points up to its payload capacity.
18.3 Payload Cost
All Weapons Systems have a Payload Cost of one, except Hydrogen Bombs and AGMs, which have a Payload Cost of two.
Example: an aircraft with a Payload of three could carry one AGM and one atomic bomb.
18.4 Pre-loading Weaponry
All Weapons Systems must be loaded onto aircraft at the start of the scenario. Weapons Systems may not be transferred between air units.
18.5 Total Loss
If an aircraft is destroyed, then any weapons systems it is carrying are also destroyed. If an aircraft if aborted, any weapons systems it is carrying remain with it.
18.6 Dropping Bombs
If a unit has a Bomb, then it can drop it in the same hex. Place it in that hex and use the Bomb Run procedure.
18.7 Firing AAMs and AGMs
These are fired in the Weapons System phase. When firing them, place them on the map face up and move them a number of hexes up to their speed. This uses the same procedure as normal flight, except that they may move through enemy air units. They detonate in the final hex of movement.
-
Each AAM will attack enemy aircraft in the air (see AAM rule).
-
Each AGM will attack all targets on the ground (See Bomb Run rule).
18.8 Weaponry Invulnerability
Weapons Systems in flight may not be fired on by enemy air defense nor be intercepted by fighters.
18.9 Weapon Detonation
Weapons Systems, when launched, are automatically removed at the end of the Bomb Run phase. They may not continue flying.
18.10 Targeting
You may launch weapons systems against hexes with no targets in the hopes of getting a result that will create a mushroom cloud or EMP.
18.11 Free World Weapon Usage
Free World Weapons Systems may be carried by any Free World nationality.
19.0 NUCLEAR BOMBING
19.1 A-Bombs, H-Bombs, AGMs
Weapons Systems with a nuclear bomb capability are used to execute nuclear attacks against ground targets. These include A-Bombs, H-Bombs, and AGMs (with the nuclear symbol). AAM may not be used for bombing, only air to air combat.
19.2 Bomb Run
Bombing occurs during a player’s Bomb Run segment if there are nuclear bomb capability weapons systems that have been launched into the hex.
19.3 Attacker/Defender
The player with the nuclear weapons systems being used is deemed the “attacker” while the other player is the “defender”.
19.4 Bomb Run Procedure
Indicate the hex being bombed. Reveal all targets on the ground. For each nuclear bomb capable weapons system which has been launched into the hex:
-
Consult the Bomb Run CRT.
-
Roll one die for the specific type of Weapons System.
-
Cross index the die roll with the result.
-
Apply results immediately.
18.5 Making the Rubble Bounce
You can commit more than one weapon system against a target. If all targets are destroyed before all die rolls are made, the player still completes the other die rolls (to see if there are any Backblasts).
18.6 Explanations of Combat Results
See Explanation of Combat Results (below) for outcomes. Note that generally, all printed targets and ground units will be affected by results.
18.7 Mushroom Clouds
If the result calls for a Mushroom cloud, then flip over the weapons system to its mushroom cloud side. See below.
18.8 No MIRVs
Each nuclear weapons system can be used for only one Bomb Run attack per game. When the attack is completed, place it on its mushroom cloud side if successful against a printed target; Otherwise, put it to one side off of the map.
20.0 AIR TO GROUND MISSILES (AGM)
20.1 Firing AGMs
The player fires AGM at any ground targets during the Weapons Systems Launch phase. Move them to any target hexes within speed range.
20.2 AGM Invulnerability
AGM may move through enemy air and ground units (unlike aircraft).
20.3 AGM Combat Procedure
-
When the AGM reaches the target hex, reveal all enemy ground units in that hex.
-
Execute a Bomb Run attack in the same manner as if the AGM were an atomic bomb.
-
Remover all fired AGM from the map, regardless of outcome.
21.0 ATOMIC INTERCEPTOR ROCKETS (AAM)
AAM units represent air-launched rockets with nuclear warheads (such as the USAF “Genie”).
21.1 Firing AAMs
The player fires AAMs at enemy flying units during the Weapons Systems Launch phase. Move the AAM to any target hexes within speed range.
21.2 AAM Invulnerability
AAM may move through enemy air and ground units (unlike aircraft).
21.3 AAM Combat Procedure
-
When the AAM reaches the target hex, reveal all air units in that hex.
-
The AAM detonates in the air and makes an attack against each air unit, friendly or enemy.
-
For each air unit, roll on the AAM column of the CRT. Resolve each attack individually, and extract any losses. If more than one AAM is attacking, then roll for each one separately.
-
Remove all fired AAM from the map, regardless of outcome.
21.4 AAM Detonation
AAM will target all air units of any types; interception values are ignored. Any friendly units in that same hex are also targeted.
22.0 EXPLANATION OF COMBAT RESULTS
22.1 Abort
If the distance from the targeted air unit to a friendly functional airbase is up to twice the speed of that air unit (short range or long range), then the targeted air unit is placed in the Refit box. Otherwise, the air unit is destroyed. An aborted unit is out of play until Refit.
22.2 Backblast
All flying air units in the target hex scatter. Each player does the following for each of their flying air units in the hex:
-
Roll one die to determine the direction. See the Scatter diagram. Move the unit one hex in that direction.
-
If this would take a unit off the map, it is eliminated instead. If it ends up in a hex with enemy units, it is not involved in any combat. The scattered unit may not attack, launch weapons systems, nor bomb for the remainder of the player turn.
22.3 Destroy
All of the following occur:
-
Flip the Weapons System to its Mushroom cloud side.
-
Any city and/or airbase is permanently destroyed.
-
All based air units are eliminated. Place them in the Deadpile.
-
All ground units are eliminated and placed in the deadpile.
22.4 EMP
Flip the weapons system to its EMP side. (See below.)
22.5 Flatten
Same as Destroy except ground units are not eliminated (result (4)).
22.6 Kill
The targeted enemy air unit is destroyed. Place it in the deadpile box. It may never be restored to play.
22.7 No Effect
Nothing happens. The weapons system is removed from play. Do not place a mushroom cloud or EMP on the map.
23.0 MUSHROOM CLOUD AND EMP MARKERS
23.1 Electromagnetic Pulse
An AAM weapons denotation may result in an EMP. If so, flip the AAM unit to its EMP side and placed in the hex.
23.2 Mushroom Cloud
A successful nuclear weapons denotation will result in the weapon being flipped to its mushroom cloud side and placed in the hex.
23.3 Duration
Once placed in a hex, the EMP or Mushroom Cloud marker remains there for the remainder of the game.
23.4 Superfluous Chits
There may be one each Mushroom Cloud or EMP marker per hex, maximum. Any additional markers are not placed. If a Mushroom Cloud is placed, remove any EMP in the hex. The effects of the Mushroom cloud take precedence.
23.5 Effects of EMP
Flip the weapons system generating the EMP to its EMP side.
-
All ground units in the hex have their printed ranges reduced to zero for the remainder of the game.
-
Air units in the hex have their intercept value reduced by one (to a minimum of zero). If they move out of the hex, then they are restored to printed value.
-
AGM and AAM may not be fired into the Hex (and any AGM or AAM units currently in the hex are eliminated without detonating). Bombs may be dropped normally.
23.6 Effects of Mushroom Clouds
-
All printed targets in the hex are destroyed.
-
All printed targets in the hex are destroyed.
-
All effects of EMP (above) are implemented for the hex.
23.7 Universal Effects
Mushroom Clouds and EMP affect both sides’ units.
23.8 Mushroom Cloud/EMP Markers
Only those results specifically calling for the placement of a Mushroom Cloud or EMP will cause the markers to be placed.
24.0 FOG OF WAR & REVEAL
24.1 Deployment
You may always examine your own units.
24.2 Examining Units
You may examine enemy units and stacks only if a rule specifically calls for it. Obviously, you will always be able to see the top enemy unit in a stack.
24.3 Revealing Units
You reveal units in a hex if:
a) At the start of any phase in which both players have units in the same hex, reveal all units.
b) During combat, all engaged units are revealed.
c) See the Radar and RC rules.
d) You can reveal your own units at any time.
e) Weapons Systems must be revealed when used.
24.4 Revelation Details
Units are revealed as per these circumstances, listed as follows:
Based Air Units:
These are face down (based). If revealed, the enemy can examine them, but has to keep them face down at the end of the examination (as a reminder that they are based).
Flying Air Units
When revealed, the enemy player may examine the units in the stack.
Ground Units
When revealed, face them face up. Once a ground unit has been flipped face up, it remains so for the remainder of the scenario. Also, a player can examine enemy ground units that have been revealed later on, even if there are flying enemy units in the same hex.
24.5 Air Recon
Air units when moving into a hex containing enemy air or ground units cause all those units to be flipped up, as well as themselves.
25.0 RADAR
25.1 Rader Coverage
The extent of Radar coverage is shown by a radar line. You can examine all enemy stacks within the Radar Cover line that are within range of friendly ground units (the black boxed number on ground units).
26.0 GROUND UNITS
26.1 Ground Units Term
Ground Units is a generic term for all land and naval units. They function as indicated throughout the rules.
26.2 Stationary
Ground units may never move.
27.0 SPECIAL UNITS
27.1 Special Air Units
Each of the following air units has special rules that supersede other game rules.
27.2 EB B-60 Devastator
This is a B-36 variant modified to carry parasitic escort fighters, such as the Goblin. Devastators function as bombers, except:
-
They cannot carry any payload.
-
If being attacked, then treat this unit as a fighter. However, it may not initiate attacks on its own.
27.3 VB
This represents a group of carrier-based aircraft. This type of aircraft—and only this type—may employ aircraft carriers as bases. They are otherwise treated as bombers.
27.4 RC
These are early AWACS and EW aircraft. They have the following special abilities:
-
If the player has an RC aircraft stacked friendly aircraft attacking or defending against enemy aircraft, then all other friendly air units in that stack add +1 (plus one) to their Intercept value. Only one RC unit may apply this bonus per stack, and it may not be applied to RC units.
-
An RC unit may not be targeted by defensive fire from defending enemy air units. RC units defend normally when attacked, using their printed Intercept value.
-
An RC may perform Air Surveillance from adjacent hexes. Whenever a RC ends a friendly flying phase adjacent to an enemy hex, the player may take the following action: declare Air Surveillance. Reveal the RC. Then reveal all enemy units in and adjacent to its hex.
27.5 NB
These are strategic bombers powered by a nuclear reactor. For the Fail Safe Move, you can move all of them without counting against the DEFCON limit.
27.6 Decoys
Decoy units deceive the enemy about the strength of friendly formations. They count as air units for all purposes. If they are defending in combat, they must be attacked prior to other units being attacked. They have no combat strength. When eliminated, decoys do not count as VP.
27.7 Super-carriers
These act as bases for VB units. Also, they can conduct air defense fire in the same manner as Air Defense units.
28.0 OPTIONAL RULES
28.1 Player Agreement
The optional rules 29.0 and 30.0 are only implemented if agreed by both players. Players may agree to use some optional rules, and not others, if they prefer.
29.0 COMMAND CONTROL
29.1 Scrambling
A based long range air unit which is not within range of a friendly C2 unit may not move out of its base hex on the turn it takes off. It is simply flipped to its flying side. It may move normally in ensuing turns. Short-range units move normally.
29.2 Interception
The Intercept values of all friendly air units which are within the printed range of a friendly C2 unit are raised by “1” (one). This is a maximum of one regardless of the number of friendly C2 units in range.
29.3 Intercept Bonus
There can only be one Intercept bonus applied per combat. If there is both a C2 and a RC unit involved, then only one may be used to raise the Intercept value.
30.0 EFFECTS OF STRATEGY ON COMBAT
30.1 Strategy Types
The type of Strategy a player choses during initial set up will provide certain combat bonuses throughout a game, listed as follows:
-
If a player chooses Counterforce, then whenever the player is making an attack against enemy air units, he rolls one additional die per attacking fighter, air defense unit, or AAM.
-
If a player choses Countervalue, then whenever the player is making a bombing attack, he rolls one additional die per Weapons System.
-
If a player choses Civil Defense, then whenever the player is making an attack against enemy bombers, he rolls one additional die per intercepting fighter and air defense unit.
CHARTS & TABLES
Terrain Chart (first version, as printed)
| Terrain | Effects |
|---|---|
| Free World Airbase | Free World can base air units. |
| East Bloc Airbase | East Bloc can base air units. |
| Free World Critical City | |
| Free World City | |
| East Bloc Critical City | |
| East Bloc City | |
| Land | Players can place land units. |
| Coast | Players can place land and naval units. |
| Ocean | Players can place naval units. |
| Icepack | No naval or land units can be placed. |
| Radar Line | See Radar rule. |
Victory Points Chart (first version, as printed)
| Kill | VP |
|---|---|
| Enemy bomber (any type) or RC | 2 |
| Enemy fighter (any type) | 1 |
| Enemy C2 ground unit | 4 |
| Enemy air defense unit | 1 |
| Enemy super-carrier | 5 |
| Other enemy units | 0 |
| Abort enemy unit | 0 |
| Free World Bombs | VP |
|---|---|
| East Bloc Critical Cities | 10 |
| East Bloc Cities | 5 |
| East Bloc airbases | 1 (if the airbase is in a city, then receive the VP for both) |
| East Bloc Bombs | VP |
|---|---|
| Free World Critical Cities | 15 |
| Free World Cities | 10 |
| Free World airbases | 1 (if the airbase is in a city, then receive the VP for both) |
| Friendly Strategy | Effect |
|---|---|
| Counter-force | Double VP for unit kills |
| Counter-value | +5 VP for destroying enemy cities, +1 for destroying airbases |
| Civil Defense | Halve the enemy's VP for destroying your cities and airbases |
Terrain Chart (second version, as printed)
| Terrain | Effects |
|---|---|
| Free World Airbase | Free World can base air units. |
| East Bloc Airbase | East Bloc can base air units. |
| Free World Critical City | |
| Free World City | |
| East Bloc Critical City | |
| East Bloc City | |
| Land | Players can place land units. |
| Coast | Players can place land and naval units. |
| Ocean | Players can place naval units. |
| Icepack | No naval or land units can be placed. |
| Radar Line | See Radar rule. |
Victory Points Chart (second version, as printed)
| Kill | VP |
|---|---|
| Enemy bomber (any type) or RC | 2 |
| Enemy fighter (any type) | 1 |
| Enemy C2 ground unit | 4 |
| Enemy air defense unit | 1 |
| Enemy super-carrier | 5 |
| Other enemy units | 0 |
| Abort enemy unit | 0 |
| Free World Bombs | VP |
|---|---|
| East Bloc Critical Cities | 10 |
| East Bloc Cities | 5 |
| East Bloc airbases | 1 (if the airbase is in a city, then receive the VP for both) |
| East Bloc Bombs | VP |
|---|---|
| Free World Critical Cities | 15 |
| Free World Cities | 10 |
| Free World airbases | 1 (if the airbase is in a city, then receive the VP for both) |
| Player Strategy | Effect |
|---|---|
| Counterforce | Double VP for unit kills |
| Countervalue | +5 VP for destroying enemy cities, +1 for destroying airbases |
| Civil Defense | Halve the enemy's VP for destroying your cities and airbases |
Air Combat Results Table
| Die roll | Fighters firing | Bombers firing defensively | AAM weapons system |
|---|---|---|---|
| 1 | - | - | EMP |
| 2 | - | - | - |
| 3 | - | - | - |
| 4 | - | - | Abort |
| 5 | Abort | Abort | Kill |
| 6 | Kill | Abort | Kill + EMP |
Air Defense Results Table
| Die roll | Air Defense unit printed Range is greater than targeted air unit Intercept rating | Air Defense unit printed Range is equal to targeted air unit Intercept rating | Air Defense unit printed Range is less than targeted air unit Intercept rating |
|---|---|---|---|
| 1 | Backblast | Backblast | Backblast |
| 2 | - | - | - |
| 3 | - | - | - |
| 4 | - | - | - |
| 5 | Kill | - | - |
| 6 | Kill | Kill | - |
Bomb Run Combat Results Table
| Die roll | AGM | A-Bomb | H-Bomb |
|---|---|---|---|
| 1 | - | - | Flatten |
| 2 | - | Flatten | Destroy |
| 3 | Flatten | Destroy | Destroy |
| 4 | Destroy | Destroy | Destroy |
| 5 | Destroy | Destroy | Destroy + Backblast |
| 6 | Destroy + Backblast | Destroy + Backblast | Destroy + Backblast |
Free World Cold War Crisis Event Table
| Die roll | Event |
|---|---|
| 1 | New Look. Free World receives 10 additional RP. |
| 2 | Defence White Paper. Reduce the cost of NATO and RCAF units by one RP each (to a minimum of one). |
| 3 | CONELRAD. US Air Defense units now each cost one less RP. |
| 4 | Revolt of the Admirals. The Free World receives 15 additional RP. However, the Free World must build at least one super-carrier unit. |
| 5 | Warsaw Pact Rebellion. The East Bloc may not deploy nor Refit units in Eastern Europe. |
| 6 | Space Race. Free World pays the following costs to set its DEFCON Level: One = 4; Two = 3; Three = 2; Four = 1; Five = 0. |
East Bloc Cold War Crisis Event Table
| Die roll | Event |
|---|---|
| 1 | We Will Bury You! East Bloc receives 10 additional RP. |
| 2 | Espionage. East Bloc AAM now cost 1 RP; East Bloc AGM now cost 2 RP; East Bloc Tu-119 now cost 6 RP. |
| 3 | Sino-Soviet Rapprochement. Receive three A-Bombs and 2 H-Bombs at no cost. |
| 4 | Third World Explodes. The Free World may not deploy any units in Morocco. The Cuban air base starts East Bloc controlled. |
| 5 | Ban the Bomb. NATO aircraft may not carry weapons systems. |
| 6 | Space Race. East Bloc pays the following costs to set its DEFCON Level: One = 4; Two = 3; Three = 2; Four = 1; Five = 0. |