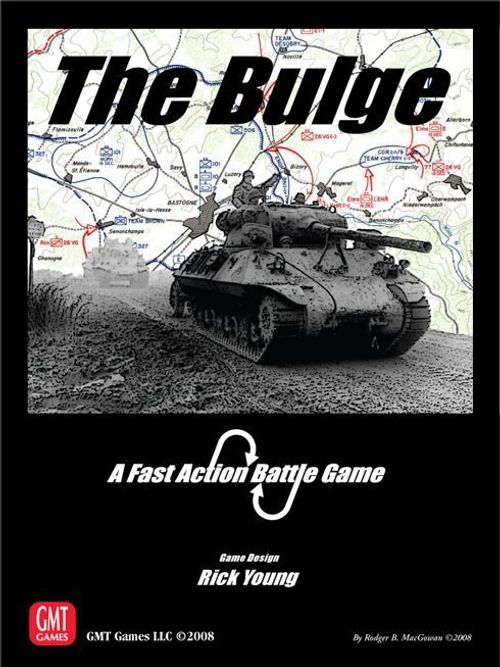
FAB: The Bulge
FAB: The Bulge Rulebook
Table of Contents
Table of Contents
- 1.0 Introduction
- 2.0 Key Words & Concepts
- 3.0 Sequence of Play
- 4.0 Reinforcement & Admin Phases
- 5.0 Stacking and Movement
- 6.0 Combat
- 7.0 Reaction & Breakthrough Phases
- 8.0 Special Actions & Staff Functions
- 9.0 Supply Phase
- 10.0 Designer's Notes
- 11.0 Introduction
- 12.0 Game Components
- 13.0 Definition of Standard Terms
- 14.0 General Rules
- 14.1 Boundary & Connection Types
- 14.2 Appropriate Entry Areas
- 14.3 Army Boundaries & Zones
- 14.4 Movement Restrictions
- 14.5 Engineering Functions & Considerations
- 14.6 Additional Special Action Uses & Staff Functions
- 14.7 Reserve Marker Eligibility
- 14.8 Strategic Movement Limits
- 14.9 Supply Sources & Special Rules (9.31)
- 15.0 Unit Rules Specific to this Game
- 16.0 Asset Rules Specific to this Game
- 17.0 Event Descriptions
- 18.0 Optional Rules
- 19.0 Determining Victory
- 20.0 Designer's Notes
- 21.0 Developer's Notes
- 22.0 Player's Notes
- 23.0 Examples of Play
- 24.0 Scenarios
1.0 Introduction
The Fast Action Battle (FAB) series of games was designed to recreate important battles of the early to mid 20th Century, using wooden blocks to represent the major combat formations (units) and die-cut counters to represent the supporting elements (assets).
As the field commander for your chosen side, you must decide how to make the best use of your units, reserves, assets, and Special Actions towards fulfilling your assigned objectives.
These games are designed to impart a good sense of the history and to play fast (compared to other wargames on the same topic), while being both fun and challenging. Enjoy the games!
There are references to other rules – e.g. (4.3) – throughout these booklets. These references may be ignored when reading through the rules for the first time. They are provided to help you find a rule that you might be seeking during play.
2.0 Key Words & Concepts
2.1 General
10-sided Dice—Regardless of any modifiers and the purpose of the die roll, a roll of '1' will always result in success and a roll of '10' will always result in failure. The dice included with each FAB game are numbered from 1 to 10. If you are using ten sided dice that are numbered from 0 to 9, treat each roll of a 0 as a 10.
Exclusive Rules—The Exclusive Rules (those beginning with section 11.0 in the Play Book) represent rules that are specific to the battle being portrayed. If they contradict the Series Rules, the Exclusive Rules take precedence.
First Player—This is the player that moves first each turn and is designated in the Exclusive Rules (13.1).
Selection Cup—This is an opaque container, such as a coffee cup, from which assets and events are drawn at random. Each player needs a selection cup (not included in the game).
Status Boxes—Each player has his own set of Status Boxes on the map sheet. The Available Box holds the assets/events that are playable; the Used Box holds the assets that have been used in the current game turn; and the Eliminated Box holds all used events and units/assets that have been eliminated.
Success Number—This is the number needed (or less) on a 10-sided die to succeed in what you are attempting. The basic Success Number is always '5'. This can be modified up or down by applicable modifiers. These modifiers are listed in the Combat Table on the Player-Aid Card and in the appropriate rule sections.
2.2 Units, Assets, Events, & Markers
Units—These are the main combat and maneuver elements. Each unit's size depends on the battle portrayed, but is usually a Regiment, Brigade, or Division, and it is represented by a wood block with a label that has been applied according to the Getting Started Card. Blocks are normally placed on edge, with the labels facing away from your opponent, providing a built-in limited intelligence system. The current step value should be along the topmost edge of the playing piece. The highest value on each label represents that unit at full-strength.
Assets—These die-cut counters represent small formations which you can assign to the battles that you deem most crucial. There are two types of combat assets for game purposes; indirect-support (artillery, naval gunfire, etc.), and direct-support (independent formations of engineers, infantry, armor, etc.). For brevity, these asset types shall hereafter be called artillery assets and battle assets, respectively. Various non-combat assets may also be included, depending on the battle portrayed (command staff, fuel, etc.).
Events—Each die-cut event contains the title of the event that it represents and the game turn that the chit gets added to the selection cup. Events include replacements, air missions, Special Actions, and other events that did or likely could have occurred in the battle. The use of each event is explained in the Exclusive Rules (17.0).
Special Actions—Special Actions represent an extra effort of command and supplies used to prompt units to perform above and beyond the normal course of duty (8.0).
Game Markers—These die-cut counters are used to track game information, unit status, and to denote such things as field works, blown bridges, and river assaults on the map sheet.
2.3 Unit Details
Armor & Infantry Class—Units and assets that are armor class represent formations with significant armor components. Units and assets that are infantry class represent formations without significant armor components. The Exclusive Rules will show which unit types are in each class (13.3).
Good Order—Units without either a disordered or a recovering marker are said to be in good order and they operate with normal capabilities.
Disordered—Units (not assets) can become disordered, which affects their capabilities until they recover (6.5). Such units are marked with either a disordered or a recovering marker.
Higher Echelons—The Exclusive Rules will identify the Higher Echelons (Corps or Army HQ's) and their identifying colors (13.2). These Higher Echelons are an administrative concept and are not represented by actual game pieces, but all the units, assets, and events in the game will show which Higher Echelon they belong to by the colors on their labels and counters (shown as the background of the counters for events and within the unit symbols for units and assets).
Morale Checks—At certain times the rules will call for a unit to make a morale check against its troop quality to see if it is able to endure the stress of the task requested of it (6.7).
Point Unit—This is the unit that leads the attack for the Attacker or defends the key approaches for the Defender. Both sides designate a point unit for each combat (6.24).
Reserve Units—These are units that have been marked with a reserve marker, which are limited by the counter-mix. Reserve units may move during a future Movement Phase (5.21).
Steps/Step-Losses—Steps are the increments by which units are built-up by certain events (or Special Action usage) and depleted by step-losses. Steps are represented by the number of pips on the outside edge of the unit labels, with the current step value being on the uppermost edge. If a multi-step unit suffers a step-loss, reduce its current step value by rotating the block 90 degrees counter-clockwise. If a unit with only one step remaining suffers a step-loss, it is eliminated.
Troop Quality—This represents the skill, equipment, training, and motivation of the units/assets, and is shown by the color of the pips on the edge of the piece. Red pips represent elite quality troops, black pips represent veteran quality troops, and white pips represent green quality troops. Current troop quality may change as the unit's current step value changes. A unit's current troop quality may provide Success Number modifiers for combat and morale checks.
Unit Status—This refers to a unit's current condition (good order or disordered; supplied or unsupplied; marked as a reserve or not).
2.4 Areas
Area—Each numbered and named playing space on the map is called an area. Units in play should always be within an area.
Contested & Uncontested Areas—An area containing forces from both sides is said to be contested. An area containing no forces or forces of only one side is said to be uncontested.
Controlled Areas (friendly and enemy)—Each area is controlled by one side or the other, whether contested or not. An area is controlled by the side that was the last sole-occupant. Players begin each scenario controlling all areas identified by the Exclusive Rules (24.0). Change of an area's control occurs at the instant one or more of the other side's units are the sole-occupants. Assets may retain, but do not change an area's control. Use control markers for areas where the controlling side is not obvious (9.2).
Terrain—Apart from river boundaries and blown bridges, terrain has no effect on movement. The terrain difficulty symbol shown within each area matches a Terrain Difficulty Number on the Map Legend which is a modifier that is applied against the Attacker's ground fire (6.28).
Newly Contested Area—A newly contested area is an area containing units of both sides, where the area was uncontested prior to the just completed Movement Phase. Newly contested areas are recognizable at the start of the Combat Phase by the units within them not yet being displayed face-up.
3.0 Sequence of Play
3.1 Reinforcement Phase
Both players receive new units, assets, and events, and also relocate assets from the Used Box (4.1).
3.2 First Player Turn
The First Player moves first in each game turn and is the Phasing Player for steps 3.21 through 3.28 below. The Second Player is the Non-phasing Player.
3.21 Admin Phase. Assets and events are added to the Available Box (4.2a). Events and engineering assets may then be played by both players (4.2b & 4.2c).
3.22 Operational Movement Phase. Each of the Phasing Player's units may move, build field works, hold its position, or be marked as a reserve (5.21 – 5.24).
3.23 Strategic Movement Phase. The Phasing Player may move units marked with a reserve marker via strategic movement (5.4). Restrictions that apply are found in 14.8.
3.24 Combat Phase. All combats required or desired by the Phasing Player are resolved, in any order the Phasing Player determines, per the combat rules (6.0).
3.25 Reaction Phase. The Non-phasing Player moves any reserve units that he wishes to move, up to their full movement allowance, removing the reserve marker from the units that have moved (7.2).
3.26 Breakthrough Movement Phase. The Phasing Player moves any units marked with an exploitation marker (6.8), any reserve units (5.21), and any other units he activates via Special Action (8.21) as desired, in any order desired (7.3).
3.27 Breakthrough Combat Phase. A round of combat must be fought in newly contested areas, and may be fought elsewhere by spending a Special Action (8.22). Once this Combat Phase begins, there is no more movement allowed for the current player turn.
3.28 Supply Phase. Both players verify the control of areas, check supply for friendly units, and adjust disordered markers; then the Phasing Player makes unsupplied morale checks; and then both players remove all appropriate markers (9.0).
3.3 Second Player Turn
The Second Player now performs Phases 3.21 through 3.28 as the Phasing Player, with the First Player becoming the Non-phasing Player.
3.4 Victory Check
Victory Points are calculated (19.0) and a check is made for a sudden death victory (19.4).
3.5 Game Turn Advancement
If a sudden death victory was not achieved, advance the Game Turn marker to the next turn unless the last turn of the game was just played. In that case, check the scenario's victory conditions to determine which side has won the game.
4.0 Reinforcement & Admin Phases
4.1 Reinforcement Phase
Both players perform each of the following actions in the sequence listed below:
a) If a player's reusable Special Action was available to him last turn and he did not use it (it's still in the Available Box), the player may move any one asset of his choice directly from the Used Box into the Available Box, while also keeping the reusable Special Action in the Available Box for the current turn. Move any reusable Special Action(s) in each player's Used Box into their respective Available Box.
b) Both players move any and all assets that remain in their Used Box into their respective selection cup.
c) Place reinforcing units on their respective entry area(s) as shown on the unit label. There is no movement cost in placing these units in their starting areas. Note that the entry area letters on the map are labels identifying the adjoining entry areas, and are not areas themselves. Placement may not violate stacking, nor may units be placed in an enemy-controlled area unless the area is currently vacant. If the unit's label lists two areas, the listed areas indicate a range of allowable entry areas (e.g. AC means the unit can be placed in Entry Area A, B, or C). If all indicated entry areas are currently blocked per the above, the unit's arrival is delayed by one turn and it then arrives at the nearest allowed appropriate entry area (14.2). Another option would be to spend a Special Action to reroute the reinforcement on its indicated turn (8.27). Units arrive at full-strength unless otherwise indicated by the scenario.
d) Place reinforcing assets/events in the selection cup.
4.2 Admin Phase
This Phase occurs at the start of each player turn and is performed in the following sequence:
a) Both players randomly draw a number of asset/events from their selection cup as indicated on the Turn Track (see example below), placing the drawn chits in the Available Box.
b) The Phasing Player may play events currently in the Available Box, and use engineer assets currently in the Available Box to perform engineering functions (4.3). The Phasing Player may also perform Staff Functions (8.3) and certain Special Action uses (8.25 & 8.26) at this time.
c) The Non-phasing Player may then play events, Staff Functions, Special Actions, and engineer assets as above.
4.21 Alternate Event Use. Either player may elect to use an event to move two assets (not units or other events) of the owning player's choice from the Eliminated Box into the selection cup, rather than for its printed (17.0) purpose.
4.22 Used Events. Whether used for its printed purpose or the alternative use above, events are single-use only and each is placed in the Eliminated Box after being used.
4.3 Engineering Functions
Each engineer asset in the Available Box may be used to perform one of the functions defined in 4.31 through 4.35 below, a function specified in the Exclusive Rules (14.5), or may be used as a battle asset during combat (6.32 & 6.33).
4.31 Blow up Bridge(s). Bridges may be demolished (blown) where the engineering player has a supplied, friendly-controlled, and uncontested area adjacent to the river boundary. Each engineer asset may blow up to two bridges in an Admin Phase, provided both bridges are adjacent to the same eligible area. Place a blown bridge marker on the affected river boundaries and place the engineer asset in the Used Box.
4.32 Repair a Bridge. To repair a blown bridge, the engineering player must either control both areas adjoining the blown bridge or control one area and contest the enemy-controlled one. Each engineer asset may repair one bridge in an Admin Phase. The friendly-controlled area that the repair is originating from must be both supplied and uncontested. Remove the blown bridge marker and place the engineer asset in the Used Box.
4.33 Construct Field Works. Place a field works marker on any supplied, friendly-controlled, uncontested area containing at least one friendly unit of the same Higher Echelon as the engineer, and then place the engineer asset in the Used Box.
4.34 Construct a Roadblock. Place a roadblock marker on any supplied, friendly-controlled, and vacant area that has a Terrain Difficulty Number of one or higher, and then place the engineer asset in the Used Box. The effect of the roadblock is that for the current player turn, the first enemy unit that enters the area must pay one additional movement point to enter, and then it ends its movement in that area. The roadblock marker is removed when an enemy unit pays this penalty, when a friendly unit enters the area, or during the Supply Phase of the same player turn (9.5).
4.35 Create a Defended Roadblock. Place the engineer asset itself instead of a roadblock marker in a supplied, friendly-controlled, and vacant area that has a Terrain Difficulty Number of one or higher. The defended roadblock is identical to the roadblock above, except that the engineer asset is not removed by an enemy unit entering the area, acting partly as a unit instead, in that it may attempt to blow bridges by following rule 5.35d, and it causes all enemy units to stop in the area, forcing them to resolve combat. During the Combat Round, the Defender may not use a Special Action to reinforce or retreat before combat and one artillery asset from the same Higher Echelon is the only asset that may be assigned to help the defending engineer (no events). If the defending engineer survives until the Supply Phase (with or without combat), it is placed in the Used Box.
Note: Only use defended roadblocks to avert a crisis, as they will often result in the destruction of a valuable engineer asset.
5.0 Stacking and Movement
5.1 Stacking Limits
Each area may hold up to two units of each side. Stacking limits are enforced at the end of each Phase and throughout each Combat Phase by retreating (6.6) any units in excess at those times. Units unable to legally retreat to correct overstacking are eliminated instead. There is no stacking limit for assets.
5.2 Operational Movement Phase Options
During an Operational Movement Phase, each eligible unit may be placed in reserve, move to another area within range of its movement allowance, build field works, or hold its position.
5.21 Placing Units in Reserve. Reserve markers may be placed on eligible (14.7) units during the Operational Movement Phase, up to the limit of the counter-mix. A unit that is in reserve may move either in the same Operational Movement Phase, in the Strategic Movement Phase, during a Reaction Phase, or a Breakthrough Operational Movement Phase. The reserve marker is removed when the unit moves, when the area containing the reserve becomes contested, or during the enemy player's next Supply Phase (9.5).
5.22 Moving to Another Area. During a friendly Operational Movement Phase, each infantry class unit has a movement allowance of three movement points, and each armor class unit has a movement allowance of six movement points. No unit may exceed its movement allowance unless moving only one area (5.33). Units are revealed (placed face-up) when entering a contested area if the other forces within that area are already face-up from a prior Combat Round, even if the existing units leave to allow new units to enter. Otherwise the area containing enemy units becomes newly contested and the units remain upright until the Combat Phase.
5.23 Building Field Works. A unit may expend its entire movement allowance in an uncontested area to place a field works marker in that area. Only supplied units in good order may build field works. All units friendly to the unit that built the field works benefit from it in that area. A field works marker is removed when it absorbs the first hit in combat, when the area does not contain a friendly unit at the end of any Phase, by an enemy engineer in combat (6.33), or when the area is contested during any Supply Phase. Field works never benefit enemy units. Enemy units have a –1 Success Number modifier when firing at friendly units that are in field works at the time the attacking dice are rolled.
5.24 Hold Position. The unit neither moves nor changes its status.
5.3 Operational Movement
5.31 Boundaries & Connections. Each area is separated from other areas by its boundaries. Units use connections to cross those boundaries, which costs movement points. The Exclusive Rules may introduce other boundary and/or connection types (14.1).
Boundary Types—the standard boundary types are as follows:
- Open boundary
- River boundary
- A bridge always exists on each river boundary unless a blown bridge marker is present
- Blown bridges affect movement
Connection Types—the standard connection types are as follows:
- Road connection
- Basic movement cost: 1 MP
- Where a primary road connects two adjacent areas
- Primary roads connecting to adjacent areas do not have to be connected to each other inside an area
- Field connection
- Basic movement cost: 2 MP
- Where no primary road connects two adjacent areas
5.32 Movement Point Costs Between Areas. Units may move between adjoining areas. Units may not move diagonally across the point where boundaries intersect. The movement costs are as follows:
- If a road connects two areas (whether crossing over an open or a river boundary), the crossing costs one movement point.
- Otherwise, it is a field connection (whether crossing over an open or river boundary) and the crossing costs two movement points.
- A river boundary where the bridge has been blown costs a unit its entire movement allowance to cross. This supersedes the two previous bullet points.
- Entering an area that already contains unit(s), friendly and/or enemy, costs one additional movement point (total).
- Units exiting a contested area pay one additional movement point (5.34).
- Unsupplied and/or disordered units are only permitted to move into an adjacent area (5.33).
5.33 Guaranteed Minimum Movement. A unit may always move from its starting point to a non-prohibited adjacent area, even if such a move would exceed its movement allowance.
5.34 Exiting a Contested Area. If exiting a contested area, the first area entered must be both friendly-controlled and uncontested. From that first allowed area the unit may continue moving, up to the limit of its movement allowance, but that unit may neither enter nor create another contested area during that same Movement Phase.
5.35 Other Movement Restrictions:
a) Units are always moved one at a time, with one unit completing its move before the next unit begins its move.
b) Units must stop when entering either an area containing enemy unit(s) or a roadblock (4.34 & 4.35).
c) Only one unit may cross each river boundary (whether the bridge is blown or not) into a contested area each Movement Phase. There is no limit on the number of units crossing a river boundary into uncontested areas, even if leaving a contested area.
d) A unit that attempts to cross a River boundary into a newly contested area triggers an opportunity for the opposing side to attempt to blow that bridge. This attempt is optional, and succeeds on a 1-5. If the bridge is blown, the unit that triggered the attempt may still cross the river if it began the Phase adjacent to the targeted area. If the unit does not or cannot cross, it does not pay the movement cost for the area it was to have entered. It instead loses one movement point, but may continue moving.
e) A river assault marker is placed for newly contested (only) areas where all attacking units crossed river boundaries into the area and at least one of the attacking units crossed a blown bridge into the area.
5.4 Strategic Movement (Strat-moves)
Only supplied units that are marked with a reserve marker may strat-move. See rule 14.8 for applicable restrictions. To strat-move, the unit is moved from its starting area to any other friendly-controlled and supplied area that it can trace a continuous path of road and field connections to, without crossing a blown bridge or moving into or through an enemy-controlled or a contested area. Remove the reserve marker from any units that strat-move.
6.0 Combat
Combat is required for newly contested areas. Combat is optional (Phasing Player's option) where an area was already contested, signified by the units already being face-up at the start of the Combat Phase. Combats are resolved in any order chosen by the Attacker.
6.1 General Rules
6.2 The Combat Round
The following sequence must be followed each time there is a Combat Round fought within an area. For combat purposes, the Phasing Player is always the Attacker, and the Non-phasing Player is always the Defender. Disordered units may not participate for the Attacker or be assigned losses but do participate for the Defender normally (with the –1 Success Number modifier for being disordered).
6.21 Defender's Special Action Decision. The Defender may use a Special Action to reinforce or retreat from this battle (8.23 & 8.24). If the Defender retreats, an exploitation opportunity arises (6.8), and this Combat Round is over (proceed to 6.29), otherwise continue to 6.22 below.
6.22 Attacker Assigns Assets. Provided his forces present are both in supply (from the Supply Phase) and can currently trace a valid supply path (9.31), the Attacker may assign assets to this battle from his Available Box by placing them in the contested area. If all attacking units are from the same Higher Echelon, then up to two artillery assets and/or one event from that Echelon may be assigned for the Attacker. The only limits on battle assets are the number in the Available Box and that the assigned assets are from the same Higher Echelon as the attacking units. If units from different Higher Echelons are involved, then no battle assets (or events) may be assigned; only the artillery assets are allowed (up to one from each involved Higher Echelon).
6.23 Defender Assigns Assets. Provided his forces present can currently trace a valid supply path (9.31), the Defender may assign assets to this battle from his Available Box by placing them in the contested area. No more than one artillery asset and/or one event may be assigned for the Defender. The only limits on battle assets are the number in the Available Box, and that all units involved must be from the same Higher Echelon as the assigned assets. If units from different Higher Echelons are involved, only one artillery asset may be assigned from either involved echelon (no battle assets or events chits). This also applies if the only defender is an asset (4.35).
6.24 Point Units Designated, then Units Revealed. Both sides designate their point unit, Defender first. For a newly contested area, the Defender designates, but does not reveal the point unit until the Attacker also designates his point unit. Each firing unit (and asset) compares its own unit type and troop quality against the opposing side's point unit to determine applicable modifiers for its own Success Number. The point unit for both sides will also be the first unit to suffer a step-loss during the Combat Round (battle assets may suffer losses before the point unit). The point unit cannot be an asset unless there is no unit present. After both sides have designated their point units, unrevealed units of both sides are revealed in opposing lines, with their current step value facing the line of enemy units.
6.25 Attacking Artillery Fires. The Attacker rolls one die per assigned artillery asset, modifying the Success Number as indicated by the Combat Table. All hits are applied to the Defender per rule 6.42. If the point unit is eliminated, a new one must be chosen following rule 6.24 if any defenders remain. If all non-artillery defenders are eliminated, an exploitation opportunity (6.8) arises for the Attacker and the Combat Round ends after any defending artillery fires (6.26).
6.26 Defending Artillery Fires. The Defender rolls one die per assigned artillery asset (some of the FAB games allow more than one for certain Defenders—see 16.0), modifying the Success Number as indicated by the Combat Table. Hits are applied to the Attacker per rule 6.41. If the point unit is eliminated, a new one must be chosen as in rule 6.24 if any attackers remain. If the Attacker aborts the attack (6.41b), the Combat Round is over (proceed to 6.29), otherwise continue to rule 6.27 below.
6.27 Defensive Ground Fire. The Defender fires his remaining units and battle assets, rolling one die per firing step, modifying the Success Number as indicated by the Combat Table. After all dice are rolled, hits are applied to the Attacker per rule 6.41, starting again with priority 'a'. If the Attacker aborts the attack (6.41b), the Combat Round is over (proceed to rule 6.29), otherwise continue to 6.28 below.
6.28 Offensive Ground Fire. The Attacker fires his remaining units and battle assets, rolling one die per firing step, modifying the Success Number as indicated by the Combat Table. After all dice are rolled, any hits are applied per rule 6.42, starting again with priority 'a'. If all defending units and battle assets are eliminated with at least one unapplied hit remaining, an exploitation opportunity (6.8) arises for the Attacker.
6.29 End of the Combat Round. Both sides move surviving assets (artillery and battle) from the contested area to their own Used Box. If both sides have units remaining in the area, the units remain face-up in opposing lines within the area, otherwise the remaining units (plus any units that retreated) are now tipped up and faced away from the enemy.
6.3 Assets in Combat
Assets are used in combat by assigning them to a battle, Attacker first, after the Defender decides on his retreat or reinforce options (6.21 – 6.23).
6.31 Artillery Assets. The Attacker may assign one or two artillery assets per battle while the Defender may only assign one. Artillery fires during the Combat Round (6.25 & 6.26). Artillery assets may not be assigned step-losses (6.43).
6.32 Battle Assets. Battle assets may be assigned to each battle if the appropriate conditions are met (6.22 & 6.23). Battle assets do not modify the current troop quality of any unit in the battle, nor vice-versa. Battle assets are fired with friendly units (6.27 & 6.28). Each battle asset that suffers a step-loss is eliminated.
6.33 Engineer Assets in Combat. An assigned engineer asset may automatically eliminate the enemy field works marker, if one exists, instead of firing as a battle asset. To do this the engineer asset must have survived artillery and defensive ground fire, and the Attacker must not have aborted the attack. The enemy field works marker is removed prior to other friendly units firing, thus negating the field works' –1 Success Number modifier.
6.4 Hit Distribution and Priorities
Hits are applied according to the following rules. All hits are distributed by a combination of absorbing the hits (due to aborting the attack, removing field works, becoming disordered and/or retreating from battle) and taking the hits by applying step-losses. Players use the appropriate hit-priority sequence (6.41 or 6.42) to apply hits against their own units and battle assets.
6.41 Hit Priorities for hits against the Attacker
a) Mandatory Step-Loss: The first hit is always taken either by having a step-loss inflicted upon the point unit or by eliminating any one assigned battle asset.
b) If more hits were scored, the Attacker must choose to either:
- Abort the Attack: Ignore all remaining hits by aborting the attack. Units that abort the attack remain in the contested area and become disordered. For river assaults (5.35e), aborting unit(s) cannot remain in place; they become disordered and retreat (6.6) back across the river(s) that they moved across. Any assets remaining that were assigned are sent to the Used Box.
- Apply Step-Losses: Take the remaining hits by applying step-losses. Follow the step-loss allocation rules of 6.43.
6.42 Hit Priorities for hits against the Defender
a) Loss of Field Works if Present: The first hit in the Combat Round from any firing source is absorbed by removing the field works marker, if present.
b) Disorder Option due to Artillery Fire: When hits from artillery are applied, one hit may be absorbed (after any field works marker has been removed) by placing a disordered marker on all defending units (not assets) that are in good order or recovering (6.5). If all defending units are already disordered or there are only defending assets present (4.35), this option may not be taken.
c) Retreat Option due to Ground Fire: When hits from offensive ground fire are applied, one hit may be absorbed (after any field works marker has been removed) by retreating all units present (6.6—note that retreating units not already disordered become disordered). Assets are not physically retreated; instead, surviving assets are placed in the Used Box after the battle. Retreat is not possible for areas defended only by assets (4.35). Retreating units/assets remain susceptible to priority (d) below for remaining unapplied hits.
d) Apply Step-Losses: Any remaining hits (after any field works marker has been removed and any disorder/retreat option taken above) are taken by applying step-losses, using the step-loss allocation rules of 6.43. If the Attacker inflicts more hits than the Defender can absorb/take, an exploitation opportunity (6.8) arises for the Attacker.
6.43 Step-Loss Allocation. Step-losses are allocated at the discretion of each player to his own units and battle assets according to the following restrictions:
- The first unit to suffer a step-loss must be the point unit (battle assets may suffer losses before the point unit).
- Each friendly unit and battle asset present must receive one step-loss before any unit receives a second step-loss.
- After all friendly units present have taken a step-loss and all friendly battle assets have been eliminated by taking a single step-loss each, there is no further restriction on how the owning player distributes any remaining step-losses.
6.5 Disorder Results & Recovery
Units (not assets) can become disordered (see 9.33 for effects of being disordered) during a Combat Phase. When this happens, place a disordered marker on the affected unit(s). Recovery is a two-step process for eligible units (see 9.35 for the procedure to follow during Supply Phases). Units with a recovering marker suffer all the effects of being disordered. Units that suffer a disorder result while they are 'recovering' have the marker again flipped to its disordered side. There is no additional effect when a disorder result is applied to units that are already disordered.
6.6 Retreats
Any time a retreat is called for, the owning player moves the retreating units one at a time from the retreat's origination area to an adjoining, uncontested, friendly-controlled area (two retreating units may retreat to different areas), even if a retreat is across a blown bridge. If no such adjoining area exists, the unit may not retreat and must take step-loss(es) instead. If a retreating unit causes overstacking in the area it retreated to, the unit must retreat again as above and continue to do so until the stacking limits are obeyed. Retreats do not require movement points. Units that retreat are marked with a disordered marker after retreating unless they retreated via Special Action (8.24). Surviving assets do not retreat, and are instead placed in the Used Box after the battle is fully resolved.
6.7 Morale Checks
At certain times the rules will call for a unit/asset to make a morale check to determine whether it can accomplish a goal or sustain a challenge in game terms. A morale check is performed by rolling a single 10-sided die for each affected unit/asset, with the Success Number of '5' being modified by troop quality (–2 Green, +2 Elite) and/or being disordered or unsupplied (–1 each). A hidden unit making a morale check must be revealed for the duration of the roll. The penalty for failing a morale check varies depending on the situation and is outlined in the appropriate rules.
6.8 Exploitation Opportunities
If the Defender of a battle is completely eliminated (excluding artillery assets) by artillery fire, retreats via Special Action, or is eliminated by ground fire with at least one hit that remains unresolved, an exploitation opportunity results, and all attacking armor-class unit(s) in that area make a morale check (exception—exploitations never arise from river assaults or Breakthrough Combat Phases). A hidden unit making a morale check must be revealed for the duration of the roll. You may decline the opportunity and remain hidden. Armor-class units that pass this morale check have an exploitation marker placed on them. This allows the marked unit(s) to move in the Breakthrough Movement Phase (7.3).
7.0 Reaction & Breakthrough Phases
7.1 Eligibility
The Non-phasing Player's units that are marked with a reserve marker may participate in the Reaction Phase. The Phasing Player's units that are marked with a reserve marker, plus armor-class units that are either marked with an exploitation marker or that have been activated by a Special Action may participate in the Breakthrough Phase.
7.2 Reaction Phase
The Non-phasing Player may move friendly units marked with a reserve marker up to their full movement allowance, either to an uncontested area or to reinforce a contested area, but may not use them to create a newly contested area. There is no combat during the Reaction Phase. Reserve units may opt to build field works rather than move. The reserve marker is removed from each unit after it moves or builds field works.
7.3 Breakthrough Movement Phase
The Phasing Player may move units marked with reserve markers and those marked with exploitation markers, and may also use Special Actions to move other armor-class units as exploitation units (8.21). Once breakthrough combat (7.4) begins, no more breakthrough movement is allowed.
7.31 Movement Restrictions. Reserve-marked units may make a normal operational move with their full movement allowance. Exploitation-marked units may only move one area and may not cross a blown bridge even if blown by the unit's attempted move, in which case the unit cannot move at all. Either type of unit may enter contested areas and may build field works rather than move. Reserve and exploitation units are moved one at a time, in any order, intermingled as the Phasing Player desires. After each unit moves or builds field works, its reserve or exploitation marker is removed.
7.32 Newly Contested Areas. Creating newly contested areas is allowed for both reserve and exploitation units. A mandatory round of combat must be fought during the Breakthrough Combat Phase for these areas. Non-phasing units in these areas may attempt to blow bridges that the Phasing Player attempts to cross (5.35d).
7.4 Breakthrough Combat Phase
Mandatory and optional combats as described below may be fought in any order desired by the Phasing Player.
7.41 Mandatory Combats. One round of combat is fought in newly contested areas that resulted from the Breakthrough Movement Phase. This combat round is fought according to the combat procedure (6.2) without requiring a Special Action.
7.42 Optional Combats. Additionally, already contested areas may have one round of combat fought in them, using the combat procedure (6.2), if the Phasing Player spends a Special Action to re-engage the area (8.22).
8.0 Special Actions & Staff Functions
8.1 General Rules
Special Actions come in two types, reusable and single-use. There is also a command staff asset which may be used to perform Staff Functions (8.3).
- Reusable Special Actions represent your personal command influence and may affect unit(s) of any friendly Higher Echelon(s). They are represented in the game as wood blocks that have a Special Action label affixed. They are moved to the Used Box after use, and automatically returned to the Available Box during the Reinforcement Phase, bypassing the selection cup process.
- Single-use Special Actions represent the command influence of your Higher Echelon commanders and may only affect units of the matching Higher Echelon. They are represented in the game as events, which are placed in the Eliminated Box after use. Either type may be used to perform any one function described in rules section 8.2. A single-use Special Action does not count against the one event allowed per battle.
- The Command Staff Asset represents your HQ staff working in the background in an ongoing effort to uncover additional resources for you and when available it may be used for any Staff Function listed in section 8.3.
8.2 Special Action Uses (see also 14.61)
8.21 Conduct Breakthrough Movement (Breakthrough Phase). Each Special Action spent allows one supplied armor-class (only) unit in good order that has not yet moved this phase to move in the Breakthrough Movement Phase, moving as an exploitation-marked unit (one area only—see 7.31).
8.22 Conduct Breakthrough Combat (Breakthrough Phase). Each Special Action spent allows one already contested area to have a round of combat fought in it during the friendly Breakthrough Combat Phase. This area may not have already fought a round of combat during this same Breakthrough Combat Phase.
8.23 Reinforce a Battle (Combat or Breakthrough Phase). Each Special Action spent allows one unit in good order from an adjacent uncontested area to reinforce a declared combat (Defender only). This reinforcing unit may not violate stacking, may not reinforce a battle involving only assets (4.35), and may not be designated as the point unit unless the original point unit is eliminated.
8.24 Retreat before Combat (Combat or Breakthrough Phase). Each Special Action spent allows the Defender (only) in a declared combat to retreat all units as per rule 6.6, except that the retreating units do not become disordered. The Attacker should await the Defender's decision before assigning assets. The Attacker is awarded an exploitation opportunity (6.8) if this retreat is conducted.
8.25 Rally the Troops (Admin Phase). Each Special Action spent in an Admin Phase allows the player to designate any one supplied area. All friendly units marked as disordered or recovering within the designated area and all adjacent areas recover fully and have their disordered and recovering markers removed.
8.26 Acquire Quality Replacements (Admin Phase). Each Special Action spent in an Admin Phase allows the owning player to select a supplied reduced unit (either unit class) to receive one step of replacements, even if the replacement step is elite.
8.27 Reroute a Reinforcing Unit (Reinforcement Phase). Each Special Action spent in the Reinforcement Phase allows one reinforcing unit to be placed in any friendly-controlled or vacant enemy-controlled appropriate entry area (14.2) outside its listed entry area(s).
8.3 Staff Functions (see also 14.62)
The command staff asset, when in the Available Box, may be used to perform any one of the below Staff Functions during an Admin Phase, with no Higher Echelon restrictions, after which it is placed in the Used Box and recycled like any other asset.
8.31 Replacements Found. One step of non-elite replacements may be added to any supplied infantry-class (only) unit.
8.32 Intelligence Gathering. Choose any one enemy unit, anywhere on the map and in any supply status, which is then revealed to you until the end of the Admin Phase.
8.33 Reserves Made Available. Mark any eligible unit (14.7) with an appropriate and available reserve marker.
9.0 Supply Phase
9.1 Sequence
The following steps occur during this Phase, in the order listed. Both players are involved in each of these steps and they may resolve their portions simultaneously.
a) Verify control of areas.
b) Determine supply status and adjust disordered markers.
c) Perform morale checks for Phasing Player's unsupplied units and remove appropriate markers.
9.2 Verify Control of Areas
Both players check each area to verify that control is intuitively clear to them; otherwise the area is marked by a control marker from the appropriate side (the last sole-occupant).
9.3 Determine Supply Status & Adjust Disordered Markers
9.31 Tracing a Supply Path. Supply is checked for both players during each player's Supply Phase. A unit's or area's supply status remains valid until the next Supply Phase. A supply path is traced from any given friendly unit or friendly-controlled area towards any valid supply source (14.9).
a) The supply path is traced through friendly-controlled areas, and it may only trace over a blown bridge if the tracing unit/area is adjacent to that blown bridge.
b) A supply path may be traced out of enemy-controlled areas, but never into or through them.
c) A supply path cannot pass through a vacant area that is adjacent to an enemy-controlled area with one or more uncontested enemy units.
d) Supply may always be traced into and through occupied friendly-controlled areas, regardless of enemy units.
9.32 Marking Supply Status. Units and areas that cannot trace a valid supply path are unsupplied and have an unsupplied marker placed on them. Unsupplied markers are removed from units and areas that were previously marked as unsupplied that can now trace a valid supply path.
9.33 Effects on Units that are Unsupplied and/or Disordered:
a) Units may only move one area during a Movement Phase, complying with rule 5.34 when appropriate.
b) Units may not build field works or be placed in reserve.
c) Units have a –1 Success Number modifier when firing and when making a morale check. These modifiers are cumulative when a unit is both unsupplied and disordered.
d) Disordered units (only) may not attack. They may defend with the Success Number modifier specified in (c) above.
9.34 Additional Unsupplied Effects
a) Units may not have any assets assigned.
b) Units must make a morale check at the end of the friendly Supply Phase, with failure causing a unit to either become disordered, lose one step, or surrender (9.4).
c) Disordered markers may not be favorably adjusted (9.35).
d) Areas and units may not be affected by friendly events, Special Actions, Staff Functions, or engineering functions.
9.35 Adjusting Disordered Markers. For all their disordered and recovering units that are able to trace a supply path (9.1), both players remove all recovering markers and then flip disordered markers over to the 'recovering' side.
9.4 Morale Checks for Unsupplied Units
The Phasing Player (only) performs a morale check (with –1 unsupplied Success Number modifier) for his units that are unsupplied. Units that fail this check that are not yet disordered become disordered. Units that fail this check that are already disordered suffer a step-loss. Veteran disordered units that roll a 10 or green disordered units that roll an 8-10 surrender and are eliminated regardless of remaining steps. Disordered units with a current troop quality of elite do not surrender, though they still suffer a step-loss with a failed morale check if disordered.
9.5 Removing Appropriate Markers
Both players remove from the map all field works markers that are in contested areas, all roadblocks and all defended roadblocks; all river assault markers and all exploitation markers, plus all of the Non-phasing Player's reserve markers.
10.0 Designer's Notes
Wargamers need more games that are easy to get into, fun to play, shorter in duration, and with a good feel for the history, while also being challenging enough to warrant repeated play.
My focus was to put you in the role of the field commander, and have you decide where to direct your main effort. You must prioritize and assign the precious few assets and Special Actions to the units and battles that you deem most crucial, though all your units are begging for these limited resources.
Field works represent a higher quality of defensive works than the simple foxhole dug by each soldier before he slept at night. They represent defending troops using sandbags, barbed wire, mines, and the natural resources at hand to fortify a defensive position, and were often rapidly constructed by combat engineers attached for such a purpose. These positions were most beneficial for the initial contact with the enemy. After the defensive positions were revealed they were of less value.
One decision that went against the grain of the design was having the assets and events displayed face-up. The necessity for this decision was quite simply speed of play. If the assets were inverted, then limited intelligence would work against both sides, and delays in the game would occur as the owner of the assets and events had to reveal them to himself, trying to find the one he wants to play. You are welcome to play with these inverted, if both players agree, but do not expect the game to play as quickly.
I hope that you will enjoy playing this game as much as I have enjoyed refining its various systems.
— Rick Young
11.0 Introduction
Once more, we find ourselves in the Ardennes Forest in the month of December, 1944. How many times have the veteran wargamers among us fought this particular battle over a game board? Yet for many of us, we keep coming back to that dark and cold, heavily wooded battlefield. It was an epic battle of desperation, for the Germans it was desperation from a strategic standpoint, and for the Americans it was desperation from an operational standpoint. The soldiers of both sides fought hard, because to them the end was not yet decided.
To the new player of historical simulations, welcome to an exciting and challenging gaming experience, where you will try to better the historical result of your armies. Historical simulations are at their absolute best when you use them as "Paper Time Machines" (Redmond A. Simonsen—R.I.P.).
12.0 Game Components
FAB: The Bulge includes:
- Seventy Five (75) wood blocks
- German = gray
- British = blue
- US = green
- One (1) sheet of die-cut labels for the blocks
- One (1) sheet of 228 die-cut 9/16" counters
- One (1) Getting Started Card
- One (1) FAB series Rule Book (12 pages)
- One (1) FAB: The Bulge Play Book (24 pages)
- One (1) 22" x 34" Mapsheet
- Two (2) Reinforcement Cards
- Two (2) Player-Aid Cards
- Four (4) 10-sided Dice*
* Regardless of any modifiers, a roll of '1' will always result in success and a roll of '10' will always result in failure. The dice included with each FAB game are numbered from one to ten. If you should find yourself using ten sided dice that are numbered from zero to nine, treat each roll of zero as a ten.
13.0 Definition of Standard Terms
13.1 First Player
For The Bulge, the Germans are the First Player in all scenarios. The Allies are the Second Player.
13.2 Higher Echelons
The Higher Echelons, along with their associated unit symbol colors used on the labels and counters, are as follows:
German:
- 5th Panzer Army (gray)
- 6th Panzer Army (purple)
- 7th Army (blue)
- Strategic Reserve (orange)
Allied:
- US 1st Army (light green)
- US 3rd Army (dark green)
- US Strategic Reserve (light blue)
- British XXX Corps (red orange)
13.3 Units by Class
Armor class units & assets include: Armor, Armored Cavalry, Mechanized Infantry.
Infantry class units & assets include: Infantry, Mountain Infantry, Airborne Infantry, Engineer, Artillery, Rocket Artillery.
14.0 General Rules
14.1 Boundary & Connection Types
There is an additional boundary type in this game, which is the Restricted Boundary located between areas 4 and 11, representing the Schnee Eiffel. The connection between these two areas is also restricted. The movement cost of the restricted connection is 3 MP, but armor class units and units moving by strat-move may not cross the restricted boundary at all in either direction.
14.2 Appropriate Entry Areas
These are areas that units may arrive in when their entry areas were all blocked on their listed turn of entry or when a Special Action is used to reroute a reinforcing unit.
14.21 German Entry Areas. 5th Pz Army units use Entry Areas X-Z, while 6th Pz Army units use Entry Area Y or Z, and 7th Army units use Entry Area X or Y. Strategic Reserve units may use Entry Areas Y or Z.
14.22 American Entry Areas. 1st Army units use Entry Areas A-J (the north and west map edges), 3rd Army units use Entry Areas K-M (the south map edge), and Strategic Reserve units use Entry Areas F-J (the west map edge).
14.23 British Entry Areas. Enter using Entry Areas C-H.
14.3 Army Boundaries & Zones
14.31 German Army Boundaries & Zones. The army boundaries on the map indicate the areas that each German Higher Echelon (army) is responsible for.
- The areas within each army's boundaries are collectively called that army's zone.
- For reference purposes, the 5th Pz Army's zone is zone 5, the 6th Pz Army's is zone 6, and the 7th Army's is zone 7.
- German assets/events may not be played outside of their own army's zone (but see 14.52 & 17.1).
- Except as noted in rule 14.72, the Allies are not affected by army boundaries.
- German units may cross other boundaries, cross into their own army's zone, and also retreat, exploit, or strat-move across any and all army boundaries with no restriction.
14.32 Allied Army Boundaries. None (but see 14.72).
14.4 Movement Restrictions
14.41 German Movement Restrictions. Crossing an army boundary where the unit would be departing its own army's zone during Operational Movement Phases costs each crossing German unit two additional movement points.
14.42 American Movement Restrictions. The Americans have no special movement restrictions.
14.43 British Movement Restrictions. British units may only operate northwest of the Meuse River (from Area 57 in the north to Area 96 in the west).
14.5 Engineering Functions & Considerations
14.51 Additional Engineering Functions (4.3). None for this game.
14.52 German Engineering Considerations:
- In cases where an army boundary passes along a river boundary, the bridging functions may be done by an engineer from either Higher Echelon from its appropriate adjacent area, provided the area in that engineer's zone meets all the other requirements (4.31 – 4.32).
- Each German Army has only one engineer asset. Any German Army that has had its engineer asset eliminated may have any friendly engineer asset perform bridging functions (only) within its zone as an exception to 14.31.
14.6 Additional Special Action Uses & Staff Functions
14.61 Additional Special Action Uses. None for this game.
14.62 Additional Command Staff Functions
a) Boundary Crossing Pre-authorized (Germans only)—Each time this function is selected, one German unit may depart its army's zone without paying two additional movement points. Mark the unit with a Boundary Crossing marker, which is removed after the unit next moves or in the next friendly Supply Phase, whichever occurs first.
b) Assets Pooled for Crucial Battle (Americans only)—One area may be designated in the Admin Phase for pooled assets. Mark it with the Pooled Assets marker, which is removed during the Supply Phase of the current Player-turn. Throughout that Player-turn, the restrictions on assets only being able to support units of their own army and the restrictions on units from mixed Higher Echelons are lifted for the Americans in the designated area.
14.7 Reserve Marker Eligibility
For all players, units are only eligible to receive a reserve marker if they are supplied, in good order, and in an uncontested area.
14.71 German Reserve Marker Eligibility. Reserve marker placement is restricted by zone (14.3). A German reserve marker may be placed on any Higher Echelon's unit within the zone indicated on each reserve marker.
14.72 Allied Reserve Marker Eligibility. Reserve marker placement is also restricted by zone for the Allies. An Allied reserve marker may be placed on any Allied unit within the zone(s) indicated on each reserve marker.
14.8 Strategic Movement Limits
14.81 German Strat-move Limits. The Germans may only strat-move one unit per game turn. This unit may originate in any German Army's zone and may cross army boundaries.
14.82 American Strat-move Limits. American strat-moves are not limited, except by the quantity of reserve markers.
14.83 British Strat-move Limits. The British may not strat-move outside of their operating limits (14.43).
14.9 Supply Sources & Special Rules (9.31)
14.91 German Supply Sources. German areas, units, and assets of all Higher Echelons trace supply to any friendly-controlled German entry area (Entry Areas X-Z). Supply traces may cross army boundaries without penalty.
14.92 Allied Supply Sources. Allied areas, units, and assets of all Higher Echelons trace to any friendly-controlled Allied entry area (Entry Areas A-Q).
14.93 Unsupplied Morale Checks. Game turns 6-9 represent two days each instead of one (as the troops involved slowed down and became less responsive from battle fatigue and casualties). During each of these game turns, unsupplied units must make two sequential morale checks during the friendly Supply Phase instead of only one.
15.0 Unit Rules Specific to this Game
15.1 German Strategic Reserve
After repeated requests by the German commanders for additional support, some divisions were eventually released piecemeal—too little, too late.
a) Each of the four units of the German strategic reserve (labels with an orange unit type) arrives when its matching event gets played and may be placed at Entry Area Y or Z.
b) These four units do not pay the two movement point penalty when crossing any Army boundaries (14.41).
c) These units may have assets attached from and use the events of the Army whose zone they are currently within, even if stacked with a unit from a Higher Echelon belonging to a different zone (though in that case it could only have an artillery asset assigned per 6.22 – 6.23).
15.2 US Strategic Reserve
The airborne units and assets, the engineer assets, the task force assets, the garrison assets, and the airpower events represent the American Strategic Reserve, identified by their light blue Higher Echelon color.
a) Units, assets, and events belonging to the strategic reserve may be mixed with and/or attached to other US Higher Echelons without the usual mixed Echelon penalties.
b) Units of the strategic reserve may receive events and assets from either of the other US Higher Echelons without penalty (but not both in a given combat round unless the Command Staff asset has been used for that battle [14.62b]).
15.3 German Turn 4 Reinforcements
The three German units arriving on turn four are allowed to be placed in Entry Area Z in violation of stacking, as an exception to rule 4.1c.
16.0 Asset Rules Specific to this Game
16.1 German Asset General Rules
German assets may only be played in their own Army's zone, along with the normal restrictions (6.22 & 6.23).
16.11 von der Heydte Paratroop Drop. This was a hastily conceived airborne operation. Very few of the paratroops made it to the correct drop zones.
- On the Admin Phase that this asset is first drawn from the selection cup, place it either in Hohes Venn [Area 31] or Stoumont [52], provided the selected area is vacant and Allied-controlled, otherwise place it in the Available Box as a battle asset (losing its opportunity to paradrop).
- If paradropped, the Americans may not strat-move through or retreat into the area currently occupied by this asset and the first American unit to move into the space must pay one extra movement point, causing the German player to roll a die to resolve the paradrop as follows:
- 1 = Asset landed intact: The Americans must engage this asset as if it were a defended roadblock (4.35) in the ensuing Combat Phase, except that the asset may not receive artillery support. The asset may never initiate an attack; it only fires while defending. If the defending asset is not eliminated by the Supply Phase, it remains in the area instead of being placed in the Used Box. The asset may not be removed until it is eliminated or relieved.
- The asset does not need to trace supply until the December 19th game turn, and then it will need to make an unsupplied morale check if unsupplied, with the asset being eliminated if it fails.
- If the asset is still in its drop area when a German unit enters that area, von der Heydte is relieved and is sent to the Used Box, where it becomes a regular battle asset.
- If the area was contested when the German unit enters, the relieving German unit is revealed upon entry.
- 2-5 = Asset is partly scattered: Treat in all ways as an intact landing above, with the exception being that the asset does not fire back when attacked (it only interferes with movement and retreat until eliminated or relieved).
- 6-10 = Asset is completely scattered: Place the asset in the Eliminated Box. The unit that triggered the die roll may continue moving if it has movement points remaining.
- 1 = Asset landed intact: The Americans must engage this asset as if it were a defended roadblock (4.35) in the ensuing Combat Phase, except that the asset may not receive artillery support. The asset may never initiate an attack; it only fires while defending. If the defending asset is not eliminated by the Supply Phase, it remains in the area instead of being placed in the Used Box. The asset may not be removed until it is eliminated or relieved.
16.12 German Artillery Assets. The Germans had a difficult time both in keeping artillery with the spearheads and in concentrating artillery fire during this campaign.
German artillery assets have the following special rules:
- During the Reinforcement Phase of each turn, the German player must move one regular artillery asset (not rocket artillery) of his choice from the Used Box to the Eliminated Box if at least one such asset is in the Used Box at the time 4.1b is performed, before actually moving the assets from the Used Box to the selection cup.
- The Germans may not use two artillery assets in an attack unless both a regular artillery asset and a rocket artillery asset from the same Higher Echelon are used.
16.13 Fuel Shortage. Fuel was in very short supply for the Germans for this battle. New players on the German side should ignore this rule until their first German win is achieved, as learning the German side is the steeper learning curve.
No German unit (including newly arriving reinforcements) may move more than three movement points (exception—see 5.33), or move in the Strat-move Phase, unless fuel is available. Each unit moved as above uses one fuel asset from the Available Box (spending more than three movement points while moving only one area does not use a fuel asset). The German player begins the game with five fuel assets in his Available Box, and as they are used they are moved to the Used Box and recycled as other assets. Each time the German player captures, for the first time, a yellow-star objective area (19.1), he might capture additional fuel. Roll one die and apply the following result:
- 1 = Add the captured fuel asset to the Available Box. This increases the number of fuel assets in the game and can only happen once. If this result occurs more than once, treat subsequent rolls of a '1' as a '2-5' result below.
- 2-5 = Move one fuel asset directly from the Used Box (or selection cup if none in Used Box) to the Available Box.
- 6-10 = No fuel captured.
16.2 Allied Asset General Rules
16.21 Garrison Assets. Scenarios may call for garrison assets to be set up in the areas of Wiltz, Bastogne, Spa, and St. Vith. These assets do not move from their area of placement until eliminated. If fought alone, they act as defended roadblocks (4.35) except that they are never sent to the Used Box. If Allied unit(s) are present, the garrison asset acts as a battle asset for the unit(s). Garrison assets cannot retreat from combat (units in the area with the garrison asset can retreat if any hits remain to be absorbed after it is destroyed) and are eliminated either by taking a hit or failing an unsupplied morale check. Garrison Assets may NOT be returned by the alternate event use (4.21).
16.22 Task Force Assets. For Game Turns 2-5, the Allied player receives task force assets that are placed during the Reinforcement Phase (4.1). These assets may be placed in any uncontested friendly-controlled area that is currently in supply. It is okay if other friendly forces are already in the area. Once placed, task force assets act exactly like garrison assets, and abide by rule 16.21 above.
16.23 US Artillery Assets. For battles involving unit(s) of the US Armies, the Allies may use one artillery asset over the normal limit (i.e. three when attacking and two when defending) to better reflect the devastating effect of American artillery during this battle. This advantage does not apply to battles involving defended roadblocks nor mixed Higher Echelons, unless permitted by the Allied command staff asset (14.62b).
17.0 Event Descriptions
17.1 German Events
German events may only affect their own Army's units (plus Strategic Reserve units). Also they may only be played in their own Army's zone. German Strategic Reserve events may be played within any Army's zone and affect the units of all German Armies.
17.11 Greif Team Interdict. One of the tactics of Operation Greif was to cause confusion among American units.
- This event is played on an American unit during an Admin Phase, and stays with that unit until the next time that unit attempts to move, build a field works marker, or receive a reserve marker. The American player must announce the intended activity and cannot change his mind after the event has been resolved. At that time, the unit is revealed and the unit makes a morale check with an additional +2 modifier—a green supplied unit in good order passes on 1-5, a similar veteran unit passes on 1-7, etc.
- If the morale check fails, the unit may only remain where it is or move to an adjacent area. The unit may not build a field works marker nor be placed in reserve. Any reserve marker declared for this unit may not be reused on a different unit this Phase.
- If the morale check succeeds, the unit may proceed with its intended activity with no ill effect.
- After the results of this morale check are resolved, the interdict event is placed in the Eliminated Box.
- If the affected unit's next movement is caused by a friendly Special Action (8.21, 8.23, or 8.24), then the Greif Team Interdict Marker is removed to the Eliminated Box without having any effect.
17.12 Greif Team Bridge. Another key goal of Operation Greif was to control important bridges.
- This event is played on a river boundary during an Admin Phase and it remains there until either the bridge is blown or a German unit crosses the river boundary, whichever occurs first. In either instance, the event is placed in the Eliminated Box afterwards.
- If the Allies attempt to blow the marked bridge during an attempted German crossing, a 1 must be rolled to successfully blow the bridge instead of the normal 1-5.
- If the Allies attempt to blow the bridge using an engineer asset in an Admin Phase, the bridge will be blown on a roll of 1-5 instead of being destroyed automatically. The Allies may not attempt to destroy that bridge again during the same Admin Phase if the first attempt fails.
17.13 Strategic Reserve Division Released. There is one event each for the 6th SS Mountain Division, the 10th SS Panzer Division, the 11th Panzer Division, and the 17th SS Panzer Grenadier Division. Playing each of these events allows the indicated unit to enter the game and be placed in either Entry Area Y or Z (German player's choice).
17.14 Operation Bodenplatte (Base Plate). This represents the Luftwaffe operation wherein most of Germany's remaining aircraft attacked Allied airfields hoping to affect the Allies' overall air-supremacy. It cost the Luftwaffe heavily and had only a temporary effect as the Allies shifted replacement aircraft from other sectors to replace their losses.
When this event is played, the German player rolls one d10 for each air mission event currently in the Allied Available Box and applies results as follows:
- 1 = the air mission chit is placed in the Eliminated Box
- 2-5 = the air mission chit is returned to the selection cup
- 5-10 = the air mission chit is unaffected.
17.2 Allied Events
Allied events may only affect their own Army's units (exception—15.2), but they may be played in any zone.
17.21 Allied Air Mission. These events represent air sorties of sufficient number to impact Divisional operations, not the actual aircraft that flew them. As such, they are treated as events, rather than assets. Air missions may be played on areas that are unsupplied as an exception to rule 9.34d. Each air mission event may be used to perform ONE of the following three missions, and is then placed in the Eliminated Box:
- Combat Support Mission—During a Combat Round, an air mission may be assigned as the allowable event in each contested area. It may be played even if mixed Allied Higher Echelons are present. The event is used in one of the following two ways, and afterwards is placed in the Eliminated Box, even if the attack was aborted:
- As an artillery event, it fires when Allied artillery fire is resolved, and it does not count against the limit of useable artillery assets for the combat (16.23). The choice to use the air mission as an artillery asset must be made before friendly artillery fire is rolled.
- As a battle support event, it gives direct support to one unit present, Allied player's choice, providing a +2 modifier to that unit's Success Number. An Allied step-loss may NOT be assigned to the air mission.
- Interdiction Mission—Place the air mission counter on an area during the Admin Phase. The Germans must pay one additional movement point to enter AND to leave the affected area. The Germans may NOT strat-move through the interdicted area. The event is placed in the Eliminated Box during the Supply Phase of the same player turn.
- Air Supply Mission—Use anytime during a Supply Phase by declaring one unsupplied area. The area, the friendly units, and any garrison asset within it are supplied for all purposes (except 9.34a & 9.34d) from the time the event is played until the beginning of the next Supply Phase. The event is then placed in the Eliminated Box.
17.22 Rebuild or Replace. There are two 'Rebuild or Replace' chits for the American 1st Army, one each for infantry and armor. These events may be played like replacement events (17.31), or they may be used to return an eliminated one-step non-elite unit of the appropriate class back from the Eliminated Box. Eliminated multi-step units may not be returned by this event. Returned units are placed in any friendly-controlled objective area (19.0), even if contested.
17.23 Arriving Infantry Regiments. The American 1st and 4th Infantry Divisions each have events specific to those Divisions. These chits represent reinforcing regiments that belong to those Divisions that arrived later in the battle. When one of these chits is played, a step of replacements must go to the supplied unit specified. If the specified unit is in the Eliminated Box, the chit is used to bring the unit back into play, placing it in an appropriate friendly-controlled entry area (14.2) with a strength of 1-step. An arriving Regiment may be used to replace the 1st Infantry Division's elite step. These events are otherwise treated exactly like infantry replacement chits (17.31).
17.3 Events Available to Both Sides
17.31 Infantry Replacement. This event may be used to increase the current strength of any supplied, damaged infantry-class unit of the indicated Higher Echelon, even in a contested area. Eliminated units may not be returned from the Eliminated Box by use of a replacement chit, nor may a replacement result in the receiving unit having elite troop quality. The German Strategic Reserve infantry replacement chit may be applied to an otherwise eligible unit of any German Higher Echelon.
17.32 Armor Replacement. Used exactly as the infantry replacement above, except that it affects armor-class units.
17.33 Special Action. These events are single-use Special Actions (8.1) which may be used for any purpose outlined in the Special Action rules (8.2) for units of the indicated Higher Echelon.
17.34 Delayed Response. This represents early battlefield confusion for the Allies and the later effect of Allied fighter-bombers on the Germans. When these are drawn they are immediately placed in the Eliminated Box, with no positive effect for the drawing player (may not use rule 4.21). A Delayed Response event does count as one of your allowed draws from the selection cup.
18.0 Optional Rules
These rules add more "chrome" to the game. Use and mix these rules as desired when agreed upon by both players.
18.1 Bridge Repair Limits
The Germans had bridging equipment for eight heavy bridges. This design assumes two of those bridges are used for bridges that are not reflected on the game map. The Germans are limited to repairing a maximum of six bridges. At game start, place the German Bridges Remaining marker on the '6' box of the General Information Track and slide it down one space for each bridge repaired.
18.2 Bidding for Sides
If both players want to play the same side, the bidding is in starting fuel assets for the German player. Roll a die to determine the player with the opening bid. Zero is a valid opening bid.
If both sides want to play the Americans, the number bid will increase the German player's beginning fuel assets by the number of the final bid. These additional fuel assets are not recycled through the selection cup, but are instead placed in the Eliminated Box when used. There are two additional "bid" assets included in the countermix, and they have the event border to remind players that they are not to be recycled. If the winning bid was higher than two, use coins to denote the additional fuel assets. Even though they have the event border, these assets may not use rule 4.21.
If both sides want to play the Germans, the number bid will decrease the German player's beginning fuel assets by the number of the final bid. Move the indicated number of fuel assets from the Available Box to the Used Box before starting the game. These fuel assets WILL be recycled through the selection cup as normal. Five is the maximum bid when bidding to be the Germans. The first player to make that bid is awarded the German side, even if that is his opening bid.
18.3 KG Peiper
This unit of 6th Panzer Army was highly trained in night combat and was the only unit to breakthrough in that zone, causing the Americans a brief scare.
Once per game, during a Breakthrough Movement Phase, on or before game turn 3, KG Peiper may move with its full movement allowance instead of an adjacent-area-only move, when moving as an exploitation unit (either from Special Action or combat).
18.4 150th Panzer Brigade
This unit was outfitted with small quantities of captured American equipment.
This unit attempts to sow confusion in the American line as follows: the first time (only) that this unit is in a battle, it must be assigned as the point unit. On that one occasion, after artillery has fired on both sides, and assuming the 150th Panzer survives this artillery fire, the American point unit must make a morale check with an additional +2 modifier—a green supplied unit in good order passes on 1-5, a similar veteran unit passes on 1-7, etc.
- If the morale check fails, the American point unit (only) is immediately disordered. If the failed morale check was for a defended roadblock, the defending asset is eliminated, and an exploitation opportunity (6.8) is awarded.
- If the American point unit passes this morale check, or if it was already disordered, there is no effect.
18.5 American Airborne Units
The 82nd and 101st Airborne Divisions, and the 517th Airborne Regiment, were specially trained and equipped to operate behind enemy lines with minimal supply. These three units (only) ignore the usual –1 unsupplied morale check modifier (6.7).
18.6 Advanced Artillery Modifiers
Artillery is generally less effective against defenders and more effective against infantry-class targets than armor-class targets. Add the following Success Number Modifiers for artillery fire:
- –1 Target is the Defender
- +1 Target's point unit is infantry-class and not in field works.
18.7 Overrunning Artillery
If the Defender had an artillery asset in a combat and the area was vacated of defending units, there is a chance the defending artillery asset will be overrun and destroyed. To resolve this, the attacker rolls one die for each defending artillery asset (including rocket artillery). If the Defender retreated, but at least one step survived, the artillery asset is destroyed on a die-roll with a Success Number of 1. If the defending units and battle assets were destroyed, the Success Number becomes 2. Add one to the Success Number for each unabsorbed hit from the combat. If the defender was destroyed by attacking artillery fire, roll for the attacking units' ground fire (modified as if the defender was still present) to determine how many unabsorbed hits will be used to modify the success number vs. the defending artillery. Roll one die for each involved defending artillery asset.
18.8 Maintaining Field Works
Instead of removing field works from a contested area automatically during a Supply Phase, have the controlling player make a morale check for one unit of his choice within the area during friendly Supply Phases (only). The field works marker is only removed by absorbing a hit or by failure of this morale check.
18.9 Random Reinforcements
18.91 Overview. Any of the scenarios may be played with randomized reinforcements to better reflect fog of war.
18.92 Procedure. Follow all of the scenario rules for the scenario being played, but reinforcing units (only) are randomized by the following procedure.
a) Take the unselected units scheduled to arrive on or before the current turn and place them in a unit selection cup along with any units scheduled to arrive on the following turn.
b) Randomly draw from the selection cup the number of units you were to have received this turn. The remaining units may either be left in the cup or placed face down with the next turn's reinforcements.
19.0 Determining Victory
Players earn Victory Points (VP's) by securing objective areas (identified by having one or more VP symbols within the area) and by eliminating certain enemy units.
19.1 Objective Areas Victory Points
An objective area must be both friendly-controlled AND be able to trace a valid supply path (9.1) for a player to be awarded its VP(s) during the Victory Check Phase. Objective areas have different VP symbols within them to show who is awarded the VP's for control as follows:
- Areas within Germany—These areas have one or more German symbols printed within them. Each symbol indicates a VP that is awarded to the Allied player for control of that area. Only the Allied player is awarded VP's for control of these areas.
- Important Map Edge Areas—These areas have one or more white stars printed within them. Each star indicates a VP that is awarded to the German player for control of that area. Only the German player is awarded VP's for control of these areas.
- Areas of Battlefield Importance—These areas each have one yellow star printed within them. One VP is awarded to whichever player controls each of these areas during each Victory Check Phase.
19.2 Eliminated Large Units
Destruction of the enemy's combat power was one of the critical objectives of both sides in this battle. Each eliminated unit which has three or more steps on the unit label is worth one VP to the opposing player. Such units are placed on the Eliminated Large Units Track as they are eliminated. Smaller units and assets do not have a VP value. Note that the US 1st and 4th Infantry Divisions might later be removed from this track by the Allied player using a reinforcement event specific to those divisions (17.23).
19.3 Calculating Victory Points
During the Victory Check Phase of each turn, both players sum the VP's they are awarded for objective areas they control per 19.1 above, then add the number of eliminated enemy large units, and then compare those totals. The difference between those totals is the current VP level, with the player having the higher total being the advantaged player. Use the VP marker provided, which has a German side and an Allied side, placing it on the General Information Track to reflect the advantaged player and the current VP level.
19.4 Sudden Death Victory
Beginning with turn 4, the Turn Record Chart shows what is needed in terms of net Victory Points to end the game in a Sudden Death Victory during the Victory Check Phase. If the advantaged player's VP level (19.3) is greater than or equal to that player's net VP value for the turn (see Turn Track), that player wins a Sudden Death Victory. If a Sudden Death Victory does not occur, play proceeds to the next Game Turn.
20.0 Designer's Notes
I was inspired to create this game by the many great Bulge games that have preceded it. Most notably Ray Freeman's Tigers in the Mist and Mark Simonitch's Ardennes '44, both also published by GMT Games. From Tigers in the Mist the FAB series uses a more strict application of the traffic jam effects. From Ardennes '44, FAB uses the idea of elite, veteran, and green troop qualities, though for different effects, and also the thoroughly researched Order of Battle. Thanks Ray and Mark for inspiring me with your designs!
It was the fun I had playing those two games that led me to choose this battle for the first volume of the FAB series. As fun as these two designs are, and as numerous as Bulge designs are, I still felt I could contribute to the genre by designing a game that met my own expectations for speed of play, ease of grasping the rules, and constant gut-wrenching decisions about resources that are too few and goals that are too many.
For better speed of play, I made each turn equal a day, instead of the typical 8-12 hours, and made the unit scale Division/Brigade instead of the more typical Regiment/Battalion.
For ease of grasping the rules, I kept to the core systems of FAB and only added the simplest additional rules to give FAB: The Bulge the proper feel. I did not add rules unless they were easy to implement and added to the overall fun.
The need for constant decisions is already a part of the FAB series, due to the assets, events, reserves, and Special Actions that have been added into the usual mix of units and objectives. Deciding when and how to use these resources will usually spell the difference between victory and defeat.
One minor point that has always bugged me about Bulge games was that they rarely end up as a bulge, but rather as a straight line from the south map-edge to the north map-edge that generally advances from east to west. This is usually because the German player spreads out more than historically to limit road congestion and to maximize battles with good odds. In the actual event, the Germans had "Rollbahns" that each Division was ordered to follow, and these orders were mostly followed, often ignoring tactical opportunities to flank exposed American positions. Hopefully you will find that FAB: The Bulge gives the proper feel of a salient with north & south shoulders, though to be sure FAB volume one will not always result in a bulge.
The German rocket artillery (nebelwerfer) assets were extremely useful throughout the Bulge so they do not suffer from being removed steadily like the regular German artillery.
I'd like to thank noted Bulge designers Mark Simonitch, Randy Heller, and Bruno Sinigaglio for their historical insights and comments, which contributed in making FAB: The Bulge a better game.
Game on!—Rick Young
21.0 Developer's Notes
A few months after I began working closely with Rick on his FAB system, it dawned on me that the tools of the design fit together in a special way. At the center of the design is the figure of the field commander with elements at his immediate command surrounded by a widening degree elements less and less in his command. There are two kinds of elements under the field commander's purview: his resources and his span of control. The resources in game terms are the units, assets and events. The span of control is represented by another layer in the design: the special action, the command staff function, and reserves. These notes describe my sense of how these components interlock to deliver the FAB essence.
Units—Your Basic Forces. Units represent the primary forces disposed in assigned areas by the field commander. For proper scale, the units represented by blocks are regiments, brigades or divisions depending on the national army organization. Units remain visible and tangible even as they degrade (the blocks represent the combat force and the inherent command organization of the unit). The use of wooden blocks enables useful features about your forces: the system uses intuitive mechanisms for troop quality and morale (different quality values for each strength value) as well as representing current strength (rotation of the block for strength / step loss). The strength and identity of the enemy force is not always clear—you have to engage the enemy to gain information.
With units as blocks and assets as counters, a rich range of unit strength and span of control is enabled. The players can enable strong concentrations of unit strength at critical points. Combat takes on a rich texture within the area, without having to increase the number of units and/or move them to a tactical battle board. However, the players must manage uncertainty of resource strength with every game they play. With units, assets and events as your resources, FAB gives you a number of command levers to direct these resources as you respond to the unfolding crisis points in the game. These command levers together represent your span of control. It is challenging to use all these levers effectively.
Assets—Corps-level and Detached Elements. Assets represent a number of smaller-level capabilities in an army. These are not as reliably at the disposal of the field commander as the units since they involve ad-hoc or more distant command relationships. Large unit organizations such as divisions operate in the field dynamically, which means the field commander has made decisions to detach elements of his organization to match the developing situation. In this game, these detached elements show up in two flavors, one is formal – battalions of engineers, infantry and armor – and the other is less formal—the task forces and garrisons. The formal detached elements could be detached to transition to a different army organization following another command request. These may also form a corps-level reserve at the disposal of the field commander. The informal elements are more typically detached for an immediate tactical purpose. Significant supporting capabilities are inherent at higher levels of army organization and can be deployed independently from units within the organization. Artillery is a perfect example of this inherent capability that is available and assignable outside the specific area of unit control. Detached elements provide combat and support functions that are typically represented by special rules or by inherent functions of the primary units. Using counters permits the game system to incorporate effective, non-primary units easily.
Events—Inter-Service Operations and Fate. Many of the events in the FAB system depict interesting sub-operations planned in conjunction with other service arms of the combatants. For example, Allied Air Missions (the dreaded Jabos) and Operation Bodenplatte (the sacrificial air offensive by the Germans) are not defined by extensive air rules which you as the overall field commander could command directly. Instead, these missions arrive as events. Along with the virtue of simplicity, this design approach keeps you firmly in the role of the commander who remains unsure as to when the planned and promised operations will occur. Who knows how bitter the inter-service rivalry will be during a given game of FAB? Because events must come into your control through the selection cup, you cannot know when and if you will be able to use them. In some cases, the event is non-existent (called Delayed Response), which hands you an empty bag. The ebb and flow of events forces you to manage for disruption.
The huge disparity between the generous quantities of American engineers compared to the paltry sum of German engineers will also give the German player fits and no doubt have him grumbling "damn engineers". British assets will usually not see any action, but the asset pulls for turns 6-9 were increased by one per turn to compensate for this. If you draw all 5, you got one U.S. asset less than historical. If you draw fewer than 4, you probably received more than you deserved. All part of the things you can't plan for in this series.
Special Actions—Your Command Influence. The command style of the overall commander is the subject of intense scrutiny and interest. Commanders are praised for dynamism and luck but also prudence and steadfastness. Commanders are dismissed for bringing the wrong energy to the given moment. The force of leadership is a fascinating subject. You command your resources through the game rules and in a sense each choice represents your exertion of command leadership. FAB expresses your personal command influence as a key factor in the design. The play of the Special Action allows you to make powerful choices. Because you must exert attention on your chain of command to execute your Special Action, you only get to play it once a turn. Since you are the overall commander, day by day, you may continue to exert your influence—hence the Special Action is made available automatically during the next game turn's Reinforcement Phase.
The Initiative of Subordinate Command. Executing the current plan is the primary focus of the subordinate commanders. They operate at a level where too much independent initiative might easily confuse the central direction of the battle or campaign by the overall commander. Bad language is usually reserved for such Rear Echelon seat-holders, since they must usually embrace "the orders" without deviation or must pick and choose when to escalate to the overall commander. At points in a battle, subordinate commanders will rise to the occasion, intuit a necessary adjustment and take action. Your subordinate command is represented by single-use Special Actions (like events) associated with a particular Higher Echelon (the major army organizations in the game). You cannot count on when a given subordinate Army Commander will enable seizing stronger initiative in a sector of the battlefield. The act of initiative by a subordinate commander is unlikely to happen again for the current battle.
The Foresight of your Command Staff. Command Staffs work tirelessly to negotiate up and down the command chain to free resources up and clear bottlenecks. Sadly, the same staff function is itself the bottleneck, where good information goes to die amid piles of paper. Your Command Staff is represented by an asset, which is reusable, but must cycle through the selection cup like any other asset. The Staff Functions do not have as strong an impact as the Special Action capabilities but they are able to recur for both players. Once the asset goes into the selection cup, however, you cannot count on when your Staff will pull off a key horse trade or cut some red tape or assemble strong intelligence information.
Reserves—Preparation for the Possible. Placing a unit in reserve withholds it from the immediate points of attack. No army can afford too much of a reserve. Without one, however, developing advantageous positions is not easy. Reserves are declared during the Operational Movement Phase. If you think of the Admin Phase somewhat like a "command briefing" combined with "pre-assault preparations", you get to see what your resources are (asset/event draw) and the effect of your engineering functions before you commit to your operations. For the Attacker, a unit in reserve gives you a one-two punch in the Breakthrough Movement Phase. For the Defender, a unit in reserve allows you to fill gaps and contain what could be a devastating breakthrough.
Exploitation—The Rewards of Point of Attack. Whether by the doctrine of blitzkrieg (bypass strong points) or some other means of overrunning the defensive position, the use of armor is critical to developing and exploiting weakness. In FAB, you have a choice to make, especially where river crossings are involved since only one unit may cross a given bridge into a contested area. Do you lead with your armor unit (which may suffer the best defensive shot) looking for an exploitation opportunity or do you take the more cautious approach of sending in an infantry unit first to establish a bridgehead and prepare for a better assault in the following turn? Leading with armor alone across a river is risky. If the Defender secures a hit, your armor unit may lose elite status, and even worse, you may have to abort the attack anyway—losing headway in your assault. But there is a reward for driving forward in overrun situations—you can pry open a gap in the line, clearing the way for other units (especially ones in reserve) to push through the gap you opened.
We hope you enjoy the richly-layered command experience as you play FAB.
22.0 Player's Notes
22.1 German Player
The German player needs to be aggressive and attack in every area where he can amass reasonable force. Remember that you can always abort attacks that are not developing well. Stretch the American defenses but remember that the bulk of the VP's are on the northern half of the map, don't get distracted pushing southward.
In the early going, never let an American unit that is not yet under a field works marker escape your wrath. Don't forget that one way to bust through field works is to use an engineer asset's special ability in Combat.
Eventually some of your units will get worn out to the point that they are no longer productive in the attack. These units should get off the main roads, create field works, and protect your flanks against the inevitable American counterattack.
German replacement events are minimal, so do not bleed excessively for areas that are not on the path to victory.
22.2 Allied Player
Time is on your side, delay the German as best you can, and fight tooth and nail for the objective areas.
Timing the American counterattack is a key to victory. If you launch it too early, you will suffer higher losses and the going will be tough. If you wait too long, you will not gain back enough ground or eliminate enough German units to win.
Making the best use of your air missions will often prove decisive. In combat, always remember that there are two ways of committing them, and either way can prove more beneficial than the other depending on the circumstances.
Making the best use of your engineer assets is another key to victory. It will likely be unavoidable in the early going that some of them will need to be used to create defended roadblocks. Other than that, they are usually best used blowing bridges or creating field works for units that had to move to new defensive positions or were themselves disordered and unable to build their own field works.
22.3 Both Players
When placing units face up in an area for combat, always leave at least a portion of the terrain symbol visible so that the terrain modifier can be seen without having to move the units.
23.0 Examples of Play
Each phase of the standard game turn is illustrated in the examples below. The examples for each phase typically stand alone – the narrative is not continuous – moving to different locations of the overall battlefield to emphasize key learning points that occur for the game mechanisms as well as in characteristic game situations.
23.1 Reinforcement Phase
Each game turn starts with the Reinforcement Phase, which both players use to manage their resources. The resource boxes on the map list the steps each player needs to perform, including any specific steps done only by one side.
Situation—At the start of Turn 2, the German player has in the Available Box: three artillery assets, two engineer assets, five fuel assets (unused during Turn 1), and the reserve markers (one of which is on the KG Peiper unit). He has in the Used Box: twelve artillery assets (six artillery and six rocket artillery) and one engineer asset.
German Resource Availability. First he checks to see if he has the Reusable Special Action block in the Available Box—he does not (since it has not yet arrived). Note that after that block arrives in the game, if he had not used it during a previous turn (meaning it was still in the Available Box), he could immediately move one asset of his choice from the Used Box directly into the Available Box. This bypasses the selection cup process for that one asset. If the Special Action block was in the Used Box to begin with, he would move it directly to the Available Box (no bonus retrieval of a used asset).
Per 16.12, he must eliminate one regular artillery asset: He chooses the 408th Artillery asset. This asset reduction affects the German player every turn. He then moves the remaining twelve assets in the Used Box into the selection cup. He also receives the Reusable Special Action block and places it in the Available Box. Now he receives the assets and events arriving on Turn 2, which include four assets – von der Heydte, two artillery and one infantry – and three events: Greif Team Interdict, Greif Team Bridge, and Non-Elite Infantry Replacement. He places all of these into the selection cup as well.
Allied Resource Availability. The Allied player performs the Reinforcement Phase steps as well although he had no assets to use—none were provided for Turn 1. He receives the Reusable Special Action block and places it in the Available box. He then places his Turn 2 arriving assets – five engineer and five artillery – and his arriving events – 4th Infantry Division Replacement and Delayed Response – into the selection cup. Next, he receives two task force assets and places one into his Available Box. He decides to place the other one into Houffalize [36] due to a German breakthrough during Turn 1 into Weiswampach [22]. He finally places his arriving units: the 10th Armored Division arrives in Area N, P or Q; the 7th Armored Division arrives in Area A, B or C; and the 1st Infantry Division arrives at reduced strength (1) in Area A, B or C.
23.2 Admin Phase
The Admin Phase is done by both players during each player turn. This allows the players to draw available resources twice each game turn.
Situation—On the First Player turn of Turn 2, the German player draws nine chits from the selection cup (leaving ten) and the Allied player draws seven chits (leaving five) according to the Turn Track. Note that on the Second Player turn of Turn 2, the German player draws five more chits while the Allied player draws zero. The drawn chits are now placed in their respective Available Boxes.
German Draw and Admin Plays. The German player randomly draws nine chits: seven assets – four artillery, one engineer, one infantry and one armor – and two events – Greif Team Bridge and Non-Elite Infantry Replacement. He places the Greif Team Bridge event on the Marnach [21] / Lullange [37] river boundary. He plans on using this capability in the Operational Movement Phase. He uses the Non-Elite Infantry Replacement event (color-coded for the 6th Panzer Army) to give a strength point to the 12th Volksgrenadier (VG) Division – it had suffered a loss in combat in Udenbreth [9] during Turn 1 – and places the event in the Eliminated Box.
Allied Draw and Admin Plays. The Allied player randomly draws seven chits: six assets – three engineer and three artillery – and one event – Delayed Response. He places the event in the Eliminated Box (since this particular event has no effect). He then uses two engineers to blow four bridges on rivers at key points. He places the 35th Engineer Battalion in Ligneuville [25] and blows the bridges to St. Vith [23] and to Malmedy [33]. He places the 168th Engineer Battalion in Vielsalm [24] and blows the bridges to Malmedy [33] and Baraque de Fraiture [35]. After marking these four river boundaries with a blown bridge marker, he places the two engineer assets in the Used Box.
23.3 Operational Movement Phase
During this Phase, the player may move any of his units by selecting one friendly occupied area at a time and resolving movement one unit at a time in any order he wishes. The Defender may take permitted actions as desired or required in response to the Attacker's movements. The basic movement rules and restrictions are described first and then a typical game situation is described next.
Movement and Boundaries. There are two standard boundary types in the game—open and river. River boundaries always have bridges. When units move across the boundaries, the type of connection they use – road or field – defines the movement cost. When a primary road crosses the boundary of an area into another area – whether the boundary is depicted as a line or a river – that makes the connection a road connection. Otherwise, that connection – whether the boundary is depicted as a white line or river – is a field connection. Note that road depictions inside an area do not have to connect with one another.
Other Restrictions to Movement. Aside from bridge crossing effects (covered in the game situation described below), there are some other important movement restrictions related to crossing army boundaries, crossing restricted boundaries and fuel requirements for German armor movement. All these restrictions can interact with each other in ways that cause severe congestion. Consider an infantry and an armor unit in Prüm [4] both trying to move to St. Vith [23]:
A) The infantry unit moves north into Losheim [5], which costs 1 MP for the road connection and an additional 2 MP for crossing out of Zone 5 (its own army zone) into Zone 6. It must stop.
B) The infantry unit moves west into Bleialf [11], but the restricted boundary (the Schnee Eiffel) forces the unit to spend its entire movement allowance. It must stop. Note that the armor unit may not cross this boundary type at all.
C) The infantry unit moves south and then west, using road connections through Pronsfeld [3] for 1 MP, then Lutzkampen [12] for 1 MP, and finally into St. Vith [23] for 1 MP. A unit entering Pronsfeld [3] from Prüm [4] at a cost of 1 MP may continue on to Lutzkampen [12] at a cost of 1 MP (for a total of 2 MP spent) even though the road depictions do not connect inside the area. This path taken by the unit uses two road connections. Note that if that unit had entered Dasburg [13] instead of Lutzkampen [12], it would use a field connection (over the river depiction without a road) at a cost of 2 MP (for a total of 3 MP spent).
D) The armor unit moves north into Losheim [5], paying 1 MP for the road connection and an additional 2 MP for the crossing out of Zone 5 (its own army zone) into Zone 6. If the German player uses one of his available fuel assets, he may continue to expend more MP in this movement, otherwise he must stop immediately. Assuming he uses a fuel asset, the armor unit continues on (using road connections) in Bucholz [10] for 1 MP, then to Bleialf [11] for 1 MP and finally into St. Vith [23] for 1 MP. The armor unit uses its full movement allowance (6 MP) moving this way. Note that there is no penalty for crossing back into its own army zone.
E) If the German player has the Boundary Crossing Pre-authorized asset available, he may place this asset on the armor unit in the previous Admin Phase, which cancels the 2 MP penalty for crossing out of Zone 5 into Zone 6. In this case, using the same path through Losheim [5] to St. Vith [23], the armor unit needs to spend 4 MP to get there. However, unless he spends an available fuel asset (allowing the armor unit to spend more than 3 MP in a single movement), the unit will have to stop in Bleialf [11].
F) The armor unit moves south and then west, using road connections through Pronsfeld [3] for 1 MP, then Lutzkampen [12] for 1 MP, and finally into St. Vith [23] for 1 MP. No fuel asset is needed for this movement.
If an Allied unit was in St. Vith [23], the movement options above become even more limited due to the movement cost of +1 MP for entering an occupied area (whether friendly or enemy). In this case:
- The infantry unit in Prüm [4] cannot reach St. Vith [23] using any movement pathway since it would need to spend 4 MP to get there.
- If the armor unit uses the pathway through Losheim [5], the German player must spend both a fuel asset and have the boundary crossing pre-authorized. This path costs 5 MP to reach St. Vith [23].
- If the armor unit uses the pathway through Pronsfeld [3], the German player must spend a fuel asset. This path costs 4 MP to reach St. Vith [23].
Situation—In the 5th Panzer Army sector, the principal spearhead of the offensive is taking shape on Turn 2 using the 2nd Panzer (Pz) Division, the 26th VG Division and the Panzer Lehr Division. The 2nd Pz has already caused the US 110/28th Regiment to retreat from Marnach [21] into Lullange [37] during the Combat Phase of Turn 1. Since the 110/28th was protected by field works, it was able to absorb two hits in that attack and survive (1 hit for the field works and 1 hit for the retreat and becoming disordered). Note that the CCR/9th Armored (Arm) Division had vacated Lullange [37] in order to rush into Wiltz [38] to aid the beleaguered garrison.
Crossing Attempt. The 2nd Pz attempts to cross into Lullange [37] to attack the 110/28th. Since the German player placed the Greif Team Bridge event on the bridged river boundary, the Allied player must roll a 1 for success to blow the bridge instead of a 5 or lower. He decides that this situation is the most serious in the Allied line and plays his remaining engineer, the 159th Engineer Battalion in Lullange [37]. He may now roll a 5 or lower to blow the bridge—and does. The Greif Team Bridge event is placed in the Eliminated Box, the 159th Engineer Battalion is placed in the Used Box, and a blown bridge marker is placed on the bridged river boundary.
Blown Bridge Causes River Assault. The 2nd Pz can still cross the blown bridge into Lullange [37] but it can only do this because it started in an adjacent area and must use all its MPs. After it moves across, the German player places a river assault marker on the unit. He decides to place Pz Lehr in Dasburg [13] into reserve. He considers whether to move the 560th VG Division from Weiswampach [22] into Lullange [37] (1 MP to Lullange plus 1 MP to enter an occupied area). This move would negate the river assault facing the 2nd Pz. However he decides against this move since he has other plans for the 560th VG.
23.4 Strategic Movement Phase
During this Phase, the player may move units marked with a reserve marker in a previous Operational Movement Phase. This is usually the fastest way to bring reinforcements up near the line of battle. Note that both sides have specific limits to the number of Strategic Moves per turn—the American limit is 3 and the German 1 (the British cannot perform Strategic Movement in this game). In addition, the German player must use a fuel asset to conduct Strategic Movement. Also, unlike Operational Movement which enables units to move into enemy-controlled areas, Strategic Movement only enables units to move freely within friendly-controlled areas (never crossing a blown bridge nor moving into an area that is enemy-controlled and/or contested). It is recommended that players place control markers in their own unoccupied friendly-controlled areas that are in gaps that may appear between the opposing lines.
Situation—A critical moment for Strategic Movement occurs on the Allied side of Turn 3—when the 82nd and 101st Airborne Divisions race to fill major gaps in the Allied line near Bastogne [47] and Marche [75].
Race to Reinforce. On Turn 3 the German player has contested and secured Bastogne [47], displacing the 7th Armored Division and opening a large gap in the Allied line between Sibret [64] and Samrée [49]. The Allied player receives crucial replacements on Turn 3, notably the 82nd and 101st Airborne Divisions. During the Reinforcement Phase at the beginning of Turn 3, he chose to place the 82nd in Givet [96] which is Entry Area H and the 101st in La Chapelle [87] which is Entry Area J. Next in his Operational Movement Phase, he marked each of them with an available reserve marker: he placed a US Zone 5/6 Reserve Unit marker on the 82nd and a US Zone 7 Reserve Unit marker on the 101st. He decides to use Strategic Movement for both units. During the Strategic Movement Phase, he moves them through friendly-controlled, uncontested areas: the 82nd strat-moves from Entry Area H to La Roche [62] and the 101st strat-moves from Entry Area J to Champlon [74].
Other Options. Since Strategic Movement does not permit units to enter an enemy-occupied area, the Allied player had to consider whether he should have moved the two reinforcing Airborne Divisions during the Operational Movement Phase. There are some alternate movement paths, showing movement point costs. The reinforcing infantry-class Airborne units are not within striking distance of any enemy units. Also, these units can only reach areas that are well back of where the immediate gaps are in the Allied line. The Allied player gains a significant advantage by moving the units in the Strategic Movement phase, since he can locate the two units in better defensive terrain and fill the most important gaps in his line.
Situation—The 106th Infantry Division was forced to retreat from Bleialf [11] into St. Vith [23] (and become disordered) in the Turn 1 Combat Phase. By the Turn 2 German Admin Phase, the 106th Inf had become good order once again but the Allied player decided against using an engineer asset to build field works in St. Vith [23]. The garrison asset in St. Vith [23] acts like a defended roadblock (not a unit) if it is alone, otherwise it behaves like a battle asset for a unit in the area. The 18th VG successfully advanced into St. Vith [23] during the Operational Movement Phase and avoided a river assault when the Allied attempt to blow the bridge failed. Only one unit may cross a river into a contested area. The 62nd VG remained behind in Bleialf [11]. At the beginning of a round of combat in an area, the Defender may use a Special Action to reinforce an adjacent area. The Allied player does just this, playing the Reusable Special Action to move the CCB/9th Arm from Ligneuville [25] into St. Vith [23].
23.5 Combat Phase
The Phasing player (the Attacker) determines the order in which combats are resolved in contested areas. Combat is mandatory in a newly contested area, but it is optional in a previously contested area—sometimes pinning your opponent is more effective than attacking. When the Phasing player selects a contested area for combat, a single round of combat occurs—defined strictly in 6.2. Avoid the temptation to treat the individual steps in 6.2 as simultaneous; they are not.
Combat. Neither player chooses to allocate artillery assets to this combat, so defensive ground fire is next. The Allied player must choose the 106th Inf as the point unit (since the CCB/9th Arm just arrived into the area) to face the 18th VG (it must be the German point unit). The firing order is not important.
- CCB/9th Arm unit has +1 (firing unit is armor) and +0 (veteran firing on veteran point unit) for a net Success Number (SN) of 5+1=6, and fires with 1 die (1 step). This is expressed as "1 try for a 6" – rolls 5 – one hit!
- Garrison asset has –1 (green firing on veteran) for a net SN of 5–1=4, and fires with 1 die (1 step). This is "1 try for a 4" – rolls 5 – no hit!
- 106th Inf unit has –1 (green firing on veteran) for a net SN of 5–1=4 and fires with 1 die (1 step). This is "1 try for a 4", rolls 1—one hit!
Hit Resolution. The German player has two hits to resolve and cannot afford to press the attack.
- The first hit is a mandatory step loss. The 18th VG is immediately rotated once to indicate the loss.
- Instead of taking the second step loss, the German player decides to abort the attack, which absorbs any and all remaining hits and causes all attacking units to become disordered.
Although the Allied player has blunted the attack, he must now make a choice to stand in St. Vith [23] or withdraw to Vielsalm [24], since the German player will advance the 62nd VG from Bleialf [11] on his next turn.
23.6 Combat Phase with Exploitation
Here is a second example of combat in which an exploitation opportunity occurs, leading to a possible Breakthrough Movement Phase. Note that before an exploitation opportunity may be acted upon, all combats in the Combat Phase must be completely resolved.
Situation—The German player looks to clear out Weiswampach [22] to develop his position more fully later in Turn 2. The 112/28th Infantry regiment was pushed back from Lutzkampen [12] on Turn 1 and could not build field works because it was disordered. The 116th Panzer Division benefited from the successful play of the Greif Team Bridge event (the Allied attempt to blow the bridge failed), which allowed it to cross the river into Weiswampach [22] without suffering a river assault.
Artillery Fire. The German player assigns two artillery assets: the 15th Rocket Battalion and the 401st Battalion. Due to availability constraint, the German player must have both types of artillery available in order to assign two artillery assets to a single combat. The Allied player assigns one artillery asset, the 333rd Battalion.
- 15th Rocket and 401st has +0 (no field works present) for a net SN of 5 and fires with two dice. This is "2 tries for a 5" – rolls 6, 10 – no hit!
- 333rd has –1 (target's point unit is armor) for a net SN of 5–1=4 and fires with one die. This is "1 try for a 4" – rolls 9 – no hit!
Ground Fire. The Allied player must choose the 112/28th as the point unit to face the 116th Pz (the German point unit) and fires first with the results applied first.
- 112/28th has –1 (veteran firing on elite point unit) and –1 (target point unit is armor) for a net SN of 5–2=3 and fires with one die. This is "1 try for a 3" – rolls 3 – no hit!
- 116th Pz has +1 (firing unit is armor), +1 (elite firing on veteran point unit) and –1 (Terrain Defense Number or TDN) for a net SN of 5+1=6 and fires with three dice. This is "3 tries for a 6" – rolls 1, 6, 5 – three hits!
Hit Resolution and Exploitation. Since the Defender has no field works, the unit is in jeopardy.
- The first hit from ground fire is absorbed by retreating and becoming disordered. There remain two additional hits to resolve.
- The second hit eliminates the unit—it only has one step.
- The third hit is an excess hit.
The 116th Pz now attempts to pass a morale check to gain the exploitation opportunity (to move in the Breakthrough Movement Phase). It has +2 (elite unit morale) for a net SN of 5+2=7. This is "1 try for a 7" – rolls 6 – succeeds! The 116th Pz is marked with an exploitation marker and the German player may move this unit during a Breakthrough Movement Phase.
23.7 Reaction & Breakthrough Phases
After all combats have been resolved, the Non-phasing Player has the opportunity to move units marked with a reserve marker in reaction to what the Phasing player has accomplished so far. He may not move his units into an uncontested enemy area and cause combat. The opportunity for a unit to move in this Phase is limited to the following conditions: the player may move units (a) marked with an exploitation marker, (b) marked with a reserve marker or (c) by expending a Special Action. If this movement causes an area to be contested, the combat in that area is mandatory—which is how the Breakthrough Combat Phase occurs.
Reaction. During the German player turn, the Allied player received 1st Army reinforcements (the depleted 1st Infantry Division and the 7th Armored Division) and 3rd Army reinforcements (the 10th Armored Division). Since the German player is the First Player, the Allied player will not be able to mark these reinforcements with a reserve marker until his turn—these units are not yet eligible to move during the Reaction Phase of the First Player's turn. Therefore, the Allied player cannot react. Note that Reaction Movement in this Phase has an advantage over regular Strategic Movement—the Defender can reinforce contested areas during the Reaction Phase.
Situation—In Turn 2, the potential for a breakthrough and even a breakout is very strong in the central 5th Panzer Army sector of the German offensive. Note that some of the unit placements are slightly different than in previous examples to illustrate points relevant to breakthrough. This example shows that three different mechanisms can be used to advance a player's position during the Breakthrough Movement Phase.
Breakthrough Movement. The combat outcomes for the German player in Turn 2 have been effective enough to put the Allied line in jeopardy. He plans a sequence of breakthrough movements in and through Weiswampach [22].
A) To relieve congestion, he chooses to move the 116th Pz (marked with an exploitation marker) one area from Weiswampach [22] to Houffalize [36]. The exploitation occurred as a result of the combat described above (see 23.6). Since the area is occupied by the CCR/9th Arm, there will be a mandatory round of combat to resolve.
B) With Weiswampach [22] clear, he chooses to activate Pz Lehr in Dasburg [13], which had been placed into reserve by the German player during the Operational Movement Phase (see 23.3). He moves the unit into Marnach [21] for 2 MP (as long as the blown bridge was repaired in the Admin Phase) and then to Weiswampach [22] for 1 MP. This is as far as Pz Lehr can move unless the German player uses an available fuel asset to extend its movement allowance, which he does. He continues moving into Vielsalm [24] for 2 MP (1 MP for the road connection and 1 MP for entering an occupied area). Since the area is occupied by the 106th Inf, there will be a mandatory round of combat to resolve. If the 106th Inf was not in Vielsalm [24], Pz Lehr could have pressed as far as Samrée [49] heading west through Baraque de Fraiture [35]. If he had used the Command Staff Function to pre-authorize the boundary crossing for Pz Lehr (marking the unit during the Admin Phase), he could have sent Pz Lehr on to Trois Ponts [34]. Either move tears apart the Allied line.
C) The third way to conduct Breakthrough Movement is via the expenditure of a Special Action. He now activates the 150th Panzer Brigade to move forward one area from Lutzkampen [12] into Weiswampach [22].
Breakthrough Combat. This occurs only in newly contested areas due to Breakthrough Movement. Breakthrough Combat is otherwise identical to Operational Combat. Continuing the example above, two mandatory combats must be resolved, one in Houffalize [36] and one in Vielsalm [24]. These combats assume that neither player commits any assets (either saving them or having none left to allocate).
D) The CCR/9th Arm has +1 (firing unit is armor), –1 (veteran firing on elite point unit), –1 (target's point unit is armor) and +1 (targeted unit has river assault marker) for a net SN of 5+0=5 and fires one die. This is "1 try for a 5" – rolls 5 – one hit! Since the first hit is a mandatory step loss, the German player rotates the 116th Pz block one step and decides to continue. 116th Pz has +1 (firing unit is armor), –1 (conducting a river assault), +0 (veteran firing on veteran point unit), –1 (versus Defender's terrain defense modifier) and –1 (target's point unit is armor) for a net SN of 5–2=3 and fires two dice. This is "2 tries for a 3" – rolls 1, 9, 4 – only one hit! The Allied player decides to have the CCR/9th Arm absorb that one hit by retreating into Noville [48] and becoming disordered.
E) The 106th Inf has –2 (green firing on elite point unit) and –1 (target's point unit is armor) for a net SN of 5–3=2 and fires three dice. This is "3 tries for a 2" – rolls 6, 4, 10 – no hits! Pz Lehr has +1 (firing unit is armor), +2 (elite firing on green point unit) and –1 (versus Defender's terrain defense modifier) for a net SN of 5+2=7 and fires four dice. This is "4 tries for a 7" – rolls 1, 9, 5, 8 – two hits! The Allied player decides to have the 106th Inf absorb one hit by retreating into Baraque de Fraiture [35] and becoming disordered; the second hit is a mandatory step loss, reducing the 106th Inf to two steps in strength. Note that even if the German player had secured five hits on the 106th Inf (eliminating it with one more hit than it could absorb following the hit priorities) no further exploitation opportunity could occur in this Phase.
23.8 Supply Phase
The Supply Phase affects players during their own player turn, so it is important to take actions that leave your units in good order during your own Supply Phase. The effects do not immediately take hold, however, which allows players to consider bolder moves. Note that the units in this example are placed to show aspects of the four supply path tracing sub-cases in 9.31.
Situation—During Turn 2, the German player took actions that opened a pathway through Malmedy [33] up through Stoumont [52] and beyond. Now during Turn 3 he decides to boldly press KG Peiper from Losheim [5] up beyond Stoumont [52] and on to Werbomont [51]. He would not make this bold move unless he was counting on the 18th VG to successfully clear Trois Ponts [34] during the Combat Phase. In this example, the 18th VG failed and KG Peiper is in danger of becoming unsupplied. In the Supply Phase, the German player checks for supply in the following areas that contain his units:
Malmedy. The 1st SS(-) Pz traces to Ligneuville [25] and then back to Entry Area Z. The supply path crosses no blown bridges nor enters or passes adjacent to areas with enemy units. The 1st SS(-) Pz is in supply.
Ligneuville. The 3rd FJ traces to Entry Area Z. The supply path crosses no blown bridges nor enters or passes adjacent to areas with enemy units. The 3rd FJ is in supply.
Vielsalm. The 62nd VG traces into St. Vith [23] and then to Bucholz [10] and then back to Entry Area Z. If the US 106th Inf is trapped in Bleialf [11], reduced and unsupplied, the path to St. Vith [23] may be blocked per 9.31c if Bleialf [11] is uncontested by the German player. If this happened, then the 62nd VG could trace across the adjacent blown bridge (per 9.31a) into Ligneuville [25] and then back to Entry Area Z. In either case, the 62nd VG is in supply.
Trois Ponts. The 18th VG contests the area, engaged against the US CCB/9th which still controls Trois Ponts [34]. It had failed to clear the area during the Combat Phase. In this situation, per 9.31b, the 18th VG may trace out of the enemy-controlled area. It may trace across the adjacent blown bridges per 9.31a into either Vielsalm [24] or Malmedy [33] and then back to Entry Area Z. It may not trace a path into the vacant (friendly-controlled) Stoumont [52] since this area is adjacent to an uncontested enemy unit in Aywaille [53] per 9.31c. The 18th VG is in supply.
Werbomont. KG Peiper is at risk. It may not trace a path into the vacant Stoumont [52] due to the presence of the 1st Infantry Division in Aywaille [53] per 9.31c. Because of the presence of the 168th Engineer Battalion acting as a defended roadblock, KG Peiper cannot attempt to trace a path through Manhay [50]. Even if Manhay [50] were empty, KG Peiper could not trace (per 9.31a) through it and Baraque de Fraiture [35] since these are enemy controlled. The last hope appears to be through Trois Ponts [34] but this is not allowed because the area is still enemy controlled. If Trois Ponts [34] was actually controlled by the 18th VG then, per 9.31d, KG Peiper could trace a valid supply path into Trois Ponts [34]. But its valid supply path would end there: per 9.31a, the tracing unit must be adjacent to the blown bridge, which is not the case. KG Peiper is unsupplied and is immediately vulnerable.
Allied Supply Consideration. The CCB/9th is also in a precarious situation. At the end of the Supply Phase, the 168th Engineer Battalion is removed to the Used Box. The only valid supply path for the CCB/9th is through Manhay [50]. At that instant, although Manhay [50] is still friendly controlled, it is vacant and adjacent to an uncontested enemy unit—KG Peiper in Werbomont [51]. The CCB/9th itself will be at risk of becoming Unsupplied per 9.31c in the Allied player's Supply Phase unless it operationally retreats to a safer position.
The German player has used his command tools and his opportunities to press the attack forward and develop his position before the Allied player has a chance to fill the gaps.
23.9 Second Player Turn
After the appropriate markers have been adjusted and/or removed from the map at the end of the First (German) Player's Supply Phase, it is now the Second (Allied) Player's turn. The complete sequence of play is repeated as above with a few minor adjustments per the Exclusive Rules. For example, the Allied player does not remove an artillery asset during the Reinforcement Phase. Most notably, both players must take care to observe on the Turn Track the exact number of chits to pull from the selection cup during the Second Player turn. This number is less than the number pulled during the First Player turn.
23.10 Victory Check Phase
After both player turns have been completed, the Victory Check Phase is performed. Victory involves control of objective areas and elimination of major enemy unit formations.
Turns 1-3. During these turns, players will calculate and adjust the net Victory Point (VP) marker on the General Information Track, however, no Sudden Death victory is checked during these turns. It is too early in the conflict to evaluate success.
Sudden Death Victory. Starting Turn 4, a victory by Sudden Death is possible for either player. Each player sums together the VP value of the objective areas he controls and adjusts that sum upward for each eliminated large enemy unit. The difference between the two player totals is the current VP level, which is marked on the General Information Track. Except for a net VP level of 0, the net VP level is positive for one player or the other. That player compares his current VP level with the Net VP number for Sudden Death Victory on the Turn Track. If his net VP level is equal to or higher than his targeted Sudden Death number on the Turn Track for the current turn, then that player has won a Sudden Death Victory.
Turn 4 Example with Aggressive German Attack. An aggressive German player attack might typically leave the Allied player controlling only two of the tactical battlefield objectives—Verviers [55] and Huy [77]. These areas yield only 2 VPs, while the German player will have retaken Monschau [27] negating one VP for the Allied player and then will have taken Malmedy [33], Bastogne [47], Werbomont [51] and Marche [75]. Before the players add in the eliminated large unit adjustment, the current VP level is net 2 to the German player. That level of success by the German player might involve the elimination of the weak 99th and 106th Infantry Divisions as well as the depleted 1st Infantry Division without the loss of a single large German unit. That would boost the current VP level to net 5 for the German player, equal to the Sudden Death Victory target of 5 for the German player on Turn 4. In this example, the retention of Marche [75] and/or the recovery of the 1st Infantry Division by the Allied player is absolutely essential for staving off a Sudden Death Victory by the German player. Note that the under-strength 1st Infantry and 4th Infantry Divisions are easily eliminated during the early stages of the battle, however, the Allied player has special replacement events for both of these divisions that will allow them to be pulled off the Eliminated Large Unit Track on the map sheet (these units received waves of replacements during the battle).
Turn 4 Example with Effective Allied Defense. An effective Allied player defense might typically leave the Allied player controlling two of the German areas – Monschau [27] and Kesternich [8] – plus four of the tactical battlefield objectives – Bastogne [47], Verviers [55], Marche [75] and Huy [77] – without having surrendered any Allied areas northwest of the Meuse. These areas yield 6 VPs, leaving the German player only 2 VPs for possession of Malmedy [33] and Werbomont [51]. Before players add in the eliminated large unit adjustment, the current VP level is net 4 to the Allied player. This is 1 VP short of the Sudden Death Victory target of 5 for the Allied player on Turn 4. Despite such an effective defense, the Allied player remains unlikely to have eliminated any large German units, although the German player in this situation would not likely have eliminated any large Allied units either. In this example, the retention of Werbomont [51] by the Allied player might grasp Sudden Death Victory.
Scenario Victory. At the end of the scenario chosen by the players, if neither has won a Sudden Death Victory, then victory is determined using the particular victory rules for the scenario. For example, the tournament scenario lists levels of victory for either player based on the final net VP level (which was not high enough for either player to achieve Sudden Death Victory). Note that the introductory scenario uses a non-standard method of calculating victory.
24.0 Scenarios
24.1 The Campaign Scenario
24.11 Overview. This is the long game, representing both the German Offensive and the beginning of the American riposte. Playing this game to completion should take experienced players four to five hours. The American position will feel desperate in the early going, but hang in there. There should come a point where initiative will pass to your side and you will get to enjoy a bit of revenge.
24.12 Scenario Length. Play all 9 Game Turns unless a Sudden Death Victory is achieved.
24.13 Area of Play. The entire map is used. All areas where Allied forces are set-up (even Contested Areas) and all areas behind this front line are Allied-controlled. The Germans control all other areas.
24.14 Deployment at Start
- All starting units and assets are used.
- Starting units are deployed Full-Strength except for the US 4th Infantry Division, which begins the scenario with only two steps.
24.15 Reinforcements
- All scheduled units, assets and events are used in this scenario.
- All reinforcing units arrive full-strength for both sides except for the US 1st Infantry Division, which arrives on Turn 2 with only one-step of strength.
24.16 Special Scenario Rules
- All areas, zones, and boundaries are in effect.
- The scenario begins with the German Combat Phase of Turn 1. The German Movement Phase has been made according to the detailed plans drawn before the battle.
- All Contested Areas are considered Newly-Contested for the German Combat Phase of Turn 1 and a round of combat must be fought in them during that Phase.
- Four bridges begin the scenario already destroyed. Place blown bridge markers on the river boundaries between areas 15/16; 15/18; 13/20; and 13/21.
- The three German units that arrive on Turn 4 are all placed in Entry Area Z (overstacked), as an exception to rule 4.1c. Stacking must be corrected by the end of the German Operational Movement Phase of Turn 4.
24.17 Victory. If a Sudden Death Victory was not achieved, then the VP's are calculated per 19.3 and the final tally is compared to the following table:
- 4+ VPs = Operational Victory for the side with the VP's
- 1-3 VPs = Marginal Victory for the side with the VP's
- 0 VPs = Draw
24.18 Historical Outcome. After the first desperate strike, the combatants settled into a bitter wrestling match in the mud and snow of winter. The Germans threw their last and best reserves into the effort, and the Allies threw everything they could in return. Both sides grappled with grim purpose.
German Forces at Start
| Area No. | Area Name | Units / Assets | Marker |
|---|---|---|---|
| 5 | Losheim | Peiper | Reserve |
| 6 | Blankenheim | 1st SS(-) & 150th Pz | |
| 7 | Schleiden | 12th SS | |
| 8 | Kesternich | 326th VG | |
| 9 | Udenbreth | 12th VG & 277th VG | |
| 10 | Bucholz | 3rd FJ | |
| 11 |
Allied Forces at Start
| Area No. | Area Name | Units / Assets | Marker |
|---|---|---|---|
| 9 | Udenbreth | 99th Inf | Field Works |
| 10 | Bucholz | 14th Cav | Field Works |
| 11 | Bleialf | 106th Inf | Field Works |
| 12 | Lutzkampen | 112/28th Inf | Field Works |
| 16 | Echternach | 4th Inf (at 2 steps) | Field Works |
| 18 | Beaufort | CCA/9th Arm | Field Works |
| 19 |
24.2 The Tournament Scenario
24.21 Overview. This is a shorter game, representing only the period where the German Offensive had its best chance for success. Playing this game to completion should take experienced players two to three hours. The American player can only win by keeping the German player from attaining his goals.
24.22 Scenario Length. Play Game Turns 1-5 unless a Sudden Death Victory is achieved on turn 4.
24.23 Area of Play. The entire map is used. All areas where Allied forces are set-up (even Contested Areas) and all areas behind this front line are Allied-controlled. The Germans control all other areas.
24.24 Deployment at Start
- All starting units and assets are used.
- Starting units are deployed Full-Strength except for the US 4th Infantry Division, which begins the scenario with only two steps.
24.25 Reinforcements
- All scheduled units, assets and events received through Turn 5 are used in this scenario.
- All reinforcing units arrive full-strength for both sides except for the US 1st Infantry Division, which arrives on Turn 2 with only one-step of strength.
24.26 Special Scenario Rules
- All areas, zones, and boundaries are in effect.
- The scenario begins with the German Combat Phase of Game Turn 1. Note that the German player's Movement Phases having already been made according to the detailed plans executed before the Bulge offensive began.
- All Contested Areas are considered Newly-Contested for the German Combat Phase Turn 1 and a round of combat must be fought in them during that Phase.
- Four bridges begin the scenario already destroyed. Place blown bridge markers on the river boundaries between areas 15/16; 15/18; 13/20; and 13/21.
- The three German units that arrive on Turn 4 are all placed in Entry Area Z (overstacked), as an exception to rule 4.1c. Stacking must be corrected by the end of the German Operational Movement Phase of Turn 4.
24.27 Victory. If a Sudden Death Victory was not achieved, then the VP's are calculated per 19.3 and the final tally is compared to the following table:
- 4+ German VPs = German Operational Victory
- 2-3 German VPs = German Marginal Victory
- 0-1 German VPs = Allied Marginal Victory
- 1+ Allied VPs = Allied Operational Victory
24.28 Historical Outcome. Fighting through severely congested terrain and with only days of fuel, the German army lunged desperately towards the Meuse. Fighting with inexperienced troops in fog and initial confusion, the Allied armies heroically countered and bought enough time to allow the reinforcements to arrive that prevented German success.
The starting deployment for the Tournament Scenario uses the same German Forces at Start and Allied Forces at Start tables as the Campaign Scenario (24.1) above.
24.3 The Introductory Scenario
24.31 Overview. Use this very short scenario to introduce yourself to the rules. The goal is simple: seize and control Bastogne!
24.32 Scenario Length. Play Game Turns 1-3 only.
24.33 Area of Play. Use the Introductory Scenario map sheet included in the game for the playing surface. Only the areas on this map sheet are in play. All areas where Allied forces are set-up (even contested areas) and all areas behind this front line are Allied-controlled. The Germans control all other areas.
24.34 Deployment at Start. Only the units, assets and events listed below are used. Starting units are deployed full-strength.
24.35 Reinforcements. Only the reinforcements listed below are used. The Allied 10th Armor Division arrives at full-strength into Martelange.
24.36 Special Scenario Rules. All Series and Exclusive rules are in effect unless modified by this scenario.
- German player: read rules 14.31, 14.41, 14.52 and 14.71 for how the army boundary between zones 5 and 7 affects your game play; read rule 16.12 for your artillery asset restriction; and read rules 17.12 and 17.33 for the two events you receive.
- Allied player: read rule 14.72 for your reserve marker; read rules 16.21 and 16.22 for the use and placement of your garrison and task force assets; and read rule 16.23 for your artillery asset enhancement.
- The scenario begins with the German Combat Phase of Turn 1.
- All contested areas are considered newly-contested for the German Combat Phase of Turn 1 and a round of combat must be fought in them during that phase.
- Place blown bridge markers on the river boundaries between a) Dasburg and Marnach and b) Dasburg and Holzthum.
- See the introductory scenario map sheet for the Admin Phase asset/event draws for this scenario.
- The supply source rules (14.91 and 14.92) are modified: a unit is in supply if it can trace a supply path into and/or through contiguous friendly-controlled areas to an area that is at the edge of the area of play.
24.37 Victory. Victory is determined at the end of Turn 3. Decisive Victory is awarded to the player who has uncontested control of Bastogne. Otherwise use the following procedure:
- Both players count the number of strength points of their units in the Bastogne area.
- The German player subtracts two points for each of these areas not controlled: Ettelbruck, Houffalize, Noville, Sprimont and Sibret.
- Marginal Victory is awarded to the player with the higher final total. The Allied player wins in case of a tie.
24.38 Historical Outcome. Three German divisions nearly surrounded the town by December 18th, but the 101st Airborne Division (the Screaming Eagles) reached the heroic defenders on December 19th. One of the most memorable races was won.
German Forces
| Area No. | Area Name | Units | Marker |
|---|---|---|---|
| 12 | Lutzkampen | 116th Pz & 560th VG | |
| 13 | Dasburg | Pz Lehr | |
| 15 | Irrel | 276th VG | |
| 19 | Diekirch | 5th FJ | |
| 20 | Holzthum | 26th VG | |
| 21 | Marnach | 2nd Pz | River Assault |
Allied Forces
| Area No. | Area Name | Units | Marker |
|---|---|---|---|
| 12 | Lutzkampen | 112/28th Inf | Field Works |
| 19 | Diekirch | 109/28th Inf | Field Works |
| 21 | Marnach | 110/28th Inf | Field Works |
| 37 | Lullange | CCR/9th Arm | |
| 38 | Wiltz | Garrison Asset | |
| 47 | Bastogne | Garrison Asset |
German starting Assets / Events
| Turn | Assets / Events | Notes |
|---|---|---|
| 1 | 47+605th Eng & 408th Arty | 7th Army Assets |
| 1 | Zone 7 Reserve | Reserve Marker |
| 1 | 7th Rocket Arty, 15th Rocket Arty, & 401st Arty | 5th Pz Army Assets |
| 1 | Zone 5 Reserve | Reserve Marker |
| 1 | 2 Fuel Assets | Strategic Asset |
German Reinforcements
| Turn | German Reinforcements | Notes |
|---|---|---|
| 2 | Greif Team Bridge | Event |
| 2 | 741+902nd Armor | 5th Pz Army Asset |
| 3 | 5th Panzer Army Special Action | Event (single-use) |
Allied starting Assets / Events
| Turn | Assets / Events | Notes |
|---|---|---|
| 1 | Zone 5/6 Reserve | Reserve Marker |
Allied Reinforcements
| Turn | Allied Reinforcements | Notes |
|---|---|---|
| 2 | 10th Arm | Martelange (46) |
| 2 | 146th, 159th & 168th Eng; 333rd & 406th Arty | 1st Army Assets |
| 2 | Task Force | Strategic Asset |
| 2 | US Special Action | Block (reusable) |
| 3 | 15th Eng | 1st Army Asset |