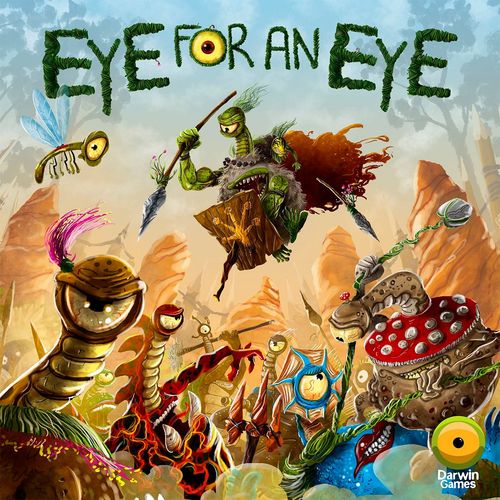
Eye for an Eye
Eye for an Eye Rulebook
Table of Contents
Table of Contents
Component Rundown
Lots more components dependant on Kickstarter Stretch Goals.
- 30x Custom Six-sided Dice
- 110x Translucent Red Health Cubes
- 4x Victory Point Cups
- 1x Soundtrack (downloadable via QR code - coming soon)
- 5x Occulite figures (Chief Grublic, Chief Riparian, Chief Banksia, Chief Incendiary and Chief Pluma) and 5x Luftle figures (Chief Echo and his four Guards)
- 1x Arena Board
- 6x Player Boards
- 6x Ceremonial Flower Tokens
- 3x Heat Tokens
- 18x Tribal Ability Cards
Setting up a Game
- Place the Arena Board in the centre of the table.
- Shuffle the six Ceremonial Flower Tokens and deal one randomly to each player. This determines your figure's starting area. It is easiest to sit near your figure's starting area.
- Each player selects one Player Board and places it in front of them.
- Take the figure that matches your chosen Player Board and place it in one of the three spaces in your starting area. Ensure your character has a clear front arc.
- Place a number of Health Tokens equal to your character's Health on your Player Board.
- Place the spare Health Tokens in the corners of the board within easy reach of all players. These are used to take Health Tokens from when you use the Heal Basic Action.
- Take five dice and place them in front of you.
- Place a Victory Cup in front of you so that all players can reach it. This is where other player's Health Tokens are placed when you inflict Hits on their character.
- If you are not playing the Basic game, then take your character's three Tribal Ability cards and place them face down in front of you.
- Choose a Soundtrack and press play. You are ready to play!
If you need to find the Soundtracks, you can access them by scanning the QR code in the rulebook. If you'd like to see the game setup in video form, you can access that by scanning the QR code in the rulebook. You can also check out the game's website at www.darwin-games.com.au/eye to find more soundtracks, videos, news, hints and tips.
How to Win
Each round ends when one of the following things happen:
- Only one player or team remains on the Arena board or,
- The Soundtrack ends and you hear 'Yarra Bung!' (or the timer finishes)
Once the round ends, players are then ranked for that round.
- Rank each player or team depending on how many Health Tokens they have in their Victory Cups at the end of the round, going from most to least.
- Any player or team that has characters with Health Tokens still on their player board adds five to this number (for each character with Health Tokens still on their player board), adjusting the ranking as needed.
Award points based on their ranking as follows:
- Two Players / Teams game: 1st - 4 points, 2nd - 2 points
- Three Players / Teams game: 1st - 4 points, 2nd - 2 points, 3rd - 1 point
- Four Player game: 1st - 4 points, 2nd - 3 points, 3rd - 2 points, 4th - 1 point
These awarded points are carried across rounds, but the number of Health Tokens in your Victory Cup are not.
Eye for an Eye is most enjoyable when played to a number of rounds equal to the number of players, plus one.
The winner is the player or team that has the most points over the agreed number of rounds. If there is a tie, then the tied players or teams play one more match to determine the ultimate winner.
For example, a four player game would be played to the best of five rounds, with the player that had the most points awarded to them across all five rounds winning.
Game Modes
Currently, there are two modes you can play Eye for an Eye in - 'Every Eye for Themselves' and 'Alliances'. The differences are listed below the setup information. In the future, other modes of play will be available.
It is recommended that all players be familiar with the unique actions that your character can perform during the game.
Every Eye for Themselves
Players 2-4
Each player is playing to win individually. Each player takes their own Victory Cup and places it in front of them within easy reach of all players.
Alliances
Players 4-6
Players work as a team to defeat rival teams. Players split into teams of two or three characters. This will allow you to play 2 vs 2 vs 2, or 2 vs 2, or 3 vs 3 games. Each team takes a Victory Cup and places it in front of them within easy reach of all players. Ie: in a game where there are two teams, there will be two Victory Cups.
All members of a team should be sitting next to each other so it is obvious which Victory Cup belongs to which team.
Concepts of the Core Game
Chief, welcome to the Arena. You may have led many campaigns during The Drums of War... been in charge of dozens of units of fellow Occulites. Your past might even have involved executing surgical strikes on the battlefield, hunting Puscual, gathering Sungems, taming Wymbrix and stealing Drunmoth eggs. But this is different. Stepping into the Arena is a whole new game... figuratively of course. You'll need to start with the basics if you plan to represent your Tribe proudly. By the end of your training Chief, you'll be ready... or you'll lose. Either way, you'll come back for more... they all do.
But first, let's get some concepts out of the way.
Basing and Facing
There are three arrows coming from the base that indicate a character figure's facing. The three board hexes each arrow points to is the character's front arc. A character can only attack into a space that it is both adjacent to, and in the front arc, unless a special ability or power states otherwise. The three board spaces behind the character (that do not have a base arrow pointed at them) are the character's rear arc. Understanding your character's front arc and rear arc is vital to playing Eye for an Eye well.
The front arc has three directions, each with its own line of sight:
- The left direction of the front arc - Can see the adjacent space with terrain, but cannot see through it.
- The centre direction of the front arc - Can see the two spaces in front of it (including the space with terrain in it), but cannot see past that space.
- The right direction of the front arc - Can see two spaces (including the one with the other character in it), but not past that character.
The character cannot see any spaces through its entire rear arc.
Line of Sight
Your character's line of sight only extends out in a straight line from your front arc until it hits another character figure or a space containing terrain that blocks line of sight. This is only important for some characters and abilities. Restricting line of sight to straight lines only is important as it simplifies the process during real time play.
Arena Board
The Arena board is where your characters will act. The spaces with rocks in them count as spaces with terrain. You may not usually move your figure onto those spaces, however some abilities will allow you to do this. To remind you of the movement restriction these spaces are outlined in red.
Each space can only ever contain one character figure. You'll notice that each space contains six sides. You must ensure when moving and positioning your model that its base arrows line up with three adjacent spaces (not the lines between spaces), as this determines Facing and Line of Sight as covered in the last Section.
Each set of three hexes around the outside of the board counts as a starting area. These are indicated in the above image with coloured circles in the slightly tinted hexes.
When placing your figures at the start of a round, only one figure may be placed in each starting area. Once the game begins figures are free to move in or out of the starting areas and the restriction to one figure does not apply.
Dice
Each die has the same six icons. These are: Attack, Defence, Move, Heal, Ready and Special.
Each character starts with a number of dice (normally five). This is referred to as the player's 'Dice Pool'.
Player Board
Each character comes with a matching player board. These allow you to control the actions of your character during the game.
This player board sits in front of you while you play. It has several basic actions and an innate action. You can see above that Chief Grublic has four basic actions. These four basic actions are available to most characters and are: Attack, Defence, Move and Heal.
During each round you will allocate dice to this player board.
Rolling and Allocating Dice to Actions
To be able to do anything during the game, you need to be able to allocate dice to the actions on your player board and tribal cards.
To do so, simply roll and reroll your dice pool as many times as you want, as fast as you want. When you see a die showing an icon that matches one of the actions you'd like to use at some point, you just pick up that die and place it onto one of the spaces of that action. This is called allocating. You can do this with one or more of the dice you have just rolled.
To allocate a die, you need to:
- Ensure the icon matches the action you want to allocate it to
- Ensure there is a space for the die
- Place the first die in the Minimum Requirement space (indicated by a border of flowers), and fill the track from there.
In the example shown in the rulebook, the player has allocated two dice to the action 'Movement'. They could have chosen to allocate any of their other dice to a matching action or they may reroll them.
Any dice showing icons that you don't want at the moment can be immediately rerolled until you either choose to allocate more dice, or to resolve an action.
Resolving Actions
Resolving an action allows you to do what the action tells you. The timing of when you resolve an action is important and is something you will learn as you play.
To resolve an action, ensure that you have filled the minimum requirement spaces, and then simply:
- Call out the exact name of the action along with the number of dice you want to spend on it.
- Indicate any figure that may be directly affected by the action (such as attacks and Tribal Abilities).
- Carry out the action.
- Spend the dice you used for the action by removing them from the action and returning them to your dice pool.
For example, if we wanted our character to move two spaces, we could allocate the two dice from the example and then call out 'Movement Two'. We would then remove those two dice, add them back into our dice pool and move Chief Grublic two spaces. We can then continue to roll the in the dice pool, allocate them, and resolve actions. The movement of your dice from the pool to the board and back again is a constant flow of action as players roll, allocate, roll, allocate, resolve actions, roll, etc.
Realtime Nature and Soundtrack
Eye for an Eye is unlike any other Arena combat game in that it is played in realtime. This means that:
- There are no set turns, it is always everyone's turn
- You do not generally need to wait for other players before rolling and rerolling dice or resolving actions
- It is super intense...
Just because it is realtime does not mean that the fastest player wins. The timing of when you resolve actions and ability to second guess what the other players are doing is vitally important.
To add to the atmosphere of the game and to help track the length of each round, the game is played to a soundtrack. The music track is chosen beforehand and will range in length from between four and a half minutes to just over five minutes.
The game begins when you hear the announcer call out 'Yarra Mark!'. This means 'Begin!' in the Occulite tongue. When you hear the announcer call 'Yarra Bung!' it is the end of the round and players must immediately stop.
If you find the music too intense, you can always use a timer set to five minutes.
Conflicts and Timing
In Eye for an Eye, where players are calling out and resolving actions in realtime, there can sometimes be conflicts in timing that need to be resolved.
Things like calling Movement and Readying Tribal Abilities can often be called at the same time with no discernable effect on the other player. This will happen during the game and this is normal. When the action affects another character, then it defaults to whichever action is called first is resolved first, with others being resolved after the first in order of being called.
If players cannot agree, then all players involved clear their board and cards of all dice and then continue with the game.
Like any game, honesty is key here and you will get more enjoyment out of Eye for an Eye if you resolve any such disputes quickly and honestly.
Movement
This basic action allows your character to move around the Arena. All characters will have a movement action. You can see where this is located on the player board.
How this action is carried out may differ between characters. For example: Chief Grublic's Movement action says 'Move one space in any direction or change your facing by one side per die spent'. So, for every allocated die spent (moved from the Movement action back to the dice pool), will allow Chief Grublic to move one space in any direction, or change his facing by one side.
When moving a character into another space, you must not change its facing unless an action's text indicates otherwise or you spend dice to allow you to do so.
Resolving a Movement Two action might see you move one space and then change facing by one side, move two spaces, change your facing by two sides, or change your facing by one side and then move one space.
The rulebook shows four Movement Two examples: (A) the character is moved forwards one space and then forward-left a space without changing facing; (B) the character is moved forward one space and then its facing is rotated left by one hex side; (C) the character is moved backwards one space and then backwards-right a space without changing facing.
Scan this QR code in the rulebook to see a video of how Movement works.
Attacking
This basic action allows your character to attack an opponent in the Arena. All characters have some form of this action. This is the same for most of the characters, but it can differ. The basic attack is always found on the left side of the player board.
Chief Grublic's basic attack action is called 'Spear Thrust' and says 'Inflict 1 Hit per die spent'. Whenever resolving this action, you must always indicate which character is affected.
For example, you could resolve a basic attack action against an adjacent Hydris Chief by calling out 'Spear Thrust 3 on Hydris', then removing three dice from Chief Grublic's basic attack action. Removing three dice will, according to Chief Grublic's Spear Thrust ability, cause three hits on the Hydris character.
It is important to note that unless an ability states otherwise you can only ever resolve a basic attack action on an adjacent character that is in your front arc.
Losing Health
The majority of characters start each round with 15 Health Tokens (some start with less than this). Your Health Tokens are the translucent red cubes.
At the beginning of each round, these Health Tokens are placed on your player board. During each round, you will lose Health Tokens as you get hit.
When your character gets hit, you must immediately stop rolling, allocating dice and resolving actions. As quickly as you can, take a number of Health Tokens equal to the number of hits inflicted on your character and place them in the Victory Cup of the player or team that inflicted them. Each one will count as a Victory Point at the end of the round. Once this has been done, you can continue to roll, allocate dice and resolve actions.
If you ever have zero Health Tokens left on your player board, your character has been knocked out. Take them off the Arena board and place them on the player board of the character that inflicted the final hit as their trophy.
Continuing the example, if Chief Grublic calls out 'Spear Thrust 3 on Hydris', the Hydris player will need to stop what they are doing and place three of their Health Tokens into Chief Grublic's Victory Cup before continuing her turn.
Scan the QR code in the rulebook to see a video of this example of Losing Health.
Healing
This basic action allows your character to recover Health Tokens. This is the same basic action for most of the characters, but it can differ. The basic heal is always found at the top of the player board.
Chief Grublic's basic heal action is called 'Heal' and says '+1 Health Token'. You will notice that all three of its spaces are minimum requirement spaces (all three are surrounded by flowers). This means to resolve this action, you must have dice allocated to all three spaces.
When resolving it, you take one Health Token from a common supply next to the Arena board and add it to your player board. You then spend all three dice, removing them from your player board and placing them back into your dice pool.
For Chief Grublic, it takes three Heal dice to recover one Health Token.
Recovering Dice
At any point during a round, a player may recover any number of their allocated dice, by simply taking them off the player board (or Tribal Ability cards) and returning them to their dice pool to be rolled again. This does not count as spending them and there is no penalty for doing so.
Defending
The last of the basic actions, Defending allows you to cancel incoming hits from opponents during a round and is found on the right hand side of the player board.
On most character's player boards (including Chief Riparian's), this basic defence action is called 'Parry' and says 'Cancel 1 Hit per die spent'. Because this action's name is bookended by asterisks (Parry) it can be used in reaction to another character's action. You can also see that unlike most basic Movement and basic Attack actions that have one minimum requirement space, 'Parry' has two minimum requirement spaces.
This means that whenever you want to resolve a basic Defence action, you must have at least two Defence dice allocated to it. You can still resolve a basic Defence action to cancel one hit by calling 'Parry 1' and only spending 1 of your allocated dice. You just need to have at least two allocated to do so.
When an opponent resolves an attack on you from a space in your front arc, if you have enough dice allocated to the minimum requirement spaces, you can resolve a basic Defence in response. To do so:
- Call out the name of your basic Defence and the number of dice you will be spending.
- Cancel a number of hits done to you equal to the number of dice spent.
- Spend the dice you used for the action by removing them from the action and returning them to your dice pool.
- Any remaining hits that are not cancelled are then resolved. Place that number of Health Tokens in the Victory Cup of the character that attacked you.
You may not defend against attacks coming from your rear arc, even if you have dice allocated to defence. You may only resolve basic Defence actions when you are attacked from a space in your front arc, unless an action or Tribal Ability card says otherwise.
Scan the QR code in the rulebook to see some examples of Defending.
Core Game
Congratulations Chief, you are now ready to step into the Arena and show us what you've learned! Is your heart thumping? Not yet? That's ok, it will be soon. Feel the dirt under your feet, the way the noise bounces off the rocks. Imagine the roar of the crowd... the honour you will bring to your Tribe when you resolve disputes in their favour...
Don't worry Chief, if things don't go so well, you are immediately reborn to honour the sacrifice you've made for your Tribe. Now are you right handed or left handed? Wait, don't tell me, it doesn't matter. It's easy, hit your opponent and don't let them hit you... what could go wrong? Hold your weapon tight and keep your wits about you. Make sure you're looking at your opponent when you strike and don't let them pin you down.
You have two jobs out there today, beat your opponent... and beat your opponent! Oh, and if you have time... beat your opponent! Get it? Alright, good! Now, keep your defense up and get out there and make me proud!
What now? Now it is time for you to have a go at the Core Game. You have all the information you need. Just follow the setup instructions on page 6 of this rulebook, choose a game mode from page 7 and go for it!
In the Core Game, you may only use the following actions: Basic Movement, Basic Attack, Basic Heal and Basic Defence.
Scan the QR code in the rulebook to see a full Core Game played. This will help you get the feel for the pacing and flow of Eye for an Eye. Good luck and have fun!
When you've played a few Core games you'll be ready to jump in and introduce the rest of the rules into your games. Read up on the Advanced Rules on page 16 to add more depth, fun and excitement to your games, as well as experiencing how Eye for an Eye was meant to be played.
Advanced Rules - Full Game
Well done Chief. You have completed your basic training. That's going to get you started in the Arena. Now if you really want to get the crowd cheering, let me show you how to draw on the unique abilities that you've gained throughout your time as a Chief.
You now know everything you need to play Basic games. These are great for when you are just learning to play with new people, kids, or if you just want a fast throwdown without all the extras.
For those of you who are ready to move onto the next level, this advanced tutorial will introduce you to the rest of the rules that make up the full game of Eye for an Eye. Surely you must be wondering what the Ready and Special faces on the dice are by now? Are you ready?
Innate Actions
Innate actions allow you to break the rules in a way that is thematic to your character. This action is found to the left of the centre of the player board.
These actions are always different depending on which character you are using. You can see that Chief Grublic's is called Watch Out! and says 'Change your facing to any direction'. It requires two Special dice to be allocated to it and both of those spaces are minimum requirement spaces. The other important thing to note is that it is bookended by asterisks, meaning that it can be used in reaction to an opponent's action. In this case, it would allow you to change your facing immediately after being attacked, thus giving you the chance to change your facing in order to defend against an attack.
Some Innate actions do not have any spaces to allocate dice, but instead provide an advantage that is written and always active instead. For example, Chief Riparian's Innate action Healing Mucus says: 'May use Special results as if they were Heal instead.'
Tribal Cards
Tribal cards provide your character with three very thematic options to use during a round. These options are three Advanced actions. But unlike your Innate actions, they need to be Readied before you can use them.
Each character has three Tribal cards that they can draw upon, a Band I, Band II and Band III card. The effects of these cards increase from Band I - the smallest effect, through to Band III which has the greatest effect.
Quite often, the dice allocation commitment also increases alongside the strength of the ability. So to use the more powerful Tribal cards, you are sacrificing other game options to do so. Timing is everything!
Tribal cards have both a Ready and Unready side. At the beginning of the game, players begin with all three of their Tribal Cards with the 'Unready' face up. They can then Ready them during the round.
Using Tribal Cards
Using Tribal cards in Eye for an Eye helps to build each character's own personality and playstyle. You will quickly find that some characters better suit your natural playstyle than others, but there is someone for everyone. And who doesn't want to give them all a go!?
To include Tribal cards in a game of Eye for an Eye, simply take your character's three Tribal cards and place them Unready face up above your player board. These three cards provide three extra actions to utilise during the game. By allocating a number of Ready dice equal to the minimum requirement spaces on the card, you can Ready the card.
If you had allocated a Ready die to the Palaudis Tribal card shown in the rulebook, 'Leap', you could then Ready the card by calling 'Readying Leap!' and flipping the 'Leap' card to its Ready side. The die spent readying 'Leap' is then returned to your dice pool, and the 'Leap' card is ready to be used.
Once a Tribal card is Readied, it provides an Advanced action for you to use during the round. The vast majority of Readied Tribal cards require Special dice to be allocated to them to resolve the action.
Now the 'Leap' card is Ready, the player may allocate one Special die to [the rest of this sentence is cut off by the page emblem in the printed rulebook and is not legible in the source].
The 'Leap' card reads: 'You may Move 2 spaces in a straight line through your forward facing. Ignore the contents of the first space you Move through.'
To resolve this action:
- Call out 'Leap!'
- Move your character as indicated by the Tribal card
- Spend the dice allocated to the Tribal card
- Flip the Tribal card back to its Unready side.
When resolving Tribal cards, you should always make note of the minimum requirement spaces on the card and how these work. Sometimes, you will get extra bonuses for allocating more dice than is required.
The higher the Band of the card, generally the more dice need to be allocated in order to Ready it. The timing of when you do this is important, and involves guessing what the other players are doing and taking calculated risks... all while the timer is ticking down!
Unblockable Hits
Some Tribal cards say that they inflict Unblockable hits on their opponent. An Unblockable hit is a hit that cannot be cancelled by anything. You cannot resolve a Defensive action to cancel Unblockable hits, they are automatically inflicted unless an action allows you to specifically cancel Unblockable hits.
If a combination of hits and Unblockable hits are inflicted on your character, you can cancel the regular hits if you are able, but the Unblockable hits go through.
First Dispute to be Settled
Phew! Ok Chief, that's it. You now know everything you need to settle your first dispute. Which is lucky, because as you can see, the seats are filling up fast! Use what you've learned and adapt to your opponent. Give it your all and represent your Tribe with honour... oh... and don't look for me in the crowd. Because it might just be me that you're fighting. All the best my friend. You're going to need it!
You now have all the rules you need to play full games of Eye for an Eye.
If you are feeling a little overwhelmed by the options available to you in the game, you might like to start off using only your Innate action and your Band I Tribal card for your first round or two. Each additional round you play, you might like to add in another Tribal card until you are playing with all three... or just dive right in! The choice is yours.
Recommended CHARACTERS for new players are: Palaudis Chief Grublic, Hydris Chief Riparian, Floris Chief Banksia, Nimbus Chief Pluma.
Tournaments
A single round in five minutes, a full Tournament in one hour.
Tournaments for Eye for an Eye are best played using the advanced rules, but there is no reason why you couldn't run it with just the core rules for unfamiliar groups.
Full details of how to run an Eye for an Eye Tournament are kept in the Living Tournament rules document, which the rulebook links by QR code.
Tournaments are a fun way for competitive Eye for an Eye players to throw down. They work great in both game clubs, game nights, game stores, conventions and even in the comfort of your own home.
They can be tailored to suit a large number of players. Playing with honest, friendly people, where you can easily agree on timing rulings is going to be the most enjoyable, in a tournament space it is recommended that you have a referee or players that are not currently playing to help quickly enforce timing decisions.
The standard tournament is 2-4 Every Eye for Themselves or 2v2 / 3v3 Alliance matches (but you can play 2v2v2 if you want). Players play five separate rounds against randomly determined opponents (where all games are played at the same time). Scores carry on from each game and are totalled across all five rounds.
The top 16 Players or 8 Teams are then given set matches as follows (players' scores are reset to 0 in each of these matches):
Every Eye For Themselves
Elimination Round 1
- Group A - Players ranked 1, 5, 12, 16
- Group B - Players ranked 2, 6, 11, 15
- Group C - Players ranked 3, 7, 10, 14
- Group D - Players ranked 4, 8, 9, 13
The top two players of each Group then go onto the second Elimination Round, with the bottom two of each Group being eliminated.
Elimination Round 2
- Group AD (top two players of group A and top two players of group D)
- Group BC (top two players of group B and top two players of group C)
The top two players of each of these two Groups go into the final. The Final consists of three Rounds, with scores carrying over for each of those three Rounds. The player with the highest score after those three Rounds wins the Tournament.
Alliance Mode
Elimination Round 1
- Group A - Teams ranked 1 and 8
- Group B - Teams ranked 2 and 7
- Group C - Teams ranked 3 and 6
- Group D - Teams ranked 4 and 5
The top Team of each Group then go onto the second Elimination Round, with the bottom Team of each Group being eliminated.
Elimination Round 2
- Group AD (top Team of group A and top Team of group D)
- Group BC (top Team of group B and top Team of group C)
The top Team of each of these two Groups go into the final. The Final consists of three Rounds, with scores carrying over for each of those three Rounds. The Team with the highest score after those three Rounds wins the Tournament.
The rulebook's closing page advertises other products in the Rise of the Occulites saga (Sungem Run, Tribal Wars). Those promotional blurbs are not rules and have been omitted.