Extra Innings Baseball
Extra Innings Baseball Rulebook
Table of Contents
Table of Contents
- Component Notes
- The Ground Rules
- Patience Please
- "The Big Secret"
- The Mechanics of the Game
- Second Roll Chart
- Errors
- Optional Plays
- Double Play Chart
- Rating Teams for Double Plays
- ERA Adjustment Chart
- Walks by Pitchers
- Walks by Batters
- Strike Outs
- Strike Outs by Batters
- Playing Safe
- Injuries
- Rating the Players for Hitting
- Defensive Ratings
- Playing the Game
- Getting Started with "Extra Innings"
- Note on the Charts Not Transcribed
Component Notes
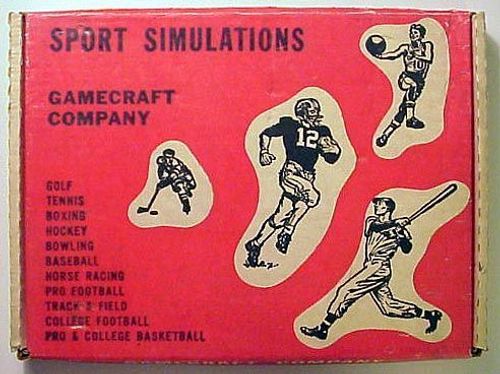
From the publisher's introductory letter (Gamecraft Company), rules-relevant passages only.
NO DICE! Extra Innings is produced in book form and shipped at book rate. Postal regulations prohibit the shipping of unbound material at this special rate, hence the game contains no dice, although the instructions are written as if dice were being used as the activator. In place of dice, the game contains a computer generated random number table following the game chart section. Each set of numerals represents a dice roll. For example, the first number 452 represents a dice roll of red-4, white-5, green-2. The three numerals are always taken to be in the sequence red-white-green. Begin at a different number on the table each time you start a new game and proceed in a different direction, such as down through a column for the first game, up for the next game, left for the next game, etc. If you already possess three colored dice, however, you may omit the random number table if you prefer. Many people find the random number table more convenient and faster, however.
Do not tear your cards apart. Use scissors. The card material will cut easily along the perforations and you will end up with a set of top quality cards. Plastic card holding sheets are available. Each sheet holds 9 cards in view. The sheets may be used to hold the player cards during play if you wish. Or they may be used to store your cards in a three-ring binder or in the game binder itself.
If you are a beginner at table top sport gaming, "EI" is likely to overwhelm you at first. In that case, turn to page 9 and read "Getting Started with Extra Innings."
The Ground Rules
Let's all gather at home plate and make sure we all understand the game we are about to play.
"Extra Innings" suggested itself as a title for this form of table baseball because it is a means to extend the fun and excitement of actual baseball. It is a way to have today's players duplicate their diamond feats; it is a means by which the players of the past can recreate their skills forever.
"Extra Innings" gets its results by combining the precision of mathematics with the random rolling of dice to provide the excitement of a game. Baseball itself has been described as a "game of percentages". "Extra Innings" is also a game of percentages.
To achieve as close to total realism as is possible with a table game, "Extra Innings" combines exact computations with a reasoned approach to bring about the logical result in all situations.
"Extra Innings" was devised to give its players a complete game now and the knowledge with which they could extend the play of the game in the years to come or apply to any level of competition which appealed to them.
While the game comes with many team rosters, the owner of "Extra Innings" also has, in this book, the information from which to structure any team, or combination of players, from any statistics which include the needed data.
Patience Please
Please do not skim through these instructions. If they appear overly detailed, this is intended to both clarify and slow down the reading pace. We can't know how competent every potential "EI" player is in reading for comprehension; in mathematical conceptualization or even in grasp of basic baseball fundamentals. Throughout we use the standard position identification for reference. If you don't now know the following, learn it and use it: 1—pitcher; 2—catcher; 3—first baseman; 4—second baseman; 5—third baseman; 6—short stop; 7—left field; 8—center field; 9—right field.
"The Big Secret"
All table games, whether sports related or not, are a mixture of chance and probability. Some achieve this with dice, some with spinners, some with cards, some with a combination of "activators" and then refer you to charts or instructions.
The number of dice combinations, cards used, spaces on the spinner card, etc. offer the chances. These are then apportioned according to likelihood of some action taking place.
The more sophisticated the game the more exacting is the creating of the possibilities and their assignment.
Most games hide these factors in codes. "Extra Innings" does not.
It will help you understand the explanation of the method of "Extra Innings" if you look at the "Master Chart" (opposite page.)
The "Master Chart" is simply a computer print-out of all the decimal equivalents possible from three dice, arranged in sequence, so that they read 1-1-1 through 6-6-6. (The dice with "Extra Innings" are always arranged red, white and green so that these combinations remain constant.) There are 216 combinations possible (6x6x6).
The quickest way to grasp how this chart is used to establish the percentage of something taking place, is to understand that if you assign all dice combinations from the start of the chart 1-1-1 down to 2-5-5, you have set up .3009 (30%) of the possible combinations.
If you want to create a ".300 hitter" you give him a base hit every time he rolls between 1-1-1 and 2-5-5 (anything higher being a form of put out).
"Extra Innings" takes this simple formula into rather complex expressions to obtain realistic results. But the basic premise is really very simple and is the basis for the authentic results obtained.
We'll discuss how this approach is applied to obtain realistic hitting, pitching, fielding and strategy moves as we go along.
The Mechanics of the Game
The First and Second Roll
Those who have played other table sports games may wonder why two rolls of the dice are necessary. (They may also wonder why other games, using a single action or two dice are limited in their satisfactions.)
"Extra Innings" strives for realism. From a percentage point of view, the surest place to obtain this is in batting average. After all, the batting average is, itself, a percentage (the number of hits made per times at bat.)
In our earlier reference to the use of the Master Chart and how you would obtain a .300 hitter, we showed this was done by working with hits and put outs. Once you start mixing in errors, hit batsmen, walks, balks, catcher's interference, and other factors, you lose the balance between the basic ingredients of a batting average (hits and outs).
So, we have established "Extra Innings" as a two roll game. On the First Roll we handle everything except hits and outs (which result from the batter's action). On the Second Roll we deal only with hits and outs. The Second Roll Chart contains only put outs. Depending upon the hitter's ability, a share of these will be converted into base hits.
The two rolls are considered necessary to provide a more perfect balance. Having two rolls is also an added action value when the game is played two-handed. The team "in the field" makes the first roll; the team "at bat" makes the second roll. This, obviously, gives both players action on every batter.
First Roll Chart
This chart is used for every batter. It describes all actions which can take place, except for the actual making of a hit or an out (these actions are handled on the Second Roll Chart.)
Remember, the dice are always read in sequence (red, white, green!) The numbers used on the charts refer to the count on each dice in that order. 1-1-1 means 1 on each dice. 2-3-6 would mean a two on the red dice, a three on the white dice and a six on the green dice.
The First Roll Chart capsules the information for each possible roll. What follows here is a more detailed explanation, intended mostly to give you a better understanding of the principles of the game at the outset.
1-1-1 thru 1-6-6 (See pitcher's rating for walks issued.)
Later in this text we will describe how each pitcher is rated for walks. Whatever his rating, however, it will fall between 1-1-1 and 1-6-6. When you have a first roll in this range consult the pitcher's rating to see whether it produces a walk by that pitcher. If it does not, you move ahead to the second roll. Please remember, if any first roll cannot produce action, move on to the second roll.
2-1-1 Hit Batter. Batter takes first base. Also consult injuries. Applies only when pitcher and batter are both left or right handed, with less than two out. With two out, applies regardless of how pitcher and batter throw and hit.
2-1-2 Passed Ball - all catchers. When catcher is rated SD (Superior Defense) this does not apply if there is a runner on third base.
2-1-3 and 2-1-4 Even with 216 combinations, a pickoff play is a relatively rare occurance so limiting circumstances must be used to avoid this being too often invoked. We have established a chart to be applied. When a 2-1-3 or 2-1-4 is rolled on the First Roll, and there are any base runners, consult chart.
Later we will describe the option the defensive team has of playing its base runners "safe" (not taking risks by long leads). Naturally, if the defensive team has declared it is playing runners "safe", no pickoff play can be made.
2-1-5 Wild Pitch when runner on first only. Runner advances one base.
2-1-6 Wild Pitch with a runner or runners on any bases. All base runners advance one base.
2-2-1 Balk. This occurs regardless of which base or bases are occupied but to limit realistically, a runner rated S or AAR must be on base. All base runners advance one base.
2-2-2 Interference by catcher. Batter takes first and any runners move ahead if necessary. This "interference call" is invoked only if there is at least one runner on base and if the batter strikes out on the Second Roll Action. When a 2-2-2 is rolled on the First Roll and there is a runner on base, proceed to the Second Roll. If the batter is struck out, cancel the strike out and convert the play to interference by the catcher (give the catcher an error.) The reasoning here is that this play occurs too infrequently to justify allocating one of the 216 possible combinations (.0046). By placing "conditions" on the circumstance we provide a more reasonable chance of it occuring realistically.
2-2-3 thru 2-3-4 All of these First Roll numbers provide for injuries occuring. All have limiting conditions relating to Second Roll action. This is an optional area of play. Many players who are recreating a full season of play ignore this action. Instead they follow the guidelines of games played and at bats (and games started and innings pitched) and use all roster players according to their appearances in actual competition. To some table gamers injuries are an intriguing part of the action; to others a needless inclusion. We will provide separate injury information to establish the details and length of time lost because of the injury.
2-3-5 Ground Rule Double. Proceed to Second Roll. If batter hits a home run or triple, it is reduced to a two base hit. If a runner is on first base he advances to third on the base hit; runners on second or third score.
2-3-6 thru 2-5-6 Reserved for "rare events." Some table gamers like to contribute their own "gimmicks" toward realism. For example, "EI" does not provide an automatic means of having a game called while in progress. We leave it to your choice whether you want to run the risk, for the sake of realism, of having a power failure, torrential down pour or a player's strike stop a game.
Also, you might have other rare events you'd like to include. If you want to stop the game for ten minutes to chase a stray dog off the field.....or anything you find gives the game as you play it added zest, you can introduce it in this range of First Roll numbers.
2-6-1 thru 2-6-6 This is a Special Double Play Range (in addition to 3-1-1 thru 3-4-4 to be described next.) It does not apply when the defense is playing the infield shallow. A runner must be on first base (other runners can also be on base). There must be, obviously, less than two out. The play is scored 6-4-3 if a right handed batter; 4-6-3 if a left handed batter. Any runner on third base scores on this play, unless it is an inning ending double play, of course.
3-1-1 thru 3-4-4 Double Play Range. This will be discussed in detail in the section of the game dealing with DPs.
3-4-5 and 3-4-6 Triple Plays. Both of these are "conditioned" to limit their occurance. See First Roll Chart. For score keeping purposes, the infielder catching the ball makes the first two put outs and throws to the nearest base for the third out. For example: with runners on first and second, a line drive to the short stop would be scored TP 6-6-3. The shortstop would have caught the ball, tagged the runner off second (or stepped on the base) and thrown to first for the put out on the runner caught off that base.
3-5-1 thru 6-6-6 Error Range. This will be taken up in detail later in this text. It more than amply provides for errors to occur. Actually, the full range of 216 combinations on the First Roll Chart exceeds the possible play assignments.
Remember, there need not be a specific action occur when the First Roll is made. The importance of the First Roll is really to insure accuracy in hitting statistics from the Second Roll by delegating actions which do not result in a hit or put out to a preliminary action.
Second Roll Chart
Here's where the ball game is played. The First Roll Chart has taken care of play actions which do not produce a hit or an out by the batter.
The Second Roll Chart presents every dice combination (1-1-1 thru 6-6-6) as an out. The roll of the dice gives you a reading which either leaves that combination describing a put out or changes it into a base hit according to the batter's rating.
Each batter has his own rating. It assigns him "hitting lines" starting at 1-1-1 and advancing to the top figure against left and right handed pitching which gives him a base hit. The higher the player's batting average the more hitting lines he has.
His hits are divided into home runs, triples, doubles and singles. The extra base hits start at 1-1-1 for home runs. A power hitter will have more lines assigned for home runs than a punch hitter.
In using the Second Roll Chart you roll the dice and first determine if the roll has given the batter a hit and, if so, if it is an extra base hit - and for how many bases - or a single. If it has not given him a hit, it is an out. You then read the Second Roll Chart to learn the form of put out.
Up to 3-6-6 it is an outfield fly out. From 4-1-1 through 4-6-6 it is an infield fly out (line drive or pop up). From 5-1-1 through 6-6-6 it is an infield ground out.
The Second Roll Chart has been designed to give you one reference chart. Once you have learned the game it will serve you in all play situations, regardless of the number of runners on base.
It includes variations in interpretations according to the graded defensive abilities of the players. It uses standard scoring symbols to show positions: 1-pitcher; 2-catcher; 3-first baseman; 4-second baseman; 5-third baseman; 6-short stop; 7-left fielder; 8-center fielder; 9-right fielder.
An "8" would mean a fly ball to the center fielder. A "4-3" would mean a ground ball to the second baseman who threw the runner out at first base.
We'll delay describing "LD" (limited defense) and "SD" (special defense) until later in this explanation.
To provide more variety in results and direction in which the ball travels, we show how each batter does against left and right handed pitching. We also give an action when there are none out; one out; two out.
EFFECT ON BASE RUNNERS: With a runner on first base a ground ball will either have him forced at second or move there while the batter is thrown out at first. If the action is described 4-6 it means a runner from first is out at second, second baseman to the short stop, while the batter reaches first. If there were no runners on first base, it would be applied 4-3, second baseman to first baseman.
There is no effect on base runners on an infield fly ball.
All advancement by base runners on outfield fly balls is optional and requires use of the Sacrifice Fly Chart. When an asterisk (or double asterisk) is next to a flyout (9*), runners can advance at own risk.
Runners who are not forced advance on a ball "hit behind them"; hold their base on a ball "hit in front of them." A runner on second, who is not forced to move, goes to third base if a ground ball is hit to the second baseman or first baseman. He holds second if the ball is hit to the short stop, third baseman or pitcher.
A runner on third base who is not forced scores on ground balls hit to the short stop or second baseman. Otherwise he holds his base.
When there are runners on second and third, but no runner on first, the advance of both runners is decided by the advance possible to the runner of third base. If he advances so does the runner on second. If he doesn't, neither does the runner on second.
If there are runners on first and second or bases are loaded, a ground ball which forces the runner from first at second base allows the runner(s) at other bases to advance one base.
Later we will describe two optional factors which can change the above. These are when the defensive teams elect to "play in" to try for a play at the plate on a runner on third or when the team at bat decides to play its runners safe.
Up to this point we have dealt with the basics. Each batter is rated with a hitting range according to his average. You go through the First Roll to learn is anything going to happen in this turn at bat which is not either a hit or a put out. Having disposed of the batter via a walk or hit batsman, or having set up conditional action awaiting the Second Roll, or, quite frequently, having rolled a dice combination whose action is not possible in the situation, such as a passed ball with no one on base, you move to the Second Roll Chart. Any number you roll for the Second Roll Chart has a meaning. If it is a low number, starting with a 1 or 2 (or for a high average hitter, even a 3) it might be a hit. You check the batter's hitting range. If the combination is between 1-1-1 and the top of his hitting range, it is a base hit (we'll tell you how to separate home runs, triples, doubles and singles shortly.) If it is beyond his hitting range you read the form of put out beside the dice combination.
Example: if you rolled a 2-4-6 it would be a fly out to right field, unless the batter had a hitting range which included 2-4-6. In that event it would be a base hit. Let's say a batter was a .250 hitter and you rolled 2-4-6. The top of a .250 hitter's range is 2-3-6, so, for that batter, 2-4-6 would be a fly out to right field. But, if the batter, were a .300 hitter, (2-5-5) then 2-4-6 is within his "hitting range" and it would be a base hit.
HOME RUNS, TRIPLES, DOUBLES, SINGLES. Now that you recognize each batter's "hitting range" - from 1-1-1 up to the top figure shown with his name on the roster - let's divide his hits into extra base blows and singles. Look at any of the rosters you received with the game. At the right you'll see columns headed HR, T, D, L and R.
We always start with 1-1-1. The combination under HR is the highest figure up from 1-1-1 which means a home run. A slugger might have 1-3-1. Anything from 1-1-1 to 1-3-1, for that batter is a home run. A punch hitter might only get a home run on 1-1-1 or 1-1-2 (or none at all, in which case his first number might be under triples or doubles.)
As an illustration, a batter might be shown as HR 1-2-1, T 1-2-4, D 1-3-6. This'd mean he'd get a home run on a roll from 1-1-1 thru 1-2-1, a triple on 1-2-2 thru 1-2-4 and a double on 1-2-5 thru 1-3-6. Anything higher than 1-3-6, up to the top of his "hitting range", would be a single. (We will show you the mechanics of figuring power lines when we take up ratings.)
Next you'll see columns headed L and R. Each batter is rated for his hitting against either left or right handed pitching. Depending on which side the pitcher throws from, you'd read the combination under L or R as the top of the batter's hitting range.
Let's have one last re-cap to this point. Once you've reached the Second Roll, anything you roll will be a hit or an out. If you've rolled a low number, starting with a one or two, it is most likely a hit. You'd consult the batter's record on the roster to see if it was within his "hitting range" and if it was an extra base hit or single.
This is not nearly so time consuming as the explanation might indicate. As each batter comes to the plate you'll know his average and, even without looking at the L and R columns know quite closely what is possibly a hit for him and what is not. If the first number in the combination is a 4 or 5 or 6, you'll know it isn't a hit and would glance at the put out data on the chart. The better you know your players the less often you'll have to consult the roster to determine whether a combination is a hit or not for each batter.
Errors
Earlier, when we dealt with the First Roll Chart, we pointed out that numbers from 3-5-1 to 6-6-6 were in the "error range" and assured an explanation.
If you look at one of your rosters you'll see that each team has been given an error range, starting at 3-5-1. The actual range is determined by the team's fielding average. A team that made no errors would have a 1.000 average. To determine a team's error range we first identify the percentage of chances on which they made errors. We subtract the team fielding average from 1.000. In 1970 the Washington Senators led the American League with a team fielding average of .982. Subtracted from 1.000 it shows they made errors on .018 of all their chances. The Master Chart (decimal equivalents of all three dice combinations) shows that four lines equal .018. Therefore, the Senators would have an error range from 3-5-1 thru 3-5-4. Any First Roll in that range would signal an error to be made.
With the error signaled, we would then make the Second Roll. If the batter hits safely, the error is added on to the hit. If the batter makes out, the error replaces the put out.
In this way we have not tampered with the techniques which produce true batting averages. We do not deprive a batter of a chance of getting a hit by lumping in the possibilities of reaching on an error with his chances to get a hit. If he gets the hit, the error is added to it.
NOTE: Very few table gamers keep defensive statistics. The assigning of an error to a position is of slight interest to them. The effect of an error is important. For example, whether it is a one or two base error and how it affects any base runners.
So, before entering into a necessarily tedious and complicated explanation of how to assign errors so that they are charged proportionately as they occur in regular play, let us give you a usable short cut to follow if you really don't care who made the error, only what effect it had on the action.
When you have signaled an error on the First Roll Chart and then proceeded to the Second Roll Chart to learn whether the error is to replace a put out or be added on to a base hit, roll the dice again. Any roll from 1-1-1 thru 5-6-6 establishes the error as a one base error. A roll from 6-1-1 to 6-6-6 as a two base error.
A one base error places the batter on first base, if it is converting a put out or on second base if it added on to a single. Or, adds one further base to a double or triple. A two base error places the batter on second base if it is converting a put out or adds two bases to a base hit.
Any base runners advance one base on a one base error or two bases on a two base error.
The above instructions will serve all but those who wish the finite playouts and assignments. For those table gamers we instruct as follows:
For consideration as to whom to charge the error, it should be to the fielder to whom the ball was hit. A "realism" problem arises here as outfielders rarely make errors on fly balls (they make them more often on misplayed ground balls or on throws.)
With an error designated on the First Roll, you've made the Second Roll and it is a put out. Charge the error to whomever the ball is hit. On a ground ball, to the first fielder handling it. A play designated 3-1 (first baseman assist, pitcher put out) the error would be charged to the first baseman. On an infield fly ball to the player to whom hit.
On a fly out to the outfield, if it would have been the third out, read it as though it were a fly out to the infield to designate the error to a position.
All errors permit the batter to reach first base and any base runners to advance one base.
A two base error is charged in these situations:
a. On outfield fly balls when the put out is designated with a single or double asterisk (* or **).
b. On infield ground balls only when batter is rated S or AAR as a runner.
c. On infield fly balls, never.
On a two base error all base runners score except a runner rated Slo who is on first base when action starts.
The foregoing deals with the situation when an error replaces a put out as the action. Errors can also follow base hits.
Logic tells us the error, following a base hit, should be charged to the player in whose direction the ball was hit. Such an error will add a base or bases to the hit.
We'll introduce the concept of directional base hits at this point. We'll come back to it again when we discuss advancing base runners on hits.
On all base hits the third die tells us where the ball has gone. For convenience this is included on the Second Roll Chart.
However, there are infield hits; balls knocked down in the infield that don't get to the outfield. They are not errors but can have errors attached to them, usually with a wild throw made in vain.
Any single which is the result of both the second and third dice (white and green) being the same number 2-3-3, for example) is an infield hit at all times. When it follows an error designation on the First Roll Chart, it is applied this way: Left Handed Batter, X-1-1 third baseman; X-2-2 short stop; X-3-3 and X-4-4 second baseman; X-5-5 first baseman, X-6-6 pitcher. Right Handed Batter, X-1-1 third baseman; X-2-2 and X-3-3 short stop; X-4-4 second baseman; X-5-5 first baseman; X-6-6 pitcher.
An infield base hit can only be a single. Like all other singles, doubles and triples, which are balls hit into the outfield, they are subject to errors being added to them. (A home run nullifies any error designation.)
As with put outs changed into errors, the error can be for one or two bases. All errors add one base to a base hit and advance any base runners one base further than he would have gone as a result of the hit.
A two base error adds two bases to the hit and scores any base runners.
MOVEMENT OF BASE RUNNERS ON BASE HITS
"EI" uses a chart to determine the advancement of base runners on singles and doubles. Each base runner is rated for Base Advancing as Slo, Average Runner (AR), or Above Average Runner (AAR). Usually we only describe the Slo or AAR runner, everyone else being, obviously, AR. The Chart is designed to provide a variety of actions which reflect what a runner is likely to do in certain situations; the inhibiting effect on a runner by an outfielder with a potent throwing arm; and the effect of where the hit was placed (a runner is less likely to advance from first to third on a ball hit to left field than to right, for example.)
The Chart assumes a conventional base hit to the outfield. However, "EI" also produces "infield hits" which would have a different effect on base runner movement. An "infield hit" is recorded when, on a single, the second (white) and third (green) dice are the same. Runners advance one base only, only if forced; otherwise they hold their base(s).
STOLEN BASES
Please refer to this chart. You'll see we have governed the chances of success according to several circumstances, including whether the pitcher is left or right handed. The runner's speed rating is a factor and the base being attempted also is reflected in the chances of success.
To avoid contradictions in action, steal attempts must be made before the First Roll on the batter at the plate.
In designing this game we considered the effect of the catcher on steals but decided not to use this as a factor. Bases are much more often stolen on the pitcher. Mostly, we are inhibited by the lack of stats which really reflect a catcher's throwing ability. Even a high number of assists might really identify a catcher whose throwing ability is doubtful and many runners try to steal on him. He'll get some of them and if enough try, his assists will be out of proportion to reality. Until stats are provided which report each catcher's results against attempted steals, we don't feel we or anyone can do justice in this area.
ERRORS ON STEAL ATTEMPTS. If the runner has stolen the base and the second and third dice are the same number, advance the runner another base and charge the error as follows:
On steal of second base: 1-1 and 2-2 (short stop error); 3-3 and 4-4 (second base error); 5-5 and 6-6 (catcher's error).
On steal of third base: 1-1, 2-2 and 3-3 (error third baseman); 4-4, 5-5, 6-6 (error catcher).
If runner is unsuccessful on steal attempt, he obtains the base on an error as follows:
On steal attempt of second base: 1-1 (short stop error); 2-2 (second base error); 3-3 (catcher error); 4-4 (runner moves to third base (error short stop); 5-5 (runner moves to third base (error second base); 6-6 runner moves to third base (error catcher).
On steal attempt of third base: 1-1, 2-2 (third base error); 3-3, 4-4 (error catcher); 5-5 runner scores (third base error); 6-6 runner scores (error catcher.)
On steal of home: 1-1, 2-2 (error pitcher.) 3-3, 4-4, 5-5, 6-6 (error catcher.)
On double or triple steals, all action is on the front runner. Other base runners advance whether the front runner is safe or out.
Optional Plays
Sacrifice Bunts
When this optional play is used it replaces both the First and Second Rolls. It cannot be used with a runner on third base. In that situation you'd use the squeeze play.
The chart governing this action evolved after considerable exchanges with table gamers. We elected to handle the sacrifice by giving the batter three opportunities to succeed or fail, rather than have the action handled with one roll. The sacrifice bunt achieves its purpose, or fails, by steps in actual play. The bunt achieves its purpose of advancing the number about 70 per cent of the times it is tried. This seems to be contradicted by our recollections of batters fouling off bunts or missing them altogether. However, the sacrifice attempt doesn't become a measureable statistic until the batter actually completes his turn at bat. He may foul off or miss on his first two tries - but they never appear in the box score. It is his try which concludes the action which does. This may be on any of three attempts.
We have included the running ability of the runner to be advanced in our computations. It is often overlooked that the speed - or lack of it - of the base runner is an important factor in sacrificing.
The use of the Sacrifice Bunt also occasions a great deal of special data which is made part of the Chart, regarding the handling of the ball, having the sacrifice bunt attempt be misplayed into an error or even result in becoming a base hit.
We have made the third bunt attempt optional. With two strikes now on the batter the manager may decide to hit away. In this situation, because he is hitting with two strikes and less likely to get his pitch, we penalize the batter. The batter's "hitting range" is lowered by 6 lines on this turn at bat. When the Sacrifice Bunt is called off, after two foul ball attempts, go directly to the Second Roll Chart.
NOTE: If the involvements of the Sacrifice Bunt Chart seem too complicated for you at the learning stage of the game, a simpler process can be used. Roll the dice once. A roll from 1-1-1 thru 5-2-2 is successful. Score the play pitcher to the second baseman covering first (1-4). On any roll higher than 5-2-2 retire the batter on a strike out. That's a lot simpler, but also removes much of the variety and gamesmanship possible in the game.
Sacrifice Fly Option
This chart needs little further explanation but requires some justification. We have placed an asterisk next to some outfield fly outs to show they can be used as sacrifice flies. We have identified other outfield fly outs with a double asterisk, as usable only by the fastest runners, those rated AAR. We have also lowered the chances of success against outfielders who are strong throwers (rated T-1.)
This chart is used usually when there is a runner on third. If third base is unoccupied, a runner rated AAR for Base Advance Running may elect to attempt an advance from second after the fly out. The attempt is successful only when the dice range is from 1-1-1 through 4-3-6 regardless of outs and may not be attempted against an outfielder rated T-1.
We have made the likelihood of success less with two outs and in the later stages of the game. The reasoning is that greater risks will be taken to score in these situations. If the fly ball is the first out of the inning, a runner on third is more likely to hold his base as the next batter may bring him in. If it is the second out of the inning, the runner knows only a hit or error can advance him and will take a greater risk in being cut down. Also, toward the end of a game, when one run can be the difference in victory, greater risks are taken.
In attempting to score from third base, an AAR runner nullifies the effect of a T-1 outfielder. His chances of success are the same as they'd be against a non-T-1 outfielder.
Squeeze Play Chart
The detail on this chart is explicit and needs little text amplification. It is used only with a runner on third and less than two out. Any other base runners advance when the play is a "suicide squeeze" (in which the runner on third commits himself on the pitch and cannot return to third base.) On a "safety squeeze" (when the runner waits until the ball is bunted) any other base runners do not advance. You can't have a "safety squeeze" with bases loaded.
In two-handed play this option makes for good gamesmanship. You'll notice the infield can be played either "in" or "back" by the defensive team. However, when playing on a solitaire basis it is difficult to assume both managers roles simultaneously. We suggest that, when playing solitaire, the squeeze always be on a suicide basis and the infield always be played in.
Hit and Run Play
This optional play can be used only after the First Roll has been completed. If an error or double (or triple) play has been signaled on the First Roll it cannot be used.
With the "hit and run" in effect a single moves any base runner one base further than shown on the Advancing on Singles and Doubles Chart. All runners score from first base on a double.
When the batter makes an out in a "hit and run" situation the following takes place:
Strike Out: If the batter strikes out, the runner or, if more than one, the lead runner, is handled exactly as though it were a steal attempt. Refer to that chart and roll the dice for the results.
Outfield Fly: If the batter flies out, base runners return safely to their bases. Any runner rated SLO is doubled off by a T-1 outfielder.
Infield Fly Out: On a foul out to an infielder or catcher the runners return safely to their bases. All fair fly balls handled by the infielders or pitcher are considered line drives and the runner or lead runner, if more than one, is doubled off his base.
Infield Ground Ball: Runners advance one base with the batter retired at first. There can be no force out at second.
NOTE: With Two Out, if you use the "Hit and Run Play," lower the batter's hitting lines by six and reduce extra base hits by one line. There can be no home run on the "hit and run play" if it is used with two out. We penalize the batter to discourage the use of the "hit and run play" being called with two out when there is no risk of a double play resulting.
Playing the Infield "In"
With a runner on third the defense may elect to bring the infield in to cut the runner down at the plate on a ground ball. This defensive adjustment must be made before the First Roll.
When the infield plays in, in real play, the chances of the batter hitting the ball safely through the drawn in infield are increased. Accordingly, increase the batter's hitting range by six lines. If the batter's hitting range was 2-3-5, with the infield drawn in it would be 2-4-5.
All put outs made by the batter on the Second Roll are unchanged. See chart for detail.
NOTE: If runner on third is not forced, runner may be "played safe." He cannot score on an infield out. Play follows Second Roll action.
NOTE: When bases are loaded, increase possibility of put out at plate by one.
See below for effect on double play.
Double Play Chart
When we explained the First Roll Chart we deferred discussion of double plays. We'll take them up now. They appear on each team roster as the number of lines contained in the "double play range." For purposes of playing Extra Innings you need only use that information. Shortly we will describe for you the technique of rating teams yourself for DPs which will also serve to explain the methodology of handling DPs.
First, when playing "EI," you use your First Roll to establish whether a DP is signaled. A roll between 3-1-1 and the top of the range figure which appears on your roster tells you a double play can take place, if there are less than two out and at least one runner on base.
You proceed to the Second Roll only to learn if the batter has made a base hit. If he has, ignore the double play signal and situation. The base hit erases it!
However, if the batter does not hit safely, do not use the put out designation on the Second Roll Chart. Instead turn to the appropriate column. Do not roll the dice again. The readings start, for any batter, from whatever dice combination is one more line higher than the top of the batter's hitting range up to 3-6-6. You'll find a base runner situation on the Double Play Chart to cover all possible circumstances. Note: When the batter is rated S (Superior Runner) reduce the defensive team DP range by four lines; when rated AAR (Above Average Runner), by two lines. When batter is rated Slo, increase DP range by four lines.
When infield is "in" 2-6-1 to 2-6-6 is not a DP signal. The above action (Double Play Chart) does not apply to DP signaled with 2-6-1 to 2-6-6 on First Roll.
Rating Teams for Double Plays
Double plays result from the fielding skills of the players and the opportunities to accomplish double plays. As it takes a base runner to make up the twin killing, teams which have strong pitching staffs have fewer opportunities to make double plays. If the team's pitchers are yielding fewer base hits, walking less batters, and the team is making fewer errors, obviously not as many runners will get on base as will happen with teams with weak pitching staffs and which are more prone to errors.
Therefore, we must correlate a team's ERA with the double plays made by the team in actual competition. First we determine the number of DPs per game made by the team. Divide the number of DPs by the number of games played.
Now look up the staff ERA of the team. You are now ready to use the following chart:
| Team ERA | Number of Lines |
|---|---|
| 1.00 to 1.99 | 21.68 x DP/G |
| 2.00 to 2.99 | 19.09 x DP/G |
| 3.00 to 3.99 | 17.54 x DP/G |
| 4.00 to 4.99 | 16.47 x DP/G |
| 5.00 to 5.99 | 15.67 x DP/G |
| 6.00 or higher | 15.00 x DP/G |
Illustration: It a team had an ERA of 3.50 and 1.1 DPs per game. Multiply 1.1 times 17.54 equals 19.29, which rounds off to 19 lines. You would assign 3-1-1 to 3-4-1 as the Double Play range for that team.
ERA Adjustment Chart
Extra Innings balances offense and defense. The batter's "hitting lines" give him his batting average and power factors. In an extended competition he will face both strong and weak pitchers.
To allow for this we give each pitcher the ability to raise or lower a batter's average and power factors according to the pitcher's earned run average.
Once you have absorbed the basic play of "EI" we urge that you adopt the ERA Adjustment Chart. Otherwise, all pitchers will perform at the same level.
Look at this chart. You'll see that 3.27 through 3.41 is set as the level at which no change is made in the batter's "hitting lines" and power factors. With the chart in use in circumstances when it is applied, any pitcher with an ERA between 3.27 and 3.41 has no effect on hitters as they are rated. Pitchers with lower or higher ERAs do.
The chart, as presented, is intended for use in games or leagues with teams from different years, such as may be chosen from the Historic Team section or "drafted" from the Hall of Fame or Top 400 sections.
However, when replaying an actual season, that league's pitching ERA becomes the "norm," the level at which no changes are made. For example: if you were replaying the 1972 American League, when the league ERA was 3.02, the level at which no changes were made would be 2.99 - 3.12. You'll have to "slide" your deducted and added lines mentally.
We do not have a totally satisfactory application for replayed World Series as, more often than not, each league's representative is working from a somewhat different league ERA.
We favor assigning the league ERA as the "norm" to that league's representative. You could argue that the opposite league's ERA should be used. Or, you could fall back on the ERA Adjustment Chart as it is printed and use 3.27 - 3.41 as the standard for both. In any event, the basic purpose of the Adjusted ERA Chart is maintained to give low ERA pitchers an advantage and to apply a penalty to those with a high ERA.
Walks by Pitchers
When we discussed the First Roll Chart we said we'd take up walks later on. This is the time. We have set aside the range of combinations on the First Roll Chart from 1-1-1 to 1-6-6 for walks.
All pitchers on the rosters you have are rated to issue bases on balls at the frequency they did in actual play. The rating is arrived at in this way: three times the innings pitched, plus hits, plus walks to determine batters faced by pitcher (BFP). At this time the National League includes BFP with its official statistics, the American League does not. The formula we have provided is not a 100 per cent accounting of batters faced by pitchers in a season. It lacks hit batsmen and batters reaching base on errors. However, a true tabulation must also account for runners erased on double plays, steal attempts and picked off base. The formula we use compares very closely with the actual BFP figures of the National League.
Having obtained the BFP figure we now divide that figure into 90 per cent of the pitcher's walks. We leave 10 per cent for intentional walks to be given in replays and for the influence of "plus walks hitters" (to be described later in this section.)
Illustration of the formula: let's say a pitcher had 281 innings pitched, given up 214 hits and 122 walks. We'd have 3x281 equals 843 plus 214 plus 122 equals 1179 divided into 90 per cent of his walks (110) times 216 equals 20 lines (1-4-2). This pitcher's walk rating would be 1-4-2. On the First Roll he would yield a base on balls on all combinations from 1-1-1 through 1-4-2 (20 lines).
We have now accounted for the pitcher's role in issuing walks. We could leave it there and have realism and accuracy so far as the pitcher's replay stats were concerned. But, if we did we'd have all batters averaging the same number of walks over a season's play. Walks average about 10 per cent for all pitchers combined. If all batters obtained 10 per cent walks for their plate appearances we'd find that many hitters would have distorted records. Those hitters who work a pitcher to get on, and whose talents are part of their contribution to team offense, would lose this value. Also, the feared power hitter who causes pitchers to work him carefully, risking a walk rather than a home run would walk less often. In a table game this would mean many more times at bat. In turn this would mean proportionately more home runs and other hits.
Walks by Batters
To give a balancing effect to the hitter on the issuing of walks, by being either a dangerous hitter, a patient worker of pitchers or a free swinger who accepts fewer walks than the average player, we have rated such batters PW (plus walks) or MW (minus walks).
Remember, pitchers yield walks at an average of 10 per cent, therefore batters obtain them at the same average. The great majority of batters are not in either group, PW or MW. We identify PW (Plus Walks) batters as those who obtain 100 or more walks in a season or who walk 20 per cent or more times compared to their at bats (ABs divided into walks, including intentional). For MW (Minus Walks) we use the same formula and apply this rating to those who only walk 5 per cent or less of the time.
The PW and MW ratings for batters now must affect the pitcher's walk ratings and adjust them. The PW rating increases the pitcher's walk rating against a batter so rated by three full numbers on the second (white) dice, up to a maximum of 1-6-6. A pitcher with a walk rating of 1-3-2 would be 1-6-2 against a PW rated batter.
For MW (Minus Walks) we make the adjustment downward by two full numbers on the second dice. The pitcher with a 1-4-2 rating would drop to a 1-2-2 for a MW rated batter. The minimum decrease allowed is to 1-1-6.
NOTE: You might find these manipulations unnecessary to provide you with all the action you find satisfactory. You can adopt a standard for bases on balls and eliminate separate considerations for each pitcher's walk rating and whether or not a batter has an effect against it.
Just alter the First Roll Chart to show a base on balls for all rolls from 1-1-1 to 1-4-1. You will be sacrificing accuracy, realism and gamesmanship, but we recognize that not all table gamers seek the same gratifications.
Strike Outs
Each pitcher on your rosters is rated for strike outs. When discussing the Second Roll Chart we said that put outs on ground balls would be converted to strike outs according to the pitcher's strike out rating.
First, we'll explain how a pitcher's strike out rating is determined and then show how it is applied.
There is a significant difference in determining walks from strike outs in "EI." As this game is conducted with two rolls, with walks being determined on the first roll and the second roll being used entirely for recording of hits or outs (combined making up "at bats"), we eliminate walks in figuring a BFP which will only include ABs. The formula is 3 x InP plus hits. Divide that into strike outs and multiply by 216 to learn the number of lines to be assigned for strike outs by the pitches. Count them down from 6-6-6.
A pitcher who struck out 10 per cent of all batters he faced, would use 22 lines for strike outs. You'd credit him with a strike out on all Second Rolls from 6-3-3 to 6-6-6.
NOTE: Again, if you want to sacrifice accuracy, realism and gamesmanship for speed and simplicity, you can just regard every roll from 6-2-6 through 6-6-6 as a strike out by every pitcher.
Strike Outs by Batters
Some batters strike out very often, some get a piece of the ball most often. From a realism point, this is more important at the extremes. You'd expect Babe Ruth and Mickey Mantel to strike out more often than the average batter; you'd expect a punch hitter to fan less often. As batted balls often affect the movement of base runners you'll want the style of a hitter to be realistic. In modern play batters, swinging more freely at pitchers with greater velocity and starters lifted more quickly for top flight relievers, strike out more often than in earlier years of baseball.
Strike outs are registered, slightly better than 20 per cent on all put outs. To identify those who fan more frequently than average, we'll add strike outs to those who fan more than 30 per cent of their outs (not at bats). On the other end of the scale, we'll use less than 10 per cent of their outs (not at bats). The formula is this. ABs minus hits divided into strike outs. Those who strike out more than 30 per cent of the time are identified as PK (plus strike outs), those less than 10 per cent are MK (minus strike outs.)
Application is simply this: A PK batter increases pitcher's strike out rating by 3 numbers on second (white) dice, an MK batter decreases it by two numbers.
Playing Safe
The team at bat can eliminate the risk of having a base runner picked off or a runner who is not forced being doubled off his base be declaring it is "playing safe." When this condition is in effect, the Double Play Chart is only effective on a ground ball with a runner on first base. No base runner can be doubled off his base. The pickoff plays on the First Roll Chart (2-1-3 and 2-1-4) are suspended.
To offset this, a base hit made when a team is "playing safe" can only advance a runner one base further than the hit itself. A base runner can only advance one base. For example: when "playing safe" with a runner on second, a single or double would advance him only to third base. A runner on first would advance only to third on a double, only to second on a single.
Injuries
We commented, when describing the First Roll Chart, that this is an optional touch of realism. We've made it possible for injuries to occur and feel it adds a realistic factor in the playing of a single game. When it happens, the injured player leaves the game and is replaced.
However, the duration of time lost because of an injury becomes a factor if you are conducting a series of games or playing a season. You have several options: one, of course, is to simply ignore all injuries. Another is to recognize the injury but only take the player out of the game, and not extend the time lost. Many who replay actual seasons prefer to be guided by the number of games played and times at bat shown for each player on the roster. An injury which forces a player out of the game for a long period can upset that approach.
Others, either using all-star combinations or having created a fictitious world of ball players (as in Robert Coover's "The Universal Baseball Association, J. Henry Waugh, Prop.") want to have players sidelined. (Personally, we stop short of fatalities).
For the purpose of creating a length of time lost because of injury we provide the following.
Roll the dice to determine length of injury period.
- 1-1-1 thru 4-6-6. Returns to action with next game.
- 5-1-1 thru 5-1-6 misses one game; 5-2-1 thru 5-2-6 misses two games; 5-3-1 thru 5-3-6 misses three games; 5-4-1 thru 5-4-6 misses four games; 5-5-1 thru 5-5-6 misses five games; 5-6-1 thru 5-6-6 misses six games.
- 6-1-1 thru 6-3-6 misses ten games; 6-4-1 thru 6-5-6 misses 15 games; 6-6-1 thru 6-6-4 misses 20 games; 6-6-5 and 6-6-6 out for rest of season.
If a pitcher is injured he cannot be used in the following six games on a roll from 5-1-1 to 5-6-6. He cannot be used in the next ten games on a roll from 6-1-1 to 6-4-6; the next fifteen games from 6-5-1 to 6-5-5; the next twenty games from 6-5-6 to 6-6-4 and is out for the season on rolls 6-6-5 and 6-6-6.
Note: On a Hit Batter (First Roll Chart 2-1-1) apply the same injury information. However, on rolls from 1-1-1 thru 4-6-6 he remains in the game.
Injured Player: On base hits, the runner is the injured player. On put outs the player making the put out is the injured player. On the force play at second, if the batter is right handed the play is made by the second baseman, if the batter is left handed by the short stop. On tag plays at the plate, if the third (green) dice is 1-2-3-4, the runner is injured; 5 and 6, the catcher is injured.
Rating the Players for Hitting
In earlier sections we found it more practical to discuss the techniques of rating players so that you would understand the principles as well as the application. In batting we have not yet showed you how batters are rated for extra base hitting. The formula is this: At bats divided into the extra base hit - do HR first. If batter had 529 ABs and 25 HR, 529 into 25 is .047. Multiply by 216 (lines) to get ten lines. Rate 1-1-1 through 1-2-4 for homers. Do same steps for triples, then doubles.
The batting averages have been described as being in effect against both right and left handed pitching. We provide you with the dice combinations to bring about all batting averages with the text. These are the results of computer computations based upon the expectation that a batter faces a mixture of pitching which will be 80 per cent right handed and 20 per cent left handed.
You have learned how to rate pitchers for walks and strike outs. Team ratings for double plays and errors have also been described.
We now reach the area of "subjective" ratings. These are running speed, throwing ability and defensive capability. Unlike the ratings which are entirely the result of arithmetic (batting, power hitting, walks, strike outs, etc.) these require an "opinion."
In ratings we provide we try to be objective and to have a basis for our opinion. We rely on reputation, observation and are guided by statistics.
Running Ratings have been discussed in some detail already. We've explained why we discriminate against pitchers. Stolen bases is not an absolute indicator of running speed. Joe DiMaggio and Mickey Mantle were exceptional base stealers on those rare occasions when they found it important. Usually they waited for the next Yankee slugger to bat them home. Of course, Mantle had injury prone legs and limited his risks. Both were outstanding in taking the extra base.
Throwing ratings for outfielders depend mostly on the number of assists. Again, this is not an absolute statistic. As we commented in discussing steals against catchers; a suspected or known poor arm will encourage runners to make many more attempts. The percentage of runners thrown out may be low (but is not a published stat) but the number of assists (which is a published stat) may be high.
Defensive Ratings
Over-all Defensive Ratings are very much a matter of opinion. Many of the greatest defensive players have led the league in errors and some of the most limited players have had league leading fielding averages.
The effect of running and throwing ratings are built into the charts where this is a factor. However, we have rated some players SD (Superior Defense) and LD (Limited Defense) and there is a specific application of these ratings to the play of the game.
Please observe that on the Second Roll Chart we have boxed some of the combinations.
When an LD (Limited Defensive) player is at the position identified inside a boxed combination the put out becomes a base hit (single).
For example: With a left handed batter at the plate and one out, a 5-2-1 is rolled. The series identifies it as a ground ball and the one on the third die (for a LHB and none out) directs you to a 3UA (put out by first baseman unassisted). However, if an LD first baseman was at that position it would go as a hit.
Players rated SD (Superior Defense) affect base hits. They turn base hits into put outs.
All base hits are directed somewhere. On the Second Roll Chart you will find these designations. This shows the outfielder who finally picks up the safely hit ball, whether it is a single over the infield or a double or triple up the alleys or over the fielder's head. Less frequent involvement by a first or third baseman is also provided. When we discussed "Errors Following Base Hits" we also described infield hits, where a ball is knocked down and kept in the infield.
When a base hit is made you know who will handle the ball, mostly an outfielder, but it can be an infielder or a pitcher.
Whenever a base hit, single, double, triple or home run, is the top of the batter's range for each type of hit (after ERA Adjustment is applied if you are using this) and it goes to an SD rated player, it is turned into an out (put out, unassisted) and any base runners hold their bases.
Example: The batter is rated 1-1-6/1-2-3/1-3-1 for extra bases and 2-4-4/2-5-1 for singles. A roll of exactly 1-1-6 would mean a home run to left field. If the left fielder were rated SD, it would be a put out instead. A roll of 1-2-3 would mean a triple to center field. An SD center fielder would catch it for a put out. A roll of 1-3-1 would be a double over first base. An SD first baseman would catch the ball on 1-3-1.
Against a left handed pitcher, a roll of 2-4-4 would be an infield single to the second baseman. If an SD second baseman, it would be an out, unassisted.
The use of LD and SD players adds considerable interest to the play of the game and their effect balances out over a season's play.
Playing the Game
"Extra Innings" was designed to allow the re-playing of a complete season based upon official statistics. Obviously, if it meets that standard, any shorter version can be handled. Games play in 30 minutes, or less, solitaire, once you've become familiar with the rules.
When space permits, we suggest that a large back board be obtained and propped up to be both a back board against which to roll the dice and to which to tack the charts.
In designing "Extra Innings" we have tried to include all fringe action on an optional basis. If you want to utilize the sophistications of SD and LD players, the counter balancing effects of pitchers and hitters on walks, you can.
Here are some further "optional devices."
Home Team Advantage. Most teams win more often at home than on the road. They have the advantage of a familiar ball park, fan support (usually), and are living at home. Probably more important, teams are assembled so that players can use their talents best. A ball park with a short left field fence (Fenway Park, Boston) will try to obtain right handed pull hitters; the New York Yankees, with a short distance to right field and a long way to left field, will go for left handed pull hitters.
Teams which play in spacious ball parks (Los Angeles Dodgers, for example) go for line drive hitters who are fast runners. In other words, most teams are put together to take advantage of the home ball park where they'll play half their season's games.
If you want to shade the statistics you can increase the power lines for the home team by one number of the third (green) dice for home runs, triples and doubles! If batter has no power lines in an extra base category, give him one starting with doubles. At the same time decrease the visiting team's power lines the same way.
Effect of Tiring Pitcher... We cannot find a satisfactory method to utilize which is substantiated by stats. Obviously pitchers do tire. Yet, they are relieved most often after allowing batters to get on base but before runs are scored against them. The relief pitcher's ability to close off the inning without the runners scoring and being charged to the previous pitcher is an unmeasureable intangible.
By basing our pitcher ratings on ERA we are recognizing a stat which is the composite of all innings pitched, fresh and weary. We defer to those who like to "fine tune" table games any alterations in pitcher ratings to recognize a reduced effectiveness after a pitcher has gone any number of innings.
Stretching Base Hits... Players are rated to replicate extra base hits, including those they stretched from singles to doubles, doubles to triples, etc. In "EI" a single is a single. If, as surrogate manager, you wish to have the batter try to increase this to a double (or a double to a triple) utilize the Stolen Base Chart after action is completed and, if successful, register it as a double instead of stolen base. Over use will warp the true life stats to be duplicated but it's YOUR GAME. "EI" has given you the techniques to make any changes you feel will make the game more exciting to you as you choose to play it.
Forestalling Questions: We don't want, ever, to reach a point of corporate stuffiness which sees us replying to questions by form letter or ignoring them. Still, most of those which require specific answers stem from the following:
The use of stats which have been introduced in recent years (attempted steals, for example). "EI" is intended for play both by those table gamers who relate to today's teams and those who prefer to use teams and players from earlier eras.
Our guiding rule is that, unless a stat is included in that fantastic resource work, MacMillan's "The Baseball Encyclopedia," we don't use it.
Prepared rosters for earlier seasons. Other than making this a feature of the newsletter from time to time, we cannot expend the time and absorb the printing cost for full leagues unless enough interest is shown. In the meantime, we have shown you how to do it for yourself.
Now, we hope you've absorbed most of what you've read and will learn "EI" by playing it. If you do, and if you have the imagination and intelligence, you have many years of a most rewarding hobby ahead. Play ball!
Getting Started with "Extra Innings"
The game is explained in full detail. We realize it might overwhelm some younger players. Yet, it can be played in a very simple form at the start.
Your ability to keep a boxscore is presumed. So long as you can understand your entries, that's all that counts. There are a great many ways of scoring plays. The use of standard position numbers is a requirement. We've already listed these in the text. 1 equals pitcher, 2 equals catcher; 3 equals first baseman; 4 equals second baseman; 5 equals third baseman; 6 equals short stop; 7 equals left fielder; 8 equals center fielder; 9 equals right fielder.
There is no "game board" with Extra Innings. By keeping a box score account of the game you don't need one to tell you where base runners are, how many outs, what inning, etc.
To get started, all you need is your team roster and the First and Second Roll Charts. Read the sections that tell how to use the First and Second Roll Charts. Now, make out a box score and start rolling the dice. Play a few practice games and pay no attention to errors and double plays if they come up on the First Roll Chart. Get the feel of the game first. Don't concern yourself with the Adjusted ERA Chart. Handle all pitchers alike. Any First Roll from 1-1-1 thru 1-4-2 is a walk to any batter. Any roll from 6-3-3 to 6-6-6 is a strike out, by any pitcher of any batter.
Play enough games to get the feel of things. Then start using more things: the Stolen Base Chart, Advancing on Singles and Doubles, Sacrifice Bunt, Sacrifice Fly. Save the Adjusted ERA Chart to be the last element of advanced play you work in.
Note on the Charts Not Transcribed
The charts scan (charts.pdf, 16 pages, scanned without a text layer) is a companion to this rulebook and is not transcribed in this file. Its first page is the Random Number Table. The Master Chart referred to in the text is on the rulebook scan (page 5). The remaining play charts the rulebook refers to (First Roll, Second Roll, Stolen Base, Advancing on Singles and Doubles, Sacrifice Bunt, Sacrifice Fly, Squeeze, Double Play and related charts) are on the charts scan and are not reproduced here.