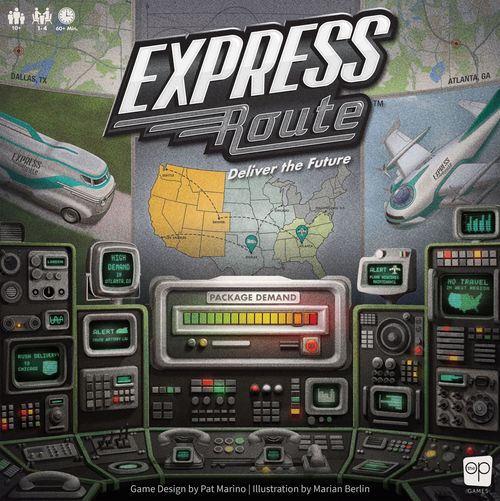
Express Route
Express Route Rulebook
Table of Contents
Table of Contents
Overview
This new employee handbook will teach you everything you need to know to keep the Express Route system running smoothly. First and foremost, this is a team effort and 1-4 employees will cooperate and think strategically to grow our new automated shipping company. Customers will use our company to ship packages around the United States. As more shipping requests come in, the overall demand on our infrastructure will increase. To succeed here at Express Route, you must use your specialist abilities and make strategic upgrades to our equipment to stay ahead of the demand. If you fill the delivered package track before the time runs out or demand gets out of control, you will win!
Will you fall behind or will you Deliver the Future?
Meet the Specialists
- Executive: May move the Executive upgrade token to any Control to increase it by 1 (max 3).
- Pilot: Can Activate each Plane control up to 2 times per turn using any battery color.
- Opportunist: May load a Package onto a vehicle without using a Control.
- Driver: Can move one Truck 1 space if it has not moved yet this turn.
- Navigator: When adding Packages to the board, you may place 1 in a City adjacent to its origin city.
- Operator: Can remove all packages from the Phone Bank and draw replacements from either or both decks.
- Autodeliver: Once per turn, you may unload a Package at its final Destination without using an Unload Control.
- Spacesaver: The Spacesaver may place a 2nd Package into one occupied Capacity space in each vehicle.
- Dispatcher: Can discard a Delivered Package to move any truck to the Destination City of a Package it is carrying.
- Warehouse: You may change the order of Packages in any City or Cities on your turn.
- Forecaster: When drawing events, look at the top 2. Choose 1 to resolve.
(Full Specialist details are in the Appendix - Specialists below.)
Components
- Map Game Board
- 4 Vehicle Boards (3 trucks, 1 plane): Streamline Shipper Mach 1, Streamline Shipper Mach 2, Streamline Shipper Mach 3, Skylane Shipper
- 3 Truck Wood Meeples
- 1 Plane Wood Meeple
- 12 Silver Batteries
- 4 Purple Batteries
- 43 Event Cards (Deck 1)
- 26 Event Cards (Deck 2)
- 75 Package Tokens (48 Low Demand, 27 High Demand)
- 4 Control Panel Player Boards
- 1 Roadblock Standee
- 8 Delivery Requirement Tokens
- 11 Specialist Cards
- 21 Upgrade Cards
- 1 Warehouse Standee
- 1 Pilot Token
- 1 Executive Token
- 1 Demand Pawn
- 7 Lock Tokens
- 16 Load Tokens
- 12 Range Tokens
Key Concepts for Working in the Express Route Command Center
The Map
The Map shows cities across the United States connected by highways. Cities are grouped into color-coded regions. Some cities feature Airports, indicating that Plane travel is allowed. There are also waypoints - dots without city labels.
Demand
Each Package sent via our service has a Demand value, representing how quickly the recipient would like it to arrive. The Demand Track represents the total Demand value on our growing company. While it is possible to delay delivering individual Packages, you must keep the total Demand in check - if it gets too high, it means that too many customers have become dissatisfied with the speed of our service, and the company has failed!
Phone Bank
On the main game board, you will find the Phone Bank. This is how new customers place their shipping requests. Active callers are on the phone with an Express Route customer service agent and their packages are ready to ship. Incoming callers, represented by the Package decks, are potential customers that will come through as phone lines open.
Vehicles
Your team shares control of three automated Trucks and one Plane. These Vehicles have limited capacity to carry Packages, as indicated by the Capacity spaces on the Vehicle cards. At the start of the game, each Truck can only carry one Package, and the Plane can carry up to two Packages.
Packages
Packages in the Phone Bank are always face down, showing the Origin city on the back. Players may not look at the front of a Package tile to see the Destination city or actual Demand value until it is added to the Map.
Package tile: the back shows the Origin City and an icon indicating Low Demand (1-3) or High Demand (4-6). The front (Destination City side) shows the Origin City, the Demand value (Demand icon), the Destination City, and a QR Code.
Tip: Express Route employees are encouraged to scan the QR code after completing each delivery.
Setup
If you're new here at Express Route, use the setup described here. In this 'free-play' mode, all Specialist and Upgrade cards are available to choose from. Once you have learned the ropes, try playing through the Scenarios on pages 16 and 17. Scenarios will test your skills by limiting the available Specialist and Upgrades, altering the amount of Event cards, and will set specific end game objectives to provide new challenging twists to ensure you stay sharp working here at Express Route.
If you prefer to have more choice or variety, or if you are playing with new players, you can always return to the 'free-play' mode.
Map Game Board
Place the Map in the center of the table.
Vehicle Boards
Place the four Vehicle cards together to the left side of the Map.
Wooden Truck and Plane Meeples
Place the Streamline Shipper Mach 1 in San Francisco, CA; Streamline Shipper Mach 3 in Kansas City, MO and the Streamline Shipper Mach 2 in Albany, NY. Place the Skylane Shipper in Dallas, TX.
Demand Pawn
Set the starting Demand by placing the Gray Pawn on spot 15 of the Demand Track. This will match the total Demand value of the Packages that were added to the Map in the Packages step.
Low Demand Package Tokens
Shuffle all remaining Low Demand Package cards together and create a face down draw pile. Place the pile in the indicated space on the Phone Bank. Move the top 2 Low Demand Packages into the unlocked active caller spaces keeping them face down, so the Destination city is still hidden.
High Demand Package Tokens
Shuffle all remaining High Demand Package tokens together and create a face down draw pile. Place these piles in the indicated space on the Phone Bank.
Delivery Requirement Tokens
Shuffle the Delivery Requirement tokens. Choose two at random and place them in the order revealed in the spaces above the end of the Delivered Packages Track. Return the rest of the tokens to the box.
Packages
Look through both Package decks and find five Packages with the following Demand levels: 1, 2, 3, 4, and 5. Add these Packages to the spaces on the Map adjacent to their Origin cities with the Destination city face up.
Upgrade Cards
Lay out all of the Upgrade cards face up next to the Map.
Specialists
Lay out all of the Specialist cards face up next to the Map.
Event Cards
Separate the Event cards by their backs (Events 1 and Events 2). Shuffle each deck separately. Randomly select 12 Event 1 cards and 12 Event 2 cards. Place the selected Event cards in a single stack on the indicated space with the Event 2 cards on the bottom and the Event 1 cards on top.
Lock Tokens
Place the 7 Lock tokens in the indicated spaces:
a. 1 on each of the 4 Vehicle cards, b. 2 on the Phone Bank and c. 1 on space 36 of the Demand Track.
Player Setup
Starting Player
The player who most recently received a package goes first.
Control Panel
Give each player a Control Panel.
Range and Load Tokens
Place a Range token (gas can) on the 1 space for each Truck. Place a Load token (hand cart) on the 1 space for each truck and the plane.
Specialists
Each player selects one of the 11 Specialist cards from the supply. Each Specialist card has a unique ability that the player can use on their turn as well as a setup bonus. This setup bonus is completed after the steps above, but before the first turn. For more information on these bonus and Specialist abilities see the Specialist reference on Page 3 (and the Appendix - Specialists).
Tip: If you can't decide which ones to pick, try using the four from Scenario 1 (Autodeliver, Opportunist, Operator, and Driver).
Batteries
Each player takes three Silver Batteries from the supply.
Solo Play
If you are playing a solo game, you may use 1, 2, 3, or 4 Control Panels. Assign a Specialist to each Control Panel. Treat each Control Panel as a separate player with their own turn, as you would in a multiplayer game. Scenario play is a great way to challenge yourself as a solo player!
Objective
To win, you must fill the Delivered Package track with Packages before either the Demand exceeds the limit (the Demand Track limit is 35, or 40 with the Demand Upgrade) or there are no Event cards left at the start of a player's turn.
Turn Summary
Each player completes all of these steps on their turn.
- Add Package(s)
- Draw an Event
- Complete Actions a. Controls (Movement, Loading/Unloading, Capacity, Delivering Packages) b. Use Specialist Ability (Optional) c. Upgrade the system (Optional)
- Clean Up
Detailed Turn Rules
1. Add Package(s)
The color of the Demand Track determines how many Packages are added to the Map, and what type of Packages are moved from the Incoming Call piles to the Active Caller positions to replace those packages.
Check the color of the current Demand level and compare it to the color reference on the Phone Bank.
Packages must be added from the active caller spaces, not the incoming call deck spaces. At the start of the game, this means you will only be able to choose from two Packages. Place the first chosen Package in its Origin city with the Destination city side face-up. Each Package added to the Map increases the Demand on the system. When the Package is placed on the Map, move the Demand pawn up equal to the Demand value shown on the Destination side of the Package.
Before picking the next Package(s), refill the active caller space with a Package from either the Low Demand or High Demand draw pile as indicated by the icon(s) shown on the Phone Bank Guide. Continue to draw and place the required number of Packages.
There is no limit to the number of Packages that can be in a city. Stack new Packages on top of any Package(s) already in the city. You may only access the top Package in a stack.
The Phone Bank Guide for Package Placement (the colored lights correspond to the green, yellow and red sections of the Demand Track):
- Red light: Add 1 direct from the Low Demand deck (Incoming Callers). (Deck icon read from the page art: the plain deck icon is the Low Demand deck, the starburst icon the High Demand deck.)
- Yellow light: Add ANY 1 from Active Callers, replace from the High Demand deck.
- Green light: Add ANY 2 from Active Callers, replace from the Low Demand deck.
Tip: Without the Phone Bank Upgrades you will have a limited choice about which Packages are added to the Map. Unlocking one or both Phone Bank Upgrades will give you more choices and control over which Packages are added to the Map, which can be a powerful advantage!
Tip: Be careful in what Packages you cover. You might regret stacking a Low Demand value Package on top of a High Demand value Package.
Tip: When choosing which Packages to add, consider if they are High or Low Demand and look for Origin cities you can easily reach with a Truck or the Plane.
2. Draw an Event
Reveal one Event card and apply the effect. Event cards are drawn from Event deck 1 until it runs out, then move on to Event deck 2. The effects of an Event last only for the current turn. Important: Players cannot use Specialist abilities to override an Event.
Events may block travel in certain cities, regions, or routes. If any part of the board is blocked, no Vehicle may enter or leave that city or region, or travel along that pathway. Other Events may cause Vehicles to be unusable for the current turn.
The Roadblock Standee may be placed on blocked cities or stopped Vehicles as a reminder of the Event.
(Example event card: "NO TRAVEL IN OR OUT OF CHICAGO, IL - Gale Force Prevents Travel in Windy City!")
3. Complete Actions
Control Panels
You will use your Control Panel to move Trucks, fly the Plane, and to Load and Unload Vehicles. To activate a Control, place a Battery on an empty space matching the Battery color and resolve the action. Repeat this process until all of the Batteries are used, or you choose to pass the turn to the next player. In order to use the same Control twice in a turn, you must have a Silver and a Purple Battery.
Example: Player 1 only has Silver Batteries. To activate a Control, they can place a Silver Battery on any of the empty matching Silver spaces on their Control Panel.
3a. Controls - Vehicle Range
The lefthand side of a Control Panel shows the Range (number of connections) that each Vehicle can travel. The gas can token indicates the maximum Range of each Vehicle. Movement cannot be split by other Actions. You may move fewer than the number of spaces allowed, but any unused movement is lost. Trucks move from point to connecting point on the Map, including all waypoints. The Plane flies directly to any city with an Airport. Any number of Vehicles may occupy the same city or waypoint.
Movement Example: You've made several Upgrades to your player board, and your Streamline Shipper Mach 1 now has a Range of 3. For your first action, you assign a Silver Battery to the Movement Control for the Streamline Shipper Mach 1. This allows you to move it up to 3 spaces on the Map. You move it 2 Spaces from Salt Lake City, through Denver (one space), to Kansas City (second space) and decide to stop. You forfeit your third space of movement.
3a. Loading/Unloading
The righthand side of the Control Panel shows how many Package actions the Automated Vehicles can complete when Loading or Unloading. The Load (hand cart) tokens indicate the loading/unloading power of each Vehicle.
There are four types of Package actions:
- Load one Package from a city or waypoint onto a Vehicle
- Unload one Package from a Vehicle to a city or waypoint
- Load one Package from a Vehicle onto another Vehicle in the same city or waypoint
- Unload one Package from a Vehicle onto another Vehicle in the same city or waypoint
At the start of the game, each Vehicle's Load/Unload Control can only complete one Package action with a single Battery. If a Load/Unload Control is Upgraded to a 2, you may complete any two of the Package actions listed above each time you activate the control. For example, Unload a Package from the Streamline Shipper Mach 1 to Kansas City AND Load a Package from Kansas City onto the Streamline Shipper Mach 1. Similar to movement, all Load actions from one Battery must be performed at the same time. You may not Load a Package, move a Vehicle and then Unload the Vehicle; that would require a second Battery.
Packages Loaded onto Vehicles must be placed in an available (unlocked and empty) space on the Vehicle board.
Tip: Sometimes it is helpful to move a Package from one Vehicle to another. When doing so, you may choose to use a Load Control for the new Vehicle or an Unload Control from the starting Vehicle. When deciding, consider which other Controls you might want to use later on your turn.
3a. Capacity
Capacity determines how many Packages a Vehicle can carry. Until a Capacity Upgrade has been unlocked, only one Package fits on each Truck and two on the Airplane. If there are no empty spaces on a Vehicle card, new Packages may not be Loaded onto it until a Package is Unloaded to make room.
You may Unload Packages at any city or waypoint, even if it is not the Destination city for that Package. This may be helpful if your plans change, or if you want to leave a Package for a different Vehicle to pick up later.
Tip: Waypoints are never Origins or Destinations for Packages, but you may Unload and Load at a waypoint. This may happen as a result of an Event, or you may use a waypoint to move Packages from one Vehicle to another.
3a. Delivering Packages
When a Package is Unloaded in its Destination city, it is immediately Delivered. Move the Package to the leftmost empty space on the Delivered Package track and reduce the Demand track by the Demand value shown on the Package.
There are no constraints when filling the four leftmost spaces of the Delivered Package track. They must be filled before players can attempt to complete the delivery requirements on the right side of the track.
The delivery requirements placed above the four rightmost spaces determine what Packages can go into these paired spaces. As long as the four leftmost spaces are filled, players may place delivered Packages into ANY of the appropriate requirement spaces. If Packages in the free spaces are spent or removed, players must again fill all of the free spaces before they can resume filling the requirement spaces (see Upgrade the System for more on spending packages).
If a Package is delivered, and there are no open free spaces, and it does not match any of the requirements, it may be spent immediately for an Upgrade, or one already on the track may either be spent immediately for an Upgrade or discarded to make space for the newly delivered Package.
Example 1: If this Orlando to Atlanta Package was just delivered, it could not go into either open space, as the Demand value is not even, and the Destination was not in the West region. The players must either spend this Package immediately for an Upgrade, discard it, or may spend or discard one of the Packages in the first four spaces of the track to make room for it. In any case, the Demand is still reduced as normal for the delivered Package. The rules on Upgrades will help you understand these choices more.
Example 2: In this case, the first delivery requirement is different (Same Demand Value) and offers another choice. Players could spend or discard the Indianapolis to Atlanta Package with Demand 6, and place the newly delivered Package with Demand 5 in its place.
Example 3: The players had filled the four free spaces and had begun completing the Delivery Requirements. However, on a previous turn they spent the Package in the fourth space for an Upgrade. Even though the newly delivered Package meets the 'West Destination' requirement, the players are required to fill the open free space on the track first before continuing to work on the requirements with their next delivery.
Loading/Unloading Example: Continuing from the example from page 10, for your second action, you want to Load the Package in Kansas City. There is already a Package on the Streamline Shipper Mach 1, and no space is available because its Capacity has not been Upgraded yet. Fortunately, the Package on the Streamline Shipper Mach 1 is bound for Kansas City, and your Upgraded Loading Action for the Streamline Shipper Mach 1 allows you to complete two Package moves. You activate this control to Unload the Package from the Truck, delivering it to Kansas City. This creates space on the Truck to then Load the Package bound for San Francisco. If the Package unloaded from the Streamline Shipper Mach 1 did not have Kansas City as a Destination, it would have stacked on top of the Package already there, blocking access to the San Francisco Package.
Continuing from the previous example: For your third action, you want to get the Streamline Shipper Mach 1 to San Francisco to deliver the Package you just Loaded. You have already moved the Streamline Shipper Mach 1 once this turn, but fortunately you have a Purple Battery and can activate the same Control twice. You assign your Purple Battery to the Streamline Shipper Mach 1 Range Control. This Control is fully Upgraded, so you can move the Truck the full 3 spaces to reach San Francisco. You are out of Batteries for your turn - but the next player will be able to Unload the Streamline Shipper Mach 1 to complete the Delivery!
Optional Turn Actions
3b. Use Specialist Ability (Optional)
Each Specialist has an optional ability to use once on each of your turns. The table on page 19 (Appendix - Specialists) outlines how each Specialist ability works and details the set-up bonus.
Continuing the previous turn example: As the Driver Specialist, your ability allows you to move one unused Truck at the end of your turn. You haven't moved the Streamline Shipper Mach 3, so you use your Specialist Ability to move the Streamline Shipper Mach 3 one Space from Orlando to Atlanta. The Plane is already in Atlanta and holding a Package bound for Orlando. You suggest that the next player could Unload the Package from the Skylane Shipper onto the Streamline Shipper Mach 3 and then move it back to Orlando.
3c. Upgrade the System (Optional)
At any point during your turn, you may spend any Package from the Delivered Package Track to purchase an Upgrade, returning the spent Package token to the box. Each spent Package may only purchase one Upgrade, but you may purchase as many Upgrades as you can afford. Upgrades are critical to having an efficient system to keep Demand in check. Remember, the four leftmost spaces on the Delivered Package Track must be filled or re-filled before Packages are placed in the spaces with requirements.
The cost associated with an Upgrade is shown on the top half of the card, and the effect is on the lower half. The Cost is an aspect of a Delivered Package, either Demand value, Destination city, or Destination region. Each Upgrade card can only be purchased once. Phone Bank and Battery Upgrades have two levels. You must complete level 1 before level 2. After purchasing an Upgrade, place it facedown in a discard pile in the lower right corner of the Map board.
Example: In the previous example, when the Package was delivered to Kansas City, MO, it could be spent to gain an Upgrade. It has a Demand of 3 and was Delivered to the Midwest region.
There are three ways to use this Package to Upgrade your system:
- Demand Value (3): Increase the movement of a Truck using the Range Upgrade with cost Demand = 3.
- Midwest Region: Increase the Capacity of either a Truck or Plane with the Capacity Upgrade showing Midwest Destination.
- Odd Value: Extend the Phone Bank to three spaces with Phone Bank 1 Upgrade that has a cost of Demand = 1, 3, or 5.
Tip: Choose your upgrades carefully. Spent Delivered Packages will make your system more efficient, but will also remove one Package from the Delivered Package Track.
The available Upgrades are described in more detail in the table in the Appendix - Upgrades.
4. Clean Up
After completing all of your actions, remove the Batteries from your Control Panel and remove any Event tokens that were in play.
Check for END GAME conditions.
A. YOU WIN: If there are eight Packages in the Delivered Package Track, and the delivery conditions for the final Packages have been met.
B. YOU LOSE: If there are not eight Packages in the Delivered Package Track, and the Demand is higher than the maximum allowed - 35 (or 40 with the Demand Upgrade).
C. YOU LOSE: If there are no Event cards remaining in the draw pile.
D. If none of the End Game conditions has been met, play proceeds to the next player in clockwise order.
Setup Scenarios
The table below provides several scenarios to try. The level of challenge increases from top to the bottom. Follow normal setup instructions with these changes.
- Event I and II - how many cards to pull from each deck during set-up.
- Delivery Requirement - how many Delivery requirement tokens to place above the Delivered Package Track, and any requirements for which tokens to use.
- Specialists - which specialist cards may be used in the scenario. Players may only choose an available Specialist.
- Upgrades - which Upgrade cards to remove and/or include during set-up. All other Upgrade cards are returned to the box during set-up. Upgrades earned from Specialists still remove one of the remaining Upgrade cards in play in the scenario.
| # | Event 1 | Event 2 | Requirement 1 | Requirement 2 | Specialists | Upgrades |
|---|---|---|---|---|---|---|
| 1 | 14 | 10 | None | None | Operator, Driver, Opportunist, Autodeliver | Keep All |
| 2 | 12 | 12 | Low Demand (3 or less) | Different Destination Regions | Operator, Executive, Autodeliver, Spacesaver | Remove: Any 2 Capacity, Any 3 Load, Any 2 Range |
| 3 | 12 | 12 | Same Demand | Odd Demand | Driver, Opportunist, Autodeliver, Forecaster | Remove all Load Upgrades |
Note: the scenario numbers in the first column are added for reference (the printed table is unnumbered, listed in order of increasing difficulty; the handbook refers to the first row as "Scenario 1"). The printed table uses "Dispatch" for the Dispatcher Specialist and misspells "Capacity" as "Cpacity" in one row; both are transcribed as printed.
Appendix - Upgrades
| Upgrade Name | Delivered Package Cost | Effect |
|---|---|---|
| Range | Package with Demand matching the value on the Upgrade card (1-6). | Each player increases the Range of any one Truck on their Control Panel by moving a Range (gas can) token 1 space to the right. Players may choose different Trucks. Plane Range cannot be upgraded. (Card text: Range, Demand = [1-6]; All players +1 Range.) |
| Load | Package with a Destination matching the city shown (Tip: they are all Airport cities). | Each player increases the Load rate of any 1 Truck or Plane on their Control Panel by moving a Load (hand cart) token 1 space to the right. Players may choose different Vehicles. (Card example: Los Angeles, CA Destination; All players +1 Load.) |
| Capacity | Package with a Destination city in the region shown on the Upgrade card. | Unlock the extra Package Capacity space on any one Vehicle of your choice by removing the Lock token. (Card example: Southeast Region Destination; Remove 1 Lock from the Capacity space of any Vehicle.) |
| Demand | Package with a Demand value of 5 OR 6. | Unlock the end of the Demand track, raising the maximum Demand from 35 to 40. (Card text: Remove the Lock from the Demand Track.) |
| Phone Bank 1 | Package with Odd number Demand (1, 3, or 5). | Unlock the first (small) Phone Bank Upgrade, extending it to 3 Spaces. Fill the new space with your choice of a Low or High Demand Package. You may now select Packages from any of these 3 spaces. (Card text: Remove the leftmost Lock from the Phone Bank. Fill the new Space with a Low or High Demand Package.) |
Appendix - Specialists
| Name | Ability | Set-up |
|---|---|---|
| Dispatcher | Once per turn, you may discard a Delivered Package to move any truck to the Destination city of a Package it is carrying. That Package is immediately delivered. | After placing the starting Packages, move the Trucks to any starting cities of your choice. Move the Plane to any Airport city. |
| Opportunist | Once per turn, you may Load a Package without using a Control. | Unlock any one Capacity Upgrade at the end of setup, then remove a Capacity Upgrade card of your choice from play. |
| Pilot | You may activate each Plane control up to two times per turn using a silver or Purple Battery for each activation. When using a control twice, stack the batteries in the Control Panel space. | After placing the starting Packages, add an Airport to any city on the Map using the provided token. This Airport remains in play for the full game. |
| Forecaster | At the start of your turn, draw two Event cards. Choose one to resolve and return the other to the top or bottom of the deck. | Two Range Upgrades for your Control Panel. These can be for the same or two different trucks. Do not remove any available Range Upgrade cards from play. |
| Navigator | When adding Packages to the board, you may place one in a city adjacent to its Origin city, as long as that city is not also the Destination for that Package. Ex: A Package with an Origin in Chicago may start in Des Moines, Detroit or St. Louis instead. |