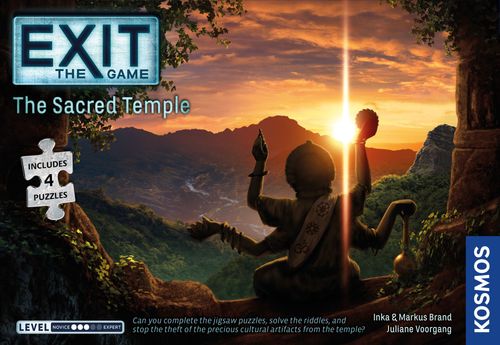
EXIT: The Game + Puzzle – The Sacred Temple
EXIT: The Game + Puzzle – The Sacred Temple Rulebook
Table of Contents
Table of Contents
Helper App
Download the free bonus app for a game tutorial, an atmospheric soundtrack, and a digital timer. For Android, iOS, and Fire. Check the app stores for details.
Game Materials
- 4 Puzzle bags with 88 pieces each — each puzzle has a unique back design
- 12 Riddle documents
- 3 Strange items
- 4 Decoder disks of different sizes
- 1 Two-piece snap fastener
- 1 Rulebook with help and solution section
Additionally Required Game Materials
In addition, you will need writing implements (ideally a ball-point pen and a pencil), a pair of scissors, and possibly a sheet of paper for notes. You will also need a watch — ideally, a stopwatch. As an alternative, you can use the digital timer with the atmospheric soundtrack. Just select the game in the Kosmos Helper App and click on the hourglass.
Game Setup
Arrange the 12 riddle documents fanned out along the edge of the table with the symbols visible on their front sides. Don't forget: Be sure not to look inside the documents yet!
You can leave the four puzzle bags inside the box for now.
Carefully remove the four decoder disks and the two strange items from the die-cut cardboard. If necessary, use a sharp object to clear the four holes in the snake item. Set the snake aside at the edge of the table along with the other two strange items. You will not need these materials until later in the game.
Assemble the Decoder Disk
Take the small two-piece snap fastener and insert the part with the depression into the small center hole of the largest decoder disk from behind (1).
Then, in order of size starting with the second-largest disk, place the three other disks on the fastener (2). The numbers on the outer ring of the three disks have to be facing up. Finally, secure the white fastener with the top portion. Press the two parts tightly together until the top one snaps into the depression and you hear a click.
Check to make sure that your decoder disk looks like the front side and back side illustrations. Are the wheels easy to turn? If so, set the disk within easy reach at the edge of the table. If not, check to make sure that you assembled the two parts of the snap fastener properly. The two parts should not come apart easily.
Where Is the Game Board?
This game has no game board! The four jigsaw puzzles, which you will find and assemble one by one during the game, will show you what you need to find in the game and what the locations look like.
You can tell the four puzzles apart by looking at their backs. There are four different patterns: one puzzle with grayish-blue back and no pattern, one puzzle with striped back, one puzzle with stars on the back, and one puzzle with circles on the back.
During the course of the game, you will be told exactly which puzzle bag to take from the box and when.
Example: At the start of the game, all you have available to you are the puzzle bag containing pieces with a grayish-blue back with no pattern, the decoder disk, and the parchment paper.
During the game, riddle documents will be added. You are allowed to take and look at a riddle document whenever you have entered a code in the decoder disk and you have been directed to the corresponding riddle document by the symbols that appear there. Sometimes you will be explicitly directed to a riddle document by something you read. When that happens, you are also allowed to take the corresponding riddle document from the edge of the table.
The strange items may likewise only be used when you are explicitly told that you have found them. Until then, leave them at the edge of the table!
Course of Play
Your goal is to work together as quickly as possible to find the professor and protect the secret of the temple from the treasure hunters. That would definitely be easier if there weren't riddles all over the place that you have to solve in order to make any progress!
IMPORTANT: To solve the riddles, you can write on, fold, or cut the materials … All of this is allowed, and sometimes even required. (You can only play the game once — after which you will know all the riddles, and won't need the game materials any longer!)
Solve the riddles in their proper order as you work through the various locations to find the hidden temple. Over and over, you will come across locked objects and doors. They are barred with small colored locks, which can only be opened with a three-digit code.
If you see a riddle, take a close look at the material that you have been told you are allowed to use. The materials may include strange items, riddle documents, individual puzzle pieces, the rulebook and the box. Put your heads together to try to figure out how to solve the riddle and find the correct three-digit code. You will then enter this code into the decoder disk.
On the outer edge of the disk, there are ten different-colored locks pictured. Each lock stands for one of the codes you are looking for. Pay close attention to which lock is shown on the objects or doors in the puzzle picture! Enter the three-digit number code under this lock on the disk — starting from the outside edge and proceeding toward the center. Then flip the decoder disk over. You will see a picture in the viewing window of the largest wheel on the disk. This will tell you whether the code might be correct.
Example: You have calculated the code 8 5 1 as the solution to the riddle with the black lock. Enter this combination of numbers under the black lock on the decoder disk — starting from the outside and proceeding toward the center. Then, flip the decoder disk over onto its back to check if the code is correct.
Is the Code Incorrect?
If so, an X or a lock of a DIFFERENT color will appear in the little viewing window on the back side of the decoder disk. Check the lock color and the code on the front side. If that doesn't help, take another look at the riddle and try to come up with a different code.
Is the Code Possibly Correct?
If so, in the viewing window on the back side of the decoder disk you will see a lock in the SAME color as the lock that you are trying to open.
Turn the decoder disk back to its front side. In the three viewing windows on the three smaller wheels of the disk, you will see three symbols. When read from outside in, they will form a very specific sequence. Look for this exact combination of symbols on the riddle documents.
Example: You want to open the black lock on the rock. After entering the code under the black lock on the decoder disk and seeing the black lock through the viewing window in the back, you will get the symbols on the front side. Now look for the riddle document with this sequence of symbols.
Is the Code Really Correct?
If you find a riddle document with the symbol sequence shown on the decoder disk, the number code is correct. Immediately take the riddle document and look at it. It will tell you how to continue.
Is the Code Actually Incorrect?
If you cannot find a riddle document with a matching symbol sequence, re-check the number code sequence and verify that the lock color entered in the decoder disk matches that of the lock to be opened, and also re-check the symbol sequence appearing on the front side against what you see on the riddle documents. If the code is indeed still wrong, take another close look at the riddle to see if you can come up with a different code.
IMPORTANT: You must solve the riddles in order! In other words, you can only take the next riddle document or take the next puzzle bag if you have cracked the previous code or the game tells you that you are allowed to proceed!
Need Help?
The game can provide you with assistance if you get stuck. For each code, there are three clues in the corresponding lock color.
Each "1st clue" will provide some useful initial assistance and will tell you what you will need or what you can start doing to find a solution to the corresponding riddle.
The "2nd clue" will give you more concrete assistance in finding a solution to the corresponding riddle.
The "solution" will tell you the approach to take in solving the riddle along with the correct code or the right symbol sequence for the next riddle document.
The green help section starts on the back of this rulebook. Page 1 of that section tells you where you can find which clues. Only examine the clue that you need for the riddle you are trying to solve. You will find a brief set of instructions on page 2 of the help section. (You may want to read this before beginning).
Don't be shy about using the clues if you are stuck with a riddle. If you have used a clue that provided you with NEW information or the solution, enter an X in the box at the bottom right. At the end of the game, count up all the marked clues and solutions, which will contribute to the assessment.
When Does the Game End?
The game ends when you have solved the last riddle and found the treasure of the hidden temple. A riddle document will tell you this.
Assessment
Assembling the four puzzles and solving all the riddles is a great achievement! If you also want to assess how well you did with the puzzles and riddles, you can take a look at the table below.
When calculating the number of clues used, use the checked boxes in the help section. Only count the ones that provided you with NEW information or solutions!
| Time | No Clues | 1–2 Clues | 3–5 Clues | 6–10 Clues | > 10 Clues |
|---|---|---|---|---|---|
| < 100 Min. | 10 Stars | 9 Stars | 8 Stars | 6 Stars | 5 Stars |
| < 120 Min. | 9 Stars | 8 Stars | 7 Stars | 5 Stars | 4 Stars |
| < 150 Min. | 8 Stars | 7 Stars | 6 Stars | 4 Stars | 3 Stars |
| < 180 Min. | 7 Stars | 6 Stars | 5 Stars | 3 Stars | 2 Stars |
The Game Begins
What are you waiting for? You might want to re-read the story on page 1 again to get in the mood. At the start, you will have the decoder disk, the parchment paper, and puzzle bag with the grayish-blue pieces with no design on the back available to you. Start the stopwatch or the timer and start assembling the puzzle pieces into the first picture (the clearing in the jungle).
We hope you have a lot of fun with EXIT: The Sacred Temple!
The authors and Kosmos thank all the test players and rule reviewers.
Certificate of Escape
ATTENTION! Do not turn the page! On the back, you will find the certificate and the end of the help and solution section.
The scientific expedition members have on ______ in ______ found the hidden temple and saved the professor from the treasure hunters. Congratulations!
- To do it, they required ______ Minutes and ______ Seconds.
- They used a total of ______ clues.
- This earned them ______ stars in the assessment!
- The coolest riddle was ______
- The trickiest riddle was ______