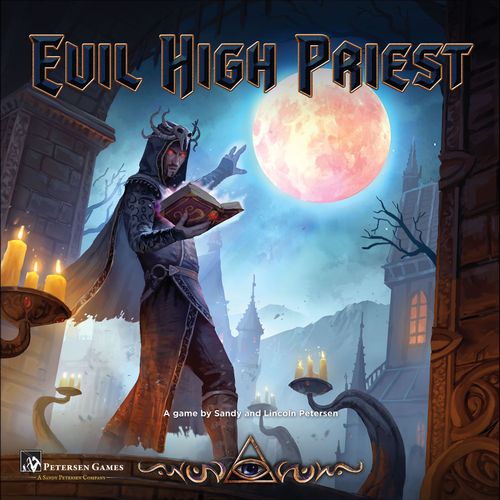
Evil High Priest
Evil High Priest Rulebook
Table of Contents
Table of Contents
Components: Core Game
1 rulebook
1 two-sided cult board (Cthulhu/Black Goat) — Choose 1 Great Old One for the game. The object of the game is to shatter the Elder Signs on the cult board and awaken your Great Old One.
1 town board — The towns, societies, and locales in the New England region to which your cultists travel to acquire resources and other benefits … sometimes at a cost.
1 ritual board — Your cultists can participate in magical ceremonies which give you great power but, during the extended time rituals take to finish, they will not be available for other tasks.
5 priest boards — Each player has their own priest board. Your cultists are available for use when they are in your cultist pool. There are also several priest-only action spaces, and 3 lairs where you can keep monsters.
1 card display board — The Chamber decks (and the Investigator and unique Monster decks, if you are playing with them), and their discard piles are placed to the sides of this board, and face-up cards from those decks are displayed on it.
5 sanctum boards — Each player has their own sanctum board. You place Chamber cards on the large spaces to define the chambers of your sanctum, and store resources on those cards. Acolytes not currently available for use are stored on the 4 asylum spaces. The raid strength track records the strength of investigator raids.
13 Elder Signs — Elder Signs start face-up on the cult board, and lock any associated space(s). When you shatter an Elder Sign (removing it from the cult board), you must store it in your sanctum shattered side face-up. When all 13 Elder Signs are shattered, the game ends. Elder Signs are considered resources, and are worth victory points.
Tokens: 40 treasure (30x1, 10x3), 28 blood (22x1, 6x3), 23 tokens (18x1, 5x3), 12 spellbook — Treasure, blood, magic and spellbooks are resources that are stored in your sanctum and used to activate actions and effects. They are also worth victory points.
Treasure, blood, and magic tokens come in denominations of 1 and 3: you may exchange tokens for those of equal value at any time.
5 raid markers — Use a raid marker to track the strength of investigator raids on your sanctum board.
1 Deep One marker — This marker is used on the Cthulhu cult board.
40 Chamber cards — When you choose a Chamber card, place it on a free space on your sanctum board. Each Chamber card represents a chamber of your sanctum and has an intrinsic defense value and space to store resources.
30 acolyte cultists in 5 colors — Each player can have up to 6 acolyte cultists. Place them on action spaces on the various boards to gather resources or shatter Elder Signs.
15 generic Monster cards — Monsters (in the core game, they are all the same) are kept in the lairs on your priest board. They can be used to defend against investigator raids.
5 priest cultists in 5 colors — Each player has 1 priest cultist. Like acolytes, place your priest cultist on action spaces to gather resources or shatter Elder Signs. Only your priest can use the action spaces on your priest board, and your priest can't be sacrificed, placed in your asylum or escape space, or eliminated.
Priests and acolytes are referred to as cultists, but a priest is not an acolyte, and an acolyte is not a priest.
1 Shoggoth card — The card is used with the Cthulhu cult board.
1 First Player marker
3 dice
Components: Blood Ceremony Expansion
2 two-sided cult boards (Sleeper/Tcho-Tcho, and Opener of the Way/Crawling Chaos) — Choose 1 Great Old One for the game.
12 unique Monster cards — Unique monsters are kept in the lairs on your priest board. They can be used for their special abilities, and to defend against investigator raids.
10 Investigator cards — Randomly choose an Investigator card when an investigator raid is triggered on the cult board. It features special effects that modify a raid.
4 Crawling Chaos Avatar cards — These cards are used with the Crawling Chaos cult board.
1 Tcho-Tcho growth marker — This marker is used on the Tcho-Tcho cult board.
10 Priest cards — Each player has 1 Priest card with a special ability they can activate once during the game.
Components: Dark Ritual Expansion
2 two-sided cult boards (The Ancients/Windwalker, and The Watcher/Yellow Sign) — Choose 1 Great Old One for the game.
Tokens: 28 atomics (22x3, 6x1) — These special resources are used with The Ancients cult board.
15 Slime Mold cards — These cards are used with The Watcher cult board.
12 Unique Monster cards — Unique monsters are kept in the lairs on your priest board. They can be used for their special abilities, and to defend against investigator raids.
11 Investigator cards — Randomly choose an Investigator card when an investigator raid is triggered on the cult board. It features special effects that modify a raid.
10 Priest cards — Each player has 1 Priest card with a special ability they can activate once during the game.
1 King in Yellow card — This card is used with the Yellow Sign cult board.
3 Windwalker Monster cards — These cards are used with the Windwalker cult board.
Components: Artifact Pack
Deluxe plastic pieces to replace your tokens:
- 30 Treasure coins
- 10 Treasure chests (each worth 3 Treasure coins)
- 22 Blood Drops
- 6 Buckets of Blood (each worth 3 Blood Drops)
- 18 Magic Eyes
- 5 Big Magic Eyes (each worth 3 Magic Eyes)
- 12 Spellbooks
- 13 Elder Signs
Components: Cultic Sets
Plastic miniatures to replace your meeples. Note that your choice of miniatures has no effect on gameplay.
Set 1: 6 Daemon Sultan acolytes, 6 Windwalker acolytes, 6 Opener acolytes, 6 Ancients acolytes, 6 Crawling Chaos acolytes, 5 priests in 5 colors
Set 2: 6 Sleeper acolytes, 6 Black Goat acolytes, 6 Tcho-Tcho acolytes, 6 Yellow Sign acolytes, 6 Cthulhu acolytes, 5 priests in 5 colors
Setup
Choose 1 cult board from those available (cult boards have two different sides to choose from). Any other cult boards will not be used in this game: return them to the box.
Place your chosen cult board and the town and ritual boards in the center of the table, within easy reach of all players. The ritual board begins the game face-down.
Place the 13 Elder Sign tokens face-up ('shattered' side down) on the cult board in the spaces marked with an Elder Sign icon. If a cult board requires additional setup, follow the instructions on the board.
Shuffle the Chamber deck and place it face-down on the draw space to the left of the card display board (there is also a space for its discard pile to the right of the board). Draw the top 3 cards from the Chamber deck and lay them out face-up on their spaces on the card display board.
If a deck runs out during the game, shuffle its discard pile to form a new deck.
If you're using the generic Monster card deck, place it anywhere on the table.
If you're using expansions, shuffle all unique Monster cards together, including just one generic Deep One card. Shuffle all Investigator cards together. Place the decks in the same way as above. With these decks in play, you will have a total of 9 cards face-up on the card display board. Alternatively, you can place the decks and the face-up cards anywhere on the table, and not use the card display board.
Each player takes a priest board and a sanctum board and places it in front of them.
Each player takes a raid marker and places it on the 0 space of the raid strength track on their sanctum board.
Each player chooses a color and takes the priest cultist and 6 acolyte cultists of that color.
Each player places their priest and 2 of their acolytes on the cultist pool space on their priest board, and their remaining 4 acolytes on the asylum space on their sanctum board.
Shuffle the Priest deck. Each player draws 1 card and places it face-up on the Priest space on their priest board. The remaining Priest cards will not be used in this game: return them to the box.
Select one person to be the first player and give them the First Player marker.
In turn order (starting with the first player and going clockwise around the table), each player takes starting treasure equal to their number in the order: i.e. the 1st player gets 1 treasure, the 2nd player gets 2 treasures, the 3rd player gets 3 treasures, and so on. Starting treasure is stored on the exposed resources space on your sanctum board.
Sort the treasure, blood, magic, and spellbook tokens by type and place them within easy reach of all the players.
Playing the Game
The game is divided into rounds. Each round consists of an Action phase in which players take turns placing all their available cultists on the various boards, followed by a Preparation phase.
Action phase
1. Place cultists
The first player takes their turn by choosing 1 cultist (either their priest or one of their acolytes) from their cultist pool and placing it on an available action space on their priest board, the town board, the ritual board, or the cult board.
They then activate that space by paying any cost in resources outlined in broken red (some spaces have no cost) and gaining any rewards outlined in blue, and performing any other instructions on the space. Then the other players, in clockwise order around the table, each take a turn by placing one of their cultists in the same way.
Only 1 cultist can be on a space at a time (unless a cultist has skulked—see below) and only your priest may use the priest-only action spaces on the priest board.
Sometimes, placing a cultist leads you to perform further actions.
EXAMPLE: Zelda has a Byakhee in her lair. Before she places her next cultist, she discards the Byakhee to steal a spellbook from Frank (as per the Byakhee's ability) and puts the spellbook in her exposed resources space. She then places a cultist on the Silver Twilight Lodge as her action, spending the spellbook she just acquired. She gains a chamber and a monster. She chooses the available Dimensional Shambler, and then takes one of Amelia's cultists and places it on the card (as per the Shambler's ability). She then chooses her chamber and places it in her sanctum. Because she just placed a new chamber, she can also reallocate her resources. All this in one turn!
Continue taking turns in clockwise order until all players have placed all their cultists.
When you run out of available cultists, skip your turn until all the other players also run out of available cultists.
If you somehow receive a newly available cultist, you re-enter the Action phase when it's your turn, and you can place that new cultist.
2. Activate skulk space(s)
At the end of the Action phase, any cultists placed on the town board's skulk space(s)—up to one in a 2- to 4-player game, and up to 2 in a 5-player game—can now move to any town space (except Providence) and activate that location as normal, even if the space is occupied by one or more cultists. If you can't agree about the order of placement, each player in turn order places all of their skulking cultists, in whatever order they wish.
Costs and rewards
You activate a space by putting a cultist on it and paying the space's costs, shown in broken red circles.
To pay costs, take resources from your Chamber cards and/or the exposed resources space on your sanctum board and return them to the general piles. If you have to sacrifice acolytes, take them from anywhere except your escape space or asylum (you can even take them from the ritual board), and place them in your asylum. If your asylum's 4 spaces are full, place them on your priest board's escape space instead.
Once the space's costs are paid (if any), you gain its rewards, shown in blue circles. Take resources from the general piles and place them on your Chamber cards and/or the exposed resources space on your sanctum board. When you gain acolytes, take them from your asylum, and place them in your escape space. If there are no cultists in your asylum, you don't get any!
Self-sacrifice
You cannot use the cultist who triggered the action space to pay that space's cost—cultists may be fanatical and insane, but they have limits!
Preparation phase
Complete the following steps in order, each step in turn order (starting with the first player and going clockwise around the table):
- Cultists on a ritual board space advance to the next space of the ritual. The player owning the cultist takes any reward indicated on the new space. If a cultist is already on the last space of a ritual, return it to its owning player's cultist pool.
- Remove all cultists from their current locations and return them to their owning player's cultist pool. Cultists performing rituals, on an asylum space, or trapped by a monster, stay where they are.
- Any players with Monster cards that have abilities triggered during the Preparation phase activate those abilities now.
- Players may rearrange their resources between their chambers and their exposed resources space, just as they could if they were placing a new chamber.
When the Preparation phase is complete, the round is over. Now begin a new round with a new Action phase.
The Game Boards
Priest board
Each player has their own priest board. There are 5 action spaces on your priest board: 4 that only your priest cultist can use (Priest Ability, Summon Monster, Rescue Acolyte, and Chanting), and one that any cultist can use (Escape).
- Priest Ability: Place your priest cultist (only) here to use your unique priest ability. You can only use this ability once per game; flip the card face down or discard it after use.
- Summon Monster: You can only use this action space after the first investigator raid is resolved, and you can't use it if you have a monster in any of your lairs. Place your priest cultist (only) here, send an acolyte to your sanctum board's asylum space, and choose a Monster card.
- Rescue Acolyte: Place your priest cultist (only) here, pay 2 treasure and 2 blood, and move an acolyte from your sanctum board's asylum space to the priest board's escape space.
- Chanting: Place your priest cultist (only) here, then choose a chamber from one of the 3 face-up Chamber cards and place it on a space on your sanctum board. If your sanctum has all 7 chamber spaces filled, this Chanting space still lets you re-arrange your resources, and you can also choose to replace one of your Chamber cards with a new one.
- Escape: Acolytes rescued from the asylum are placed on this space. Your priest can never be placed here. Acolytes on the escape space can't take actions, block investigator raids, or be used in any way. You can also place an acolyte here as an action to earn 1 treasure. During the Preparation phase, return all acolytes on the escape space to your cultist pool.
- Cultist pool: This holds all the cultists currently available for placement during the Action phase.
- Monster Lairs: There are 3 monster lairs. When you gain a monster, place it on one of your empty lairs to gain a useful effect, resources, or other advantage. Once all 3 lairs are filled, you cannot draw or gain another until a lair is free. When you use a monster to defend against an investigator raid, discard it.
The Escape space
You can rescue acolytes from the asylum on your sanctum board by activating the Rescue Acolyte action space. This brings them back into play, but first they move to the escape space on your priest board.
If you have 4 acolytes in the asylum, any acolytes that are to be placed there instead go directly to the escape space.
Sanctum board
There are no action spaces on your sanctum board. This is where you store insane acolytes, build your sanctum, and defend against investigator raids. Your sanctum starts the game with 7 empty sanctum spaces.
- Raid Strength Track: This track records your personal raid strength value during an investigator raid.
- Exposed Resources: Place any resources that you can't store on Chamber cards here.
- Sanctum Spaces: These spaces are where you place the Chamber cards you gain during the game. Empty spaces can never hold any resources or provide any defense, and are skipped during a raid.
- Asylum: All sacrificed acolytes (i.e. those used to pay a cost), as well as acolytes lost to abilities, monsters, or investigator raids, go to the asylum. Your priest can never be sent here. The asylum can hold up to 4 acolytes; extras go to your priest board's escape space. Whenever you gain a cultist as a reward, take the cultist from your asylum and place it on your priest board's escape space.
Chambers
When you gain a Chamber card, choose from 1 of the 3 face-up available Chamber cards and place it any vacant sanctum space. Then replace the card you just drew with a new one, placed face-up, from the deck.
You may then immediately rearrange all of your resources among all your chambers and your exposed resources space, following the storage restrictions on the Chamber cards. You must place any 'excess' resources on your exposed resources space.
You can only replace an existing chamber if all 7 sanctum spaces are already occupied by Chamber cards (at which time you can also rearrange all your resources).
At any time, you may exchange 3 resource tokens of the same type in the same space for a single token representing 3 of those resources, or vice-versa.
TIP: The only time you can rearrange your resources during the Action phase is just after you've placed a new chamber. If you sense a raid coming, you may wish to place a chamber just for re-arrangement purposes.
A single token representing 3 resources still counts as 3 separate resources for the purpose of occupying chambers (e.g. a Well can only hold 1 'value 3' blood token).
Investigator raids always start by hitting your exposed resources area, then moving deeper into your sanctum chamber-by-chamber, following the arrows on the shields.
Each Chamber card has 3 characteristics:
- Defense: how much the chamber weakens an investigator raid.
- Resource: the type and number of resources the chamber can hold.
- Special Power: a chamber's unique ability or weakness, if any.
White circles anywhere except on a Chamber card represent any of the 3 basic resources: treasure, blood, magic, and atomics. You can't spend (or gain) a spellbook or Elder Sign in this way.
White circles on the Chamber cards represent any resource: treasure, blood, magic, spellbooks, and Elder Signs.
Town board
There are 14 action spaces on the town board: 12 locations and 2 skulk spaces. You may not place a cultist on a location if you can't or don't want to pay the costs of that space. For example, you can't place a cultist on Arkham just to prevent someone else going there: you must pay the Elder Sign cost.
When a location requires you to pay 'any' resources, this means any combination of basic resources (treasure, blood, magic, and/or atomics).
- Kingsport: gain 3 treasure.
- Innsmouth: gain 2 blood.
- Boston: gain 1 treasure and 1 blood.
- Dunwich: gain 1 magic.
- Silver Twilight Lodge: pay 1 spellbook, then gain 1 Monster card and 1 Chamber card from those face-up. Draw new Monster and Chamber cards, face-up, to replace the ones you took.
- Arkham: pay 1 Elder Sign, then gain 3 treasure, 2 blood, and 1 magic, and rescue 1 cultist from your asylum, placing him on your priest board's escape space.
- Miskatonic University: pay 1 treasure, 1 blood, and 1 magic, then gain a spellbook.
- Aylesbury: pay 10 treasure, then gain 2 spellbooks.
- Starry Wisdom Church: pay any 1 resource (even 1 treasure), then gain 3 treasure.
- Salem: pay any 3 resources, then gain 3 blood.
- Athenaeum: pay any 5 resources, then gain 3 magic.
- Providence: gain 1 treasure and take the First Player marker: next turn you will be first player.
Skulk spaces
In a 2-4 player game, up to 1 cultist may be placed on the main skulk action space per Action phase.
In a 5-player game, up to 2 cultists may be placed per Action phase—one on the main skulk space and one on the skulk space marked '5 players only'.
At the end of the Action phase, a player who placed a cultist on a skulk space may place that cultist on any town space (except Providence – note the 'no skulk' icon) and activate the location as normal—even if the space is occupied.
Ritual board
There are 5 action spaces on the ritual board, each the first space of one of 5 rituals.
At the start of the game the ritual board is face-down and no one can use it. After the first investigator raid is resolved the board is flipped face-up and can be used.
To start a ritual, place a cultist on one of the ritual start spaces (the labeled spaces) and pay the 2 treasure cost. You can't place a cultist directly on a space other than a start space.
During the Preparation phase, all cultists already on a start space (or an intermediate space of the Dragon Ascending ritual) advance 1 space, and then their owner immediately gains the listed rewards on the new space.
Cultists who are already on the final space of a ritual return to their owner's cultist pool.
A cultist that advanced to a ritual's final space (or an intermediate Dragon Ascending space) this turn stays on the ritual board and is not available to you during the next Action phase. The cultist can still be sacrificed (returned to its owner's asylum) during an investigator raid, or used for certain cult board functions.
TIP: A cultist sent to the ritual board will not be available next turn (for the next 3 turns, for Dragon Ascending). Keep this in mind when assigning cultists here, so you don't limit your next turn's options.
- Tulszcha Awakening: when your cultist moves to the end stage space, immediately gain 1 spellbook.
- Mao Ceremony: when your cultist moves to the end stage space, immediately gain 4 magic.
- Spectral Horror: when your cultist moves to the end stage space, immediately gain 1 Monster card and 1 Chamber card from those face-up. Draw new Monster and Chamber cards, face-up, to replace the ones you took.
- The Red Sign: when your cultist moves to the end stage space, immediately gain 6 blood.
- Dragon Ascending: when your cultist moves to the second stage space, nothing happens. When your cultist moves to the third stage space, gain 9 treasure. When your cultist moves to the end stage space, gain another 9 treasure.
Cult board
The action spaces on the cult board can only be used in a restricted order. Elder Signs must be shattered to allow progress on the board along the arrows.
There are 2 types of action spaces on cult boards: lock spaces and bonus spaces.
Lock action spaces
Lock action spaces are associated with a single Elder Sign. By placing a cultist on the space and immediately paying the indicated cost, you shatter that Elder Sign and take the Elder Sign token. Place this with the other resources in your sanctum, its 'shattered' side face-up.
Since there is only 1 Elder Sign associated with each lock space, each lock space can only be used once per game, and each Elder Sign can only be shattered once per game.
If activating the lock space results in any other effect (e.g. an investigator raid, or some benefit), this effect takes place immediately after taking the Elder Sign token.
Bonus action spaces
Many (but not all) lock spaces are linked to a bonus action space. While the lock space is unactivated and its Elder Sign is intact (i.e. on the cult board) the linked bonus action space is locked and cannot be used. Once the Elder Sign is shattered, that bonus action space is unlocked (and the orange 'unlocked' arrow is revealed), and can be used as usual for the rest of the game.
If you just shattered an Elder Sign, and that unlocked a bonus action space, you have the option to immediately move your cultist from the lock action space to the bonus action space and activate it by paying its cost. However, you may shatter the Elder Sign (and take the token) without using the unlocked bonus action space, if that space has a cost which you can't or don't want to pay.
Once a bonus action space is unlocked, it becomes available for any player to use (like any other action space), once your cultist has moved off it or the linked lock space. A cultist on the lock space blocks other cultists from being on the linked bonus space.
EXAMPLE: On the Cthulhu cult board, the Start lock space's Elder Sign can be shattered by paying 2 magic. Once it is gone, then lock spaces A, D, B, and C are all available to have their Elder Signs shattered. If the second sign shattered is lock space B, then lock space E becomes available.
Progress on the cult board
When an Elder Sign is shattered, this also (usually) unlocks access to further Elder Signs on the cult board. If any progression arrows on the cult board connect from the newly shattered Elder Sign to other lock spaces, those spaces are now accessible to anyone. Note that the arrows may originate from the lock space and/or the linked bonus space on the board.
On most cult boards, there is a lock space marked Start which must be used before any other spaces on the cult board can be used.
Note that you do not 'progress' a cultist from space to space along the arrows to use a newly available lock space or bonus action space (as you do, for example, on the ritual board). They simply become available to have a cultist placed on them in the Action phase, like any other action space.
EXAMPLE: On the Cthulhu lock space D, the bonus space allows you sacrifice a cultist (i.e., return him to your asylum) to take control of the Shoggoth. When the lock space's associated Elder Sign is first removed, you are not forced to use this option, though you block it from being used by another player until your cultist vacates the lock space or the bonus space. Now this bonus space has been unlocked however, any player who places a cultist on it must sacrifice a cultist and take control of the Shoggoth.
EXAMPLE: Cecil places a cultist on lock space B, pays 1 spellbook, and takes the associated Elder Sign token. He then advances the Deep One track by 1. Then, a 1 die investigator raid is triggered. During the Preparation phase, his cultist returns from lock space B to his cultist pool. For the rest of that game, no player may ever again place a cultist on lock space B: it's Elder Sign is shattered and it is completed.
Investigator Raids
Investigators usually trigger raids when a cult board lock space with one or more investigator icons is unlocked.
All players are raided, not just the player who triggered the raid.
To resolve an investigator raid, follow these steps in order, with all players acting simultaneously or in turn order:
-
Determine the Raiding Investigator: Roll 1 die to find out which investigator is raiding the sanctums. On a result of 1-2, take the first face-up Investigator card. On a 3-4, take the second, and on a 5-6 take the third.
-
Check the Investigator Card: Examine the Investigator card and note any special abilities on the card.
-
Roll Dice: Roll the number of raid dice indicated (each die icon represents 1 6-sided die) and total the results to find the raid strength. Take into account any modifiers to the number of dice, or the total of the results; but you must roll at least 1 die, and you can never have a raid strength of greater than 18, regardless of bonuses.
-
Set Personal Raid Strength: Each player now places their raid marker on the space of the raid strength track on their sanctum board corresponding to the raid strength.
EXAMPLE: if the raid dice result totaled 7, each player sets their raid marker to 7 on their raid strength track.
From this point on, each player keeps track of the strength of their own investigator raid. If one player successfully blocks part or all of their raid, this confers no advantage to other players, who must still suffer the raid's full effects.
-
Asylum Defense: Each player now lowers their personal raid strength by 1 for each acolyte they still have in their asylum or on their escape space. You can't choose to reduce or cancel this reduction: the raiders are taking less interest in your cult, because they can see how many of your acolytes are locked up.
Example: 4 acolytes in your asylum lowers the raid strength on your raid strength track by 4.
-
Cultist Strike: At any time during the raid, you can sacrifice your acolytes (you cannot use your priest) by moving them from anywhere to your asylum. Each sacrificed acolyte lowers your raid strength by 2. Once the 4 spaces of your asylum are full, extras go to your priest board's escape space. Note that sacrificed acolytes go to your asylum, but they do not count as part of your asylum defense for this raid.
EXAMPLE: A player has just triggered a 2 dice investigator raid. Investigators are being used, so a die is rolled and the investigator is the Private Eye, so the raid will skip every player's first chamber's defense. A raid strength of 8 is rolled on 2 dice.
First, Carol sets her raid marker to 8 on her raid strength track.
She has 2 cultists in her asylum, so she lowers the raid strength to 6.
She has only 1 treasure in exposed resources, so she lets that be destroyed.
Though her first chamber is a Trap that holds no resources and has 3 defense, it is skipped, so the raid goes straight to her second chamber, which is a Vault (Defense 2). This lowers the raid strength to 4.
Carol can now let the raid destroy the 2 blood she has in that chamber and proceed to the next one, or she can sacrifice her monster or 2 of her acolytes to stop the raid. She decides to lose the 2 blood.
Her third chamber is also a Vault, lowering the raid strength to 2. Now Carol sacrifices one of her acolytes off the ritual board (the cultist was on an end stage slot, so she isn't losing much), and moves it to her asylum. This blocks the raid's last 2 points, and the raid is now over. In the end, she lost 1 treasure, 2 blood, and an acolyte, which wasn't too bad.
Monsters and Lairs
All monsters in the base game (the 'generic' monsters) have 5 defence and no special abilities. If you are playing with only the generic monsters, there is no need to lay out 3 Monster cards; anytime you gain a monster, just take the top card from the Monster deck.
If you're using a unique Monster deck, choose one from among the 3 face-up monsters on display. After choosing, draw a replacement Monster card from the deck and place it face-up to replace the one you took.
You can only have 3 monsters, one in each of your 3 lairs. You cannot draw or gain another until a lair is free. If your lairs are full and the monster is part of a reward from an action space or ritual you do not gain the monster part of that reward.
The only ways to discard an existing monster are by discarding it in a monster strike during an investigator raid, by activating an action space that lets you discard a monster, or by using its own discard ability (e.g. the Ghoul).
Most monsters have a special ability that triggers at the specified time: when you place them in a lair, or during the Preparation phase, for example. If an ability activates when you sacrifice the monster during a raid, such an ability does not activate if you sacrifice the monster outside of a raid.
You can use the abilities of monsters in your lairs in any order you like, but you can only use each monster's ability once per phase.
If a dispute arises when multiple players activate special abilities, activate the abilities in turn order (starting with the first player and going clockwise around the table).
Winning and Scoring
When the last Elder Sign is removed from the cult board, the game immediately ends, and each player counts up their resources and totals their final score as follows:
- Elder Sign: 10 points each
- Spellbook: 5 points each
- Magic: 2 points each
- Blood: 1 point each
- Treasure: the player with the most treasure gains 5 points (on a tie, all players involved in the tie earn the 5 points). Everyone else gets 0 points for treasure.
- Monsters, cultists, chambers, etc: 0 points
The player with the most points is appointed High Priest of his deity, and wins the game.
In a tie, all winners rejoice in their shared victory … or you can play another game as a tie-breaker!
The Cult Boards
Great Cthulhu
At the start of the game, place the Shoggoth card in its space on the board, and place the Deep One marker on the 0 space of the Deep One track.
Unlike other monsters, the Shoggoth is not placed in a monster lair. If you acquire it, just place it near your Priest board.
The Shoggoth acts as a monster that blocks up to 10 raid strength from an investigator raid. If it is sacrificed in this way, it is not discarded—instead, return it to the cult board.
If another player takes control of the Shoggoth, the current controller loses it and must give the card it to its new keeper.
When the Shoggoth is sacrificed to gain an Elder Sign (on the space that says "lose control of the Shoggoth"), return it to the cult board, then remove the selected Elder Sign from the board, without paying the cost for shattering it. Any effects of shattering that Sign still take place: e.g., Deep One track increases, investigator raids, etc. If you use the Shoggoth in this way on a location with a reusable space, you can't also activate that space.
Move the Deep One counter along the track 1 space each time an investigator raid occurs. It is used in conjunction with the 2 Deep One spaces on the cult board.
If you are using the Deep One monster cards, the Deep One track has no connection to those cards.
Black Goat
The Black Goat board has 2 start sites.
When you shatter an Elder Sign and trigger an investigator raid, you often gain a free monster (this is noted on the space). These monsters are always gained after the investigator raid, so they can't help defend against it.
If you have 3 monsters in your lairs you can still shatter an Elder Sign that provides a monster—and if you sacrifice one or more monsters to defend against the raid, you can then place your new monster in an open lair. If you do not have any such open lairs after the raid, you do not gain the free monster.
One space on this board lets you rescue 2 acolytes for 5 treasure. If you have just 1 acolyte in your asylum you can still use this space (but you only rescue the 1).
Note that you can't use the Cult Skulk to shatter an Elder Sign; only to activate an already-unlocked space on this cult board.
Crawling Chaos
Several of this board's spaces send acolytes to worship Azathoth. When you do so, place them in the central pool. An acolyte placed in the pool is no longer available for normal placement or sacrifice, and must be retrieved somehow to be used elsewhere.
The Azathoth pool has 2 other effects:
- When an investigator raid is triggered, add +1 to the raid strength (to a maximum total of 18) for each acolyte worshipping Azathoth. e.g. if 4 acolytes were worshiping Azathoth, and a raid strength roll resulted in a strength of 7, it would be increased to 11.
- If the number of cultists worshiping Azathoth ever equals 3 times the number of players (e.g. 9 in a 3-player game) the game ends and all players lose.
Spaces on the Crawling Chaos board are subdivided into 4 sections, each containing 3 Elder Signs. Each section contains an avatar of Nyarlathotep: in order, the Howler, the Bloated Woman, the Dark Pharaoh, and the Haunter of the Dark.
When you shatter an avatar's Elder Sign, all 3 spaces of the next section become available.
In addition, you gain that avatar, which gives you a benefit every Preparation phase while you control it:
- The Howler lets you retrieve any acolyte (you may choose your own) from the Azathoth pool, then gives you 1 magic.
- The Bloated Woman lets you place an acolyte from the Azathoth pool on a ritual board start space. Because this happens in the Preparation phase, you won't gain the rewards till the end of the next Action phase, but you do get to pick your track first, and block other players.
- The Dark Pharaoh sends other player's acolytes to Azathoth, and earns a reward for doing so.
- The Haunter allows you to gain a monster if you don't have one. Acquring the Haunter allows access to the last space on the Crawling Chaos board.
Note that you can't use the Cult Skulk to shatter an Elder Sign; only to activate an already-unlocked space on this cult board.
Opener of the Way
On the Opener of the Way board, all the spaces are treated as Start spaces. They are not connected by arrows and can be unlocked in any order, but some have requirements which must be met first.
The Evolution track has 3 levels, tracking your acolyte's degeneration into a Thing of the Outer Spheres. The first stage is Mutant, the second is Abomination, and the last is the Spawn of Yog-Sothoth (Spawn, for short). Your acolytes can enter these stages, or advance through them, by unlocking or activating various spaces on the board. This does not count as "sacrificing" the acolyte, so you can send an acolyte which you placed on a space to the Evolution track.
While on the Evolution track, acolytes are no longer available for placement on action spaces, and can't be sacrificed to defend against an investigator raid. They do, however, provide a passive defense against attacks. Each of your Mutants blocks 2 points of a raid, each Abomination 3, and each Spawn 4.
Acolytes on the Evolution track are immune to all effects that target acolytes, such as the Fungi from Yuggoth or the Yithian effects. Their only activity is to progress down the track, or to be discarded in lieu of a spellbook (in the case of an Abomination or Spawn). You can discard them anytime you want to use a spellbook, and they can be destroyed by a Byakhee's special ability (which doesn't target acolytes). In this case, the Byakhee user does gain a spellbook in return.
This board also features re-usable investigator raid spaces. These are triggered by using the action space, not simply by shattering the Elder Sign. For example, a player who unlocked the space that costs 2 magic could choose not to send his minion to the Mutant box, and thus avoid the 1 die investigator raid. Of course, usually it's best to use the space.
Note that you can't use the Cult Skulk to shatter an Elder Sign; only to activate an already-unlocked space on this cult board.
Sleeper
The Sleeper board has many Skulk spaces, including the unique Ritual Skulk, the Flex Skulk, and the Block Skulk.
This board also has a space which rewards 4 treasure, but you must have at least 1 cultist on any Skulk (either the Town Skulk, or any of the other Skulks on this cult board) to use this space.
More than 1 Skulking cultist does not increase the reward.
The Ritual Skulk lets a player place a cultist on the Start space (only) of any ritual track. When you do so, you must pay the 2 treasure cost as normal. When the Ritual board activates, this cultist does advance to the next stage and gain rewards, because the Skulk is placed before the rituals are advanced. Of course you must still leave your cultist on the ritual board for the next turn (or longer, if you chose Dragon Ascending).
The Flex Skulk lets you place the cultist as per the normal Town Skulk or the Ritual Skulk.
The Block Skulk must be the first Skulk assigned at the end of the Action phase. It acts the same as a Flex Skulk except no other Skulk can be assigned to its spot.
Tcho-Tcho
The Tcho-Tcho board has 2 Start spaces, and 4 more spaces that are not unlocked through normal play. Instead, these 4 spaces are triggered by the Growth track, which charts the increase in size of Ubbo-Sathla, a terrible entity which the Tcho-Tchos grow in a secret place.
Many of the spaces increment the Growth track. When the Growth marker reaches or passes a trigger point, make a note. After the current space's effects are completely finished (including any raids that were triggered), then resolve the triggered space.
The 4 Growth sites each give an Elder Sign to a player with the most of a particular resource, then trigger a raid. For example, the triggered space tied to 2 on the track ("When the Growth track reaches 2... ") gives its Elder Sign to the player with the most treasure, then triggers a 1 die investigator raid.
If there is a tie for the player with the most resources in the named category, then the player whose action triggered the Growth track action chooses which player (in the tie) gains the Elder Sign.
Example: Zelda pays 2 treasure, 2 blood, and 2 magic to shatter the Elder Sign on the Tcho-Tcho cult board. This also increases the Growth track by 2, and then triggers a 2 dice investigator raid. Because this raises the Growth track from "4" to "6", the Growth site tied to "5" will have to be resolved after this attack. Once that's done with, Zelda reads the board, and sees that the new Elder Sign must be given to the player with the most blood. Unfortunately, Zelda has 0 blood, while the other 3 players each have 2. She chooses the least menacing player to gain the Elder Sign. Then another 2 dice investigator raid is triggered, due to the Growth site. Zelda crosses her fingers, hoping this second attack will destroy the new Elder Sign she was forced to give to her rival.
Windwalker
Three of the Windwalker spaces activate entities which power the 3 mystic glaciers. These entities are the Wendigo, the Gnoph-Keh, and Rhan-Tegoth. Place the appropriate card on the relevant glacier. The Wendigo and Gnoph-Keh Monster cards have nothing to do with the Windwalker entities.
When you unlock Rhan-Tegoth's Elder Sign, your Priest ability is also flipped face-up, so it can be used a second time. If you have not yet used your Priest ability, there is no additional benefit from this space.
Once a glacier is activated, it provides its rewards for all players in every Preparation phase.
Watcher
This board has 4 Start spaces.
Slime Molds are monsters. They act like normal monsters in every way except they have a defense of -1 against an investigator raid (which naturally discourages their use).
The cost of some actions is to take a Slime Mold: you must be able to take a Slime Mold to take the action. You must take a Slime Mold when it is given to you, and it does use up one of your monster lairs. If all your lairs are filled when someone else gives you a Slime Mold, you do not need to take it.
Note that the Slime Sea Overlook makes your Slime Molds worth 4 defence each, as long as you have a cultist there.
The Eternal Skulk: when skulks trigger, place the acolyte on this space on any town space (except Providence), then lay it on its side to indicate that it is "eternal". From now on, every Action phase, gain the resources on that space. If the space has a cost, you can choose not to pay the cost, in which case you do not gain the rewards.
An Eternal Skulk cultist does not block other cultists from being placed on that space—even other Eternal Skulks.
The only way to get an acolyte back from an Eternal Skulk is by sacrificing it (or perhaps if it is kidnapped by some monster).
One space on the Watcher board forces all players to place one of their acolytes back into the game box, out of the game. This acolyte can be taken from the asylum. Another space instructs all players to put all their acolytes on their escape space. This includes acolytes on the ritual board, but does not include your priest cultist.
Ancients
The Ancients introduces a new resource, atomics, which is only used on this board. Certain Elder Sign spaces require atomics to be unlocked.
Atomics can also be used for any "exchange" space. For example, a player could place an acolyte on Starry Wisdom on the town board, and exchange 1 atomic for 3 treasure.
Atomics are worth 0 VP at the end of the game, and must be stored in chambers (and are destroyed by investigator raids) like any other resource.
Yellow Sign
The Start space on the Yellow Sign board costs nothing, and gives you the King in Yellow card. Place this card by your priest board. It acts as a new action space that only you can activate (while you have control of the King).
To use the King in Yellow, place an acolyte on the card (it cannot be your priest), then pay the cost: 1 each of treasure, blood, and magic. Then add an acolyte from your asylum directly to your pool, ready for action. If another player takes control of the King in Yellow while you have an acolyte on him, that acolyte goes to your escape space.
Once the King has been unlocked, the start spaces of 3 ritual tracks become available on the cult board. These tracks must also be unlocked, step by step, and can't be accessed until at least 2 Elder Signs on that track have been shattered: the first Ritual Start space, and at least 1 space past that.
Because of the way you shatter Elder Signs and unlock spaces, you can never have all 3 ritual tracks used in their entirety in any one game.
When you have a cultist on a ritual track, he returns to your pool when, at the end of the Action phase, no more spaces beyond the one he is currently on are unlocked. You could, therefore, have a cultist already on a ritual track, and if the next site was unlocked before he'd reached it, he could continue on the track.
One track costs you a chamber to embark upon: discard any of your chambers, placing any resources in it on your exposed resources space.
The other 2 tracks do not cost you anything to embark upon. Instead, you must select an opponent, who gains either 1 magic or 1 blood (depending on the track).
Glossary
Acolyte Each player has up to 6 cultists that are acolytes.
Action space Any space on a board that can be activated by placing a cultist on it and paying its costs (indicated by icons outlined in broken red). Once the action space is activated, any rewards (indicated by icons outlined in blue) are gained, and any special instructions on the space are perfomed.
Chambers The chambers of your sanctum are represented by the Chamber cards you place on your empty sanctum spaces on your sanctum board. You can store resources on Chamber cards, and some provide you with defense during an investigator raid.
Cultist A cultist is either an acolyte cultist or a priest cultist. Each player can have up to 6 acolyte cultists and 1 priest cultist during the game. Both acolytes and priests can be used to activate action spaces.
Investigator raid An investigator raid is triggered when a cult board action space containing an investigator icon or icons is activated. A raid affects all players at the same time, not just the player who triggered it.
Lairs The 3 spaces on your priest board where you store monsters.
Locked A bonus space on a cult board may be locked by an Elder Sign. Once the Elder Sign is shattered, the space becomes unlocked and available for activation.
Monsters Monsters are either generic cards or special cards with varying attributes. They are placed in your lairs and can provide you with special abilities, or can be discarded during an investigator raid for their defense value.
Priest Each player has 1 special cultist that is a priest. Only your priest can use the action spaces on your priest board, and your priest can't be sacrificed, placed in your asylum or escape space, or eliminated.
Raid Strength The raid strength of an investigator raid is tracked individually on each player's sanctum board. The initial strength is determined by rolling a number of 6-sided dice, and then is personally modified by a player's use of defenses, cultists, monsters and special abilities.
Resources The 3 basic resources are treasure, blood, and magic. Spellbooks and Elder Signs are also resources.
Rituals These are a series of action spaces on the ritual board that provide significant rewards, but tie up cultists for several turns.
Sacrifice An acolyte is sacrificed when it is removed from a space in order to pay a cost, or used in a cultist strike during an investigator raid. Sacrificed acolytes go to your asylum and, once that is full, to your escape space. Your priest cultist can never be sacrificed.
Sanctum Your sanctum is represented on your sanctum board. You start the game with 7 empty sanctum spaces and an exposed resources space.
Shatter You shatter an Elder Sign by activating the locked space associated with the Elder Sign. Take the Elder Sign token and store it with your other resources on your sanctum board. Shattering an Elder Sign may unlock an associated bonus action space or trigger an investigator raid or other effect. Shattering an Elder Sign allows access to further spaces on the cult board along the routes indicated by arrows.
Skulk A cultist gains the ability to skulk when it is placed on the town board skulk space or a cult board skulk space. 'Skulks' typically move onto already occupied action spaces, which is not normally allowed.
Towns These are action spaces on the town board that can be activated to provide resources.
Variant
Aggressive Investigators!
Experienced players may wish to have more deadly investigator raids. If all players agree, instead of rolling 2 dice for a raid, roll 1 die and add 6. Instead of rolling 3 dice for a raid, roll 1 die and add 12.
Investigator modificiations (such as for the Minister or the Hobo) are added or subtracted normally.
For example, the Antiquarian reduces the raid strength by 1 die. If he is used when a 1 die+12 raid is triggered, subtract the 1 die, and just use a flat 12 for the attack.