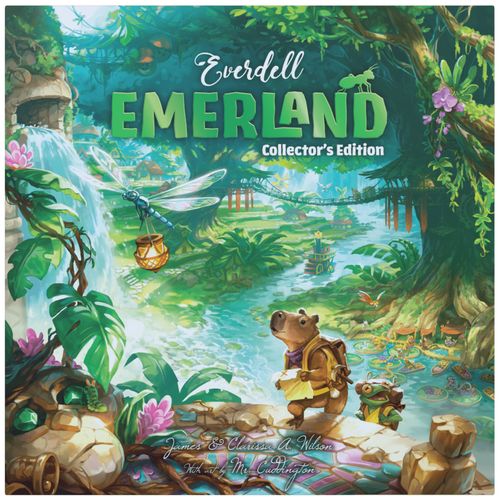
Everdell Emerland
Everdell Emerland Rulebook
Table of Contents
Table of Contents
A Blessing from the Elder
May the sun brighten your face in the morning, and the moon sing you to sleep at night. May your heart be as carefree as the river. May your will be as strong as the stone, and your laughter as refreshing as the wind. May your appetite be always up to the task, and may your days be long and bountiful, and may your friends put up with you and your family excuse you, and your fur or scales be ever fresh and shiny!
Game Contents
- 1 Rulebook
- 1 Game Board
- 1 3D Jungle Ruins (Includes Lost City Path Board)
- 3 Board Overlays
- 24 Worker Critter Meeples (6 Capybaras, 6 Tree Frogs, 6 Chameleons, 6 Monkeys)
- 16 Helper Critter Meeples (4 Beetles, 4 Caterpillars, 4 Dragonflies, 4 Ants)
- 1 Cloth Artifact Draw Bag
- 100 Double-Sided Jungle Cards
- 45 Artifact Tokens
- 4 River Market Dice
- Resource Tokens (25 Bamboo, 25 Leaf, 25 Fig, 25 Marble)
- Point Tokens (30 1s and 10 3s)
- 18 Realm Cards (Mini Size)
- 4 Player Reference Cards
- 25 Emeralds
- 20 Harps
There is no limit to the amount of resources, Harps, Emeralds, or Point tokens a player may have during the game. If any of these components run out, use something else as a substitute.
Solo Components:
- 9 Expedition Cards
- 9 Excavation Cards
- 9 Trick Cards
New Features (Comparing Emerland to Everdell)
Emerland is built upon the main mechanical structure of Everdell, but there are many important and complex differences for you to encounter and master. If you have never played Everdell before, you can skip this page.
- Your Hand has a limit of 6 cards, while your City has a limit of 12.
- Duplicate cards in the Plateau get stacked on the same spot so there are always 6 different cards in view.
- One of your Workers is designated as an Archaeologist, who travels along a separate path over the course of the seasons to explore the Jungle Ruins in a search for the Lost City, discovering Artifacts and earning additional points. Artifacts are unique treasures that can add points and instant bonuses.
- You now also have Helpers, who have special abilities to aid your Workers. If a Helper is placed on an eligible space with a Worker, that space is activated twice. A Helper can also accompany a Worker as a negotiator to allow that Worker to visit an occupied space. Additionally, there are some spaces on the board that may only be visited by Helpers.
- Nearly every card in the deck features brand new abilities, creating an abundance of fresh strategies and combos to explore.
- There is no Common vs. Unique designation for Critters or Constructions.
- All Red cards have an Exclusive Location for the owner of the card. Red Critters have an additional Exclusive Location that can only be visited by opponents.
- Artisans are an all-new card type. These cards are activated by discarding a card from your hand beneath them. This qualifies as a turn action.
- Cards are double-sided, with one side the Basic side and the other representing an . Cards are generally played first on the Basic side, with Upgrades achieved through various means. The Upgraded side of each card has a higher base point value and enhanced abilities.
The majesty and mystery of the jungle sings out to pleasure-seekers and fortune-hunters alike. Emerland rewards explorers with enchanting adventures, breathtaking beauty, exquisite treasures, and the thrill of constant discovery.
Overview
In Emerland, you send critter Workers to various locations on the board to gather resources. You use these resources to play cards face-up in front of you, forming your jungle city and helping you to score points.
Each turn, you take one of 6 possible actions:
- Place a Worker (with or without Helpers)
- Place a Helper
- Play a Card
- Use an Artisan Card
- Excavate with your Archaeologist
- Prepare for Season
All 6 actions will be explained in greater detail later in the rulebook.
If all of your Workers are deployed and you can perform no other actions (or don't wish to), you may prepare for the next season by bringing back all of your Workers, gaining a new Worker or Helper critter (depending on the season), and performing the action described for the following season. The first player to Prepare for Season will also reroll the 4 orange River Market Dice.
A player is finished when they have played the last season (spring) and can no longer perform any actions. After all players have finished, the player with the most points is the winner.
The country of Emerland boasts the perfect climate and landscape for a relaxing tropical getaway! In this delightful realm of music, art, and exploration, you will find your heart and mind transported and refreshed. Delicious fruits, striking buildings, unforgettable music, ancient history, and the world's most beautiful and intricate jewelry! With sunset river rides and enchantment at every turn, Emerland is the perfect berrymoon location. Five suns!
—Berry Wettail, Happy Traveler
Game Setup
- Place the Game Board in the center of the table. a. If playing with 3 Players: Add the 3p Board Overlay to the lower right portion of the board. b. If playing with 4 Players: Add the 3p and 4p Board Overlays to the top portion and lower portion of the board.
- Place the Lost City Path Board above the Game Board.
- When playing with the 3D Jungle Ruins, construct it using the provided assembly sheet and place it on top of the Lost City Path Board as shown. If playing without it, make sure the Lost City Path side of the board is face-up.
- Place the Artifact Tokens into the draw bag and place it nearby.
- Shuffle the deck of Jungle cards and place 6 cards in the Plateau. If there are any duplicate cards in the Plateau, stack them together by name and refill the empty spots from the deck. Place the deck near the board. It is okay if players see the top card of the deck.
- Shuffle the Realm Cards into a face-down deck, then reveal and place 3 of them on the top area of the board.
- Place the resources near their designated spots beside the Game Board.
- Place the Point Tokens, Emeralds, and Harps in separate piles near the Game Board.
- Roll the 4 orange River Market dice and place them on the lily pads in the river.
- Place stacks of Point Tokens on each space of the Lost City Path as shown on the spaces on the path. a. 2 Players: Only create a single stack on each space, using the most valuable space.
Note: The cards are all double-sided. The side with the cost and the dark lower portion should be face-up for all cards. This is the basic starting side of the card. The dark lower portion shows what the ability is on the upgraded side of the card.
Player Setup
- Each player chooses a color and takes all of the Worker critters and Helpers of that color. On the lower section of the board, each player will place 1 Helper in autumn, 1 Worker in winter, and 2 Workers, along with 1 Helper in spring.
- Each player will place 1 Worker on the first space of the Lost City Path to represent their Archaeologist. This means that each player has 2 Worker critters and 2 Helpers to start the game.
- Each player gains 1 Emerald from the supply.
- The First player draws 3 Jungle Cards from the deck, the second player draws 4 Jungle Cards, the third player draws 5 Jungle Cards, and the fourth player draws 6 Jungle Cards.
The most musical player goes first.
How to Play
On your turn, you must perform one of the following actions:
- Place a Worker (with or without a Helper)
- Place a Helper
- Play a Card
- Use an Artisan Card
- Excavate with your Archaeologist
- Prepare for Season
Place a Worker
Place one of your Workers on any eligible location on the board and perform the action there immediately.
You may also choose to bring along one of your Helpers as a guide. If you do so, activate the action there twice.
If a Worker, either yours or an opponent's, is already at the location, you must bring along one of your Helpers to act as a negotiator in order to place there. This negotiator Helper does not activate the space twice; you would need to bring along 2 Helpers in this situation, one to serve as a negotiator to permit access and one as a guide to activate the space twice.
In the very rare event that you cannot place a Worker because all spaces are full and you do not have a Helper to act as a negotiator, you cannot place a Worker as an action for your turn.
Main Board Location Types
Green
- Place a Worker on an unoccupied space.
- Place a Worker with a Helper as a guide on an unoccupied space to activate it twice.
- Place a Worker with a Helper as a negotiator on a space occupied by ANY player including yourself to gain access. (A second Helper may act as a guide to activate it twice.)
Brown
- Place one Helper at a time on a space, regardless of whether it is already occupied.
Fountain
- Place a Worker on an unoccupied space.
- Place a Worker and a Helper as a negotiator on a space occupied by another player. (Helpers may NOT be used as guides to activate these spaces twice.)
Green Locations
These spaces provide you with resources:
- 2 Emeralds
- 3 Bamboo
- 2 Leaves
- 2 Figs
- 1 Marble and draw 1 card from the deck
You may have any number of your workers on a green space as long as you use a Helper as a Negotiator for each one after the first.
At the River Market location, gain resources as shown on any 2 of the dice in the River Market. These dice represent the orange boats used by traders at the floating market. If you double the action space with a Helper, gain the results of each die you choose twice.
Fountain Locations
You may only have 1 of your workers on each Fountain space at a time. At the Realm location, pay 2 Emeralds from your supply to gain 1 of the face-up Realm cards, or draw the top card of the face-down Realm deck. Place the Realm in your play area. This represents your exploration into further areas of the jungle. Each Realm that you have allows you to play an additional card into your city, and scores based on the conditions of the Realm, as described later.
At the Song location, pay 1 Emerald to gain 1 Harp to your play area. Also, draw up to your hand limit. The jungle is vibrant with music, and filling your city with songs will attract more critters to live in your dwellings.
Board Overlay Locations
These Fountain Locations will be only be available in 3- or 4-player games. Place the overlay on the board in the spot indicated on the back of each piece during Game Setup.
3 Player space:
- Draw 2 cards from the Plateau into your hand, gain 1 Emerald, and gain the reward shown on 1 of the Market Dice. Replenish the Plateau after you've drawn both cards.
4 Player spaces:
- Gain 1 Emerald and gain 1 Artifact from the bag.
- Pay 1 Emerald to gain the reward of all 4 River Market dice.
Helpers may not be used as a guide to double any of the Fountain spaces. You can still bring a Helper as a negotiator if another player is already at either of these locations.
Important: You may only have 1 Worker at each of the Fountain locations at a time. You may NOT bring along a Helper to act as a guide, so you cannot activate these spaces twice. You can bring a Helper as a negotiator, though, if another player is already at either of these locations.
Destination Cards
You may visit any red Destination card that you have played into your city to activate their ability. You may only have up to one of your Workers on a Destination card at a time.
You may also visit any Construction Destination card in any opponent's city. Place your Worker on the Community space in the top right of the card. When you visit one of these, the opponent who owns that card gains point tokens from the supply as shown beneath the space where you placed your Worker.
The owner of the card may also visit it by placing their Worker on the stone circle at the center of the card. In this way, these cards are available to both the owner and one opponent. The owner of the card may only place a Worker on the location at the center of the card.
Important: Helpers may NOT be used as negotiators or guides on Destination Cards.
Place a Helper
There are three locations where you may place a Helper by themselves.
Upgrade Space
This space on the board may only be visited by a Helper. You may place one of your Helpers here on your turn, then pay 1 Emerald from your supply to upgrade any one card in your city. You will learn about upgrading cards later.
Mooring Space
Draw the top 2 cards from the deck or gain the reward of 1 of the Market Dice.
Helpers may only be placed on these locations one at a time. Helper board locations do not require you to bring an extra Helper as a negotiator to go there, even if the space is already occupied.
Critter Destination Cards (in your city)
These show a Worker placement symbol that is half green and half brown. You may place a Worker or a Helper on these cards to activate them. If the card has either a Worker or a Helper on it, you may not visit it again until the space is empty.
Play a Card
As your action, you may play one card. To play a card, you must pay the resources shown on the left side of the card from your supply to the general supply. Then place the card face-up in front of you. These cards will form your city.
Cards may be played either from your hand or from the 6 face-up cards in the Plateau. If you play a card from the Plateau, refill the Plateau from the deck at the end of your turn.
All cards are double-sided. When you first play a card, play it to its Basic side. This is the side with a dark area at the bottom that shows the upgraded ability on the other side. Additionally, the Basic side features the resource cost to play the card, whereas the Upgraded side features a blooming flower.
All cards in the deck, the Plateau, and your hand should have the basic sides face-up.
Harps
Critter cards may be played for zero resources by using 1 of your Harps. To do so, place a Harp from your supply on an upgraded Construction in your city.
Then play a Critter of any color into your city, but play it so the upgraded side is face-up. Once played, each Harp remains on the card on which it was placed.
Important: You may only have 1 Harp per color of Construction in your city. So if you used a Harp on an upgraded green Construction, you could not use a Harp on another upgraded green Construction later.
Basic Side card diagram callouts: Cost of Resources to play the card into your city; Color card type; Card ability; Quantity in the deck; End game Point Value; Critter/Construction; Upgrade Card ability preview.
Upgraded Side card diagram callouts: Upgrade Flower Icon; Upgrade Card ability; Upgraded Point Value.
Card Types and Keywords
There are two main types of cards: Constructions and Critters.
"Critters" cost Figs to play, or may be played for free by using a Harp (see Harps, above).
"Constructions" cost a combination of Bamboo, Leaves, or Marble.
Unlike other games in the Everdell world, Emerland cards do not have the Common/Unique keywords. Your city may duplicate cards.
Each of the 6 card types functions in a slightly different way, as outlined below:
- Production: Activate immediately when played. Production cards also activate when you prepare for autumn and for spring.
- Governance: Activate as described on the card, granting bonuses when you play cards or perform certain actions. Blue cards do not trigger themselves when played.
- Traveler: Activate only once, immediately when played.
- Destination: These activate when you place a Worker on them (or a Helper on a Critter card). They do not activate when played.
- Artisan: As your action on your turn, you may discard any 1 card from your hand beneath an Artisan card in your city to activate it. There is a limit to the number of cards you may have beneath an Artisan card, as shown on the card on the arrow icon.
- Prosperity: At the end of the game, these cards are worth their listed points and the bonus points if you meet the requirement on the card.
Timing
When a card is played, follow this sequence of actions, when applicable:
- Pay resources or use a Harp to play the card into your city.
- Place the newly played card into your city.
- Resolve the newly played card effect if it is a Production or Traveler card.
- Resolve triggered effects from Governance cards already in your city.
If the card came from the Plateau, refill the Plateau from the deck.
Additional Card Rules
- You have 12 spaces in your city that may be filled with 1 card each, including duplicates. When your city is full, you may not play any more cards.
- Each Realm (see Realm Cards, below) that you have grants you 1 additional space in your city to play a card.
- Any time you get to draw a card, draw it from the deck, unless explicitly instructed otherwise.
- You have a strict hand limit of 6 cards; you may never draw beyond 6 cards.
- Any time you discard a card, discard it from your hand.
- If there are ever any duplicate cards in the Plateau, stack them in the same spot and refill the empty spot from the deck. If you play a card from such a stack, the remaining card stays in the Plateau.
- If at any point you must draw a card from the deck or replace a card in the Plateau and there are no cards in the deck, shuffle the discard pile to form a new deck.
- All card abilities are optional.
Upgrading Cards
Whenever you perform an action that shows the upgrade icon, choose one card in your city and flip it over from its basic side to its upgraded side. The card now has a new ability and is worth 1 more point.
Most cards activate when you upgrade them, as outlined below:
- Production: Activate the card.
- Governance: Gain the new ability.
- Traveler: Activate the card.
- Destination: Each player who has a Worker or Helper on the card gets to activate it. If two players are on a Destination Construction card, the owner of the card gets to activate it first. Note that the owner of the card gains the listed point tokens only if the opponent decides also to activate it. Either way, all Workers on the card remain on the card.
- Artisan: The card now has the new ability. Any cards already under the Artisan card remain there and count towards the total amount allowed.
- Prosperity: The end game goal on the card is now easier to attain and worth more points.
Important: You must have an upgraded Construction card to use a Harp on it. You may only have 1 Harp per color of upgraded Construction in your city.
Using an Artisan Card
As previously described, you may use 1 of your Artisan cards in your city. Using an Artisan card counts as your turn.
As your action on your turn, you may discard any 1 card from your hand beneath an Artisan card in your city to activate it. The number of cards you may have beneath an Artisan card is limited to what is shown on the card on the arrow icon.
Example: This card may be activated up to 2 separate times by discarding a card beneath it each time.
Excavate with your Archaeologist
As an action, you may move your Archaeologist forward one space on the path toward the Lost City. To do so, pay the number of resources shown on the next section of the path to the supply, and discard at least 1 card from your hand (you may discard any amount that you would like). Then move your archaeologist forward to the next space. If there are any piles of point tokens here, take the pile with the most tokens.
Then, for every card that you discarded, draw 1 Artifact token from the bag. Other players may see these. Choose 1 Artifact to keep, and return the rest to the bag.
You may only move your Archaeologist up to the space allowed for the season you are currently in, as shown by the Season icon above the spaces. So while you are in summer, you may only move 1 space. You do not have to move your Archaeologist at all if you choose not to.
If you did not move your Archaeologist in summer or autumn, you could move 3 spaces while in winter, but only 1 space per turn.
The final spaces on the path represent you discovering the Lost City. When moving into the Lost City, place your Archaeologist on the open space worth the most end game points. You cannot move any more spaces after you have reached the Lost City.
Artifacts
Any time you perform an action showing the Artifact card symbol, draw that many Artifacts.
Important: You may always keep only 1 of the Artifacts, regardless of how many you draw. The rest must be returned to the bag.
Many of the Artifacts give you an immediate reward, as shown on the top of the Artifact. Other Artifacts are simply worth points at the end of the game. If you draw and choose to keep the treasure chest artifact, you may draw and keep another Artifact immediately.
The Artifacts vary greatly in point value, with the highest valued Artifact being worth a significant 7 points. It is often beneficial to search through more Artifacts if you can.
Realm Cards
Each Realm Card you have gained gives you 1 more space in your city to play a card.
Realms are also worth points at the end of the game based on different aspects in your city. They are worth the listed amount of points for each item shown that you have.
Prepare for Season
If you have placed all of your Workers, you may take the Prepare for Season action on your turn. You do not need to have placed all of your Helpers. To do so, retrieve all of your Workers and Helpers from the board and Destination cards, and perform the steps for the next season that you are preparing for, as outlined below.
The game begins with you in summer, so the first season you prepare for will be autumn. Spring is the final season that you will prepare for.
Important: Players do not have to perform the Prepare for Season action at the same time.
Only you Prepare for Season if you choose this action. Other players will continue with their next turns as normal.
Autumn: Gain 1 Helper and activate all Green Production cards in your city, in any order you wish.
The first player to prepare for autumn will also reroll the 4 orange River Market Dice.
Winter: Gain 1 Worker and 1 Emerald.
The first player to prepare for winter will also reroll the 4 orange River Market Dice.
Also, the winter rains have arrived! Discard all cards from the Plateau, then refill the Plateau.
Spring: Gain 2 Workers and 1 Helper, and activate all Green Production cards in your city, in any order you wish.
The first player to prepare for spring will also reroll the 4 orange River Market Dice.
End of Game
When you have reached the end of spring and cannot perform any more actions (or do not wish to), you have finished the game and must pass. Once you have passed, you cannot come back into the game. Your Workers remain on the board, and other players must still use Helpers as negotiators to visit spaces you occupy.
Any unfinished players continue playing until all players have passed. Once all players have passed, count up the final score.
The player with the most points is the winner.
If there is a tie, check these tie breakers in this order:
- Most upgraded cards in their city
- Furthest position on the Lost City path
- Most Realms
- Most leftover resources, including emeralds
If still tied, players share the victory!
Scoring
- Base point value of Jungle cards in your city
- Bonus Prosperity points
- Point tokens
- Points on Artifacts
- Position of your Archaeologist, if you made it to the Lost City
- Points from Realm cards
- 1 point for every two leftover resources, including emeralds
Scoring Example
| Card Base Points | Prosperity Card Bonus Points | Point Tokens | Artifacts | Archaeologist Position | Realms | Sets of 2 Resources | Total Score |
|---|---|---|---|---|---|---|---|
| 32 | 13 (River Wharf: 5, Statue: 5, Maestro: 3) | 7 | 10 | 3 | 10 (Cavern: 5, Ruins: 5) | 2 | 77 |
Solo Mode
For years, the infamous Ape explorer, Professor Koto D. Figsmash the III, has been hunting for the fabled lost city of the Ancients. With his team of scavenger monkeys and digger ants, Professor Koto has prepared an epic expedition into the uncharted realms of Emerland. He will stop at nothing to satisfy his relentless thirst for riches and fame, and he does not care who or what gets trampled along the way.
You must be diligent and swift to discover and preserve the artifacts of the Ancients before Professor Koto claims them all for himself, and destroys the beauty of Emerland in the process.
Setup
Choose a color for Professor Koto (red is his preference), and set up the game following the setup instructions for 2 players (see Game Setup). You will draw 4 cards for your starting hand. Professor Koto does not receive any starting cards or a starting Emerald.
Place one of Professor Koto's workers on the Lost City Path as an Archaeologist. Shuffle Professor Koto's two decks (Expedition and Excavation) into two separate facedown piles. Place these along with the Professor's starting Workers and Helpers in an area designated for him on the table.
Professor Koto is the starting player.
Professor Koto's Starting Materials: Expedition deck, Excavation deck, Trick deck (OPTIONAL — for greater challenge).
Overview
On Professor Koto's turn, you will reveal a card from one of his decks and perform the action listed on it for the current season. His Expedition cards will tell you where to place his Workers / Helpers. His Excavation cards will tell you which card he will play into his city from the Plateau.
The Professor's Workers and Helpers are used interchangeably, and will be referred to only as Workers in these rules.
The only resource the Professor will gain is Emeralds, either from placing his Worker on the Emerald location, or gaining an Artifact that grants an Emerald. Otherwise the Professor does not gain any resources from Worker placements, artifacts, or card abilities, and does not draw cards into his hand at any time in the game. All card abilities that he plays into his city have no effect for him.
Expedition Deck
If the Professor still has any Workers that have not yet been placed, then reveal the top card from his Expedition deck. Check the left side of the card to find the icon for the current season that you are in. This will tell you how many Workers that the Professor will place for this turn. The Professor uses his Workers and Helpers interchangeably, and ignores the normal restriction rules for where they may be placed.
The Professor will place the listed amount of Workers on the location shown for the current season. However, the Professor will not send any Workers to a location that is already occupied, either by you or by him.
If the listed location for this season is occupied, immediately perform the New Plan shown in the red area at the bottom left of the Expedition card. After doing this, check the next location shown for the following season. If that space is available, place the Worker(s) there. If you are in spring, move to the summer location. If all of the locations shown on the card are unavailable, place the Worker(s) on a brown Helper area on the board, as shown in the bottom right tan area of the Expedition card.
The Professor does not gain any resources when he places his Workers. The one exception to this is the 2 Emeralds location. If the Professor places 1 of his Workers here, he will gain 2 Emeralds. If he places 2 of his Workers here, he will gain 4 Emeralds.
If the Expedition card says to visit a Red Destination, the Professor will first visit his city if able. If not, choose which Destination card he will visit in your city, and you gain any associated point tokens. Whenever he visits a Red Destination card, he also moves his Archaeologist one space toward the Lost City, gaining any point tokens there, and gaining 1 Artifact from the bag. He cannot move beyond the current season shown for the Lost City path.
Professor Koto will continue revealing Expedition cards on his turns until he has placed all of his Workers. Once they are all placed, his next turn will be to play a card as shown by his Excavation deck.
Excavation Deck
For the Professor to play a card, reveal the top card from his Excavation deck. Find the current season. If it shows the Upgrade symbol with it, then the card he plays this season will be to the upgraded side.
Now check the details for the card that he is going to play, as listed in the current season on the card. He will play a card matching these requirements from the Plateau, if it is available.
If there is more than one viable card, take the first available card progressing through the Plateau from top to bottom, left to right.
If there is not a card matching the listing for this season, immediately perform the New Plan action in the bottom left red area of the Excavation card.
Then move through each next season to see if there is a viable card to play. If none of the cards in the Plateau match any of the requirements on the Excavation card, then perform the last resort action which always has you playing an Upgraded card to the Professor's city, and sometimes also gaining an Emerald or a point.
His Production cards do not activate. He does not gain an Emerald when preparing for Winter.
Trick Cards
To make the game more challenging, add the Trick cards. Shuffle the deck and place it facedown in Professor Koto's area.
You can adjust the difficulty as follows:
- Normal: After the Professor Prepares for Season and after he plays his 15th card, reveal the top Trick card and perform the action matching the season that just ended.
- Hard: Also reveal a Trick card every time the Professor moves his Archaeologist, and perform the action for the season you are currently in.
Moving the Professor's Archaeologist
Whenever the Professor moves his Archaeologist on the Lost City path, he must obey the season rule and go no further than the current season allows. If there are any point tokens at the new space, the Professor will take them. He will also gain 1 random Artifact from the bag (Koto does not need to discard cards for Artifacts). He ignores any bonuses on the Artifacts, except for gaining an additional Artifact, upgrading a card in his city (your choice), or gaining Emeralds.
Important: If he is supposed to perform the action to move his Archaeologist forward and he is unable to, he does not get to gain the Artifact.
Prepare for Season
If Professor Koto has placed all of his Workers, and on your turn you Prepare for Season, then the Professor's next turn will be to Prepare for Season. To do so, retrieve his Workers from the board, and give him the next Workers or Helpers for the new season. Also reshuffle his Expedition and Excavation cards to form new face-down decks.
End Game
The Professor will continue to perform actions from his Excavation deck until he has played a full 15 cards into his city. He will not play any more cards into his city after this. In the rare event that this happens before the final season of the game, then he will gain 1 Emerald for each turn you take until he prepares for the final season. After that, he will place all his Workers as normal, but will not play any further cards.
If the Professor has placed all his Workers in the final season, and has played 15 cards into his city, then he will end his game on his turn. To do so, move his Archaeologist all the way to the highest valued space in the Lost City if he is not there already, and gain 1 Artifact (and any remaining point tokens) for each spot he passes on the way.
After this, Professor Koto will take no further actions in the game.
Scoring Professor Koto
Normal Difficulty
- Base Score: 10 points
- Prosperity Cards: 3 points each
- Upgraded Cards: 2 points each
- Point Tokens: 1 point each
- Artifacts: Listed points on Artifacts
- Archaeologist Position
- Realm Cards: 4 points each
- Emeralds: 1 point each
Hard Difficulty
- Base Score: 15 points
- Prosperity Cards: 4 points each
- Upgraded Cards: 3 points each
- Point Tokens: 1 point each
- Artifacts: Listed points on Artifacts
- Archaeologist Position
- Realm Cards: 5 points each
- Emeralds: 2 points each
Glossary and Legend
- Card: A Jungle card.
- Draw: Take a Jungle Card from the top of the deck and add it to your hand.
- Draw 2 Jungle Cards: Take 2 Jungle cards from the top of the deck and add them to your hand.
- Draw up to Limit: Draw until you reach your hand limit.
- Discard: Discard a card from your hand into the general discard pile.
- Play Top Card from the Deck: Play the top card of the deck directly into your city.
- Plateau: The 6 face-up cards available for any player to play or draw.
- Draw Card from Plateau: Take a card from the Plateau into your hand.
- Activate 1 Green: Activate 1 Green (Production) card in your city or in the Plateau.
- Critter Card: A card of the Critter type.
- Construction Card: A card of the Construction type.
- Worker: A Worker critter meeple.
- Helper: A Helper critter meeple.
By night, I might, by chance See the dream of you come true In the day, awake, I wait and watch Dreaming of you, by the river blue
Sail with me, drift with me By moonlight, hearts alight Along the river of dreams tonight!