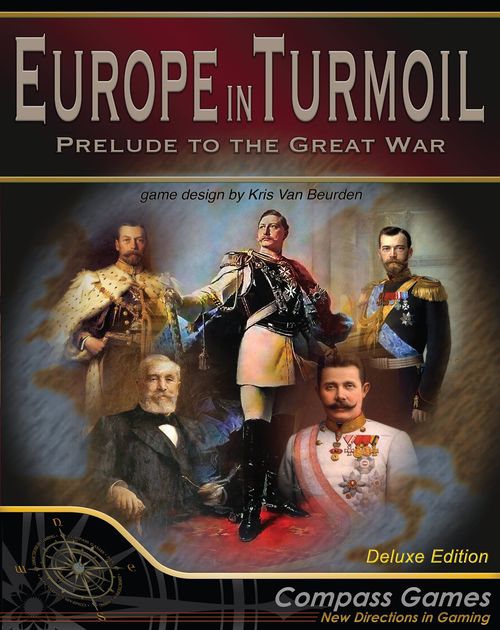
Europe in Turmoil: Prelude to the Great War
Europe in Turmoil: Prelude to the Great War Rulebook
Table of Contents
Table of Contents
1.0 Introduction
As the year 1900 comes around, Europe is in the middle of the Belle Époque. Everybody is full of enthusiasm for the future. Warfare in Europe is considered to have become obsolete, most popularly by such writers as Jan Block in his book "Is War Now Impossible?"
Science and progress, economic prosperity, and cultural innovations are the words of the day. The Arts flourish.
However, dark clouds gather, as Kaiser Wilhelm II ascends to the Throne of Imperial Germany and "drops his pilot" the experienced chancellor Otto von Bismarck. Henceforth, Germany will be on a collision course with Great Britain, characterized mostly in the Naval Arms Race, eventually culminating in the H.M.S. Dreadnought and her successors.
In Europe in Turmoil: Prelude to the Great War, players will recreate the touch-and-go dynamic between the Authoritarian and Liberal streaks in European politics.
In France, where the average government lifetime is less than a year during this period, and Russia, in dire need of reform, huge swings in political power can and will occur. In fact, Imperial Germany may prove the only stable Authoritarian country - if Wilhelm II does not cave to Liberal demands. And at the edge of the gameboard, the unstable Balkans region faces Constantinople, the capital of the "Sick Man of Europe", the tottering Ottoman Empire.
2.0 Components
Europe in Turmoil: Prelude to the Great War contains the following:
- 2 counter sheets
- This rules booklet
- 22" x 34" map
- 1 Player Aid
- 1 Naval Arms Race Chart
- 110 Strategy cards
- 20 Stability Check cards
- 35 Mobilization cards
- 4 transparent disks
- 1 blue six-sided die
- 1 yellow six-sided die
2.1 Game Map
2.1.1 The map is divided into 5 scoring regions (France, Russia, Germany, Austria-Hungary, and The Balkans) and several Independent countries which are not part of a scoring region (e.g. Belgium, Spain/Portugal, Morocco…). The spaces that belong to a scoring region share the same background colour. All spaces that do not belong to a scoring region share the same colour.
2.1.2 Each space on the map represents either a country (e.g. Belgium), a major city, or a sub-group of people within a country (e.g. the French Catholic Church, the French Bourgeoisie, ...).
2.1.3 Each space has a stability number representing that space's overall stability, independence, and power. This number determines how much Support is necessary to control the space and also represents the space's resistance to Support Checks (see 6.2). Each space on the map is either uncontrolled or controlled by the ideology whose Support Points exceed his opponent's Support Points in that space by at least the space's Stability Number.
2.1.4 Lines Spaces are connected to one another via lines on the map; a space is considered adjacent to all other spaces to which it is connected.
2.1.5 Socio-Economic Icons Each space has (at least) one icon representing various socio-economic segments of society.
2.1.6 Battleground Spaces have a yellow/blue stripe along the top. All other spaces are normal spaces.
2.2 Strategy Cards
2.2.1 There are 110 Strategy cards used in the game. Each card contains an Operations Point value, an Event Title and an Event Description. Some cards are labeled SCORING, which must be played sometime during the turn they are drawn. There are five Scoring Cards, one for each region. When played they generate Victory Points. See 10.0.
2.2.2 Strategy cards have a banner near the top of the card that represents a time period. There are three era banners: a blue banner for the Victorian Era, a blue and yellow banner for the Edwardian Era, and a yellow banner for the Georgian Era.
2.2.3 Each card has a symbol to indicate which ideology is associated with its Event, as follows:
- Cards with a Yellow Crown are associated with the Authoritarian ideology
- Cards with a Blue Star are associated with the Liberal ideology
- Cards with a Circle are not associated with either side.
See 5.2 for the effect of playing cards whose Events are associated with your opponent's ideology.
2.2.4 Cards may be played in one of two ways, as Events or Operations.
2.2.5 Many cards have an asterisk * following their Event title. When these cards are played as Events, they are removed permanently from the game.
2.2.6 Cards that have their Event title underlined are displayed face-up on the side of the game board until they are canceled (or the game ends). The corresponding event marker is placed on the board as indicated by the card text.
2.2.7 Cards that have their Event title written in red are prerequisite cards for follow-up Cards. They are also always underlined, to clarify their ongoing effect.
2.2.8 Cards that are discarded (not permanently removed from the game) are placed in a face up pile adjacent to the draw pile.
2.3 Stability Cards
2.3.1 There are 2 decks of 10 stability cards each used in the game. They are used when a scoring card is played. See 9.0 Stability for their use.
2.3.2 Blue Stability Cards are used by the Liberal player. Dark yellow Stability Cards are used by the Authoritarian player.
Socio-Economic Icons
- Government - the Chancellors, Ministers, advisers etc. in charge of day-to-day operations
- Monarchy - representing those countries where the Monarch was still the ruler of the country, rather than constitutional Head of State
- Church - representing religious institutions. The Church in France had a lot of influence over the populace (and the élite), at least until the Separation between Church and State. On the other hand, in Germany the Protestant Church had been made subservient to the Empire by Bismarck.
- Workers - the lower class, employed in the industries owned by the Bourgeoisie
- Bourgeoisie - a powerful élite, owning most of the means of production
- Farmers - rural areas, still part of the primary sector of the economy. Traditionally more conservative than their urban counterparts
- Army - the armed forces of each Scoring Region; the more militarist members of society, usually propping up Authoritarian regimes
- Intellectuals - the writers, painters, publicists who form and foment popular opinion
- Annex - former conquests or colonies, not entirely integrated into society
2.4 Mobilization Cards
2.4.1 There are 35 Mobilization cards used in the game. They are used for the Optional Rule regarding the Great War. See 8.4.4.
2.5 Markers
2.5.1 Support Markers: The struggle for power across the board is tracked by Support markers. The number on a Support marker denotes the number of Support Points (SPs) it represents.
- Support markers are treated like cash, in the sense that players may 'break' a large denomination into smaller denominations at any time. Additionally, the number of Support markers in the game is not an absolute limit. Small poker chips, coins, or wooden blocks can be utilized to substitute in the event of a marker shortage.
- If a player controls a space, his Support Markers should be placed darker side face up to denote this. If not, place the lighter side face up.
2.5.2 The game includes various other markers to assist play:
The Action Round Marker is used to track the current round within the turn and the Turn Marker is used to track the current turn.
The VP Marker is used to track the current VP total. The Tension Marker is used to track the current Tension.
The Naval Arms Race Markers are used to track each player's progress on the Naval Arms Race Track.
War status markers are used to track the current alliances and other effects that influence Great War resolution. Next to the War Status track is a legend to indicate participants to the Great War.
Event markers are placed on the board as indicated by their Strategy Card event text.
Markers: Cardboard vs. Plastic — Both counter sheet markers and clear transparent plastic disks have been provided to keep track of the information on the Turn Track, Action Track, Tension Track, and Victory Point Track. Either may be used dependent on player preference.
When using the disks, simply place the disk on the applicable space of the track.
When using the counters, simply cover the applicable space with the counter. The Tension marker is an exception. When using the Tension marker, the counter should be placed in such a way that the black triangle on the marker points towards the applicable Tension Track space.
3.0 Game Setup
3.1 Shuffle the Victorian Era cards and deal each player 8 cards. The players are allowed to examine their cards prior to deploying their discretionary Support Points (see 3.4). If either player is currently holding two or more "Scoring" cards, they may reveal them (see note below).
3.2 The Authoritarian places Support Points in the following spaces: 4 in French Catholic Church, 1 in French Armed Forces, 1 in Colonials, 1 in Belgium, 1 in Prussia, 5 in Wilhelm II, 3 in Imperial Army, 1 in Jugendstil, 4 in Nicolas II, 1 in Dual Monarchy, 1 in Bulgaria and 1 in Algeria.
The Authoritarian Support Squares on the game board that start with Support Points have crown icons.
3.3 The Liberal player places Support Points in the following spaces: 1 in Netherlands, 2 in Greece, 1 in Trieste, 2 in Russian Bourgeoisie, 2 in Siberia, 2 in Bavaria, 2 in French Writers, 1 in Beau-Monde, 2 in Picardy, 2 in Switzerland, 1 in Romania and 1 in Paris.
The Liberal Support Squares on the game board that start with Support Points have star icons.
3.4 Then each player places an additional 6 discretionary Support Points in the following order:
- Authoritarian places 2
- Liberal places 2
- Authoritarian places 3
- Liberal places 3
- Authoritarian places 1
- Liberal places 1
NOTE: These Support Points may be placed in any space(s) that do not have opponent's SPs at the time of placement.
If a player revealed two or more scoring cards in 3.1, whenever they receive Support Points in the above schedule, they get one additional Support Point.
3.5 Place the British and German Navy markers on the pre-Dreadnought Fleet space of the Naval Arms Race track. Place the Turn Marker on the first space of the Turn Record Track. Place the Action Round marker on the first space of the Action Round track. Place the Tension marker indicating the "0" space of the Tension track. Place the Three Emperor League marker on its space on the Great War track, then place all other Event and Great War markers in the Marker Pool on the board. Place the German Navy High Water Mark in the Marker Pool. Finally, place the VP marker on the Victory Points Track on the zero space.
4.0 Game Sequence
4.1 Europe in Turmoil is played in ten turns. Each turn represents between one and two years, and will involve seven normal card plays by each player (starting from turn 4, each player will have eight normal card plays). At the beginning of the game, each player receives eight cards from the Victorian Era deck. At the beginning of turn 4, the Edwardian Era deck is shuffled into the draw pile and players receive nine cards from the deck from now on. At the beginning of turn 8, the Georgian Era deck is shuffled into the draw pile.
4.2 The Phasing Player is the player whose Action Round is currently being played.
4.3 When there are no cards remaining in the draw deck, reshuffle all discards to form a new draw deck. Note that cards played as Events with an asterisk (*) are removed from the game when they are played, and are not shuffled into the new draw deck.
4.3.1 Deal all cards remaining in the draw deck before reshuffling, except in turns 3 and 7. See 4.4.
4.4 When moving from the Victorian Era deck to Edwardian Era, or from Edwardian Era to Georgian Era, do not add in the discards to the deck—instead add the Edwardian Era or Georgian Era cards (as appropriate) to the existing deck and reshuffle. The ignored discards remain in the discard pile for now, but will be reshuffled into the deck in the next reshuffle.
4.5 The Turn Sequence
A turn in Europe in Turmoil has the following sequence:
- Deal Strategy Cards
- Play Action Rounds
- Verify Held Cards
- The Great War (if triggered during Phase 2)
- Advance Turn Marker
- Calculate Final Scoring (after turn 10)
4.5.1 Deal Strategy Cards: The players receive enough Strategy cards to bring their total hand size to eight. The first card is dealt to the Authoritarian player, and then the deal should alternate back and forth between the players until both have received their full hand size. Starting from the Edwardian Era (turn 4), players receive nine cards per turn.
4.5.2 Action Rounds: This is the main phase of the turn. Each player receives seven Action Rounds. Players alternate Action Rounds, playing one Strategy card per Round. The Authoritarian player always takes his Action Round first, followed by the Liberal player. Starting on turn 4, each player receives eight Action Rounds.
All actions required by each card must be resolved before the next player starts his Action Round by playing a card.
The player taking his Action Round is called the "Phasing Player."
- Ordinarily a player will have a card left over after the completion of all Action Rounds. This card is considered "held," and may be played in subsequent rounds. Scoring cards may never be held.
- If for any reason a player has no cards in his hand to play at the start of an Action Round, he must forfeit that Action Round and take no action.
4.5.3 Verify Held Cards: Scoring cards may never be held from one turn to the next. If a player is holding a scoring card at this stage in the turn, that player loses the game. Scoring cards are unique and color coded to their nation so that non-scoring cards can be identified by only revealing the card's edge.
4.5.4 The Great War: If a crisis has resulted in an Outbreak of War, the game is over and a winner is determined. See 8.4.
4.5.5 Advance Turn Marker: Move the Turn Marker to the next turn. If it is the end of turn 3, shuffle the Edwardian cards into the draw deck. If it is the end of Turn 7, shuffle the Georgian cards into the draw deck. See 4.4.
4.5.6 Final Scoring: If it is the end of Turn 10, and the game's winner has not yet been determined, perform Final Scoring as described in the Scoring rules. See 10.4.2.
Norwegian Independence — When Europe in Turmoil begins, Norway and Sweden were known as the United Kingdoms of Sweden and Norway. Norway achieved independence on the 13th of August, 1905.
Until the event on card #51 Norwegian Independence occurs, support points may not be placed in the Norway space.
5.0 Card Play
NOTE: The play of Scoring cards is covered in section 9.0 and the scoring itself is covered in section 10.0.
5.1 Cards may be played in one of two ways: as Operations (see 6.0) or Events (see 7.0). Typically, players will hold one card in their hand at the end of the turn. All other cards will be used for events or operations. Players may not forgo their turn by declining to play a card, or by discarding a card from their hand.
5.2 Events Associated With Your Opponent: If a player plays a card as an Operation, and the card's Event is associated only with his opponent, the Event still occurs (and the card, if it has an asterisk after the Event title, is removed). Exception: cards used for Naval Arms Race attempts. See 6.3.
NOTE: When playing a card for Operations and it triggers your opponent's event, your opponent implements the event text as if they had played the card themselves.
- The phasing player always decides whether the event is to take place before or after the Operations are conducted.
- If a card play triggers an opponent's Event, but that Event cannot occur because a prerequisite card has not been played, or a condition expressed in the Event has not been met, the Event does not occur. In this instance, cards with an asterisk Event (marked *) are returned to the discard pile, not removed from the game.
- If a card play triggers an opponent's Event, but play of that event has been prohibited by a superseding Event card, then the Event does not occur, and the card remains in play for Operations only.
- If a card play triggers an opponent's Event, but the event results in no effect, the Event is still considered played, and would still be removed if it has an asterisk.
5.3 When a card played as an Event requires the play or discard of another card of a specific value, a higher valued card will always satisfy the requirement.
5.4 When an event forces a player to discard a card, the Event on the discarded card is not implemented. This rule also applies to Scoring cards.
5.5 Card text that contradicts the written rules supersedes the written rules.
6.0 Operations
When a non-Scoring card is played as an Operations card, the player must choose to use all of the card's Operations Points on one of the following Options: Support Point Placement, Support Checks or a Naval Arms attempt.
6.1 Placing Support Markers
6.1.1 The rules in this section only apply to Support Points (SPs) that are placed with Operations Points (OPs). Support points placed by Events can be placed anywhere (ignoring adjacency and control).
6.1.2 SPs are placed one at a time. However, all SP markers must be placed with, or adjacent to, friendly SP markers that were in place before the first SP was placed.
6.1.3 It costs one OP to place an SP in a space that is friendly-controlled or uncontrolled. It costs two OPs to place an SP in an opponent-controlled space. If a space's control status changes while placing SPs, additional points placed during that Action Round are placed at the lower cost.
6.2 Support Checks
6.2.1 Support Checks are used to reduce opponent Support in a country, and possibly to add friendly support if the Support Check is successful enough.
6.2.2 Each Strategy Card played for Support Checks gives two Support Checks to the Phasing Player, regardless of the card's Operations value. Support checks made using Operations must be done in different spaces (i.e. no two consecutive Support Checks in the same space; this restriction does not apply to Support Checks made through Events).
6.2.3 To attempt a Support Check in a space, the space must have at least one opponent SP. The player must resolve the first Support Check before declaring the next target.
6.2.4 To resolve a Support Check, multiply the Stability Number of the target space by two (x2). Then roll a die, and add the OPS value of the card played to the die roll. Further modify the die roll by:
- +1 for each adjacent friendly controlled space (counting UK and Egypt as Liberal controlled and Ottoman Empire as Authoritarian controlled).
- −1 for each adjacent opponent controlled space (counting UK and Egypt as Liberal controlled and Ottoman Empire as Authoritarian controlled).
- SPs in the target space itself do not modify the die roll in any way.
6.2.5 If the modified die roll is greater than the doubled Stability Number, the Support Check succeeds, and the phasing player removes opposing SPs equal to the difference from the target space. If there are insufficient opposing SPs to remove, he adds friendly SPs to make up the difference (but never more than necessary for control).
6.3 Naval Arms Race
6.3.1 The Naval Arms Race track contains two Navy markers (one per player, the British Navy belonging to the Liberal player and the German Navy belonging to the Authoritarian player). These are initially placed on the pre-Dreadnought space. Operations Points may be spent to attempt to advance a player's marker to the next box on the track. To do so, roll a die and add the Operations value of the card to the total.
Modify this total by:
- +1 if the card played is the player's own Event.
- +1 if this is the second or subsequent attempt to advance to the box (i.e. the Navy marker is on its +1 side)
- +1 if Liberal player and Admiral Fisher in effect
6.3.2 If the total matches or exceeds the number required to advance to next box (printed in the box), the player moves his Navy marker forward to the new box (unless attempt was made by the Authoritarian player and British Navy marker has not yet left the pre-Dreadnought space), flipping it back from its "+1" side if necessary. Otherwise (if not already there) flip the Navy marker to its "+1" side to indicate the +1 modifier (see 6.3.1, 2nd bullet point).
NOTE: If an event moves a Navy marker, it remains on its current side.
6.3.3 A player may only make one regular Naval Arms Race Attempt per turn, although he can be allowed additional attempts (due to the Helgoland Class space on the Naval Arms Race track, the Two Power Standard or Bethmann-Hollweg strategy cards or the Naval Law Amendment Stability card). When, according to the Two Power Standard event a player has to make multiple consecutive attempts, this is across turns if not enough Action Rounds remain in this turn, however attempts made by Two Power Standard do count against the limit for the purpose of deciding if a subsequent attempt may be made (i.e. after all the mandatory consecutive attempts have been made, no further regular attempts may be made during that turn).
6.3.4 Several Events on strategy cards (Naval Bill / Fleet Law, Admiral Tirpitz, Lord Fisher, Franco-British Naval Cooperation) allow a player to advance his Navy marker forward on the Naval Arms Race track. Such cards may be played for the Event in addition to any Naval Arms Race attempt(s) on a given turn.
6.3.5 When a player's naval marker advances to the next box on the Naval Arms Race Track, the player follows the instructions in the Ship Class box just entered (exception 6.3.8).
Naval Arms Race track:
| Box (advance total needed) | Ship Class | Effect |
|---|---|---|
| — | Pre-Dreadnought Era | Place both Naval Markers here at start of game. While both Naval Markers are here, all Authoritarian Naval Arms Race attempts automatically fail. |
| 4 | HMS Dreadnought | The first player to reach this box may place 1 SP in up to two uncontrolled independent spaces. |
| 5 | Nassau Class | Once the first player reaches this box, all cards worth 3+ OPs of his opponent are worth -1 OPs until the opponent reaches this box. |
| 6 | Bellerophon Class | The first player to reach this box gains 2 VP. The second player to reach this box gains 1 VP. |
| 6 | Helgoland Class | Until the opponent reaches this box, the first player to reach this box may take one additional action round each turn, which must be a Naval Arms Race attempt with -1 to the roll. |
| 6 | Colossus Class | The first player to reach this box can play a card for both its OPs value and Event once per turn until the opponent reaches this box. The player can choose the order in which to use the card, OPs or Event first. |
6.3.6 Regardless of the text on the card, the Event of a card played as a Naval Arms Race attempt is not implemented. The card is placed in the discard pile.
6.3.7 If a Navy marker reaches the final box of the Naval Arms Race Track, that player may no longer make Naval Arms Race attempts.
6.3.8 Certain strategy cards (Copenhagenization and Mittel Europa) can move the German Navy marker back on the Naval Arms Race track. If this occurs and the "German Navy High Water Mark" is not yet on the Naval Arms Race track, put it on the track in the current space of the German Navy prior to the event.
Return the German Navy High Water Mark to the marker pool when the German Navy marker advances beyond it on the Naval Arms Race track. While the German Navy High Water Mark is on the Naval Arms Race track, treat it as the German Navy marker for the purpose of awarding effects of spaces (e.g. If the German Navy marker enters a space that awards VPs, the Authoritarian player would not receive these VPs. If the British Navy enters a non-VP space, the Liberal player would not receive its special ability if the German Navy High Water Mark marker is in or beyond that space).
6.3.9 The OPS reduction/increase from Strategy cards such as Absolutism, March of History or Stymied happens before any OPS reduction from spaces on the Naval Arms Race track.
7.0 Events
7.1 General Rule: If a card has a playable Event associated with either the Phasing Player or both players, it may be played as an Event instead of Operations. If so, the card's Event takes effect as directed by the card's text.
7.2 Lasting Events: Some Event cards remain in effect until canceled by a later Event. Some Events last for the duration of the game. When such cards are played as Events, place them to the side of the map, and move their markers from the Marker Pool to the appropriate space on the Map, as a reminder of their ongoing effects. Lasting events have their Event title underlined.
7.3 Events that Modify OPs Values
7.3.1 Some Event cards modify the Operations value of cards that follow. These modifiers should be applied in aggregate.
7.3.2 Regardless of modifiers, a non-Scoring card always has a minimum Operations Value of 1.
7.3.3 Events modifying the Operations value of a card only apply to one player, and do so for all purposes.
7.4 Events That Play Like OPs Cards: If an Event specifies that a player may conduct Operations, place Support, or make Support Checks as if he played a card of a certain operations value, those additional Operations are treated as if a card had been played for its Operations Point Value. Therefore, those Operations are subject to all rules for placing Support Markers (see 6.1) and other Events limiting their value or use.
7.5 Unplayable Events: If an Event becomes unplayable due to its cancellation or restriction by another Event card, the unplayable Event card may still be used for its Operations value.
8.0 Tension & the Great War
"The lamps are going out all over Europe, we shall not see them lit again in our life-time" - Sir Edward Grey
8.1 Tension Track
8.1.1 Tension measures the willingness of the countries of Europe to go to war. The Tension level begins the game at its minimum of 0. It can go up and back down due to events.
8.1.2 Tension may never go below 0, nor may it go higher than 6 (Higher than 3 if Franz Ferdinand in effect and both Vienna and Budapest are under Authoritarian control). Whenever a card effect would make it go below 0 or higher than 6 (3 if Franz Ferdinand in effect), the player whose event altered the Tension instead respectively gains or loses 1 VP per unresolved point of Tension.
Great War Status Track: Three Emperor League (At Start) is placed at the leftmost space, followed by spaces numbered -4, -3, -2, -1, 0.
8.2 Great War Status Track
8.2.1 Great War status measures the different alliances formed during this period, which will eventually cause the assassination of Franz Ferdinand and the local conflict between Austria-Hungary and Serbia to escalate into World War I.
8.2.2 At the beginning of the game, the Three Emperor League marker is on the Great War Status Track. Place it in the leftmost space of the track.
8.2.3 Whenever a new marker is to be placed on the Great War track, place it in the leftmost open position.
8.2.4 The Great War Status modifier is the number in the leftmost open position of the Great War track (if all spaces are filled, it is 0), potentially modified by -2 if the Three Emperor League marker has not been flipped to its Franco-Russian Alliance side or by +1 if the Balkan War marker has been placed on the track.
8.3 Crisis
8.3.1 Whenever a player is instructed to make a "Crisis" roll, the following procedure should be executed prior to executing the remainder of the event and/or the OPS expenditure. Always execute all text prior to the Crisis Roll instruction before making the Crisis Roll.
Roll a die, with the following modifiers:
- +1 for each point of Tension.
- +X for the total Great War Status modifier (usually negative).
If the result is higher than 6, the Great War breaks out. Immediately end the Action Phase, skip the Verify Held Cards phase and go to The Great War Phase (8.4). Otherwise, continue the execution of the event and the game progresses as normal.
8.3.2 At the end of each Scoring (as written on the scoring cards), make a Crisis roll (as defined in 8.3.1).
8.4 The Great War
The Great War will always be a conflict between two sides, the Entente and the Central Powers. If decisions need to be taken for either of these sides, they are taken respectively by the Liberal and the Authoritarian player.
8.4.1 Determine Participants: Depending on the Alliance markers on the Great War track (and other events), certain powers participate in The Great War belonging to a certain side:
- Germany always belongs to the Central Powers.
- France always belongs to the Entente.
- Britain belongs to the Entente if Entente Cordiale and/or Schlieffen Plan Adopted is in effect, and belongs to neither side if Splendid Isolation is in effect.
- Austria-Hungary belongs to the Central Powers if Three Emperor League or Dual Alliance is in effect.
- Russia belongs to the Central Powers if Three Emperor League is in effect, to the Entente if Franco-Russian Alliance is in effect and belongs to neither side if Russian Collapse is in effect.
- The Balkans belong to the same side as Russia (Entente if Russia does not belong to either side) if Balkan Wars or Balkan Civil War is in effect.
8.4.2 War Resolution
The 'winner' of the Great War (not the game) is resolved.
Determine each player's War Resolution Modifier. This is done by checking the markers on the Great War Status Track and any markers on the four event spaces above the track. Markers with a black circle in their upper left corner contain a number which is a War Resolution Modifier for either the Authoritarian player (yellow number) or the Liberal player (blue number).
Each player calculates their War Resolution Modifier (Authoritarian player sums the yellow numbers, Liberal player sums the blue numbers).
Each player rolls a die, applying the following modifiers:
-
- player's War Resolution Modifier
- +1 if currently ahead on the Naval Arms Race track.
- +1 if currently controlling the Constantinople and/or Italy space(s).
Highest roller wins the Great War and gains 4 VP. In case of ties, treat both players as loser of the Great War.
8.4.3 War Losses
If the Entente lost the Great War, execute the following procedure for each scoring region belonging to either of the participating sides:
- If the scoring region belonged to the Entente, Liberal player rolls a D6, then removes SPs from spaces in the scoring region (or independent spaces adjacent to the scoring region) equal to the result. Subsequently, the Authoritarian and then the Liberal player repeat once.
- If the scoring region belonged to the Central Powers, Authoritarian player rolls a D6 and gains that many OPs to place SPs in spaces in the scoring region (or independent spaces adjacent to the scoring region). Subsequently, the Liberal player rolls a D6, then removes SPs from spaces in the scoring region (or independent spaces adjacent to the scoring region) equal to the result.
- Place enough support in the Constantinople and Italy spaces for Authoritarian control.
If the Central Powers lost the Great War, execute the following procedure for each scoring region belonging to either of the participating sides:
- If the scoring region belonged to the Central Powers, Authoritarian player rolls a D6, then removes SPs from spaces in the scoring region (or independent spaces adjacent to the scoring region) equal to the result. Subsequently, the Liberal and then the Authoritarian player repeat once.
- If the scoring region belonged to the Entente, Liberal player rolls a D6 and gains that many OPs to place SPs in spaces in the scoring region (or independent spaces adjacent to the scoring region) equal to the result. Subsequently, the Liberal player rolls a D6, then removes SPs from spaces in the scoring region (or independent spaces adjacent to the scoring region) equal to the result.
- Place enough support in the Constantinople and Italy spaces for Liberal control.
If both sides lost the Great War, only execute the first bullet point of the above two paragraphs. Once War Losses are resolved, go to Final Scoring (8.4.5).
The order in which regions are scored is determined by the Great War winner. If both sides lost, the Entente chooses the first region affected, then players alternate choosing.
8.4.4 (Optional) War Mobilization
Instead of executing steps 8.4.2 and 8.4.3, players can at the beginning of the game decide to use the optional "War Mobilization" rules.
NOTE: this is an additional "mini-game" on top of the normal rules, and it is advised not to use these rules unless both players are comfortable with the general rules.
Additional participants:
- If Russia is a participant, the Ottoman Empire will participate (belonging to the opposing side).
- If Triple Alliance or Perfidious Italy is in effect, Italy belongs to the Central Powers or Entente respectively.
Each player simultaneously selects one Mobilization card (exception: U-Boat War) for each nation participating on their side.
In order of ascending priority (from 0 to 8), reveal Mobilization cards and execute all valid Mobilization effects, checking the validity at the time of execution (e.g. a selected Mobilization card can become invalid by the execution of a Mobilization card with lower priority). Cards with equal priority are executed simultaneously.
Once all Mobilization cards are executed, go to Final Scoring (8.4.5).
EXAMPLE: Players have decided to use the War Mobilization rules to determine the result of the Great War. The following nations are participants: Germany and Austria-Hungary on the Central Powers side and France, the Balkans and Italy on the Entente side. Schlieffen Plan Adopted is in effect. The Authoritarian player selects Mobilization cards for Germany and Austria-Hungary and the Liberal player does likewise for France, the Balkans and Italy. Authoritarian player selects Guns of August [3] and Isonzo Campaign [6]. Liberal player selects Plan XV [1], War of Liberation (Austria-Hungary) [3] and Neutrality [1]. When ready, Liberal player reveals Plan XV and Neutrality, executing their effects. Subsequently, after skipping [2] as both players confirm they have no card with Priority 3, the players reveal Guns of August and War of Liberation (Austria-Hungary) respectively, executing their effects. Finally, Authoritarian player reveals Isonzo Campaign and resolves its effect.
8.4.5 Final Scoring
Score all Scoring Regions that participated in the Great War, then end the game and determine a winner based on whose side of the Victory track the VP marker currently is positioned. If tied, the player whose side won the Great War wins. If still a tie, both players lose.
9.0 Stability
Whenever a country's Scoring card is played, a Stability Check in that country is immediately conducted. IMPORTANT: Scoring cards must be played on the turn in which they are dealt. If a player is left with a Scoring card in his hand at the end of the final Action Round of a turn, he loses the game.
Each player has his own deck of ten Stability cards. These cards are open knowledge and each player can at any time (except during the following sequence) inspect the other player's stability deck.
A Stability Check is resolved by following this sequence:
-
Choose Cards: Each player chooses a card from his available Stability Cards. Certain cards and effects allow additional cards to be chosen. This can happen during a Stability Check if a player is allowed to select multiple cards. Once a player has only 1 Stability card remaining, all unavailable Stability cards of that player become available again.
-
Play Cards: The non-active player first reveals his Stability card and executes its effect. Subsequently, the active player reveals his Stability card and executes its effect. If either player selected more than one Stability card in Step 1, players take turns playing Stability cards until all selected cards have been played. Once a Stability card has been played, it is unavailable for use until that player's Stability cards are refreshed (by semi-exhaustion of the deck, see step 1, or by the play of the US Interventionism or US Non-Interventionism strategy cards).
-
Scoring: Finally, the country is scored according to the rules in section 10, with the VP marker moving accordingly.
-
Make a Crisis Roll. See 8.3.
NOTE: all steps of a Scoring must be completed before checking the VP marker for auto-victory.
10.0 Scoring
The object of the game is to score Victory Points (VPs). Regional Victory Points are scored through support within the five scoring Regions and their periphery and colonies. VPs can also be received through the play of certain Events. Each region has its own 'scoring card'. Playing a scoring card causes Victory Points to be scored, based both on how much support your ideology has in that region and its periphery and how stable that region is at the time the card is played.
Scoring takes place in a region at the following times:
- During the last step of a Stability Check in a region
- During Final Scoring (8.4.5) for ALL regions
- During the "Great War" for all PARTICIPATING regions
10.1 SCORING Cards
10.1.1 The following terms are used during Regional Scoring:
Presence: An Ideology has Presence in a Region if it Controls at least one space in that Region.
Domination: An Ideology achieves Domination of a Region if it Controls more spaces in that Region than its opponent, and it Controls more Battleground spaces in that Region than its opponent. An ideology must Control at least one non-Battleground and one Battleground space in a Region in order to achieve Domination of that Region.
Control: An ideology has Control of a Region if it Controls more spaces in that Region than its opponent, and Controls all of the Battleground spaces in that Region.
10.1.2 If a player has achieved Presence, Domination, or Control, he scores VPs equal to the number shown on the country's Scoring Card for the highest of the three levels he has achieved.
10.1.3 Each player scores 1 additional VP for each Battleground space that he controls in the region.
10.1.4 Each player scores 1 additional VP for each independent country he controls which is adjacent to the Region.
10.1.5 Each player totals up his VPs, and the net difference between the two scores is marked on the Victory Point Track.
10.2 Non-Scoring Event Cards
Playing certain card Events may result in Victory Points being scored.
10.3 The Victory Point Track
10.3.1 The Victory Point Track shows a range of scoring possibilities from Liberal 20 (Liberal Automatic Victory) to Authoritarian-20 (Authoritarian Automatic Victory). At the start of the game, place the VP marker in the center of the chart, on the box marked 0. This box represents zero points, or total equilibrium of the two sides. This box should be counted as a space when players' scores are adjusted.
10.3.2 Wherever a card states that the player 'gains' a Victory Point, this means that the VP marker is moved that many spaces in that player's favor, i.e., if the VP marker is on the 10 space (Liberal winning) and the Authoritarian player gains 2 VP, the marker is moved to the 8 space on the VP track.
10.3.3 If both players earn Victory Points from the same card or Event play, apply only the difference in Victory Points awarded.
10.3.4 At the end of Scoring, make a crisis roll (8.3)
10.4 VICTORY
10.4.1 Automatic Victory. There are several ways to achieve an automatic victory in Europe in Turmoil:
- The instant one player reaches a score of 20 VP, the game is over and that player is the winner. NOTE: All VP awards (for both players) that are scored during an event or scoring card must be applied prior to determining automatic victory.
- If the Liberal player Controls Germany, he wins when the Germany Scoring card is played.
- The Great War. (see 8.4)
- Illegal Held Card: if a player has a scoring card in his hand in the Verify Held Cards step of a turn, that player loses and his opponent is declared the winner. If both players hold scoring cards, the game is considered a draw
10.4.2 End Game Victory. If neither side has achieved victory of any kind by the end of turn 10, then every Region is scored as if its regional scoring card had just been played (these new VPs are added to the current score). No Stability checks are conducted or crisis rolls. Every Region's score must be calculated before final victory is determined. Reaching 20 VPs does not result in Automatic Victory during scoring at the end of turn 10; however, Control of Germany does grant automatic victory to the Liberal, regardless of scoring elsewhere. Once all regions have been scored, victory goes to the player who has accrued most VPs. If the VP marker is on a positive number, the Liberal wins; if the VP marker is on a negative number, the Authoritarian wins. If the VP marker is on zero, the game ends in a draw.
Card Notes: Restoring the French Monarchy
(The one embedded rule inside the otherwise historical-background Card Notes section — attached to the Bonapartism/Monarchism card, #20.)
Optional Rule: Restoring the French Monarchy
If due to the Support Check caused by the event text of the Bonapartism/Monarchism Strategy card the Paris space became Authoritarian-controlled, for the rest of the game treat Paris as a Monarch space (instead of a Government space, not in addition to that type). Place the Monarchy Restored marker to cover the government icon on the Paris space. When you use this rule, the Absolutist Rule Stability card does not count Paris unless it is a Monarch space.
13.0 Example of Play
Below is an example of the opening two turns of a game of Europe in Turmoil played by Kris (the Authoritarian player) and Tâm (the Liberal player).
Opening Hand
After the initial setup (see 3.2 and 3.3), both players draw their opening hand of eight Victorian Era cards.
Kris, the Authoritarian player, draws the following cards:
- #07 Austria-Hungary Scoring
- #02 Second International
- #14 Radical Party Founded
- #15 Lord Fisher
- #23 Third Department/Okhrana
- #25 Legacy of Bismarck
- #31 Status Quo
- #38 Kulturkampf
Tâm, the Liberal player, draws the following cards:
- #06 France Scoring
- #16 Stymied
- #09 Russo-Japanese War
- #33 Modernism
- #01 Admiral von Tirpitz
- #04 Franz Ferdinand
- #24 Tsarist Repression
- #28 Scramble for Africa
Kris has several strong Liberal events. If the Liberal player does not "open" the Naval Arms Race (remember that the German Navy marker cannot move from its starting position prior to the British Navy marker doing so), it will probably be best to play Lord Fisher and following it up by a Naval Arms Race attempt discarding either Radical Party Founded or the Second International. Due to the A-H Scoring card, an effort should be put into controlling the Scoring Region by taking control over Vienna, Budapest and at least one non-battleground space.
Tâm also has some choices to make. Presumably Admiral Von Tirpitz will end up as a Naval Arms Race card, but then the Liberal attention will still have to be split between France, Russia and Austria-Hungary.
Discretionary Player SP Placement (see 3.3)
- Kris places 1 SP in Vienna (0,1) and 1 SP in Budapest (0,1), locking up the two Austria-Hungarian battlegrounds for the time being (during setup, support can only be placed in spaces not already containing opponent's support).
- Tâm counters by placing 1 SP in Poland (1,0) and 1 SP in Saint Petersburg (1,0).
- Kris places 1 SP in Moscow (0,1), 1 SP in Alsace-Lorraine (0,1), and 1 SP in Russian Orthodox Church (0,1).
- Tâm places 1 SP in Italy (1,0), 1 SP in Trieste (2,0), and 1 SP in Kiel (1,0).
- Kris places 1 SP in Budapest (0,2*).
- Tâm places 1 SP in French Writers (3*,0).
A fairly standard setup by the Authoritarian player prevents the Liberal player to easily access A-H battlegrounds. In the following setup turns the players divide the remaining open battlegrounds in Russia and other important spaces such as Italy and German battlegrounds (Germany is not scored in the First Era, but it is unwise to completely ignore it).
Tâm puts support in Trieste in an attempt to reach Presence in the A-H scoring region.
Notation Used in Example of Play
Yellow Text is used for the name of Authoritarian cards.
Blue Text is used for the name of Liberal cards.
Green Text is used for the name of Neutral / Scoring cards.
Rounds are shown as Round #.# where the left number is the turn and the right number is the round.
The amount of support in a space is shown as (#, #) where the left number is the amount of Liberal SP in the space and the right number is the amount of Authoritarian SP in the space.
If one player controls the space, the SP number appears followed by an asterisk (*).
Turn 1
Both players will alternate playing cards during the seven rounds until each has had seven opportunities to play a card.
Round 1.1
Authoritarian: Kris plays Third Department/Okhrana for 3 OPs, placing 2 SP in Vienna (0,3*) and 1 SP on the Dual Monarchy (0,2*).
Liberal: Tâm plays Stymied for 4 OPs, placing 1 SP in Trieste (3*,0), 1 SP in Paris (2*,0), and 2 SP on the Beau-Monde (3*,0) space.
Round 1.2
Authoritarian: Rather than playing the Austria-Hungary Scoring card which could be soft-countered by the Stability card Workers Unite, Kris plays Kulturkampf, electing to have the event occur first.
Because of the triggered event, Tâm may make 2 Support Checks in Intellectual or Church spaces - and as she gains them through an event text rather than OPs, they can potentially be in the same space.
The only eligible spaces are the French Catholic Church and the Orthodox Church in Russia.
She elects to have the first check made in the Orthodox Church space, rolling a 3 modified by +3 (3 OPs of Kulturkampf) and subtracting 6 (twice the stability of the Church space) yielding 0 resulting in no change.
The second check she decides to make in the French Catholic Church space, rolling a 4 modified by +2 (for adjacent control of Paris and French Writers), +3 (3 OPs card), and subtracting 8 (4 OPs of French Catholic Church space) yielding 1 resulting in a loss of 1 Authoritarian SP. The French Catholic Church is now (0,3). Kris has lost control of the space.
Subsequently, Kris receives 3 OPs, of which he uses 1 SP to place support in the French Catholic Church (0,4*) space regaining control and nullifying Tâm's last Support Check, 1 SP to take control over the Viennese Secession (0,1*), and 1 SP in Algeria (0,2).
Liberal: Having a plan to counter what she thinks is the likely Authoritarian Stability card play, Tâm decides to play France Scoring.
Stability must be checked (see 9.0, steps 1 and 2) within the French Scoring Region. Both players select a single Stability card from their pool of ten available stability cards.
Kris checks his cards and notices he could play Most Favoured Nation (which would allow him to take control of Algeria, which as an independent space adjacent to France would gain him a VP this scoring) or Ecclesial Influence (which he can use placing 2 support in Picardy to break Liberal control in the only Liberal non-battleground space and thus breaking Tâm's current Domination in the French Scoring Region). He chooses to play Ecclesial Influence, doubting his ability to control many Church spaces during the game and thus using it now while he can.
Tâm looks through her playable Stability cards. She could play Workers Unite, which could counter the effect of Ecclesial Influence in Picardy and would gain the Liberal control over Dijon. However, she would prefer to use this strong card in Austria or Germany later in the game. Similarly, she would like to save Anarchist Attack for play during the Russia, Austria or Germany scorings. She also declines to play Left-Wing Governments or Silent Majority, another strong card but right now domination of France needs to be ensured over beneficial effects in other scoring regions. While Most Favoured Nation would be a valid play, she is not in a position to profit from it. Intelligentsia is not a good play as there is currently no 2-OPS card in the discard. Instead she opts to play Farmer Collectives, a card which should ensure Domination over France.
Both players reveal their selections. Tam smiles. This was exactly the play she expected Kris to make when she decided to play French Scoring.
As the scoring card was played by Tâm, Kris resolves his Stability card first, using Ecclesial Influence to add 2 SP in Picardy (2,2). Tâm then uses Farmer Collectives to place 2 SP in Nice (2*0). Both Stability Cards are set aside and are currently not available for use during a subsequent scoring.
Now players execute Scoring: Tâm dominates France while Kris is merely present, resulting in a net of 3 VP (in favour of the Liberal player). Additionally, Tâm controls 2 more battlegrounds (another 2 VP). No independent nations adjacent to France are controlled so no further VP gain or loss. The VP marked is moved to +5 (see 9.0, step 3 and 10.1).
A Crisis roll is to be made, modified by -6 (due to the Great War status track) and +0 (from the Tension track). A 5 is rolled, resulting in a total of -1 (which is not higher than 6). No Great War erupts (see 9.0, step 4 and 8.3).
Round 1.3
Authoritarian: With no possible Stability card play from the Liberal able to stop a profitable Austria scoring, Kris plays Austria-Hungary Scoring.
Kris chooses to play the Absolutist Rule stability card while Tâm has the choice between Most Favoured Nation (investing in Italy and Switzerland for future turns) or Workers Unite to pressure Vienna. She chooses the latter, gaining control over Bohemia (2*,0) and Moravia (2*,0) while Kris gains 2 VP for Absolutist Rule. The VP marker is moved down to +3.
Scoring results in -6 VP for Kris (-6 VP for Authoritarian control, an additional -2 VP for 2 more battlegrounds than Tâm, and +2 for Liberal presence), with no independent spaces controlled. VP goes to -3. Crisis roll is again ineffective.
With A-H and France scored, only Russia Scoring is still in play until the reshuffle in turn 3.
Liberal: Tâm plays Franz Ferdinand and elects to go first, placing 1 SP in Saint Petersburg (2,0) and 1 SP in Croatia (1,0). Then, Kris places 1 SP in Croatia (1,1), Transylvania (0,1) and Budapest (0,3*) thanks to the Franz Ferdinand event. As this is the first card with an asterisk next to its name being played for its event, it is the first card removed from play rather than being placed in the discard pile, it remains in front of the Authoritarian player reminding Kris of the special text while Budapest and Vienna are both Authoritarian controlled (see 2.2.5 and 2.2.6).
Round 1.4
Authoritarian: Kris plays Status Quo for 2 SP in the Russian Orthodox Church space (3*,0).
Liberal: Tâm plays Scramble for Africa for 1 SP in Saint Petersburg (3*,0). Thanks to the event, Kris places 1 Authoritarian SP in Algeria (0,3*) and 2 SP in Tunisia (0,2*).
Round 1.5
Authoritarian: With 3 Liberal cards remaining in his hand, Kris is beginning to sweat a little. He would like to keep his play of Lord Fisher followed by a Naval Arms Race attempt as his last two action rounds (to limit the options for Tâm to profit from the effects of Lord Fischer) and now has to decide between playing Second International or Legacy of Bismark for his last unplanned moved. He decides on playing Legacy of Bismark, using it to place 2 SP in Moscow (0,3*). This means he will "carry over" a Liberal card to the next turn (see 4.5.1).
Liberal: Tâm plays Russo-Japanese War for the OPs. Since she did not use the event, the card goes to discard. While it would be nice to play it for the event, forcing Kris to lose 2 SP from the Moscow and Nicolas II spaces, keeping the card in the deck is worth more in the long run. She uses the 3 OPs to place 3 SP in Constantinople (3*,0).
Round 1.6
Authoritarian: Kris plays Lord Fisher, moving the British Navy marker to the "HMS Dreadnought" box on the Naval Arms Race track. Tâm uses the text of that box to place 1 support in Sweden (1,0) and 1 support in Italy (2,0). Kris uses the 3 OPs to place 3 SP in the Tsarist Army space (0,3*). The Lord Fisher card is placed in front of Tâm, the Liberal player, as a reminder of its permanent effect.
Liberal: Tâm uses Admiral von Tirpitz as a Naval Arms Race attempt, rolling a 3 modified by +1 (for Lord Fisher) and +4 (card OPs) for a total of 8, easily beating the 5 needed to move to the "Nassau-class" box. For now on until the German Navy reaches the "Nassau-class" box, all 3+ OPs cards from the Authoritarian are worth -1 OPs. The Admiral von Tirpitz card is put in the discard pile and not removed from play as it was used on the Naval Arms Race.
Round 1.7
Authoritarian: With both cards in his hand effectively worth 2 OPs (due to the "Nassau class" box reducing Radical Party Founded to 2 OPs), Kris opts to play Second International on the Naval Arms race track (hoping to reach the "Nassau-Class" box in time to turn Radical Party Founded into a 3-OPs card again). He rolls a 4 modified by 2 (card OPs) for a total of 6, enough to reach the first box (neither receiving a reward nor ending a reward already gained by the Liberal player).
Liberal: For her final action, Tâm plays Modernism, placing 1 SP in French Writers (4*,0), 2 SP in Bosnia (2,0) and 1 SP in the Symbolism space (1*,0).
After verifying neither player's last remaining card was a Scoring card, play continues to Turn 2 (see 4.5.3 and 4.5.5).
Turn 2
Players alternate drawing cards with the Authoritarian player drawing first. Since Radical Party Founded remains from Turn 1, Kris will draw seven cards bringing his hand size to 8. The cards in his hand are:
- #05 Dreyfus Affair
- #17 Eight Nation Alliance
- #11 Foreign Investments
- #14 Radical Party Founded (from turn 1)
- #19 Union of Liberation
- #26 Franco-Russian Alliance
- #18 Bernhard von Bülow
- #30 Military Tradition
The Liberal player needs to replenish cards. Since Tsarist Repression remains from turn 1, Tâm will draw seven cards bringing her hand size back to 8. The cards in her hand are:
- #10 Entente Cordiale
- #22 Socialist Movements
- #20 Bonapartism/Monarchism
- #21 Prussian Spirit
- #24 Tsarist Repression (from turn 1)
- #27 Dual Alliance
- #29 Two-power Standard
- #35 Absolutism
Round 2.1
Authoritarian: Without the Russia Scoring card in hand, Kris realizes that chances are pretty high that Tâm currently has it. As such, he feels it is imperative to consolidate Russian control. However, one thing is more important - the naval status. With the current -1 OPs on all OPs cards, fighting for Russia seems hopeless. Therefore Kris plays Bernhard von Bulow for its event (counting Nicolas II, Wilhelm II and Dual Monarchy as 3 Authoritarian-controlled Monarch spaces) to play Admiral von Tirpitz from the discard. Tension increases to 1. The crisis roll is a 5 but still modified down to 0 means the Great War does not occur yet.
Kris removes 2 support from the Wilhelm II (0,3) space to advance 2 boxes on the Naval Arms Race track, moving through the "Nassau-class" box (thereby ending its effect) and then gaining -2 VPs from reaching the "Bellerophon-class" box, moving the VP marker to -5.
Liberal: Tâm's hand is horrendous, featuring no fewer than 6 Authoritarian cards. With Russia strongly in the hands of the Authoritarian player, Tâm suspects Kris would have used Russia scoring if he had it in his hand. It is probably still in the deck, so she decides to "take a break" this turn and jettison some dangerous cards. She plays Two Power Standard, which will now give her 3 OPs but ensures her next three actions will be Naval Race attempts. With the 3 OPs she places 2 support in Poland (3*,0) and 1 in Italy (3*,0).
Round 2.2
Because of Two Power Standard, Tâm will not be doing anything constructive during her next 3 actions. Time for Kris to profit from that.
Authoritarian: Kris plays Union of Liberation and, in addition, immediately plays Eight Nation Alliance (to prevent the effect of Union of Liberation). With the 3 OPs he places 3 support in the Kiel (1,3) space. Both cards are placed in the discard pile. Even though Union of Liberation has an asterisk after its name, the play of Eight Nation Alliance prevented it from being removed from play, as with all events whose play conditions were not met (see 5.2).
Liberal: For Tâm's first mandatory Naval Race Attempt she decides to discard Tsarist Repression. Tâm rolls a 1 modified by +1 (Lord Fisher) and +3 (card OPs) which is not enough to reach the next space on the Naval Arms Race track. The British Navy Counter is flipped to +1 side, providing a +1 modifier for the next Liberal Naval Race attempt(s).
Round 2.3
Authoritarian: Kris uses Radical Party Founded for 3 OPs, placing 1 SP in Kiel (1,4*) and 2 SPs in Alsace-Lorraine (0,3*). Tâm places 1 SP in Picardy (3,2), 1 SP in Paris (3*,0), 1 SP in Fauvism (1*,0), and 1 SP in Bordeaux (1,0) thanks to the strategy card's event text.
Liberal Tâm's second mandatory Naval Race attempt sees her discarding Prussian Spirit and another 1 is rolled, which is enough thanks to the +1 on the British Navy marker. Tâm gains 1 VP (VP marker is moved to -4) after the British Navy marker is moved to the "Bellerophon-class" box and is flipped back to its front side.
Round 2.4
Authoritarian: Kris plays Foreign Investments for 2 OPs and decides to have the event occur first. Tâm decides to move 3 Liberal SP from Picardy (0,2*) moving 2 SP to Vienna (2,3) and 1 SP to the Orthodox church (1,3). Kris then uses the 2 OPs to place support in Vienna (2,5*).
Liberal: Finally Tâm's last mandatory Naval Race attempt sees Bonapartism/Monarchism discarded. Tâm rolls a five modified by +1 (Lord Fisher) and +3 (OPs) for a total of 9, more than enough to advance to the "Helgoland-class" box (see 8.2).
Round 2.5
Authoritarian: Kris plays Military Tradition for 2 OPs, placing 1 SP in the Orthodox Church (1,4*) and 1 SP in Crimea (0,1).
Finally after all those Naval Race attempts, Tâm gets to react again to the new board position.
Liberal: Tâm plays Entente Cordiale, placing its marker on the leftmost open space of the Great War Status Track (the -4 space), then places 2 SP in the Colonials (2,1) and 2 SP in the French Armed Forces (2,1).
Great War Status Track after play of Entente Cordiale: Three Emperor League and Entente Cordiale markers occupy the two leftmost spaces, so the leftmost open space is -3.
Round 2.6
Authoritarian: Kris plays the Dreyfus Affair for its event text placing 2 SP in the French Armed Forces (2,3) and doubling the cost for Tâm to place support in France for remainder of turn.
Liberal: Socialist Movements is played and its event is used to place 2 support in East Prussia (2,1).
Round 2.7
Authoritarian: Kris plays Franco-Russian Alliance as a Naval Arms Race attempt, rolling a 3 modified by 2 (for OPs) for a 5. This is not enough to reach the next box, and the German Navy marker is flipped to its +1 side.
Liberal: Tâm plays Absolutism, gaining 3 OPs which she uses to place 3 support in East Prussia (5*,1). The event goes into effect (and the card is removed from the game) but to no avail as Kris has no card plays remaining.
Thanks to the British Navy being on the "Helgoland-class" box, Tâm may make one more Naval Arms Race attempt.
She discards her final card Dual Alliance and rolls a 4, which is modified by +1 (Lord Fisher), -1 ("Helgoland-class" box) and +2 (OPs) for a total of 6, advancing the British Navy marker to the "Colossus-class" box.
Turn 3
Both players have exhausted their entire hands and will draw 8 new cards.
Once each player receive 4 cards, the play deck is exhausted and the play deck is shuffled (minus the cards removed from play). This means that in addition to the Russia Scoring card (which is definitely in either player's hand), the France Scoring and A-H Scoring cards could potentially be drawn again this turn.
The Authoritarian hand is:
- #07 Austria-Hungary Scoring
- #40 Indecisiveness
- #02 State Secularism in France
- #03 Second International
- #38 Kulturkampf
- #25 Legacy of Bismarck
- #34 Government-Sponsored Art
- #37 Ferdinand Esterhazy
The Liberal hand is:
- #06 France Scoring
- #08 Russia Scoring
- #09 Russo-Japanese War
- #33 Modernism
- #36 March of History
- #78 Revolution of 1905
- #13 Traditionalism
- #31 Status-Quo
At this point, the position of the Authoritarian player is pretty strong, as Kris is clearly leading in Russia, Germany and Austria-Hungary while not lagging in Balkans and only really weak in France (where having State Secularism in his hand rather than in the Liberal hand is an strong asset).
Tâm clearly needs to focus on the Balkans and should make good use of the "Colossus-class" box to regain the initiative, presumably starting the turn by playing either the Russo-Japanese War or the Revolution of 1905 for both its text and OPs. The game is on!
The Great War
We rejoin Kris and Tâm's game after several more turns have been played. During those turns, the #26 Franco-Russian Alliance, #27 Dual Alliance cards (adding and flipping markers on the Great War Status track), and the #50 Schlieffen Plan Adopted card (adding an event marker near the Great War Status track) have been played. Tension in the meantime has risen to 3.
Tâm, who is still ahead on the Naval Arms Race track, has just played the #57 Naval Bill/Fleet Law strategy event as her impulse. She increases Tension to 4, then makes a Crisis roll. She rolls a 5, modified by 4 (Tension) and -2 (current value of the leftmost open position of the Great War Status track). The -2 modifier from Three Emperor League is no longer in effect as this marker had previously been flipped to its Franco-Russian Alliance side. The total Crisis roll is 7, which exceeds the 6 needed to start the Great War. The game turn immediately ends (and the remaining text on the Naval Bill/Fleet Law card is ignored) and the game proceeds to the Great War (see 8.4).
First, they have to determine who is participating in the Great War and on which side (see 8.4.1).
- Kris, championing the Central Powers, will fight alongside Germany and Austria-Hungary (thanks to Dual Alliance).
- Tâm, commanding the Entente, will control France, Russia (thanks to Franco-Russian Alliance), and Britain (thanks to Entente Cordiale and Schlieffen Plan Adopted).
- The Balkans Scoring Region will not participate as the Balkan Wars marker is not on the Great War Status track
Both players now determine their total War Resolution modifiers (see 8.4.2).
- Kris will receive a +2 to the Great War roll due to the Dual Alliance marker, and an additional +1 for Schlieffen Plan Adopted and +1 for control of Constantinople.
- Tâm will receive a +4 to the Great War roll due to her two Alliance markers on the Great War Status track, and an additional +1 for the British Navy being ahead on the Naval Arms Race track.
Both players roll.
- Kris rolls a 5 modified by +4 for a total of 9.
- Tâm rolls a 2 modified by +5 for a total of 7.
The Central Powers win the Great War and gain 4 VP.
With the Central Powers winning the Great War, War Losses (see 8.4.3) are determined as follows:
- In the Scoring Regions that participated on the Entente side (i.e. Russia and France), Tâm will roll a D6, then remove SPs from spaces in the scoring region (or independent spaces adjacent to the scoring region) equal to the result, after which Kris will do the same. Finally, Tâm will repeat this process one last time.
- In the Scoring Regions that participated on the Central Powers side (i.e Austria-Hungary and Germany), Kris will roll a D6 and gain that many OPs to place SPs in spaces in the scoring region (or independent spaces adjacent to the scoring region), after which Tâm will roll a D6 and remove SPs from spaces in the scoring region (or independent spaces adjacent to the scoring region) equal to the result.
- Constantinople was already under Authoritarian Control, but Italy was uncontrolled. As a result of War Losses, enough Authoritarian SP are placed in Italy for control.
As the Central Powers won the War, Kris selects the order of the Scoring Regions for this process.
Finally, after all War Losses have been removed, all participating Scoring Regions (i.e. all but the Balkans) are scored again (without using Stability cards, which are only used when playing a Scoring card!). At this point, the player with the most VPs will win the game. In case of a tie, Kris, whose side won the Great War, would win.
Credits
Game Design: Kris Van Beurden
Graphic Design: Bill Morgal
Compass Logo Banner: Brien Miller
Rules Proofer: Rich Jennings
Playtesting: Tâm Dang Vu, Severijn De Wilde, Eddy Sterckx, Bart Van Beurden
Production: Ken Dingley and Bill Thomas for Compass Games, LLC.
Player Aid: Quick Reference
The rules booklet's two-sided Player Aid card, transcribed for reference.
Cards can be played in three manners:
- Play the card for its OPs value (if the card is aligned with your opponent's ideology, the event will occur)
- Play the card for its event, if the card is aligned with your ideology or is neutral
- Play the card as a Naval Race Attempt (regardless of ideology, the event will not happen) - once per turn unless otherwise specified (e.g. Two Power Standard, Naval Law Amendment, von Bethmann-Hollweg, ...).
Placing Support (6.1)
- OPS can be used to place Support, on a 1 OPS for 1 support basis. Support placed in this way can only be placed in or adjacent to a space where you had influence at the beginning of the action round (but see Great Britain, Egypt and Ottoman Empire)
- While a space is controlled by the opponent, each support costs 2 OPS.
- Support can be placed through events or other game effects. Unless specified otherwise, Support placed in this way is not limited to the rules mentioned above.
Support Check (6.2)
- Cards played for OPS can be used to make (two) Support checks, never in the same space consecutively. A Support check may only be made in a space containing opponent's support.
- Roll a D6, adding the OPS value of the card played plus 1 for each adjacent space controlled by you, and subtracting twice the space's stability number plus 1 for each adjacent space controlled by opponent.
- If the result is positive, remove opponent's support from the space equal to the result (adding your own support if opponent's support reaches zero, but never more than the space's stability). Otherwise, no effect.
- Support checks can be made through events or other game effects. Unless specified otherwise, any number of such Support Checks may be made in the same space.
Naval Arms Race (6.3)
- Whenever a card is played as a Naval Arms Race attempt, make a roll, adding the card's OPS value, plus 1 if the Strategy card is aligned to your ideology and plus 1 if your Naval marker is flipped to its +1 side.
- If the modified roll is equal to or higher than the value in the next space on the Naval Arms Race track, move your Naval marker one space (flipping it to its front side if necessary).
- Otherwise, flip your marker to its +1 side (if necessary).
- Immediately gain the result of the space entered (or stop opponent's effect).
Crisis Rolls (8.3)
- Whenever a card is played that requires a Crisis roll to be made, roll a D6, subtracting the number in the FIRST OPEN SPACE on the Great War Track (and an additional two if Three Emperor League marker is on the track) and adding the value of the space currently containing the Tension marker (+1 if the Balkans marker on the Great War track).
- If this roll is greater than 6, the Great War breaks out.
Great War (8.4)
- Determine participants (8.4.1)
- Determine War Outcome (8.4.2) and War Losses (8.4.3) or (optional) use War Mobilization (8.4.4)
- Final Scoring (8.4.5, only for participants)
Player Aid: Marker Legend
The rules booklet's second Player Aid card, transcribed for reference.
Three Emperor League
- Placed on leftmost space of the Great War Status track during setup
- Flipped to its reverse side by card #26 Franco-Russian Alliance
- Removed from the Great War Status track by card #61 Russian Collapse
- While marker on the Great War Status track, counts as an additional -2 modifier to Crisis rolls and Authoritarian player receives +2 to his War Resolution roll (see 8.4.2)
State Secularism in France
- Place marker on French Catholic Church space after play of card #2 State Secularism in France
- While on the French Catholic Church space, that space and all connections to it are considered to be absent
Entente Cordiale
- Place marker on leftmost open space of the Great War Status track after play of card #10 Entente Cordiale
- Flipped to its reverse side by card #95 Splendid Isolation
- While there, Liberal player receives +2 to his War Resolution roll (see 8.4.2)
Franco-Russian Alliance
- Flips the Three Emperor League marker to its reverse side after play of card #26 Franco-Russian Alliance
- Removed from the Great War Status Track by card #61 Russian Collapse
- While there, Liberal player receives +2 to his War Resolution roll (see 8.4.2)
Dual Alliance
- Place marker on leftmost open space of the Great War Status track after play of card #27 Dual Alliance
- While there, Authoritarian player receives +2 to his War Resolution roll (see 8.4.2)
Belgian Rule in Congo
- Place marker in Congo Annexed box near the Belgium space after play of card #45 Belgian Rule in Congo
- While in the Congo Annexed box, Belgium is treated as both a Worker and an Annex space
Austria Annexes Bosnia
- Place marker in Bosnia Annexed box near the Bosnia space after play of card #49 Austria Annexes Bosnia
- While in the Bosnia Annexed box, Bosnia is part of the Austria-Hungarian and the Balkan scoring region
Schlieffen Plan Adopted
- Place marker in its space above the Great War Status track after play of card #50 Schlieffen Plan Adopted
- While marker there, Authoritarian player receives +1 to his War Resolution roll and (unless Splendid Isolation marker on the Great War Status track) Britain belongs to the Entente during Great War resolution
Norwegian Independence
- Place marker in Norwegian Independence box near the Norway space after play of card #51 Norwegian Independence
- Unless marker in the Norwegian Independence box, SP cannot be placed in the Norway space and Support Checks cannot be made in the Norway space
US Interventionism
- Place marker in its space above the Great War Status track after play of card #58 US Interventionism
- While there, Liberal player receives +2 to his War Resolution roll (see 8.4.2)
- Removed from its space (or Marker pool) by card #88 US Non-interventionism
Russian Collapse
- Replace the Three Emperor League (or, if flipped, the Franco-Russian Alliance) marker from the Great War Status track by the Russian Collapse marker after play of card #61 Russian Collapse
Triple Alliance
- Place marker on leftmost open space of the Great War Status track after play of card #68 Triple Alliance
- While there, Authoritarian player receives +2 to his War Resolution roll (see 8.4.2)
- Flipped to its reverse side by card #94 Perfidious Italy
von Bethmann-Hollweg
- Place marker in its space above the Great War Status track after play of card #74 von Bethmann-Hollweg
- While there, Authoritarian player receives +1 to his War Resolution roll (see 8.4.2)
Balkan War
- Place marker on leftmost open space of the Great War Status track after play of card #87 War in the Balkans or card #90 Balkan Civil War
- While marker on the Great War Status track, counts as an additional +1 modifier to Crisis Rolls
Perfidious Italy
- After play of card #94 Perfidious Italy, if the Triple Alliance marker is on the Great War Status track, flip it to its reverse side. Otherwise, place marker on leftmost open space of the Great War Status track
Splendid Isolation
- After play of card #95 Splendid Isolation, if the Entente Cordiale marker is on the Great War Status track, flip it to its reverse side. Otherwise, place marker on leftmost open space of the Great War Status track
Black Hand
- Place marker in Serbia, Bosnia, Montenegro or Macedonia after play of card #103 The Black Hand
- While marker in one of the above spaces, no support checks may be made in that space and this marker counts as 2 Authoritarian SP that may never be removed
German Army Expansion
- Place marker on leftmost open space of the Great War Status track after play of card #102 German Army Expansion
- Authoritarian player receives +1 to his War Resolution roll for remainder of the game (see 8.4.2)
Marker Placement
8.2.3 Whenever a new marker is to be placed on the Great War track, place it in the leftmost open position.
8.2.4 The Great War Status modifier is the number in the leftmost open position of the Great War track (if all spaces are filled, it is 0), potentially modified by -2 if the Three Emperor League marker has not been flipped to its Franco-Russian Alliance side or by +1 if the Balkan War marker has been placed on the track.
8.4.2 Near the Great War Status Track are four Event marker spaces reserved for events affecting War Resolution. These are: Schlieffen Plan Adopted, German Army Expansion, Von Bethmann-Hollweg and US Interventionism. After playing the event, place the appropriate marker in the corresponding box.
NOTE: Play of US Non-interventionism will remove the US Interventionism marker from the game (whether in its box or in the marker pool).
Icons
Great War Status Modifier — A number in a red circle modifies the number on the Great War Status Track when resolving a Crisis (see 8.3.1). This applies when either player makes a Crisis roll.
War Resolution Modifiers — Each yellow number in a black circle modifies the Authoritarian player's War Resolution roll (see 8.4.2). Each blue number in a black circle modifies the Liberal player's War Resolution roll (see 8.4.2).