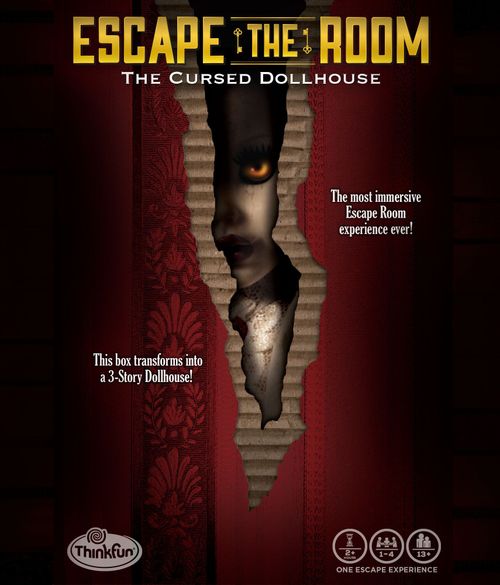
Escape the Room: The Cursed Dollhouse
Escape the Room: The Cursed Dollhouse Rulebook
Table of Contents
Table of Contents
Dollhouse Assembly Guide
Before you begin playing, please check the contents of the box and read the setup and assembly instructions to properly prepare the game. Please do not open or adjust anything unless instructed. Otherwise you risk spoiling a puzzle or part of the story. If additional assistance is needed, consult www.ThinkFun.com/EscapeTheRoom
Includes
- Two-Story House Setup (the top and bottom of the game box)
- Attic Room Assembly
- 3 Punchboards with Furniture and Components
- Component Envelope
- Solution Wheel
- Instruction Manual with Story
IMPORTANT: After exploring a room, if you would like to confirm you have all the components needed to solve the puzzles for that room, visit: www.ThinkFun.com/Dollhouse-Checklist
Additional Materials Needed
- Pencils and Paper (for taking notes and working through some of the puzzles)
- Internet Access (optional): Download a sample invitation letter, access online hints during the game, stream recommended playlists, download and print puzzles for reassembly, and more.
Setup
IMPORTANT: This game requires some assembly before play begins. Only do as instructed and do NOT remove any of the game components mounted by adhesive before starting the game.
TO START: Remove all of the punchboards, the component envelope, the protective cardboard sheet, and the protective plastic sheet from the box. Open the component envelope and remove all of the contents. Do NOT open any of the smaller envelopes.
To build the Dollhouse and all of its accessories, and to correctly place each accessory, follow the icons on each of the punchboards, and the images shown in the assembly guide.
Legend: icons printed on the punchboards show in which room each item must be placed: Living Room, Kitchen, Bedroom, Bathroom, Attic.
NOTE: The precise placement of items within a room will not impact gameplay, as they can be moved during play. It is most important to place the items in the correct room at the start of the game.
Some items require assembly. Follow the instructions in the assembly guide to assemble these items before placing them in the room indicated.
Dollhouse
House Assembly:
- Stand the top and bottom of the game box side by side so that the kitchen and the bathroom are on the right. NOTE: The bathroom will stand slightly taller than the bedroom.
- Lay the folded floor flat with the wood and tiles face up, and ceiling lights face down.
- Slide the floor into the middle of the house, aligning the three slots on the floor and the house.
- The two horizontal tabs should extend through the slots on the back wall. Fold the edges of both tabs to lock the floor in place.
Attic Assembly
Assemble the attic following the three illustrated steps. Add to room: Chest, Nesting Doll.
Items to Add to Each Room
- Living Room: 6 Wood Planks, Rug, Porcelain Doll
- Kitchen: Paper Doll, Pin, Table (Table Assembly: follow the illustrated steps)
- Bedroom: Bed, Quilt, Voodoo Doll (Bed & Quilt Assembly: follow the illustrated steps)
- Attic: Chest, Nesting Doll
Your Dollhouse is now ready!
ONLY PROCEED IF YOUR DOLLHOUSE IS FULLY ASSEMBLED.
Game Introduction
Escape the Room: The Cursed Dollhouse is a tabletop escape the room experience in which players must solve a series of puzzles found within an actual dollhouse. The full experience is intended to take several hours. The dollhouse is made up of 5 rooms, each with its own set of puzzles. Players move through the experience one room at a time following the story. The progression to each phase of the experience and story is always blocked by a door or other object, marked with an icon with an outline.
Whenever players see this icon it indicates that the players must first find three specific symbols in the room that they are currently in before they can proceed to the next phase. Each symbol will be linked to a specific ring on the solution wheel. There are many symbols throughout each room, but you must solve several puzzles to find the correct ones. When the three symbols entered into the Solution Wheel are confirmed to be correct, you may proceed into the next room of the house and read the next part of the story, as instructed.
It is important to note that while three symbols are needed to progress past the icon in each phase, there may be other puzzles in the room. These will often provide symbols or clues that will be used later in the game.
Each room of the house contains a variety of items, clues, and details. Only when you have entered a room can you open any envelopes, remove any adhesive, or otherwise explore that room. Some items may need to be manipulated, i.e., moved, folded, torn, or marked in order to solve the puzzles. Some items will be damaged during play; these items can be printed and replaced for re-packing after you have finished the game. See www.ThinkFun.com/EscapeTheRoom for details.
Some of the clues and items are in plain sight and some are hidden. Some clues and items are only used in the room in which they are found while other clues and items may be used in a future location, or more than once. There are also clues hidden within the story, so pay careful attention to details when reading.
The full experience can take several hours. If you would prefer to split the game into more than one session, it is best to pause the game immediately after completing any one of the rooms before proceeding to the next. If players prefer a timed experience, set a timer for 2 hours and 30 minutes, and start the timer when you enter the Living Room.
Solution Wheel
The Solution Wheel is used to confirm you have correctly solved a puzzle, and if you can move to a new location. You will want to familiarize yourself with the symbols on the wheel. To unlock a door/object you will need three symbols. The solution can include any group of three symbols (including duplicate symbols).
IMPORTANT:
- In solving each puzzle there will always be clues to indicate which ring on the solution wheel you will be using. If you carefully examine all the details in the house and story, you will never need to guess which ring to use.
- Some rooms have more than three puzzles. In these rooms, you must still find three symbols to enter into the Solution Wheel. The reason for the other puzzles will reveal itself in time.
When you think you have found the three symbols to unlock a door/object:
- Locate the yellow symbol representing your current location on the outer ring of the Solution Wheel.
- Rotate each of the colored rings to line up the three solution symbols you have found with the symbol on the outer yellow ring.
- Gently slide the tab until all six windows open. The windows in the center of the Solution Wheel will indicate if you have three correct symbols. (Slide to the right to open windows; slide to the left to close windows.)
- When the Solution Wheel indicates that you have entered three symbols correctly, you can move to the new location outlined in the text.
Your solution is correct if:
- The same symbol from the outer yellow ring appears through TWO windows on the Solution Wheel (example: the Laundry Symbol, a washing machine, appears in two windows).
Your solution is incorrect if:
- No symbols appear in the Solution Wheel windows, or
- The symbol(s) in the window(s) don't match the Room Symbol on the outer yellow ring.
If you are incorrect, the solution wheel will not indicate which individual symbols need correction. Carefully reexamine all the clues in the room and look for different solutions, particularly for puzzles where you may not have been completely confident in the answer.
IMPORTANT: After each try of the Solution Wheel (whether your solution is correct or incorrect) slide the tab until all six windows close. We strongly recommend that you do not leave the windows open while you rotate the Solution Wheel at random to find the correct answers by "guessing and testing." This will only anger the evil spirits of the Dollhouse!
Hints
If you get stuck, use the online hints at www.ThinkFun.com/EscapeTheRoom
Make sure that all players are in agreement before turning to the hints. If you can't decide whether or not to use a hint, take a quick vote - majority rules (the host's vote breaks any ties).
Beginning the Game
When you are ready, begin reading "The Story Begins". If you would like a more exciting, timed experience, set a timer for 2.5 hours and start it when instructed. Otherwise, feel free to enjoy solving the puzzles without the timer. Good luck!