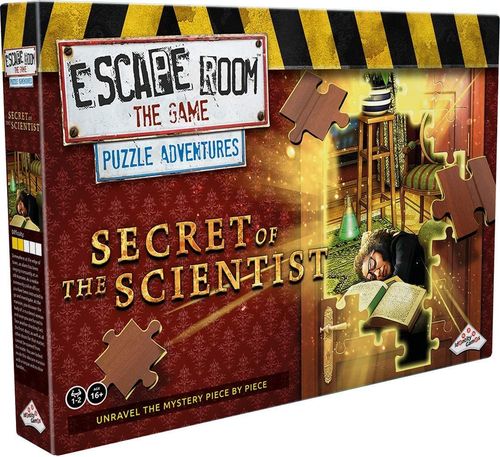
Escape Room: The Game – Puzzle Adventures: Secret of The Scientist
Escape Room: The Game – Puzzle Adventures: Secret of The Scientist Rulebook
Table of Contents
Table of Contents
Puzzle 1: The Paintings
You step into a chic but cluttered living room. Several paintings are scattered across the floor… and so is the motionless body of an older woman. There is no trace of any door handle in the room. Then, your eyes are drawn to the paintings on the floor and the 4 places where they should be hanging. Is someone playing a game with you?
The 5 paintings each show a famous scientist who has contributed something to the field of medical science. There are 4 spots for hanging paintings inside the room: 2 empty spots on the wall and 2 easels right across from them. These 4 painting spots are labelled A, B, C and D. These letters indicate the key positions. Your task is to deduct which painting goes in which spot and, thus, which painting does not have a spot. Luckily you are in possession of a book filled with useful information.
Who is who?
First, it is helpful to know which painting features which scientist. The book provides descriptions of 4 out of 5 scientists.
- Joseph Lister has long sideburns
- Wilhelm Röntgen has a beard
- Marie Curie is not described, but is the only woman
- Alexander Fleming wears glasses
- Edward Jenner must be featured in the remaining painting
Find the hidden clues
Next, it's time to deduce which painting belongs to which spot. The bookmark shows hidden messages in the book which give clues about the correct positions of the paintings. Place the bookmark on the book so the coffee stain on the bookmark connects seamlessly to the coffee stain in the book. The symbols on the bookmark refer to certain words inside the book. Each horizontal row on the bookmark consists of 6 symbols or X's. Each sentence in the book consists of exactly 6 words. This means that if there's a symbol (other than an X) on the 4th position of a row on the bookmark, you should read the 4th word of the same row inside the book. Read all words belonging to one symbol (the triangle, for example) and then move on to the next symbol until you've deciphered all the secret messages:
- ✺ Röntgen looks at Fleming
- ✢ Fleming looks at Curie
- △ Jenner has no spot
- ◇ Lister stands on an easel
Who's hanging where?
Use the clues to hang the paintings in the right spots:
Röntgen looks at Fleming, which means Röntgen should hang to the right of Fleming. Therefore, Röntgen and Fleming should either both be hanging on the wall, or both be standing on an easel. However, since one of the easels is already taken by Lister ("Lister stands on an easel"), it means Röntgen and Fleming should both be hanging on the wall: Röntgen in position A and Fleming in position D.
'Fleming looks at Curie': Fleming looks straight ahead, meaning Curie should be in position C. 'Jenner has no spot', so Lister should be in the remaining position: position B. The numbers on the back of the paintings refer to key pieces:
- A = Röntgen = 5
- B = Lister = 2
- C = Curie = 4
- D = Fleming = 1
CODE PUZZLE 1 = 5 2 4 1
(Puzzle Decoder modifier: −1)
Convert the code of puzzle 1 using the Puzzle Decoder to find this symbol: a purple spiral piece.
Puzzle 2: Travels Around The Globe
The door at the other end of the room opens. Not the door you had hoped for… You have no choice but to continue this 'game'. You go through the door and end up in some sort of study, filled to the brim with all sorts of souvenirs from different countries. On the desk lies a map on which 4 journeys are indicated.
The journeys are lettered A, B, C and D and each consist of 4 destinations. For each journey, find the 4 souvenirs associated with those destinations. Mentally connect these souvenirs, in the travel order, to find a shape.
The destination note lists, among others: 1 Agra (India), 2 Cairo (Egypt), 3 Tokyo (Japan), 4 Beijing (China), 5 Nairobi (Kenya), 6 Sydney (Australia) (the rest of the note is covered by the overlaid map photo in the booklet).
Connecting the souvenirs on the room photo in numeric sequence for each journey traces these shapes:
- Journey A (red): souvenirs 2–4–5–1, connected in a loop, trace a wide parallelogram.
- Journey B (green): souvenirs 7–3–12–8, connected in a loop, trace a narrow parallelogram.
- Journey C (blue): souvenirs 9–10–11–6, connected in a loop, trace a wide parallelogram (mirrored from A).
- Journey D (purple): souvenirs 13–14–15–16, connected in a loop, trace a square.
So:
- A = red parallelogram, leaning right
- B = green parallelogram, narrow and leaning left
- C = blue parallelogram, leaning right
- D = purple square
CODE PUZZLE 2 = shape A, shape B, shape C, shape D (the four traced shapes, read in that order)
(Puzzle Decoder modifier: +1)
Convert the code of puzzle 2 using the Puzzle Decoder to find this symbol: a blue hexagon piece with a dollar sign.
Puzzle 3: The Balance
You enter a room which looks a little like a courtroom. In niches along the wall are 4 big weighing scales, each containing a differently shaped weight. On the wall is a message in Latin, which you successfully translate into: 'Bring balance. Use all small weights'.
The scales are marked by the letters A, B, C and D. Find out how many small weights each shape weighs to balance the scales. The Latin sentence indicates that all small weights need to be distributed over the 4 scales to bring balance to them all. The amount of weights per scale refers to the key pieces.
Look around the room to find 15 small weights.
The four shapes on the scales are a house, a dog, a person, and a sailboat. This means: house + dog + person + sailboat = 15×.
You know that: sailboat + dog = 6×, so: house + person = 9×.
2× house = person, so house + person = house + (2× house) = 3× house = 9×, so: house = 3×.
person = 2× house, so: person = 6×.
house is heavier than 2× sailboat, so: 2× sailboat weigh less than 3×. So: sailboat = 1×.
sailboat + dog = 1 + dog = 6. So: dog = 5×. This makes the code (dog, person, sailboat, house): 5, 6, 1, 3
CODE PUZZLE 3 = 5 6 1 3
(Puzzle Decoder modifier: +5, shown as = +1)
Convert the code of puzzle 3 using the Puzzle Decoder to find this symbol: a blue star piece.
Puzzle 4: The Ape
After balancing all 4 scales, the door swings open, revealing a jungle-themed room. In the corner there is a cage with a living chimpanzee inside. As soon as the ape has spotted you, it starts jumping up and down, screaming, and reaches its hand through the bars of its cage, almost begging. Poor thing!
You're having a moral dilemma. Are you opening the ape's cage first, or the door leading to the next room? Both feature locks with similar symbols on them. Only the order of the symbols differs. The right move is to release the ape (according to the person who designed these tests, dr. Asalia). Its owner is dead and if you won't help it, the poor creature will probably starve to death.
To free the ape, you need to solve the 4 puzzles in the order that is indicated on the lock on the cage: Block, Bowl, Ape, Cup.
Block
Inside the room, there's a big box with 3 numbered holes in it. A little block lies on the box. Through which of the 3 holes does the block fit?
Draw 3 views (red, blue and green) of the block. Use the top view from the room and the view on the back of the peanut dispenser to do so: the red view is a plus/cross shape, the blue view is a 2×3 rectangle block, and the green view is an L-shaped/step block.
The green view fits through hole 1.
Key piece A: 1
Bowl
In a funnel on the wall are 16 peanuts. Underneath the funnel is a system of tubes that connects the funnel to 3 bowls. Your goal is to figure out which of the bowls receives the most peanuts. At each junction the amount of peanuts is split exactly in half. Note down how many peanuts pass through each tube after each junction. Continue until you know how much peanuts end up in each bowl.
The 16 peanuts split at the first junction into 8 and 8. Each 8 splits again; following the tubes down through further junctions of 4s, 2s and 1s, the peanuts finally collect in the three bowls: Bowl 1 receives 5 peanuts, Bowl 2 receives 6 peanuts, and Bowl 3 receives 5 peanuts.
As you can see, bowl 2 receives the largest amount of peanuts.
Key piece B: 2
Ape
On the bulletin board are 7 illustrations of ape heads, portraying a certain pattern. Your goal is to figure out which of the 3 illustrations that are lying on the ground would fit on the spot with the question mark.
Carefully watch the row of illustrations to find 2 patterns:
- There is a pattern in what the ape touches or covers: eyes, ears, mouth, forehead, eyes, ears, mouth, …
- There is a pattern in which hand(s) the ape uses to do so: right, left, both, right, left, both, right, …
The illustration on the spot with the question mark should be an ape that touches its forehead with its left hand. This is illustration 3.
Key piece C: 3
Cup
On a box there are 3 cups. One of these cups contains a peanut. One section of the wall once held 6 posters, attached with tape. These posters indicated the way in which the cups were shuffled after a peanut was placed underneath the left cup. Your goal is to hang the posters back in their correct positions to figure out which cup currently holds the peanut.
Look carefully at the positions of the pieces of tape on each poster to figure out where it must have hung. The colouration of each spot shows which corners of the poster that used to hang there had a piece of tape on it.
The correct order of the posters shows that the peanut is currently underneath cup 3.
Key piece D: 3
Therefore, the code to free the ape is: 1233
CODE PUZZLE 4 = 1 2 3 3
(Puzzle Decoder modifier: +1)
Convert the code of puzzle 4 using the Puzzle Decoder to find this symbol: a gold star piece.
Puzzle 5: The Lab
You walk through the open door and enter a high-tech lab. Located in the middle of the lab is a large container for mixing chemicals. On the desk in the corner of the room, you find a note listing instructions for the preparation of some mixture.
The note contains the 4 steps necessary to create this mixture:
Step 1: Find all the ingredients
Upon careful inspection of the entire house you will find 8 Erlenmeyer flasks containing different coloured liquids: 3 red, 3 blue, 1 black and 1 yellow. These indicate the ratio in which you need to mix the colours.
Step 2: Add together in the ratios found
Assemble the spinner according to the illustrations on the instructions. Use the 2 parts of the axle included in the carton frame that also held the Puzzle Decoder. Place the spinner-sheet on the spinner in the correct way to reveal the correct ratio of colours: 3 parts red, 3 parts blue, 1 part black and 1 part yellow.
Step 3: Mix
Mix the colours by spinning the spinner at a high speed.
Step 4: Check the colour
Check the colour that arises on the spinner. Compare these colours to the colours on the back of the instructions. The matching colour indicates the code: 4534
CODE PUZZLE 5 = 4 5 3 4
(Puzzle Decoder modifier: −1)
Convert the code of puzzle 5 using the Puzzle Decoder to find this symbol: a green spiral piece.
NOW OPEN THIS LAST COMPARTMENT AND READ THE LETTER!