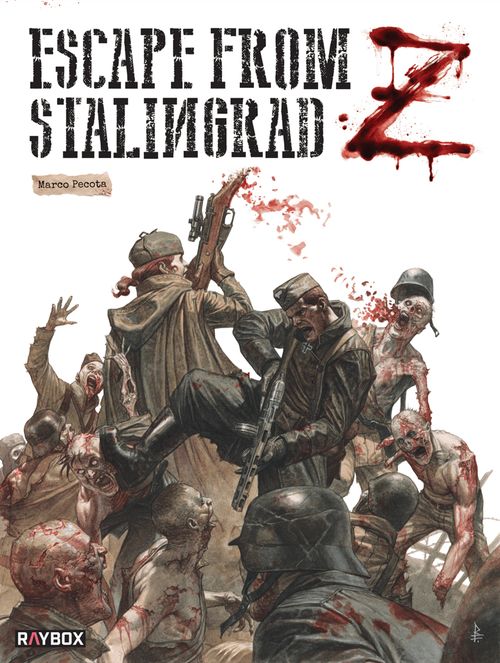
Escape from Stalingrad Z
Escape from Stalingrad Z Rulebook
Table of Contents
Table of Contents
- Before You Begin
- Core Concepts
- Your Characters
- Character Dashboards
- Scenario Setup
- Playing a Scenario
- Tactical Rules
- Tactical Rules - 1st Scenario
- Zombies
- Your Second Scenario
- Tactical Rules - 2nd Scenario
- Scenario 3
- Tactical Rules - 3rd Scenario
- Your Team
- Rescuing Civilians
- Armoury
- Versus Play
- Entries
- Scenario Rules
Before You Begin
Welcome to Stalingrad, 1942. Your odds of survival are not great. Supplies are cut off, command is breaking down, winter is here and the dead have arisen. Escape is your only chance. You may play the scenarios as one-offs but it is as a campaign that the full story experience is completely realized. You must supply the requisite judgement, guts, and fortitude to get yourself and your people out. Luck, of course, will take care of its fickle self…
Difficulty Level
Choose a difficulty level for your campaign playthrough. Note that the primary objective must be met, or the scenario must be replayed. Should the primary victory condition not be met, and no replays are available, the campaign is over and the player(s) have lost.
Difficulty Levels do not affect gameplay but do allow a varying number of scenario replays. If a scenario is replayed, that result must be kept, even if the outcome is worse. They are as follows:
- GREEN: Up to 2 replays per scenario – keep track of how many you've used in the Replays box in the team control sheet.
- REGULAR: The default setting. Will provide a rewarding and challenging experience to most players. Six scenario retries are allowed per campaign – record how many replays you've used in the Replays box of the team control sheet.
- ELITE: Hardcore players and/or those who have already completed one of the paths out of the doomed city may want to try this setting. It is not for the faint of heart. No scenario replays are allowed.
When replaying, your character's health, fatigue, supplies and gear revert to what they were when you started the scenario. If you wish, record these details in the Notes section of the Team Control Sheet at the start of each scenario so you know what to revert to.
Campaign Victory Conditions
For most, survival will be enough, but some may wish to measure their success compared to other players in the community. Competitive campaign victory conditions are found in Versus Mode (page 46).
Victory Levels are as follows:
- MARGINAL: One character survives.
- SIGNIFICANT: Two characters survive.
- DECISIVE: Three Characters escape.
- OVERWHELMING: All four characters escape.
- EPIC: 5 characters escape…Is this even possible?!!
CO-OP Play
If you choose to play with a friend, the game starts by each player selecting one character. When you find future characters in the game, the players must decide who controls the character.
Core Concepts
Core concepts are common rules which are frequently referenced throughout the rules. They are included now so as to make it easier to understand future rules.
Adjacency
Many rules in Stalingrad Z use the term "adjacent." This term specifically refers to orthogonal adjacency (except where it explicitly states "diagonally adjacent"). So, for example, a zombie is adjacent to a character if it is in one of the four squares to the immediate left, right, in front of, or behind the character.
Conflicting Rules
If there is ever a contradiction of rules between the manual and the scenario book, the scenario book rules take precedence.
Dice
Escape from Stalingrad Z is played using twelve-sided dice (d12). Players may be required to roll one or more dice to resolve an action. The number of dice required for a roll is abbreviated as Xd12 where "X" represents the number of twelve-sided dice to be rolled. The result of each die is read separately.
Facing
This concept denotes the direction in which the character/zombie is "looking." All characters must face one of the 4 adjacent squares.
The character marker's front facing is denoted by the blue hue.
Zombies are considered to be facing in all directions at the same time.
A miniature's facing is determined in a manner suggested by the miniature itself. Usually by the direction of the head or weapon - it is ultimately up to the player to decide. Whatever it is it should be consistent.
Figures
Character markers, zombies markers, standees and miniatures shall all be collectively referred to as figures in these rules.
Miniatures
You can choose to play with miniatures if you like. Simply replace the character/zombie markers with miniatures when they appear on the scenario map. Use your own or purchase the official Stalingrad Z miniatures from our website www.rayboxgames.com.
Scratch Rule
Whenever a team member rolls a 1 on a die when attacking, the player can either discard a scratch token to reroll the die or obtain a scratch token for use later. A scratch token can be used at anytime to reroll any die roll. This includes initiative dice, attack dice and dice rolled to determine a search result.
The team can never have more than 3 scratch tokens, and they may not be carried over to future scenarios.
Survivor
The term survivor is a catch all that represent all non zombie figures.
Action Markers
There are 2 types of action markers you need to put by your characters: attack and covering.
You place these when:
- Your character has attacked this round: place an attacked marker next to your character.
- Your character did not attack this round: if they were stationary, place a 0 covering marker; if they walked, place a +2 covering marker; and if they ran, place a +4 covering marker beside the character.
Status Markers
There are 2 status markers you will need to use during the game: stunned and locked.
These are used when:
- If you successfully rolled equal to or over the modified stun value when attacking a zombie but did not kill it, place a black stunned marker beside it. Stunned zombies cannot move or attack.
- If a zombie has successfully locked you in H2H combat, place a red locked marker between that zombie and your character.
Team Control Sheet
The Team Control Sheet is designed to record your characters' experience points, notes and civilian rescues, among other things. A sheet for photocopying is available at the back of this rulebook or downloadable PDF at www.rayboxgames.com/efszfreestuff.
Your Characters
The characters represent the most hardened and luckiest of the survivors who have lived past the first few days of the zombie outbreak. There are eight to choose from, each one with unique skills that will help you achieve victory. You start the game with one character but can gain up to three more to join your group of survivors.
These characters are represented by character markers.
As you play each scenario your character will come closer to escaping the damned city of Stalingrad. Along the way, they will need to defeat swarms of zombies, and recover essential clues as well as gear, food and ammo. They will also be gaining experience and unlocking unique skills.
Character Dashboards
The character dashboard keeps track of a character's skills, health, fatigue and gear.
- READY WEAPON / OFF HAND. Place the weapon marker you are currently wielding here. Some weapons are one-handed, allowing your character to ready two weapons. Place the secondary weapon marker in the off hand slot.
- SUPPLIES. Keep track of supplies here. Place supply track markers in the appropriate slots. Spaces are allocated for grenades, ammo, food and medkits. You can carry a maximum of 3 of each.
- GEAR. Listed is the character's preferred weapon along with slots to hold additional weapons scavenged along the way.
- SKILLS. Your character's unique skills which unlock as you gain experience.
- HEALTH. Where you keep track of health. If you hit 0, your character turns into a zombie.
- FATIGUE. Keep track of your character's fatigue.
During the course of the game, use the character dashboards along with markers, or printed character sheets and the team control sheet to keep track of your characters' progress.
Character Dashboard Details
The following instructions detail each aspect of the character dashboard. It is not necessary to read them all at this moment but you can refer back to them if you need clarification.
WHAT YOU START WITH: Your characters start with nothing but the clothes on their backs. The character dashboard has 4 slots for gear and weapons. Search and scavenge as soon as you can.
GEAR: As you acquire weapons and gear, place the markers in one of the four gear slots. Your character may not carry more weapons and gear than they have slots. Of course, they are free to pass weapons or gear to their comrades (Movement page 14).
Ready Weapon / Off Hand
READY WEAPON: A character can only attack with a weapon that is readied. Place the desired weapon marker in this box. You can switch weapons for 1 movement point (Movement page 14). This also allows you to equip, or change, your readied weapon(s).
OFF HAND WEAPON: Some weapons are one-handed. If you have two such weapons you may ready both. One-handed weapons have an asterisk on the weapon marker. To ready two weapons, both must have an asterisk. Place the weapon marker of the secondary weapon in this box. Any attacks with a secondary weapon are penalised (Attack Modifiers page 19).
Supplies: Ammo, Food, Medkits
Supplies is the catch-all term for the four types of consumables your characters will collect and use during the campaign, ammo, food, medkits and grenades. As you collect supplies record them on your character dashboard. A character can never carry more than 3. If you ever receive more than that limit, the excess is placed on the map and can be picked up by other characters. Supplies can be passed from one character to another.
- AMMO: If the character has no ammo markers, they can no longer fire their weapons.
- FOOD: Food can be used to mitigate or reverse ill effects (Between Scenarios page 39).
- MEDKITS: Medkits can be used to heal wounds. For every medkit used, heal 1 wound. This can be done between scenarios (Between Scenarios page 39).
- GRENADES: On your journey to escape Stalingrad, some searches will reveal grenades.
Skills and Experience
SKILLS: Each character has unique skills which can be unlocked through experience attained while completing the campaign. Rules for skills can be found on the character's dashboards.
EXPERIENCE: Experience is recorded on character dashboard or written on the Team Control Sheet.
Health
Use a marker on this track to show the character's current health. Whenever your character takes a wound, move the marker one space to the left. Once you reach zero your character has perished and will return as a vengeful zombie (Character Death page 40).
When you heal wound(s), move the marker by the number of wounds healed to the right. You can heal 1 wound by expending 1 medkit. This can only be done between scenarios (Between Scenarios page 39).
Fatigue
The fatigue track indicates your level of weariness and discomfort. Two factors contribute to character fatigue: hunger and cold. A new character's fatigue starts at 0, place a hex accordingly. If you are instructed to increase fatigue move the marker the appropriate number of spaces to the right. Likewise, move the marker to the left, when you reduce fatigue (Between Scenarios page 39).
Be careful, if your character becomes too fatigued they will become less skilled in combat and reduce their chance of survival.
Scenario Setup
Punch out all of your markers and place them in the small baggies, grouping the zombie figures and the character/trooper figures separately. It is up to you how you would like to separate and bag the balance of the markers.
It is now time to set up your play area and scenario 1: Furchtbar. The instructions on how to set up the scenario and any special rules are contained on the left hand page of a scenario spread. The map on which your characters will traverse (and complete objectives) is on the right page. We are setting up for a solo game but the setup for coop is identical.
- A INTRODUCTION TEXT. You can read this now.
- B FORCES. The figures that will be used in the scenario.
- C SETUP. Details on where the figures and markers are placed on the scenario map.
- D OBJECTIVE. The primary objective(s) that needs to be completed to finish the scenario. In this case it is to exit the map at the point marked by the green arrow without allowing a zombie to activate while it is adjacent to your character.
- E SECONDARY OBJECTIVES. Optional objectives you can choose to complete. In this case you may search the squares marked with an O for supplies.
- F SPAWN. Rules for when and where a zombie will spawn on the map.
- G THINGS TO REMEMBER AND WHAT YOU CAN FIND. Useful information for helping you play the scenario.
- H EXIT. Read this after you have successfully completed the scenario. Follow its instructions and you will be told what your next scenario is or whether you may choose one.
- I BETWEEN SCENARIOS. Not included in the first two scenarios this area details what can be done between scenarios.
READ ENTRY. At various points during a scenario, you may be instructed to read an entry – you can find the entry in the back of this rulebook, ENTRIES. Please read only the designated entry and follow its instructions as directed.
Campaign Setup
Starting a new campaign only consists of two steps.
CHOOSE YOUR CHARACTER. Pick one character dashboard from the 8 available.
TEAM CONTROL SHEET. Record them on your team control sheet.
Play Area / Setup
- Place your character dashboard near the scenario book. To build your dashboard place a marker on the #4 on their health track and a marker on the #0 on their fatigue track.
- Place your character figures on or adjacent to the square marked A.
- Place objective markers on all squares marked O, O1, O2 and so on. In this case there are 2 squares marked O so put on both of those.
- In the first scenario place 4 Beta Zombie markers in the zombie pool. If there are any squares marked with a Z on the map, draw zombie markers from the zombie pool and place them on each square of those squares. The first scenario has no squares marked with a Z.
- Place the round track marker on the first space of the round track. At the end of each round, you will advance it one square. When the round track marker would move off the end of the round track, it resets, moving back to the first space of the track.
- If there are any blue highlighted doorways in the scenario then place a door standee in its place.
- Designate an area next to the scenario book as your "discard area". You'll place the markers of eliminated zombies here.
- Only if using standees or miniatures, designate an In-play area. A zombie's marker will be placed here while that zombie is in play.
Playing a Scenario
The scenario is set up! Let's dive into the action.
The game is played out over a series of rounds. Each round is comprised of the Initiative Segment where we find out who will take the first turn, characters or zombies, then two turn segments, and lastly an End Segment, where certain scenario effects may be triggered.
Initiative Segment
- Roll 1d12 for both you and the zombies.
- The zombies receive a -4 to their roll (some types of zombies may negate this).
- The higher roll gains the initiative and chooses who will take the first turn.
- If the zombies win, they always choose to go first (in solo mode).
- In the event of a tie, roll again.
Turn Segment
A turn is divided into three phases: start, action and final phase. When the first turn is finished, the other side takes their turn, and the three phases are repeated. The round proceeds to the end segment after the final phase of the 2nd turn has been completed.
START PHASE: On the player's turn, remove covering and attacked markers from their characters.
ACTION PHASE: Activate each of the figures, one by one. For players it is in an order of their choosing. For the zombies it is the figure closest to a character.
CHARACTERS ACTION PHASE
- When a character is activated, the player must declare if the character is stationary, walking, running or performing a special action.
- If a character is declared stationary, walking or running, during their activation they may perform movement actions and a single attack action.
- Each character can only be activated once per turn.
- Only one character can be activated at a time.
- Characters may conduct a covering attack at any point - this includes the initiative and end segments.
ZOMBIES ACTION PHASE
- Activate non-stunned zombies one at a time starting with the zombie closest to a character.
- Stunned zombies do not activate; instead, remove the stunned token and move on to the next zombie.
FINAL PHASE. During the zombie turn, zombies are spawned in this phase. Characters may take covering fire.
End Segment
Advance the round marker on the round track by one. Additionally, certain scenarios will have actions to perform or things that occur during the end segment (e.g., the water level rising, fire spreading etc.).
Tactical Rules
We will be introducing rules in a staggered format so that you will be learning a portion of them at a time and then playing a scenario to use them. Some rules contain parts that won't be used until future scenarios, but we have included them so that the rules are all kept in one place.
Rules in blue do not need to be read until the second scenario is ready to be played.
Tactical Rules - 1st Scenario
Movement
In Escape from Stalingrad Z, moving, opening doors, passing/picking up gear and changing weapons are conducted using movement points (MPs). Zombies use different rules for moving - see the Zombie Movement section in this book.
All the rules below pertain only to characters.
- Only activated characters may spend MPs.
- A walking character has 4 MPs, while a running character has 8 MPs. A character who is stationary or performing a special action receives 0 MPs.
- A character may perform as many movement actions as their MPs will allow, in any order.
- Hindering terrain (outlined in yellow on the map) costs an additional 1 MP to move onto or cross.
- Characters may not move through walls, closed doors, or anywhere else the map shows a solid barrier, or squares outlined in red - these are collectively known as obstructive terrain.
- Characters may not move through a space occupied by another figure (either character or zombie).
- When moving diagonally at least one of the adjacent squares being moved past must be unobstructed, unoccupied and not in a zombie's ZOC. If both squares are obstructed and/or occupied, and/or a ZOC, then diagonal movement is prohibited.
- It costs 1 MP to exit a map.
- A character is not required to use all of its movement points, but any points not used are lost.
- Characters may pass weapons or gear to another character at the cost of 2 MPs. Passed weapons can be readied immediately for free (potentially swapping out an already readied weapon). Only the passer spends MPs.
- A character may pick up gear that is in plain sight (doesn't require searching) for 1 MP walking or 2 MPs when running. If a weapon was picked up, the character may ready it in either main or off-hand for free (even if this requires swapping out a different weapon, rearranging or discarding gear).
- Characters can move onto a fire square, causing them to take 1 wound, but cannot finish their activation on it. This damage also occurs if a character moves between two diagonally adjacent fire squares or a fire square diagonally adjacent to obstructive terrain. Additionally, if a fire marker is placed in a square with a figure, that figure takes 1 wound.
*To pick up or pass gear or open/close a door, the target of the action (either the character receiving the gear or a door) must be adjacent to the activated character.
MOVEMENT TABLE
| Action | Walk Cost | Run Cost |
|---|---|---|
| One Space forward | 1 | 1 |
| Turn 90 degrees | 1 | 2 |
| One Space Sideways | 2 | n/a |
| One Space backwards | 2 | n/a |
| Move Diagonally Forward | 2 | 2 |
| Move Diagonally Backward | 3 | n/a |
| Open/Close Door | 1* | 2* |
| Hindering Terrain | +1 MP | +1 MP |
| Switch Weapons |
Movement Examples
Dasha moves diagonally, paying 2 MPs. She then moves diagonally again and pays 3 MPs for the 2nd square because she is moving onto hindering terrain, which costs +1 MP. Moving 1 square forward within the hindering terrain costs another 2 MPs as the square is within the yellow box. Total MPs spent is 7. Note that she has to be running to achieve this.
Dasha wants to pass Reiser a knife she has picked up. From her starting position, she cannot give it to him since they are not adjacent. She declares herself walking and uses 1 MP to move forward then 2 MPs to give Reiser the knife and uses her last MP to move forward 1 square. Reiser is not required to spend any MPs for this.
Dasha wants to move to square A diagonally. She will be moving between the fire (causing 1 wound) and the rubble pile (hindering terrain). She chooses to take the penalty from the hindering terrain rather than take a wound, so it will cost her 3 MPs: 2 to move diagonally and 1 for the hindering terrain. If the rubble pile was an obstructive terrain (like stacked crates), she would be forced to take the wound from the fire. Alternatively, if the fire square was empty, she would not incur the +1 from the hindering terrain and would only pay 2 MPs.
Dasha is declared walking. She moves diagonally first, costing 2 MPs, then she elects to open the door for 1 MP and then uses her last MP to move one square forward. If she was running it would have cost her 2 MPs to open the door.
Special Actions
Special actions are only possible when specified by a scenario. Rules for resolving the outcome of a special action are given in the scenario.
- A character who is performing a special action may not perform any movement or attack actions. Instead, they spend their entire activation performing the special action.
- The character must be on or adjacent to the designated square to perform the special action.
- The most common special action you will encounter in scenarios is searching. Any time a scenario specifies that you need to search a location you need to perform a special action to do this.
- If the search results in a zombie appearance, place the zombie marker on the closest available unhindered or unobstructed square (player's choice).
Dasha wishes to use a special action to search the objective marked O on the map. The search square is behind her, but she still may search it as it is adjacent to her. Dasha may not move or attack this round.
Zombies
Zombie Turn
REVEALING ZOMBIES
Zombie markers are flipped, revealing the zombie, as soon they are in LOF (in any arc of fire) of a character. This is done immediately regardless of when it occurs (e.g. during spawning, zombie/character movement or a scenario effect).
When revealed (and if you have them), replace the marker with the appropriate miniature or standee and place the zombie marker to one side of the map (not the discard area).
Unrevealed zombies are treated as Beta zombies for movement.
SPAWNING
Zombies are spawned (placed on the map) in the final phase of the zombie turn when the current round space on the round track shows a spawn location. When this occurs, draw (from the zombie pool) and place a face-down zombie marker on each matching spawn location on the map.
E.g. If the current round space contains an "S," you draw and place a face-down zombie marker on each square marked with an "S" on the map.
The following rules apply to all zombie spawns:
- Zombie markers should not be looked at and are placed face down so the player doesn't know their identity until it is revealed.
- Some scenarios may instruct you to place a specific zombie that was set aside during setup, rather than draw one from the pool, for a certain spawn location.
- Zombies may also spawn as the result of an unlucky search. If the search result is a zombie, place the zombie marker on the closest available unhindered or unobstructed square (player's choice).
- If you need to spawn a zombie and there are none left in the zombie pool, take all the zombie markers in the discard pile, shuffle them, and place them face down into the zombie pool. If none remain in the discard or pool, skip spawn.
- If a spawn location is occupied by a zombie, place the spawning zombie face down off the board, near the spawn location. As soon as the spawn location is empty, place the waiting zombie - it does not activate if this occurs during the zombie turn. Multiple zombies may queue for the same location in this manner.
- If a spawn location is occupied by a character, the character takes 1 wound. The zombie waits off-map as per rules for a zombie occupied spawn location.
- If you are instructed to spawn a specific zombie, first use any that were set aside during setup, then any in the discard, then any in the zombie pool (reshuffle after looking). If all zombies of that type are currently on the map, skip the spawn.
- Also, note that spawning in the zombie final phase may be prevented by characters in the rearguard (Rearguard page 39).
"We all opened fire, round after round. No matter how many times they were hit, they got back up, lurching closer and closer. Til blew one's head off. It fell like a marionette with its strings cut."
ZOMBIE ACTIVATION
All zombies on the map must be activated in the order described below.
- Activate each zombie one at a time, starting with the one closest to a character.
- Do not activate zombies with no path to a survivor.
- When activating a zombie, first complete its movement and then its attack (if any).
- When stunned zombies activate, remove their stun marker. No movement or attack is allowed.
Zombie #1 is the closest to Til so would activate and move first. Zombie #2 would activate second and zombie #3 would not activate at all since it has no path to Til (blocked by the closed doors).
Zombie Movement
Unless otherwise specified, all zombies follow the movement rules as listed below.
- A zombie will target any survivor on the map.
- A zombie will not move if already adjacent to a survivor.
- Zombies can move up to a number of squares equal to their move statistic.
- They can move in any direction, including diagonally.
- Each square moved, even if diagonal, counts as 1 move for the zombie.
- A zombie will always move towards the closest survivor, which is the survivor that could be moved adjacent to in the smallest number of moves (regardless of any zombies that are blocking the shortest path).
- A zombie can only move diagonally if at least one of the adjacent squares it is moving past is empty.
- Zombies may not open doors.
- Zombies will not move diagonally across the corner of a fire square.
- A zombie will not move if there are no unobstructed paths to a survivor (e.g., if the zombie is shut in a room behind a closed door).
- Zombies may not move through obstructing or hindering terrain.
For each move, determine where the zombie goes by using the first option from this list that the zombie can complete successfully:
- Move adjacent to a survivor.
- Move diagonally adjacent to a survivor.
- Move towards the closest survivor, using the shortest path.
If there is more than one valid square the zombie could move into for one of the options, the player may choose which the zombie moves into.
If a zombie cannot successfully complete any option (because the relevant squares are all occupied by other zombies), then it does not move.
Examples of Zombie Movement
Move adjacent to a target. Zombie #1 can move to either A or B. Both are the same distance (1 move). Because the distance is equal, the player may choose which square the zombie moves to.
Move diagonally adjacent to a survivor. Zombie #1 will move to A (adjacent to closest survivor). With A being blocked by zombie #1, zombie #2 will go to B, diagonally adjacent to the closest survivor.
Move towards the closest target. Zombie #1 would not move toward character A since there is no path to get adjacent to him. Character B, who can be reached in three moves, is the closest target to zombie #1. It would move towards him. Character C is the closest target to zombies #2, #3 and #4, all of whom could move adjacent with a single move. First, zombie #2 will move up to be adjacent to character C. Zombie #3 now can't move because the shortest path to C runs between 2 occupied spaces. Zombie #4 cannot move to be adjacent, but can move to be diagonally adjacent.
Zombie Zone of Control
A character must stop when their move takes them into any square adjacent to a non-stunned zombie. A zombie's 4 adjacent squares are its zone of control.
- The character may use any unused movement points that they have left over to change facing.
- The character may still attack the zombie and if the zombie is stunned or killed, continue taking movement actions normally.
- Stunned zombies do not hinder character movement.
- If a character is activated already in a zombie's zone of control, they may move out of it normally (unless locked by the zombie) – the zone of control is only triggered by a character moving into it.
- Characters may not move diagonally between two zones of control.
Complete Scenario 1
You are now armed with all the information you need to play to the end of scenario 1. Give it a try! Have you escaped the clutches of the wandering zombies?
If so, congratulations! Read the exit text and either mark any final notes on your team control sheet, including writing 1 in the Last Scenario Played box and put away the game for a later play or continue to scenario 2.
If you failed, or are unclear about any rules, feel free to replay this scenario, and any of the other first three scenarios, as many times as you need.
Scenario 2: Time to Die, will introduce you to the concepts of combat. Good luck, we'll see you there.
Your Second Scenario
Welcome to your next scenario, Wake Up – Time to Die. Go ahead and open the scenario book to scenario 3 and lay it out flat in front of you. Follow the SETUP instructions as you did in the first scenario.
In this scenario you will be introduced to the rules on combat for both your character and the zombies. Experience points will also be covered.
Tactical Rules - 2nd Scenario
Combat
Attacking
All rules in this section pertain to characters - zombie attacks are covered in the Zombies section.
While a character is activated, it may use an attack action. The character may use its attack before, during or after its movement.
When using an attack action, a character must:
- Select an attack type: normal fire, spread fire, hand-to-hand combat or grenade. You must have at least one ammo to select either the normal fire or spread fire attack types. The H2H attack type must be selected if there is a non-stunned adjacent zombie.
- Select a readied weapon, suitable for the attack type, to attack with.
- Resolve the attack.
- Place an attacked status marker next to the character to show they have attacked (this also allows you to track which characters have already activated this turn).
If a character with an attack action has not used it when you choose to end their activation, place the appropriate covering status marker next to the character (Covering).
Resolving an Attack
Each attack type resolves differently but all of them use the following core process or a variation of it:
- Determine the target of the attack. This must be the closest (i.e., shortest range) zombie in the character's front arc that the character has a line of fire to.
- Determine the range to the target (Range).
- Calculate the attack modifier(s) (Attack Modifiers).
- Roll a number of d12 equal to the rate of fire of the weapon being used in the attack (Weapon Characteristics and Rolling Attack Dice).
- Resolve the effect of the attack (Attack Effects).
Any special rules or variations to this process for each of the attack types will be covered in the section on that attack type.
Arc of Fire
A figure has four arcs of fire: front, right, left and rear. These are 90-degree arcs as shown in the diagram. A figure may only attack a figure within its front arc. Throwing grenades is the exception (Grenades).
Zombies have no facing or arc of fire. They are assumed to be facing all directions.
Line of Fire (LOF)
Line of fire determines whether there is an unobstructed path between two figures. Figures can only see, or attack figures, they have a LOF to.
- To determine LOF, trace a straight line from the center of the attacking figure's square to the center of the target figure's square.
- Any squares through which the line passes are considered when checking if a LOF exists between the two figures.
- Line of fire is blocked by obstructive terrain (doors, walls, pillars, stacked crates, etc.).
- Corners do not affect line of fire.
- Intervening figures do not block LOF but will make it harder to hit the intended target.
- When attacking past a figure, a natural roll of a 2 on the d12 signifies that the first intervening figure gets hit instead and takes 1 wound.
Soviet Sniper Dasha (#1) can attack zombie B because it is in her front arc, and she can trace a line of fire to the center of its square. Her LOF crosses a square with another figure in it so she will receive a +2 attack modifier (Attack Modifiers). If Dasha rolls a natural 2 she hits Becker (Rolling Attack Dice).
Dasha (#1) cannot target A because her line of fire crosses a wall.
Tank Commander Becker (#2) cannot target either zombie because neither is in his front arc of fire.
Range
When attacking, determine the range by counting the number of squares from the attacking character to the target figure, including the target's square but not the firing figure's square. When calculating range, any diagonals count as 2, as they do when moving.
Weapon Characteristics
Listed below are the Characteristics of most of the weapons you will find in the game. Some of the terms mentioned in the descriptions and example have not been explained yet - see Attack Modifiers and Rolling Attack Dice for full details and refer back to this page as needed.
-
RATE OF FIRE (ROF): The number of d12 to roll when attacking.
-
ASTERISK: Indicates a one-handed weapon. Two weapons may be readied, one in the off-hand, if both show the asterisk.
-
STUN/WOUND VALUES (S/W #): The numbers you need to roll equal to or higher than on a d12 to, respectively, stun or wound your target if it is within PB range.
-
H2H STUN/WOUND VALUES: The numbers you need to roll equal to or higher than on a d12 to, respectively, stun or wound your target in hand-to-hand combat.
-
RANGE MODIFIER (RM): Add +1 to your attack modifier each time you increase the weapon's range past PB range by this amount.
-
PB RANGE (PBR): Any target within the indicated range is considered to be at point-blank range.
-
The Luger pistol shown has a rate of fire of 1, which means it rolls 1d12 when attacking.
-
Its S/W is 6/9, meaning it will cause a stun on a 6+ or a wound on a roll of a 9+ (before attack modifiers are applied).
-
The range modifier is 1, adding a +1 attack modifier for every 1 square the target is beyond the PBR.
-
E.g., Using the Luger on a target at range 5, the attack modifier would be +1, at range 6 it would be +2.
Attack Modifiers
Various factors may make it harder or easier to hit your target. This could be the type of attack conducted, the range of the target, or perhaps a figure is firing through hindering terrain. These circumstances create attack modifiers which are applied to your weapon's stun/wound values to give a modified S/W that you will roll against when rolling your attack dice.
- A positive modifier makes it harder to hit a target while a negative modifier makes it easier.
- Modifiers are cumulative and are applied to the weapon's S/W values prior to rolling the attack dice.
- It is possible for a figure to have enough modifiers to make an attack impossible.
- A character may also have modifiers from their dashboard, e.g., +1 to S/W # when fatigue reaches 2. Any time you would apply attack modifiers you also apply these modifiers to the S/W values.
There are three types of attack modifiers, regular, line of fire and ranged.
LOF Modifiers
LOF modifiers represent adjustments for intervening terrain and figures that hinder but do not block a character's LOF to the target. The maximum total LOF modifier that can be applied to an attack is +4.
- When an attack traces LOF through any portion of a square containing hindering terrain or a figure, a penalty is incurred for each hindering terrain square/figure in the LOF between the attacker and defender.
- Hindering terrain squares will be highlighted in yellow.
- If the attacking character is adjacent to a hindering terrain square in their LOF, then it does not cause a penalty. Adjacent figures in LOF incur the normal penalty.
Ranged Attack Modifiers
The accuracy of a weapon begins to drop when attacking targets outside of its PB range - the further away the target is the more difficult the shot. This varies by weapon type and is represented by the weapon's range modifier (RM).
When attacking a target outside of the PB range add the RM to the PB range as many times as is required to reach the target. However, each time, add a +1 to the ranged attack modifier.
The Luger's and MP-40's stun values increase with the ranged attack modifier applied at different ranges. E.g. the MP-40 stuns on a 6 at up to range 4, then it increases to a 7 at range 5-6 and so on.
Modifiers Examples
- The GREEN line indicates Soviet Sniper Dasha's (#1) line of fire through the figure Unteroffizier Reiser (+2 LOF mod.). At this range (4 squares), Dasha, who is also walking, attacking with her Nagant sniper rifle has a modified S/W of 7/10 (weapon S/W of 5/8 and a +2 LOF modifier for the intervening figure). Dasha rolls an 8 stunning zombie B. Note that if Dasha rolls a natural 2 then she will hit poor Reiser instead (Rolling Attack Dice).
- Unteroffizier Reiser (#2) is declared walking and is using his KAR 98 rifle to fire at zombie C. The 98K has a S/W of 6/9 with a PB range of 10. The RED line indicates the figure's line of fire (crossing a corner which is allowed - the corner wall projects beyond the square due to aesthetic purposes but does not block the attack). At this range (4 squares), and with no attack modifiers, Reiser requires a 6 or more on 1d12 to stun and will wound on 9+.
- The GREEN line indicates Dasha's (#1) line of fire over one square of hindering terrain (+2 LOF mod.) to zombie A. Her figure is activated and is declared as running (+2 attack mod.). At this range (6 squares due to diagonal), Dasha, with her Nagant sniper rifle, has a modified S/W of 9/12 (weapon S/W of 5/8, +2 terrain LOF mod., +2 running attack mod.).
- Panzerkommandant Becker (#2), armed with a Luger, is attacking a zombie across hindering terrain; his LOF is depicted in BLUE. His figure is declared as stationary giving his attack a -2 attack mod. but he still has to contend with the LOF modifier of +2 for the hindering terrain. His figure is 5 squares away from the zombie, so he also has a ranged attack modifier of +1 giving a total attack modifier of +1 (-2 stationary attack mod., +2 hindering terrain LOF mod. and +1 ranged attack mod.). His modified S/W is therefore 7/10.
- Pz Kommandant Becker (#1), walking, is attacking der Kugelfisch (A) along the green LOF. He has a +2 attack mod. (0 for walking, 0 for the adjacent square of hindering terrain and +2 for the second square of hindering terrain). His final stun/wound (S/W) number is 8/11.
Rolling Attack Dice
Once the attack modifier has been calculated and applied to the weapon's stun/wound values to get the modified S/W values. The number of attack dice rolled is equal to the ROF of the weapon. The attack dice are rolled one at a time, applying the rules below after each roll. All attack dice must be rolled, even if the target has already been eliminated.
- Attack modifiers are recalculated after each die is rolled. I.e., if the first die stuns the zombie, the stunned zombie attack modifier is applied before rolling the 2nd die.
- If a 1 is rolled while performing a normal fire or spread fire attack, reduce your ammo by 1. A roll of 1 expends an ammo but only after the entire attack action is completed (e.g., if the first die rolled is a 1 and this reduces you to 0 ammo you still get to use the rest of the ROF dice). A maximum of one ammo can be lost per attack action, regardless of how many 1's are rolled.
- If you roll a 2 and there are one or more intervening figures in the LOF (regardless of attack type), the first intervening figure takes 1 wound. This can only occur once per attack action, regardless of how many 2's are rolled.
- If there are any rolls equal to or over the weapon's stun value the target is stunned. See Attack Effects below for details on stunning a zombie.
- Each roll equal to or over the weapon's wound value causes 1 wound to the target. See Attack Effects below for details on wounding a zombie.
Attack Results
A successful attack will either wound and/or stun a zombie with the following effects:
- For each wound the zombie has received reduce the zombie's health by 1.
- If a zombie's health is reduced to 0 then it is eliminated with a gruesome killing blow to the head. Otherwise, track the damage by placing a wound marker next to the zombie.
- If a zombie is stunned, place a black stunned marker beside it. Note that a roll that causes a wound will also stun a zombie if it hasn't been eliminated by the wound. Further stun results against a stunned zombie have no effect - do not add additional stun markers.
- If a character is ever attacked by a weapon (for example caught in a grenade blast) they are wounded on a stun result or higher.
So, if attacking a Beta Zombie with 1 health and you have a modified S/W of 4/7 and you roll a 7 or more you kill the zombie and place the zombie's marker in the discard area. On a roll of 4-6, you stun the zombie and place a stunned token (unless one was already present).
Eliminating Zombies
When zombies are eliminated remove the figure from the map and place their marker in the zombie discard pile beside your play area. They will be returned to the zombie pool when the round track resets or when the zombie pool runs out.
Attack Types
NORMAL FIRE. This is the basic attack type which uses the attacking process without any changes.
HAND-TO-HAND COMBAT (H2H). Hand-to-hand combat must be used when a non-stunned enemy is adjacent to the character.
H2H STUN/WOUND VALUES: Always use this number when attacking an adjacent zombie.
- Weapons that are specialized for H2H combat have an H where the RM is usually shown.
- H2H attacks never consume ammo, so you may perform a H2H attack even if you have 0 ammo.
- H2H weapons have a point-blank range of 1 or 2. A PBR of 1 allows H2H attacks in the square directly in front of the figure. A weapon with a PBR of 2 allows you to attack diagonally adjacent enemies (in your front arc) or 2 squares directly in front of your character.
- When using a non-specialized weapon in H2H, you have a range of 1 and only roll 1 attack die (ignoring the weapon's printed PBR and ROF).
- An unarmed character has a H2H S/W of 10/12.
Pioneer Til is facing off with a couple of zombies. When using the axe with a PB range of 2, he can choose which zombie to attack as both are "closest" at a range of 2. If Til is using the knife, then he can only attack zombie #2 with a S/W of 4/7. If Til is using the Sniper rifle, then he can only attack zombie #2 and he uses the H2H S/W of 7/10 for the attack.
The following are not used until the next scenario and the rules for them can be found there: COVERING, SPREAD FIRE, GRENADES.
Zombies Attacking
All zombies attack in the same way. Some of the more powerful types have additional options.
- A zombie will attack if it is activated adjacent to a survivor or moves adjacent to a survivor and has moves remaining.
- When attacking, a zombie makes only one attack against a single adjacent survivor.
- If a zombie attacks a locked character, they inflict 1 wound on them.
- If a zombie attacks a civilian or soldier, they eliminate them.
- If a zombie attacks a character who is not already locked in H2H, they will lock the character into H2H combat. Place a red locked status marker between them.
- If the zombie could attack multiple survivors: the zombie will always attack a locked character in preference to an unlocked one. Otherwise, it's the player's choice who they attack.
- The character automatically faces the zombie when locked.
- A zombie that has locked a character will not damage any character this round.
- Starting in the locking zombie's next turn it will inflict 1 wound against the character.
- When a zombie is stunned, it loses any lock it had. Likewise, if a zombie is killed, any lock it has is removed.
Locked Characters
When activated, a locked character must immediately declare its movement option (e.g. stationary, walking, or running) and attempt to break out of the lock.
- If they fail to break the lock, they cannot spend any movement points or attack.
- To test whether they break the lock, use the same process as resolving a H2H attack, applying any relevant attack modifiers.
- This does not count as your attack and cannot stun or wound the zombie.
- If you roll at least the modified stun value the lock is broken, and the character may move and attack this round.
Types of Zombies
Zombie Powers remain in effect even if they are stunned.
BETA. Move: 1. Attack: 1. Health: 1. Powers: none.
ARMOURED. Move: 1. Attack: 1. Health: 1. Powers: Armoured – Cannot be Stunned.
KUGELFISCH. Move: 1. Attack: 1. Health: 1. Powers: Toxic Gas – A stun against this zombie makes it "POP" (killing it). The square it was standing in and the surrounding 8 squares are filled with noxious gas. Place the noxious gas marker in the square where the zombie was eliminated. Characters take one wound in the final phase if they end their activation in the affected area. The effects of noxious gas clouds do not stack when overlapped.
ALPHA. Move: 2. Attack: 1. Health: 2. Powers: Leader of the Pack – All zombies on the map move 2 squares instead of 1. Eliminates the -4 to the zombie initiative roll while on the map.
ALPHA PRIMES / GRINSER / TANKISTKA. Move: 2. Attack: 1. Health: 3. Will move towards character with the least health. Powers: Leader of the Pack – All zombies on the map move 2 squares instead of 1. Eliminates the -4 to the zombie initiative roll while on the map.
OMEGA. Move: 2. Attack: 1. Health: 4. Will move towards character with the least health. Powers: Leader of the Pack – All zombies on the map move 2 squares instead of 1. Eliminates the -4 to the zombie initiative roll while on the map. Evolves – More of the zombie's powers will be revealed in the scenarios you encounter them.
Earning Experience
Experience is a measure of a hero's growing skills, confidence and abilities, represented by the awarding of points known as experience points or XP. Experience is earned by killing enemies and completing scenario objectives, as shown in the table.
YOU DO NOT RECEIVE XP FOR KILLING ZOMBIES AFTER THE ROUND TRACK RESETS.
| Achievement | XP |
|---|---|
| Kill Beta Zombie | 1 |
| Kill Evolved Zombie | 1 |
| Kill Alpha Zombie | 2* |
| Kill Alpha Prime Zombie | 3* |
| Kill Omega Zombie | 4* |
| Complete Scenario | 1^ |
| Complete All Secondary Objectives | 1* |
*On multi-wound enemies, XP are earned only when the final wound is inflicted. ^All team members get this XP.
RECORDING EXPERIENCE. Record character XP by writing it on their section of the Team Control Sheet.
Unlocking Skills
Heroes may spend their XP to unlock SKILLS. XP are awarded as they are earned, but skills are not purchased until the BETWEEN SCENARIOS stage. Once purchased, skills take effect immediately.
Noted beside each skill is an XP number. When the experience points exceeds the skill's XP number, the character may now use that skill. XP is cumulative.
Enhanced Skills
Some skills are the enhanced versions of a previously gained skill – the names of these will be the same except the number at the end of them increases. E.g. Tactics 2 is the enhanced version of Tactics 1. In these cases the enhanced version, the one with the higher number, entirely replaces the earlier version of the skill – e.g., once you gain Tactics 2 you cannot use Tactics 1.
Ready to Roll
You now know everything you need to proceed with playing your second scenario. Steel your nerves and head out. Good luck soldier.
Remember the round structure!
- INITIATIVE SEGMENT
- TURN SEGMENTS
- END SEGMENT
When completed, don't forget to read the Exit text and mark any notes on your team control sheet including writing scenario 3 in the Scenario Played box on your TCS. You only need to ever write down the last scenario played.
Scenario 3
Congratulations on completing the second scenario. You were given a choice as to which scenario to play next; scenario 2, A Friend Will Bleed or scenario 4, Stash. Either will use the following rules.
HINT: Scenario 4, Stash is harder than scenario 2. You may change your decision now if you like.
Go ahead and open the scenario book to your selected scenario. In this scenario you will be introduced to additional rules on attacking.
Tactical Rules - 3rd Scenario
Attack Types Continued
Covering
In combat you are often in a "wait-and-see" situation where you know there are enemies "out there," but you do not yet have a target. Soldiers train their weapons in the direction where they "feel" the enemy will present themselves, waiting for a shot. In Escape from Stalingrad Z, this is represented by the covering rules.
- Covering attacks may take place at any point during the round, including the zombie turn.
- A figure that does not use its attack while activated is placed on covering. Place a covering marker with the appropriate modifier next to the covering figure.
- A covering figure can select normal fire, spread fire or hand-to-hand combat as their covering attack. A grenade attack can be used as a covering attack, provided there is one readied.
- The covering attack uses the normal combat rules and restrictions (e.g. must have LOF to target and target must be in front arc, etc.).
- Once a covering figure fires, it loses its covering status, and the marker is replaced by an attacked marker.
- Becoming locked causes a figure's covering status to be lost. Replace the covering marker with an attacked marker. Likewise, a locked character does not gain a covering marker at the end of their activation.
Dasha, in her previous turn, elected to walk but not fire her weapon. Because she walked, she is considered covering 2. A Kugelfisch zombie walks from around a corner, exposing itself. Dasha elects to interrupt the zombie turn and attack using her covering attack. The weapon's S/W is 5/8 and the zombie is within her weapon's PB range of 10. She has a modified S/W of 7/10 (S/W 5/8, +2 covering attack modifier = 7/10) for her attack on the zombie. The covering status marker is removed and replaced with an attacked status marker.
Spread Fire
This attack type allows for a character's attack to be split across multiple targets when the attacker is using a weapon with a ROF of 2 or higher. The following additional rules apply:
- A +1 ATTACK MODIFIER is applied.
- Like a normal fire attack, the attacker must initially target the closest enemy.
- As per the normal rules, recalculate your attack modifiers before rolling each die, taking into account the change of target.
- Then, after rolling and resolving the first attack die, regardless of its outcome, the attacker may change their target to any figure adjacent, or diagonally adjacent, to the previous target, even if it's not the closest enemy to the attacker.
Pz Kommander Becker has scrounged an MG42 light machine gun, which has a ROF of 3 as noted in its top left corner and is ready to try it out. He declares walking and immediately performs an ATTACK, choosing the spread fire attack type. He must make zombie 1 his initial target, as it's the closest enemy in his front AOF. After rolling and resolving the effect of his 1st attack die on zombie 1, his options for his two remaining attack dice are:
- Use them to attack two different zombies, e.g., he might change his target to zombie 2, then roll and resolve a 2nd attack die. Then change his target to zombie 3, or even back to zombie 1 if it is still alive and roll and resolve his 3rd attack die against the chosen zombie.
- Use them to attack just one other zombie, e.g., he might roll his second attack dice against zombie 1, then change his target to zombie 2 or 3. Or he might immediately change his target and roll twice against the newly targeted zombie.
- Use both of them on his initial target, zombie 1. Note that you can decide whether to change targets after seeing the outcome of each attack die roll. For example, despite declaring a spread fire attack, you might use all three attack dice against zombie 1.
Grenades
The grenade attack type is used when throwing area of effect (AOE) weapons such as grenades, satchel charges and Molotov cocktails - all of which are collectively known as AOE weapons.
Unlike other attack types, the hero does not need to have the weapon readied, and the attack does not consume ammo. Instead, when the attack is completed, the weapon used is consumed - reduce your supply of grenades by one.
Attacking with a grenade is split into three steps:
- Select a target square you wish to throw the AOE weapon into. This target square does not need to be the closest enemy.
- Then determine if the explosive lands in the desired target square or, if it misses, where it ends up.
- At the end of the attacking hero's activation, the weapon explodes, and you resolve an AREA OF EFFECT ATTACK from the final target square.
Throwing AOE Weapons
To throw an AOE weapon use the following steps:
- Select a target square in the thrower's front or side arcs, that they have a LOF to, and is within a maximum range of 8.
- Determine the number you will need to roll to successfully land the weapon on the target square. This will be the range of the target square plus any attack modifiers except LOF and ranged attack modifiers.
- Roll 1d12 - if your roll is equal to or greater than the calculated number, you land the explosive in the target square, otherwise, it deviates (Thrown Explosive Deviation).
Throwing AOE Weapons Without LOF
This rule reflects the ability to throw grenades around corners or bounce them off walls. Grenades, and only grenades, may be thrown at target squares that the hero does not have LOF to.
You cannot throw a grenade through obstructive terrain. When calculating the range to the target square you must trace a path that goes around any obstructive terrain. An attack modifier of +4 applies when targeting a square the hero doesn't have a LOF to.
Dasha's LOF is blocked by the wall so she throws a grenade without LOF. The range is 5. She needs to roll a 9 to land the grenade in the square containing zombie A.
THROWN EXPLOSIVE DEVIATION. When a thrown explosive weapon deviates, roll 1d12 and use the following rules to determine where it lands:
- On a roll of 1-8, shift the target square as indicated on the Thrown Explosive Deviation Chart shown below.
- On a 9-12, the thrown explosive deviates 2 squares instead of 1. Roll 1d12 again to determine which direction. Any further 9-12 rolls are rerolled.
- If the new target square is occupied by obstructive terrain, reroll the deviation check from scratch from the target square.
Resolving an Explosive Attack
At the end of the attacking hero's activation, the weapon explodes.
Resolve an attack against all figures within the blast range and LOF of the target square by rolling attack dice equal to the ROF of the weapon against each.
An explosive shows no Range Modifier but instead has "A" in its place.
- No modifiers apply.
- LOF is measured from the target square.
- Blast range calculations do not include the target square but does include the attacked figure's square.
- If the explosive attack targets an unrevealed zombie, reveal the zombie so you can assess any impact to the attack modifier and attack effects.
- Against human targets, a stun result from an explosive is considered a wound.
- Dasha successfully lands her grenade on the square marked 1. She will wound the zombie in the final target square on an attack roll of a 9 or better. If she fails to eliminate it, the zombie will be stunned regardless of the number rolled as it is in the PB range.
- The grenade attack on zombie #2 has a modified S/W of 10/13 (a base S/W of 6/9, +2 ranged attack modifier, +2 for the hindering terrain).
- The chance to hit zombie #3 is zero since the blast of the grenade is blocked by the wall (obstructive terrain).
- A S/W attack roll of a 9/12 or better is needed to hit zombie #4 (S/W number of 6/9 and +3 for the RM, which includes one diagonal square).
- Dasha can't be hit by the grenade blast as the modified S/W for her is 13/16 (base S/W of 6/9, +5 ranged attack modifier, +2 for hindering terrain), so there is no need to roll an attack on her.
Priorities of Attack
Instances may occur in which several different types of attacks happen simultaneously or interrupt one another. In these instances, refer to the priority chart below to determine what happens first.
The chart lists the priority fire from highest to lowest (highest goes first). Actions with the same priority act simultaneously.
Good to Go
Now that you have successfully completed your third scenario you are almost ready to take on the whole campaign. The next few pages will outline any remaining rules you will need. When in doubt of a rule use the Index at the end of this manual to quickly find the rules you are looking for.
Your Team
During the campaign, you may collect up to 4 characters to form your team. Most scenarios will allow for up to 2 characters on the map. The excess characters are referred to as the rearguard and contribute to the success of the scenario by potentially limiting the number of spawned zombies that appear on the board.
New Characters
Apart from your starting character, you may only add new characters to your team when instructed to do so by a scenario.
New characters start with 4 health, 0 fatigue and no gear or supplies, unless the scenario instructs otherwise.
Rearguard
Each character in the rearguard will have a chance to reduce the amount of arriving zombies through the zombie spawn points.
When a zombie spawn is indicated on the round track, roll 1d12. On a roll of a 1, draw one less zombie from the zombie pool and choose which spawn location to not place a zombie on. Your rearguard character gains 1 zombie kill.
If you have 2 characters in the rearguard, roll for both.
- Characters in the rearguard may heal 1 wound per scenario if they have a medkit. Discard medkit after use.
- Characters in the rear guard are subject to the fatigue listed in the scenario.
Between Scenarios
Starting scenario 6, The Fountain, most scenarios have a Between Scenarios section detailing what occurs between the completed scenario and the next.
After any scenario (regardless of whether it had a Between Scenarios section or not), you can always eat food, redistribute weapons, gear and use medkits.
FATIGUE: The Between Scenarios section shows the fatigue gained which is applied to all characters in the team, not just the ones who were active in the scenario.
As fatigue increases, negative effects are applied to the character. When the fatigue marker reaches a space with "1 Wound" below it, the character immediately loses 1 health. You do not regain any health when reducing fatigue.
When the fatigue marker reaches or passes a MP penalty or attack modifier, it is then applied to all future activations and attacks respectively - these penalties are not cumulative, just apply the rightmost reached penalty of each type.
Food
For every food consumed, reduce fatigue by one.
Characters may only consume one food between scenarios (this includes food consumed during holing up). Hot food, prepared in hole up scenarios, reduces fatigue by 2.
Medkits
For every medkit used by a character, increase their health by one up to the maximum. A character cannot use more than one medkit between scenarios.
Scavenging and Holing Up
The Between Scenarios stage may also allow you to scavenge or hole up. Scavenging and holing up scenarios are played just like campaign scenarios. Once they have been played (successfully or not), choose your path from the previous campaign scenario.
SCAVENGING: Your characters may decide to go on scavenging missions in the hopes of finding ammo, food and other essential supplies. Scenarios will indicate if scavenging is available in the "Between Scenarios" section and, if available, the scenario # to use.
HOLING UP: Once a scenario is completed, you may choose to find a protected space and hole up for the night. It's great to eat hot food and warm yourself by the fire, but you may attract more zombies. Scenarios will indicate if holing up is available in the "Between Scenario" section and, if available, the scenario # to use.
There are advantages to holing up for the night:
- Warm by the fire: Each character reduces fatigue by 1.
- Cook your food: Doubles the effectiveness of food. Each food consumed now reduces fatigue by 2.
If you fail the main objective of a holing up scenario, you do not have to use a replay to play the scenario again.
Between Scenario Trade
Instead of actually playing a scavenging scenario, you can choose to perform a Between Scenario Trade. This abstracts what might have happened in the scavenging scenario. You can trade as much as you like.
The following is what you can trade for. The Trade columns tell you what you will lose, and the Gain columns tell you what you will receive in return.
TRADE TABLE
| Trade | Gain |
|---|---|
| 2 x Ammo | minus 1 Fatigue for team |
| 2 x Grenade | minus 1 Fatigue for team |
| 2 x Grenade | 2 x Ammo |
| 2 x Ammo | 2 x Grenade |
| 1 x Medkit | 2 x Ammo |
| 1 x Satchel Charge | 1 x Medkit |
| 2 x Ammo | 1 x Medkit |
| 1 x Medkit | 1 x Satchel Charge |
| One Team Member takes 1 Wound | minus 2 Threat |
No experience is gained in a Between Scenario Trade.
Character Death
If a character dies, they are permanently out of the campaign and may not be selected for future scenarios.
- The character turns, immediately rising up as a zombie in the square they were killed.
- The dead character is now a zombie with statistics identical to a Beta zombie. However, they are harder to kill with any attacks on them receiving a +1 attack modifier.
- If the new zombie character is not eliminated during the scenario, the character's marker goes into each subsequent scenario zombie pool until killed.
Rescuing Civilians
During the campaign, your characters will have the opportunity to rescue civilians. There are several advantages to rescuing as many as you can, as well as risks.
- To rescue a civilian, move the character adjacent to them. Perform a special action and then add the civilian marker to one of the character's available gear slots.
- One civilian per gear slot is allowed.
- A civilian is considered rescued once the scenario is over and the character with them has survived.
- At the end of the scenario roll on the chart below for each civilian rescued.
- Civilians on a character dashboard are immune to noxious clouds.
- If a character with a civilian takes a wound they may sacrifice them instead of taking the wound.
- Record how many civilians are rescued on the Team Control Sheet.
Team Control Sheet
The team control sheet is designed to record your characters' experience points, notes, and civilian rescues among other things.
When you start a campaign, record your chosen character's name in the top box. As they acquire clues and other items of interest keep track of these in the appropriate box and keep track of the total number of civilians rescued by the entire team.
The Kill box is where experience points (XP) are recorded. A separate tally is kept for each character.
Each time a new character joins the team, add them to the roster. Should they fall, record the unfortunate incident in the Team Notes section and remove them from the Team Control Sheet.
Record the last scenario completed by the team in the Notes section. You may record health, fatigue and supplies here either as a "save" between gaming sessions or before each scenario to reference when using a replay.
You can download the PDF at: www.rayboxgames.com/efszfreestuff.
Armoury
There may be some discrepancies in weapons and gear detailed here compared to the same ones listed in scenarios. Those listed in scenarios may have specific qualities for those scenarios and should be used as written in them. There are extra weapons listed which are not included in the campaign scenarios but may be used in upcoming DLC or DIY scenarios.
Satchel Charge
Throwing a Satchel Charge. Uses grenade rules with the exceptions listed below.
- You may only throw a satchel charge into a square you have LOF to.
- When a character enters a mined square there is a chance that it will trigger. Upon entry, roll 1d12. The mine detonates on a roll of 1-2 if the character was walking and 1-4 if running.
- Zombies can detonate mines. Roll 1d12 every time a zombie moves into a mined square. The mine detonates on a roll of a 1-2.
- Mines detonate using the Resolve a Grenade Blast rules and using the standard grenade stats.
- Mines are persistent and remain even if triggered.
- A figure moving diagonally between two mined squares or between one mined square and obstructive terrain/an occupied square must roll for detonation.
- Satchel charges have a maximum throwing range of 5.
- Apply a +1 attack modifier to the throw attack number.
- A satchel charge explosion can destroy adjacent doors (those placed in the setup of a scenario). Make an attack roll against the door - a wound result destroys it.
Setting a Satchel Charge
- While adjacent to the target square use a special action to place it on the target square. Place an objective marker green side up on the satchel charge marker.
- At the start of the end segment, if the objective marker on the satchel charge is green side up, flip the marker to its red side.
- At the start of the end segment, if the objective marker on the satchel charge is red side up the explosive detonates. The target is destroyed.
- In addition to demolishing any scenario specified target, the satchel charge creates a blast equal to that of a grenade, originating where it was placed.
Mines
Mines are only present when described as such in a scenario. Squares containing known mines are designated by an M in that square or by mine markers.
Maxim Gun on Wheeled Carriage
The Maxim heavy machine gun consists of 3 components. The gun, a water jacket cooling system and the wheeled carriage with gun shield.
- The Maxim gun has its own facing.
- Counts as hindering terrain.
- To attack with this weapon a figure must be adjacent or diagonally adjacent to it and in its rear arc.
- A figure executing an attack action using the Maxim must have been declared stationary when activated. The stationary attack modifier is already included in the gun's S/W number.
- Targets must be in the gun's front arc.
- Crewmen use their own HtH values if adjacent to enemy figures.
Other Weapons
MOLOTOV COCKTAIL. Uses grenade rules with the exceptions below.
- You may only throw a Molotov cocktail into a square within your LOF.
- If the attack roll is a natural 1 the Molotov cocktail detonates in the thrower's square.
- A gear slot may hold up to two Molotov cocktails. They are not interchangeable with grenades.
- Molotov cocktails detonate immediately upon impact in their final target square.
- The maximum range of the explosion's attack is 2.
- After detonation, place a fire marker in the final target square. Any figure that ends its activation in the square takes 1 wound.
- The fire marker is removed on a roll of 7+ during the end segment of each subsequent turn. Until its removal, it functions as any other fire square.
CLUSTER GRENADE. Uses grenade rules with the exceptions below.
- You may only throw a cluster grenade into a square within your LOF.
- Cluster grenades have a maximum throwing range of 6.
- Apply a +1 attack modifier to the throw attack number.
- A cluster grenade explosion can destroy adjacent doors (those placed in the setup of a scenario). Make an attack roll against the door - a wound result destroys it.
BAYONET
- A knife may be mounted to a Kar 98 or Nagant.
- Costs 1 MP to mount/demount.
- Apply a +2 attack modifier when used in a normal/spread fire attack.
- Apply a -1 attack modifier when used in H2H.
- H2H range is 2.
- Takes up no slots when mounted.
Gear
BANDOLEER
- Place in ammo supplies slot.
- Allows the wearer to carry 5 ammo instead of 3.
ALARM CLOCK
- Takes up no space.
- Alarm clocks are thrown using Grenades rules. Alarm clocks do no damage, so resolve no attacks from it, but instead cause the final target square to be considered to be the closest character to all zombies not adjacent to or diagonally adjacent to a character.
- Once the final target square is determined, place an alarm clock marker on it. During each end segment roll a d12: on a roll of 1-4 remove the marker.
GAS MASK
- 1 gear slot.
- Allows the wearer to ignore effects of noxious gas clouds.
OILED COAT
- 1 gear slot.
- Grants the wearer a -2 attack modifier when escaping a H2H lock.
GRENADE VEST
- Place in grenade slot.
- Allows the wearer to carry up to 5 grenades instead of 3.
CLUB
By spending 3 MP in or adjacent to any hindering terrain a character may pick up a club.
Versus Play
In this mode, one or two players control the human characters and the other controls the zombies as the zombie master. Versus play uses the campaign mode of play starting at scenario #1 - the player wins if they escape Stalingrad and the zombie master wins if they eliminate the characters. There are a few changes in the rules for the zombie master and a significant one for the players.
The Zombie Master
The zombie master player is able to exercise control over his forces. This allows for crucial tactical decision making on the part of the zombie horde. Command is exercised using zombie control counters which are numbered one to six.
Zombie Control Counters (ZCC)
Zombie control counters denote the number of zombies the zombie master directly commands each turn of the scenario. This varies from one to six. In addition, the zombie master always has command over the boss zombies (Grinser, Tankistka and the Omega). All zombies not directly commanded follow the standard game AI rules.
ZCC SELECTION
- Before starting the scenario, take the 10 zombie control counters and place them face down so you can not see the numbers.
- Shuffle them.
- The zombie master then selects 5 of the counters.
- These are the active zombie control counters.
ZCC USE: Zombie control counters have two uses. They may either be used to generate order markers (allowing you to exert direct command over a number of your zombies) or be used to obtain a roll on the Random Events chart.
Command
At the start of each round, before initiative is rolled, the zombie master may choose to activate one of the active ZCC's.
- The zombie control counter, if activated, is flipped over and denotes the number of order markers you have for that turn. Once activated the ZCC is no longer available for the scenario so discard it.
- If the zombie master has one or more order markers they must place them, green side up, beside the zombies that will be directly controlled.
- Initiative is then rolled.
- Directly controlled zombies activate in any order while uncommanded zombies follow the Zombie Activation rules.
- The zombie master may choose where a directly controlled zombie moves and who they attack. They must still follow normal movement and combat rules, such as not moving onto hindering terrain etc.
- After a commanded zombie completes its activation flip the order markers over to the red side.
- Remove all of the order markers at the end of the round.
Random Events Chart
- The zombie master may choose to expend one of the zombie control counters before the scenario commences (after you finish setup) to get a roll on the random events chart.
- Select the ZCC counter to be spent and flip it over. Add its number to the die roll.
| Modified Die Roll | Event |
|---|---|
| 2 | Human player places one medkit, food and ammo on one of the spawn points or square marked Z. |
| 3 | Human player places one medkit on one of the spawn points or square marked Z. |
| 4 | Human player places two ammo on one of the spawn points or square marked Z. |
| 5 | Human player places two food on one of the spawn points or square marked Z. |
| 6 | Human player places one grenade on one of the spawn points or square marked Z. |
| 7 | Nothing. |
| 8 | Zombie Master randomly draws a Zombie Control Counter. |
| 9 | Zombie Master randomly draws two Zombie Control Counters. |
| 10 | Decreased visibility: Characters receive a +1 attack modifier for the first 3 rounds. |
| 11 | Decreased visibility: Characters receive a +1 attack modifier for the first 6 rounds. |
Character Advantage
The characters facing a commanded assault will find the battle more difficult. They do, at least have the benefit of greater reflexes.
FIGHT OR FLIGHT
- Characters, at any time in the game, may convert their covering marker into a reaction move allowing them to move 1 square in any direction for free.
- The figure may change their facing freely at the end of this move.
- The figure may not move through obstructive terrain.
Entries
At various points during a scenario, you may be instructed to read an entry. Please read only the designated entry and follow its instructions as directed.
#1 The Street: In the pockets of the Alpha zombie, you find a crumpled soviet transcript.
Read the following if one of your characters is Soviet: ORDER No. 227. Panic makers, cowards and the infected must be liquidated on the spot. Not one step backward without orders from higher headquarters! Commanders who abandon their position or attempt to cross the Volga without an order from higher headquarters are traitors to the Motherland.
#2 The Light Above: Folded neatly in an orders book you find a soviet transcript.
Read the following if one of your characters is Soviet: 24th Tank Battalion Company A orders. Support elements of the 13th Guards Infantry Division to hold the perimeter of the train station. Trains must be kept operational at all costs.
#3 T Thirty-Four: A gore-soaked fragment of marching orders.
Read on if one of your characters speaks German: "Abwher order… winter storms and fuel shortages to suspend flight ops at Pitomnik airfield 12.15.42." There is also a hand drawn map to a food cache.
Add +2 food to your next search result.
#4 Fire and Ice: You find a filth-caked, hand drawn map of sewers leading to the Dzerzhinsky Tractor Factory tucked into one of Tankistka's pockets.
When you have completed this scenario, you may choose to go to scenario RED BARRICADES page 30 instead of the scenario listed in the Exit section.
#5 Not One Step Back: The Soviet artillerymen have the range. They call down the god of war. Bright green tracers lash out from east bank gun pits. The ferry is smashed from under you, casting you into the frozen dark depths of Mother Volga.
Torn by the reaping shrapnel, pummeled by savage concussion, you are dragged down by the weight of your gear. Finally, mercifully, the numbing embrace of the river closes in.
You have failed. There will be no escape from Stalingrad for you. Not in life anyways.
#6 Sewer Rat: Soaked in sewage you pull a telegraph from the document pouch of the Alpha. Read the following if one of the characters is German: Operation Winter Storm has been suspended ++Stop++ All Heer units advised to attempt breakout and linkup with 4 Pz Army to the west ++Stop++ Regroup at Kotelnikovo Station ++Stop++ Offensive ops against Soviet units to be conducted at local commanders' discretion ++Stop++ No units to retreat west of Chir river ++Stop End++ You find one ammo.
#7 The Bunker: You find wadded-up, handwritten instructions for placing boobytraps along with a spool of wire and a grenade sitting on the toilet tank. Don't flush.
Gain 1x grenade and a +1 to all future rolls on booby trap result tables.
#8 The Bunker: The radio must be damaged as it does not appear to transmit. You hear "This is Stalingrad train station number three… we are cut off… perimeter is holding for now… working locomotive but not enough coal to get to Kotelnikovo Station… is there anyone on this channel… please send help. There are children…" The desperate message then repeats.
You also find one medkit in the room.
#9 The Cellar: In the center of the generator room a fleshy corpulent man, almost a Kugelfisch, in a soiled engineer's coverall is backlit by a fire barrel. His right hand is swathed in blood and grease-soaked rags, on his left hand the fingernails have been chewed bloody to the bone. He squints up piggishly.
"You don't get anything without the proper paperwork." He squeals. "Nothing. And no ideas about looting either. You will get a nasty surprise if you try." He snickers and then stops. "Watch out for Muller. He's acting funny, sick, and Bremmer too. And that malingerer Schmidt. I locked them all into the front room with my tricks."
He gnaws on a bloody finger for a moment. "Can't leave my post. Not with the likes of you and Muller and the damn Ivans around. I caught myself in one of my own traps, heh. I can't move so fast. When Bertha here is out of juice, so am I. I am not going to die in the dark down here and I am no deserter."
With dawning horror, you see the chair he is on and the entire room behind him is packed with explosives. The engineer fondles the detonator with his maimed hand. "Time to go boys. Mind Muller on the way out and here is a pfennig for your time."
You receive a gas mask, 3 x ammo and booby trap instructions: add +1 to all future rolls on booby trap result tables.
#11 Night Terrors: "Thank you comrade, thank you. Take this, it is all I can give you. Before we were injured and taken to that mad woman my teammate and I set up a supply cache for our platoon. Here is a map."
Receive a map to a supply cache. When playing the next scavenging scenario: do not spawn any zombies and roll all search results on search table 1.
"I have had enough. I am going to find my family and we are going to try for the train station. I hear they are evacuating people that way. Stalin be damned. Station Number Three, maybe I'll see you there."
#12 Einzelhaft: Clutched in the frozen dead hands of a lieutenant are a photograph and handwritten note. Addressed to his loving wife it expresses his undying love for her. His letter also reveals that Operation Winter Storm has failed and that there will be no relief. Those trapped will have to fight their own way out.
You grimly tuck the letter into your jacket but leave the picture for him.
#13 Die Brücke: You find a charred fragment of a radio log… "all evacuees to be disarmed and detained at Kotelnikovo Station assessment center. Unwounded Heer personnel are to be quarantined on-site for no less than 14 days. All others are to be turned over to Ahnenerbe Special Research Group 7 for processing…."
You also receive 3 ammo and 1 medkit.
#14 Juggernaut: You receive gear points equal to the number of civilians rescued during the campaign. In addition, saving the baby Kalinka or the soldier from the Night Terrors scenario each gives you 3 additional points. You may spend these points according to the following chart:
If you have less than 4 characters in your team, you may recruit one new one. They will have achieved their second skill and have their preferred weapon and 2 ammo.
You may now perform the equivalent of a successful HOLE UP without doing the scenario. Read on.
The preparations are nearly finished. Shunting is complete and the overloaded wagons are full to bursting with their precious, desperate cargo. The engine is alive, trembling in his eagerness to go. All that remains is to open the switch to the main line and lift the pile of cargo pallets from astride the tracks. These pallets keep the undead out of the compound, but also trap the train within.
A forlorn hope of railway men move out, covered by sharpshooters on the cars and illuminated by the locomotive's great headlamps. The operation goes smoothly at first. The men fan out to their tasks, shadows stretching before them. The farther they get from the train the harder they are to see.
The engine huffs insistently and hisses as the engineer releases pressure, but still, it shakes and screeches against the brakes. People cheer as the crane running lights come on and gouts of blue smoke jet from the truck's exhaust. The passengers are excited, hopes of escape about to be fulfilled, but you take your queue from the doctor who nervously watches through a spyglass.
The crane operator radios in that all is good, and the load is rigged. You see the crane boom swing around and the cargo soon rises into the air. Though half expecting it you are still surprised by how fast things turn bad. A petrifying wail resounds from the darkness and it is answered by a deeper roar. The load plummets to the ground, and gunshots crackle out.
The crane man screams "They were waiting, they're in… I smashed the big one under the crates, but the track is blocked… oh God she's in the cab…"
Hordes stream in chasing and pulling one of the railway men down as he tries to open the switch to the main line. With no way but forward to go, you attack.
#15 The Lair: A handwritten note lies beside a headshot body.
To whom it may concern,
Heinrich Gelbeman and Anatoly Kaslov are filthy thieves and scoundrels. They have abandoned me to die in this hell hole even though it was me who stashed some fuel and me who had the idea to take the Hanomag and try for the airfield. It was even me who got the boarding passes from the Golden Pheasant with the Ahnenerbe. Damn them and their families. I had one good leg when they left. They could have gotten me out. It's too late for me now, I know.
Bless the other one with them. The one who left me this pistol and this magazine. I pass them on to whoever finds this letter, in the hopes that you use them on Gelbeman and Kaslov. Good luck.
Major H. Schwartzseele
You find 1 Luger and 1 ammo.
#16 Badehaus: Carefully opening a sodden orders packet reveals the following: NKVD Special Detachment 1624. RE: Pitomnik Containment Force. All personnel are instructed to give passage to individuals bearing appropriate credentials both Soviet and German…
You also get 1x ammo.
#17 Live Trials: Upon opening the observation booth door, you are welcomed by the officer in the lab coat and cap. You notice with loathing and alarm that his rubberized canvas coat almost covers a uniform and collar from which peep two silver lightning bolts. The booth is shared by a glowering giant in an NKVD uniform and an obscenely swollen ghoul of a type you have nicknamed Kugelfisch, the latter in chains.
"Your timing is most fortunate kamaraden. I am Sturmbannfuher Doctor Ewald Bucher. Perhaps you have heard of my insightful work in North Africa. You have done all of the countries of the world a great service by rescuing us today. My comrade is Major Doctor Viktor Kavilov of the NKVD. The unfortunate fellow in chains is or rather was Hauptsturmfuhrer Karl von Traubenberg. The nature of what we are doing here is quite beyond you, but you can certainly profit from it."
Kavilov growls from the corner, sweating and shaking, "It is not for profit but for duty that we sacrifice."
The German doctor passes you a briefcase while saying "These are copies of research records of our soviet friends here, as well as my own efforts. Stalin has commanded this site purged and Major Kavilov is in the most unfortunate position of being on the wrong side of the river when the order was received. STAVKA has commanded that no one crosses the Volga. Stalin has no qualms about letting this plague spread west to the Fatherland, however. This makes the information in the case all the more valuable. Take it to the airfield at Pitomnik. If I do not make it out myself, these records will be the key to humanity's salvation and apotheosis. Here is a flight pass and… oh my…"
With a blood-curdling roar, Kavilov swells, uniform bursting from his grotesquely swollen form. In a frenzy, the Kugelfisch rips itself from its bonds, sloughing off the flesh from its hands in a bloody spray, and both of them surge forward. Bucher dashes from the room. You don't have time to flee.
Place the Omega on O2 and the Kugelfisch adjacent to it on the drain. Continue playing the round normally.
#18 URRAH: Clearly the corpse of the city is still very much a battleground even though the living armies that fought so savagely over it have mostly ceased operations against each other and left those trapped within the kettle to their own dwindling resources.
The cold morning air resounds with the ripping linen rasp of an MG-42 on full auto. A Hanomag 251 has pulled off to the side of one of Pitomnik Airfield's secondary gates. The gunner, anonymous in helmet and scarf, expertly knocks down ghouls, one after another. The gates are barred, but unmanned, and the undead are beginning to flank the halftrack. Based on what you have heard of this crew, they may be little better than ghouls themselves, but they are your way onto the field.
You race to the 251's rear doors. The gunner pauses long enough to point at a satchel charge and then over to the locked gates. The implication is clear.
#19 URRAH: Climbing from the driver's seat your new comrade swears loudly "Bastards left me to die and pissed off with the boarding passes." They further explain that proper passes are needed to get past the inner checkpoint and onto the ramp. To try to board without documents is a guaranteed bullet behind the ear for desertion.
Whether you have proper documents, a briefcase or just your wits, you may continue to the checkpoint. Turn to scenario 22, CHECKPOINT CEASAR.
If you do not have the proper documents or if it seems too risky, you can make your way east through the sewers and head for the industrial district. Turn to scenario 26, SEWER RATS.
#20 URRAH: You find a soaked and soiled page torn from an orders book. "24th Tank Battalion Company A orders. Support elements of the 13th Guards Infantry Division to hold the perimeter of the train station. Trains must be kept operational at all costs."
On the back is a hand-drawn map of the sewers leading to the Dzerzhinsky Tractor Factory. When you have completed this scenario, you may choose to go to scenario RED BARRICADES on page 30 instead of the scenario listed in the Exit section.
#21 Checkpoint Caesar: Field Police try to keep control of the situation, firing over the heads of the crowds for now. A large corporal notices your group and looks you over suspiciously. While most of his men are preoccupied with crowd control, two of his even larger squad mates unfold the wire stocks of their MP-40s.
"You there, what's your business. If you have wounded take them straight to triage. They'll check your papers there. You want to come through here, you're my business and I will need to check your papers now." He stops and deliberately slaps the receiver of his weapon. His men straighten from their slouches.
"If you are lost and need to find your way back to your unit," he says sarcastically, "you'd best piss off right now. They're not even holding field court-martials, and if I have to go bother an officer, he'll just have you shot."
If you have passes and a briefcase, read entry #22. If it is time to find another way out, read entry #30. If you try and get out through the wounded queue, read entry #23.
#22 Checkpoint Caesar: The corporal's demeanor changes instantly when you show him the briefcase and your passes. "Major Bucher has been waiting for your lot," he says nervously. "Head to Checkpoint Caesar over by the maintenance shops. Someone will meet you there and get you on the last bird out."
Hurriedly you follow his directions and arrive at the high concertina-topped wall. Sirens begin to wail, and shots ring out, automatic fire this time and not in the air. A small gate is open. A heavily wounded man in torn battle dress waits there alone.
"Do you have it, the briefcase, I mean? And the passes. Never mind, there is no time. You wouldn't be here if you didn't… aha… never mind me, it's a scratch, but pretty deep I think… hnn… just need to breath… the Major's gone on but he left me… the key, oh the key… the fire door is locked. Engines are warming up already. The key." The wounded man slides down the wall.
An explosion rocks the far end of the field. "Damn Ivans," says the man, breath gurgling in his throat. "Trying to shut us up, just like the Major said. The key, is it in my office?" He staggers upright, shambles a few steps and collapses dead. More explosions shake the airfield, and the air reverberates with the sound of BMW-132 engines warming up.
He begins to stir.
Return to scenario 22, CHECKPOINT CAESAR.
#23 Checkpoint Caesar: You head towards the medical area. A busy doctor, tired unto death, waves you forward. Behind him, the wounded are sorted into groups, according to the merciless logic of the triage. There are some with battlefield trauma, a great many with frostbite and a number who tremble and sweat, eyes sunken and bloodshot although they bear only minor wounds. These later are taken into open-air pens where gun teams cover them carefully.
Gas-masked orderlies move among them, stopping to check them and, twice while you watch, firing pistols into their heads.
"We're out of morphine, out of food and I have got about 400 people in line for whatever spaces are left on those two planes." The doctor says. "I can offer you a bullet to end the misery, but you all look like survivors to me. I hear there is still a rail corridor open from Station Number 3, north of the factories."
Another plane rumbles down the runway and out, navigation lights dwindling in the darkness. The crowd roars angrily.
"If you have any supplies to share, we can sure use them." The doctor says.
If you give him a medkit or 2 food, he passes on a map through the sewers and to the Dzerhinsky Tractor Factory. Turn to scenario 30, RED BARRICADES, otherwise go to scenario 26, SEWER RATS.
#24 Last Flight from Pitomnik: "Do you, have it? Do you, have it? The briefcase!" He screams blocking your way into the plane looking past you for a moment. "This plane has only one extra seat I'm afraid. It goes to the one with the briefcase, but since you have all made it thus far, I will let you decide amongst yourselves as to who is saved. Hurry, we are leaving now."
You may choose to give over the briefcase and select one of your characters to get on the plane. Remove that character, their preferred weapon and the briefcase from the game. You may keep any gear or supplies that they had. You have achieved a victory of sorts. That character has escaped from Stalingrad, read entry #25.
If you choose to keep the briefcase and do not board the plane, then read entry #27.
#25 Last Flight from Pitomnik: You settle into your seat, watched carefully by the officer and his bodyguards. He offers you a silver and black flask.
"Congratulations. Never let it be said that Major Ewald Bucher is not a man of his word. You are destined for great things. Eat now or rest if you like."
His voice fades. You spare one last glance out the small fuselage window to watch the diminishing flicker of explosions receding to the east.
#26 Last Flight from Pitomnik: The engines howl, overwhelming even the sounds of combat. The airplane shudders and begins to move slowly, zig-zagging onto the runway. It turns, pauses and then rolls down the strip with increasing speed. As the wheels lift from the tarmac, the main runway lights wink out and the plane lifts into the dark western sky.
You were that close, but there is no time for regrets.
You may continue to a nearby Kettenkrad tow vehicle (O3).
- To start the vehicle one character must move onto O3 and perform a special action.
- When all surviving characters are adjacent to or on the Kettenkrad, you may choose to exit the map at the end of the round.
- Turn to scenario 30, RED BARRICADES.
Or withdraw into the night and return to the sewers you found earlier. Turn to scenario 26, SEWER RATS.
#27 Last Flight from Pitomnik: Sharing glances you choose to stay together as a team. Backing away from the Major, you raise your weapons and retreat into the darkness. The Major offers you an ironic salute saying, "So be it..." He slams the door of the transport and it begins to taxi down the runway. You make your way to a nearby Kettenkrad and make your escape as the airfield is overrun. Turn to scenario 30, RED BARRICADES.
#28 Kalinka: As you creep into the cold night, you are greeted by a quiet but intense whisper. The child's desperate young mother returns from foraging, delayed by the undead. When you return the child, she thanks you profusely and offers you 2x food, 2x ammo and a medkit. She also gives a small wind-up music box (may be used as an alarm clock, see relevant entry in Armoury). She then takes the child, Kalinka, and fades into the night.
#29 Kalinka: As you creep into the cold night, you are greeted by a quiet but intense whisper. The child's desperate young mother returns from foraging, delayed by the undead. When you tell her you were unable to save the child she makes one strangled sob, sounding all the worse by the anguished effort it takes her to hold it in. She composes herself, looks you in the eyes, and thanks you sincerely for your effort. She also gives a small wind-up music box (may be used as an alarm clock, see relevant entry in Armoury) and vanishes into the night.
#30 Checkpoint Caesar: The Soviet artillery barrage shakes the field and scatters the crowds. Ghouls move freely on the tarmac, and you realize that it is time to go. You backtrack to the sewer entrance you found earlier.
Turn to scenario 26, SEWER RATS.
#31 Blocking Detachment: Stapled to the chest of the dead ghoul is a waterproof document pouch, unfortunately center punched by one of your rounds. The intact portion of the top sheet reads "...Subject 7993. Capture intact if possible. Return specimen or head and spinal remains to Bilzer-Tatiana Agricultural Institute... By order of the People's Committee of Health and STAVKA..." An address and map are included. If you wish to investigate this institute turn to Scenario 17 The Lair. Receive 2 ammo.
#32 Devil's Garden: In the Alpha's backpack you find a hand drawn map of the Volga ferry port's defences, showing machine gun nests, mines, and troop emplacements. There is also a satchel charge. Before he turned, this poor bastard must have expected to have to fight his way onto a boat.
Receive 1x Satchel Charge. Receive Port Defences Map. You do not have to roll for mine detonation in Scenario 15, Not One Step Back.
#33 Badehaus: The small rooms alongside the pools could contain anything though the one labeled "Aптекарь" is the most promising. As you advance, the cracked, moldy and damp tiles feel greasy underfoot. The turgid surface of the pool begins to slosh back and forth. A nauseating sweet rotten stench gushes forth as ghouls lurch from the hidden depths. Rancid flesh sloughs from bones and splatters the tiles.
Scenario Rules
This rulebook includes sample scenario setups. The full campaign is contained in the separate Scenarios book.
Juggernaut
Read entry #14. "Comrades. This would have ended badly for us already if not for you", the doctor says. He points to a pile of gear on his desk. "You've all more than earned a berth on Number 13 and this can not possibly repay you for all that you have done, but we have more to ask of you yet. If you will, we need guns at the front of the train, to cover us as we break out. For now, eat, rest if you can and know that however you were, wherever you came from, we are all brothers and sisters to the end."
FORCES
- CHARACTERS: Four
- ZOMBIES: Beta x 10 • Armoured x 3 • Kugelfisch x 2 • Alpha x 1 • Omega • Tankistka • Grinser
SETUP
- Place characters on squares marked A.
- Place Grinser on the square marked G.
- Place Tankistka on the square marked T.
- Place all zombie markers, except the Omega, on each of the squares marked with a Z.
- Place objective markers on squares marked O1 (switch) and O2 (crane).
- Place two crate markers on each of the squares marked O3.
- Characters automatically win initiative for the first turn.
SPAWN
- Zombies spawn on S.
- Also, see special rules.
OBJECTIVE
- Activate track switch at O1.
- Activate the crane at O2.
- Use the crane to move the debris blocking the tracks.
- Clear the rail yard of zombies.
SPECIAL RULES
TRACK SWITCH. While adjacent or on O1, perform a special action to activate the switch and change the track direction.
CRANE
- While adjacent or on O2, perform a special action to activate the crane.
- While adjacent or on O3, perform a special action to clear debris from the track and remove 2 square crate markers from that square.
- Once the track is clear place the Omega on K.
TANKISTKA. Does not move until she has LOF to one character.
EVOLVED
- DODGE: When a hit is inflicted, roll 1d12 for Tankistka's dodge. On a 9-12 the attack misses.
- ARMOURED: Stun results have no effect.
- NIMBLE: Ignores terrain for movement.
- CLAW FRENZY: She does not lock characters. If adjacent to a character, she inflicts 1 wound for each remaining MP.
GRINSER
- While Tankistka is on the map, he does not move. His WAIL ability remains active.
- Once Tankistka is removed from the map he switches to his MG42 power.
EVOLVED
- DODGE: When a hit is inflicted, roll 1d12 for Tankistka's dodge. On a 9-12 the attack misses.
- WAIL: While not stunned Grinser wails causing great fear and disruption in the human ranks. All Character's MPs are reduced to 3 (6 if running) and all attacks have an attack modifier of +1.
- MG42: Unlimited range, ROF of 3, unlimited ammo and inflicts a wound on a 10 plus roll on a d12. Only moves to get LOF to closest character or improve LOF attack modifier.
SPAWN (rules)
- Place zombie markers into the zombie pool face down immediately when eliminated.
- When you eliminate a zombie, shuffle its facedown marker into the zombie pool.
- Each turn draw 3 face down zombie markers and put them on the squares marked S. Extras stay in zombie pool.
- If there are less than 3 zombie markers, you can choose the spawn points.
- When Tankistka or Grinser are killed, place them face up in the zombie pool.
- After face down markers are placed on spawn points, turn over any face up markers and shuffle.
- The Omega does not respawn.
- If the Omega has been defeated and Tankistka and Grinser are not on the map, do not spawn any more zombies.
EXIT
The switch is open, the tracks cleared. The whistle screams and the engine slams forward, rattling the couplings. Massive steel wheels shriek, seeking traction and finally biting. The train begins to move, slowly at first but gaining momentum. With your last energy you climb onto the locomotive while the others fend off ghoul's clumsy attempts to board. Soon the train is travelling fast enough to escape any of the ghoul's clutches. The sky is beginning to lighten behind you as the whistle screams defiantly once more. The train rumbles westward into the retreating night, rocking you into a fugue. Too exhausted for celebration or even conversation, you stare out the window at your own muted reflection. There is no revelation, no epiphany, no insights into the human condition. There is only survival. For now, that is enough. Behind you, the city burns as you speed into the west and an uncertain future.
Congratulation on escaping Stalingrad…
FIN
Last Flight from Pitomnik
Preoccupied with the pre-flight procedures, the aircrew do not notice you. A ground crewman pulls the chocks from the landing gear. He sees your effort to signal the crew and mouths "Radio room," while pointing to a small shack topped by a crown of antennae.
More artillery rounds fall randomly on the field. Someone fires a flare cluster from the main control tower, harshly illuminating the swirling panorama of milling crowds along with the ghouls that have breached the perimeter.
The ground crew abandon their posts. A mob of undead are driven forward by the terrible Grinser and, even over the roar of the Junkers' three radial engines, you hear the snarls of something worse…
FORCES
- CHARACTERS: Three
- ZOMBIES: Omega x 1 • Grinser x 1 • Beta x 10 • Armoured x 3 • Kugelfisch x 2 • Alpha x 1
SETUP
- Place your characters on squares marked A.
- Draw and place a zombie marker on each square marked Z.
- Place objective markers on squares marked O1 and O2.
- Place a door on the blue doorway.
SPAWN
- Grinser spawns on G. Draw 2 zombie markers from the zombie pool and place them adjacent to the Grinser when he spawns.
- Omega spawns on K. Draw 2 zombie markers from the zombie pool and place them adjacent to the Omega when he spawns.
OBJECTIVE. Get one character onto square O2 by round 7 (round 11 if the secondary objective is achieved). If you fail to do this objective, read entry 26 when the first character reaches O2 (instead of reading the Exit section).
SECONDARY OBJECTIVE. Radio (O1) plane to forestall its departure by 4 rounds.
THINGS TO REMEMBER. Characters must attack the closest zombies.
WHAT YOU CAN FIND. Nothing of note to find.
BETWEEN SCENARIOS
- Before the start of the next scenario: each character must either increase their fatigue by 1 or consume 1 food.
- You may choose to scavenge (scenario 25).
- You may choose to hole up (scenario 10).
SPECIAL RULES
RADIO
- To operate the radio, perform a special action at O1.
- Once used the time to reach O2 is extended by 4 rounds.
GRINSER
EVOLVED. DODGE: When a hit is inflicted, roll a 1d12. On a 9-12 the attack misses.
OMEGA
EVOLVED. DODGE: When a hit is inflicted, roll a 1d12. On a 9-12 the attack misses.
EXIT
Dodging the grasping claws and gnashing teeth of the ghouls, you make it to the rear fuselage passenger door. As you reach it the engines throttle back and the door is flung open by an officer in a black leather trench coat.
Turn to entry #24.
Der Kommissar
The twilight deepens towards night, a vulnerable time. Still, you have decided to follow the faint sounds of a small engine murmuring softly in the distance. A sharp crack echoes through the darkening streets. You flinch; hold over reflexes from an earlier hell. A second shot rings out, then another. A twinkle of muzzle flashes grabs your attention. Another survivor, another gun. You head towards them, towards life.
A huge red banner bedecked edifice looms before you. Malevolent shapes move in the gloom drawn to the noise. Lenin glowers over the entranceway. Small arms fire increases in tempo. A soldier holds ghouls at bay, a child close by. Racing past the impotent defences, you charge…
FORCES
- CHARACTERS: Four
- ZOMBIES: Beta x 10 • Armoured x 3 • Kugelfisch x 2 • Alpha x 1 • Omega x 1
SETUP
- Place characters on squares marked A.
- Select a new character and place them on the square marked B.
- Place civilian markers on squares marked C.
- Place doors on the blue doorways.
- Remove the Alpha marker from the zombie pool and place it on the square marked ZA.
- Draw and place a zombie marker on each square marked Z.
SPAWN. Zombies spawn on S1, S2 and S3. Omega spawns on K.
OBJECTIVE. Kill the Omega and exit the board with the Kettenkrad at the point marked by the green arrow.
SECONDARY OBJECTIVE. Rescue civilians. See civilian rules. Each civilian rescued gives you 1x food.
BETWEEN SCENARIOS
- Before the start of the next scenario: each character in your team must either increase their fatigue by 2 OR consume 1 food and increase their fatigue by 1.
- You may choose to scavenge (scenario 25).
- You may choose to hole up (scenario 24).
SPECIAL RULES
WINDOWS
- Windows are marked by a yellow outline with a blue interior.
- To pass through a window an attack action must be made against it to destroy the window.
- Place a green objective marker on destroyed windows.
- The window opening acts as hindering terrain.
NEW CHARACTER
- The new character starts with their preferred weapon, plus 1x knife, 2x food, 2x ammo and 2x medkits.
- They start with 50 experience.
KETTENKRAD
- To start it up, 1 character must move onto it and perform a special action.
- If all surviving characters are adjacent to or on the Kettenkrad, you may choose to exit the map at the end of the round.
OMEGA
- Rules are found in the rulebook (Types of Zombies).
- Spawn on the round marked K on the round track.
EVOLVED. DODGE: When a hit is inflicted, roll 1d12 for the Omega dodge. On a 9-12 the attack misses.
EXIT
This new monster, dressed in the garb of an old monster, is finally dead. It is not your concern to wonder why the ghoul Commissar would have deliberately locked living people into cells. It only matters that it is dead. Your little group, packs filled with plunder, watch the civilians quietly drift back into the ruins. They all speak of Station Number 3 and the train waiting there.
Gathering around the Kettenkrad, you say "If this was our 251, we could all just ride out of here in style. Though there isn't much fuel." Your new companion agrees that they and the 251 will join your team and has an idea about where to get some gas. It's risky though.
One option is to make for the train station but we'll need to get that gas first.
If you would like to try for the train station, turn to scenario 40, LILI MARLENE.
Alternatively, there may be enough fuel left to reach the spearhead of the 4th Panzer Army relief force.
If you want to try to reach General Hoth's relief force outside the city, turn to scenario 39, EINZELHAFT.
Not One Step Back - Part 1
The gates to salvation are barred; its outworks are held only by the ghouls. If you want in you will have to blast a path through with only the tools at hand. A crate of explosives sits abandoned on the wreck of a Soviet T26 light tank.
FORCES
- CHARACTERS: Three
- ZOMBIES: Beta x 6 • Armoured x 2 • Kugelfisch x 1 • Alpha x 1
SETUP
- Place your characters on squares marked with an A.
- Draw and place a zombie marker on each square marked with a Z.
- Place satchel charge marker on square O1.
- Place objective marker on O2.
SPAWN. Zombies spawn on S1 and S2.
OBJECTIVE
- A: Pick up satchel charge from the T26 wreck at O1.
- B: Use satchel charge at O2 to blow doors open. Once it detonates read the EXIT text.
SECONDARY OBJECTIVE. None.
THINGS TO REMEMBER. Squares bordered in red are obstructive terrain and block LOF.
WHAT YOU CAN FIND. Other than the satchel charge there is nothing of value.
SPECIAL RULES
MINES. Read rules on Mines (Armoury).
TRENCHES
- Enter trench for 1MP.
- Exit trench for 2MPs.
- Characters can not jump over trenches.
- Figures in trenches can only be targeted if the attacker is either adjacent to them or also in the trench.
- Zombies can move into or out of trenches freely.
EXIT
The gates collapse. Beyond the bitter smoke, shapes move. Already shaking off the effects of the blast a Soviet commissar and his NKVD troops ready themselves, aiming their weapons directly at you. The commissar shrieks into his bullhorn "Traitors, cowards, invaders. Kill them all." First option; you can retreat immediately.
Turn to scenario 26, SEWER RAT.
Second option: Fight on.
Turn to scenario, NOT ONE STEP BACK PART 2.
Round track for part 1 keeps going with spawns but part 2 track runs simultaneously. They both advance at the same time.
Not One Step Back - Part 2
FORCES
- CHARACTERS: Same as part 1
- ZOMBIES: Omega x 1 • Beta x 4 • Armoured x 1 • Kugelfisch x 1
SETUP
- Characters start in their final position when the doors were blown up.
- Place Soviet soldier markers on squares marked C.
- Place Commissar marker on C1.
- Draw and place a zombie marker on each square on part 2 marked with a Z.
- Note that the two maps have separate zombie pools to draw from.
SPAWN. Zombies spawn on S3 and S4.
OBJECTIVE. Kill the Omega and exit at the green arrow.
SECONDARY OBJECTIVE. None.
SPECIAL RULES
MAXIM GUN
- Uses rules on Maxim Gun (Armoury).
- Unlimited ammo.
- The crew consists of one Commissar and one Soviet soldier.
- While either crew remains, the Maxim activates at the end of the zombie turn and attacks the closest figure (zombie or character).
SOVIET RIFLEMEN
- Can fire anywhere on the map in their LOF.
- There are 2 Soviet riflemen.
- Unlimited ammo.
- At the end of the zombie turn, each rifleman will activate and fire at the closest figure (zombie or character). They do not move.
- Stun/wound: 6/9 - ROF: 1 - Range: unlimited.
ZOMBIES AND SOVIET SOLDIERS. Zombies target soldiers in the same way as characters and will eliminate them if they attack them. See zombie movement and attacking rules.
OMEGA
- Use rules from Types of Zombies.
- Will move towards the closest Soviet soldier or character.
EXIT
You exit onto the launch and clear it of the undead. Hurriedly you cast off, ignoring the sickly-sweet miasma from the small cockpit. The boat struggles against the current.
From the east bank, as if from another world, skull-emblazoned banners in both German and Russian emerge from the smoke to tell you to turn back. Disembodied amplified voices reinforce the message. Artillery fire picks up and near misses bracket the ferry. It begins to take on water.
To the west looms the skeletal mass of the Dzerzhinsky Tractor Works. You could abandon your plan to escape this way and ground the boat here.
If you choose to do so, turn to page 30, RED BARRICADES.
If you press on through the fire, read entry 5.