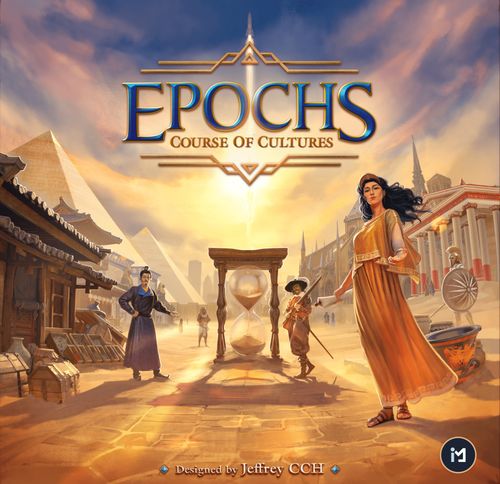
Epochs: Course of Cultures
Epochs: Course of Cultures Rulebook
Table of Contents
Table of Contents
- Components
- Setup (General Area)
- Setup (Player Area)
- 1. Shuffle the epoch I invention cards and deal 6 to each player
- 2. Each player chooses their civilization
- 3. Each player chooses a player color
- 4. Start building your player area
- 5. Set up your trading board
- 6. Place your starting unit
- 7. Set up your government board
- 8. Set up your civilization board
- 9. Arrange your starting resources
- 10. Build your personal supply
- 11. Set up your status of diplomacy
- Objective
- Game Overview
- On Your Turn
- End of Your Turn
- End of an Epoch
- Set Up a New Epoch
- Final Scoring
- F.A.Q.
Components
- 1 main board
- 1 culture and research board
- 1 invention market board
- 12 civilization boards
- 1 direction tile
- 1 first-player marker
- 16 map tiles
- 1 scroll token
- 12 combat dice
- 96 market cards (Epoch I to III+)
- 96 invention cards (Epoch I to III)
- 4 trading boards
- 4 government boards
- 4 player aids
- 4 storage boards (1 per color)
- 4 unique unit cards
- 4 axeman cards
- 24 player cities (6 per color)
- 96 player cubes (24 per color)
- 16 trading posts (4 per color)
- 8 counter markers (2 per color)
- 4 supply tokens (1 per color)
- 4 demand tokens (1 per color)
- 4 "30+" tokens (1 per color)
- 6 neutral cities
- 10 barbarian cubes
- 8 ability tokens
- 4 government tokens
- 40 food tokens
Setup (General Area)
1. Construct the map
- Shuffle the map tiles, and randomly place 9/12/16 face down for 2/3/4 players following the formats below.
- Place the direction tile in the location shown.
- Then, reveal the middle 1/2/4 tile(s) (starting from a tile of your choice and continuing clockwise, if more than one). As you reveal each map tile, terrains should be matched (if possible) as described below.
Matching a terrain:
First, check if any sea is present on the newly revealed tile. If there is, you must try to connect it to any of the sea terrains on the already-revealed map tiles that surround it. (You can rotate the newly revealed map tile if this is the only way you can connect a sea.) If the newly revealed map tile has no sea or there is no sea that can be connected on the surrounding revealed map tiles, then do the same check for the plains terrain.
- Repeat the above process until a terrain can be connected (following the priority order below). Continue to the next point if no terrain can be connected.
Priority order: Sea > Plain > Desert > Forest > Mountain
- If no terrain can be connected or the terrain can be connected with the map tile rotated in either direction, rotate the tile so that its pointed end faces the direction shown on the direction tile.
Example of matching a terrain: The map tile on the left has just been revealed, and it contains a sea terrain that cannot be connected. The next terrain type to be checked, plains, can be connected by rotating the new tile. So, the new tile is rotated to connect the plain terrains.
- After the map is built, place the depicted components on their indicated spaces.
2. Set up the unit and wonder market on the main board
- Place the main board on either side of the table beside the map.
- Shuffle the epoch I market cards to form a market deck. Place the deck face down on the designated space on the main board.
- Draw and place 4 epoch I market cards face up on the main board. (Place support unit cards on the top row, main unit cards on the middle row, and wonder cards on the bottom row.) Then, shuffle the epoch II invention cards, and place them face down in the lower space of the main board.
- Ignore the combat value track for now; it will be set up later.
3. Set up the culture and research board and the invention market board
- Place the culture and research board on the opposite side of the table from the main board (so that the map is in the middle). (Remember to use the 2-player side, if applicable.)
- Place the scroll token on the starting space of the research track.
- Place the invention market board immediately below the culture and research board.
- Ignore the culture track for now; it will be set up later.
- Shuffle the epoch I invention cards. Draw and place 4 of them face up on the invention market board. Put the remaining epoch I invention cards next to the invention market board. They will be used later in the player setup.
4. Create a supply of tokens
- Place the resource tokens, dice, neutral cities, barbarians, and special tokens somewhere near the map.
- For 3-4 player games, consider creating the supply as two piles in order to make it easier for all players to reach the tokens.
5. Prepare the remaining cards
- Sort all the following cards, and place them somewhere near the map for use later in the game: i. Invention cards for epoch III ii. Market cards for epochs II, III, and III+ iii. Unique unit cards (e.g., Phalanx)
Setup (Player Area)
Using the following steps, players will set up their player area around the general area:
1. Shuffle the epoch I invention cards and deal 6 to each player
Return the rest of the epoch I invention cards to the game box.
2. Each player chooses their civilization
- Shuffle all civilization boards, and deal 2 to each player.
- Simultaneously, each player chooses 1 to use and returns the other to the box. (For new players, you are recommended to check the Glossary and pick a civilization with a lower complexity.)
3. Each player chooses a player color
- Choose to be the Red, Yellow, Blue, or Green player.
- Then, take all the below components:
- 1 trading board, 1 government board, 1 player aid, 1 axeman
- 6 cities, 24 player cubes, 4 trading posts, 2 counter markers, 1 supply token, 1 demand token, 1 "30+" token
- 1 set of formation tokens, 2 ability tokens, 1 government token, 1 set of basic resources, 5 honor tokens
- 1 set of flags with your and each rival's colors, 1 status of diplomacy, 1 warmonger flag, 1 storage board
4. Start building your player area
- Combine the trading board, government board, civilization board, storage board, and the player aid as shown below.
5. Set up your trading board
- Then, place the demand token and supply token on the designated places on the trading board.
6. Place your starting unit
- Place your Axeman card above the trading board.
- It should be on the slot designated for units.
7. Set up your government board
- Place the government token on the Chiefdom box.
- Place your 5 honor tokens on the designated area.
8. Set up your civilization board
- Place 1 city, 4 player cubes, and 4 trading posts on the designated area on the civilization board.
- Place 2 ability tokens in the marked area on the civilization board.
9. Arrange your starting resources
- Place your basic resources (the food token, production token, science token) on the upper area of the resource board.
10. Build your personal supply
- Place your tokens and other wooden components into a personal supply on the right side of your player area.
11. Set up your status of diplomacy
- Place your diplomacy status display somewhere near your boards. Make sure it is clear for the other players to see.
12. Determine first player
- Randomly choose a first player, and give them the first-player marker. Turn order proceeds clockwise from the first player.
13. Place your counter markers on their tracks
- Place 1 of your counter markers on the first space of the military track on the main board. Markers on the track can be in stack in any order.
- Place the other one on the "0" space of the culture track on the culture and research board. Unlike the military track, the markers here should be in a stack with the first player's marker on top, followed by the second player's marker, and so on (so that the last player's marker is at the bottom).
Objective
As the leader of a civilization, your goal is to acquire the most victory points (VPs) and prove you are the greatest leader through the three epochs.
Game Overview
Epochs: Course of Cultures is played over three epochs, representing three periods (Ancient, Medieval, and Modern) of human history.
Over the course of your 18 turns (6 per epoch), you will introduce inventions to customize your civilization, explore undiscovered regions, expand your territories on the shared map, build cities and build trading posts, conduct academic research, change your form of government, and build magnificent wonders to consolidate your authority. But cruelly, being peaceful is not always the best way to benefit your people—you may have to enter into armed conflict with other civilizations. A wise leader should prepare for their civilization's defense and possible wars by improving their military's units.
Flow of the game:
- Setup of epoch I
- 6 turns per player
- End of epoch I
- Setup of epoch II
- 6 turns per player
- End of epoch II
- Setup of epoch III
- 6 turns per player
- End of epoch III
- End of the game
On Your Turn
"Nothing is more difficult, and therefore more precious, than to be able to decide." — Napoleon Bonaparte
Starting with the first player and proceeding clockwise, each player will take a turn consisting of the following three phases: Upkeep Phase, Action Phase, Military Phase.
Upkeep Phase
1. Draw 1 invention card of the next epoch. (Skip this during epoch III, since there is no epoch IV.)
2. Deal 1 market card to the market.
2-player game: Deal 2 market cards instead of 1.
Decide which row to place the card as below:
- Support unit: top row
- Main unit: middle row
- Wonder: bottom row
Whenever there is an empty space on the right of a card, move the card rightward to fill the space. Put the new card on the left of the existing cards on the respective row. If there is no empty space, discard the row's rightmost card and move the other cards rightward to free a space for the new card.
The discarded card is no longer available in the market.
Empty spaces on the market: Whenever there is an empty space on the right of a card, move the card rightward to fill the space.
3. Reveal a face-down map tile. (Skip this if all the map tiles have already been revealed.)
Choose a map tile to be revealed. After revealing it, just like in setup, you must try to match a common terrain (for details, check page 4).
Then, place the depicted tokens or wooden components on the indicated places. If 6 neutral cities are already present on the map, ignore placing a neutral city on the indicated place.
Action Phase
In this phase, you have to either:
- Invent and perform 1 action, or
- Perform 2 actions but do not invent.
1. Invent and perform 1 action.
Invent:
- Play a current epoch invention card (either from your hand or the market) to the area above your government board. This will be referred to as "invent" or "inventing".
- To invent an invention card from the market, you must replace the taken card with a current epoch invention card from your hand.
- The abilities of your invention cards are still in play in future epochs. When you invent in epochs II and III, place new inventions in a way that they do not cover up the abilities of those you already have.
Note: You cannot invent 2 inventions that share the same name as each other.
Example of inventing from your hand: In epoch II, you have decided to invent "Bazaar" from your hand. You play it to your play area, covering only the upper part of the previous invention (because its abilities are still in play).
Example of inventing from the market: In epoch II, you have decided to invent "Steel" from the market. You place it to your play area. Also, place a card from your hand to the original place of the "Steel" you have just taken from the market.
Action:
- When you invent on your turn, you can perform only 1 action. Actions are explained in detail starting on page 10.
2. Perform 2 actions but do not invent.
- You can choose not to invent to perform 2 actions.
- When you do this, you must place an invention card from the current epoch into the market, covering one of the cards already present there.
Example of covering a card in the market: Let's say you need 2 actions on this turn, so you choose not to invent. After some considerations, you decide that "Domestication" is not useful to you now, so you use it to cover up a card in the market.
Note: You must invent exactly 3 inventions in an epoch. You cannot invent fewer inventions to have more actions.
Invention card:
When you invent, gain the debut reward of the invention card on its top-left corner.
A new invention always impacts the world. The player on your left also gets the debut reward.
After that, the invention card provides you with abilities.
Abilities marked with a lightning bolt icon are activated immediately. Abilities marked with an hourglass icon are activated during scoring at the end of the game. All other abilities are ongoing abilities that are active for you for the rest of the game.
Gaining resources:
When you gain resources, take them from the supply, and store them on your storage board.
Store basic resources on the upper area and gold on the lower area. Gold can be used as any basic resource.
If you run out of tokens, try to use the 5×resource tokens to represent 5 individual units of that resource.
Extra action:
Other than the 1 or 2 action(s) you perform in the action phase, sometimes you are able to take extra action(s) that is gifted by a certain effect. For example, the ability of the form of government "Republic" is that when you expand, you can perform an extra expand action. The extra expand action would not be counted as the 1 or 2 action(s) you perform in the action phase.
Beware that when you perform the extra action, you will not gain another extra action again from it no matter what. You can only gain an extra action outside of an extra action.
If the ability writes "an extra action" instead of an action icon, it means that you can perform any action as the extra action. For example, if your form of government is "Constitutional Monarchy", after you build a wonder as your action in the action phase, you gain an extra action that allows you to perform any action you want. However, if you build a wonder again in this extra action, you will not gain another extra action.
Personal supply and gaining authority:
During setup, each player set aside some wooden components and tokens to form a personal supply. During the game, you can only take components from your supply when you gain them.
You can only use the cities, player cubes, or trading posts that you have already placed on your civilization board.
Whenever you gain 1 player cube, take it from your personal supply and place it beside your civilization's illustration. You only have 24 player cubes; and if you run out, you cannot gain more.
You can gain access to more cities by changing your government (explained later).
Gaining culture:
Advance your counter on the culture track by the amount of culture you have gained, place your counter on top of any counters already present on the space. Whenever you need to compare whose culture is higher, the player whose counter is on top is considered higher.
For example, as the Blue player, you have reached the "5" space, but Red was already there. So, you place your counter on top of the Red's counter. When comparing whose culture is higher, yours is considered to be higher.
When your culture reaches 30 or more, place this token on the "0" space of the culture track. In the very rare situation that you have exactly 30 culture more than one or more players, place your counter beside any cube(s) present on the space instead of on top.
Actions in Detail
In the action phase, you can perform 1 (or 2 if you did not invent) of the following actions.
Note: For your first action of the game, you must expand to set your civilization's place of origin (your starting land).
Expand
Pay 1 food and place a cube from your civilization board to a legal hex. The hex you pick will become one of your lands and is claimed as part of your civilization. A legal hex is one that you can expand to if ALL of the following conditions are fulfilled:
- It is adjacent to one of your lands, cities, or trading posts. (Ignore this if you do not have any land on the map.)
- It is not occupied by your rivals or barbarians.
- It is not a sea. (A sea cannot be occupied under any circumstances.)
Occupied hex: If there is a cube (player's cube or barbarian's cube) on a hex, it is occupied. If not, it is unoccupied and can be occupied by expanding.
Unknown resources to be explored: The token on the right indicates an unknown resource for you to explore on the map. You can expand into a hex with an unknown resource to, and reveal it.
If it is a question-mark token, leave it on the hex. If it is 1 or 2 exploration tokens, take the resource bonus and discard the unknown resource token.
Example of expanding: The circled player cube indicates Red's starting land. Red would like to perform the expand action. Red can choose to occupy either of the 2 hexes with the checkmark. Red cannot choose to occupy the hex with a barbarian.
Note: In your first expand action, you do not have any land at the beginning of the game. Therefore, ignore condition 1, and place your player cube on any unoccupied hex to claim your starting land. (Other conditions still apply.)
Natural resources on the map: There may be a natural resource on a hex. When you occupy a hex containing one, you now own that kind of natural resource.
Each strategic resource shield provides you 2 production. Each of the other natural resource icons provides you 1 production. (Duplicated natural resources also provide you production.) These natural resources will help you gain a higher trade income between epochs. Trading income will be explained later.
Strategic resources are also useful in upgrading your units.
For example, Red expands their lands to a hex with a strategic resource. Now, Red owns it and gains 2 production. Red moves their supply token from "0" to "2" on the trading board.
Build a City
Pay 3 production and place a city from your civilization board to a corner of a hex that is surrounded by your lands. However, if there is already a city on any adjacent corner, you cannot build the city there.
If you choose a corner adjacent to a sea, you only need to occupy the other hexes to build the city (because sea cannot be occupied).
You cannot build a city on the edge of the map.
Benefits provided by a city:
- 1 demand to the owner.
- Different rewards to the owner between epochs if it is fed (see page 21).
- 4 VPs during the final scoring.
Build a Trading Post
Pay 1 production for a land route or 2 production for a sea route. Then, place a trading post from your civilization board to a city that is reachable for you and open for trading.
Sanction on the warmonger: If you are a warmonger:
- You cannot build a trading post.
- Also, other players cannot build a trading post in your city.
A city is reachable by a land route within 1-2 hex edges from a corner of one of your lands without crossing sea along the way. A city is reachable by a sea route with unlimited distance as long as it shares the same group of sea terrain with a corner of one of your lands.
A city is open for trading if ALL of the following requirements are met:
- It is a neutral city or the city belongs to a friendly player.
- You have no trading post in it.
- It is a city with 0 or 1 trading post.
Friendly player: A friendly player means a player that is neither a warmonger nor at war with you.
To build a trading post in a friendly player's city:
- You must gain permission from that player to do so.
- As an extra reward, both of you gain 1 gold immediately.
Benefits provided by a trading post:
- 2 demand to the owner.
- Can be a new starting point for you when expanding.
Example of building a trading post: Blue wants to build a trading post. Blue starts to look at the options from the circled corner. No player is a warmonger, and Blue is not at war with Red or Yellow, so Blue can select either the nearer Red city or the Yellow city over a sea. The farther Red city is not selectable because it is not reachable by either land or sea.
If Blue chooses the Red city, they create a land route that costs 1 production. If they choose the Yellow city, they create a sea route that costs 2 production.
Let's say Blue chooses the Yellow city because Red is ahead in VPs, and Blue wants to build a good relationship with Yellow.
Blue spends 2 production to build a trading post in the Yellow city. Then, Blue gains 2 demand, and both Blue and Yellow gain 1 gold.
Tracking Demand and Supply:
When an epoch ends, you earn a trade income that brings you gold and culture. The amount earned as your trade income is decided by your demand and supply.
During the game, your demand and supply may change in many circumstances. You should always keep your demand and supply updated on your trading board.
For example, when you build a city, it provides 1 demand. You should immediately update your demand by moving the demand token 1 space to the right on your trading board.
For example, you have just lost a land that contained a strategic resource in a war, and so you lose the 2 production provided by the strategic resource. You should immediately update your supply by moving the supply token 2 spaces to the left on your trading board.
Conduct Academic Research
Pay the required science below the next column on the research track. Then:
- Gain either the rewards printed on the top or bottom row of the next column.
- Move the scroll token to cover the rewards. Skip this if the scroll token is about to reach the last space.
Take the track below as an example. In order to conduct research, you need to spend 2 science as the cost for advancing the scroll token to the next column. After spending the science, choose either 4 production or 2 food 1 culture as the reward, then move the scroll token 1 column forward.
City requirement for conducting academic research: Starting from the 3-science section of the research track, you must own the indicated number of cities in order to perform this action.
Build a Wonder
Spend the required production on the wonder card you choose on the market. Place it above the corresponding space of your trading board.
If there are culture and other rewards stated on the wonder card, you immediately gain them as a one-time reward right after you build them.
You gain the abilities of each wonder once you have built it.
There is no limit to how many wonders you can have.
Upgrade a Military Unit
- Pay the required science based on the unit card you choose from the market. There are factors that affect the science you have to pay (see the section below).
- Return the formation tokens from your current units to your personal supply.
- Place the chosen unit card on the corresponding space above your trading board.
Note: You can have at most 1 main and 1 support unit. (Always cover the old one if you have an upgraded one.)
Note: You cannot upgrade to a unit identical to the original one you already have.
- Update your base combat value on the military track.
Base Combat Value: Every unit has its base combat value. You should always show the total base combat value on the military track of the main board.
During a battle, regardless of your base combat value, you will roll dice and gain extra combat value (explained later).
- When your 2 units share a matching pair of formation icons (infantry/cavalry/ranged), place that formation token from your personal supply on the units. If there are multiple icons matched, only choose one of the formation tokens to place on the units. Formations are explained in detail on the next page.
Unit cards:
A unit provides you not only its base combat value in battles but also all the abilities and advantages stated on the card. (Battles are explained in detail starting on page 18.)
A unit card shows: Formations/Abilities, Upgrade Cost, Attack Expenditure (if any), Advantages, and Combat Value.
Factors affecting the cost of a unit card:
There are some factors that may affect the cost you need to pay when upgrading your units.
- If you are upgrading a current unit (as opposed to adding a second unit card, since you start with only one, Axeman), when you pay the cost for upgrading, only pay the difference in cost between your current unit and the new one. Take the below case as an example: your current unit has a printed cost of 4 science. Because you are upgrading from this card, instead of paying the new unit's cost of 6 science, you only need to pay 2 science. (Unique units have no printed cost.) On the other hand, if the new unit has a lower cost than your current one, you do not need to pay any cost for it.
- If there is any strategic resource beside the cost, you need to pay an extra 2 science for every of them that you do not have in your lands. Take Swordsman as an example. You need to pay either 2 science to upgrade your main unit to it if you have the strategic resource in your lands or pay 4 science if you do not have it.
- If there is any terrain icon beside the cost, you need to pay an extra 2 science if you do not own land of that terrain. For example, to upgrade your support unit to a Javelin Thrower, you need to pay 2 science if one of your lands is on the matching terrain or pay 4 science otherwise.
Formations:
Formations are very useful in battles, allowing you to use a formation token from your units to enhance your combat value in battles after rolling the die. Return the formation token(s) to your personal supply after used.
- Phalanx — When you are defending, you can use this formation token to gain 2 combat value.
- Flank — When you are attacking, you can use this formation token to gain combat value equal to the number of your lands or empty hexes (except sea) adjacent to the battlefield.
- Wedge — When you are attacking or defending in plains or desert, you can use this formation token to gain 3 combat value.
Change Your Form of Government
Advance your government token to a higher government following the arrows. The only requirement is that you must have already reached the required space on the culture track. Then, gain the instant rewards stated on the top-right corner.
Your form of government decides the maximum number of cities you can control at a time, and it provides you with an ability.
Example of changing your form of government: If you want to change your form of government from Chiefdom to Monarchy, you need to have 2 or more culture.
Let's say you have enough culture, and you have decided to change your government. First, advance your government token from Chiefdom to Monarchy, then gain the printed rewards. You also now possess the ability of Monarchy.
Maximum number of cities you may own: You should always check the total number of cities you may own on your civilization board and the map. This total should always match the number of cities you can have (printed on your government form). When your maximum number of cities increases, take the cities from your personal supply, and place them onto your civilization board.
In some rare cases, the maximum number can decrease. You will have to return cities from your civilization board to your personal supply. You may even need to remove your cities from the map if you do not have enough cities on the civilization board for the adjustment.
Produce Resources
Gain the resources shown on your current form of government.
Example of producing resources: Your current form of government is Federalism, and you are planning to upgrade your units in the future. So, you would like to have more production in preparation. On this turn, you decide to produce resources.
Producing resources under Federalism provides you 2 production.
Military Phase
1. Change Status of Diplomacy (declare war OR become a warmonger)
Your status of diplomacy determines the target(s) you may attack. In this step, you may change your status by either declaring a war on others or becoming a warmonger.
Declare war:
You can declare war on a friendly player by performing the following steps:
i. Exhaust 1 cube by moving 1 cube from your civilization board to the lower-right box of your government board.
ii. Both of you insert the flag that matches your colors into the diplomacy status display, showing the horn symbol. You are now preparing for war, and in this stage, you two cannot yet attack each other. You will be able to attack each other when the flag is turned (explained later).
Note: You can declare war on multiple rivals. For every rival you would like to declare war on, repeat the steps above.
iii. Due to the declaration of war, you must remove all trading posts built in each other's cities.
Removing trading posts: Other than this step, trading posts must also be removed when a city with trading post(s) has been removed.
When removed, trading posts return to their player's civilization board and are available to be built again. For every trading post returned this way, its player gains 1 gold (because the merchants are returning home).
Become a warmonger:
If you wish to attack instantly or attack a neutral city, you have to become a warmonger:
i. Remove all other flags (if any), and insert the warmonger flags into your diplomacy status display.
ii. Remove all of your trading posts, including:
- Your trading posts in all cities belonging to your rivals, as well as those in neutral cities.
- All rivals' trading posts in your cities.
Benefits as a warmonger:
- Only for this turn, if you do not choose to attack any neutral parties (neutral cities or barbarians), you can attack each of your rivals separately in step 2, "Attack."
- You can attack neutral cities.
Consequence of being a warmonger:
- Being a warmonger seems powerful, but it is an uncivilized act. At the end of the epoch, depending on which epoch you are in, you will lose 1/2/3 honor as a penalty.
Example of becoming a warmonger: Yellow has decided to become a warmonger, so they need to change their status of diplomacy to warmonger.
Yellow removes all 3 of their trading posts and gains 3 gold. Blue also removes their trading post in the Yellow city and gains 1 gold.
After removing the trading posts, Yellow can attack all of their rivals or attack one of the neutral parties.
2. Attack
"Know thy self, know thy enemy. A thousand battles, a thousand victories." — Sun Tzu
To start a battle, you may attack a target that is adjacent to your lands or cities, unless you have any abilities that allow attacking across a type of terrain. Remember, your status of diplomacy decides which target(s) you can choose to attack.
Example of choosing a target to attack: Red is a warmonger, so they can attack anyone. Red's main unit is a Berserker, which has the ability to launch an attack across a sea. This means Red can choose to attack any 1 of the 3 circled targets on the map.
Each time you attack, you must pay the ENTIRE attack expenditure shown on your unit(s) (if any). You cannot attack if you cannot afford it.
Important Note: You do not need to pay for defending.
Example of attack expenditure: Take the units below as an example: the Knight and the Tower Elephant have a total of 1 production and 1 food attack expenditure. To attack, you must pay BOTH of them. You cannot pay just one of them and only use that unit to attack.
Protected Neutral City: When you attack a neutral city that has a trading post of a rival, that rival can decide to protect the neutral city. In this case, the combat value and winning reward are the same as attacking that rival (explained below). (Note: If there are 2 rivals having a trading post in that neutral city, they can decide who will protect the city.)
Example of a battle with a neutral city: Yellow would like to take the neutral city by attacking it. As Red has a trading post in it, Red can decide whether or not to protect the city.
If Red has decided not to protect the city, Yellow only needs 8 combat value to take it.
If Red decides to protect the city, regard it as a city owned by Red, and resolve the battle (for details, see "Battle with a rival" below). If successful, Yellow can take up to 1 honor from Red + remove and replace neutral city + 1 gold from Red, depending on the difference between their combat values.
Battle
Once you attack, a battle starts. Follow the below steps to resolve the battle:
1. Calculate your final combat value
- Your basic combat value (it was explained on page 14).
- + Roll 1 die, and additionally roll dice equal to the number of advantages applicable for this battle.
Important Note: The icons on the right edge of your units are their advantages, allowing you to add one die to your roll when attacking barbarians and neutral cities or in terrains and conditions that match these.
- + You may use a formation token. If you do, it provides extra combat value.
- + If the battlefield is a city, you gain 1 extra combat value for every adjacent land you occupy.
- + You may have any abilities that provide extra combat value.
The sum of the above numbers is your final combat value in this battle.
2. Compare it with your opponent's
Compare your final combat value with your opponent's. Your attack is successful if yours is higher than your opponent's. Different types of opponents provide different rewards you can get.
Barbarian: The combat value of a barbarian is 3. If your attack toward a barbarian is successful, remove the barbarian cube and as a reward, you may replace it with one of your cubes from your civilization board.
Neutral City: The combat value of a neutral city is 7. If your attack toward a neutral city is successful, remove the neutral city and as a reward, you may replace it with one of your cities from your civilization board.
Rival: The rival calculates their final combat value in the same way. If your final combat value is higher than theirs, the attack is successful. You can gain the reward(s) below based on the difference between the final combat values—they are cumulative, so you can gain any and all of the rewards equal to and below the difference between the final combat values.
- If your final combat value is higher than your opponent's by 1 or more, take 1 honor from the rival.
- If your final combat value is higher than your opponent's by 3 or more, you also remove the target land or city. Then, you can replace it with your cube or city from your civilization board.
- If your final combat value is higher than your opponent's by 6 or more, you also take 1 gold from the rival.
(Note: You can still take the honor and gold from the rival if you are in a battle with them for a neutral city.)
Example of attacking a rival city across a sea: Yellow's main unit is a Marine, which has the ability to attack across a sea. Yellow and Red are now at war, and Yellow has decided to attack the Red city.
Attacker's total: As the attacker, Yellow rolls a total of 3 dice because their units have a total of 2 advantages (1 for war near sea + 1 for war in a city). Yellow rolled a total of 6. By adding their die roll total, 5 combat value from Mortar, and 9 combat value from the Marine, Yellow has a total of 20 combat value.
Defender's total: As the defender, Red rolls a total of 4 dice because their units have a total of 3 advantages (3 for defending). Red rolled a total of 6. By adding their die roll total, 3 combat value from the Crossbowman, 7 combat value from the National Guard, and bonus 1 combat value provided by their land adjacent to the city, Red has a total of 17 combat value.
As the attacker, Yellow has a greater total than that of the defender, Red, by 3. So, Yellow gains 1 honor from Red, and they can remove the target Red city and place a city of their own there for free.
Variant: Less luck in battle
For players who are not fans of rolling a lot of dice in battle, this variant can be applied to all battles in this game but only if all players agreed to do so before the start of the game.
In this variant, players will always only roll 1 die for every battle. Each applicable advantage does not give an extra die to roll but instead provides 1.5 combat value.
3. Turn the flag(s) in your diplomacy status display
If there are any flags showing the horn symbol in your diplomacy status display, turn them to show the sword symbol instead. This indicates you are now prepared for the war. When both sides are prepared, you two are at war and can attack each other in this epoch.
Example of declaring war: Red wants to declare war on Yellow. Red exhausts 1 cube, then both Red and Yellow take the flag matching both of their colors and insert it with the horn icon showing into their diplomacy status displays. At the end of Red's turn, Red turns their flag to the sword side. Both of them cannot attack each other, though, until the Yellow's flag is also turned (which will happen at the end of Yellow's turn).
Strategically, although Red cannot attack Yellow until the next turn, this act can put pressure on Yellow to use resources to upgrade their units to prepare for the upcoming war.
List of status of diplomacy:
- Peace: You can attack barbarians or neutral cities.
- At war: You can attack barbarians, neutral cities, or the rival(s) you are at war with.
- Warmonger: You can attack barbarians, neutral cities, or any rival.
On Your Turn - Free Actions
At any time on your turn, except in the middle of your current action or battle, you can perform any of the following free actions:
A. Convert basic resources. B. Unlock your civilization abilities.
A. Convert basic resources.
You may exhaust 2 gold to convert a resource to any basic resource (food, production, or science).
Example of converting basic resources: You have only 3 gold and you need 2 more to conduct academic research, and you want to save your gold for future use. So you perform this free action twice, consuming 4 gold to convert 1 food and 1 science to 2 production.
B. Unlock your civilization abilities.
Each civilization has a set of 4 unique abilities that are designed based on its characteristics. You can unlock up to 2 of them by covering the square with an ability token. You cannot unlock the same ability twice. If there is any resource requirement, you must pay it to unlock the ability. The roman numeral on the right shows in which epoch the ability is available to be unlocked. If you are not in that epoch, you cannot unlock it.
However, this does not mean the ability is only active in that epoch. Unless otherwise stated, unlocked abilities are active for the rest of the game.
Example of unlocking civilization abilities: All of Italy's abilities except Heritage Preservation can only be unlocked in epoch II. You choose to unlock Condottiero in epoch II. Starting from epoch III, you cannot unlock the other two epoch II abilities. However, even though epoch II has ended, Condottiero is still active until the end of the game. So, if you upgrade a military unit in epochs II or III, the discount provided by this ability still applies.
End of Your Turn
After the military phase, your turn ends, and the player on your left starts their turn. Players take turns until each player has had 6 turns in the epoch. Then, the epoch ends.
End of an Epoch
"Time is the wisest counselor of all." — Pericles
Resolve the following steps at the end of each epoch:
Note: Players may resolve the steps simultaneously, except for step 2 and 3. You have to follow the current turn order to resolve those 2 steps.
1. Gain a Great Work of Art
"If you hear a voice within you say you cannot paint, then by all means paint, and that voice will be silenced." — Vincent van Gogh
Art usually comes from cultured people. Only the civilizations with higher culture can produce a great work of art. Determine which player can gain a great work of art using the table below.
| Epoch I | Epoch II | Epoch III | |
|---|---|---|---|
| 2P | 1st | 1st | 1st |
| 3P | top 2 | top 2 | 1st |
| 4P | top 3 | top 2 | 1st |
Great work of art tokens should be kept at the bottom-left of your government board, in a way your rival can always see clearly how many you own.
2. Gain Trading Income
Each player gains their trade income based on their trading board. Compare your demand and supply, and gain the rewards under the lower one.
Example of gaining trade income: Blue has 8 demand and 5 supply. So they can gain 3 gold and 2 culture.
3. Feed Your Cities
"To the people, food is heaven." — Book of Han, Volume 43
At the end of each epoch, each player spends 1/2/3 food for every city they have on the map. If you have enough food to feed all your cities, you must feed them all. If not, you must choose cities to remove until you have enough food to feed all of your cities.
Note: Remember, gold is a wild resource, so you can also use it for feeding your cities.
For every city you removed, lose culture due to the discontent of your starving people.
For every city you fed, gain rewards based on the below table.
| Epoch | Consumption (per city) | Rewards (per city) |
|---|---|---|
| I | 1 food | 1 cube (restored), 1 culture |
| II | 2 food | 2 gold, 1 culture |
| III | 3 food | — |
Remove unfed cities; lose 1 culture for each.
Note: Despite no reward at the end of epoch III, each of you gain 4 VPs for each of your cities that remain on the map during final scoring.
4. Convert Your Basic Resources to Gold
"Wealth is the slave of a wise man, the master of a fool." — Seneca the Younger
Convert your remaining basic resources (food/production/science) to gold. For every 3 basic resources (in any combination), you get 1 gold. (If your form of government is Monarchy, instead of 3, convert 2 basic resources (food/production/science) to 1 gold.)
Return all your remaining basic resources back to the supply. In other words, only gold can be kept from one epoch to the next.
Note: Only if you have an ability that allows you to keep a type of basic resource (food/production/science) from one epoch to the next (for example, the invention Food Preservation), can you skip converting any number of that resource into gold.
5. Barbarians Pillage
"It was the mark of a barbarian to destroy something one could not understand." — Arthur C. Clarke
For every barbarian camp that is adjacent to your lands or cities, lose 1 gold. Ignore this if you have no gold.
6. Restore Exhausted Cubes
Return all your exhausted cubes to your civilization board.
7. Reset Your Status of Diplomacy (and warmongers lose culture)
All players remove the flags from their diplomacy status display. You are no longer at war with anyone (and are no longer a warmonger). Additionally, if you were a warmonger before removing the flags, you lose 1/2/3 culture if you are in epoch I/II/III. If your culture is 0, ignore this penalty.
Set Up a New Epoch
After the end of epochs I and II, you will need to set up a new epoch with the following steps:
1. Reveal 4 Invention Cards for the New Epoch
- Reveal 4 invention cards of the new epoch and place them on the invention market one by one covering each of the invention cards there.
2. Set Up the Invention Deck for the New Epoch
- Shuffle all the next epoch's invention cards, and place them face down on the main board. Skip this when setting up epoch III because there are no epoch IV cards.
3. Set Up the Market Deck for the New Epoch
- When setting up epoch II, shuffle the II market cards, and place them face down on the main board.
- When setting up epoch III, shuffle the III and III+ market cards separately. Place 13 or 16 of the III market cards (depending on the number of players) on top of the III+ market cards, and place them face down on the main board. (x16 for 2 or 4 players, x13 for 3 players.)
4. Reveal and Deal 4 Market Cards to the Market
- Reveal and deal 4 market cards from the newly formed market deck to the market.
5. Determine the New First Player, and Start the New Epoch
- The player with the lowest culture decides who takes the first-player token and the first turn of the new epoch.
Dealing the epoch III+ market cards (only once per game):
In epoch III, when you are about to deal a market card to the market in your upkeep phase, if you can see the back of epoch III+ market cards, do the following:
Immediately deal 4 epoch III+ market cards into the market. Then, continue to deal the 1 (or 2) market card(s) to the market as usual.
This is a one-time step that always occurs at the beginning of the 4th round of epoch III.
Final Scoring
"Bury my body, and don't build any monument. Keep my hands out, so the people know the one who won the world had nothing in hand when he died." — Alexander the Great
The game is over at the end of epoch III, at which point you will calculate everyone's total VPs to determine who is the greatest leader in this re-imagination of history. You may use the scoring pad to assist you.
- 1 culture = 1 VP
- 1 honor = 1 VP
- 1 wonder = 1 VP
- 1 city = 4 VPs
- 2 gold = 1 VP
- VPs from your ongoing/end-of-game abilities.
- VPs for the total number of great work of art tokens you have according to the following table:
| Great work of art | 1 | 2 | 3 | 4 | 5 | 6 | 7+ |
|---|---|---|---|---|---|---|---|
| VPs | 1 | 3 | 5 | 8 | 12 | 17 | 22 |
Sum up your VPs. The one with the highest total is the greatest leader and winner of the game.
If there is a tie, the player with the higher culture wins.
Variant: Quick Game Mode
Epochs: Course of Cultures can be played in a shorter way with some little tweaks in setup and scoring. The quick game also skips one of the 3 epochs. You choose to either play only epoch I to II or only epoch II to III.
Quick game - Epoch I to II
Additional setup:
- Each player gains a great work of art token.
At the end of epoch II:
- A fed city does not give you 2 gold and 1 culture. Instead, it stays on the map and provides 4 VPs during final scoring.
- Skip epoch III, and proceed to final scoring.
Civilizations:
- Before choosing your civilization, check the table at the next column. Some civilizations are less powerful in this mode so extra VPs during final scoring will be given to them. (Note: For the scoring pad, the additional VPs will be added to the VP scored from ongoing/end-of-game abilities.)
Quick game - Epoch II to III
Changed setup:
- Because the game starts with epoch II, the cards in the market and your hand should all be for epoch II. The invention cards you draw during your upkeep phase should be epoch III cards.
- Before players choose their civilizations, reveal all the map tiles.
- The scroll token on the research track should be placed on the last space of the section costing 1 science.
- Each player gains 1 great work of art, 2 gold, 2 culture, and 1 cube.
- At the end of setup, the first player uses 3 cubes from their civilization board to occupy 3 connected hexes on the map. If a city can be placed legally afterwards, place it on the map as well. Then, the next player clockwise does the same. Repeat this for all remaining players.
Change on gameplay:
- Your first action no longer has to be expand.
Civilization:
- Before choosing your civilization, check the table at the bottom of this section. Some civilizations are less powerful in this mode so extra VPs during final scoring will be given to them. (Note: For the scoring pad, the additional VPs will be added to the VP scored from ongoing/end-of-game abilities.)
| Civilization | Epoch I-II | Epoch II-III |
|---|---|---|
| Egypt | 1VP | Removed from game |
| Greece | 1VP | Removed from game |
| China | 1VP | Removed from game |
| Mongolia | 0VP | 1VP |
| England | 2VPs | 0VP |
| France | 2VPs | 0VP |
| Rome | 0VP | Removed from game |
| Carthage | 0VP | Removed from game |
| India |
* The Middle East and Latin America expansion
Using the Glossary
The rulebook is provided for players to learn how to play the game. The glossary explains detailed rules including civilizations and cards clarification. As questions arise during the game, you may refer to the glossary to find an answer.
F.A.Q.
"The right question is usually more important than the right answer." — Plato
Q1. If I gain more than 1 effect after doing an action thanks to my combo, is there any order I should follow to resolve those effects?
A: No, it is up to you. However, you must finish resolving a single effect before you resolve another one. For example, with both Mongolia's "Nomadic" ability and the "Republic" form of government, after expanding, you must decide whether or not to activate "Nomadic." Then, you can expand again thanks to "Republic," allowing you the chance to activate "Nomadic" again.
Q2. If I gain an extra action, can I gain an extra action within the extra action?
A: No, an extra action cannot trigger another extra action. For example, by building a wonder in the "Constitutional Monarchy" form of government, you may receive an extra action. Within that extra action, if you build a wonder again, you will not be awarded a second extra action.
Q3. If an ability said that I may do a specific action, do I need to pay the cost for the action? For example, I may immediately expand and research after building "Statue of Liberty."
A: Yes, you need to pay the cost unless it states otherwise. Therefore, after you build the Statue of Liberty, you can expand and conduct academic research, but you still need to pay the cost for expanding and the science cost for conducting academic research.
Q4. Will there be any rewards if I have successfully defended in a battle?
A: No. You do not have any rewards for successful defensive battles, unless your support unit is the English Longbow. It is an unique unit for England.