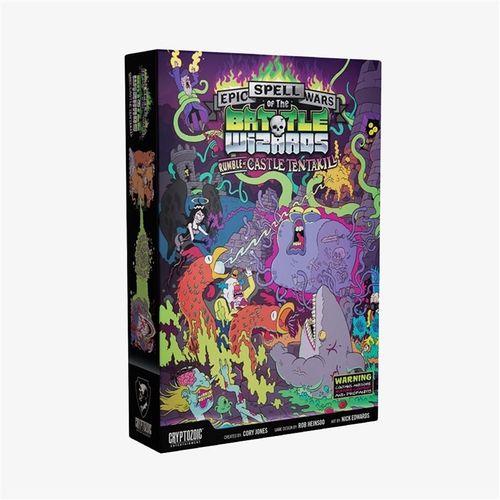
Epic Spell Wars of the Battle Wizards: Rumble at Castle Tentakill
Epic Spell Wars of the Battle Wizards: Rumble at Castle Tentakill Rulebook
Table of Contents
Table of Contents
- Quick Reference
- Components
- Object of the Game
- Set Up
- Match Play
- Start of Each Round
- The Cards
- Building a Spell
- Placing Your Spell
- Turn Order
- Reveal Your Spell
- Resolve Your Spell
- Magical Glyphs
- Power Rolls
- Targets
- Adding Cards to Your Spell
- Creatures
- Blood
- Wild Magic
- Treasures
- The Dead Wizard Deck
- The Standee
- Reactions
- Quick Match Variant
- Full Spell Resolution Example
- End of a Game
- Combining with the Original Game
Quick Reference
This condensed play summary is printed on the back cover for reference during play.
Start of Each Round: Each Wizard draws from the Main Deck until he or she has a full hand of eight cards. Each dead Wizard draws a Dead Wizard card.
Create Your Spell: Each Wizard places up to three different types of Spell Components face down in front of him or her.
Turn Order: Each Wizard announces how many Components are in his or her Spell. Wizards who played one card go before Wizards who played two cards, and they go before Wizards who played three. Ties are broken by the Initiative number on Deliveries. A Wild Card in the Delivery slot or no Delivery Component is Initiative 0. The higher your Delivery's Initiative, the sooner you act. If there is an Initiative tie, each tied Wizard rolls a die, and the high roller resolves his or her Spell first.
Resolve Your Spell: Read the name of your Spell in a wizard voice. Resolve the effects of the cards in your spell in the order they are read: Source, then Quality, then Delivery.
Blood: When you kill a foe, gain 3 Blood.
The Standee: At the end of each round of play, the Wizard with the Standee in front of him or her gains 1 Blood from the pool.
Components
- 40 Source Cards
- 40 Quality Cards
- 40 Delivery Cards
- 8 Wild Magic Cards
- 8 Oversized Hero Cards
- 7 Last Wizard Standing Tokens
- 6 Blood Counters
- 6 Skull Life Counters
- 25 Treasure Cards
- 25 Dead Wizard Cards
- 4 Six-Sided Dice
- 1 Standee
Object of the Game
Blast your opponents into smoldering bits of goo.
If you defeat each of your foes, you earn a Last Wizard Standing token. Earn two of these, and you win the match!
Set Up
Combine all of the Source, Quality, Delivery, and Wild Cards into one deck. Then shuffle each deck separately. Each player chooses a Wizard to play.
Each Wizard starts each game with 20 Hit Points. Place a skull counter on the 20 (found on your Hero card) and use it to mark your gains and losses of Hit Points. Place a Blood Counter next to your Wizard card, down by the 1, but not on the card. You start the match with 0 Blood. You can raise your HP and Blood up to a maximum of 25.
Place the Spell deck (the cards with the black backs) and the Standee in the middle of the play area. Place the Treasure and Dead Wizard decks off to the side.
Match Play
A match consists of a number of short games. A game consists of enough rounds for a player to win that game. During each round, players will create spells, blast their opponents, collect fabulous treasures, and most importantly, try to survive. The Wizard who can stand tall when all other Wizards have been disintegrated wins that game and earns a Last Wizard Standing token.
Start of Each Round
Each Wizard draws from the Main Deck until he or she has a full hand of eight cards.
The Cards
Your hand will consist of various Spell Components:
Source — Each Source is named after a legendary Wizard. When you cast your spell, the Source will give credit where credit is due.
Quality — Each Quality allows you, the Wizard, to inject some of your own creativity into your spell. These adjectives give your Spell flavor, often giving your foes a taste of the trauma they're about to suffer.
Delivery — A Delivery is the big boom—the cataclysmic finality of your Spell, sure to leave your foes bloodied and begging for mercy. Deliveries all have an Initiative number and require a Power Roll. (More on that stuff later.)
Building a Spell
Each Spell may contain up to three different Components. A spell can contain no more than one of each type of Component (Source, Quality, and Delivery). These are all legal spells: Source; Source + Quality; Quality + Delivery; Quality; Delivery; Source + Delivery; Source + Quality + Delivery.
Notice the nameplate banner? A full three-card Spell will always have a complete nameplate with a beginning, middle, and end. Sources are always the leftmost card of your Spell, Qualities are always found in the middle, and a Delivery is always the rightmost card of a Spell.
These are examples of illegal Spells: Source + Source; Source + Quality + Quality.
If a Wizard reveals an illegal spell, he or she must choose and remove cards from it until the spell becomes legal. Place those removed cards into the discard pile. Note that a player may never play more than 3 components. If they do, they must return the additional cards to their hand before announcing the size of their spell.
Placing Your Spell
A Wizard must play all the Components of a Spell face down into the play area directly in front of him or her. You may stack your cards up, spread them out, or even keep them under your hand if you wish to hide the number of Components you are playing—opposing Wizards don't have the right to thumb through your cards to check. Here is what the table might look like when all Wizards have placed their Spells: each Wizard's Hero card and character sheet sit next to their face-down Spell, arranged around the Main Deck in the center, with the Dead Wizard Deck and Treasure Deck off to the sides.
Turn Order
When all Wizards are done placing their cards on the table, the order of Spell resolution must be determined. At this time, each Wizard should call out the number of Components in his or her Spell: one, two, or three.
Wizards who played one Spell Component take their turns before Wizards who played two or three Spell Components. Wizards who played two Spell Components take their turns before Wizards who played three Spell Components.
If two or more players declare the same number of Components in their spell, then those Wizards announce their Initiative numbers.
Find your Delivery's Initiative number in the flaming ember next to the end of the card name banner.
You may peek at your Delivery to find this out, but don't reveal the card yet. A Wizard who didn't play a Delivery Component or has a Wild Magic card in his Delivery slot has an Initiative of 0. (More on Wild Magic cards later.)
The highest Initiative Delivery acts first. If there is a tie for highest Initiative, each tied Wizard rolls a die, and the high roller resolves his or her Spell first.
Example: In a four-player game, three players each declare three Components, while one player declares two Components. The player with only two Components will act first in the round. When that player's Spell is done resolving, the other three players call out their Initiative numbers. Let's say they are 17, 14, and 14. The 17 Initiative will act first amongst the players at three Components, as it's the highest Initiative. When that player's Spell is done resolving, the two players at Initiative 14 each roll a die to break the tie. The high roller will act first, then the low roller will act last in the round.
Reveal Your Spell
When your Initiative comes up, reveal the Components of your Spell. Now, in your best Epic Wizard Voice, read the name of your Spell in dramatic fashion in this order: Source, Quality, Delivery. Your play group can decide the proper punishment for a Wizard who fails to read the full name of their Spell before starting to resolve it.
If your Spell is missing any of the elements:
Missing the Source: Use your Hero's name or use your own name.
Missing the Quality: You don't have to add an adjective here, but feel free to make up something creative.
Missing the Delivery: Use any magical word, like cantrip, conjuration, or invocation.
Resolve Your Spell
Resolve the effects of the cards in your spell in the order they are read:
Source first Quality second Delivery last
If a new component enters your spell while you are resolving it, and it's of a type that you have already resolved, finish resolving your current component, then resolve the new one. Example: Your Quality puts a Source into play, but you have already resolved your Sources. No matter. Resolve the new Source before proceeding to your Delivery.
Magical Glyphs
Each Spell Component has a magic type, represented by a word and a glyph on the card.
The five types of magic are:
Arcane — Hurt foes. Gain Treasure. Still time for tea.
Dark — Deal with forces beyond your control as you dispense unrighteous magiks.
Elemental — Ignite your foes, then laugh at their screams of fiery anguish.
Illusion — You never know what you'll get, except corpses.
Primal — Whether you heal damage or deal damage, it all revolves around deep wounds.
Power Rolls
When you make a Power Roll, look at the glyph on the card that requires the roll. You roll one six-sided die for every card in your spell that has that glyph.
In other words, if you play one Primal Component and it requires a Power Roll, you'll roll one six-sided die. If you had played three Primal Components in that spell, you would have rolled three six-sided dice instead.
There are many other effects, combos, and Treasures that let you roll more dice with certain Power Rolls.
Targets
Most Spells have targets. Most of the time, your Spell will dictate its own target. Keep these targets in mind when creating your Spell! A target can be random; a foe on or your left, right, or left and right; each foe; or various other criteria. If it's a healing Spell, the target will be you. The target of a Spell Component must be determined before any dice are rolled.
Strongest & Weakest Foes: The strongest foe is the foe with the most Hit Points. The weakest foe is the foe with the fewest Hit Points. If there is a tie, you get to choose who you want to consider strongest or weakest. You are not your own foe, so if you are the strongest or weakest Wizard, you don't count.
Stronger & Weaker Foes: A stronger foe is any foe with more Hit Points than you. A weaker foe is any foe with fewer Hit Points than you. If there is a tie, you get to choose who you want to consider strongest or weakest. If a foe has the same amount of HP as you, they are neither stronger nor weaker.
Random Foes: Starting with the player to your left, distribute values on a single six-sided die to each of the legal targets for the effect. Then roll a die to see who the victim will be. (See the Full Spell Resolution Example below.)
Adding Cards to Your Spell
Some Spell Components can add cards to your Spell. Adding cards this way doesn't make a spell illegal. Added cards should be placed vertically adjacent to the Components of the same type. If you have multiple unresolved Spell Components of the same type, you resolve them in the order of your choice.
Creatures
Creatures are a subset of the Delivery component. All of the Deliveries in this set are also Creatures. The word Creature appears in the lower left corner of the card. Creatures are unique in that they can stay in play at the end of your casting. Most Creatures have the word KEEP somewhere on them. When you Keep a Creature, leave it face up in front of you. You don't discard it with the rest of your spell components after resolving your spell. Most of the time you trigger the Keep keyword by rolling well on Power Rolls. Some cards allow you to pay something to Keep the Creature around.
With a face-up Creature in play, you have a new friend! This faithful companion is even willing to sacrifice its life for you. Anytime you would take any damage from a foe, you may instead choose to discard a face-up Creature you have in play. Doing so negates the damage to you, but not other players (if it hit multiple targets). Creatures cannot absorb self-inflicted damage. A Creature that is unresolved (face down) in your spell is not eligible for this kind of loyalty. If a card deals multiple instances of damage, like 2 and then 2 more later, a Creature only blocks one instance of damage. If a card deals 2 damage, or 4 damage if you are the strongest foe (or whatever)… that is a single instance of 4 damage, so one Creature will absorb it all.
While protecting you like a guard dog is certainly useful, if you hold onto your Creature until the next round, you get to attack with it again when your initiative comes up. In fact, you must! You cannot choose to skip making a Power Roll for it.
- A "kept" Creature does not add to the spell component card count that determines how quickly you cast your spell. For example, if you play a 3-card spell and you have kept two Creatures from previous rounds, you are still playing a 3-card spell, not a 5-card spell.
- If your Creature has no legal target, you still roll to see if you keep it or not (whether it was new or was already in play).
- The glyphs on your kept Creatures ARE counted amongst all of the glyphs for your spell.
Count the glyphs that match your kept Creature and roll, just as if it were part of your spell. It's certainly possible to Keep a Creature around for several rounds if you are lucky enough to roll a KEEP result each time. But if you don't roll KEEP again, it is discarded at the end of your turn as usual.
- Discard all of your Creatures at the end of each game in a match.
If a card says to kill a foe's Creature, and then deal damage to that player, the Creature dies before it can jump in the way of any damage. Only cards that specifically target or mention Creatures can choose to hit Creatures. You can't choose to hit a foe's Creature with generic damage. Only that foe may choose whether or not to have the Creature absorb the damage. If the damage is random, wait until the value has been determined before deciding. You don't need to decide before you know how much is coming at you. No matter how little or great the damage, the Creature absorbs it all, and then the Creature card is discarded. Zero damage does not kill a Creature.
When you die, discard any Creatures you have in play. You should have sacrificed them to stay alive, numbskull!
Blood
You might have noticed the 6 Blood drip markers on the punch-out sheet. Those are for tracking the Blood you collect throughout the game. Blood is a secondary resource you can spend to increase the potency of many spell components, treasures, and dead wizard cards. You start each match with no Blood.
When you kill a foe, gain 3 Blood. Killing off your foes is the easiest way to gain Blood. You get no Blood for killing yourself. You're not around to collect it! As you gain Blood, move your blood drip marker up on your wizard's character sheet. Your Blood and HP will be kept track of on the same sheet, so don't confuse the two counters. The skull is your Hit Points, while the blood drop is your Blood stockpile.
You maintain your Blood count from game to game during a match. Do not reset it when you die. You might even be able to gain or spend some while you are dead. You cannot have more than 25 Blood at any time.
A Blood payment looks like this: "Pay n Blood: (Effect)." The n is a number between 1 and 8, and the effect is what you get for your investment. If the "number" is an X, you may pay as much or as little Blood as you wish, but it must all be paid at once. A Blood payment on a spell component may be made a single time during the casting. A Blood payment on a Treasure may be made once per round and only during your initiative.
If you don't have the Blood to spend, you cannot make the payment and you don't get the effect. Paying a Blood cost is part of the activation of that spell component. You must choose to pay it or not before dealing any damage, rolling any dice, etc. You can't kill a foe, gain 3 Blood, and then pay a Blood cost on the spell component you used to kill that foe.
Wild Magic
You might be lucky enough to draw a Wild Magic card from the Main Deck. These special cards don't have a Component type. Instead, they may take the place of any Component type. For example, if you don't have a Quality in your hand but you still wish to play a three-Component Spell, you can place a Wild Magic card in your Spell to act as the missing Component.
When your Spell is revealed, immediately reveal cards from the top of the main deck until you find the type of Component you're missing. Add it to your spell and then discard the Wild Magic card and the rest of the revealed cards. If you played more than one Wild Magic card in your Spell, repeat this process for each one. Read the name of your Spell only after you have replaced all of your Wild Magic cards.
Treasures
Treasures are powerful items that some Spell Components can award you. When you gain a Treasure, it is always placed face up in front of you for all to see. Treasures are never placed into your hand. But look out! Some crafty Wizards may try to steal your Treasures.
The Dead Wizard Deck
When a Wizard is slain, he or she discards the cards in his or her hand, discards his or her Treasures, and immediately draws a card from the Dead Wizard Deck. Being dead isn't enough to put a Wizard completely out of the action. At the start of each new round of the game, each dead Wizard draws a Dead Wizard card. If the other Wizards take a few rounds to kill each other off, you will end up with several Dead Wizard cards. These cards will help you win the next game.
Some Dead Wizard cards have the words "Resolve now" on them. These cards resolve immediately when drawn instead of at the start of the next game. You should keep them in front of you until the end of the game, so the other players can see how many Dead Wizard cards you have drawn.
The Standee
See that awesomely gory cardboard thing, with the slot cut into the base? Insert tab A into slot B and it stands up. That makes it a Standee and it has a part to play in the game! He who holds the Standee will find extra bonuses on many cards in the set. When you see the words "Standee: (Effect)" on a card you play, and you have the Standee at the time, you get the effect listed after the word "Standee." If you don't have the Standee, no one gets the Standee bonus on cards you play.
The Standee starts each game controlled by no one. Leave it in the middle of the play area. No one gets any benefit from it while it is not controlled.
- At the end of each round of play, the player with the Standee keeps it, and gains 1 Blood from the pool.
- If you slay a foe who has the Standee, you take it. If you are now the Last Wizard Standing, the round also ends, so see the above bullet.
- At the start of a new game in a match, the Standee is returned to the middle of the table.
- If you want to control the Standee, play spell components that read "gain" or "take" the Standee.
Reactions
Some spell components have the keyword "Reaction" on them. Reaction cards let you spring a surprise on a foe in case of your untimely death. If a Reaction card is in your spell and you are unceremoniously killed before you get the chance to resolve the card with the word Reaction on it, you get the effect listed. Reaction cards might allow a wizard with low HP to play a larger spell and still get in some good licks even if they die before casting it.
Note that Reaction cards in hand do nothing. They must be waiting in the spell cards you've placed to be able to trigger. A Reaction can even trigger if you die to self-inflicted damage, as long as you have not started resolving the Reaction component. If your own Source kills you, and your Quality and/or Delivery has a Reaction, it will trigger! If you own Delivery kills you, a Reaction on that Delivery and already-resolved Sources and/or Qualities will not trigger.
Quick Match Variant
This method of play is great for 5-6 player games or if you have very little time to play. Instead of playing until one player has two Last Wizard Standing tokens, you play a Three-Game Match. Instead of collecting LWS tokens, you score points for killing your foes and staying alive. Keep score using Last Wizard Standing tokens, pennies, or just write it down. Best to avoid using six-sided dice to keep score, as they tend to get picked up to make Power Rolls.
- For each foe you kill, score 1 point (and 3 Blood as usual)
- If you are the Last Wizard Standing in a game, score 1 point
You get no points or Blood for killing yourself. After 3 games have completed, compare scores. The highest score wins! If there's a tie, the tied player who was most recently the Last Wizard Standing in the match is the winner.
Full Spell Resolution Example
In a four player game, a foe who played a two-Component Spell has already acted. With an initiative of 16, you are the fastest of the three-Component Spells, so yours resolves first.
Your Spell is A.D.H. Deezi's (Source) + Sparkling (Quality) + Tentakiller (Delivery).
Now read the name of the spell in your best Wizard voice. We'll wait.
The source of your spell is A.D.H. Deezi, so it will resolve first. It reads:
"Take the Standee. If you're taking it from a living foe, also deal 3 damage to a different foe."
You take the Standee, but since no one had it at the time, you don't deal 3 damage to anyone.
Now that you have resolved your Source, you move on to your Quality, Sparkling, which reads,
"Deal one die of damage to a random foe. Standee: Then deal 2 damage to a different foe."
You assign the numbers 1-2 to the foe on your left, 3-4 to the next foe, and 5-6 to your last foe. You then roll 1 die, getting a 4. Sorry Dennis. Now you roll the die to see how much damage he takes, rolling a 3. Dennis takes 3 damage. Hey, Megan, no laughing at Dennis! Oh, wait, what's this? Because you have the Standee, you get to deal 2 damage to a different foe (someone other than Dennis). So you choose to deal it to Megan. That's what you get for laughing!
Now that your Quality is done resolving, we move to your Delivery, which is Tentakiller. It targets one foe with no Creatures in play. None have any, so you can attack any foe. Now you need to make a Power Roll to determine the outcome.
Your Delivery has an Illusion glyph at the bottom left of the card. That gives you one die right there. But your Source also has an Illusion glyph. Any components with glyphs that match your Delivery's glyph (including itself) add to your Power Roll. So with two Illusion glyphs in your spell, you get to make a two die Power Roll. You roll a 7, so looking at the card we see that lands in the "5-9: 2 damage. KEEP"
You deal 2 damage to Megan, and you get to keep your Creature in play. You can use it to block incoming damage you would take, or you can resolve it again during your next spell.
When you are done resolving all the components of your spell, discard each of your resolved components, and the next Wizard gets to reveal his or her spell and start resolving it.
End of a Game
When the dust settles and there is but one Wizard alive, the game ends and that Wizard earns a Last Wizard Standing token. In the unlikely event that a Wizard kills himself, leaving no Wizards alive, that Wizard still earns the token. Going out in a blaze of glory is never frowned upon in an Epic Spell War!
All Treasures, Creatures, and all cards in each Wizard's hand are discarded at the end of each game. None of the decks should be reshuffled until they run out of cards. This ensures that you will see a wide variety of different cards during each game. After everyone has cleared their cards, Wizards with Dead Wizard cards should then gather the bonuses those cards have granted (extra HP, Treasure, etc.) and then discard the Dead Wizard cards.
Now go bathe in the blood of all who oppose you!
Combining with the Original Game
Feel free to shuffle each of the different decks together, but that will be hard to shuffle! Another way to do it is to have two Main Decks, and players get to choose which one to draw/reveal cards from whenever they would draw or reveal cards.
If a spell component copies a Creature Delivery, it cannot Keep. It reverts to a non-Creature at the end of your casting.