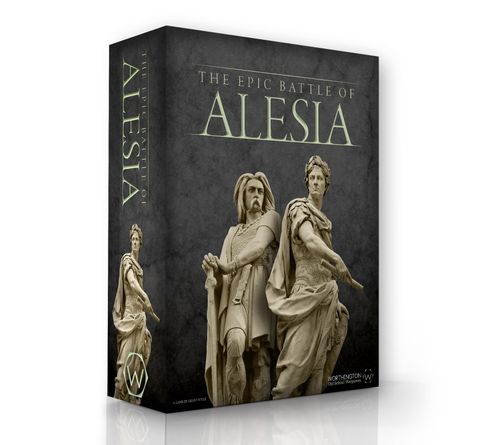
The Epic Battle of Alesia
The Epic Battle of Alesia Rulebook
Table of Contents
Table of Contents
- 1. Introduction
- 2. Game Units
- 3. Opening Setup
- 4. Assaults
- 5. Sequence of Play
- 6. Zones of Control
- 7. Movement
- 8. Movement Bonuses
- 9. Terrain Movement Cost and Restrictions
- 10. Stacking
- 11. Alesia
- 12. Off Board Chart (OBC)
- 13. Shock Combat
- 14. Multiple Unit Shock Combat
- 15. Resolving Shock Combat
- 16. Retreat and Advance
- 17. Multi-Player Games
- 18. Gallic Attack Coordination
- 19. Leaders
- 20. Missile Fire
- 21. Disruption
- 22. Defensive Works
- 23. Forts
- 24. Walls
- 25. How to Win
- 26. Terrain Examples
- Terrain Chart
- Strategy
1. Introduction
The battle of Alesia in 52 BC was the climatic battle of the Gallic Wars.
Vercengetorix, the "supreme leader" of the Gallic revolt, had retreated to the hilltop fortified town of Alesia with 30-50,000 warriors. Julius Caesar with his force 50,000 men consisting of 10 Roman legions, archers, slingers and Numidian warriors built a line of walls and entrenchments around Alesia. Realizing the Gauls were assembling a relief force to attack the Romans, Caesar then built a line of walls, camps, and defenses facing outwards.
Within this "defensive donut" Caesar and his 50,000 soldiers prepared to face an attack from a relief force believed to be between 70 - 150,000 strong, while still defending against the besieged Vercingetorix and his 30-50,000 men.
This is your battle to fight. As the Gallic player your goal is to open a road for Vercingetorix to escape the board and carry on the Gallic revolt. As the Roman, your goal is to stop the escape of Vercingetorix and stamp out the flames of revolt throughout Gaul.
2. Game Units
2.1 The counters represent the combat units and leaders that were at the battle. The Gallic units are two-tone blue (besieged force) and two-tone green (relieving force).
The Roman counters are variations of red.
2.2 The combat units are the Gallic tribes, Roman Cohorts, Numidian warriors, archers, slingers, and Germanic / Roman cavalry.
Leaders are not combat units - but do give units stacked with them a benefit in shock combat. They have no Zone of Control (ZOC).
Forts are terrain pieces that are placed during setup by the Roman player. They may not move but may be removed by the Gallic player eliminating them.
2.3 A combat unit's strength points (SP hereafter) is a unit's base strength when attacking or defending (this can be doubled based on terrain).
2.4 A unit's movement points (MP hereafter) is the base number of hexes a unit may move in one turn over clear terrain.
2.5 Identifiers for units are for historical reference only.
2.6 The front of Gallic units is their non-disrupted side, which shows their MP and SP. The back is the disrupted side with only a unit image and identifying tribe name.
The front and back of Roman units are the same, except for cohorts which have their missile-capable black circle on the front, but not on the back.
3. Opening Setup
3.1 Overlaid on the map board is a hex grid which is used to determine movement and the range between units for missile fire. The Terrain Chart explains the terrain effects of the various terrain features on the board.
3.2 The Roman player places all of their units anywhere on or between the inner and outer wall hexes (including Roman camp hexes), and Mt. Rea, printed on the game map.
Roman fort counters are placed in any hex on or between the inner and outer wall on the map, including on Mt. Rea. Forts must not be within 5 hexes of Alesia, within 2 hexes of the board edge, and must be at least 3 hexes from any other fort.
3.3 The Gallic player places all the besieged (blue Gallic) units and the Vercengetorix leader in any hex in the walled area of Alesia. When placing units in Alesia they may be stacked 3 high and remain so until they move out of Alesia.
3.4 The Gallic player places all relief force units (green Gallic) on the Off Board Chart, which is divided into 10 boxes with Roman numerals which correspond to entrance zones on the game board. The chart should be placed behind the player screen so the Roman player cannot see it. The Roman player may not look at the Off Board Chart (OBC) during the game. In each box on the chart is the game turn in which those forces may enter the map during the 1st assault. Once placed at the start of the game, it may not be changed until the set up during the second assault.
3.5 Place the Assault marker in the first box on the assault track. Place the Turn marker on the 1 space on the turn track.
4. Assaults
4.1 The game consists of Two Assaults (days) that each last 12 turns, if necessary.
4.2 At the end of turn 12 of the First Assault any on board besieged Gallic units are picked up and placed back in the Alesia town regardless of where they are on the map board.
4.3 At the end of turn 12 of the First Assault any on board relieving Gallic units are picked up and placed on the OBC corresponding to the closest off-board zone.
The closest zone is calculated by the distance from the unit to the off-board zones on the edge of the map, measured by the number of hexes in a straight line regardless of terrain restrictions. If a tie between two or more off-board zones, the Gallic player decides to which off-board zone that unit will move.
4.4 At the end of the First Assault both sides bring back into play 10% of their eliminated SP (Note: SP - not units) of their respective eliminated units. Round fractions down.
Losses must be counted by unit type, for example, cavalry, infantry, archers, etc. If a unit type has not had enough factors eliminated to replaced, they may not be brought back.
4.5 Besieged and Relief Gallic replacements are determined separately. Gallic relief force replacements may be placed in any box on the Off Board Chart but must be placed prior to seeing the new Roman starting positions. Gallic besieged replacements are placed anywhere in Alesia.
After placing Gallic relief replacements, the Gallic player may adjust any relief force units by up to two boxes (For example, a force in box I could move to box II or III, or X or IX). Again, keep the chart hidden from Roman player view.
Roman replacements are held off board until the Gallic player has placed all their replacements.
4.6 After the reorganization of Gallic forces the Roman player may reset all their combat units, leaders, and replacements from off board as if setting up at the beginning of the game. Forts may not be reset. All on board Roman cohorts are flipped to their front sides (missile capable).
4.7 In the first assault only, Gallic units in the OBC may not enter the game board from their zone box until the turn (or after at the Gallic player's discretion) listed on the OBC zone box.
In the second assault, all Gallic units may enter the game board on the first turn (or after at the Gallic player's discretion).
5. Sequence of Play
Each game turn consists of the following sequence.
5.1 The Gallic player flips all disrupted units face up.
5.2 Gallic Move: The Gallic player moves all on board units they want to move. Then, if any Gallic off board units are eligible, based on the current turn, to be moved on board, they may do so from the Off Board Chart.
5.3 Defensive Works: Determine the effect of the Defensive Works on all Gallic units that are located in Roman ZOC AND are also located in a defensive works terrain hex.
5.4 Missile Fire Phase: The Roman player resolves missile fire from eligible Roman units.
5.5 Gallic Shock Combat Phase: Resolve all shock combat caused by Gallic movement on the Shock Combat chart. Retreats and advances are immediately conducted after each battle based on the results.
5.6 Roman Move: The Roman player moves all their units they want to move.
5.7 Roman Shock Combat Phase: Resolve all shock combat caused by Roman movement on the Shock Combat Chart. Retreats and advances are immediately conducted after each battle based on the results.
5.8 This ends the current turn. If the Gallic player has not won an automatic victory, advance the "TURN" counter one box on the Turn Track and repeat steps 5.1 - 5.7 until the end of the last game turn of the Second Assault if one side does not win earlier. Follow the reset rules for the end of the 1st assault. Play the 2nd assault the same as the 12 turns of the 1st assault.
6. Zones of Control
6.1 All combat units have a Zone of Control (hereafter referred to as ZOC) which consists of the six adjacent hexes to the unit. A unit's ZOC extends across all types of terrain and units except the town of Alesia, into and out of forts, and off the board.
6.2 Units must stop when they move into an enemy ZOC and must attack those enemy units exerting the ZOC during the shock combat portion of their turn.
6.3 Units beginning the movement portion of their turn in an enemy ZOC must attack those units exerting the ZOC or move out of that unit's ZOC.
6.4 A unit may not move from one enemy ZOC directly into a ZOC of the same unit or another enemy unit.
6.5 The presence of friendly units or friendly ZOC does not negate the ZOC of an enemy unit.
6.6 Disrupted units do not exert a ZOC.
7. Movement
7.1 During the movement portion of your turn you may move as many of your units as you wish, up to their MP limit, while following all rules for terrain and ZOC.
7.2 Units are moved one at a time, in any direction or combination of directions (players may move a stack to speed up play if they all start and stay together the entire move).
7.3 A unit's MP is spent for each hex entered based on terrain cost or the presence of enemy units.
7.4 MP are not transferable from one unit to another, nor can they be saved from one turn to the next.
7.5 You may move over your own units or stacks, including during retreats, but you may never move onto a hex occupied by an enemy unit.
8. Movement Bonuses
8.1 When moving from a wall hex to a connected adjacent wall hex or fort a unit spends ½ MP for each hex entered.
For example, a unit with a movement factor of 6 could move 12 hexes if all movement was along connected walls.
8.2 A unit may combine wall and nonwalled movement in any fashion (including through forts).
For example, a unit could move three hexes along a wall for the expenditure of 1 ½ MP, move 2 clear hexes for the expenditure of 2 MP, back onto a wall hex for 1 MP, and then three hexes along the wall for 1 ½ MP giving a total of 6 MP spent.
8.3 A unit expends one full MP when crossing a hex side from a wall hex to another wall hex not directly connected to the wall being moved across.
9. Terrain Movement Cost and Restrictions
9.1 Units must stop on river hexes when they move onto them regardless of remaining MP if intending to cross. The unit may move off the river the next turn.
9.2 Movement along rivers is considered normal movement. Crossing a river requires that the unit start its turn in that hex.
9.3 A unit does not have to stop moving when entering a river hex if the river ends in the hex the unit moves into (in effect the unit is moving around the end of the river).
Units defending against an attacking unit on the end of a river are still doubled.
9.4 No Roman unit may enter a hex adjacent to the walled city of Alesia or the map edge.
10. Stacking
10.1 For game units on the board, stacking rules apply at the end of each move, retreat and advance. The Roman player may stack up to three combat units in a single hex; the Gallic player may stack up to two combat units.
10.2 Units may move, retreat and advance over friendly stacks and units. Any stack above the stacking limits at the end of a move, retreat or advance must eliminate enough units to make the stack legal. The owning player determines which units to eliminate.
10.3 Players may recombine units into different stacks at any time during the movement phase or because of the results of combat.
10.4 Forts, leader units (Caesar, Labienus, Commius, and Vercingetorix), and markers for Battle Rages are not counted towards stacking limitations.
10.5 Forts and leader units should be placed on top of stacks so they are visible to both players.
11. Alesia
11.1 No Roman unit may ever move adjacent to or enter the town of Alesia.
11.2 Gallic units are placed in stacks of up to three units within the town hexes. The location of the units does not affect which hex they move out of Alesia. There is no movement within the Alesia hexes. In effect, Alesia is just a holding box.
11.3 The Gallic player may send any besieged unit or units out of the town at any time from any wall hex following movement and stacking rules. It costs 1MP for the first Gallic unit OR stack of two Gallic units exiting a hex of Alesia and increases by 1MP for each Gallic unit or stack of two Gallic units that exit the same hex of Alesia. Follow stacking rules after exiting Alesia.
12. Off Board Chart (OBC)
12.1 The map board is divided into ten zones which correspond with the Roman numerals I through X around the edge of the board. The small black dividing lines arranged around the edge of the map designate the borders of each off-board zone.
12.2 The Off Board Chart has ten holding boxes, each of which corresponds to the zone on the game board. During set up of each assault the Gallic player places their relief force units in any box following the rules for each assault on the Off Board Chart. Each box has located in it the turn number that units located in that box may enter the game board during the Gallic player movement phase. This applies only during the 1st assault.
12.3 Stacking rules do not apply on the Off Board Chart. Relief force units are placed in zone boxes on the off-board chart however a player can fit them.
12.4 Units on the Off Board Chart enter the playing area from the edge of the map between or on the two black lines corresponding to its zone on the Off Board Chart.
The first Gallic unit OR stack of two Gallic units entering along the map edge must spend 1MP. Each Gallic unit or stack of two Gallic units that enter the same map edge hex must spend 1 additional MP.
12.5 Once on the map Gallic units may not move back off board and if forced to retreat off board are eliminated.
13. Shock Combat
13.1 Whenever units start their shock combat phase in an enemy ZOC they must attack those units exerting the ZOC. The player moving their units is the attacker; the non-moving player is the defender.
13.2 The attacking player may move as many units as stacking limits and the rules of movement will allow into attack positions. A player may make as many attacks as they want in one turn, but no unit may attack in their shock combat phase more than once per turn. A unit can be attacked more than once per shock combat phase.
13.3 During shock combat the attacker resolves all battles one at a time in any order they choose. All retreats or advances due to combat results are completed for that combat before proceeding to the next combat.
13.4 The combat factor of a unit is never doubled for any reason while attacking, nor may the combat factor of a single unit be split during an attack.
13.5 The combat factor of a unit may be doubled while defending based on the terrain the defending stack are located in.
The defensive benefit of terrain is not cumulative. For example, a defender on a wall being attacked from a river hex is doubled, not quadrupled.
14. Multiple Unit Shock Combat
14.1 When two or more units attack one defending hex the factors of the attacking units are added into one combined attack factor.
14.2 When one unit attacks two or more defending units the factors of the defending units must be combined into one defense factor.
14.3 When several units attack several defending units the attacker may divide combat as below making sure all 3 points are true:
- They attack every defending unit in whose ZOC they have a unit,
- All units in enemy ZOC attack an enemy unit(s),
- Each attacking unit is adjacent to the specific defending unit it is attacking.
14.4 Stacked defending units in a hex combine their combat factors into one total defense strength. The units may not be attacked individually in shock combat.
14.5 Shock attacking units in the same hex may divide their stack to make separate attacks against defending units in separate hexes.
14.6 The combat factor of an individual attacking unit cannot be split and applied to more than one shock combat.
14.7 A player may attack with one or more units at unfavorable odds to gain more favorable odds over other defending units. This is called soaking off.
14.8 Each attacking unit, may only be involved in one shock combat per player turn. Units may end the player turn in enemy ZOC following shock combat based on combat results.
15. Resolving Shock Combat
15.1 For each individual shock combat the "odds" must be calculated to the basic odds shown on the Shock Combat Table shown on the player aid.
To calculate the odds, divide the smaller SP into itself (equals 1), then divide the smaller SP into the larger SP. The resulting two numbers are expressed as a strength ratio with the number representing the attacker first in the ratio, followed by the defender. Fractions of any size are rounded up or down to the whole number most favorable to the defender in each attack.
For example, Attacker 14, defender 8; dividing both by 8 yields attacker 1 6/8, defender 1. Since 1 6/8 is rounded off IN favor of the defender the ratio is 1:1. 8 attacking 14 is 1:2; 14 attacking 6 becomes 2:1; 4 to 14 is 1:4.
15.2 The attacker rolls the die and cross-indexes the result with the odds column of the Shock Combat Table.
For example, A Roman cohort with a strength of 6 is stacked with a cavalry squadron (strength of 2), and they are attacked by four Gallic units; two 7's and a 6 and a 4. The odds would be 24-8 or 3-1 on the Shock Combat Chart.
15.3 The various combat results are defined as follows:
- Attacker Retreats #: The attacker retreats the attacking unit(s), passing through each hex only once. The path of retreat may not be into enemy ZOC or across a river. Retreating units blocked by an enemy ZOC, crossing a river, or the board edge are eliminated. Units that would be over stacked at the end of a retreat are eliminated.
- Attacker Advances #: The attacker may advance any of their attacking units into the defender's vacated hex. The advancing units may advance up to the given number of hexes barring enemy ZOC or crossing river. The vacated hex counts as the first hex of the advance.
- Attacker Eliminated: All attacking units are eliminated.
- Defender Eliminated: All defending units are eliminated.
- Defender Advances #: The defender may advance any of their attacking units into the attacker's vacated hex. The advancing units may advance up to the given number of hexes barring enemy ZOC or crossing river. The vacated hex counts as the first hex of the advance.
- Defender Retreat #: The defender retreats the defending unit(s), passing through each hex only once. The path of retreat may not be into enemy ZOC or across a river. Retreating units blocked by an enemy ZOC, crossing a river, or the board edge are eliminated. Units that would be over stacked at the end of a retreat are eliminated.
- Melee: Both sides remain adjacent. The next player must move or attack in their player turn.
- Battle Rages: All units in the shock combat (attacker and defender) are marked with a Battle Rages marker, with the arrow on the marker pointing to the opposing units involved. The battle must be refought in the attacker's next turn, unless the defender chooses to counterattack during their attack phase. All units affected by a Battle Rages result may not move. Units marked with Battle Rages markers retain their full SP and ZOC. Both sides have the option to reinforce the battle but must fight it with all the original participating units as well.
The defending player may reinforce the Battle Rages situation without having to attack by bringing new units into the hex or hexes of the defending unit(s). The defending player may place new units in other adjacent hexes without having to attack, providing that these reinforcing units are not moved adjacent to an enemy unit not marked with a Battle Rages marker. The option to reinforce a battle does not permit the defender to ignore the presence of other enemy units in whose ZOC he moves.
If the defending player counterattacks any of the original attacking units in a Battle Rages situation, all the original attacking units must be attacked. An attack on one of the original attackers in a Battle Rages result automatically releases the other original attackers from the effects of the Battle Rages.
15.4 Gallic units that are surrounded by Roman ZOC and attacked at odds of 2-1 or more are automatically eliminated. Roman units involved in the attack may advance up to 4 hexes following rules for advance after combat.
15.5 Odds of 6-1 or better result in automatic elimination of the defender with the attacker eligible for an advance of up to 4 hexes following advance rules.
15.6 Odds worse than 1 - 4 are resolved as 1 - 4.
16. Retreat and Advance
16.1 Units which receive an "advance" result on the Shock Combat Chart may always advance into the vacated hex of the defeated opponent, regardless of enemy ZOC. Further advance beyond the vacated defenders hex may be blocked by enemy ZOC or crossing river. The rules for enemy ZOC and river crossing apply in retreat and advance as they do in movement.
16.2 Units which are unable to retreat the number of hexes specified by the Shock Combat Chart due to enemy ZOC, crossing river, or board edge are eliminated.
Units will always retreat with the idea of not being eliminated if possible, and this may mean retreating towards enemy units while trying to avoid enemy ZOC.
16.3 The owning player of the retreating units conducts their retreat (Gallic player retreats Gallic units and Roman player retreats Roman units). Gallic relief units retreat towards the closest board edge or their entry zone but may stay on board if possible. Gallic besieged units retreat toward Alesia town hexes, and Roman units retreat toward wall hexes. (Let common sense prevail.)
16.4 An advance can always move into an enemy ZOC, but never through it. The advancing unit stops when entering enemy ZOC.
A unit forced to retreat into enemy ZOC is eliminated. A unit can retreat onto and along a river hex but never across, and if forced to do so is eliminated.
16.5 A stack of units retreating or advancing may split the stack to retreat or advance the individual units from the stack to different hexes.
17. Multi-Player Games
17.1 Alesia can be played by from two to four players. When three players are involved, two play the Gallic side with one commanding the besieged forces, and the other player commanding the relief forces.
With four players, the Roman players should split command with one player commanding the inner lines of walls, while the other player commands the outer lines of walls, OR each Roman player taking command of a set of 5 legions.
18. Gallic Attack Coordination
18.1 The besieged Gallic force with Vercingetorix may not leave the town of Alesia until the turn after ten or more relieving Gallic units end the movement phase of the Gallic turn on or cross the Defensive Works and at least one Shock Combat has been resolved. The ten units do not need to survive to fulfill this requirement.
18.2 At the end of the turn this requirement is met, the Gallic player randomly draws one of four counters (numbered from 1 to 4) and places it face down (question mark side up) on the turn track on the current turn. Only the Gallic player may look at the number (this prevents the Roman player from knowing exactly when the besieged forces will begin moving).
The besieged forces may not move from Alesia until that many turns after the relieving force has landed ten units on the Outer Works.
For example, ten units land on the Outer Works on turn 3 and the 2 counter is drawn. The 2 counter is placed face down on turn 3 on the Turn track. Beginning with the Gallic movement phase of turn 5 (3 + 2,) the besieged Gallic force may move from Alesia.
19. Leaders
19.1 The Vercingetorix piece is used for victory determination. It has no combat abilities and is automatically eliminated if placed in a Roman ZOC, whether alone or when stacked with another unit.
19.2 The Vercingetorix piece may be moved within missile range of an archer, slinger, or occupied fort but may be targeted and eliminated by successful missile fire.
19.3 Anytime the Gallic relief force leader Commius is stacked with a unit involved in a shock combat attack only, it may call for one reroll of the die. If involved in a shock combat against a Roman unit stacked with Labienus or Caesar, Commius ability is negated. Commius may only apply this ability to an attack (not defense) and only once per turn regardless if stacked with two units.
19.4 The two Roman leader counters (Labienus & Caesar) have special combat abilities. Roman leaders have no combat factors, cannot attack by themselves, and are automatically eliminated if ending a Shock combat phase alone in enemy ZOC.
19.5 Anytime the Labienus counter is stacked with a unit involved in a Shock Combat (either while on offense or defense), it may take an additional die roll. The Roman player may choose the most advantageous of the two die rolls to determine the outcome of the combat.
19.6 Anytime the Caesar counter is stacked with a unit involved in a Shock Combat (while on offense or defense), it may take two additional die rolls. The Roman player may then choose the most advantageous of the three die rolls to determine the outcome of the combat. Should both Roman leaders be involved in the same attack only one may use its abilities.
19.7 A Roman leader may apply their ability to as many attacks as there are units they are stacked with. A leader could take part in as many as three attacks every turn.
20. Missile Fire
20.1 Only Roman archers, slingers, cohorts, and Roman occupied forts may missile fire. Missile fire occurs after Gallic movement. Missile units have a black circle with a letter as a designator.
20.2 A Roman cohort may missile fire at Gallic units in adjacent hexes. Archer and Slinger units may fire at Gallic units up to 2 hexes away. Occupied forts may missile fire at Gallic units up to 3 hexes away. Missile units may fire through (over) any terrain or units EXCEPT walls and camp hexes. Missile units may always fire at adjacent Gallic units.
20.3 Roman cohorts are missile capable when on their front side. When a Gallic unit ends its move adjacent to a missile capable Roman cohort, the Roman player may fire at the adjacent unit. The Roman player rolls the die and cross references the die result on the Roman Pila Chart. The result is applied to the Gallic unit targeted by the Roman player. Regardless of the result of the die roll, the Roman player flips the firing unit to its lighter shaded side. (This means that each cohort gets one shot per assault).
20.4 Archers and slingers may never attack on the Shock Combat Table. Their combat factor of 1 may only be used in defense.
20.5 Archers and slingers may not move or advance into an enemy ZOC, even if stacked with non-missile units.
20.6 An archer or slinger unit which starts its turn in a Gallic ZOC must move away if possible unless marked with a Battle Rages marker or blocked by enemy ZOC or restrictive terrain.
20.7 A missile unit under a Battle Rages marker may not shock attack OR missile fire.
20.8 Eligible cohort, archer and slinger units may fire at only one unit per missile fire phase with the firing unit designating the target (the Roman player picks which unit in a stack).
20.9 Occupied Roman forts may fire at three Gallic units per fire phase, as long as all enemy units are within range of the fort.
20.10 Gallic units can be targeted by multiple missile attacks in the same player turn. Missile fire is targeted to individual Gallic units in a hex. Each missile fire is at a single unit of the Roman player's choosing, no matter the number of stacked units in the hex. Gallic leaders may be the target of missile fire.
21. Disruption
21.1 Gallic units attacked by any form of missile fire may be disrupted. Disrupted units are flipped to their back side and may not attack that turn.
21.2 Disrupted units lose their ZOC and may not attack while disrupted. Roman units do not have to attack adjacent disrupted units, even if stacked with another Gallic unit that is being attacked.
21.3 Disrupted units still count towards stacking limits and defend full strength if attacked.
21.4 Disrupted units are flipped back to their non-disrupted side at the beginning of the next Gallic turn following becoming disrupted.
21.5 Disrupted units in the same hex with another attacking unit neither advance nor retreat, regardless of the movement after combat generated by the attack.
21.6 A unit which is disrupted twice in the same turn suffers no additional penalties.
22. Defensive Works
22.1 All Gallic combat units ending their move on Defensive Work terrain hexes and are also in Roman ZOC are subject to elimination on the Defensive Works Chart. The die is rolled separately for each such unit and cross referenced with the Defensive Works chart prior to Roman Missile Fire Combat. The Defensive Works never effect Roman units (other than Roman cavalry).
22.2 Disrupted Gallic units and units involved in 'Battle Rages' results must roll on the Defensive Works chart if in a Roman ZOC following Gallic movement.
22.3 Cavalry units may never move into a Defensive Works terrain hex and are eliminated if forced to retreat on or through them. This applies to any hex containing Defensive Works terrain.
22.4 The Defensive Works terrain has no effect on movement of non-cavalry units.
23. Forts
23.1 The Roman player has 23 fort counters which he sets up at the beginning of the game. During setup, Roman fort counters are placed in any hex on or between the inner and outer wall on the map, including on Mt. Rea. Forts must not be within 5 hexes of Alesia, within 2 hexes of the board edge, and must be at least 3 hexes from any other fort.
23.2 Forts double the defensive strength of all Roman units in their hex.
All forts occupied by Roman combat units may conduct missile attacks during the Missile Combat Phase.
23.3 Fort missile fire takes place during the Missile Fire Phase. Fort missile fire follows the rules of missile fire except Fort missiles have a range of three hexes and may conduct 3 missile fires per turn.
This fire is in addition to any missile units located in the fort hex.
23.4 Roman units located in forts have no ZOC and Gallic ZOC does not extend into the occupied fort hex, so shock combat is not mandatory for units in or adjacent to forts.
Battle Rages and Melee results are negated if either the entire attacking or defending force occupies a fort.
Some units may attack out of a fort while others do not, regardless of the presence of enemy units.
23.5 Forts act as bridges when placed on a river hex and serve to connect any wall hexes in hexes adjacent to the fort. Movement through forts is double the normal rate, like walls.
23.6 Whenever a fort is entered by a Gallic unit, the fort is eliminated. However, a Gallic unit may retreat through a vacant fort-using it as a shield from enemy ZOC. The fort is destroyed after the Gallic retreat. During movement a fort cannot be used as a bridge by Gallic units.
24. Walls
24.1 Wall terrain hexes double the defense factors of all occupying units when attacked from non-wall, non-connected walls or Roman camp walls or forts.
24.2 When an attacker and defender occupy adjacent wall hexes but there is a visible break in the wall between the units, the defender is still doubled on defense.
24.3 Units on walls are doubled on defense only when all attacking units attack from a non-wall or a wall hex which is not directly connected through the hex side being attacked to the defending wall hex. If even one attacking unit is located on a directly connected wall hex the defender is not doubled in defense.
24.4 Walls act as "bridges" across any river they cross. Units defending behind rivers lose the doubling effect of the river if attacked from a wall or fort "bridge" hex.
25. How to Win
25.1 The Gallic player wins if he moves the Vercingetorix piece off the map during any turn. The piece is not eliminated - he escapes Caesar, and the revolt continues. Caesar is recalled to Rome in disgrace.
25.2 The Roman player automatically wins if he moves any combat unit adjacent to Vercingetorix anytime during the game, eliminates Vercingetorix with missile fire, or prevents the Gallic player from moving Vercingetorix off the board within the time span of the game. Vercingetorix is captured and taken to Rome in chains. All of the Gallic besieged units are given to the victorious Roman soldiers as slaves. Vercingetorix is strangled within the year. The Gallic revolt is squashed (historical result).
26. Terrain Examples
Camp example. The Turoni tribe unit is attacking a Roman I Legion Unit. The Roman unit is on the adjacent connected camp hex, the Roman unit is not doubled. The same would be true if it was the Roman unit attacking.
Wall example 1. The Turoni tribe unit is attacking a Roman I Legion Unit. The Roman unit is on a wall terrain hex, the Turoni unit is also on an adjacent connected wall hex. The Roman unit is NOT doubled due to the Turoni unit is on a connected adjacent wall hex.
Wall example 2. The Turoni tribe unit is attacking a Roman I Legion Unit. The Roman unit is on a wall terrain hex, the Turoni unit is also on an adjacent wall hex. The Roman unit IS doubled due to the Turoni unit NOT on a connected adjacent wall hex.
Wall and camp example 1. Two Turoni tribe units are attacking a Roman I Legion unit. The Roman unit is on the Wall terrain hex, one Turoni unit is also on an adjacent wall hex. The Roman unit is not doubled due to the Turoni unit on a connected adjacent wall hex.
Wall and camp example 2. The Turoni tribe unit is attacking a Roman I Legion unit. The Roman unit is on the wall and camp hex, the Turoni is only on the camp hex. The Roman unit is doubled as terrain goes to the defender's advantage. (The Roman player would declare the Roman unit was on the wall, not the camp).
Wall and camp example 3. Two Roman cohorts are attacking the Turoni tribe unit located on the camp hex. One Roman unit is on the wall, one Roman unit is in the adjacent connected camp hex. The Turoni tribe unit is not doubled due to the Roman unit attacking from the adjacent connected camp hex.
Wall and camp example 4. The Roman I Legion unit located on the end of the wall is attacked by the Turoni unit in the camp. The Roman unit is doubled as the camp is not connected to the wall the Roman unit is on. If the Roman unit attacks the Turoni unit, the Turoni unit is doubled in defense.
River movement example. The Roman I Legion unit could move onto the river hex and along it within the turn, but would have to stop movement for the turn in river hex if they wanted to cross it.
River attack example 1. If either unit attacked the other, either would be doubled as they are both on different rivers.
River attack example 2. If either unit attacked the other, neither would be doubled as they are both on the same river.
River retreat example. The Roman I Legion unit is attacked and forced to retreat. The cohort can retreat along the river, but would be eliminated if forced to retreat across the river and cannot.
Terrain Chart
The Terrain Chart (referenced in 3.1) is printed on page 12 of the rulebook as follows.
- Wall: Units move 1/2 MP when moving from wall to connected wall, or fort. Defending units are doubled SP if attacked and all attacking units not on connected wall.
- Defensive Works: Cavalry units are eliminated if forced to enter due to retreat. Gallic units located on defensive works and in a Roman ZOC, at the end of the Gallic move phase, must roll on the Defensive Works chart.
- Clear: (no entry printed on the chart)
- Up Slope: Defending units are doubled SP if all attacking units are attacking up slope.
- Camp: Defending units are doubled SP if all attacking units are not on connected camp hex.
- River: Units must stop movement for the turn when entering if crossing. Units can move across next turn. Units can move along with no penalty. Defending units are doubled SP if all attacking units are not on a connected to a river hex.
- Alesia: Roman units may not move within 2 hexes.
Strategy
Printed on page 11 of the rulebook. These are the publisher's play suggestions, not rules.
Gallic Strategy: The Gallic player should consider making an attack in I, II, or X in the first two turns of an assault to make sure the besieged force has enough time to break out if the attack is successful. It does not have to be with the whole relief force but should be at least half. Keep the Roman player guessing. By moving half your units on board early, you can keep Roman troops with the fear you may move on in a distant zone. You could hold troops off zone I and move them in over multiple turns, thereby causing the Roman troops poised to defend against a possible attack in Zone V. When attacking the Romans the Gauls should always have 2 units per stack in the attack. Soak off attacks should be used wherever possible to gain a local advantage.
Units behind the front lines should be kept in single units per hex. This allows units in the front lines room to retreat, losing units to over stacking is wasteful and useless.
Keep the attack as spread out as possible to prevent the Roman player from being able to concentrate on defense. Your advantage is in numbers. With that said, don't waste valuable time spreading the attack out, running around looking for an opening. The Romans have the interior lines and can shift troops rapidly along the walls.
Always pick off lone Roman units wherever and whenever possible. Keep your cavalry on your flanks to prevent the Romans from encircling your units.
Just keep attacking, you are going to take losses, but make sure you are getting a cohort eliminated whenever you get the opportunity.
Roman Strategy: Use your interior lines to full advantage. Your units move quickly along the walls. Set up your forts to bridge gaps in your walls to speed movement and block possible attack points along the walls.
You can stack 3 high vs the Gallic 2 high. This allows you to concentrate counterattacks and also strongly defend key points in the line.
Your forts are valuable. Don't allow them to fall easily. A Roman cohort with a Pila, along with a missile unit can be very deadly in combat if located in a fort. The missile fire from the combination can quickly breakup a high powered enemy attack.
You win by preventing the breakout, so while defending the outer walls is important, keep your eye on the prize, don't let Vercingetorix out from the inside.
Use your leaders for counter attacks. They are critical.