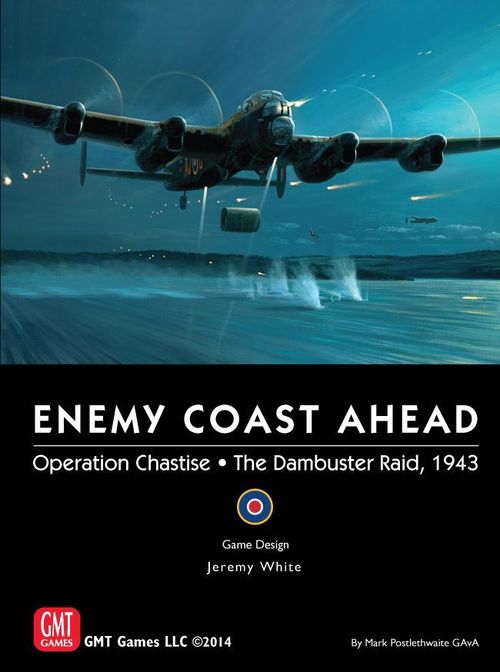
Enemy Coast Ahead: Operation Chastise – The Dambuster Raid
Enemy Coast Ahead: Operation Chastise – The Dambuster Raid Rulebook
Table of Contents
Table of Contents
1.0 Introduction
On the night of May 16-17, 1943, the Royal Air Force attacked Germany's dams. The Dambuster Raid simulates that action.
NEWBIES: We suggest you learn the game by setting up one of the Attack Scenarios, such as Scenario 5 (it has a special variant just for beginners). Set up information can be found in the Scenario Book, and to play, use the player aid card to guide you through the sequence of phases (the card to use is the one labeled A1 to A14; it has Attack Turn information on it).
1.1 Rules
This book describes the rules of the game. Rules are numbered and cross-references to other rules are listed [in square brackets]. Examples appear off to the side in the margin, as do historical and design notes (but these are in shaded boxes).
The rules are presented in three sections. This introduction [1.0 and 2.0] and Part 1 [3.0 to 5.0] presents everything you need to play Scenarios 1-5. Part 2 adds the flight rules, and combined with Part 1 will tell you everything you need to play Scenarios 6-9. Part 3 explains the additional rules necessary to play Scenario 10 (the campaign game).
1.2 Scenario Book
Historical notes, set up information and Debriefing Charts for the scenarios are included in a separate Scenario Book. There are ten scenarios in The Dambuster Raid, plus combinations and variants.
1.3 Players
The Dambuster Raid is a solitaire game. You play the role of the British squadron commander, and sometimes the game asks you to assume other roles too.
Multi-Player Games: The game may also be played with two or three players, either cooperatively or competitively. Special rules for group play can be found in the Scenario Book [p.43].
1.4 Scale
Each Lancaster marker represents a single Lancaster, and each Aircrew marker represents the seven men operating the aircraft. Some Elite Crewmen are singled out, represented by individual markers. The specially engineered mine — codenamed Upkeep — is also represented by its own marker. Each Planning Turn represents approximately two weeks, each Flight Turn represents an hour, and each Attack Turn represents seven or eight minutes (eight Attack Turns are nested inside a single Flight Turn).
1.5 Component List
A complete game of Enemy Coast Ahead: The Dambuster Raid contains the following components:
- One Rule Book
- One Scenario Book
- One 22" x 34" map
- Three 11" x 17" player aid cards (double-sided)
- One 11" x 25.5" player aid card (double-sided)
- Two 8.5" x 11" player aid cards (double-sided)
- One half sheet of 1" playing pieces (35)
- One and a half sheets of 5/8" playing pieces (264)
- Four six-sided dice
1.6 Mapsheet
The game map is organized in three sections. The leftmost section is the Mission Planning Blotter (explained in Part 3 of the rules), while the rightmost section presents the Target Maps and each dam's Status Record Track (explained in Part 1 and used in all scenarios). The center section is the Flight Map (explained in Part 2 and used for Scenarios 6-10).
1.7 Player Aid Cards
The three 11x17 player aid cards carry regularly accessed information, including the charts and tables necessary for playing the game. Each card is dedicated to a part of the rules: attack, flight and planning, and each is organized by the sequence of play. The three-panel player aid (11 x 25.5) includes a flow chart which may help you understand how the various sequences fit together. Although a game of this complexity will necessitate dipping into the Rule Book from time to time, these cards present that information in short and graphic form, hopefully reducing the number of visits you make to this manual.
Player aid card references appear in these rules as boxed codes: A = Attack Turns, F = Flight Turns, P = Planning Turns, E = End Game.
1.8 Squadron Log
Instead of using the markers provided, players may prefer to keep track of the condition of the Lancasters with pencil and paper. Two log sheets are provided at the back of the Scenario Book for that purpose. You may use either one, and may copy them.
2.0 Assets
A variety of 1" and 5/8" square playing pieces (also called markers or counters) are used to play the game. They represent the aircraft, crewmen and ordnance at your disposal. Others allow you to keep track of a variety of functions during the game.
2.1 Lancaster
Individual Lancasters are represented by 1 inch squares, referred to in these rules interchangeably as "Lancaster(s)", "bomber(s)" and "aircraft".
The numeral in the lower right-hand corner of the marker is used only in Scenario 10 (it is the requisition cost), and the letters at the top of the marker (for example, "AJ-F") is the Lancaster's identification sign. The name at the bottom left is for informational purposes (flavor text), indicating the historical pilot's last name, and the number or word on the back of the counter is also for historical interest (it is the time of the aircraft's return to Scampton, or its fate as known at the time of the raid).
2.1.1 Damage to Lancasters
The front of the Lancaster marker is its undamaged side, the back is its damaged side (damage is caused when the Lancaster suffers a "hit" by either Flak [4.2.4] or Hazards [7.7]). Once damaged, a Lancaster marker should be flipped over so that its damage side is face up. A Lancaster may never become un-damaged during the game (in Scenario 10, however, during the Modifications Phase, aircraft damaged in training can be repaired [10.4.5]). A damaged Lancaster that suffers damage again is destroyed and removed from play.
2.1.2 Attachments to Lancasters
Aircrew, Upkeep, and Elite Crewmen "attach" to the Lancaster markers when they are assigned to a Lancaster. An easy way to indicate attachment is to literally stack them on the Lancaster marker, or keep them adjacent, or use the Squadron Log and a pencil. Attachment happens at set up, or in Scenario 10 at the end of the Flight Preparation Sequence before the first Flight Turn [Sortie, 11.5]. Once attached, those markers must remain attached to their aircraft throughout the game. Upkeep is an obvious exception: remove the Upkeep marker from the Lancaster when it is released against its target [4.2.5, 4.2.9, 4.2.12]; or as an adverse result during the Resolve Hazards Phase of a Flight Turn [Crash, 7.7.2e]). Once assigned, attachments may not be transferred to another aircraft (Scenario 10 exception: the Jinx transfers to another Lancaster [see 13.1]).
2.1.3 Hazards as Attachments
During the Resolve Hazards Phase of a Flight Turn, it is possible for a revealed Hazard marker to be attached to an aircraft. Once attached, the marker may not be removed. If the Lancaster is destroyed, place the Hazard marker back in the cup (exception: Delayed Sortie [7.7.3f]). There is no limit to the number of Hazard markers that may be attached to the same aircraft (their effects are cumulative).
2.2 Aircrew
The seven men operating a Lancaster are represented here by 5/8 inch markers rated according to experience type, as noted on the counter: Veteran, Seasoned, and Green.
Each Lancaster on the Target Map or Flight Map must have an Aircrew marker attached to it. During Flight and Attack Turns an aircraft may not be in play without an attached aircrew, and no aircrew may be in the game without attachment to an aircraft. If the aircraft is destroyed during a Flight or Attack Turn, so is the attached aircrew.
The single-digit number on the Aircrew marker is used only in Scenario 10 (it is the requisition cost, explained in Part 3).
2.3 Elite Crewmen
These represent individual crewmen who distinguished themselves during previous missions or training for this mission. Each provides a benefit to the Lancaster he is attached to. An Elite Crewman must be attached to an aircraft, and no aircraft may have more than one Elite Crewman attached to it (exception: the Jinx in Scenario 10 [13.0]). Unlike Aircrew markers, an aircraft need not have an Elite Crewman at all; it may operate in the game without it. Once assigned, an Elite Crewman must remain attached to its aircraft throughout the game, and is destroyed if its aircraft is destroyed.
Elite Crewmen Effects: One side of the Elite Crewman marker indicates its beneficial effect. Unless noted otherwise, the effect applies only to the Elite Crewman's Lancaster. In many cases, the effect may only be used once (this is indicated on the marker), and to signify that it has been used, flip the marker over so that the name and face of the crewman is face up (or make a note on the Squadron Log). Even after being flipped, an Elite Crewman still influences its Lancaster's ability to Return to Base [5.1].
The special effects, or benefits, of each Elite Crewman are explained below:
2.3.1 Bomb-Aimer
+1 Release Modifier – Add 1 as a modifier to the release during the Release Sequence [4.2.13 step 3].
2.3.2 Engineer
+1 Speed Chit – During step 2 of the Approach Sequence, draw an extra Speed chit [4.2.2]. It has no effect during the Release Sequence; that is, it may not be used during the Final Speed Check [4.2.13 step 2]. This is a permanent benefit.
2.3.3 Front Gunner
Gunnery -1 – Subtract 1 from the die roll when performing Gunnery using the front gunnery [4.2.8 & 4.2.11 & 4.2.13 step 5]. This is a permanent benefit.
2.3.4 Wing Commander
You may re-roll one or more dice. You may do this only if the roll directly affects the Elite Crewman's Lancaster. However, if on the Flight Map and attached to a Wave Leader [6.7.5], you may use this benefit if the roll directly affects ANY bomber in the wave. Regardless of how it is used, the Wing Commander benefit may only be used once per game.
2.3.5 Navigator
There are four types, each with a unique benefit:
Navigation Check +1 – Add 1 as a dice roll modifier when you make Navigation Checks for this Lancaster [7.4.1]. If making a check for a wave and this Elite Crewman is attached to the Wave Leader, you may use this benefit too. This is a permanent benefit.
+1 Altitude Chit – During step 3 of the Approach Sequence, draw an extra Altitude chit [4.2.3] (it has no effect during the Release Sequence; that is, it may not be used during the Final Altitude Check [4.2.13]). This is a permanent benefit.
2.3.6 Pilot
Each marker has a unique benefit:
Approach Vector – Roll two dice instead of one when making an Approach Vector Check, and select the most favorable die [rule 4.2.1, the table is printed on the map].
Ignore Damage – When the Elite Crewman's Lancaster suffers damage [2.1.1], you may choose to ignore it (you must make this decision immediately). This benefit may be used only once each game.
Weave & Jink – Remove an unrevealed Hazard marker during the Evade Hazards Phase of the Flight Turn [7.6.2]. If in a wave, this Elite Crewman's benefit may be used to remove a hazard from the Wave marker. Only one Hazard marker may be removed, and only once per game. It may not be used to evade hazards in the English Coast or North Sea Zones.
Ignore Map Error – You may remove one Map Error marker from the Elite Crewman's aircraft. This benefit may be used anytime, but only once each game.
2.3.7 Rear Gunner
Gunnery -1 – Subtract 1 as a die roll modifier when you make a Gunnery Check when using rear gunnery [4.2.11 Balloons, 4.2.13 step 6]. This is a permanent benefit.
2.3.8 Wireless Operator
Three Dice – During the Wireless Phase of a Flight Turn, when you perform Wireless Telegraphy, you may roll three dice instead of two [7.2.1]. After rolling, select two of the dice and then apply the result. If in a wave, this benefit applies to the Wave Leader even if not attached to the Wave Leader's Lancaster. This benefit is permanent. If the elite wireless operator's Lancaster has a Broken Radio attachment, you may not use this benefit.
2.3.9 Armorer, Jinx, and Spy
These three Elite Crewman markers are used only in Scenario 10 and are explained in Part 3 of the rules [Armorer 9.4, Jinx 13.0, Spy 10.2.3].
2.4 Upkeep (ordnance, aka the "bouncing bomb")
In Scenarios 1-9, scenario instructions will tell you which Lancasters must start with an Upkeep marker as an attachment. In Scenario 10 attachment happens during the Flight Preparation Sequence [11.5]. Only one Upkeep marker may be attached to a Lancaster, and once attached, may not be transferred to another Lancaster. When selecting an Upkeep marker for attachment, pick it randomly and do not peek at its damage side.
The back, or "damage side" of the Upkeep marker must remain hidden throughout the game, and may be revealed ONLY during the Detonation Result step during the Status Phase of an Attack Turn [4.4.4], or when you perform Morning Reconnaissance at the end of the game [5.2]. Even when an Upkeep marker is removed from play (for example, because the aircraft carrying it is destroyed), you may NOT peek at the damage side of the marker.
2.4.1 Evens & Odds
There are two numbers printed on the back of the marker, an odd number above an even number. When you resolve damage inflicted on a dam from a successful release [4.4.4], you will apply one of the two numbers as determined by a die roll: if the roll is even, apply the even number, and if odd, apply the odd number.
2.5 Wave
A Wave marker (1 inch square) serves as a placeholder on the mapsheet for multiple aircraft. When you form a wave, find a convenient place for the Lancaster markers and their attachments on your gaming table (you are welcome to use the Wave Holding Boxes player aid cards). An aircraft in a wave is considered to move wherever the Wave marker moves.
On the Target Map, the Wave marker's only purpose is to mark the location of multiple aircraft sharing the same space, and you may "create" or "dissolve" Waves at any time while on the Target Map. In fact, the use of Wave markers is not mandatory on the Target Map at all; use them only as a convenient method of handling the aircraft and their attachments.
The use of Waves on the Flight Map is more strict (in Scenarios 6-10). They are explained in Part 2 of the rules [6.7].
2.6 Approach & Release Chits
These fourteen chits are used during the Approach & Release Sequence of the Attack Turn, allowing you to determine the speed and altitude of a Lancaster. Half are Speed chits and half Altitude chits (you will need to keep them in separate opaque cups). The pink "release" side is used only when the Lancaster is in the Release Box [4.2.13] while the tan "approach" side is used when the Lancaster is in the Far, Near and Close Zones of the Approach [4.2].
These chits are drawn randomly and blindly from a cup and reused each time altitude or speed must be checked during the Approach & Release Sequence.
2.7 Dam Defense Level Markers
Use these to keep track of the status of each dam's defenses. There are three categories of defense: Flak, Searchlights, and Balloons. Place the markers on the dam's Status Record Track to record the current Defense Level as indicated by the Scenario Book.
2.8 Very Light Flare Markers
On the back of the Flak and Searchlights markers are Very Light Flare markers. Most likely you will not require all eight Flak and all eight Searchlights markers (if you do, surrender), so you are free to use the extras as Very Light Flare markers.
On the Flight Map: A flare may be fired during the Coordination Phase [7.1.1] of a Flight Turn. Place the marker on the Lancaster that fired it, or on its Wave marker. These markers are removed from the Flight Map during the Resolve Hazards Phase [7.7].
On the Target Map: A flare may be fired by any Lancaster during the Circling Phase of an Attack Turn [4.3.1]. Place the marker on the Attack Turn Track, and check for flare removal at the end of each Status Phase [4.4.5]. It may also be fired during an Uncoordinated Entry into a Target Map at the start of a dam attack [7.9.4].
2.9 Water Level Markers
Place this marker on the dam's Status Record Track to record the dam's current Water Level: Rising, High, or Full. In Scenarios 1-9 all Water Levels will be Full, but in Scenario 10 they may vary.
2.10 Recon & Activity Level Markers
Record the amount of reconnaissance that has been performed prior to the raid, referred to as the "Recon Level," by using the Recon Level marker. Hostile Flight Zones have Recon Level Tracks (Scenarios 6-10) while each dam has a Status Record Track (all scenarios). Record the Recon Level by placing the marker on the appropriate space on the track. Refer to the Scenario Book for Recon Levels at the start of the game. The other side of the Recon Level marker is used only for resolving a Surprise Check in Scenario 10, and is explained in Part 3 [12.0].
Activity Level: Use the Activity Level marker to record the aggressive actions of your bombers at the dam (all scenarios) [see 4.4.3]. It influences Nightfighter Checks.
2.11 Hazard Markers
Hazard markers are used only in Scenarios 6-10, explained in Part 2 of the rules [7.5, 7.6, 7.7].
2.12 Primary & Secondary Target Markers
These are intended to designate a wave's Primary and Secondary Targets. They are used only in Scenarios 6-10 and are explained in Part 2 [6.4.1 & 6.4.2].
2.13 Mission Planning Blotter Markers
A number of markers are needed to keep track of your decisions and the effects of those decisions on the Mission Planning Blotter. They are described in Part 3 of the rules [10.0].
2.14 Groundcrew
These 1" markers are used only in the campaign game (Scenario 10), and are explained in Part 3 of the rules [9.0].
2.15 Dummy Run & Approach Observed Marker
This marker is brought into play and attached to an aircraft during the Approach & Release Sequence of an Attack Turn [4.2.5, 4.2.9, 4.2.12, 4.2.13 step 3]. The marker may be used in a subsequent turn.
2.15.1 Effect
Regardless of which side is face up, Dummy Run or Approach Observed, this marker lends the same benefit to the Lancaster it is attached to. You may use it when you draw Altitude or Speed chits during the Approach or Release Sequence, as follows: when drawing chits you may remove the Dummy Run/Approach Observed marker from the Lancaster. This allows you to draw one more chit (either Altitude or Speed). You may use this benefit during Steps 2, 3, 6 or 10 of the Approach Sequence, or Steps 1 or 2 during the Release Sequence.
Clarification — No Aldis Lights: You may exchange this marker for an Altitude chit even when the Approach Lancaster does not have Aldis Lights on [see 4.2.3 and 4.2.13 step 1].
2.15.2 Removal
Besides "trading it in" for a chit [2.15.1], you may remove this marker from a Lancaster at any time. If not removed, it can remain attached indefinitely.
2.16 Security Markers
Use these only during Scenario 10. When brought into play during the Security Phase of the Planning Turn, place tan-side face-up. The effects of each marker are explained in Part 3 of the rules [10.2].
Part 1 – Attack
3.0 Target Maps
The mapsheet has three vignettes, the Target Maps. Each vignette is organized by spaces ("boxes" and "zones"). Individual aircraft must be in a space, none may be outside a space, or in between spaces. If you have more aircraft (and their attachments) than can reasonably fit in a space, use a Wave marker as a placeholder to reduce clutter. Arrows or text connect the spaces to indicate how a Lancaster may move from one space to another. Those connections are also described here in the Rule Book [4.0 to 4.3].
3.1 Circling Boxes: Near & Far
There are two circling boxes, Circling Near and Circling Far. There is no limit to the number of Lancasters that may be inside either space. The Circling Far Box represents airspace far from the dam, beyond visual contact, while the Circling Near Box represents airspace in close proximity to the dam and its reservoir, but beyond flak and effective searchlight range.
3.2 Approach (Far, Near, & Close Zones)
The "approach" is a line of spaces in the corner of the Target Map, and represents airspace above the reservoir leading to the dam. It is organized into three zones: Far, Near and Close. You initiate the Approach & Release Sequence by placing a Lancaster into the Far Zone of the Approach. Note that the Sorpe Target Map has only Far and Close Zones.
3.3 Release Box
This box may be accessed from any zone of the Approach, but only by a single Lancaster carrying Upkeep (thus initiating the Release Sequence [4.2.13]). Only 1 Lancaster may enter this box each Attack Turn and its entrance signifies the release of ordnance.
3.3.1 Released Upkeep Box
When you place a Lancaster in the Release Box, detach its Upkeep marker and put it in the Released Upkeep Box. Do not peek at its damage side. It stays here until you resolve the release [4.2.13, step 3], at which time you will shift the Upkeep marker to the dam's Status Record Track.
3.4 Climb Box
A bomber may only move into this box from the Release Box, and only after releasing Upkeep at the conclusion of the Release Sequence [4.2.13].
3.5 Dam's Status Record Track
On the extreme right of the mapsheet are eight record tracks, each corresponding to one of the target dams. Use the tracks to record the Water Level of each dam's reservoir, the level of defenses (Flak, Searchlights, and Balloons), the Recon Level, and the Activity Level of your Lancasters at the dam. There are five spaces on the track, ranging from 0 (zero) to four (Level 0 to Level 4). You will also place Upkeep markers here [4.2.13 Step 3].
3.5.1 Reservoir Value (rv)
Each dam has a corresponding "rv", or reservoir value. This value corresponds to the reservoir's capacity (Eder Dam's reservoir was the largest, it has the highest rv). This value is used only in determining the outcome of Scenario 10 [see the Scenario Book, p.39].
Sorpe Dam's rv: The rv of Sorpe Dam is variable. If Möhne Dam is breached, add 1 to Sorpe's reservoir value.
4.0 Sequence of Phases – Attack Turn
An Attack Turn is comprised of four distinct phases: a Run Phase, an Approach & Release Sequence, a Circling Phase, and a Status Phase. The player aid outlines the steps of the Approach & Release Sequences [A1].
4.1 Run Phase
You may move one Lancaster into the Approach from the Circling Near Box, thus initiating the Approach Sequence [Step 1, 4.2.1]. To make a run, the Lancaster MUST have an Upkeep marker attached. If you do not place a Lancaster in the Approach Box, skip the Approach & Release Sequence and proceed directly to the Circling Phase.
4.1.1 Start in the Far Zone
The Lancaster may only enter the Approach at the Far Zone.
4.1.2 Escort
Up to two other Lancasters in the Circling Near Box may "escort" the Approach Lancaster. The escorts must be placed in the Escort space(s) next to the Approach in the Far Zone. You may only place aircraft in the Escort space if you place one in the Approach. An Escort may NOT have Upkeep attached.
4.2 Approach & Release Sequence
The Approach & Release Sequence is triggered when you move a Lancaster into the Approach Box during the Run Phase. If the Approach is empty, skip this phase and go on to the Circling Phase. Perform the release portion of the sequence only if you end the Approach portion by moving a Lancaster into the Release Box. Perform the sequence in steps:
4.2.1 — Step 1 — Approach Vector Check
Roll one die and refer to the Approach Vector Check table on the mapsheet (it is next to the Attack Turn Track). The results will not have immediate effect, but they will influence the next two steps of the sequence. The table is organized in columns that correspond to the dams, while its rows correspond to the Recon Level at that dam. At each intersection of column and row is a yellow box. Find the result in that box.
Clear or Fog? If visibility is Clear, use only the top results, but if Fog, use ALL results in the box.
In Scenarios 1-5, starting visibility is determined by the scenario instructions, but in 6-10 it is determined during the Target Map Phase of a Flight Turn when transferring Lancasters to the Target Map [7.9.5]. In all scenarios visibility is checked during the Status Phase of some Attack Turns [noted on the Attack Turn Track printed on the map; also see 4.4.1].
Explanation of results...
S – Draw 1 less Speed chit when you check speed during Step 2 of the Approach Sequence [4.2.2].
A – Draw 1 less Altitude chit when you check altitude during Step 3 of the Approach Sequence [4.2.3]. Each Very Light Flare marker on the Attack Turn Track nullifies 1 A result.
M – Suffer a -1 modifier when you perform the Michelskopf check after releasing Upkeep during Step 4 of the Release Sequence [4.2.13]. This result is possible only at Eder Dam.
Results are cumulative. Thus, an SS means you must deduct two from the number of Speed chits you are permitted to draw during Step 2.
4.2.2 — Step 2 – Check Speed
Draw a number of Speed chits allowed by the aircrew's Altitude & Speed Training Level (recorded on the Mission Planning Blotter on the extreme left of the mapsheet; the Scenario Book indicates what the Training Levels are [p.2]).
Look at the tan approach side of the chits. It's okay to look at the pink "release" side as well, but during the Approach Sequence you only use the "approach" side. The pink side is used only during release [4.2.13].
Modifiers: Alter the number of Speed chits you may draw according to the Lancaster's attachments (if any) and by the result of the Approach Vector Check (from Step 1). The modifiers are indicated on the player aid card, and on the attachments themselves.
Drawing Zero Chits: If modifiers reduce the number of chits to zero, you may not draw any Speed chits during the entirety of the Approach & Release Sequence (including Steps 6 and 10 of the Approach Sequence, and Step 2 of the Release Sequence). The exception is the Dummy Run/Approach Observed marker.
Dummy Run/Approach Observed Marker: If the Lancaster has this marker attached, you may exchange it for a Speed chit even if you were not permitted to draw chits due to modifiers [see 2.15.1, and player aid A8 & A13]. If you elect to trade in your Dummy Run or Approach Observed marker for an extra chit, you must still end this step with only a single Speed chit (see "Keep One" below).
Keep One: If you draw two or more Speed chits, keep the best one and put the rest back in the cup. Place the one you keep in the Speed space in the Far Zone of the Approach (or just set it aside in a handy spot). The "best one" will have the highest chit value (3 is the highest and zero the lowest).
4.2.3 — Step 3 – Check Altitude
Repeat Step 2 except draw Altitude chits instead of Speed chits. The number you must draw is determined by the aircrew's Altitude & Speed Training Level modified by attachments and the result from the Approach Vector Check (from Step 1) [see player aid, A3].
No Aldis Lights: You may only draw Altitude chits if the Lancaster has its Aldis Lights on. This means that if the hazard "No Aldis Lights" is attached to the Lancaster (Scenarios 6-10 only), you may not draw Altitude chits. You may also voluntarily choose to approach a dam without using Aldis Lights, which has the same effect as the No Aldis Lights hazard, but you must make this decision before drawing chits. Once on or off, the lights stay on or off for the duration of the Approach & Release Sequence of the current Attack Turn. (Even with Aldis Lights off, you may use the Dummy Run/Approached Observed benefit to draw an Altitude chit [2.15.1]).
Sorpe and Bever Dams: Aldis Lights (or the lack of them) have no effect at these dams.
4.2.4 — Step 4 – Flak Check
If the Flak Level is 0 (zero), skip this step. If the Flak Level is 1 or greater, refer to the Flak Check table on the player aid card [A4], and roll 2 dice (or 3 for lights, see "How Many Dice?" below).
Procedure – Flak Check: The Flak Check table is organized in columns, each corresponding to a Flak Level (each dam's Flak Level is determined by set up instructions in Scenarios 1-9, and by Recon in Scenario 10). A range of numbers is located in each column. This is the "to hit" range. Roll the dice, and if the sum of the numbers rolled falls within the range, the Lancaster is hit (and thus damaged [see 2.1.1]). If the sum does not fall within the range, no hit is scored. There are no modifiers. If hit, you may attempt to avoid the hit by Evasive Action (EA) [see below].
How Many Dice? If the Lancaster has its Aldis Lights on, or if the dam's Searchlights Level is 1 or higher, roll three dice and select the two most lethal. If there are no Searchlights and the Lancaster does not have Aldis Lights on, roll two dice. You never roll 4 dice.
On or Off? Aldis Lights "on" is the default condition; the decision to turn them "off" happens in Step 3 [4.2.3]. At Sorpe and Bever Dams, Aldis Lights have no effect, on or off.
"Lethal": If rolling three dice, choose the pair that will result in a hit (the pair of dice you choose is called the "kept dice"). If no combination of dice results in a hit, keep the two dice that are doubles, if any (e.g., a 2 and a 2).
Doubles: If you rolled doubles, roll again. If you scored a hit with the first two dice, that hit must be applied before rolling again. If rolling three dice, consider only the kept dice. Repeat as many times as you roll doubles or until the Lancaster is destroyed. Also, if the Lancaster attempts Evasive Action, do not roll again (EA cancels the "doubles" effect).
Applying the Hit: A "hit" renders a Lancaster damaged [see 2.1.1]. A hit on the Target Map may be applied to the Approach Lancaster or its escort (your choice). On the Flight Map a hit may only be applied to the Lancaster that the Flak hazard was assigned to [7.5 & 7.7].
Critical Hit: If a hit is scored, and the sum of dice is 7, you score an automatic second hit and the Lancaster is destroyed. (If rolling 3 dice, count only the kept dice.) If the bomber was already damaged, the Lancaster is destroyed and one other Lancaster in the Approach or Escort space (if any) is also damaged. If on the Flight Map during the Resolve Hazards Phase, the excess must be applied to another Lancaster in the wave (if any). Note that a Critical Hit is possible only if the Flak Level is 4 or 5.
Evasive Action (EA): If hit, a Lancaster may attempt to avoid the hit by Evasive Action. (This applies to a Critical Hit too, and if the evasion fails and another Lancaster suffers damage, it too may attempt EA to avoid the excess hit.)
EA — Procedure: If this is an Attack Turn and the hit is about to be applied to the Approach Lancaster, you may evade only by forfeiting either your Speed chit or your Altitude chit: put the chit back in the cup (to perform EA, you must have a chit to forfeit). If the evading aircraft is an escort, it may take Evasive Action only by immediately moving to the Circling Near Box (no chit is forfeited). If the evading Lancaster is on the Flight Map (during the Resolve Hazards Phase), move the Lancaster to the Missing Box. After forfeiting the approach chit or moving the evading Lancaster, make an Evasive Action Check (EA Check). Attempting EA automatically ends the "doubles" effect (see "Doubles" above).
EA Check: Roll one die to determine if the hit was avoided: if the result is EVEN, the hit is not applied (it was avoided successfully). If ODD, the hit must be applied despite the evasion.
Empty Approach: If the Approach Box is empty at the end of Step 4 and only escorts remain, you may continue the Approach Sequence but only to perform Flak Checks and Gunnery in the Near and Close Zones. Bombers may never move from the Escort space to the Release or Climb Boxes, nor from the Escort space to an Approach Box.
4.2.5 — Step 5 – Release, Proceed or Pull Up?
After resolving Flak you have three choices: release Upkeep, proceed into the Near Zone, or pull up.
Release Upkeep? If you choose to release now, place the Lancaster in the Release Box, detach the Upkeep marker and place it in the Released Upkeep Box next to it, and initiate the Release Sequence [4.2.13]. Return escorts (if any) to the Circling Near Box (they pull up). Releasing from the Far Zone incurs the EARLY RELEASE PENALTY, an adverse modifier when you resolve Step 3 of the Release Sequence. If playing Scenario 10 (or the follow-up raid to Scenario 9) and there is a Balloons marker in the Close Zone, you avoid that hazard by releasing from the Far or Near Zones.
Pull Up? If you choose to pull up, place the Dummy Run marker on the Approach Lancaster as a temporary attachment [see 2.15] (an escort may not earn the Dummy Run marker). Then, place the Lancaster, and its escorts (if any) in the Circling Near Box. This ends the Approach & Release Sequence; proceed to the Circling Phase [4.3].
Proceed Nearer? Your Lancaster may move into the Near Zone (if this is Sorpe or Bever Dam, where there is no Near Zone, the Lancaster proceeds into the Close Zone instead). Slide the Lancaster into the Near Zone and perform Step 6 (if Bever or Sorpe, step 10). Escorts may slide forward as well, or pull up (but Escorts may not earn the Dummy Run marker).
4.2.6 — Step 6 – Adjustment (Near Zone)
You may adjust Altitude or Speed (you may adjust one, but not both), by replacing the chit with a new one. You must already have a chit to replace. You may also use the Dummy Run or Approach Observed marker at this time if the Approach Lancaster has it attached [2.15.1] (you may do so either immediately before or after looking at the new chit; in either case, you must end this step with no more than one Speed chit and one Altitude chit). Return excess chits to their respective cups.
Procedure — Adjustment: To adjust Altitude or Speed, draw a new chit. You may draw only 1 chit (this number is not modified but you may use the Dummy Run/Approach Observed marker now too). Compare it to the chit you already have, then choose one to keep and put the other back in the cup.
4.2.7 — Step 7 – Flak
If the dam has a Flak Level of 1 or greater, perform a Flak Check (repeat the process described in Step 4 [4.2.4]).
4.2.8 — Step 8 – Gunnery
Your Approach Lancaster and its escorts (if any) may attack the dam's defenses, each targeting ONE of the dam's defense categories (each Lancaster may target the same, or different, category): Flak, Searchlights, or Balloons (Balloons and Searchlights are possible only in Scenario 10 or the follow-up raid in Scenario 9). A targeted category must be at Level 1 or higher (for Balloons, there must be a Balloons marker in the Close Zone or Climb Box). Resolve the attack(s) one Lancaster at a time.
Procedure – Gunnery: Select a Lancaster and a defense category, then roll a die. Subtract 1 from the die roll if the appropriate elite gunner is attached to the aircraft. If equal to or less than the Defense Level, you score a hit. A hit reduces that level by 1. To score a hit against a Balloons marker, you must roll a 1 (or less), and the hit removes the marker from play. The Approach Lancaster and its escorts (if any) do not have to target the same defense category or Balloons marker.
One Hit Max: Each targeted defense category may only be reduced a maximum of 1 level each time this step is performed, regardless of the number of Lancasters that score a hit.
Front or Rear Gunner? Every Lancaster is manned by front and rear gunners, you do not need elite gunners to attack. When a Lancaster is in the Near and Close Zones, only the Front Gunner may attack. Only rear gunners may attack when in the Climb Box. In both cases, balloons present an exception:
Balloons in the Close Zone: A Balloons marker in the Close Zone may be attacked by front gunnery when the Lancaster is in the Near and Close Zones, and by rear gunnery when the Lancaster is in the Close Zone or the Climb Box. [See 4.2.8, 4.2.11, 4.2.13 step 6.]
Balloons in the Climb Box: A Balloons marker in the Climb Box may be attacked by front gunnery when a Lancaster is in the Near or Close Zones, or when it is in the Climb Box. It may also be attacked by a rear gunner when the Lancaster is in the Climb Box [4.2.8, 4.2.11, 4.2.13 steps 5 & 6].
4.2.9 — Step 9 – Release, Proceed or Pull Up?
You have three choices again: release Upkeep, move the bomber forward into the Close Zone, or pull up. If entering the Close Zone, proceed to Step 10. If it releases, proceed to Step 1 of the Release Sequence [4.2.13]. If it pulls up, move to Circling Near [see 4.2.5].
4.2.10 — Step 10 – Adjustment, and Flak (Close Zone)
If the Approach Lancaster moves into the Close Zone, perform the same procedure described for the Near Zone, steps 6-7.
4.2.11 — Step 11 – Gunnery...and Balloons?
Perform the same procedure described in Step 8 (Gunnery), and again, only front gunners may attack (for now).
Balloons: After Gunnery, if playing Scenario 10 (or the follow-up raid in Scenario 9) and a Balloons marker is in the Close Zone, the Approach Lancaster must resolve the Balloons hazard [as described in 7.7.3a]. Escorts are not affected by the hazard (they automatically evade it). Finally, the Approach Lancaster and its escort may attack the Balloons marker with Rear Gunnery [as per 4.2.8, player aid A5].
4.2.12 — Step 12 – Release or Pull-Up
The Approach Lancaster must either proceed into the Release Box (and thus initiate the Release Sequence [4.2.13]), or pull up and return to the Circling Near Box, thus ending the Approach & Release Sequence (if it pulls up, place the Dummy Run marker on the Lancaster). Regardless of your choice, all escorting aircraft, if any, must return to the Circling Near Box.
Late Release: If the Lancaster enters the Release Box from the Close Zone, it must make a Late Release Check to determine if there was an adverse effect to letting go of Upkeep too close to the target, or if it garners a benefit because the timing was "Spot on!"
Procedure — Late Release Check: Roll a die and apply the result indicated by the table printed on the player aid card [A9].
Results explained — Late Release... If you roll 1-3, a negative modifier (indicated on the table) must be applied during Step 3 of the Release Sequence (a marker is provided as a mnemonic; use it as a temporary attachment until you conclude the Release Sequence). It means the release was botched and most likely induced an extra bounce or incurred some other detriment. If you roll 4-5 there is no effect, but if you roll a 6 you earn a +1 modifier ("Spot on!") that will be applied during Step 3 of the Release Sequence [4.2.13]. The 'M' result applies only to Eder Dam and takes effect only when the Lancaster is about to enter the Climb Box [4.2.13 step 4].
4.2.13 Release Sequence
The Release Sequence is initiated when the Approach Lancaster enters the Release Box (as the result of a choice you make during the Approach Sequence [4.2.5, 4.2.9, or 4.2.12]). Only the Approach Lancaster may enter the Release Box. Escorting aircraft, if any, must return to the Circling Near Box (they pull up, but Escorts may not earn the Dummy Run marker).
Release Step 1 – Final Altitude Check
To determine the Lancaster's Altitude at the point of release, draw a number of Altitude RELEASE chits indicated by the Altitude approach chit you already have. If you don't have an approach chit, you may not draw release chits. You may use the Dummy Run/Approach Observed marker now if attached to the bomber [2.15.1].
There are no modifiers to this final check of altitude, draw only the number indicated on the Altitude approach chit. (If you don't have an approach chit, you don't draw release chits; but you may use the Dummy Run/Approach Observed marker now [2.15.1].) Look at the PINK side of the chits. Select one Altitude release chit, and put the rest back in the cup. Finally, put the Approach chit back in the cup.
Release Step 2 – Final Speed Check
Repeat step 1, drawing Speed chits instead of Altitude chits. You may do Steps 1 & 2 simultaneously.
Release Step 3 – RELEASE!
Tally all release modifiers into a single aggregate modifier, and roll 2 dice: if the modified sum of the numbers rolled is 15 or higher (after adding the aggregate modifier), the release is successful. If lower, it fails. If the modified dice roll is 10 or lower, it fails and results in a concussion to the Lancaster. The modifiers and results are explained below.
Modifiers (in alphabetical order)…
- Altitude release chit: Add the number on the chit;
- Early release penalty: Subtract 2 if the Lancaster entered the Release Box directly from the Far Zone of the Approach [4.2.5] (this modifier is printed in the Far Zone space);
- Elite Bomb-Aimer: Add +1 if this Elite Crewman is attached to the aircraft;
- Faulty Release: Subtract 1 if this Hazard marker is attached;
- Lancaster is Damaged: Subtract 1 if the bomber is damaged;
- Late Release: Subtract 1 or 2 if the aircraft suffered a late release penalty, or add 1 if the release is "Spot on!" [4.2.12];
- No Moon: Subtract 1 if the raid was launched on Planning Turn 2 or 4 (this applies only to Scenario 10 and its follow-up raid);
- Searchlights: If the dam has a Searchlights Defense Level of 1 or greater, subtract 4;
- Speed release chit: Add the number on the chit;
- Training: Add the aircrew's Bomb-Aiming & Release Training Level modifier (indicated on the Mission Planning Blotter). In Scenario 10, this modifier applies only if you completed Cockpit modifications [10.4.4].
Results explained...
SUCCESS: Upkeep detonates successfully and damages the dam. Place the Upkeep marker on the left or "damage" side of the dam's Status Record Track. Do not flip the marker over yet (you will do that during the Status Phase [4.4.4, player aid A14]).
FAILURE: Upkeep is released and detonates, but does not damage the dam. Place the Upkeep marker on the "no damage" end of the dam's record track. Do not peek at the damage side of the marker.
CONCUSSION: This result is the same as "failure" above, plus the Lancaster is damaged [2.1.1]. The "concussion" result represents a complete botch: the mine struck the airplane, or its detonation damaged it, or the bomber clipped the dam's structure...etc.
Approach Observed: If the result is Failure or Concussion, you may place the Approach Observed marker on a Lancaster in the Circling Near Box as an attachment. You may do so even if the marker (or the Dummy Run marker) is already attached to another Lancaster (simply transfer it) [2.15.2].
Release Step 4 – Climb
Return Altitude and Speed release chits back to their respective cups. Move the Lancaster from the Release Box to the Climb Box. However, if this is Eder Dam, the Lancaster must pass the Michelskopf Check first.
Eder Dam – Michelskopf Check: If this is Eder Dam, before moving the Lancaster to the Climb Box, roll two dice and refer to the Michelskopf table on the Target Map. If the sum of the numbers rolled is 3 or less, the Lancaster collides against the hill (see "Impact" below). Modify the sum by the following:
- -1 if the Lancaster entered the Release Box from the Near Zone (note the "M" icon in the Near Zone space);
- -1 for each "M" icon earned as the result of a Late Release Check [Step 12, 4.2.12];
- -1 for each Release chit with the "M" icon, and for an 'M' result during the Approach Vector Check [Step 1, 4.2.1].
Results explained — Michelskopf...
Impact: If the modified result is "impact," the Lancaster fails to negotiate the steep face of the Michelskopf. It is destroyed.
Climb: The Lancaster proceeds to the Climb Box without harm.
Release Step 5 – Flak and Balloons
If the Flak Level is 1 or greater, make a Flak Check [4.2.4]. If Aldis Lights were on during Approach & Release they are still on, in which case you must make the Flak Check with three dice. Then, if a Balloons marker is in the Climb Box, your front gunner may attack it [Gunnery, A5; see 4.2.8]. Finally, if a Balloons marker is in the Climb Box you must make a Balloons Check [see 7.7.3a].
Release Step 6 – Rear Gunnery
The aircraft's rear gunner may use gunnery to attack one of the dam's defense categories [4.2.8], including Balloons if present in the Close Zone or the Climb Box.
Release Step 7 – End
The Release Sequence is over. Proceed to the Circling Phase [4.3].
4.3 Circling Phase
You may, and sometimes must, move your aircraft on the Target Map during this phase. They may also fire Very Light Flares [4.3.1]. The following applies:
Circling Near to Far, or, Far to Near: Lancasters in either circling box MAY move to the other circling box.
Climb Box: A Lancaster in the Climb Box MUST move to the Circling Near Box. It may not move to the Circling Far Box this phase, nor may it Return to Base.
No Upkeep: Lancasters not carrying Upkeep MAY exit the Target Map. To be able to do this the Lancaster must start the Circling Phase in one of the circling boxes. Place exiting Lancasters in the Return to Base Box on the Flight Map (in the corresponding Flight Zone [6.3]).
Approach: Lancasters may not enter the Approach during this phase.
Moving is not mandatory: Except for a Lancaster in the Climb Box (and possibly a Lancaster with a Broken Radio), none of your aircraft on the Target Map need to move.
Broken Radio: If a Lancaster has a Broken Radio attachment (possible only in Scenarios 6-10 [7.7.3c]), it MUST move to the Circling Near Box. It may not move from the Circling Near to Circling Far. If not carrying Upkeep it MUST move from the Circling Near Box to the RTB Box on the Flight Map [6.3].
4.3.1 Very Light Flare
A Lancaster that begins and ends this phase in the Circling Near Box may fire a Very Light Flare to mark the Approach. The reason for doing this is to nullify an A result during subsequent Approach Vector Checks [4.2.1]. Place a Very Light Flare marker in the current space of the Attack Turn Track. Only ONE Very Light Flare marker may be placed on the Attack Turn Track each turn.
4.4 Status Phase
Perform this phase only if you have one or more bombers on the Target Map. In Scenarios 6-10, a Lancaster is not considered to be "on the Target Map" if it is on the Attack Turn Track waiting to enter [this can happen as the result of an Uncoordinated Entry, 7.9.4]. This phase consists of five steps, performed in this order:
4.4.1 Visibility Check
On Attack Turns 3, 5, and 7, roll two dice and add the numbers rolled, and then note the result on the Visibility table on the player aid card. Subtract the Visibility modifier indicated on the Flight Turn Track, if appropriate (e.g., on Flight Turn 7, subtract 2 from the Visibility Check dice roll). In Scenarios 1-5 this modifier will be indicated in the Scenario Book.
Results explained — Visibility Check...
Clear – This is the default condition.
Fog – Place the Visibility marker "Fog" side-up near the Approach Vector Check table as a reminder. Fog will have an effect on subsequent Approach Vector Checks [4.2.1].
4.4.2 Defense Attrition Check
If you released Upkeep this turn, roll a die for each defense category whose level is 1 or higher (and for each Balloons marker, if any).
Procedure — Defense Attrition: Roll a die, if the number rolled is equal to or less than the Defense Level, reduce that level by 1. For a Balloons marker, if you roll a 1, remove the marker. This is summarized on the player aid [A7] (it's the same procedure as Gunnery).
4.4.3 Nightfighter Check
This is a two-step procedure (refer to the player aid card). First, check to determine if a German Nightfighter has been sighted. Then, if sighted, check to determine if it attacks. In Scenarios 6-10, Nightfighter Checks are sometimes triggered on the Flight Map during the Resolve Hazards Phase [7.7.3l], but the procedure is identical to that explained here.
Procedure (Step 1) – Nightfighter Sighted? The "Nightfighter Sighted?" table is organized in columns, each corresponding to the current Alert Level (in Scenarios 1-5, the Alert Level is determined at set up; see the Scenario Book). There are two rows. Use the top row if the dam has a Searchlights Defense Level of 1 or greater (possible in Scenario 10 or the follow-up raid in Scenario 9), otherwise use the bottom row (note that Searchlights does not include Aldis Lights – Aldis Lights, on or off, are irrelevant for this check). (When checking for sighting on the Flight Map in Scenarios 6-10, use the bottom row unless a Searchlights marker has been assigned to the Lancaster or its wave [7.7].) Select the appropriate column and row. A range of numbers is located in each cell of the table. This is the "sighted" range. Roll two dice, and if the sum of the numbers rolled falls within the range, a Nightfighter has been sighted and you must determine if it attacks (Step 2). If the sum does not fall within the range, the Nightfighter Check ends immediately without a sighting.
For Step 2, there are two "Nightfighter Attacks?" procedures, one for use on the Target Map during an Attack Turn, the other for the Flight Map during the Resolve Hazards Phase of a Flight Turn (scenarios 6-10 only). Each is described here:
Procedure (Step 2) – Nightfighter Attacks? – Target Map: The "Nightfighter Attacks?" table is organized in columns and rows. Each column corresponds to an "Activity Level" at the dam (see below). There are two rows, a top and a bottom. Use the bottom row if there is a Nightfighter Nearby marker present from a previous "Nightfighter Attacks?" Check. Otherwise, use the top row. Locate the appropriate row and column, and roll two dice. Each cell of the table has three number ranges, stacked vertically. Add the numbers rolled and locate the sum in the appropriate range in the cell. Each range corresponds to a result located in the far-right column: "vanish," "nearby," and "attack."
Activity Level
The Activity Level is the aggregate of four factors:
- the number of Upkeep markers released at the dam (regardless of success or failure);
- the number of Defense Levels that have been lowered at this dam (by gunnery but not by Defense Attrition);
- the number of Lancasters that have been destroyed at the dam;
- the number of Very Light Flare markers currently on the Attack Turn Track.
In every case, include only those items in the above list that have taken place at this dam (while the Alert Level affects all dams equally, each dam has its own Activity Level). Added together, the sum of these factors is the Activity Level. Use pencil and paper to keep track of it, or use the marker provided (place it on the dam's Status Record Track).
Results explained — Nightfighter Sighted…
Vanish: No attack. If a Nightfighter Nearby marker is in play at this dam, remove it.
Nearby: There is no attack, but the sighting has been confirmed. Place a Nightfighter Nearby marker on the Target Map (or the dam's Status Record Track) to indicate that a Nightfighter is nearby. It remains in play at that dam until a subsequent check results in "vanish" or "attack".
Attack: The Nightfighter is no longer "nearby", it attacks! Select one Lancaster in the Circling Near Box to be destroyed (remove it). All other Lancasters in the Circling Near Box scatter (see below). All Lancasters in the Circling Far box also scatter. Lancasters waiting to enter the Target Map may remain where they are or join those scattering from the Circling Far Box (if this is Scenario 1-5, the attack ends the scenario). If the attack result happens during Scenarios 6-10, the Alert Level will increase at the end of the Flight Turn (during the Clean Up Phase [see 6.6.1]). Remove the Nightfighter Nearby marker (if any).
Scatter — Target Map: Aircraft in the Circling Near Box immediately move to the Flight Map as independent aircraft (place them in the dam's Flight Zone; if this happens during Scenarios 1-5, they Return to Base (resolve their fate at the end of the game; this is the same as placing them in the RTB Box). Scattered aircraft in the Circling Far Box also immediately transfer to the Flight Zone, but they do so together as a single wave. Place the Wave marker on its Formation Compromised side.
Procedure – Nightfighter Attacks? – Flight Map: There are three Nightfighter types: Me109, Me110, and Ju88, each corresponding to a column of the table at the bottom of the player aid card [A6]. Locate the appropriate type that matches the nightfighter depicted on the Hazard marker. Roll two dice and add the numbers together. If the sum falls in the range of the numbers in the column, the Nightfighter attacks, in which case the affected Lancaster is immediately destroyed, and the Alert Level will increase by 1 (it increases during the Clean Up Phase of the Flight Turn). If that destroyed Lancaster is in a wave, the wave scatters (see below). Return the Hazard marker to the cup.
Scatter – Resolve Hazards Phase: If the scatter result happens during the Resolve Hazards Phase of a Flight Turn, the wave becomes Formation Compromised. If already Formation Compromised, ALL aircraft in the wave are now independent aircraft.
4.4.4 Detonation Result
Perform this only if you have an Upkeep marker on the "Damage" end of the dam's Status Record Track that has yet to be revealed. However, you may perform this now ONLY if you have an aircraft in the Circling Near Box (because somebody has to be there to see it).
Procedure – Detonation Result: Turn the Upkeep marker over to reveal its damage side, and roll a die. There are two numbers printed on the marker, an even number and an odd number. If the die roll is even, apply the even number, and if the number rolled is odd, apply the odd number. The number applied is the damage inflicted on the dam. If the evens result applied, orient the Upkeep marker so its even number is right side up; if odd, orient the marker so that the odd number is right side up.
Deferring Results: If you do not have at least one Lancaster in the Circling Near Box, DO NOT resolve the detonation result now. Place the Upkeep marker on the Damage end of the dam's Status Record Track (but do not flip it over to reveal the damage, yet), and resolve the detonation result in the next Status Phase in which you have a Lancaster in the Circling Near Box of this dam. If that never happens, resolve it when the game is over (resolve the damage when you conduct Morning Reconnaissance [5.2]). More than one Upkeep marker may be revealed in the same phase.
Dam Breach: If the accumulated damage inflicted on a dam equals or exceeds its damage capacity, a breach has occurred. Flip the Water Level marker over as a reminder. The damage capacity of each dam varies depending upon the Water Level (in Scenarios 1-9 all dams are Full).
4.4.5 Very Light Flare Check
Conclude the Status Phase by determining if one or more Very Light Flare markers must be removed from the Attack Turn Track (if none are on the track, skip this step).
Procedure — Remove Very Light Marker? Roll a die for each marker. If the modified number rolled is '0' (zero) or less, remove the marker. Modify the number rolled by subtracting the number of turns since the marker was placed on the Attack Turn Track.
4.4.6 Ending the Attack Turn
At the end of the Status Phase, or if the Status Phase was skipped, advance the Attack Turn marker to the next turn space, and commence the next Run Phase [4.1].
Ending Attack Turn 8: Unless instructed otherwise, if playing Scenarios 1-5 and this concludes Attack Turn 8, reset the Attack Turn marker at Attack Turn 1 and continue; but before you start the next Run Phase make a Visibility Check. If playing Scenarios 6-10, see rule 7.9.
5.0 Ending the Game
The scenario-specific rules in the Scenario Book establish when the game ends. When the conditions have been satisfied to end the game, you must resolve the fate of returning aircraft [5.1]. You may also have to perform Morning Reconnaissance [5.2]. To interpret the game's outcome, see the scenario's "Debriefing Chart" in the Scenario Book.
5.1 Return to Base
Check aircraft in Return to Base (RTB) Boxes to determine if they reach Scampton safely. Each aircraft must be checked separately and completely before checking the next aircraft; do not check waves as a whole. If playing Scenarios 1-5, check all aircraft that were not destroyed, unless the scenario rules instruct otherwise.
Procedure — RTB: Select an aircraft and roll two dice. Modify the sum of the numbers rolled by the modifiers listed on the player aid [E1 and listed below]. Consult the RTB Table on the player aid card to determine the result.
Modifiers…
- +1 if Veteran aircrew;
- -1 if Green aircrew;
- +1 if Elite Crewman is attached (any crewman regardless of benefit, even if benefit has been used);
- -1 if Lancaster is damaged;
- -1 if Faulty Merlin is attached;
- -1 if Compass Card marker is attached (apply this modifier only if Upkeep is attached [7.7.3d];
- +2 if RTB Box is in English Coast or North Sea Zone;
- -1 if RTB Box is in Ruhr zone;
- -2 if RTB Box is in Weser zone;
- -1 if Alert Level is Alarm (apply this modifier only to bombers in hostile zones);
- +1 if the Recon Levels of all hostile Flight Zones add to 7 or more (Scenario 10 only).
5.1.1 RTB Results explained...
Returns Safely: The aircraft returns to Scampton (remove it from play).
Lost: The aircraft does not return (yet). Roll dice again and apply the same modifiers, but apply the results from the LOST TABLE [player aid E2].
5.1.2 Lost Results explained...
M.I.A.: The bomber is destroyed.
Returns Safely: The aircraft returns to Scampton (remove from play).
Returns Damaged: The aircraft returns to Scampton, but is damaged [2.1.1]. If already damaged, roll a die to see if it returns safely: 1-4 = it does not return (it is destroyed); 5-6 = returns safely (still damaged).
Attacks Target? If playing Scenarios 1-5, or if the Lancaster does not carry Upkeep, the bomber returns to Scampton. If playing Scenarios 6-10 and the Lancaster carries Upkeep, this result means that the crew veered off the intended course but eventually found a dam to attack, or, it made its way back to Britain. Your choice: either the result is "Returns Safely" (as described above), or, you play up to 8 Attack Turns at a dam of your choice (target automatically acquired, uncoordinated entry). When the attack is concluded, place the Lancaster in the Flight Zone's RTB Box and resolve its Return to Base again [as per 5.1].
5.2 Morning Reconnaissance
You must conduct a post-game recon check, as follows: roll one die for each successfully detonated Upkeep marker ["success" as per 4.2.13, step 3]. If the result is a 1, subtract 1 damage point. If the result is 2-5 there is no effect. If the result is a 6, add 1 to the Upkeep marker's damage. Thus, it is possible that a breached dam may not actually have been breached, and one badly damaged may actually have been breached.
Upkeep Not Revealed?: If an Upkeep marker is on the damage end of the Status Record Track but has yet to be revealed, flip it and roll a die to determine the damage it inflicts on the dam [as per 4.4.4]. Do this BEFORE performing Morning Recon.
5.3 Outcomes [Scenario Book]
After resolving each Lancaster's return and after performing Morning Recon, use the Debriefing Chart in the Scenario Book to interpret the outcome. Each scenario has its own chart. Read the chart from left to right, "moving" with your eye from column to column, selecting appropriate rows until you determine the result in the rightmost column. Generally, the higher your result is located on the page (that is, the higher the row), the more successful the mission. Many outcomes will also require you to roll a die or dice, especially to resolve the fate of aircrew downed over hostile territory, in which case you roll only once, not once for each Lancaster.
Part 2 – Flight
This part of the game adds the flight from 617 Squadron's base at Scampton to the dams in Germany. All the rules learned in Part 1 are used here, in addition to the following new rules. This will allow you to play Scenarios 6-9.
6.0 Flight Map
Use the Flight Map to move waves and independent aircraft from their base at Scampton to the target dams.
6.0.1 Flight Zones
The map is organized into six zones: England, English Coast, North Sea, Dutch Coast, and two zones in Germany: Ruhr and Weser. The Dutch Coast and the two Germany zones are hostile zones. Waves and individual aircraft will move from one zone to the next during the Move Phase. Hazard markers and the occasional Very Light Flare marker will also be placed in zones.
No Limit: There is no limit to the number of aircraft, waves or markers that may occupy a zone, and no marker, wave or aircraft may occupy more than one zone at a time.
6.1 Flight Turn Track
The Flight Turn Track is printed on the mapsheet next to the Flight Map. Each Flight Turn represents approximately one hour of flight time. Some turns are "-1 Visibility" and "-2 Visibility" turns, indicating modifiers that affect Visibility Checks during the Attack Turn [4.4.1]. Visibility during Turn 9 is automatically "Fog" (do not bother rolling on the Visibility table during Turn 9).
6.1.1 Turn 10 — Game Over
Historically, the raid was complete by this time; all surviving aircrews had managed to return to Scampton by then. But just in case your crews are still striving to complete their mission this late, or should we say, early, the following rule applies:
The game may not continue beyond Flight Turn 9. All surviving bombers must move immediately to the Return to Base Box in their Flight Zone. Then, resolve their fate on the RTB table [5.1], conduct Morning Recon [5.2], and then check the scenario's outcome on the Debriefing Chart [5.3].
6.2 Missing Box
Each Flight Zone has a Missing Box (except the England Zone). Evasive Action [4.2.4] or a failed Navigation Check [7.4] may require you to designate an independent aircraft as missing, which means you must place it in its Flight Zone's Missing Box. During the Move Phase, a Lancaster in the Missing Box must remain there. You may only move an aircraft out of this box during the Navigation Check Phase, and only as the result of a successful Navigation Check [7.4]. For the purpose of placing, evading and resolving hazards, an aircraft in a Missing Box is still considered to be in the Flight Zone.
6.2.1 Wave marker in the Missing Box
Ordinarily Wave markers should not be placed in the Missing Box (because only independent aircraft belong there), but you may be tempted to place a Wave marker there as a placeholder to reduce clutter. This is allowed, but even if you place a Wave marker in the Missing Box, treat each of its Lancasters as flying independently (this is particularly important during the Place Hazards Phase of the Flight Turn [7.5]).
6.3 Return to Base (RTB) Box
Each zone has a Return to Base Box (the English Coast and the North Sea Zones share the same RTB Box). When a Lancaster on the Flight Map returns to base, place it in the RTB Box in its Flight Zone. Once in the RTB Box, a Lancaster remains there until the end of the game, at which time its fate is resolved [rule 5.1, player aid E1]. Unlike the Missing Box, Lancasters in a Return to Base Box are NOT affected by Hazard markers in that Flight Zone, nor do they trigger Hazard marker placement. (As far as Hazard markers are concerned, Lancasters in RTB Boxes are invisible). To reduce clutter, you are welcome to use a Wave marker as a placeholder for aircraft in the RTB Box.
6.4 Target Acquisition Box
Both Germany Flight Zones have Target Acquisition Boxes, each box representing the location of a target dam. The Ennepe, Bever, Henne, Sorpe, and Möhne Dam Target Acquisition Boxes are in the Ruhr zone, while Eder, Diemel and Lister Dams are in the Weser zone. These boxes connect the Flight Map to the Target Maps. A Lancaster transfers from the Flight Map to the Target Map via the Target Acquisition Box, and vice versa, during the Target Map Phase of a Flight Turn [7.9], but only after successfully "acquiring" the dam during the Target Acquisition Phase [7.8].
6.4.1 Primary Targets
A "primary target" is the dam that a Lancaster is ordered to attack. All Lancasters carrying Upkeep MUST have a Primary Target. A Lancaster may be assigned only ONE Primary Target at a time. More than one bomber may share the same Primary Target.
Scenario instructions will indicate the targets for each aircraft. Designate the Primary Target with pencil and paper (use the Player Log), or use the Primary Target markers (place each in the appropriate Target Acquisition Box on the dam's Status Record Track, or in the appropriate space on a Wave Holding Box). Because all Lancasters in a wave must share the same Primary Target [6.7.3], the target markers are identified by wave. (In many scenarios, Primary Target designation is easily remembered without the aid of a note or marker.)
6.4.2 Secondary Targets
Each bomber MAY have one Secondary Target (the dam it is ordered to attack after its Primary Target has been breached). A Lancaster's Secondary Target, if it has one, may not be the same as the Primary Target. Only one Secondary Target is permitted for each Lancaster. More than one bomber may share the same Secondary Target.
Scenario instructions will indicate the Secondary Targets (if any). Designate the Secondary Target in the same way you designate the Primary Target (i.e., with paper and pencil or the target markers provided).
6.4.3 Target of Last Resort
The squadron as a whole shares the same Target of Last Resort, designated by placing the marker in a Target Acquisition Box. Scenario instructions indicate the Target of Last Resort for the squadron. If a Lancaster does not have a Primary Target, the Target of Last Resort automatically becomes its Primary Target. If the Target of Last Resort is breached, you must immediately designate another dam as the Target of Last Resort.
6.4.4 Changing the Target
There are only two ways to change a Primary Target: Wireless Telegraphy or visual confirmation that the Primary Target has breached. A Secondary Target may only be changed via Wireless Telegraphy.
Wireless Telegraphy: See 7.2.1 [player aid F2]. If the transmission is "received", any unbreached dam may be designated a Lancaster's new Primary or Secondary Target.
Visual Confirmation: During an Attack Turn, a Lancaster achieves visual confirmation if it occupies the Circling Near Box of a breached dam. During a Flight Turn, a Lancaster does so merely by acquiring the breached dam [see Target Acquisition Phase, 7.8]. Visual confirmation that a Primary Target has breached automatically "upgrades" a Lancaster's Secondary Target — it becomes the new Primary Target. If the Lancaster does not have a Secondary Target, then the Target of Last Resort automatically becomes the new Primary Target.
6.5 Recon Tracks
Hostile zones (Dutch Coast, Ruhr & Weser) have reconnaissance tracks. At set up you will place a Recon Level marker in each track. The Recon Level will not change during the game (in Scenarios 6-9). The Recon Level is important during the Evade Hazards Phase [7.6], and when your Lancasters attempt to locate a dam [Target Acquisition Phase, see 7.8].
Scenario 10 — Recon Tracks: The Recon Level starts at 0 (zero), and may increase during the Planning Turn [10.5]. Also, the back of the Recon Level marker with its cryptic symbols and numbers is only used in Scenario 10 [explained in 12.0].
6.6 Alert Track
The Alert Track is located between the North Sea and Dutch Coast zones. Use it to keep track of the current state of German alertness in hostile zones. The Alert Level applies to all hostile zones and dams, but has no effect on the North Sea, English Coast and England Flight Zones (exception if at Level 4 Alarm: see modifiers for RTB Check [5.1]).
In Scenarios 1-5 the Alert Level does not change. In Scenarios 6-10 it can increase.
6.6.1 Increasing the Alert Level
Increase the Alert Level by 1 when…
- a dam is breached,
- a Nightfighter Check results in an Attack [4.4.3].
One Level Maximum: The Alert Level may only be increased once each Flight Turn. It may only be increased during the end of the Flight Turn, and it may only be increased by a total of 1 Level each turn. Use the red side of the Alert Level marker as a reminder that an increase is pending.
6.6.2 Decreasing the Alert Level
The Alert Level can never decrease. The only exception is during Scenario 9 or 10 when you launch a follow-up raid [see the Scenario Book].
6.7 Waves on the Flight Map
Each wave represents two or more Lancasters flying together in close coordination, sharing the same dam as their Primary Target.
6.7.1 Size Limit: Two or More
There is no upper limit to the number of aircraft that may be part of a wave, and the exact number of aircraft in a wave may change during the game. If only one (or fewer) aircraft is in a wave, automatically "dissolve" the wave. The Wave marker may be reused when a new wave is formed [7.1 or 7.9.7]. Six Wave markers are included in the game but if you need more, represent waves on the mapsheet by their Wave Leader and make a note of the wave's composition with pencil and paper.
6.7.2 Formation Compromised
The front of a Wave marker is its "good order" side (it is the default condition). The back of the Wave marker is its Formation Compromised side, indicating that aircrews are not flying in close proximity to each other. A wave can become compromised during the Navigation Check Phase [7.4] and the Resolve Hazards Phase [7.7] of a Flight Turn, or as the result of a Nightfighter attack that scatters the aircraft during an Attack Turn [4.4.3]. A wave may be restored to good order during the Coordination Phase of a Flight Turn [7.1.3] or when transferring back to the Flight Map at the end of an attack [7.9.7].
6.7.3 Waves and Targets
Each Lancaster in a wave must share the same Primary Target. If a Lancaster's Primary Target changes, it may not remain in the wave unless all aircraft in the wave have their Primary Targets changed too (and, to the same dam). Primary Targets may be changed in two ways [explained in 6.4.4]. Also, if a Lancaster in a wave has a Secondary Target, all Lancasters in that wave must share that same Secondary Target.
6.7.4 Changing a Wave's Composition
While on the Flight Map, independent aircraft may not join a wave except by successfully completing a Coordination attempt [7.1.4]. Independent aircraft may combine to form a new wave during the Coordination Phase [7.1.5]. Aircraft may split off from a wave only as a result of a failed Navigation Check [7.4], by designating a new Primary Target during the Wireless Phase [7.2.2], or by performing Evasive Action when resolving Flak [4.2.4]. A Delayed Sortie hazard may force a Lancaster to split off from a wave too [7.7.3f]. You may form waves freely when Lancasters transfer from a Target Map to the Flight Map [7.9.7].
6.7.5 Wave Leader
One Lancaster in a wave must be designated "Wave Leader". Note the designation with pencil and paper, or use the Wave Leader marker provided (use it as an attachment). If the Wave Leader is destroyed or exits the wave, it remains the de jure leader but you must temporarily and immediately assign a new de facto Wave Leader from amongst those remaining in the wave. If and when the de jure leader rejoins the wave, it resumes its former role as Wave Leader. [For Wave Leader without Upkeep, see 7.3 "No Upkeep".]
7.0 Sequence of Play – Flight Turn
Each Flight Turn is played in phases, and the phases must be played in this sequence:
7.1 Coordination Phase
By passing Coordination Checks during this phase [7.1.1], you may improve the organization of your waves. Three types of actions are possible:
a. Coordinate Wave – Do this to flip a Formation Compromised wave to its good order side [7.1.3]; b. Join Wave – Do this to add an independent aircraft to a wave [7.1.4]; c. Create Wave – Do this to create a new wave [7.1.5].
These actions are voluntary (in fact, you may skip this phase entirely), but if you choose to attempt one or more actions, consider the following:
Zone by zone: Resolve all actions in one Flight Zone before resolving those in another.
Any order is okay: Actions within a Flight Zone may be performed in any order, but must be performed one at a time.
RTB & Missing Boxes excluded: Aircraft selected to attempt these actions may not be in RTB or Missing Boxes.
"Broken Radio" and "No VHF" excluded: A Lancaster with a Broken Radio attachment [7.7.3c] may not perform actions during this phase. One Lancaster in a wave with this attachment prohibits the entire wave from attempting actions. In Scenario 10, if you did not install VHF radio sets during the Modifications Phase of the Planning Turn [10.4], you may not perform actions during this phase [see 11.6].
7.1.1 Coordination Check
The success of a coordination action is determined by performing a Coordination Check.
Procedure – Coordination Check: Choose an action (Coordinate Wave, Join Wave, Create Wave), select a wave and/or independent aircraft, and roll two dice. Add the numbers rolled, and compare the modified sum to the WORST aircrew's Navigation Skill [7.1.2]. If the modified sum of the two dice is equal to or higher than the Navigation Skill of the worst quality aircrew, the action succeeds [see 7.1.3 – 7.1.5 for effects]. If it fails, there is no effect.
Modifiers…
- Veteran Leader: Add 1 if the Wave Leader is a Veteran aircrew (this is applicable only when a Wave Leader is involved);
- Very Light Flare: Add 1 if you choose to fire a Very Light Flare.
Firing a Very Light Flare: You may elect to have one of the aircraft fire a Very Light Flare now – place a Very Light Flare marker on it. If a wave is involved, place it on the Wave marker. Regardless of the number of Very Light Flare markers, you only add +1 for this modifier. The Very Light Flare marker remains attached to the aircraft or wave until the beginning of the Resolve Hazards Phase, when it is removed [7.7].
7.1.2 Worst Quality Aircrew defined
Green is worse than Seasoned, and Seasoned is worse than Veteran. In determining which aircrew is the worst, consider only those involved in the action.
7.1.3 Coordinate Wave
You may attempt a Coordination Check to flip a Formation Compromised wave to its good order side. A wave may attempt this action only once each Coordination Phase.
Effect — Coordinate Wave: Flip the Wave marker to its good order side. If the action fails, the wave remains Formation Compromised.
7.1.4 Join Wave
An independent aircraft may attempt a Coordination Check to join a wave. It may attempt this only once per phase, no matter how many waves are in its Flight Zone. Regardless of success or failure, the wave MAY also make a Coordinate Wave attempt this phase [7.1.3], either before or after the Join Wave attempt is resolved.
Requirement: The independent aircraft must share the same Primary Target as the wave it is trying to join (and Secondary Target, if any), and it must be in the same Flight Zone [6.7.3].
Effect — Join Wave: If the attempt succeeds, the Lancaster is no longer an independent aircraft, it now is part of the wave. If the independent aircraft had a Very Light Flare marker attached, transfer it to the Wave marker (it remains attached until the start of the Resolve Hazards Phase [7.7]). If the attempt fails, the Lancaster remains independent.
7.1.5 Create wave
Two independent aircraft in the same Flight Zone may attempt a single Coordination Check to form a new wave (you roll once, not twice). Both must share the same Primary Target (and Secondary, if any). Neither bomber may attempt a Join Wave action this phase.
Effect — Create Wave: If the attempt succeeds, the Lancasters are now flying in a wave. Remove them to a convenient spot on your gaming table (or Wave Holding Box) and place a new Wave marker in their Flight Zone (on its good order side). Designate one of the Lancasters as Wave Leader, and place the corresponding Primary Target marker in the appropriate Target Acquisition Box. If one or both of the independent aircraft had a Very Light Flare marker attached, transfer it to the Wave marker (it remains attached until the start of the Resolve Hazards Phase [7.7]). If the attempt fails, the Lancasters remain independent.
7.2 Wireless Phase
During this phase you may attempt to change the Primary and/or Secondary Target of your Lancasters. You do this by performing one or more Wireless Telegraphy actions.
This action is voluntary (in fact, you may skip this phase entirely), but if you choose to attempt one or more Wireless Telegraphy actions, consider the following:
Any Lancaster: You may select an independent aircraft or a Lancaster within a wave as the "recipient" of this action. If you select a Lancaster within a wave, and the transmission is "received", assigning it a new target will immediately remove it from the wave [it immediately becomes an independent aircraft; see 7.2.2].
Wave Leader: If you select a Wave Leader and the transmission is "received", it allows you to designate a new target for the ENTIRE wave. By attempting to transmit to the Wave Leader on behalf of the entire wave you forgo your right to attempt this action individually for each Lancaster within the wave [see "Once only" below].
Once only: You may select each recipient only once each phase.
Broken Radio excluded: You may not perform this action for an aircraft attached with a Broken Radio marker. If this is attached to an aircraft in a wave, its Lancaster is excluded from the wireless attempt.
Upkeep is mandatory: You may only select a Lancaster carrying Upkeep. The only exception is a Wave Leader.
Elite Wireless Operator: If the Lancaster selected has this Elite Crewman marker attached, roll three dice instead of two when you perform the Wireless Telegraphy action. Then choose two of the dice and ignore the third. A Wave Leader may use this ability if an Elite Wireless Operator is attached to any Lancaster in its wave (unless the elite operator is attached to a Lancaster that also has a Broken Radio attachment).
7.2.1 Wireless Telegraphy Action
Procedure — Wireless Telegraphy: Select an aircraft or Wave Leader, and roll two dice. Add the numbers of each die to find their sum, and refer to the Wireless Telegraphy table for the result. The table is located on the player aid [F2].
Explanation of results...
Received: This is a successful result. You are free to designate any dam as the new Primary or Secondary Target (you may change one or both).
Garbled: Immediately try again; roll two dice but add +1 to the sum. This is cumulative (that is, if you get this result the next roll, add +2 to the third roll).
Misinterpreted: Roll another die (if attempting to change the target of a wave via the Wave Leader, roll separately for each Lancaster in the wave). Apply the result corresponding to the number rolled, as follows:
- 1 — the Lancaster is ordered to Return to Base (immediately move it into the RTB Box);
- 2-3 — the new Primary Target is the dam with the lowest Recon Level (if a tie for lowest, break the tie by choosing one of them); if already breached, Target of Last Resort instead;
- 4-5 — the new Primary Target is the dam with the highest Recon Level (if a tie for highest, break the tie by choosing one of them); if already breached, Target of Last Resort instead;
- 6 — the new Primary Target is the Target of Last Resort.
A "misinterpreted" result is permanent. You are prohibited from selecting this Lancaster as a recipient during subsequent turns (if this was the Wave Leader, this prohibition extends to all Lancasters in the wave). Use the Misinterpreted marker as a reminder.
Not Received: A new target is not assigned; you may try again next turn.
7.2.2 Splitting a Wave
If you successfully assign a new Primary Target to a Lancaster in a wave, the Lancaster may not remain in that wave (all aircraft in a wave must share the same Primary Target [as per 6.7.3]). It immediately becomes an independent aircraft (place the Lancaster in the Flight Zone). If you succeed in doing this for two or more Lancasters in the same Wireless Phase, forcing each to leave the same wave, you may immediately group them into a new wave.
New Wave: To instantly form this new wave, two conditions must be satisfied: first, the Lancasters must have begun the phase in the same wave, and second, their new Primary Target (and Secondary Targets, if any), must be identical. When you form a new wave in this manner, immediately designate one of the Lancasters as the Wave Leader. If the wave they are splitting off from was Formation Compromised, this new wave begins life Formation Compromised as well.
7.3 Move Phase
Each aircraft with an Upkeep marker must move to an adjacent Flight Zone towards its Primary Target (that is, towards a Flight Zone containing the Target Acquisition Box of its Primary Target). If already in the Flight Zone with its Primary Target's Acquisition Box, the aircraft remains in that zone and does not move (it will attempt to locate the dam during the Target Acquisition Phase [7.8]).
Exceptions…
RTB Box: An aircraft in an RTB Box does not move. It remains in the box until the end of the game [see 5.1].
Missing Box: An aircraft in the Missing Box does not move. It must attempt to leave the box during the Navigation Check Phase [7.4].
Damaged Lancaster, Faulty Merlin, Broken Radio, No Aldis Lights: A damaged aircraft, or an aircraft attached with a Faulty Merlin, No Aldis Lights or Broken Radio Hazard marker, MAY move into the RTB Box instead of towards the Primary Target, at the player's discretion. It may not do this if in the Missing Box or RTB Box.
Delayed Sortie: An aircraft with a Delayed Sortie hazard may not move this turn (not even into the RTB Box). If in a wave, it breaks out of the wave and flies independently (while the wave moves). Remove the Delayed Sortie marker at the end of the Move Phase (remove it from play, do not put it back in the cup).
Flight Turn 7 or later: Starting on Flight Turn 7, you MAY move an independent aircraft or wave towards the Target of Last Resort instead of its Primary Target, or to the RTB Box. You may not split a wave to do this, it must remain together regardless of where you move it (you may only voluntarily split a wave during the Wireless Phase [7.2.2]).
No Upkeep: A Lancaster not carrying an Upkeep marker MUST move into its Flight Zone's RTB Box. It may leave a wave to do this. However, even when unburdened by Upkeep, a Wave Leader may accompany its wave towards its Lancasters' Primary Target (at the player's discretion) [6.7.5]. If the Wave Leader is knocked out of its wave and it does not carry Upkeep, he may continue moving towards that Primary Target or into the RTB Box instead.
7.3.1 No Primary Target?
Every Lancaster carrying Upkeep must have a Primary Target [6.4.3].
7.4 Navigation Check Phase
During this phase you must determine if your aircraft are flying on course and in good order. To do this, make a Navigation Check for each independent aircraft and wave, excluding those in the RTB Box.
Consider the following as you make your Navigation Checks:
Zone by zone: Perform all checks in one Flight Zone before doing so in another zone.
Once only: Check each Lancaster or wave only once this phase. If an aircraft is knocked out of a wave as a result of a Navigation Check, do not check it again as an independent aircraft. Likewise, if an independent aircraft fails its Navigation Check, do not check it again after it moves into the Missing Box.
7.4.1 Navigation Check Procedure
Select a wave or independent aircraft and roll two dice. Compare the modified sum of the numbers rolled to the aircrew's Navigation Skill. If checking a wave, use the Wave Leader's aircrew. If the modified sum is equal to or greater than the aircrew's Navigation Skill, the wave or independent aircraft passes the check (the result is "success"). If less than the Navigation Skill, the result is "failure."
Modifiers…
- Map Error and Compass Card: Subtract 1 for EACH Map Error and Compass Card marker attached to the aircraft. However, for the Compass Card, apply this modifier only if Upkeep is attached (the Compass Card should be attached to the Upkeep marker, not to the Lancaster, which means that if the Lancaster does not carry Upkeep it can't have the Compass Card attached).
- Elite Navigator: Add 1 if an Elite Crewman with a +1 Navigation Skill is attached.
- Searchlights: Subtract 1 for EACH Searchlights marker (Note: this applies only to Navigation Checks that take place during the Resolve Hazards Phase, triggered by a Searchlights hazard [7.7.3n]).
- No Moon — Scenario 10 only: Subtract 1 if you launched the Raid on Planning Turns 2 or 4.
Explanation of Results – Navigation Check...
SUCCESS: There is no effect, unless you are checking a Lancaster in the Missing Box. If that is the case, move the Lancaster out of the Missing Box and into the Flight Zone (it is now an independent aircraft in that Flight Zone).
FAILURE: The effect varies, depending on the state of the aircraft or wave being checked:
Failure — Independent aircraft: Place the aircraft in the Flight Zone's Missing Box. If already in the Missing Box, roll again and check the results on the Lost table [E2], applying only Lost table modifiers [see 5.1.2].
Failure — Wave: Flip the Wave marker to its Formation Compromised side. If already compromised, it remains compromised and one aircraft in the wave must immediately break out of the wave and fly independently (choose the Lancaster, or if you prefer, select randomly). Place it in the same Flight Zone as the wave. If you select the Wave Leader, you must immediately designate a new de facto Wave Leader until it returns to the wave (if ever) [6.7.5].
7.5 Place Hazards Phase
During this phase you must place Hazard markers in each zone occupied by your Lancasters.
7.5.1 Hazard Marker Colors
There are three types of Hazard markers, each distinguished by color. The colors correspond to Flight Zones.
When placing Hazard markers, use only the appropriate type for that zone (for example, in the North Sea Zone, you must place yellow Hazard markers). Before the game starts, group the markers according to color, and put each group in an opaque container.
7.5.2 Hazardous Flight Zones
Hazard markers are only placed in Flight Zones containing your Lancasters (waves and/or independent aircraft). Aircraft in Missing Boxes are considered to be in a Flight Zone, but those in Return to Base Boxes are not. ("Hazardous" is not the same as "hostile" [7.5.3].)
7.5.3 Procedure — Drawing Hazard Markers
Select a Flight Zone containing aircraft, and then draw Hazard markers from the appropriate cup one at a time and put them into that Flight Zone. Do not peek at the identity side of the marker (i.e., the black side). Draw all hazards for one zone before drawing for another zone.
How Many? The number of markers to be drawn is determined as follows (this is also indicated in each zone on the Flight Map):
Friendly Flight Zones:
- England: none.
- English Coast: 1 Hazard marker (yellow).
- North Sea: 2 Hazard markers (yellow).
Hostile Flight Zones:
- Dutch Coast: 3 Hazard markers plus an additional number of Hazard markers (light blue).
- Ruhr: 2 Hazard markers plus an additional number of Hazard markers (light blue).
- Weser: 2 Hazard markers plus an additional number of Hazard markers (dark blue).
Additional Hazards: The number of additional Hazard markers to be placed in a hostile zone is determined as follows:
- +1 Hazard marker for each wave and independent aircraft in the zone (including the Missing Box, but excluding the RTB Box);
- +? Hazard markers equal to the Alert Level;
- +1 Hazard marker for each Very Light Flare marker in the zone.
7.5.4 Assigning Hazards
After placing Hazard markers in a Flight Zone, each marker must now be assigned to a wave or independent aircraft in that zone (this includes aircraft in the Missing Box, but not those in the RTB Box). You may look at the front of the markers as you assign them, but do not peek at their black sides.
Distribute Evenly: Distribute them as evenly as possible within the zone. No wave or independent aircraft may have more than one Hazard marker assigned to it than any other wave or independent aircraft.
7.6 Evade Hazards Phase
During this phase you may remove newly assigned Hazard markers from hostile Flight Zones. Do not do this for yellow Hazard markers; that is, for those placed in the English Coast or the North Sea Zones (hazards in those zones may not be evaded).
7.6.1 Procedure – Evade Hazards
Select a Flight Zone in which you have a Recon Level of 1 or more, and remove a number of Hazard markers equal to the Recon Level in that zone. Place evaded Hazard markers back in the opaque cup; they may be drawn again in a subsequent turn.
If you are allowed to remove 2 or more markers in a zone, you may remove some or all of them from the same wave or aircraft.
7.6.2 Special Evasions
In addition to the Recon Level, there are two other circumstances that allow you to remove newly assigned Hazard markers from hostile zones (yellow markers may not be evaded).
Weave & Jink: Elite Crewman markers with the Weave & Jink ability allow you to evade a Hazard marker. You may use the Weave & Jink ability to evade one Hazard marker assigned to that Elite Crewman's Lancaster, or evade a Hazard marker assigned to its wave. In either case, if you choose to use the Weave & Jink ability, remove the Hazard marker and place it back in the opaque cup (do not peek at the black side), and then flip the Elite Crewman marker over as a reminder that its special ability has been used (it may only be used once per game).
Nightfighter and Flak: If you assigned a Flak hazard to a wave or independent aircraft, you automatically evade all known Nightfighter hazards assigned to that same independent aircraft or wave. Remove the Nightfighter marker(s) and put it/them back in the opaque cup. Do not peek at the black-side of the Hazard markers, use only the front or color-side of the markers to determine if it is Flak or a Nightfighter.
7.7 Resolve Hazards Phase
During this phase remove Very Light Flare markers from the Flight Map and then reveal and apply the effects of all newly assigned Hazard markers. Do this one Flight Zone at a time, resolving all newly assigned Hazard markers in that zone before resolving them in another zone.
7.7.1 Procedure – Resolve Hazards
Within a Flight Zone, resolve Hazard markers one wave or independent aircraft at a time, following this sequence of steps:
Step 1 – Select Lancaster or Wave
Select one independent aircraft or a wave in the Flight Zone.
Step 2 – Distribute Hazards in Waves
(Skip this step if you selected an independent aircraft in Step 1; Step 2 only applies to waves). You must now distribute newly assigned Hazard markers within the wave by placing them on specific aircraft.
Distribute Evenly: If there are multiple Hazard markers on the wave, you must distribute them as evenly as possible amongst the aircraft in that wave. You may not place a second Hazard marker on an aircraft unless all the aircraft in the wave already have one (ignore hazards attached in a previous turn).
Step 3 – Three Max.
No Lancaster may have more than 3 unrevealed Hazard markers assigned to it. Return the excess to the cup.
Step 4 – Reveal Hazards
Flip over all newly assigned Hazard markers. If there is more than 1 Hazard marker on an aircraft, flip them all over. If several aircraft in a wave have markers, flip them all over at the same time.
Step 5 – Attach Immediately
Some Hazard markers must be attached to their assigned aircraft [as per 2.1.3]. Once revealed, they are IMMEDIATELY attached, and no other action is necessary to resolve these hazards.
Immediate attachment applies to the following hazards:
- Yellow – Broken Radio, Compass Card, Delayed Sortie, Faulty Controls, Faulty Merlin, Faulty Release, Map Error, No Aldis Lights, Unfit Aircrew.
- Light & Dark Blue – Map Error.
Step 6 – Apply Effects
Hazards not attached to their assigned Lancasters will have an immediate effect that must be resolved during this phase. Apply the effects of each Hazard marker one at a time, in any order you like. Except for Searchlights and possibly Flak [critical hit, in 4.2.4] and Nightfighters [scatter, in 4.4.3], effects are restricted to the aircraft the hazard is assigned to. If a Hazard marker is not supposed to be attached to a Lancaster, place it back in the cup after you apply its effects (exception: Searchlights – this hazard influences Flak and Nightfighter hazards, so return it to the cup only at the end of the phase [see 7.7.3n]).
Destroyed by a hazard: When a Lancaster is destroyed by the effects of a Hazard marker, that Hazard marker and all pending Hazard markers are returned to the opaque cup ("pending" refers to those Hazard markers whose effects have yet to be resolved). The only exception is Searchlights. If it is revealed in a wave, it remains in effect until the end of the phase, even if the Lancaster it was assigned to was destroyed.
7.7.2 Veteran Save
The effects of some hazards may be avoided by a "veteran save" (eligible hazards have the letter "V" printed on them). Such a save is possible only if the Lancaster has a Veteran aircrew attached, or if it has an Elite Pilot attached. If such an attachment is present, roll a die to determine if the Lancaster is spared the effect. If you roll a 6, the Lancaster is saved, but if you roll 1-5 the hazard's effect must be applied. "Save" usually means the effect is nullified, but there are exceptions, as indicated in the description for each hazard [7.7.3; also indicated on the player aid F7].
7.7.3 Hazard Effects
The effect of each type of Hazard marker is described in alphabetical order below (you may also refer to the Resolve Hazards list provided on the player aid card [F7]). A Lancaster may be affected by multiple Hazard markers. Unless attachment is noted, once their effects are resolved, place Hazard markers back in their respective cups.
a. Balloons – To resolve the effect of this hazard, roll a die: if EVEN, the Lancaster is damaged [see 2.1.1]. If ODD, the Lancaster is destroyed.
Veteran Save? — Balloons: If saved [7.7.2], the Lancaster is neither damaged nor destroyed.
b. Birds/Bats – Roll a die: if you roll a 1, the aircraft is damaged [2.1.1]. If you roll a 2 or higher there is no effect.
Veteran Save? — Birds/Bats: If saved [7.7.2], the Lancaster is not damaged.
c. Broken Radio – Attach the marker to the aircraft. Henceforth, you may not select it for a Wireless Telegraphy action [7.2], nor a Coordination action [7.1], and its movement is limited during the Circling Phase of an Attack Turn [See 4.3]
d. Compass Card – Attach the marker to the Upkeep marker (not to the Lancaster itself). This hazard marker will function as an adverse modifier when you make Navigation Checks [F4] and RTB Checks [E1]. Remove the hazard marker when Upkeep is no longer attached to the Lancaster.
e. Crash – To determine the effect, roll a die. If the result is ODD, the aircraft is destroyed. If EVEN, it loses its ordnance (remove the Upkeep marker from the aircraft, and from the game, but do not peek at the damage side). The Lancaster is also damaged [2.1.1].
Veteran Save? — Crash: If saved [7.7.2], and the result was "damaged," the Lancaster is still damaged but Upkeep remains attached (of course, if the bomber is already damaged, it is now destroyed and the ordnance is lost anyway). If the result was "destroyed," the result instead reverts to "damaged" and now there is a chance to keep the ordnance: Roll another die to make a second Veteran Save attempt, and if it succeeds, Upkeep remains attached to the Lancaster.
f. Delayed Sortie – Attach the marker to the Lancaster. It takes effect next turn during the Move Phase. The Lancaster may not move (nor may it change altitude, if playing the optional rule [14.0]). At the end of the Move Phase, remove the Delayed Sortie marker. If in the Missing Box this hazard has no effect (because Lancasters in the Missing Box may not move). When the marker is removed, remove it from play (do not put it back in the cup to be drawn again).
g. Faulty Controls – Attach the Hazard marker permanently to the aircraft. Henceforth, the affected aircraft suffers a -1 chit draw modifier during the Approach Sequence of the Attack Turn (either Speed or Altitude, as indicated on the Hazard marker [A2 or A3]). It does NOT apply to the Release Sequence [A10 & A11].
h. Faulty Merlin – Attach the Hazard marker permanently to the aircraft. One of its engines is feathered or inoperative. At your discretion you may place this aircraft in the Return to Base Box in its Flight Zone during the Move Phase of any Flight Turn. This marker will also adversely modify the Lancaster's Return to Base Check at the end of the game [E1].
i. Faulty Release – Attach the Hazard marker permanently to the aircraft. Henceforth, the affected aircraft suffers a -1 die roll modifier when it releases Upkeep [4.2.13, step 3].
j. Flak – The Lancaster is attacked from the ground by anti-aircraft fire. Use the same procedure described in the Attack Rules [4.2.4]. The number on the Flak marker is the Flak Level.
Flak & Searchlights: If a Searchlights marker is also assigned to the Lancaster, or to another Lancaster in the same wave, roll three dice instead of two.
Evasive Action (EA): If hit by Flak, the Lancaster may attempt to nullify the hit by taking Evasive Action. Move the Lancaster to the Missing Box in its Flight Zone, and make the Evasive Action Check [4.2.4]. Unresolved Hazard markers assigned to it accompany the Lancaster to the Missing Box and are resolved there normally (a Searchlights hazard marker may thus be "moved" out of a wave by EA). Once in the Missing Box, a Lancaster may not perform another Evasive Action attempt (thus, only one Flak hazard assigned to a Lancaster may be evaded by EA).
k. Map Error – Attach the Hazard marker to the aircraft. Henceforth it will adversely affect Navigation Checks by subtracting 1 from the sum of the dice [7.4.1]. More than one Map Error marker may be attached to the same Lancaster, and their effects are cumulative. (A Map Error marker affects Navigation Checks for the wave as a whole.)
l. Nightfighter – Perform a Nightfighter Check [explained in Part One of the rules: 4.4.3].
m. No Aldis Lights – Attach the Hazard marker permanently to the aircraft. During the Move Phase, the Lancaster may move into the RTB Box [7.3]. During the Approach & Release Sequence of an Attack Turn, you may not draw Altitude chits for this Lancaster [A3 & A10]. This hazard has no effect at Sorpe and Bever Dams.
n. Searchlights – The independent aircraft that the Hazard marker is assigned to must immediately make a Navigation Check [see 7.4]. If the aircraft is in a wave, the Wave Leader makes a Navigation Check for the wave as a whole. Each Searchlights marker serves as a -1 dice roll modifier for the Navigation Check (the effect of Searchlights markers and Map Error markers are cumulative).
Effect on Flak & Nightfighter Checks: Searchlights influence Flak and Nightfighter procedures, and this effect accrues to all Lancasters in the wave.
Coned (locking on): If the Navigation Check forces you to exit a Lancaster from a Formation Compromised wave, Hazard markers assigned to that Lancaster accompany it when it exits the wave. This means that if a Searchlights marker has been assigned to a Lancaster, and you select it to exit a Formation Compromised wave due to a failed Navigation Check [player aid F4], the Searchlights marker exits with it.
o. Unfit Aircrew – Attach the Hazard marker to the aircraft. Henceforth, the aircrew's Training Levels are reduced by 3 (it can't be reduced below zero).
7.8 Target Acquisition Phase
During this phase, you may attempt to locate target dams.
Who and When? A wave or independent aircraft that occupies a Flight Zone containing its Primary Target, MUST move into the Target Acquisition Box corresponding to that target. Move such aircraft or wave(s) into the Flight Zone's Target Acquisition Box (aircraft in Missing Boxes and RTB Boxes are prohibited from doing this).
Primary Target only: An aircraft may only enter a Target Acquisition Box corresponding to its Primary Target [6.4.1]. On Flight Turn 7 or later, however, you may instead move a Lancaster or wave into the Target Acquisition Box of Last Resort [7.3]. You may not split a wave to do this. The Target Acquisition Box must be in the aircraft's Flight Zone.
Roll Dice: After entering a Target Acquisition Box, your aircraft or wave must pass a Target Acquisition Check [7.8.1].
7.8.1 Procedure — Target Acquisition Check (TAC)
Select a wave or independent aircraft in a Target Acquisition Box, and add the Recon Level in its Flight Zone to the Recon Level of the dam. Locate the sum on the table [printed on the player aid F8]. Each column of that table corresponds to a sum of the two Recon Levels. The table has two rows. The default condition is the "Moon Period," so in most cases use that row, but if playing Scenario 10, choose the bottom row if you launched the raid at the end of Planning Turn 2 or 4 (during the "No Moon" period).
Cross-index the row with the column to find an acquisition number, and roll two dice. If the sum of the numbers rolled equals or is higher than that number, the attempt SUCCEEDS. If lower, it fails. There are no modifiers.
TAC — Results Explained...
SUCCESS: The wave or independent aircraft remains in the Target Acquisition Box (you will transfer it to the Target Map during the Target Map Phase [7.9]).
FAIL: The wave or independent aircraft must either return to the Flight Zone or immediately make a "Persistent Attempt" (player's choice).
7.8.2 Persistent Attempt
If a Target Acquisition Check fails, the wave or independent aircraft may make a Persistent Attempt to find the dam. To do so, make a Navigation Check [7.4.1]. If successful, the Target Acquisition Check is a SUCCESS [as per 7.8.1], but if it fails, the aircraft or wave returns to the Flight Zone where it immediately suffers the consequences of its failed Navigation Check [as per 7.4].
7.9 Target Map Phase
Skip this phase unless you have at least one independent aircraft or wave in a Target Acquisition Box.
Aircraft currently in Target Acquisition Boxes must transfer to their respective Target Maps and attack the corresponding dam. If more than one Target Acquisition Box is occupied, perform attacks one dam at a time, in any order [7.9.9].
7.9.1 Already breached?
In the unlikely event that the dam has already been breached, the aircraft in that dam's Target Acquisition Box does not transfer to the Target Map. Instead, it automatically adopts its Secondary Target as its Primary Target via "visual confirmation" [6.4.4]. If no Secondary Target, it immediately adopts its Target of Last Resort as its Primary Target. Move the wave or independent aircraft back into the Flight Zone (it may not acquire another dam this turn).
7.9.2 Transferring Aircraft to the Target Map
There are eight dams but only three Target Maps. The appropriate map to use is indicated on the Target Maps themselves.
Coordinated or Uncoordinated Entry? Lancasters in a good order wave transfer to the Target Map in a "Coordinated Entry", while those in a Formation Compromised wave or flying independently do so in an "Uncoordinated Entry".
7.9.3 Coordinated Entry
For each Lancaster transferring to the Target Map, roll one die. If the number rolled is EVEN, place it in the Circling Near Box. If ODD, place it in the Circling Far Box. Do not roll for the Wave Leader, place it in the Circling Near Box.
7.9.4 Uncoordinated Entry
For each Lancaster transferring to the Target Map, roll one die. The number rolled is the Attack Turn that the Lancaster arrives on. For each Map Error and Compass Card hazard attached to the Lancaster (or attached to its Upkeep, in the case of the Compass Card), add 1 to the number rolled. Before rolling, you may choose to fire a Very Light Flare (place the marker on the Turn 1 space of the Attack Turn Track now), and firing this flare allows you to subtract 1 from the die roll (if the modified die roll is 0, treat as 1 except the Lancaster starts Circling Near). Only one Very Light Flare marker may be "fired" (and thus placed on the Attack Turn Track) at this time, but it applies to all Lancasters transferring to this Target Map. [For removal of the Very Light Flare marker, see 4.4.5].
Delayed Entry: If the aircraft arrives on Attack Turn 1, place it in the Circling Far Box on the Target Map. If the aircraft arrives on Attack Turn 2 or later, place it in the corresponding space on the Attack Turn Track. When you move the Attack Turn marker into a space on the Attack Turn Track containing a Lancaster, immediately move the Lancaster into the Circling Far Box on the Target Map.
7.9.5 Dam Attack Set Up
Before you conduct the first Attack Turn, you must set up the Target Map by performing these tasks, as follows:
Attack Turn Track: Place the Attack Turn marker in the Turn 1 space (the :00 turn). If this is an uncoordinated entry and there are no Lancasters arriving on Attack Turn 1, skip forward to the first turn when Lancasters will arrive.
Visibility Check: Roll 2 dice to determine the visibility at this dam [4.4.1, player aid A1].
Surprise? (Scenario 10 only [see 12.0]).
Balloons? (Scenario 10 only; or when conducting a follow-up raid, as per Scenario 9's outcome.) If the dam's Balloons Level is 1, flip the Balloons marker over to reveal its location, the Close Zone of the Approach, or the Climb Box (this is printed on the back of the Balloons marker). If the Balloons Level is 2 or higher, place a second Balloons marker in the other space. Only 2 Balloons markers may be on the same Target Map simultaneously.
7.9.6 Attacking the Dam
After setting up the Target Map, follow the sequence of play for Attack Turns described in Part One of the rules [4.0]. The attack continues until it "ends."
Ending the Attack: The attack continues until there are no more Lancasters on the Target Map or the dam is breached (exception: see Widening the Breach). If the dam is not yet breached and you still have Lancasters with an Upkeep marker on the Target Map by the end of Attack Turn 8, leave them there and resume the next Flight Turn (the attack has not ended). Recommence the attack at that dam during the next Target Map Phase, beginning again at Attack Turn 1 by making a Visibility Check [4.4.1]. Lancasters on Target Maps do not trigger hazards and are not affected by hazards (they are effectively "invisible" during the Place Hazards, Evade Hazards and the Resolve Hazards phases), and are exempt from Navigation Checks [7.4].
Widening the Breach: If the dam is breached you may continue the attack in order to release more Upkeep markers against the dam. Only one additional SUCCESSFUL release is permitted against each breached dam.
Abort: If playing Scenario 9 or 10, you may choose to stop the attack at a dam before it "ends." You may do so only if a Lancaster was destroyed during the attack at that dam (that is, during the current Target Map Phase of the Flight Turn). If you choose to abort, transfer the Lancasters back to the Flight Map during the Circling Phase [as per 7.9.7]. The Lancasters' target designations (Primary & Secondary) remain unchanged.
Abort — Broken Radio/No VHF: A Lancaster with a Broken Radio attachment may not abort. If playing Scenario 10 and the Radio modifications was not completed, you may abort only by rolling a die — if EVEN a Lancaster may abort, if ODD it may not. You may roll only once per Target Map Phase (but may do so during any Circling Phase of an Attack Turn), and you must roll individually for each Lancaster.
7.9.7 Transferring back to the Flight Map
When the attack ends [as per 7.9.6], immediately transfer all Lancasters to the Flight Map as independent aircraft or in waves (this includes Lancasters still waiting on the Attack Turn Track due to an uncoordinated entry).
Waves: You are free to organize transferring Lancasters into waves during this transfer, in any manner you like, as long as all Lancasters in a wave share the same Primary Target (and Secondary Target, if any) [see 6.7.3]. Waves transfer to the Flight Map in good order (i.e., they are not Formation Compromised). Exception: Scatter as a result of a Nightfighter attack [4.4.3].
Wave Leader: You must appoint a Wave Leader for each wave. The chosen Wave Leader must have been a Wave Leader prior to this phase, and if you have more leaders than waves, you are free to choose any eligible leader. Even if a Wave Leader does not carry Upkeep, it must remain a Wave Leader if possible (that is, if there is an eligible wave to lead). If no Wave Leaders are available (i.e., none were Wave Leaders before), any Lancaster may be appointed leader.
No Upkeep: Lancasters not carrying Upkeep move directly to the RTB Box in their Flight Zone. Wave Leader is exempt: if currently the leader of a wave, it must remain in the wave.
7.9.8 Dam Breached?
If the dam was breached, aircraft transferring back to the Flight Map from the dam's Target Map automatically adopt their Secondary Target as their new Primary Target (via Visual Confirmation [6.4.4]). Only aircraft transferring from the breached dam may do this. If no Secondary Target has been designated, the Lancasters adopt the Target of Last Resort as their Primary Target [6.4.4].
7.9.9 Simultaneity of Multiple Dam Attacks
If you acquired two or more dams in the same Target Acquisition Phase, you must conduct all of the attacks before the Target Map Phase may end. Conduct them one by one, but consider each to be happening simultaneously.
If you need the same Target Map to conduct two or more attacks (for example, attacks at Ennepe and Lister), and one does not end even after playing Attack Turn 8, momentarily set the aircraft of the first attack aside in order to clear the Target Map for the next attack.
7.10 Clean Up
At the conclusion of the Target Map Phase, advance the Flight Turn marker to the next hour turn and if necessary, adjust the Alert Level marker on the Alert Track [see 6.6.1]. You may also reduce the Activity Level at one dam by 1, but you may not choose the dam with the highest Activity Level (or tied for highest). If the game has not ended, play the next Flight Turn.
Game Over? If all your aircraft are either destroyed or are in RTB Boxes the game ends and you must resolve the fate of all returning aircraft [5.1], and then perform Morning Reconnaissance [5.2]. If this concludes Turn 9, move all aircraft into their Flight Zone's RTB Box and resolve their fate [as per 5.1]; the game is over.
Part 3 – Training & Planning
This final part of the rules covers the preparation leading to the night of the raid, used only when playing Scenario 10, the campaign game. All the rules learned in Parts 1 and 2 are used here, in addition to the following new rules.
8.0 Mission Planning Blotter
The Planning Segment requires you to use the entirety of the Mission Planning Blotter on the far left of the mapsheet. It is graphically organized from top to bottom to handle the five phases of each Planning Turn; each section is devoted to one of those phases. The bottom of the Mission Planning Blotter presents the five steps of the Flight Prep Sequence used only when you choose to conclude the last Planning Turn and launch the raid [11.0].
Record Track: At the top is an all-purpose Record Track. Use it at your discretion to record a variety of game functions, or you are welcome to keep a running tally with pencil and paper. The set up instructions for Scenario 10 assume you will make full use of this Record Track.
9.0 Groundcrew
Groundcrew markers represent the personnel and equipment in 617 Squadron operating and maintaining Scampton and its Lancasters.
9.1 Dedicating Groundcrew
Several actions during the Planning Turn require you to "dedicate" a Groundcrew marker, or are augmented by dedicating one or more of them. Only groundcrew in play may be dedicated. You bring groundcrew into play by requisitioning them [10.1]. When dedicating, keep these considerations in mind:
Once only: Once dedicated, a Groundcrew marker may not be dedicated again for the rest of the turn, unless transferred [9.2].
One or more: When the opportunity arises to dedicate groundcrew, you may dedicate one or more Groundcrew markers.
Dedication lasts 1 turn: Dedication only lasts to the end of the current Planning Turn. At the end of a Planning Turn, all dedicated groundcrew are "freed up," eligible to be dedicated again in the next turn or during Flight Preparation [11.0].
9.2 Transferring Groundcrew
You may dedicate a Groundcrew marker even if it has already been dedicated. This is called "transferring."
9.2.1 Procedure – Transferring Groundcrew
To transfer a Groundcrew marker, flip it to its Fatigued side, and move the marker to the new dedication space on the Mission Planning Blotter. You may only transfer a Groundcrew marker that is not already Fatigued. A Groundcrew marker may be dedicated and then transferred in the same phase.
9.3 Fatigue
Fatigue happens when you choose to transfer a Groundcrew marker [9.2], or when you order "Double Time" [10.1.4 & 10.4.3]. Once Fatigued, a Groundcrew marker may never be restored to its non-Fatigued side. Fatigue is immediate and permanent.
9.4 Armorer
This marker represents "Doc" Watson, an important officer directing groundcrew at Scampton, and it must be added to the pool of Elite Crewmen at the start of Scenario 10. When this marker is drawn, it immediately goes into play. You may use its special ability only during a Planning Turn, as follows: whenever a Groundcrew marker must be flipped to its Fatigued side, you may instead flip this Armorer marker, thus sparing the groundcrew of being Fatigued. You may do this once per game. It may only prevent fatigue, it may not un-Fatigue an already Fatigued groundcrew. This Elite Crewman marker has no effect during Flight and Attack Turns (do not attach it to a Lancaster).
10.0 Sequence of Play – Planning Turn
The Planning Segment precedes the first Flight Turn of the game, and may last up to four Planning Turns, each approximating two weeks of historical time. You are welcome to conclude the Planning Segment at the end of any turn, although the Planning Segment automatically ends at the end of the fourth turn.
Regardless of when you end the Planning Segment, you must conduct the Flight Preparation Sequence before beginning the first Flight Turn [11.0]. Flight Preparation happens only once, not at the end of each Planning Turn, only at the moment you declare the Planning Segment concluded (or at the end of the fourth Planning Turn).
Each Planning Turn consists of five phases: the Requisitions Phase, Security Phase, Training Phase, Modifications Phase, and Reconnaissance Phase. You must play them in order (there is no phase marker; if you really need one, use the Flight Turn's Phase marker).
10.0.1 Resource Points
In order to represent the staff, budgetary resources and materiel available to 617 Squadron, the game uses the abstraction of "resource points." You begin the game with 60 Resource Points (RP), and on Turn 2 you automatically receive an additional 60 RP. If you wish, you may also request more RP [see 10.1.5]. RP are spent during the Planning Turn, and any RP leftover at the end of the turn are saved for use next turn. RP have no effect once the Planning Segment is concluded.
RP Limit: There is no limit to the RP you may accumulate. Use the back of the tens RP marker to record RP in excess of 100, or just keep track with pencil and paper.
10.1 Requisitions Phase
During this phase you may requisition assets, and request additional RP [10.1.5].
10.1.1 Requisition Assets
You may spend RP to requisition the following assets (you may requisition them in any order during this phase):
- aircraft
- aircrew (Turn 1 only)
- groundcrew
- Upkeep
Cost: RP costs are indicated on each marker (lower right-hand corner of the marker), and indicated on the Mission Planning Blotter. You must deduct the RP cost immediately (for example, if you requisition ten Seasoned aircrew, which cost 2 RP each, you must deduct 20 RP from your total). You may not purchase more assets than you can pay for.
Countermix Limit: You may not requisition more assets than are available in the game. For example, there are 24 Upkeep markers, so, you may requisition a total of 24 of them.
"In Play": Place requisitions on the Requisitions section of the Mission Planning Blotter, or set them aside in a convenient place on your gaming table. Once requisitioned, an asset is considered to be "in play."
10.1.2 Requisitioning Groundcrew
You may requisition as many Groundcrew markers as you can pay for, and you may immediately use them in the phase that you requisition them.
10.1.3 Requisitioning Aircrew
Aircrew may only be requisitioned on Planning Turn 1. There are three types of crews, Green, Seasoned, and Veteran. It costs more assets to requisition a Veteran aircrew than a Green aircrew. You are not obligated to requisition all three types.
Elite Crewmen: Place all Elite Crewman markers into an opaque cup (including the Armorer, Jinx, and Spy). For every SIX aircrews you requisition, randomly draw one Elite Crewman marker from the cup.
Except for the results of training and ordering extra training [10.3.2 & 10.3.4], this is the only way to bring Elite Crewmen into play.
10.1.4 Requisitioning Machines (bombers and mines)
You may requisition Lancasters and Upkeep markers any turn (1 RP each), but you may do so only by dedicating groundcrew:
Handle Limit: You may requisition a number of aircraft and Upkeep markers equal to the Handle Limit of dedicated Groundcrew markers. The Handle Limit is printed on each Groundcrew marker.
Double Time: After dedicating a Groundcrew marker during this phase, you may re-dedicate the same Groundcrew marker by flipping it to its Fatigued side, effectively using it twice in the same phase (it may not already be Fatigued). Thus, you get the benefit of both its normal Handle Limit and its Fatigued Handle Limit.
Upkeep markers: When you requisition an Upkeep marker, draw it randomly from a cup and do not peek at the "damaged" side of the marker. Set it aside, you will attach it to a bomber during the Flight Preparation Sequence [11.5].
Lancaster markers: When you requisition a Lancaster marker, set it aside. Keep it face-up (it is undamaged). You will assign attachments to it later (during the Flight Preparation Sequence [11.5]).
10.1.5 Request Additional Resource Points
You are welcome to request additional RP one or more times during this phase. You may do so at any time during the phase. Success of each request is automatic, but the exact number of RP garnered must be determined by a die roll. You must roll for each request you make.
Procedure — Request Additional RP: Roll a die, if the result is an EVEN number, you are granted 30 more points, if ODD, 20 more points. Adjust your total RP amount immediately (either use the Record Track or pencil and paper).
Security Risk: Record the number of times you have requested additional resources on the Record Track (use the RP Request marker, or jot the number of requests down on paper). You will use this number during the Security Risk Check in Step 4 of Flight Prep [11.4.2, player aid P9].
10.2 Security Phase
During this phase you may elect to take actions that will improve the security of Scampton and the impending mission.
10.2.1 Procedure — Security Actions
Each Security Phase you may first flip over one already played Security marker, and then, you may play one new Security marker.
These actions are voluntary, and you may skip this phase if you prefer.
RP cost: Some actions require RP expenditure, as indicated below (also noted on the marker itself and the player aid [P3]). RP costs must be paid immediately.
Security Risk Level: These actions influence the Security Risk Level, and will take effect during the Security Risk Check that happens during the Briefing step of the Flight Preparation sequence [11.4]. You are welcome to keep a running tally before then, but the effect of some actions will not be known right away (until you actually perform the Security Risk Check [player aid P9]).
10.2.2 Security markers explained...
Extra Police: Place the marker on the "Extra Police" space on the Mission Planning Blotter. This requires an expenditure of 5 RP. During the Security Risk Check, shift the Security Risk Level marker two spaces to the left.
Transfer the Barmaid: You may only take this action if Extra Police is already in play. To flip that marker to the Transfer the Barmaid side you must pay 5 RP. Doing so will allow you to shift the Security Risk Level marker one space to the left (this is in addition to the shift for Extra Police). If the Spy is in play when you Transfer the Barmaid, remove the Spy (it is removed from the game; do not put it back in the cup).
Transfer 57 Squadron: Place the marker on the Transfer 57 Sqdn space on the Mission Planning Blotter. To take this action, you must pay 15 RP and remove one Groundcrew marker (it may be Fatigued). Once removed, the Groundcrew marker may not be requisitioned again. If 57 Squadron is transferred, during the Security Risk Check [11.4.2], roll a die and shift the Security Risk Level marker the number of spaces indicated on the chart printed on the player aid card [P9].
Quarantine: You take this action by flipping over the Transfer 57 Sqdn marker to its quarantine side. Thus, you may only take this action if you already transferred 57 Squadron to another base during a previous turn. Once quarantined, you may no longer request additional resources [10.1.5], nor may you requisition more Groundcrew markers. If the Spy is in play when you quarantine Scampton, remove the Spy (do not put it back in the cup). If quarantined, during the Security Risk Check [11.4.2], roll a die and shift the Security Risk Level marker the number of spaces indicated on the chart printed on the player aid card [P9]. These shifts are in addition to shifts for transferring 57 Squadron.
Effect on Wallis Bonus: If you quarantine Scampton, the effects of the Wallis Bonus are nullified (ignore all Wallis Bonus effects [10.3.3]).
Tirpitz Rumor: Place the marker on the Tirpitz Rumor space on the Mission Planning Blotter. During the Security Risk Check, shift the Security Risk Level marker one space to the left [11.4.2, player aid P9].
Tirpitz Ruse: You may only take this action if the Tirpitz Rumor marker is already in play. To flip that marker to the Tirpitz ruse side you must pay 5 RP. During the Security Risk Check (during Flight Preparation [11.4.2]), roll a die and shift the Security Risk Level marker to the left as indicated by the player aid [P9] (this is in addition to the shift for the Tirpitz Rumor).
10.2.3 Spy
This marker is added to the pool of Elite Crewman markers at the start of the game. If you draw this marker, thus bringing it into play, place it in the Security section of the Flight Prep area of the Mission Planning Blotter. If still in play during Flight Preparation, do not attach the Spy marker to a Lancaster. Although it does not fly with 617 Squadron, it will have an adverse effect on the Security Risk Level (it will shift the Security Risk Level marker to the right during the Security Risk Check of Flight Prep) [11.4.2, player aid P9].
Removing the Spy: If the Spy is already in play, playing either Transfer the Barmaid or the Quarantine action during the Security Phase will remove the Spy. The Spy must already be in play to be removed. Once removed, it may not enter play again (do not put it back in the cup).
Security Liability: If the Spy is in play during the Briefing step of Flight Preparation, its presence shifts the Security Risk Level marker a number of spaces RIGHT equal to a die roll [11.4.2, player aid P9].
10.3 Training Phase
You MUST train your aircrews. This is mandatory, but it does not cost Resource Points. There are three categories of training to choose from: Navigation, Altitude & Speed, and Bomb-Aiming & Release. Each category has its own record track on the Mission Planning Blotter. You must select two categories each Training Phase, and perform Training for each.
10.3.1 Training Procedure
To conduct Training, select a training category (for example, Navigation), and then roll a die for each aircrew type at Scampton ("type" refers to Green, Seasoned, and Veteran). Cross reference the number rolled with the aircrew type on the Training table printed on the Mission Planning Blotter, and find the result.
In some cases the number rolled will be modified (see below). Apply the modified result to the selected training category. In some cases there will be more than one result (apply them all).
Modifiers…
Not Enough Aircraft? If aircrews outnumber Lancasters by 2 to 1 at the moment you roll the training die, modify the training die roll by subtracting 1. Do not count damaged or crashed bombers.
No Groundcrew? If you do not dedicate a Groundcrew marker to Training, subtract 1. In order to avoid this deduction, you need only dedicate a single Groundcrew marker for the entire phase, not one per Training action. Dedicating more than one Groundcrew to Training has no beneficial effect.
Recon? If the Recon Level in each of the three hostile zones on the Flight Map is at level 1 or higher, add 1 to all Navigation training die rolls.
Aldis Lights? If you have completed the Altimeter modifications [10.4.4], add 1 to all Altitude & Speed training die rolls.
Dann Bombsight? If you have completed the Cockpit modifications [10.4.4], add 1 to all Bomb-Aiming & Release training die rolls.
10.3.2 Training Results explained...
# – Increase Training Level. The number indicates the increase in levels of that training category (zero means the level does not increase). If a level is gained, adjust the appropriate training marker on the corresponding training track.
R – Rested. Flip the Training Level marker to its Rested side (if already on its Rested side, ignore the R result). EFFECT: in a subsequent Training action (same category, same aircrew type), you may elect to flip this marker back to its un-rested side, thereby granting yourself an instant training re-roll. If you choose to make this re-roll, the new number rolled overrides the first number.
d – Damaged. Choose any one bomber in play and flip it to its Damaged side [2.1.1]. You may only select an undamaged bomber, and if you do not have an undamaged bomber in play, ignore the "d" result (the crew was flying a Wellington or an unmodified Lancaster).
c – Crash! Select an undamaged bomber in play, and remove it from the game (it may not be requisitioned again). Then, roll a die: if the roll is EVEN, draw an Elite Crewman marker, but if ODD, remove 1 Aircrew marker of the appropriate type (the crew was killed or seriously injured). If you do not have an undamaged bomber to remove, eliminate the aircrew but no bomber is destroyed.
c/d — Crash or Damaged? Roll another die: if EVEN the result is Damaged. If ODD, it is Crash!
E – Elite Crewman. Draw one Elite Crewman marker randomly and place it with your requisitions.
10.3.3 Wallis Bonus – Altitude & Speed Training
Keep note of the combined levels of Altitude & Speed training of all three types of aircrews. If their sum is 12 or higher, you earn the Wallis Bonus.
Effect – Wallis Bonus: When checking the result of a detonation during the Status Phase of an Attack Turn [play aid, A14], do not roll a die to check for evens and odds in the usual manner [4.4.4]. Instead, automatically use the highest number on the Upkeep marker. Also, during the Security Risk Check conducted in Step 4 of the Flight Preparation Sequence [11.4.2], shift the Security Risk Level marker 1 space to the right.
Quarantine: If you choose to quarantine Scampton [as per 10.2.2, "Quarantine"], all Wallis Bonus effects are ignored (Quarantine nullifies the effects).
10.3.4 Extra Training
You may order Extra Training at the end of the Training Phase. You may do this only once each turn. Extra Training allows you to perform a third Training action (you may choose any category, even one selected previously this phase). It also allows you to gain a new Elite Crewman marker.
Procedure – Extra Training: Spend 5 RP, randomly draw one Elite Crewman marker from the cup, and then select a training category. Roll a die for each aircrew type and apply results [as per 10.3.1]. You must keep track of the number of times you order Extra Training during the game, either on a piece of paper or by using the Extra Training marker on the Record Track (it will influence the Security Risk Level [11.4]).
10.4 Modifications Phase
During this phase you may attempt to modify your Lancasters [10.4.1], and repair Lancasters damaged during Training [10.4.5]. There are three types of modifications: Radio, Altimeter, and Cockpit. You are permitted to make one attempt per type each turn. Attempts are voluntary. Modifications affect ALL Lancasters, while Repairs affect only targeted Lancasters.
10.4.1 Procedure – Modifications Attempt
For each modification attempt, select one of the three modification types (Radio, Altimeter, or Cockpit), and dedicate at least one Groundcrew marker. Place the marker in the appropriate space on the Mission Planning Blotter. You may spend RP to improve your chances of success. Then, roll the dice, and determine if the attempt succeeds. Count the number of '6's rolled: if attempting Radio modifications, you succeed if you roll a '6'; if attempting Altimeter or Cockpit modifications, you succeed if you roll two '6's.
How many dice? The number of dice you roll is determined by two things: the Erk Points dedicated to the attempt, one die per point, and the RP spent on the attempt, one die per RP. You may dedicate more than one Groundcrew marker and spend any amount of RP in order to increase the number of dice you may roll.
Keep the following in mind:
One attempt per modifications type: You are permitted one attempt for each modifications type each turn; you can't make two attempts to complete the same type in the same turn. However, see "Double Time & Modifications" [10.4.3].
Groundcrew is mandatory: You MUST dedicate at least one Groundcrew marker to EACH attempt.
Spending RP is optional: You need not spend RP, but if you do, you must spend them before rolling dice.
No maximum limit: You may dedicate as many Groundcrew markers as you have available, and spend as many RP as you can afford.
10.4.2 Modifications Attempt Results explained...
SUCCESS: If you rolled two or more '6's, the attempt succeeds (for Radio modifications, you need only roll one '6' to succeed). Place the appropriate marker on the modifications Box as a reminder that the modifications have been completed, or make a note on paper (or just remember that the modifications are complete).
FAILURE: If you did not roll any '6's, the attempt fails (but see Double Time [10.4.3].
IN PROGRESS: If attempting Altimeter or Cockpit modifications and you only roll one '6', the attempt fails, but the next time you make the attempt you only need to roll one '6' to succeed. In other words, the previous roll counts (the '6' is saved for later). You can mark the modifications space on the Mission Planning Blotter with the Aldis Lights or Dann Bombsight marker as a reminder, "In Progress" side up.
10.4.3 Double Time & Modifications
If you do not like the result of the modifications attempt, you may immediately flip over the dedicated Groundcrew marker(s) and roll dice equal to its Fatigued Erk Points value (the groundcrew must not already be Fatigued to do this). If you dedicated more than one Groundcrew marker, you may flip over one, some or all. You may not spend RP to increase the number of dice rolled this second time, but you may transfer groundcrew to do this. Double Time may only be performed once for each type each turn.
10.4.4 Effects of Completed Modifications explained...
Altimeter: From now on, when you conduct Altitude & Speed training, you enjoy a training modifier of +1 to each die roll [see 10.3.1]. Also, your Lancasters are now equipped with pairs of Aldis Lights, allowing you to draw Altitude chits during the Approach & Release Sequence of an Attack Turn [A3 & A10]. (Not completing this modification means you may NOT draw Altitude chits during the Attack Turn — except at Sorpe or Bever Dams where Aldis Lamps have no effect [4.2.3].) Place the Aldis Lights marker on the modifications space on the Mission Planning Blotter as a reminder.
Cockpit: From now on, when you conduct a Bomb-Aiming & Release training attempt, you enjoy a modifier of +1 to each die roll [see 10.3.1]. Also, this modification allows you to apply the release modifier (printed on the Bomb Aiming & Release training track) when you make Release Checks during the Release Sequence of the Attack Turn [A12] (Not completing this modification means you may NOT apply that modifier during release [4.2.13 step 3]). Place the Dann Bombsight marker on the modifications space on the Mission Planning Blotter as a reminder that you completed this modification.
Radio: All Lancasters are now equipped with VHF radio sets. Place the VHF marker on the modifications space on the Mission Planning Blotter as a reminder.
There is no immediate benefit to completing this modification (being equipped with VHF radio sets is the default condition assumed by the game design). Rather, NOT completing it imposes restrictions on 617 Squadron, as follows:
- Coordination Check – no VHF: You are prohibited from performing Coordination actions (skip the Coordination Phase).
- Wireless Action – no VHF: You may only perform Wireless actions for each Lancaster individually, even when in a wave.
- Attack Order – no VHF: You must organize the Lancasters in waves, and each must have an "Attack Order." [Explained in 11.6]
10.4.5 Repairs
To repair damaged aircraft, you must dedicate at least one Groundcrew marker (place it in the Repair Lancasters Box on the Mission Planning Blotter). Once a groundcrew has been dedicated, you may spend 1 RP to repair each damaged bomber, up to the number of Erk Points supplied by dedicated groundcrew. Success is automatic, no dice are rolled. Crashed bombers may not be repaired.
Clarification: Cockpit, Radio, Altimeter modifications and repairs require individual groundcrew dedication. For example, to perform repairs and attempt Radio modifications, you would need to dedicate two Groundcrew markers, or dedicate one and transfer it.
10.5 Recon Phase
During this phase you may spend RP to order reconnaissance of hostile Flight Zones and/or dams. You do not dedicate groundcrew to recon. Recon is voluntary, not mandatory.
10.5.1 Flight Zone Recon
If you order reconnaissance of a hostile zone, record the order by spending 5 RP and increase that zone's Recon Level by 1 on the Flight Map. "Hostile zones" are those with Recon Tracks in them (they are the Dutch Coast, Ruhr, and Weser Flight Zones). Increasing the Recon Level is automatic, no die roll is necessary.
Flight Recon Limit: Although you may Recon more than one Flight Zone each turn, you may not increase the Recon Level in any zone more than 1 level per turn, and the maximum Recon Level of any Flight Zone is 3.
10.5.2 Dam Recon
If you order the reconnaissance of a dam, record the order by spending 1 RP and increase the Recon Level by 1 on the dam's Status Record Track. Then, refer to the Dam Recon table [P8] and roll a die for each category (Flak, Searchlights and Balloons) and Water Level. If this is the second time a recon has been ordered on a dam, the result is interpreted differently [see 10.5.3 – Repeated Dam Reconnaissance].
Dam Recon Limit: You may recon each dam only once per turn. If you recon a dam during the Recon Phase, you may recon it again during Flight Preparation [11.4.1]. However, no dam may be the subject of more than four recon actions during the game (thus, the maximum Recon Level of each dam is 4).
The effect of dam reconnaissance is as follows:
Defense Levels: Roll one die for each defense category, one category at a time (Flak, Searchlights, and Balloons). Cross-reference the number rolled with the defense category on the Dam Recon table [player aid P8], and locate the Defense Level. To record the Defense Level, place the appropriate Defense Level marker on the corresponding space on the dam's Status Record Track. (If the Defense Level is 0 (zero), there is no need to place a marker on the track).
Balloons: When the Balloons Level is 1 or more, you must randomly draw a Balloons marker to place on the dam's Status Record Track. Do not peek at the back of the marker, it will be revealed only when a Lancaster enters the Target Map [see Surprise 12.0].
Water Level: Roll one die and add the Planning Turn number. Locate the sum on the Dam Recon table to find the Water Level (Rising, High, or Full). Place the Water Level marker on the corresponding space on the dam's Status Record Track.
10.5.3 Repeated Dam Reconnaissance
If you perform reconnaissance on a dam that was previously the subject of a recon action (that is, the Recon Level is already 1 or higher), the procedure is the same, but the results are treated differently, as follows:
Lower Defense Levels: Do not change the current Defense Level UNLESS the recon attempt indicates a lower level. If the new result is equal to or higher than the current level, the level remains unchanged.
Raise Water Level: Do not change the current Water Level UNLESS the recon attempt would raise that level.
11.0 Flight Preparation
Flight Prep is triggered automatically after the Recon Phase of Planning Turn 4. At the conclusion of a previous Recon Phase, however, you MAY choose to "pull the trigger" and launch the raid sooner. Once triggered, flip the Planning Turn marker to its "Raid Launched" side, indicating that the Planning Segment is over and the first Flight Turn is about to begin. Before that first turn commences, however, you must conduct the five steps of the Flight Preparation Sequence. These five steps will reveal the collateral effects of training, as well as give you an opportunity to organize your aircraft and crews for the flight to the targets. It will also give you one last opportunity to recon the dams.
Groundcrew during Flight Prep: All groundcrew in play may be dedicated during Flight Preparation, regardless of their dedication during the last Planning Turn. Each Groundcrew marker may be transferred, and may do Double Time.
Double Time — Flight Prep: After completing Steps 1 and/or 2, you may nullify the result of the check and re-roll. To do so, flip one dedicated Groundcrew marker to its Fatigue side and recalculate the modifiers. You may do this only once for Step 1 and once for Step 2.
Perform the steps of Flight Preparation in this order [refer to the Mission Planning Blotter on the mapsheet]:
11.1 Aircraft Check (Step 1 of Flight Prep)
You must check to see if your aircraft are in flying condition.
Procedure — Aircraft Check: First, you may dedicate groundcrew. Then, roll two dice and add the numbers rolled. Modify the sum (see below), and refer to the result indicated on the table printed at the bottom of the Mission Planning Blotter.
Modifiers…
- +2 for each dedicated non-Fatigued Groundcrew marker;
- +1 for each dedicated Fatigued Groundcrew marker.
- -1 if the Spy is in play.
Results — Aircraft Check explained...
The Aircraft Check table printed in the Flight Prep section of the Mission Planning Blotter indicates the number of aircraft that are "grounded". If you must ground one or more bombers, select that number of in-play and undamaged aircraft and set them aside. They may not be used during Flight and Attack Turns. (If the scenario outcome indicates that a follow-up raid has been ordered, you may use any grounded Lancasters for the follow-up raid. That is, they become "un-grounded" for the follow-up raid.)
Increased Hazards: If the result forced you to ground one or more Lancasters, you must also add one or two Hazard markers during the Place Hazards Phase in the English Coast Zone of the Flight Map, as indicated by the Aircraft Check table. These additional Hazard markers apply only to Flight Turn 1 of the game. You may avoid these extra Hazard markers by choosing to launch on Flight Turn 2 or later [see 11.5.1 Staggered Launch].
11.2 Ordnance Check (Step 2 of Flight Prep)
You must check to see if all of your Upkeep have been installed in bombers.
Procedure — Ordnance Check: First, you may dedicate groundcrew. Then, roll two dice and add the numbers rolled. Modify the sum (see below), and refer to the result indicated on the table printed at the bottom of the Mission Planning Blotter.
Modifiers… (The modifiers are identical to those explained above in Step 1.)
Results — Ordnance Check explained...
If the result indicates that one or more Upkeep markers are "grounded," you must randomly select that number of Upkeep markers and set them aside (do not peek at their Damage side). Select only markers that are in play. The Upkeep markers that are set aside may not be attached to Lancasters in Step 5. (If the scenario outcome indicates that a follow-up raid has been ordered, grounded Upkeep markers become "un-grounded"; that is, they will be available for attachment in the follow-up raid, if there is one.)
11.3 Aircrew Check (Step 3 of Flight Prep)
Some of your aircrews may not be fit for flight.
Procedure — Aircrew Check: Roll two dice, and note the modified sum on the Aircrew Check table printed in the Flight Prep section of the Mission Planning Blotter.
Modifiers…
- -1 for each turn that you ordered Extra Training.
- +1 for each Aircrew Training Level marker on its Rested side (i.e., "Rested" is face-up).
Results — Aircrew Check explained...
The Aircrew Check table indicates how many Aircrew markers may not fly. You must set aside a number of Aircrew markers equal to that number, and may choose any aircrew type in play (Green, Seasoned, or Veteran). Those set aside may not be attached to Lancasters in Step 5 (but they will be available for the follow-up raid if there is one).
11.4 Briefing (Step 4 of Flight Prep)
Perform Final Dam Reconnaissance [11.4.1] and then make a Security Risk Check [11.4.2].
11.4.1 Final Dam Reconnaissance
You MAY perform a recon action at each dam. If a dam is at Recon Level 4 already, you may not perform recon there. Also, you may not perform recon in a Flight Zone.
Use the same procedure as described in the Recon Phase of the Planning Segment [10.5.2 & 10.5.3].
11.4.2 Security Risk Check
Place the Security Risk Level marker on the 0 (zero) space of the Mission Planning Blotter's Record Track, and then use it to determine the Surprise Modifier and the Alert Level. Do this by first shifting the marker a number of spaces to the RIGHT, and then to the LEFT, as indicated on the player aid [P9] [also explained in 10.2.1].
Determine the Surprise Modifier and Alert Level: Use the chart [at the bottom of P9] to note the Surprise Modifier and Alert Level. The Surprise Modifier is used in the Target Map Phase when you conduct a Surprise Check [12.1.2].
11.5 Sortie (Step 5 of Flight Prep)
Assign attachments: Place requisitioned Upkeep, Aircrew and Elite Crewman markers on aircraft. Do not use damaged or grounded Lancasters, grounded Upkeep or aircrew. Only one of each type of attachment may be attached to an aircraft (that is, 1 Upkeep, 1 Aircrew, and 1 Elite Crewman marker). Exception: the Jinx may be an extra Elite Crewman marker attached to a Lancaster [13.0]. Each Lancaster MUST have one Upkeep attached, and one aircrew attached, but it need not have an Elite Crewman marker attached. If you have more aircraft than aircrew or Upkeep, set the excess aside (no aircraft may enter the Flight Map without an aircrew and Upkeep). Those that are set aside may be used for the follow-up raid, if one is launched (as per the scenario's outcome [Scenario Book, p.42]). You may set aside (or ground) more assets than forced to by Steps 1-3 of Flight Prep.
Waves: Organize aircraft into waves [2.5 & 6.7], or leave one, some or all as independent aircraft. Place waves and independent aircraft in the England zone on the Flight Map [within sortie limits, see 11.5.1].
Target Assignments: Assign Primary Targets to all Lancasters in play that are not set aside or grounded. You may assign Secondary Targets as well, but this is not mandatory.
Target of Last Resort: Assign a dam as the squadron's Target of Last Resort. It may be any dam not already designated as a Primary or Secondary Target (unless all eight dams have been designated as a target already, in which case you may choose any dam as the Target of Last Resort). Designating a Target of Last Resort is mandatory.
11.5.1 Sortie Limits
The number of aircraft that may be placed in the England zone in a single Flight Turn is limited by the number of Sortie Points available. Each Groundcrew marker in play contributes 4 or 5 Sortie Points, unless Fatigued (in which case it has 3 Sortie Points). Regardless of previous dedication during Flight Prep, each Groundcrew marker contributes Sortie Points.
Staggered Launch: If you do not have enough Sortie points to sortie all of your aircraft in the same Flight Turn, the remainder may be placed in the England zone at the start of a subsequent Flight Turn, within sortie limits. Indeed, you are welcome to deliberately delay placement in the England zone by holding some or all Lancasters back. Lancasters held back must still be assigned Primary Targets before you begin the first Flight Turn, and you must schedule the Flight Turn when they will be placed in the England zone.
11.5.2 Launch the Raid
Set the Flight Turn marker on the Turn 1 space of the Flight Turn Track. Skip the first Coordination Phase and proceed directly to the Move Phase of the Flight Turn.
If no Lancasters sortie on Flight Turn 1, place the Flight Turn marker on the first turn in which Lancasters sortie.
11.6 Attack Order – No VHF
If you did not complete Radio modifications [10.4.4], you must organize the Lancasters into "Attack Order". This means that all aircraft must be organized in waves, none may be placed in the England zone as an independent aircraft. If a Lancaster becomes an independent aircraft during the Flight Turn, it must attempt to join its wave whenever it can as it continues on to its Primary Target [7.1.4]. Each wave must have its own Attack Order.
11.6.1 Linear
Attack Order is linear. The "line" starts with the Lancaster you designate to be first, and continues to the "last" bomber. The Wave Leader is considered to be "in front" of the first Lancaster in this scheme. You are welcome to keep track of this order in any convenient manner (for instance, by arranging the Lancaster markers on your gaming table in a line, or noting the order with paper and pencil).
No Upkeep: Once a Lancaster no longer carries Upkeep, it leaves Attack Order and must enter the RTB Box at its earliest opportunity.
11.6.2 Attack Turn in Attack Order (no VHF)
Lancasters carrying Upkeep must move to the Circling Near Box as soon as possible (i.e., at their first opportunity), and remain in the Circling Near Box until entering the Approach. Lancasters in the Circling Near Box must strictly follow Attack Order during the Run Phase of the Attack Turn. The "first" Lancaster must be the first to enter the Approach (assuming it remained with the wave en route and is capable of entering the Approach at this time), followed by the second Lancaster, and so on. If a Lancaster is knocked out of the wave, destroyed, no longer carries Upkeep, or for any other reason is not present in the Circling Near Box during the Run Phase, skip over its place in the Attack Order.
Wave Leader's Privilege: The Wave Leader may precede the first Lancaster (i.e., it may "cut in line" ahead of the first Lancaster), or it may enter the Approach instead of the next Lancaster in the Attack Order, at the player's discretion. In fact, the leader may insert itself into the order at any time. Also, the leader is the only Lancaster that may enter the Approach as an escort (but it may not do so if carrying Upkeep [as per 4.1.2]).
11.6.3 Very Lights – Attack Order Deviation
You may deviate from the Attack Order. You may do so only if the Wave Leader is in the Circling Near Box and it fires a Very Light Flare. Doing so means placing a Very Light Flare marker on the current turn space of the Attack Turn Track.
The Wave Leader may fire a Very Light Flare more than once each Attack Turn, during the Run or the Circling Phases, but only one Very Light Flare marker may occupy a single space on the Turn Track (if one has already been fired, Very Lights may be fired again, just don't place another marker on top of the one already there). Firing Very Light Flares allows you to do the following [this is in addition to 4.3.1 and the effects of Very Lights explained in 4.2.1]:
Run Phase: If fired during the Run Phase, you may place any Lancaster in the Approach, ignoring Attack Order (the Lancaster must already be in the Circling Near Box).
Circling Phase: If fired during the Circling Phase, you may move Lancasters freely between the two Circling Boxes. Lancasters moved to the Circling Far Box in this manner may not move to the Circling Near Box again until another Very Light Flare is fired in a subsequent turn. Likewise, a Lancaster that would move into the Circling Near Box may be "held" in the Circling Far Box. Once held, it may only move to the Circling Near Box if a Very Light Flare is fired again. Keep track of this by any means you like (such as orienting the Lancaster markers a certain direction, or pencil and paper).
11.6.4 Multiple Attack Orders
If Lancasters from two or more waves occupy the same Target Map, use the wave ID numbers to determine which wave's Attack Order goes first (for example, the Attack Order of the first wave takes precedence over the Attack Order of the second wave). Two Wave Leaders may enter the Approach as escorts in the same Run Phase.
12.0 Surprise Check
When playing Scenario 10, this rule must be added to the Target Map Phase of the Flight Turn. It is triggered when a dam is successfully acquired by a Lancaster for the first time (it is never performed more than once for any dam). Do not use this rule when playing a follow-up raid.
12.1 Procedure – Surprise Check
First, determine if "immediate adjustment" is necessary: If the Recon Level is 0 (zero) or 1, check the Water Level by performing Dam Recon; if the Recon Level is 0 (zero) also check Flak, Searchlights and Balloons Levels. Adjust the levels as indicated on the Dam Recon table [10.5.2 or 10.5.3, player aid P8]. However, do NOT increase the Recon Level and no RP is spent (this ends "immediate adjustment").
Then, regardless of the Recon Level, flip over the Recon Level marker on the dam's Status Record Track. Once flipped, make two Surprise Checks: one to determine if the Water Level has been reduced [12.1.1], and the other to see if the Germans have improved the dam's defenses [12.1.2].
12.1.1 Water Level Reduced?
(Perform this check only if the dam's Water Level is Full; if it is not Full, skip it and proceed to 12.1.2.) Roll a die and modify the number rolled by adding the Water Level modifier printed on the back of the Recon Level marker. If the sum of the number rolled and the modifier is equal to or greater than the Planning Turn, there is no change to the Water Level, but if less, reduce the dam's Water Level to "Rising" (the Germans recognized the danger and opened the sluice gates).
12.1.2 Surprise?
Locate the appropriate Surprise number on the back of the Recon Level marker. To determine which of the three numbers is appropriate, match the icon on the marker with the icon on the dam's Status Record Track, and use the icon in the Recon Level marker's space.
Roll equal or higher: Roll two dice, and subtract the Surprise modifier [as determined during Briefing, 11.4.2, player aid P9]. If the modified sum of the dice is equal to or higher than the Surprise number, there is no surprise and the defenses have not been improved. If the result is lower than the Surprise number, the Germans have improved the dam's defenses, thus "surprising" your aircrews.
SURPRISE IMPROVEMENT — Increased Defense Levels: If surprised, determine what the improvements are by rolling one die for each defense category (Flak, Searchlights, and Balloons). Look-up the result on the Surprise Improvement table (located on the player aid card [P6]). The numerical result is the increase in levels of that defense category (a defense category may not exceed 4; ignore any excess). The asterisk means that there is a Nightfighter nearby at that dam (place a Nightfighter Nearby marker on the dam's Status Record Track or the Target Acquisition Box on the Flight Map as a reminder; if you get an asterisk again, there is no additional effect). The Nightfighter Nearby marker will influence Nightfighter Checks at this dam, but is not permanent. It can "Vanish" as a result of a Nightfighter Check [4.4.3, player aid A6].
13.0 Jinx
When playing Scenario 10, add the Jinx marker to the pool of Elite Crewman markers (i.e., put it in the cup with the rest of the markers so it can be drawn randomly during the Planning Turn). If you are unfortunate enough to draw it during the Planning Turn, set it aside on your gaming table with the other Elite Crewman markers (it only affects play during Flight and Attack Turns). During the Flight Preparation sequence [11.5], attach it to a Lancaster. You may attach it to one that already has an Elite Crewman marker. Attaching the Jinx is mandatory.
13.1 Jinx Remains in Play (transfer)
If the Lancaster it is attached to is destroyed or enters the RTB or Missing Box, the Jinx marker must immediately transfer to another Lancaster in play (i.e., one that is not destroyed or is not in a RTB or Missing Box). If there are no other eligible Lancasters in play, remove the Jinx (this is the only way to get rid of the Jinx marker).
13.2 Jinxed Effects
The Jinx marker only affects the Lancaster it is attached to. When flying in a wave, it does NOT affect the wave as a whole.
The effects of the Jinx are as follows:
13.2.1 Jinxed Dice
When you must roll one die, roll two instead and keep the worst one. When you must roll two or more dice, there is no jinxed effect. "Worst one" means the die that will do more harm to a Lancaster, or the one you as the player would rather not be saddled with.
13.2.2 Jinxed Hazards
During the Place Hazards Phase, place an additional Hazard marker on the independent aircraft with the Jinx marker attached. If in a wave, place the extra Hazard marker directly on the Jinxed Lancaster. Ignore the even distribution rule [7.5.4] and the three hazard limit [7.7.1 step 3].
13.2.3 Jinxed Approach Chit
When the jinxed Lancaster enters the Approach, roll a die: if the number rolled is EVEN, mix the Jinx marker in with the Speed chits; if ODD, mix it in with the Altitude chits. During the Approach Sequence, if you draw the Jinx as one of the chits, it is equivalent to the "erratic" chit (+0 Chits). If the Lancaster pulls-up, return the Jinx marker to the Lancaster.
13.2.4 Jinxed Release Chit
When the jinxed Lancaster enters the Release Box, keep the Jinx marker mixed in with the Altitude or Speed chits. If you draw the Jinx as one of the chits, it is equivalent to the "erratic" chit (+0 Release modifier). When the Lancaster leaves the Release Box, return the Jinx marker to the Lancaster.
14.0 Optional Rule — High Altitude
Enemy Coast Ahead is designed with the assumption that Lancasters fly at low altitude. To help you explore what a high-altitude raid might have looked like, at least during the flight to the targets, you are welcome to apply this optional rule set. Just keep in mind that when using this rule, the default altitude is "low," and "high" means all altitudes that are not low.
14.1 Moving at High Altitude
On the Flight Map, an independent aircraft or wave may fly at high altitude. All Lancasters in a wave must fly at the same altitude, high or low. To indicate that an independent aircraft or wave is at high altitude, make a note on paper, orient the Wave and aircraft markers in a particular direction, or use some other convenient mnemonic. Two High Altitude markers are provided in the countersheet for this purpose as well.
14.1.1 Changing Altitude
During the Move Phase, in addition to moving, a wave or independent aircraft MAY change altitude. A Lancaster or wave at high altitude MUST change to low when in the Flight Zone of its Primary Target. Altitude may not be changed in the Missing Box.
14.2 Navigation Check
Roll three dice when you make a Navigation Check for a high altitude wave or aircraft, and keep the most favorable two dice.
14.3 Hazards at High Altitude
High altitude aircraft have two effects on the drawing of hazards: they increase the number of markers drawn [14.3.2] and they potentially increase the Alert Level [14.3.1]. Also, high altitude aircraft may not evade hazards [14.3.3] but some hazards have no effect on high altitude Lancasters [14.3.4].
14.3.1 Increasing the Alert Level
During the Place Hazards Phase, if you have at least one Lancaster at high altitude in the North Sea Flight Zone, put two Nightfighter Nearby markers (or any other two markers) in the cup of yellow Hazard markers. Remove the Nightfighter Nearby markers from the cup if you no longer have a high altitude aircraft in that zone. Also, if you have at least one Lancaster at high altitude in the Dutch Coast or Ruhr Flight Zone, place two Nightfighter Nearby markers in the cup containing light blue Hazard markers (for Dutch Coast and Ruhr Flight Zones). Once you no longer have an aircraft at high altitude in either zone, remove the two markers from the cup.
Drawing a Nightfighter Nearby marker: If you draw a Nightfighter Nearby marker instead of a Hazard marker, flip the Alert Level marker to its red "increase pending" side (and during the Clean-Up Phase, increase the Alert Level by 1). Drawing the Nightfighter Nearby marker does not trigger a Nightfighter Check, but it does count as a hazard — immediately replace it with another randomly drawn marker from the cup (it must be a Hazard marker, not another Nightfighter Nearby marker), and place the hazard normally [7.5.4]. The Alert Level may increase only once a turn [6.6.1], so drawing the Nightfighter Nearby marker more than once a turn has no additional effect.
14.3.2 Extra Hazards
In Hostile Flight zones, each high altitude independent aircraft and wave triggers an extra Hazard marker during the Place Hazards Phase. The extra marker must be assigned to that independent aircraft or wave (it is allowed to violate the even distribution rule [7.5.4] [7.7.1 step 2] and the three max. rule [7.7.1 step 3]).
14.3.3 Evade Hazards Prohibited
High altitude independent aircraft and waves may not evade [7.6].
14.3.4 Resolving Hazards at High Altitude
Some hazards in hostile Flight Zones are treated differently when revealed on independent aircraft and waves at high altitude. "No effect" means that the Lancaster is not affected by the hazard (you resolve the hazard by putting the marker back in the cup).
- Balloons: No effect.
- Crash: No effect.
- Delayed Sortie: The effect of this hazard remains unchanged, but a Lancaster may not change altitude while this hazard is attached.
- Nightfighter: Perform Step 1 but skip Step 2 of the Nightfighter Check; the Nightfighter automatically attacks. The Lancaster is destroyed and the Wave scatters [4.4.3].
14.4 Target Acquisition Prohibited
An independent aircraft or wave at High Altitude may take no action during the Target Acquisition Phase of the Flight Turn.
14.5 Target Map at High Altitude
Lancasters may not fly at High Altitude on the Target Map. All Lancasters on the Target Map are automatically considered to be at low altitude. In other words, this optional rule set [14.0] has no effect on the Target Map.