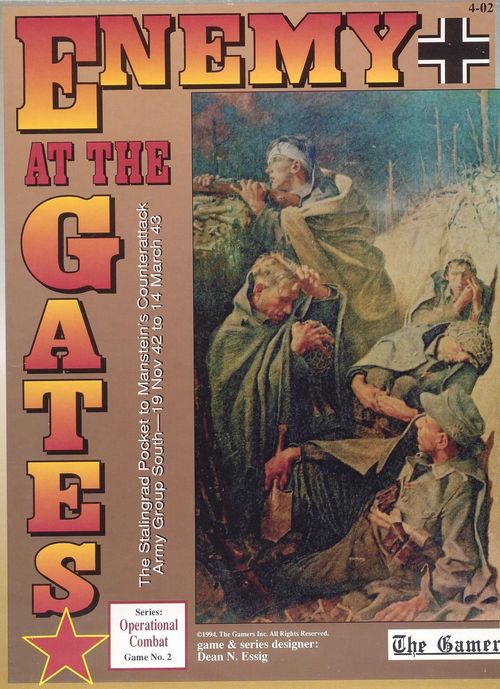
Enemy at the Gates
Enemy at the Gates Rulebook
Table of Contents
Table of Contents
- Abbreviations
- Introduction
- 1.0 General Special Rules
- 1.1 Terrain Notes
- 1.2 Weather Determination
- 1.3 Weather Effects
- 1.4 First Turn & Set Up Special Rules
- 1.5 Ending the Game
- 1.6 Reinforcement and Supply Sources
- 1.7 Airlift Supply
- 1.8 Mortar Unit Combat Supply
- 1.9 Counter Colors & Ownership
- 1.10 Reserve Marker Allocation
- 1.11 Unit Exchange
- 1.12 Breakdown Regiments
- 1.13 Engineer Capabilities
- 1.14 Rail Hex Control
- 1.15 Off-Map Rail Movement
- 2.0 Axis Special Rules
- 3.0 Soviet Special Rules
- 4.0 Minor Variants
- 5.0 Victory
- Designer's Notes
- Soviet Notes
- German Notes
- Scenario 1: The Winter Campaign in Southern Russia
- Scenario 2: The Uranus Offensive
- Scenario 3: The Chir River Battles
- Scenario 4: The Stalingrad Relief Operation
- Scenario 5: Two-Map Little Saturn
- Scenario 6: Little Saturn Campaign Start
- Scenario 7: Operation Star
- Scenario 8: Operation Gallup
- Scenario 9: The Campaign—28 Jan 43 and beyond
- Scenario 10: von Manstein's Backhand Blow
- Axis Reinforcements
- Soviet Reinforcements
Abbreviations
AG—Assault Gun; Ar—Army; Arty—Artillery; Aslt—Assault; Bde—Brigade; Bn—Battalion; Brs—Bersaglieri; Btry—Battery; Cav—Cavalry; Croat—Croatian; Div—Division; Eng—Engineer; Fld—Field; Ger—Germania; Gd—Guard; Grp—Group; Hun—Hungarian; Inf—Infantry; It—Italian; Jg—Jäger; KG—Kampfgruppe; Lt—Light; LW—Luftwaffe; MC—Motorcycle; M.Cerv—Monte Cervino; MG—Machine Gun; Mtn—Mountain; Mtr—Motorized; Nrdld—Nordland; PJ or PzJg—Panzer Jäger; Pol—Police; Pz—Panzer; PzVb—Panzer verbände; Rec—Reconnaissance; Rgt—Regiment; Rum—Rumanian; Sec—Security; SS-AH or LAH—Liebstandarte Adolf Hitler; SS-R or DR—Das Reich; SS-T or TK—Totenkopf; SS-W—Wiking; Stgrd—Stalingrad; SW—South West; Szfrzsca—Sforzesca; Ter—Territorial; Tk—Tank; Trdntina—Tridentina; Trng—Training; UR—Fortified Region; Vinca—Vinnitsa; Voro—Voronezh; Wstld—Westland.
Introduction
Enemy at the Gates (EatG) is an Operational Combat Series game covering the campaign in Southern Russia from November, 1942 through March, 1943. It covers the operational and strategic decisions in these critical swing campaigns. Within its scope are the encirclement of the German 6th Army, attempts to airlift supply and relieve the pocket, Operation Little Saturn, the destruction of the 2nd Hungarian Army, Operation Gallup, Operation Star, and von Manstein's counterattack. It is a large game covering what amounts to the pivotal battles in the European portion of World War II.
1.0 General Special Rules
1.1 Terrain Notes
1.1a Volga-Class River. In EatG the first "Volga-Class" River makes its appearance, namely the Volga itself. This level of river cannot be bridged by HQ bridging capabilities (only pontoon units can). Units can never cross a thawed Volga-Class River hexside in any way without the help of a pontoon bridge. Supply draw, however, can be conducted across such a hexside for the "issue to hex adjacent" rule.
Such rivers are capable of three conditions based on temperature—Thawed, Ice Pak, Frozen. Thawed rivers are subject to all the above.
Ice Pak Volga-Class Rivers have broken ice floating in them, but have not fully frozen. These rivers cannot be bridged—even by pontoon units. Supply throw cannot occur across Ice Pak, to include the usual "terrain free" last hex.
Handle frozen Volga-Class Rivers exactly as normal thawed Major Rivers—including the ability to be bridged by HQs.
1.1b Other River Classes when Frozen. Both Major and Minor Rivers have separate "Frozen" versions. Use these when these two classes are frozen.
1.1b Swamps. Swamp hexes can freeze over. At such times they are handled according to the separate "Frozen Swamp" terrain feature. Upon thaw, they revert back to normal swamps. Swamp hexes cannot be bridged in any manner.
1.1c Low Hills. Low Hills represent groupings of small hills and valleys which are only mildly different from the vast flat steppes surrounding them.
1.1d Minor Cities. Minor Cities are a sub-class of urban area ignored in the original GB. These hexes are too congested to be treated as villages, and are too open to warrant the extreme mantle of Major City. Here they get their rightful own classification.
1.1e The Small Lakes. Along the East edge of Map D there are four small lake features. These freeze when Minor Rivers do (and become open terrain). These lakes (when not frozen) form impassable hexside barriers to all units and cannot be bridged.
1.1f Dry Lakes. These features exist only in the semi-arid portion of Map D. They are dried-up lake beds which are unaffected by freezes.
1.1g The 19 Nov 42 Frontline. This line exists on the maps to facilitate set up. In the Turn 1 set up, the Axis player sets up on OR south and west of the line. The Soviets set up north, or east of it, but cannot set up on it.
1.1h Set Up Boundaries. In addition to the frontline, the lateral boundaries of the initial Soviet Armies are given to assist set up. The unit designation printed on the map is inside the named unit's zone. Whenever two forces share a common boundary line, both can set up units on it.
1.1i The Terrain Key is printed along with numerous specific charts and tables on the Player's Aid Sheets.
1.2 Weather Determination
Weather in EatG traverses from early winter through deep winter and into the spring thaw. Each turn, the players must roll for one or more of the weather parameters. The players check the weather's effect on flight for the turn and then roll for each of the remaining parameters based on which need to be determined that turn. A dash means the parameter does not need to be checked.
1.2a On the Weather Determination Table roll two dice (11..66, red die is the first digit, white die is the second: red 5, white 3 is 53) for Flight, and one die for each remaining parameter each turn during the Weather Determination Segment.
1.2b Every turn requires a flight weather roll. Once a parameter is frozen, do not bother rolling again until change is possible. A notation on the Weather Table such as "Ice Pak", "Thawed", or "Frozen" means that the event occurs automatically, if it hasn't done so already.
1.3 Weather Effects
1.3a Flight. On a dice roll (two dice, 11..66) within that turn's Weather Table range, flight is allowed. If the roll is less than the table range, flight is not allowed.
1.3b River and Swamp Freezes. As the winter progresses, more and more major water features become iced over allowing easier crossing. When these features freeze, use the appropriate Frozen version of that feature on the Terrain Effects charts instead.
1.3c Thaws. The only effect of a thaw is to "un-freeze" a given frozen feature, which only reverts it back to its normal (unfrozen) terrain effects.
1.3d Mud. At the end of the campaign, players will begin rolling for Mud. This is the spring version of Rasputitsa and will put a halt to all operations. In game terms, the mud's advent ends play.
1.4 First Turn & Set Up Special Rules
1.4a Set Up. The German player always sets up first. No Axis unit on the 19 Nov 42 frontline can be placed into Reserve Mode at start.
1.4b First Player. The Soviet players has the initiative on turns 1, 2 and 3 and can go first or second as he chooses.
1.4c First Turn Sequencing. On Turn 1 (Nov 19th), a special turn sequence is in effect. Should the Soviet player choose to go first on that turn, and does not make any Overrun Attacks (to include entering the hex of a Wagon Extender) during his Movement Phase, THEN there is NO German Reaction Phase in that Player Turn. The Axis player can do nothing at all in that phase.
Should the Soviet Player conduct even one Overrun attack (or jump one Wagon Extender...) then the Axis gets a regular Reaction Phase. If the Soviet player chooses to move second (for some reason), the German player gets a full, regular Player Turn of his own and rule 1.4c has no effect at all.
Soviet air activities, of any kind, do not generate a German Reaction Phase during Turn 1.
This rule has no effect on any turn other than Turn 1.
1.5 Ending the Game
The Campaign game of EatG (or any scenario which lasts until or beyond turn 28) ends on the first turn of Mud weather or after turn 34, whichever occurs first.
1.6 Reinforcement and Supply Sources
All map edge rail entry hexes (those where the rail line exits the map) provided to the player for reinforcement entry can be used as Supply Sources with the following specific rules.
1.6a General Entry: Soviet. Provided it is connected to the north or east map edges by unblocked rail hexes, Soviet reinforcements can enter directly at Kamyshin (C62.18). They can also enter via any unblocked rail hex leading off the north map edge of Map C or any rail hex leading off the east edges of Maps C & D. Furthermore, hex D62.28 can also be used for this purpose and as a supply source. See also 3.8.
1.6b General Entry: Axis. Provided they are connected to the west map edge via unblocked rail hexes, German reinforcements can enter directly in any hex of Kharkov (vic A29.22), Poltava (vic A11.19) or Dnepropetrovsk (vic A13.03). They can also enter along any unblocked rail hex leading off the west edges of Maps A & B or unblocked road hexes leading off the west edge of Map A (only). While it cannot be used for reinforcement entry, Elista (D48.01) can be used as a supply source as long as the Axis player controls D17.01.
1.6c Special Entry. Some units are exempt from the above restrictions of entry point and hex type. These units, however, are required to enter in particular areas. These are...
...Axis 1st Panzer Army Units. Anywhere along the south edge of Maps B & D, east of the Sea of Azov. These units include all forces listed on the German Order of Arrival as 1st Panzer Army and any of the Variable Panzer Divisions. Note that these forces do not arrive (at all) if the Soviet player has a combat unit in either hex of Rostov. The German player cannot use the 1st Panzer Army zone as a Supply Source.
...The Soviet 28th Army. When released, this army must enter south of D62.20 along the east edge of Map D.
...The Soviet Southern Armies. On turn 20 and later, Soviet reinforcements can enter the map in road and railroad hexes leading off the southern edge of Map D. See 3.8.
1.7 Airlift Supply
Neither player can use his air units to bring on additional supplies from off-map.
1.8 Mortar Unit Combat Supply
Mortar units function and expend supply for barrage purposes exactly as do regular artillery.
1.9 Counter Colors & Ownership
The German player controls all German Army (Field Grey), Waffen SS (Black), Hungarian (Dark Blue), Rumanian (Olive Green), Italian (Pale Green), Kalmyk and Cossack (Ochre), Croatian (White) and Luftwaffe (Light Blue) units. The Soviet player controls all Red Army (Tan), Guards (Red-Tan), Czech (you'll know it when you see it), and Red Air force (Orange-Tan) units. Wagon, Truck, Reserve and Railhead markers are colored for their side and can be used by any of a player's units—regardless of exact nationality.
1.10 Reserve Marker Allocation
Both sides are restricted to the following numbers of Reserve Mode Markers (color coded for their side) for the game's period. These markers remain in that player's possession for the entire game—they cannot be destroyed or captured.
1.10a Axis Reserve Marker Allocation. The Axis player has 30 Reserve Markers to use.
1.10b Soviet Reserve Marker Allocation. The Soviet player has 25 Reserve Markers to use. The Variant in rule 4.0d allows for a more flexible Soviet Army.
1.11 Unit Exchange
The Reinforcement Schedule will call for the exchange of one unit with another. Do this to the exact location of the unit being removed—even if surrounded or in the dead pile. The "conversion" of units to Guards does not fall under this rule—see 3.3.
1.12 Breakdown Regiments
Each nationality (except very minor Axis allies) has its own generic breakdown regiments. The countermix does not limit the number of such that a player can generate.
1.13 Engineer Capabilities
Only HQ and Assault Engineer units have full engineer capabilities. Rail Repair units have only their rail repair capabilities and Pontoon units have only bridging capabilities. See also 3.10.
1.14 Rail Hex Control
There is no concept of railroad control in this game. As long as a rail hex in question meets the following requirements, either player can use it. The extent of German gauged rail is important and be sure to mark it with railhead markers.
Conditions Affecting Rail Hex Use. To use a rail hex...
- The rail hex cannot be occupied by or adjacent to an enemy unit.
- The German player can only use rail hexes which have been converted to German Gauge. These hexes include all rail hexes west of and including the railhead markers.
- The Soviet player can only use rail hexes which are still Soviet Gauge. These include those east of the railhead markers.
1.15 Off-Map Rail Movement
Both players can use their rail capacity to move units and supplies from one map-edge rail hex to any other appropriate map-edge rail hex using off-map rail movement. Each player is incapable of disrupting the ability of the enemy to move off-map with the exception of blocking or damaging rail hexes along the map edge to eliminate their use.
1.15a The following conditions apply to both players:
- Nothing can ever end its movement off map—all cargo must begin and end its movement on the map.
- Other than off-map RAIL movement, no other such movement is allowed and units forced off the map for any reason are destroyed. Damaged rail hexes on the map edge cannot be repaired from off-map.
1.15b The Soviet Player has the following additional conditions:
- Only movement off of and on to the EAST map edge or the NORTH map edge (if east of the Don River) is allowed.
- The points of entry and exit must not be converted.
1.15c The German Player has the following additional conditions:
- Only movement off of and on to the WEST map edge is allowed (with the one exception of 3. below).
- The points of entry and exit must be converted railroad hexes.
- The Axis player can exit supplies and units using rail movement via hex D17.01 or B61.01 and have those things automatically appear (unloaded) at Elista (D48.01).
Design Note: Historically, the rail head for the troops around Elista was at Divnoe (somewhat further south). Number 3 of 1.15c allows the use of this rail head with an amount of assumed transportation between that point and our map.
2.0 Axis Special Rules
2.1 Hip Shoots
The German Luftwaffe only can conduct hip shoots. Hungarian, Rumanian, and Italian Air Forces cannot do so.
2.2 Alert Battalions
During any friendly Movement Phase, the Axis player can generate as many Alert Battalions as he wishes. To do so, announce the intention, and roll one die. Place a number of Alert Battalions equal to the roll at any German HQ, Axis Air Base, or Axis controlled city or village hex. These units can be split up into as many of the above locations as desired. The placement hex can be adjacent to enemy units. Placement must be west or south of the 19 Nov 42 frontline. The Axis player can make as many of these die rolls as he wants to in a single phase. Alert Battalions can be generated more than once in this manner—destroyed ones can come back on later rolls. The countermix does not limit the number of Alert Battalions which can be generated.
Each Alert Battalion generation die roll made gives the Soviet Player One Victory Point, regardless of the number of Alert battalions generated.
2.3 Hungarians vs. Rumanians
The Hungarian and Rumanian Armies would rather fight each other than the Russians.
Rumanian and Hungarian units (air or ground) can never do any of the following: stack, attack the same hex, draw supply from the same HQ (even if the HQ is German), OR use the same air base. Rumanian and Hungarian air units can never move to or within 10 hexes of each other.
If any of these conditions are violated (even accidentally), remove the offending units of both nations.
2.4 Variable German Panzer Entries
Four Panzer Divisions (parts of the 1st Panzer Army) may enter the map as variable reinforcements (if Hitler releases them). These are the 3rd, 13th, 23rd, and SS-Wiking Panzer Divisions. Of these, one (the 13th) was never actually released to the map area, but fought in the Kuban instead. It is here to help those who might be dice roll challenged...
Once each turn starting on turn 3 and through turn 19, the Axis player rolls two dice in his Reinforcement Phase. On a roll of 10 or more, bring on one of the divisions following rule 1.6c above. Any divisions remaining after turn 19 never enter and no more than one ever enters in a single turn. The dice roll cannot be made on any turn in which the Soviet player has a unit in either hex of Rostov.
Units from these divisions that begin play in the dead pile cannot be rebuilt until the division enters the map.
These divisions must enter in the following order: 23rd Panzer Division, SS-Wiking Division, 3rd Panzer Division, and 13th Panzer Division.
2.5 Tiger Tanks
As one of the driblets released by Hitler to stem the Russian tide, the first "use" of Tiger tanks occurred during this period. The 503rd Panzer Detachment (in the game, company) was sent to turn back the Russian offensive. These tanks immediately showed all the teething problems imaginable. They fell apart before reaching the front.
In each German Supply Phase when the 503rd Pz Company is on the map (including the first), the Axis player must roll one die. On a roll of 1 or 2, remove the unit from play. This unit can never be rebuilt if it becomes a loss for any reason.
(If desired, players can drop this unit from the game with no ill effect...)
2.6 16th Motorized Division
OKH handed the 16th Motorized Division the impossible task of defending the massive gap between the 4th Panzer Army and the 1st Panzer Army. The goal was to keep the Soviet 28th Army out of the main action. This ties the 16th to one area which it needs to hold as long as possible, for when it moves away, the 28th Army is released to the Soviet Player.
The 16th Motorized Division (including its all sub units and the Kalmyk Battalions) must remain at all times at or within 10 hexes of D48.01 (Elista). If at any time any of the 16th's units move out of this zone (for any reason), the 28th Army is released. When the 16th Motorized exits the Elista Zone, the Soviet player also receives 1 VP.
2.7 Werfer Units
The German player has a handful of Nebelwerfer Rocket Artillery Battalions. Treat these units exactly like the Soviet Katyushas as in rule 3.9 below.
2.8 Rumanian Cavalry Divisions
While they are called "divisions," Rumanian Cavalry Divisions (like Soviet ones) are still little more than brigades. That being the case, they are marked as Brigades above their type symbol on the counter and have the characteristics of any other 1 RE non-divisional unit.
2.9 Stalingrad Artillery Supply
2.9a For each announced Axis artillery firing (where the firing units are at or within 5 hexes of any city hex of Stalingrad), roll one die. Roll for each unit separately. On a 4-6, that unit need not expend supply to fire. On a 1-3, it must expend the supply to fire. (The player cannot change his mind about firing after finding out what is "free" and what isn't.)
2.9b The player need not produce the supply needed to fire the barrage—he can bank on his luck. However, if he makes a fire attempt, finds he must expend supply, and then finds he has no supply to expend, remove from play the artillery unit which attempted to fire and place it in the dead pile.
2.9c The unit need not be able to trace to Stalingrad—terrain and enemy units have no effect on this ability provided the unit is at or within 5 hexes of a Stalingrad hex.
2.9d The existence (or not) of the Stalingrad Fortress has no effect on this rule.
2.10 The Stalingrad Fortress
In any German Supply Phase (before expending any supply), the Axis player can declare that Stalingrad is a Fortress. After declaring Stalingrad to be a Fortress, the following is in effect until the declaration is revoked or Stalingrad is captured by the Russians (should either of these events occur, the units within the Fortress (including those in 2.11) are free from all these restrictions and special rules, except the VP value of Stalingrad).
- The Stalingrad city Victory Points switch from 10 VPs to 20 VPs. The VP cost of Stalingrad remains 20 regardless of later revocation.
- Supply costs for Supply Phase purposes are x1/4. (22 Divisions plus non-divisionals (the historical pocket) would cost 11.5T (rounded to 12T or 3 SPs) per turn.)
- Attacker Combat Supply costs are normal, but the unit attack strengths are x1/2. Defensive Combat Supply costs are x1/2 (rounded down—1T or 0T for defensive combat supply, that is).
- Barrage supply costs are normal, given 2.9.
- Defense and Barrage strengths are normal (but might be affected for other reasons).
- Fuel costs are normal (even when the Fortress is in effect).
- Units within the zone when it is declared cannot move out (they can attack out of it, but cannot enter a hex outside the zone). This restriction does not affect the mobile divisions listed in 2.11. (When they apply their VP cost to leave, they can do so.)
- Units outside the zone can move into it, but must follow all the fortress rules when inside and won't be able to leave unless the fortress is revoked. The only units this rule does not apply to are the mobile divisions which have paid their VP cost for release and later come back in—after having their release cost paid, they can come and go into the zone without cost.
- The fortress can be revoked in any Axis phase (and at any time in them), but revocation costs 3 VPs.
- The turn the Fortress is declared, 5 Axis occupied hexes inside the Fortress Zone get a free Level 1 Hedgehog. These hexes cannot already have a hedgehog. This effect only occurs the first time Stalingrad becomes a fortress.
- Air units are unaffected by the above restrictions.
The Stalingrad Fortress Zone boundary is printed on the map and includes all hexes inside and including the printed boundary.
Gimmick Play Note: For those players already contemplating turning off the fortress right before the Russians capture it (so as to deny them the extra VPs), once declared a fortress, the VPs for the city remains 20 even if the fortress is later turned off.
2.11 The Stalingrad Zone Mobile Divisions
Regardless of the fortress status of Stalingrad, the following applies to these units. They can function freely inside the Stalingrad Fortress Zone Boundary. But, it costs victory points for them to leave the zone. The mobile German divisions in the Stalingrad Fortress Zone cost VPs if any part of them leave that zone. These divisions are the 16th & 24th Panzer Divisions, and 3rd, 29th, & 60th Motorized Infantry Divisions. Each mobile Division costs 2 VPs. Each division is either released or not and release occurs whenever any one unit of a division leaves the zone. Once released, a mobile division can come and go from the Stalingrad Fortress Zone later without ill effect. Should Stalingrad fall to the Russians (or be abandoned to them), any of the above divisions (or what's left of them) are automatically released with no VP penalty. Destroyed units are released "for free" when they are later rebuilt.
2.12 The 14th Panzer Division
The 14th Pz Division begins the play outside the Stalingrad Fortress Zone. The instant the Fortress is declared, this division must either be entirely inside the zone, or move so as to be inside it.
Each turn any part of this division is outside the zone after the turn the Fortress is declared gives the Soviet player 1 VP—even if it finds itself unable to make it into the zone. The 14th Pz Division falls under rule 2.11 once it gets inside the zone. Alternatively, the player can release it earlier (and perhaps never go into the zone) by paying 2 VPs, as he would for one of the divisions covered in 2.11.
2.13 Meals à la Hoof
The German player can convert wagon and horse-drawn artillery units into SPs within the boundaries of the Stalingrad Fortress (while the fortress is in effect). To do so, during a German Supply Phase, remove the wagon points or artillery unit from the map and exchange it for 1 SP per wagon point or 2T per artillery unit. Only artillery units with a Move Mode Movement allowance of less than 10 can be exchanged for SPs. The size of the artillery unit does not matter in this calculation. The supply generated in this manner can only be used for Supply Phase on-map consumption—it can never be used for combat supply or any type of engineer activity. It cannot remain on the map for later phases.
3.0 Soviet Special Rules
3.1 Hip Shoots
The Red air force cannot use hip shoots.
3.2 Artillery Coordination
To engage in a single Barrage attack, the firing Soviet Artillery units must be stacked together.
3.3 Guards Conversions
The Soviet player is periodically given Guards Conversions. These are Guard units which formed from the game's units during the period shown. Rather than tie the player into an exact exchange with the historical units (and the resultant hunt for the required unit among the hundreds on the map!), the player can exchange the Guards Division for the infantry division of his choice given the below requirements.
A Guards Conversion can be made using any full strength Soviet Infantry Division with an action rating of no more than one less than the Guards unit obtained. In other words, if the action rating of the new Guards unit is four, it must be exchanged for a unit which has an action rating of at least three. The unit so picked must not be adjacent to any Axis combat unit. If there exists no unit filling the above requirements (i.e. you destroyed the Soviet infantry arm...), then the conversion is not used.
Place the unit removed from the map to make the conversion into the dead pile (it can be rebuilt later).
3.4 The Soviet Corps
Soviet "Corps" are treated exactly like German multi-unit divisions—a number of counters, Divisional Marker, stay-together supply requirements, etc. The Soviet player has a collection of Tank, Mech, Rifle, and Cavalry Corps.
3.5 The Stalin Order
After the disastrous results of the Soviet offensive in May, 1942, STAVKA issued an order to the effect that all Tank and Mechanized Corps must stay together in a compact formation at all times. This means all units of each Soviet Tank and Mech Corps must be adjacent to every other unit in the corps at the end of every friendly Movement Phase (this rule does not apply in any other phase than the Soviet Regular Movement Phase). If this restriction cannot be met at the end of any Soviet Movement Phase, all the units of the offending corps are DGd (including any units with which they happen to be stacked).
This rule has no effect on Soviet Cavalry or Rifle Corps, or the distance between the different corps.
Important: A point to consider is that if a Tank Corps has one of its brigades rebuilt it will automatically become DGd unless or until the player gets the parts together again. It might be best to take the Tank Corps out of action, rebuild it, and then send it back (the way the Soviets did it...) to avoid this effect.
3.6 Soviet Unit Sizes
Some Soviet units have been given unit sizes (on the counter) which do not equate to their historical designation (such as Soviet Tank "Regiments" which are marked on their counters as battalions). The size on the counter is the actual size of the unit (in Western terminology) so that the player need not remember that some "Regiments" are actually 1/2 RE, etc. While they are called "divisions," Soviet Cavalry Divisions are still little more than brigades. These units are marked as Brigades. They have but one RE and one step.
3.7 28th Army Off Map Units Entry
If the German player ever moves any 16th Motorized Division unit (to include the Kalmyks) further than 10 hexes from Elista, the 28th Army is released for use on the map. Prior to this time it occupies the 28th Army Holding Box off map (see 3.8).
3.8 The Entry of the Southern Soviet Armies
On turn 20 and after, the Soviet Armies which pursued Army Group A out of the Caucuses begin to arrive on the southern edge of Map D. From that turn on, Soviet Reinforcements can enter via any unblocked road or railroad hex along the southern edge of Map D. Furthermore, any railroad hex on the above map edges can be used as a Soviet Supply Source.
3.9 Katyushas
The Soviet player has a number of Katyusha Rocket Artillery units. Unlike in Guderian's Blitzkrieg, these units do not fire and return to play later—they fire like other artillery, with the rule regarding rocket artillery barrage supply costs.
3.10 Pontoon Units
The Soviet player has a number of Pontoon bridging units. To bridge with a pontoon unit, the pontoon unit must be in Combat Mode (DG has no effect on this ability). Pontoon bridges, unlike HQs, totally negate the MP cost of the feature bridged, and can do so even to units without the ability (provided the Volga is not Ice Pak). Pontoons cannot "bridge" swamp hexes or lake river-type hexsides. Pontoon units (and HQs for that matter) never negate a river hexside's terrain effects.
During any Movement Phase—even while in Combat Mode—a pontoon unit can "flip" across the river in bridging mode. Pontoon Bridges negate all river hexsides of the hex they occupy—even if the hexsides belong to different rivers. Pontoon units cannot be captured or used by the enemy.
3.11 The Stalingrad Zone Garrison—The Mobile Force
The moment the Axis player declares the Stalingrad Fortress this rule applies—subsequent revocation does not cancel it (only Stalingrad's capture or fall does). The units listed below enter their Stalingrad Fortress Garrison status. These units must enter the Fortress Zone (printed on the map) as rapidly as possible. They can be anywhere inside the printed boundary, provided they are on or within the boundary.
At the end of every Soviet turn after the German player declares the Stalingrad Fortress if any unit (or units) of unreleased groups are outside the Garrison Zone the Soviet Player loses 1 VP (the cost is 1 VP per turn per group which has one or more units outside the zone)—unless he releases the troops according to the below. Once inside the zone, these units behave normally—except that they cannot leave until either OR the Soviet player captures the city of Stalingrad (all of its hexes that is).
The Fortress Garrison is divided into the groups below—which represent the mobile forces sent to watch the pocket. These groups are:
- 4 Tank Corps
- 13 Tank Corps
- 16 Tank Corps
- 26 Tank Corps
- 8 Cavalry Corps
- 3 Gds Cavalry Corps
During any Soviet phase, the Soviet player can release any of these groups from the Fortress Garrison. Once released, these groups can be used freely (they are not constrained by the zone boundary and cannre-enter across it later without penalty). To release a group costs 2 VPs. Once released, a group cannot be "unreleased" so as to regain the victory points. When the city of Stalingrad is captured, all remaining groups are automatically released with no VP cost.
Rebuilt units are exempt from their original Garrison Group's status and are released with no VP cost. Note that the Garrison Group status is not revoked by a variant (will drag even rebuilt units back into the zone if the rest of the corps has not been released). Units cannot be "exchanged out of the garrison" using series rule 12.9.
Design Note: Historically, STAVKA reacted in near horror at the number of Germans they had trapped in Stalingrad (after it finally dawned on them the size of the forces within the pocket). Because of this (and an intense desire to "not blow it"), they allocated an enormous force (in game terms) to watch and later reduce the pocket. They also didn't have the benefit of hindsight to know that Hitler was refusing to let the 6th Army break out—in fact they expected it. These two rules apply to require him to be as wary of the pocket as they really were—just as the German is constrained in his ability to leave Stalingrad.
3.12 The Stalingrad Zone Garrison—The Perimeter Force
This rule applies only if A) Stalingrad has declared a fortress in the previous turn or earlier, and B) is turn four AND, C) a clearly defined Axis-held perimeter can be traced which contains at least one hex of Stalingrad. A "clear Axis-held perimeter" is one which makes a complete loop of contiguous hexes which connects back to itself, and each hex is occupied by Axis units (of any type, to include HQs, Axis-held airfields, Axis Supply Dumps, etc.).
When these conditions are reached and until all hexes of Stalingrad are in Soviet hands, this rule applies.
The Soviet player must keep at least 3 REs in every hex adjacent to the defined Axis pocket (or pockets, if more than one Axis perimeter can be defined following ALL THREE points above). Hexes along the perimeter which are across the Volga River do not have to be so garrisoned. A single hex with 3 REs in it can serve as garrison for more than one separate pocket. Provided each pocket has at least one hex of Stalingrad in it, there can be any number of separate pockets. The ring around the Stalingrad pocket can be further out from the pocket than the hexes adjacent to it, so long as the ring surrounding the pocket must be a contiguous set of hexes from the Volga north of the pocket around to rejoin the Volga south of the pocket.
The Soviet player loses 1 VP at the end of each Soviet Movement Phase in which he does not have the required force in each perimeter hex.
All units devoted to this duty are automatically released when all Stalingrad hexes are captured by the Russians. Furthermore, the Soviet player can exchange units watching the pocket (so long as the requisite REs are there at the end of the Soviet Movement Phase) so as to replace units watching with others.
4.0 Minor Variants
Use these to tailor the game to taste and differing player abilities.
4.0a Freer Axis Set Up. Allow the Axis player to set up any of his units at within 5 hexes of the more rigid at start starting positions (provided all units on or west of the frontline trace). There is no VP price for this option, but players must agree to its use.
4.0b Hitler Directive. This variant does not allow for any breakout from Stalingrad. None of the divisions listed in 2.11 & 2.12 can ever leave the Stalingrad Fortress zone. This variant costs the Soviet Player 10 VPs.
4.0c The Stalin Order. Ignore rule 3.5. This subtracts 5 VPs from the Soviet player's total.
4.0d A More Flexible Soviet Army. Allow the Soviet player to play with 40 Reserve Markers. This subtracts 10 VPs from the Soviet player's total.
4.0e Tell STAVKA to 'Stick it'. Allow the Soviet player to ignore the provisions of 3.11 and 3.12. This costs the Soviet Player 10 VPs.
4.0f Earlier Delivery of Yak-9s. Allow the Soviet player to bring in the four Yak-9 air units toward the end of the game. These aircraft were coming on-line at the end of the game's period and a more concentrated use of them could have had an influence on the battle. This option costs the Soviet player 5 VPs.
4.0g Both players tell their bosses to 'stick it'. Ignore rules sections 2.6, 2.11, 2.12, 3.5, 3.7 (the 28th Army enters on turn 1), 3.11, AND 3.12. This option does not cost VPs and merely removes many of the restrictions facing both players.
5.0 Victory
Victory is determined in one of two ways: at any point the Soviet Player can achieve a sudden death victory by accumulating victory points (VPs) equal to or greater than the Sudden Death Threshold for the turn OR victory is determined at the end of the game based on the number of VPs the Soviet player has at that time.
5.1 Sudden Death Victory
Sudden Death can be obtained by the Soviet player at the end of any turn in which he currently possesses or exceeds that turn's Sudden Death Victory Threshold. Points are accumulated for this purpose according to the sum of the victory points the Soviet player has at the end of the turn based on his VP total. (If the Soviet player releases a Garrison Zone group (-2 VPs) but has no victory points.)
The Soviet player receives (or loses) VPs for the following:
- Cities
- Axis Alert Unit Generation
- Release of the Stalingrad mobile divisions and/or the 14th Panzer and 16th Motorized Divisions
- Revocation of the Stalingrad Fortress declaration
- Release of Mobile Groups from the Stalingrad Garrison Zone force
- Lack of correct Soviet perimeter force
5.1a Cities. The Soviet player receives the following VPs for these cities:
- Stalingrad (D51.34, D52.34, D53.35, C53.01, C54.02): Before being made a Fortress—10 VPs, after being made a Fortress 20 VPs.
- Morozovsk (D24.29): 3 VPs
- Tatsinskaia (D18.27): 3 VPs
- Millerovo (C9.04): 5 VPs
- Voroshilovgrad (B59.34): 5 VPs
- Rostov (B62.15, B61.15): 10 VPs
- Kharkov (A30.22, A29.22, A29.23, A28.22): 10 VPs
- Stalino (B42.26, B42.27, B43.27): 5 VPs
- Starobelsk (A56.10): 5 VPs
- Belgorod (A34.30): 5 VPs
- Poltava (A11.19, A10.18): 10 VPs
- Dnepropetrovsk (A13.02, A13.03): 10 VPs
- Zaporozhe (B14.27, B13.28): 10 VPs
5.1b Alert Battalions. Each Alert Battalion die roll costs the Axis Player 1 VP.
5.1c Stalingrad Mobile Division Releases. The mobile German divisions in the Stalingrad Zone cost VPs if all or any part of them leave that zone. These are the 16th & 24th Panzer Divisions, and 3rd, 29th, & 60th Motorized Infantry Divisions. Each mobile division costs 2 VPs. Each division is either released or not and release occurs whenever any one unit of a division leaves the zone. The status of Stalingrad as a Fortress Division has no effect on these costs.
5.1d The 14th Panzer Division. If any part of this division is outside the Stalingrad Fortress Zone after it is declared 1 VP per turn is given to the Soviet player. Alternatively, the player can either move it into the zone (where it falls into the same group as 5.1c) or release it for a cost of 2 VPs.
5.1e Revocation of the Stalingrad Fortress. Each time the German player revokes the status of the Stalingrad zone as a fortress, the Soviet player gets 3 VPs.
5.1f Release of Soviet Stalingrad Garrison Groups. Each group released from the Stalingrad Garrison zone costs the Soviet player 2 VPs.
5.1g The Stalingrad Perimeter. At the end of every Soviet Movement Phase in which there isn't a correct perimeter surrounding the Stalingrad Pocket (assuming 3.12 is in force), then the Soviet player forfeits 1 VP.
Total the number of VPs controlled by the Soviet player at the end of each turn. If the result is greater than or equal to the Threshold number for that turn, a Sudden Death Massive Soviet Victory results, if not, play continues.
5.2 End of Game Victory
Having failed to have ever reach a Sudden Death victory, when the game ends (due to Mud or the last turn, whichever happens first) compare the final Soviet Victory Point total with the following chart. The result will be the victory determined for the game played.
| Type | Soviet Held VPs |
|---|---|
| Massive German Victory | 19 or less |
| Major German Victory | 20 to 29 |
| Minor German Victory | 30 to 39 |
| Draw | 40 to 49 |
| Minor Soviet Victory | 50 to 59 |
| Major Soviet Victory | 61 or more |
Designer's Notes
The design of this game went through an almost insane number of iterations. Tests of various rules ran into odd results, symptoms were misdiagnosed, which led to further wild goose chases. Places where hiding were identified in every possible way, except the correct one—the signs of where the OCS system was failing in this application.
The good news is—after an extensive amount of hemming and hawing—I finally backed away and decided to correct one and for all the features of the OCS which were misbehaving. The results were the OCS series rules 2.0 and this game which functions like a well-oiled machine. The team which put it together was happier than I have ever been to be proud of the whole thing, and I was lucky enough to have patient friends who helped me through it without giving up the whole thing.
The map was assembled using a multitude of (no exaggeration—everything about this project ended up BIG) sources. The main one again was the Defense Mapping Agency 1:500,000 series. Place names were from that source and I was lucky enough to enlist the help of Louis Rotundo who took the time to examine each name to ensure that the spellings were in accordance with the Library of Congress transliteration scheme, but its the best I can do with it. Scholars of the Russian language may disagree with that scheme.
The initial supply levels for both sides were engineered to ensure the precise logistic condition of each side was represented in game form. The bulk of the German effort in the region was sent into Stalingrad to the point where some Rumanian soldiers were literally starving.
Some have attempted to claim that there is no doctrinal differences between the armies in this system and won as far as to claim that if you switched sides you could fight with either force in the western (i.e. German) style. Besides being pure bunk, it does lead to something the Soviet player should always keep in mind—your army is incapable of German-style operations (fast moving overrun attacks thrown together off-the-cuff) and should not be used that way. If you don't believe there is any difference between the forces or that "a little difference in action taking doesn't mean anything," go right ahead and fight the German-style. You'll be better off in the tone for it.
Victory in a number of ways and I am quite satisfied with the final version. Sudden Death victory should always dangle before the Soviet player like a carrot driving him on to further and further gains. It should always be "just out of reach" as well. The German player can lose the game easily as he's careless about Stalingrad, runs too many mobile divisions out of the pocket, or just plain makes too many alert battalion rolls. I've given him enough rope to hang himself with—it is up to him not to do so.
Losses from the units in the game were represented by eliminating TO&E units or steps rather than to make the correct strength appear. For instance, a German Panzer Division with only 30 tanks would have only one of its tank battalions in play. The other tank battalions would be in the dead pile.
The assortment of Stalingrad special rules (the "fortress", restrictions on the mobile forces there) were made to both show the effects of the player's superiors on the battle as well as allow the German army to perform in the exceptional manner it did. Obviously, restrictions of forces is there to show the player that he does not have the option of dropping Stalingrad like a rotten egg and running for the hills—Hitler (his boss) will not let him. On the other side, STAVKA would not let the Soviet commanders leave a token guard force around the pocketed Germans as a player normally would. Lastly, showed more of what can be reasonably be asked of troops. They survived longer with less resources than any soldier has a right to. This was a combination of their commanders, their tradition of victory to date, a "backs against the wall" mentality, and their political indoctrination. While these things began to run in short supply and pretty hollow at the end, along the way they contributed to an enormous amount of self-sacrifice and perseverance. In other words, they lasted longer than the game would normally allow—hence the special rules.
Amazingly, after over a year of testing, a lot of yelling, and not a little gray hair, the game walked away with relatively few special rules. While the chassis remained clean in the end, it was a solid vehicle which could identify places where the OCS system itself was being worn through by numbers of counters and player techniques. The end result is a excellent simulation of the campaign, and a darn good game as well. Whew!
Soviet Notes
Working up the Red Army OB for this game was actually easier than that done for Guderian's Blitzkrieg. Excellent sources were available and I was lucky enough to be helped by Louis Rotundo and Charles Sharp. The expertise of these gentlemen made assembling a very accurate Soviet OB a relatively painless task and fortunately the cases of contradiction were not very numerous. Here are a few points of interest:
- One tank corps had only one tank brigade in it, so it was not made a corps in the game but the one brigade was made independent—the 24th Tank Bde.
- The 13th Tank Corps is such in name only. Actually it was a Mech Corps which kept the older name.
- The following Guards conversions were ignored (same units & skills, different names) in the interest of counter limitations. For those interested in these conversions, they are the following:
- 26 Tank Corps became 1 Gds Tank Corps (8 Dec 42)
- 4 Mech Corps became 3 Gds Mech Corps (18 Dec 42)
- 24 Tank Corps became 2 Gds Tank Corps (26 Dec 42)
- 7 Tank Corps became 3 Gds Tank Corps (29 Dec 42)
- 17 Tank Corps became 4 Gds Tank Corps (2 Jan 43)
- 13 Tank Corps became 4 Gds Mech Corps (18 Jan 43)
- 6 Mech Corps became 5 Gds Mech Corps (19 Jan 43)
- 4 Tank Corps became 5 Gds Tank Corps (7 Feb 43)
- 8 Cavalry Corps became 7 Gds Cavalry Corps (15 Feb 43)
In working on the Red Army at this point in the campaign, I found a much better army than that in Guderian's Blitzkrieg, yet an army which was still full of trouble. They are beginning to get their act together and will be an awesome force by the end of 1943, but at this point they still have serious problems. To highlight some of the things that continued to afflict the Red Army, I made the bulk of the Soviet tank force drop in action ratings when placed in Move Mode. This accurately reflects the inability to "think on one's feet" which showed many times when a tank unit would breakthrough and then radio back to ask the effect of "What do we do now???"
Another feature of the Red Army was that they had massive amounts of artillery but lacked the sophisticated fire controls necessary to mass all the effect together and will at the point they still have serious problems. Originally, the game had a multitude of regimental (and smaller) Soviet artillery units. These were consolidated into the current "brigades" to reflect this lack of coordination. The only remaining smaller units are those assigned to a couple of Mech Corps and the couple of super-heavy regiments available before.
Lock down the Stalingrad pocket tightly and move on to bigger gains. Stalingrad will come your way eventually. I'm sure some will try to reduce Stalingrad right away in the vain hopes of accomplishing a sudden death victory—go ahead and try if you want, but don't say I didn't warn you.
Your Logistics position is only marginally better than your Axis opponent's—and even that small edge is mitigated by the fact that you require more "stuff" to do a job than he does. You have a major choice in style to make—you can either launch major operations separated by periods of inactivity while you accumulate some supply buffer OR you can launch numerous small attacks with little or no objective or follow-up. Given the tactical advantages of the Axis (better overall action ratings), I think the latter course is a blind alley in which the strength of the Soviet army is diffused throughout the front instead of being kept at the schwerpunkt where it belongs. Lock down the Stalingrad pocket tightly, and move to bigger gains before the value of Stalingrad alone is enough to lose longer wins the game, march everyone you can into the city hexes and get the ones immediately around them, go ahead and burn some supply to hedgehog heavily, move the SPs into the city itself, and don't forget to cause havoc with the Soviet player in other theaters. Chances are he will all but destroy himself on the city and even if he doesn't, he will expend all his resources on that one object and still fail to obtain it in time. Don't be fooled into thinking the guy playing the Russians has come up with some sort of game winning technique—he hasn't.
If the Red player doesn't fall for the siren's song of a quick win by killing the pocket as quickly as possible, you'll want to make as large a pocket as you can to tie down large numbers of Soviet units. Admittedly, if he doesn't make pocket reduction his main effort, these will be third-rate units—but a unit is a unit in this case and if he leaves himself too open it might be time for the pocket to launch a minor sortie to remind him how dangerous the pocketed troops are.
Keep a cool head, watch your logistics, and get your licks in when you can. Remember to save a little supply each turn you can so you can be ready to get a big push together toward the end of the game. You'll need to let many small opportunities pass unused to allow for a build-up of something worth the price.
German Notes
The actual losses from the divisions in and around Stalingrad have been removed in the form of step losses. KG Seydel (part of the 14th Pz Division) has been eliminated and consolidated with the Italian Order of Battle by Mauro De Vita (who went so far as to ensure the Italian air units had their desert camo pattern which they were still wearing at this time!) and by Ulrich Blennemann who took time away from his studies to check out the entire Axis OB.
The German panzer units were an interesting challenge. The divisions which were part of the AG South summer offensive were beefed up to a three battalion structure by "stealing" from the divisions on other fronts—hence the sometimes strange regimental numbering in panzer regiments (you know: 1-3, 2-3, 1-39 and so on). Furthermore, some of the divisions which were stripped make an appearance—these can be noticed by their overly strong single panzer battalion, which consists of a regular panzer battalion plus an extra company assigned to them to make up for the (!) the loss of the regiment's second battalion.
The German Motorcycle units are an amalgamation of the earlier recon and motorcycle Bns as seen in GB. These units are heavy on armored cars and halftracks, but are still not mechanized enough to qualify as Mech units, but are too structure was only marginally capable of it, pursued a deep battle operational theory—one which given the more expert Soviet forces available later in the war would gain them incredible victories culminating in the final defeat of German arms in the east. Admittedly, the Red Army at this point in the war is quite likely to trip over itself trying to pull off deep operations, but the operational theory is still correct and the player could do far worse than to follow it anyway.
The hedgehog positions around Stalingrad are those built by the Russians to defend the city the previous summer. Some have been improved by the Germans, others have been left to rot. It is easy to tell which is which.
Once you get the 6th Army locked into the pocket (generally, you will), running your pocket effectively could make or break you. A few hints—there is enough supply in the pocket area (plus wagon 'meat') to last as long (and maybe a little longer) than the actual pocket did, but only if you run the most effective airlift you can. Don't ignore the airlift because it didn't fully supply the pocket in real life—it is not a useless gesture, but an effective method to extend the life of Stalingrad alone in order to attempt to pull off a sudden death victory before the value of Stalingrad alone is worth against a Russian player who decides to attack the pocket all-out in order to attempt to pull off a sudden death victory alone in order to attempt to pull off a sudden death victory before the value of Stalingrad alone no longer wins the game.
(Note: a short run of text in the scanned source repeats itself at this point in the "Once you get the 6th Army..." paragraph; the sense of the passage — that maintaining an effective airlift to the pocket for as long as possible is worthwhile even though it will not fully supply Stalingrad — is preserved above.)
Scenario 1: The Winter Campaign in Southern Russia
This scenario examines the entire campaign on all four maps. It is a major (and profitable) undertaking, but if you are new to the OCS or just new to OCS version 2.0 rules, check out scenarios 3 and/or 4 to speed up in the rules before tackling this one. If you are like the and the guys I know ("Play something other than the 'campaign game' ? Why ?"), dive right in. Soviet players might want to brush up their skills (and plans) using scenario 2, first.
- Map Area: All
- First Turn: 1
- Last Turn: As per 1.5
- Game Length: 34 turns or a little less based on 1.5
- Weather: Volga: Ice Pak. Major Rivers: Thawed. Minor Rivers: Thawed.
- Special Rules: All Game Specific rules apply.
Axis Information
Reserve Markers Available: 30
Dead Pile: 3 Pz Div (3-6 Bn); 13 Pz Div (3-29 Bn); 14 Pz Div (3-7 Bn, 64 Motorcycle Bn, 103 Inf Rgt, 108 PG Rgt); 16 Pz Div (2-2, 2-10 Pz Bn, 16 PJ Bn, 79 PG Rgt); 24 Pz Div (3-24 Pz Bn, 26 PG Bn, 40 PJ Bn); 22 Pz Div (2-240 Pz Bn); 23 Pz Div (3-201 Pz Bn); 5-5-8 AG Bn (177, 245).
Supply Sources: As per 1.6.
German Gauge Railroads: All railroads west and south of the frontline, up to the following railhead hexes: D50.28, D40.30, C2.31, A61.33.
Rail Cap: 17
Stalingrad a Fortress? No
Set Up (all units are German, unless noted otherwise):
2nd Hungarian Army (all units Hungarian, unless noted otherwise)
- 3 Hungarian Corps: A66.31 3 Hun Corps HQ, 2T; A61.34 7-2-2 Infantry Div (9), Level 1 Hedgehog; A62.33 7-3-3 Infantry Div (6), Level 1 Hedgehog; A61.33 12-1-1 Artillery Rgt (3)
24 German Panzer Corps
- C1.30 24 German Panzer Corps HQ, 2T; C1.33 7-3-3 Infantry Div (20, less one step); C2.32 20-4-3 German Infantry Div (168, less one step); C3.32 7-3-3 Infantry Div (13, less one step); C4.30 7-2-2 German Infantry Div (7), Level 1 Hedgehog; C4.29 20-4-3 German Infantry Div (336)
4 Hungarian Corps
- C3.28 4 Hun Corps HQ, 2T; C5.29 7-2-2 Infantry Div (10), Level 1 Hedgehog; C3.28 7-3-3 Infantry Div (12); C4.28 12-1-1 Artillery Rgt (4)
7 Hungarian Corps
- C5.26 7 Hun Corps HQ, 12-1-1 Artillery Rgt (7), 2T; C6.26 7-2-2 Infantry Div (19), Level 1 Hedgehog; C6.25 7-2-2 Infantry Div (23)
Army Reserve
- A61.29 1 Hun Panzer Div (2-30 PJ Bn, 1 Infantry Rgt, 5 Arty Bn); A62.27 1 Hun Panzer Div (1-30 PJ Bn, 1 Rec Arm Recon Bn, 1 Arty Bn); A60.31 1 Hun Panzer Div (51 PJ Bn, Organic Truck), 6 SPs
Army Troops
- C4.27 6-1-1 Artillery Bn (150); C2.31 8-1-1 Artillery Bn (101)
8th Italian Army (all units Italian, unless noted otherwise)
Alpini Corps
- C2.22 Alpini Corps HQ, 4-5-3 Ski Bn (M.Cerv), 3-4-3 Assault Engineer Bn (30), 2 SPs; C4.23 20-2-2 Artillery Rgt (11); C5.22 9-2-2 Artillery Bn (24, 32); C6.24 13-4-3 Mountain Infantry Div (Trdntina), Level 1 Hedgehog; C5.23 13-4-3 Mountain Infantry Div (Julia), Level 1 Hedgehog
2 Italian Corps
- C11.18 2 It Corps HQ, 3-3-3 German Police Rgt (14 SS), 4-3-3 MG Bn (2, 102), 3-4-3 Assault Engineer Bn (2), 2T; C10.18 20-2-2 Artillery Rgt (2); C8.19 12-2-2 Artillery Bn (31); C9.20 8-3-3 Blk Rgt (23 Mar); C8.20 12-3-3 Infantry Div (Cosseria), Level 1 Hedgehog; C10.19 German Breakdown Rgt; C11.19 12-3-3 Infantry Div (Ravenna), Level 1 Hedgehog
35 Italian Corps
- C14.16 35 It Corps HQ, 20-2-1 Artillery Rgt (30), 2T; C13.17 9-2-2 Artillery Bn (34, 50); C12.18 4-3-3 MG Bn (104); C13.17 8-3-3 Blk Rgt (3 Gen); C13.18 12-3-3 Infantry Div (Pasubio), Level 1 Hedgehog; C15.17 20-4-3 German Infantry Div (298), Level 1 Hedgehog
29 German Corps
- C14.10 29 German Corps HQ, 2T; C19.12 12-2-2 Artillery Bn (73); C17.15 12-3-3 Inf Div (Torino, less one step), Level 1 Hedgehog; C19.13 20-4-3 German Infantry Div (62, less two steps), Level 1 Hedgehog; C23.13 12-3-3 Infantry Div (Sfrizsca, less one step), Level 1 Hedgehog
Army Breakdown Rgts
- C16.15 German Breakdown Rgt; C22.12 Breakdown Rgt; C18.13 German Breakdown Rgt; C20.12 German Breakdown Rgt; C23.11 D'Aosta Div (6 Brs Bicycle Rgt, 13 AG Bn); C22.11 D'Aosta Div (67 Brs Pz Bn, 3 Brs Bicycle Rgt, 47 Brs Motorcycle Bn, 99 Mortar Bn); C22.10 D'Aosta Div (120 Artillery Rgt, Organic Truck), 1 SP
Army Troops
- C9.04 1-0-3 Ter Bn (215, 217, 218), 2-3-3 Croat Infantry Rgt (Legion), 4 SPs; C6.10 1-0-3 Ter Bn (247); C4.15 1-0-3 Ter Bn (441); C11.12 Wagon Extender; C15.11 1-0-3 Ter Bn (450); C16.12 4-3-3 MG Bn (109, 156); C15.11 5-4-6 German AG Bn (393); A43.17 6-1-3 Security Div (Vicenza), 6-2-2 German Security Div (403); A49.24 6-4-4 Cavalry Brigade (Barbo)
3rd Rumanian Army (all units Rumanian, unless noted otherwise)
1 Rumanian Corps
- C25.10 1 Rum Corps HQ, 2T; C27.13 1-2-4 Cavalry Bn (51); C26.11 16-1-1 Artillery Rgt (8 Hvy); C24.12 Breakdown Rgt; C25.12 12-2-2 Infantry Div (7, less two step), Level 1 Hedgehog; C26.12 Breakdown Rgt; C28.12 12-3-3 Infantry Div (11, less two steps), Level 1 Hedgehog; C29.11 Breakdown Rgt
2 Rumanian Corps
- C30.06 2 Rum Corps HQ; C31.10 16-1-1 Artillery Rgt (2 Hvy), 2T; C32.11 Breakdown Rgt, 1-3-4 Cavalry Bn (52); C30.10 12-3-3 Infantry Div (9, less one step)
5 Rumanian Corps
- C32.06 5 Rum Corps HQ, 2 SPs; C34.09 16-1-1 Artillery Rgt (5 Hvy); C34.10 12-2-2 Infantry Div (5, less one step), Level 1 Hedgehog; C35.11 12-2-2 Infantry Div (6, less one step), Level 1 Hedgehog; C33.11 Breakdown Rgt, 1-3-4 Cavalry Bn (55); C35.10 Breakdown Rgt
4 Rumanian Corps
- C37.07 4 Rum HQ, 2T; C37.08 16-1-1 Artillery Rgt (4 Hvy), 1-2-4 Cavalry Bn (54); C36.08 12-3-3 Infantry Div (13, less two steps), Level 1 Hedgehog; C35.08 12-2-2 Infantry Div (15, less two steps); C38.08 7-4-4 Cavalry Bde (1); C35.09 Breakdown Rgt; C37.09 Breakdown Rgt
48 German Panzer Corps (more accurately, Panzer Reserve Heim)
- C33.08 1 Rum Panzer Div (1-1, 2-1 Pz Bn, 3, 4 Infantry Rgt, 1 Arty Rgt, PzJg PJ Bn, Organic Truck), 1 SP + 2T; C33.07 8-3-3 German Infantry Rgt (190), 2-3-3 German Bicycle Bn (162), 3-3-7 German PJ Bn (611) (known as KG Simons); w/i I C30.05 22 German Panzer Div (1-240 Pz Bn, 129 Inf Bn, 24 Motorcycle Bn, 140 PJ Bn, 140 Artillery Rgt, Organic Truck), 3-3-7 German PJ Bn (611), 48 German Pz Corps HQ, 2 SPs
3rd Romanian Army (continued)
- D51.30 2x Rumanian Breakdown Rgt, Level 1 Hedgehog; D53.29 2x Rumanian Breakdown Rgt, Level 1 Hedgehog; D52.29 12-2-2 Rumanian Infantry Div (2, less two steps); D53.27 12-3-3 Rumanian Infantry Div (18); D53.26 12-2-2 Rumanian Infantry Div (1); D53.24 12-3-3 Rumanian Infantry Div (4); D53.22 7-4-4 Rumanian Cavalry Bde (5)
7 Rumanian Corps
- D50.18 7 Rum Corps HQ, 2T; D52.16 7-4-4 Rumanian Cavalry Bde (8), 16-1-1 Rumanian Artillery Rgt (7 Hvy); D52.19 1-2-4 Rumanian Cavalry Bn (57); D37.18 1 SP
Army Troops
- w/i 5 D48.01: 16 Mtr Div (126 Pz Bn, 165 Motorcycle Bn, 60, 156 Artillery Rgt, 228 PJ Bn, 146 Artillery Rgt, Organic Truck), 2 SPs, 1-3-3 Kalmyk Infantry Bn (450, 782, 811); w/i I D37.30 29 Mtr Div (129 Pz Bn, 71 Infantry Rgt, 29 Motorcycle Bn, 29 Artillery Rgt, Organic Truck), 2 SPs; D37.18 2-3-3 Bicycle Bn (326), 1-3-2 Police Bn (521); D44.23 1-3-2 Police Bn (521); D46.21 Wagon Extender
German Rear Security and Reserve Forces (all German)
- B60.05 6-2-2 Security Div (454); A34.30 6-3-2 Security Div (213, less one step); D24.29 (1)-2-5 Railroad Repair Bn (83), 1T; D12.27 (1)-2-5 Railroad Repair Bn (511); D35.33 (1)-2-5 Railroad Repair Bn (514); Any hex of Kharkov: 1-3-2 Police Bn (698), 4-2-1 Artillery Bn (1-77), 10-2-3 Werfer Bn (1-1, 2-1, 1-52, 2-52, 3-52, 52), 10 Wagon Points, 10 SPs; B62.15 3-3-3 Police Rgt (6 SS), 1T; B59.34 3-3-3 Police Rgt (10 SS), 1T; D18.27 3-3-3 Police Rgt (11 SS), 1T; A56.10 8-5-3 Infantry Rgt (Lehr), 5 SPs; A11.19 1T; A13.02 1T; B14.27 1T; B42.26 1T; D6.27 1T; D19.03 1T
Set up anywhere west of the front line. Truck Points: 10.
Air Bases: Level 3: A11.19, A28.24, B14.27. Level 2: A13.02, B42.26, B59.34, B62.15, D18.27, D24.29, D41.34, D48.35. Level 1: A60.31, C4.15, C9.04, C32.06, D6.27, D19.03, D51.35.
Variable Reinforcements: As per the Axis Variable Reinforcement Table.
Soviet Information
Reserve Markers Available: 25
Dead Pile: 16 Tk Corps (107 Tank Bde); 6-2-5 Tank Bde (64, 84, 148); 4-2-2 Infantry Bde (115, 149, 160); 12-2-2 Infantry Division (112, 193); 11-1-1 Infantry Division (284, 308); 14-4-3 Infantry Div (37 Gd, 39 Gd)
Supply Sources: As per 1.7.
Soviet Gauge Railroads: All railroads east and north of the German railheads.
Rail Cap: As per the Soviet Supply Table on the Soviet Play Aid.
Set Up: All set ups are free in the Army Map Zone given except for those units with specific hex assignments.
Voronezh Front
40th Army: C13.31 40 Army HQ; 13-3-3 Inf Div (25 Gd); 12-2-2 Infantry Div (6, 100, 206); 4-2-2 Inf Bde (129); 7-3-6 Tank Bde (14); 6-2-5 Tank Bde (116); 3x Breakdown Regiments; 4 Hedgehog points
18 Ind Rifle Corps (Later 69th Army): May be included with either 40th Army and/or 6th Army for supply purposes. 12-2-2 Infantry Div (161); 6-2-5 Tk Bde (137); 4-2-4 Tk Bn (292); 4x Breakdown Regiments; 2 Hedgehog points
6th Army: C17.25 6th Army HQ; 12-2-2 Infantry Div (160, 172, 267); 11-1-1 Inf Div (127, 219, 270, 309, 350); 7-3-6 Tank Bde (115); 4-2-4 Tank Bn (82, 212); 4-2-2 Infantry Bde (106); 3-2-3 Infantry Bde (1 Light); 26-1-1 Artillery Bn; 75-1-0 Katyusha Bde; (1)-0-0 Pontoon Grp (6 Ar); 4 Hedgehog points
65th Army: C40.09 65th Army HQ; C40.10 (1)-0-0 Pontoon Group (Don); 26-1-1 Artillery Bde; 2x 75-1-0 Katyusha Bde; 13-3-3 Infantry Div (4 Gd, 27 Gd, 40 Gd, 258); 7-3-6 Tank Bde (91); 6-2-5 Tank Bde (121); 11-1-1 Infantry Div (49, 84, 120, 273, 298); 4 Hedgehog points
57th Army: D55.30 57th Army HQ; 75-1-0 Katyusha Bde; 26-1-1 Artillery Bn; 11-1-1 Naval Bn (156); 11-1-1 Infantry Div (169, 422); 13 Tk Corps (17, 61, 62 Mech Infantry Bde); 3-1-1 Infantry Bde (143); 7-3-6 Tk Bde (90, 235); 4-2-4 Tk Bn (41)
51st Army: D59.25 51st Army HQ; (5)-0-1 UR Bde (76); 75-1-0 Katyusha Bde; 26-1-1 Artillery Bde; 14-4-3 Infantry Div (15 Gd); 7-3-6 Tank Bde (254); 11-1-1 Infantry Div (126, 302); 12-2-2 Infantry Div (91); 7-3-3 Infantry Bde (38); 4 M Corps (36, 59, 60 Mech Infantry Bde, 55, 158 Tk Bn); 4 Cav Corps (61, 81 Cavalry Bde)
Don Front Units (with any of the above Don Front armies or anywhere North of the Don River on Map C): (1)-0-0 Pontoon Group (Don); C43.15 (5)-1-1 UR Bde (159)
Southwest Front Units (with any of the above South West Front armies or anywhere North of the Don River on Map C): (1)-0-3 Railroad Repair Rgt (SW, SW); C33.17 1 Gd M Corps (1 Gd, 2 Gd, 3 Gd Mech Bde, 16 Gd, 17 Gd Tank Bn, 116 Gd Artillery Rgt)
Don Front
1st Guards Army: C28.21 1st Guard Army HQ; (1)-0-0 Pontoon Group (1 Gd); 13-3-3 Infantry Div (1); 11-1-1 Infantry Div (266); 12-2-2 Infantry Div (153, 197, 203, 278); 7-3-3 Infantry Bde (22); 2 Hedgehog points
5th Tank Army: C32.12 5th Tank Army HQ; (1)-0-0 Pontoon Group (5 Tank); 3x 75-1-0 Katyusha Bde; 2x 26-1-1 Artillery Bde; 14-4-3 Infantry Div (14 Gd); 13-3-3 Infantry Div (50, 159); 8 Cav Corps (21, 55, 112 Cav Bdes); 8-4-8 Tank Bde (8 Gd); 12-2-2 Infantry Div (47, 119, 346); 26 Tk Corps (19, 157, 216 Tk Bdes); 14 Infantry Bde; 1 Tk Corps (89, 117, 159 Tank Bdes, 44 Infantry Bde); 8-4-6 Motorcycle Rgt (8 MC); C37.15 Wagon Extender
21st Army: C37.11 21st Army HQ, (1)-0-0 Pontoon Group (SW); 75-1-0 Katyusha Bde; 2x 26-1-1 Artillery Bdes; 12-2-2 Mountain Infantry Div (63); 5-4-8 Tk Bde (1 Gd, 2 Gd, 4 Gd); 3 Gd Cavalry Corps (5 Gd, 6 Gd, 32 Cavalry Bdes); 4 Tk Corps (45, 69, 102 Tk Bdes, 4 Infantry Bde); 13-3-3 Infantry Div (51 Gd); 11-1-1 Infantry Div (277); 3-2-3 Infantry Bde (5 Light)
Southwest Front Units (with any of the above South West Front armies or anywhere North of the Don River on Map C, continued): (1)-0-3 Railroad Repair Rgt (SW, SW); C33.17 1 Gd M Corps (1 Gd, 2 Gd, 3 Gd Mech Bde, 16 Gd, 17 Gd Tank Bn, 116 Gd Artillery Rgt)
65th Army (Don Front listing): C40.09 65th Army HQ; C40.10 (1)-0-0 Pontoon Group (Don); 26-1-1 Artillery Rgt; 2x 75-1-0 Katyusha Bde; 13-3-3 Infantry Div (4 Gd, 27 Gd, 40 Gd, 258); 7-3-6 Tank Bde (91); 6-2-5 Tank Bde (121); 11-1-1 Infantry Div (49, 84, 120, 273, 298); 4 Hedgehog points
24th Army: C47.08 24th Army HQ; 2x 26-1-1 Artillery Bdes; 75-1-0 Katyusha Bde; (5)-1-1 UR Bde (54); 12-2-2 Infantry Div (49, 84, 120, 273, 298); 10-0-1 Infantry Div (260); 16 Tk Corps (109, 164 Tk Bde, 15 Infantry Bde); 6-2-5 Tk Bde (10); 4 Hedgehog points
66th Army: C55.05 66th Army HQ; 26-1-1 Artillery Bde; 75-1-0 Katyusha Bde; 10-0-1 Infantry Div (299); 11-1-1 Infantry Div (99, 116, 226, 343); 6-2-5 Tank Bde (58); 12-2-2 Infantry Div (64); 4 Hedgehog points
Don Front Units (Stalingrad Front boundary): With any of the above Don Front armies or anywhere North of the Don River on Map C: (1)-0-0 Pontoon Group (Don); C43.15 (5)-1-1 UR Bde (159)
Stalingrad Front
62nd Army: C54.01 62nd Army HQ; 2x 75-1-0 Katyusha Bde; 26-1-1 Artillery Bde; 12-2-2 Infantry Div (45, 95); 4-2-2 Infantry Bde (42, 92, 124); 14-4-3 Infantry Div (13 Gd)
64th Army: D52.30 64th Army HQ; 7 Rifle Corps (93, 96, 97 Infantry Bde); 75-1-0 Katyusha Bde; 3-2-1 Cadet Rgt (Vinca); 11-1-1 Infantry Div (38); 12-2-2 Infantry Div (29, 157); 13-3-3 Infantry Div (36 Gd); 10-0-1 Infantry Div (204)
Army Troops: C4.27 6-1-1 Artillery Bn (150); C2.31 8-1-1 Artillery Bn (101); 8th Italian Army units listed under Axis Information apply to the Axis side only.
Supply Dumps: C13.31: 4 SPs; C17.25: 8 SPs; C28.21: 8 SPs; C34.12: 30 SPs; C43.15: 15 SPs; C51.08: 4 SPs; C62.18: 5 SPs; C54.01: 5 SPs; D62.28: 20 SPs; C34.25: 4 SPs
Set up anywhere east of the front line. Truck Points: 10. Wagon Points: 20.
Air Bases: Level 2: C58.06, C51.14, C34.24, C28.21, C14.31.
Air Units: German (in this scenario the "Soviet Information" heading covers the Soviet air units only — see the Player's Aid Sheets for the full Soviet air unit roster; the printed page lists): 8x Po-2, 10x IL-2m, 4x Pe-2, 2x SB-2, 4x Yak-7b, 1x I-16, 4x IL-4, 4x Yak-1, 3x La-5.
Released Forces: None.
Reinforcements: As per the main Order of Arrival. Supply as per the Supply Table.
Variable Reinforcements: None.
Scenario 2: The Uranus Offensive
This scenario deletes most of the special rules which give scenario 1 its campaign character. It is designed for players who want to A) have a smaller version of the opening moves of the game, B) get in there and mix it up, and C) find out what was possible with no-holds barred. Essentially, Stalingrad Pocket's big-brother. Players wanting to examine the historical actions in a smaller setting—either because of space restrictions or in preparation for a campaign game—can play using all the special rules.
- Map Area: Maps C & D, only
- First Turn: 1
- Last Turn: 4
- Game Length: 4 turns
- Weather: Volga: Ice Pak. Major Rivers: Thawed. Minor Rivers: Thawed.
- Scenario Special Rules: The following special rules DO apply: 1.0 (all), 2.1 through 2.3, 2.7 through 2.9, 3.1, 3.2, 3.4 through 3.6, 3.9, 3.10. The following DO NOT apply: 2.4 through 2.6, 2.10 through 2.13, 3.3, 3.7, 3.8, 3.11, 3.12. The German player cannot make more than two Alert Battalion Rolls.
Axis Information
Reserve Markers Available: 20. Supply Sources: Any road or rail hex leading off the west map edge. German Gauge Railroads: All railroads west and south of the frontline, up to the following railhead hexes: D50.28, D40.30, C2.31. Rail Cap: 17. Stalingrad a Fortress? NA.
Set Up (all units are German, unless noted otherwise) — this scenario uses the same 2nd Hungarian Army, 3rd Rumanian Army, 6th Army, 4th Panzer Army, and German Rear Security & Reserve Forces deployment given for Scenario 1 above (24 German Panzer Corps, 4 & 7 Hungarian Corps, 1, 2, 5 & 4 Rumanian Corps, 48 German Panzer Corps, 11 & 8 German Corps, 14 & 51 German Corps, 4 German Corps, 6 & 7 Rumanian Corps), restricted to Maps C & D. Set up anywhere west of the front line, Truck Points: 10.
Air Bases: Level 2: D18.27, D24.29, D41.34, D48.35. Level 1: C4.15, C9.04, C32.06, D6.27, D19.03, D51.35.
Air Units: German: 3x Me109g, 2x Fw190a, 4x Ju87d, 2x Me110e, 4x Ju88a, 3x He111h, 1x Ju52. Rumanian: 2x Me109e, 1x He111h, 1x SM79b, 1x Ju87b. Italian: 1x MC202, 1x SM81.
Released Forces: None. Reinforcements: 14 SPs per turn. Variable Reinforcement Holding Box: None. Variable Reinforcements: None.
Soviet Information
Reserve Markers Available: 25. Supply Sources: As per 1.7. Soviet Gauge Railroads: All railroads east and north of the German railheads. Rail Cap: As per the Soviet Supply Table, on the Soviet Play Aid.
Set Up: All set ups are free in the Army Map Zone given except for those units with specific hex assignments.
Voronezh Front
40th Army: C13.31 40 Army HQ; 13-3-3 Inf Div (25 Gd); 12-2-2 Inf Div (6, 100, 206); 4-2-2 Inf Bde (129); 7-3-6 Tk Bde (14); 6-2-5 Tk Bde (116); 3x Breakdown Regiments; 4 Hedgehog points
18 Ind Rifle Corps (Later 69th Army): May be included with either 40th Army and/or 6th Army for supply purposes. 12-2-2 Inf Div (161); 6-2-5 Tk Bde (137); 4-2-4 Tk Bn (292); 4x Breakdown Regiments; 2 Hedgehog points
6th Army: C17.25 6th Army HQ; 12-2-2 Inf Div (160, 172, 267); 11-1-1 Inf Div (127, 219, 270, 309, 350); 7-3-6 Tk Bde (115); 4-2-4 Tk Bn (82, 212); 4-2-2 Inf Bde (106); 3-2-3 Inf Bde (1 Light); 26-1-1 Arty Bde; 75-1-0 Katyusha Bde; (1)-0-0 Pontoon Grp (6 Ar); 4 Hedgehog points
Voronezh Front Units (anywhere East of the Don River, North of Cxx.15, to the map edge): (1)-0-3 Railroad Repair Rgts (Voro, Voro)
Southwest Front
1st Guards Army: C28.21 1st Guard Army HQ; (1)-0-0 Pontoon Group (1 Gd); 13-3-3 Inf Div (1); 11-1-1 Inf Div (266); 12-2-2 Inf Div (153, 197, 203, 278); 7-3-3 Inf Bde (22); 2 Hedgehog points
5th Tank Army: C32.12 5th Tank Army HQ; (1)-0-0 Pontoon Group (5 Tk); 3x 75-1-0 Katyusha Bde; 2x 26-1-1 Arty Bdes; 14-4-3 Inf Div (14 Gd); 13-3-3 Inf Div (50 Gd, 159); 8 Cav Corps (21, 55, 112 Cav Bdes); 8-4-8 Tk Bde (8 Gd); 12-2-2 Inf Div (47 Gd, 119, 346); 26 Tk Corps (19, 157, 216 Tk Bdes, 14 Inf Bde); 1 Tk Corps (89, 117, 159 Tk Bdes, 44 Inf Bde); 8-4-6 Motorcycle Rgt (8 MC); C37.15 Wagon Extender
21st Army: C37.11 21st Army HQ, (1)-0-0 Pontoon Group (SW); 75-1-0 Katyusha Bde; 2x 26-1-1 Arty Bdes; 12-2-2 Inf Div (96, 293, 333); 12-2-2 Mountain Inf Div (63); 5-4-8 Tk Bn (1 Gd, 2 Gd, 4 Gd); 3 Gd Cav Corps (5 Gd, 6 Gd, 32 Cav Bdes); 4 Tk Corps (45, 69, 102 Tk Bdes, 4 Inf Bde); 13-3-3 Inf Div (51 Gd); 11-1-1 Inf Div (277); 3-2-3 Inf Bde (5 Light)
Southwest Front Units (with any of the above South West Front armies, or anywhere North of the Don River on Map C): (1)-0-3 Railroad Repair Rgt (SW, SW); C33.17 1 Gd M Corps (1 Gd, 2 Gd, 3 Gd Mech Bde, 16 Gd, 17 Gd Tk Bn, 116 Gd Arty Rgt)
Don Front
65th Army: C40.09 65th Army HQ; C40.10 (1)-0-0 Pontoon Group (Don); 26-1-1 Arty Bde; 2x 75-1-0 Katyusha Bde; 13-3-3 Inf Div (4 Gd, 27 Gd, 40 Gd, 258); 7-3-6 Tk Bde (91); 6-2-5 Tk Bde (121); 11-1-1 Inf Div (252, 304); 12-2-2 Inf Div (23, 24, 321); 4 Hedgehog points
24th Army: C47.08 24th Army HQ; 2x 26-1-1 Arty Bdes; 75-1-0 Katyusha Bde; (5)-1-1 UR Bde (54); 12-2-2 Inf Div (49, 84, 120, 273, 298); 11-1-1 Inf Div (173, 214, 233); 10-0-1 Inf Div (260); 16 Tk Corps (109, 164 Tk Bde, 15 Inf Bde); 6-2-5 Tk Bde (10); 4 Hedgehog points
66th Army: C55.05 66th Army HQ; 26-1-1 Arty Bde; 75-1-0 Katyusha Bde; 10-0-1 Inf Div (299); 11-1-1 Inf Div (99, 116, 226, 343); 6-2-5 Tk Bde (58); 12-2-2 Inf Div (64); 4 Hedgehog points
Don Front Units (with any of the above Don Front armies, or anywhere North of the Don River on Map C): (1)-0-0 Pontoon Group (Don); C43.15 (5)-1-1 UR Bde (159)
Stalingrad Front
62nd Army: C54.01 62nd Army HQ; 2x 75-1-0 Katyusha Rgt; 26-1-1 Arty Bde; 12-2-2 Inf Div (45, 95); 11-1-1 Inf Div (138); 4-2-2 Inf Bde (42, 92, 124); 14-4-3 Inf Div (13 Gd)
64th Army: D52.30 64th Army HQ; 7 Rifle Corps (93, 96, 97 Inf Bde); 75-1-0 Katyusha Bde; 3-2-1 Cadet Rgt (Vinca); 11-1-1 Inf Div (38); 12-2-2 Inf Div (29, 157); 13-3-3 Inf Div (36 Gd); 10-0-1 Inf Div (204); 3-2-3 Inf Bde (20 Light); 3-2-2 Naval Bde (154); 3-1-1 Naval Bde (66); 7-3-6 Tk Bde (56); 6-2-5 Tk Bde (13); (5)-1-1 UR Bde (118)
57th Army: D55.30 57th Army HQ; 75-1-0 Katyusha Bde; 26-1-1 Arty Bde; 1-1-2 Naval Bn (156); 11-1-1 Inf Div (169, 422); 13 Tk Corps (17, 61, 62 Mech Bde); 3-1-1 Inf Bde (143); 7-3-6 Tk Bde (90, 235); 4-2-4 Tk Bn (41)
51st Army: D59.25 51st Army HQ; (5)-0-1 UR Bde (76); 75-1-0 Katyusha Bde; 26-1-1 Arty Bde; 14-4-3 Inf Div (15 Gd); 7-3-6 Tk Bde (254); 11-1-1 Inf Div (126, 302); 12-2-2 Inf Div (91); 7-3-3 Inf Bde (38); 4 M Corps (36, 59, 60 Mech Bde, 55, 158 Tk Bn); 4 Cav Corps (61, 81 Cav Bde)
Stalingrad Front Troops (anywhere either East of the Volga River or South of the Volga, provided units south of the southern part of the Volga are also East of D54.xx): 12-2-2 Inf Div (300); (1)-0-0 Pontoon Group (Stgrd, Stgrd); (1)-0-0 Pontoon Bn (8 Hvy); (1)-0-3 Railroad Repair Rgt (Stgrd); 6-2-5 Tk Bde (85); (5)-1-1 UR Bde (77, 115, 156); 4-2-4 Tk Bn (35, 166); 15-1-1 Arty Rgt (5, 400); 26-1-1 Arty Bde
Supply Dumps: C13.31: 4 SPs; C17.25: 4 SPs; C28.21: 8 SPs; C34.12: 30 SPs; C43.15: 15 SPs; C51.08: 4 SPs; C62.18: 5 SPs; C54.01: 5 SPs; D62.28: 20 SPs; C34.25: 4 SPs
Set up anywhere east of the front line. Truck Points: 10. Wagon Points: 20.
Air Bases: Level 2: C58.06, C51.14, C34.24, C28.21, C14.31. Level 1: C46.31, C40.19, C17.25, C23.34, D61.33.
Air Units: 8x Po-2, 10x IL-2m, 4x Pe-2, 2x SB-2, 4x Yak-7b, 1x I-16, 4x IL-4, 4x Yak-1, 3x La-5.
Released Forces: None. Reinforcements: As per the main Order of Arrival. Supply as per the Supply Table. Variable Reinforcements: None.
Victory: If the Soviets can create the Stalingrad Pocket or capture at least one hex of Stalingrad by the end of the scenario, they win. Defining what constitutes the Stalingrad Pocket is easy for reasonable players and unreasonable players will find some gimmick to use against any definition—so it is a waste of time to try to come up with one for them. Basically, the player who plays a better game, wins.
The scanned source places a small self-contained situation on the Chir sector (map hexes D24-D38) immediately after this Victory paragraph and before Scenario 3's own heading and Map Area/Turn/Weather block; it is not separately numbered in the source, so it is transcribed here as its own entry rather than folded into either neighboring scenario.
Chir Sector Situation (untitled in source)
Axis Set Up: D37.28 Alert Bn; D36.27 Alert Bn; D35.26 Alert Bn; D33.29 6-2-2 Sec Div (403); D34.26 11 Pz Div (1-15, 2-15, 2-35 Pz Bn, 119 Arty Rgt); D33.27 11 Pz Div (61 Motorcycle Bn, 111 PG Rgt, 61 PJ Bn); D33.26 48 Pz Corps HQ, 11 Pz Div (110 Inf Rgt, 2x Organic Trucks), 7 SPs; D28.30 Wagon Extender; D26.25 Wagon Extender; D24.29 (1)-2-5 RR Bn (83), 4 SPs.
Air Bases: Level 2: D24.29. Air Units: None. Reinforcements: No unit reinforcements. 2 SPs per turn at D33.26. Variable Reinforcements: None.
Soviet Information: Reserve Markers Available: 6. Supply Source: D35.35. Rail Cap and Rail Heads: None.
Soviet Set Up: D28.35 13-3-3 Inf Div (40 Gd); D28.34 8 Cav Corps (55, 112 Cav Bde); D29.34 8 Cav Corps (21 Cav Bde); D30.33 12-2-2 Inf Div (47 Gd); D30.32 3-2-3 Inf Bde (5 Lt); D31.32 14-4-3 Inf Div (54 Gd); D32.32 12-2-2 Inf Div (321); D32.33 26-1-1 Arty Bde; D33.33 8-4-8 Tk Bde (8 Gd); D34.33 8-4-6 Motorcycle (8 MC); D34.34 5 M Corps (45, 49, 50 Mech Bde, 168, 188 Tk Bn), 2-3-6 Motorcycle (54 MC); D35.34 Breakdown Rgt; D35.35 5 Tank Army HQ, 10 SPs; D36.33 Breakdown Rgt; D36.32 Breakdown Rgt, 75-1-0 Katyusha Bde; D36.31 3 Gd Cav Corps (5 Gd Cav Bde); D35.31 1 Tk Corps (89, 159 Tk Bde, 44 Inf Bde), 12-2-2 Inf Div (333); D37.31 3 Gd Cav Corps (32 Cav Bde); D37.32 26-1-1 Arty Bde; D38.31 3 Gd Cav Corps (6 Gd Cav Bde); D39.31 13-3-3 Inf Div (258).
Air Bases: None. Air Units: None. Reinforcements: No unit Reinforcements. 3 SPs per turn at D35.35. Variable Reinforcements: None.
Victory: The Soviet Player wins if he occupies D24.29 at the end of the scenario—if not, the German player wins.
Scenario 3: The Chir River Battles
These are the actions made famous by von Mellinthin in his book Panzer Battles. The Soviet 5th Tank Army is attempting to seize the area west and south of the Chir River in order to set the stage for the massive Operation Saturn (the attempt to capture Rostov). In a series of running battles, one Soviet corps after another was rebuffed by the 11th Panzer Division as the army attempted to gain a serious foothold on the far bank of the Chir. The German defense was a classic of what was later called 'active defense' and the Soviets failed to obtain the area needed. Operation Saturn was replaced by the less ambitious Operation Little Saturn.
- Map Area: Map D only, East of 22.xx, North of the Don River
- First Turn: 5
- Last Turn: 7
- Game Length: 3 turns
- Weather: Volga: NA. Major Rivers: Frozen. Minor Rivers: Frozen.
Axis Information
Reserve Markers Available: 8. Supply Source: Morozovsk. Rail Cap and Rail Heads: None.
Set Up (all units are German, unless listed otherwise): D27.35 8-3-3 Inf Rgt (190); D27.34 Breakdown Rgt; D28.33 2x Alert Bns; D29.33 Alert Bn; D29.32 Alert Bn; D30.31 12-2-2 LW Div (8 Fld); D31.31 Alert Bn; D32.31 Alert Bn; D33.32 2x Rum Breakdown Rgts; D34.32 Rum Breakdown Rgt, 1-2-4 Rum Cav Bn (54); D35.33 12-2-2 LW Div (7 Fld); D35.32 6-3-2 Sec Div (213, less 1 step); D34.31 Alert Bn; D34.30 Alert Bn; D35.30 Breakdown Rgt; D36.30 Alert Bn; D37.30 20-4-3 Inf Div (336, less 2 steps), 2T; D38.30 Alert Bn; D37.29 Breakdown Rgt.
Scenario 4: The Stalingrad Relief Operation
This small scenario looks exclusively at the relief operation (Operation Wintergewitter) the Germans launched south of the Don River to relieve the Stalingrad fortress. It makes a good introduction to the OCS and Enemy at the Gates. Players can get a very good appreciation of both the possibilities and difficulties of the historical relief operation.
- Map Area: Map D, South of the Don, East of D33.xx.
- First Turn: 8
- Last Turn: 12
- Game Length: 5 turns
- Weather: Volga: Ice Pak. Major Rivers: Frozen. Minor Rivers: Frozen.
Axis Information
Reserve Markers Available: 15. Supply Source: The Rail line from Kotelnikovo to the south-west is connected for supply trace. Rail head is at D44.23. Stalingrad is cut off and must use on-map supplies. Rail Cap: None. Stalingrad a Fortress? Yes.
Set Up (all units are German unless designated otherwise): D34.21 1-2-4 Rum Cav Bn (56); D34.20 16-1-1 Arty Rgt (1 Hvy), 4-2-1 Arty Bn (631); D50.33 12-3-3 Rum Inf Div (20, less 3 steps), 7-4-4 Rum Cav Bde (1), Level 1 Hedgehog; D51.35 51 Corps HQ, 1-3-2 Pol Bn (571), 10-2-3 Werfer Bn (3-51), 4-2-1 Arty Bn (101), 5 SPs; D51.34 20-4-3 Inf Div (71, less 1 step, 371, less 1 step); D52.35 24 Pz Div (89 Arty Rgt, Organic Truck), 10-2-3 Werfer Bn (1-53), 4-2-2 Arty Bn (2-54); D52.34 20-4-3 Inf Div (295, less 2 steps), 15-4-3 JG Div (100, less 1 step), 5-4-3 Croat Inf Rgt (369); D53.35 20-4-3 Inf Div (79, less 1 step, 305, less 3 steps); D44.35 3 Mtr Div (29 Inf Rgt), Breakdown Rgt, Level 1 Hedgehog; D44.34 3 Mtr Div (103 Pz Bn, 3 PJ Bn), Breakdown Rgt, Level 1 Hedgehog; D45.35 3 Mtr Div (53 Motorcycle Bn, 8 Inf Rgt, 3 Arty Rgt, Organic Truck); D46.35 14 Pz Corps HQ, 5-5-3 MG Bn (9 MG), 12-2-3 Werfer Bn (3-2); D46.34 29 Mtr Div (129 Pz Bn), 2x Breakdown Rgts; D46.33 29 Mtr Div (15 Inf Rgt), Breakdown Rgt, Level 1 Hedgehog; D47.35 14 Pz Div (2-36 Pz Bn, 4 PJ Bn, 670 PJ Bn, 4 Arty Rgt, Organic Truck), Level 1 Hedgehog; D47.34 29 Mtr Div (Organic Truck), 5-5-8 AG Bn (244), 9-2-1 Arty Bn (616, 855), 12-2-1 Arty Bn (733), Level 1 Hedgehog; D47.33 29 Mtr Div (71 Inf Rgt, 29 Arty Rgt), Breakdown Rgt; D48.33 12-2-3 Werfer Bn (1-2), 10-2-3 Werfer Bn (2-2); D48.32 5-5-8 AG Bn (243), Breakdown Rgt, Level 1 Hedgehog; D49.34 4 Corps HQ, 1-3-2 Pol Bn (541); D48.35 9-2-1 Arty Bn (800), 4-2-1 Arty Bn (2-72), 5x Wagon Points, 2 SPs + 1T; D49.33 20-4-3 Inf Div (297, less 2 steps), Level 1 Hedgehog; D50.34 10-2-3 Werfer Bn (2-53), 9-2-1 Arty Bn (631).
Air Bases: Level 2: D49.34. Level 1: D51.35. Air Units: None.
Reinforcements: 2T per turn into D49.34 (the Stalingrad air-lift). 7 SPs per turn at D37.18. Turn 8 — 17 Pz Div (17 Motorcycle Bn, 1-39 Pz Bn, 40 Inf Rgt, 63 PG Rgt, 27 PJ Bn, 27 Arty Rgt, Organic Truck), 1 SP at D37.18. 10 SPs per turn at D62.28. Turn 8 — 2 Gds Army HQ, 2 Gd M Corps (4 Gd, 5 Gd, 6 Gd Mech Bde, 21, 22 Tk Bn, 117 Arty Rgt), 13-3-3 Inf Div (3 Gd, 24 Gd, 98), 12-2-2 Inf Div (33 Gd, 49 Gd, 387) at D62.28. Turn 9 — 6 M Corps (51, 54, 55 Mech Bde, 76, 80 Tk Bn), 2-4-6 Motorcycle Bn (64 MC). Exchange: replace the 13th Tank Bde (independent) with 13 Tk Corps (13 Tk Bde) at D62.28.
Variable Reinforcements: None.
Soviet Information
Reserve Markers Available: 12. Supply Source: As per the regular game rules. The railroad between D52.30 and D44.24, inclusive, has been converted to Soviet gauge and can be used for supply traces (as long as they are connected to D62.28 via extenders). Rail Cap: None.
Set Up: D36.21 4 Cav Corps (81 Cav Bde); D39.20 11-1-1 Inf Div (302); D42.18 11-1-1 Inf Div (126); D44.17 12-2-2 Inf Div (91); D46.18 4 Cav Corps (61 Cav Bde); D38.28 12-2-2 Inf Div (315); D39.24 6-2-5 Tk Bde (85); D40.30 7 Tk Corps (3 Gd, 87 Tk Bde, 7 Inf Bde), 2-4-6 Motorcycle Bn (50 MC); D40.28 10-0-1 Inf Div (204), 1-1-2 Naval Bn (156); D41.28 12-2-2 Inf Div (300); D41.25 4 M Corps (60 Mech Bde, 55 Tk Bn); D42.25 4 M Corps (59 Mech Bde, 158 Tk Bn); D42.24 4 M Corps (36 Mech Bde); D43.25 7-3-6 Tk Bde (56), 4-2-4 Tk Bn (166); D44.26 11-1-1 Inf Div (87); D44.24 13 Tk Corps (61, 62 Mech Bde), 75-1-0 Katyusha Bde, (1)-0-3 RR Rgt (Stgrd); D45.27 7-3-6 Tk Bde (90); D45.26 7-3-3 Inf Bde (38), 26-1-1 Arty Bde, 5 SPs; D46.26 4-2-4 Tk Bn (41); D46.23 6-2-5 Tk Bde (13); D47.27 51 Army HQ, 4 Tk Corps (45, 69, 102 Tk Bde, 4 Inf Bde), (5)-0-1 UR Bde (76); D48.27 5 Shock Army HQ, 4-2-4 Tk Bn (35); D50.28 12-2-2 Inf Div (29); D51.26 7-3-6 Tk Bde (254); D41.34 21 Army HQ, 26 Tk Corps (19, 216 Tk Bde, 14 Inf Bde), 3-2-3 Inf Bde (1 Lt); D42.33 26-1-1 Arty Bde; D43.35 13-3-3 Inf Div (4 Gd), 5-4-8 Tk Bn (4 Gd); D43.34 12-2-2 Inf Div (96), 5-4-8 Tk Bn (1 Gd, 2 Gd); D43.33 26-1-1 Arty Bde; D44.33 12-2-2 Inf Div (293), (5)-1-1 UR Bde (54); D45.34 14-4-3 Inf Div (52 Gd); D45.33 14-4-3 Inf Div (15 Gd), 15-1-1 Arty Rgt (5); D46.32 11-1-1 Inf Div (169), 3-1-1 Inf Bde (143), 26-1-1 Arty Bde; D47.32 13-3-3 Inf Div (36 Gd), 12-2-2 Inf Div (157); D47.31 57 Army HQ; D47.30 7-3-6 Tk Bde (235); D48.31 11-1-1 Inf Div (38, 422), 75-1-0 Katyusha Bde; D49.32 3-2-3 Inf Bde (20 Lt), 3-1-1 Naval Bde (66), (5)-1-1 UR Bde (118); D50.32 (5)-1-1 UR Bde (77, 115, 156); D50.31 26-1-1 Arty Bde, 15-1-1 Arty Rgt (400); D51.33 7 Rifle Corps (93, 96, 97 Inf Bde); D51.32 75-1-0 Katyusha Bde; D51.31 64 Army HQ; D52.30 Wagon Extender, 10 SPs; D62.28 4x Wagon Points, 10 SPs.
Air Bases: None. Air Units: None.
Victory: Major German Victory — the German player wins a major victory if he manages to move 15 or more SPs overland into the Stalingrad Pocket. Minor German Victory — the German player wins a minor victory if he manages to move at least 5, but less than 15 SPs overland into the Stalingrad Pocket. Soviet Victory — other than the above.
Map C Repositioning (untitled in source)
The scanned source lists the following Axis units on Map C, several noted as "in Move Mode," immediately after Scenario 4's Victory paragraph and before Scenario 5's own heading — again without a numbered heading of its own. No corresponding Soviet-side listing or victory clause was found nearby; it is transcribed here exactly as printed.
C4.15 1-0-3 It Territorial Bn (441); C11.15 1-0-3 It Territorial Bn (450); C6.10 1-0-3 It Territorial Bn (247), 1T; C8.12 27 Pz Div (140 Inf Rgt, in Move Mode); C7.12 27 Pz Div (127 Pz Bn, 127 Schnell Bn, all in Move Mode); C7.11 27 Pz Div (127 Arty Rgt, Organic Truck, all in Move Mode), 1 SP; C11.12 Wagon Extender; C13.18 Breakdown Rgt; C14.18 It Breakdown Rgt; C14.17 12-3-3 It Inf Div (Pasubio, less 2 steps), Level 1 Hedgehog; C15.17 It Breakdown Rgt; C15.16 8-3-3 It Blackshirt Rgt (3 Gen); C13.17 4-3-3 It MG Bn (102), 9-2-2 It Arty Bn (34,50); C14.16 35 It Corps HQ, 3-4-3 It Aslt Eng Bn (15), 20-2-1 It Arty Rgt (30); C14.10 29 Corps HQ; C16.15 It Breakdown Rgt; C17.15 12-3-3 It Inf Div (Torino, less 2 steps), 5-4-6 AG Bn (393), Level 1 Hedgehog; C18.14 It Breakdown Rgt; C18.13 D'Aosta Celere Div (67 Brs Tk Bn, 47 Brs Motorcycle Bn), 1-0-3 It Territorial Bn (454); C19.13 D'Aosta Celere Div (13 AG Bn, 6 Brs Bicycle Rgt), Level 1 Hedgehog; C20.12 D'Aosta Celere Div (3 Brs Bicycle Rgt, 99 Mortar Bn); C19.12 D'Aosta Celere Div (120 Arty Rgt, Organic Truck), 1 SP, 12-2-2 It Arty Bn (73); C21.13 It Breakdown Rgt; C22.12 It Breakdown Rgt; C23.13 12-3-3 It Inf Div (Szfrzsca, less 2 steps), Level 1 Hedgehog; C21.11 1 Rum Corps HQ; C24.12 12-3-3 Rum Inf Div (9, less 3 steps), 1-2-4 Rum Cav Bn (51); C25.12 12-2-2 Rum Inf Div (7, less 1 step); C26.11 12-3-3 Rum Inf Div (11, less 1 step); C24.11 16-1-1 Rum Arty Rgt (8 Hvy); C26.10 20-4-3 Inf Div (62, less 2 steps); C25.10 Breakdown Rgt; C24.09 Breakdown Rgt; C24.08 20-4-3 Inf Div (294, less 2 steps); C24.07 2x Breakdown Rgt, 2T; C21.07 17 Corps HQ; C19.07 Wagon Extender; C23.04 2 Rum Corps HQ; C25.07 5-3-3 Rum Cav Bde (7), 1-2-2 Rum Inf Bn (430); C26.06 12-2-2 Rum Inf Div (14, less 2 steps); C26.05 2x Rum Breakdown Rgt; C26.04 22 Pz Div (24 Motorcycle Bn, 1-240 Pz Bn, 140 Arty Rgt, Organic Truck).
Scenario 5: Two-Map Little Saturn
On 17 Dec 1942, the Soviets opened the second of their winter counteroffensives of 1942. Its purpose was to dislocate the Axis forces in Armeeabtielung Hollidt as well as relieve pressure from the forces attempting to attack into Stalingrad. The scenario gives players an interesting look at deep operations in one of the first Soviet attempts at doing so after getting the fundamentals right.
- Map Area: Maps C (West of C43.xx) & D (north of the Don and west of D41.xx.)
- First Turn: 9
- Last Turn: 12
- Game Length: 4 turns
- Special Rules: Apply 1.4c to the first turn (turn 9) and the Soviet player automatically has the initiative on that turn (only).
- Weather: Volga: Frozen. Major Rivers: Frozen. Minor Rivers: Frozen.
Axis Information
Reserve Markers Available: 20. Supply Sources: Any railroad leading off the west map edge. Also, hexes C1.30, C1.22, and C1.09 can be used as supply sources. Rail Capacity: 12. German Gauge Railroads: All railroads west and south of the frontline, up to the following railhead hexes: D38.30, C2.31.
Set Up (all units are German, unless noted otherwise): C1.33 7-3-3 Hun Inf Div (20, less 1 step); C1.30 24 Pz Corps HQ, 2T; C1.25 20-3-3 Inf Div (385, less 1 step in Move Mode); C2.32 20-4-3 Inf Div (168, less 1 step); C2.31 8-1-1 Hun Arty Bn (101); C2.22 Alpini It Corps HQ, 20-4-3 Inf Div (387, in Move Mode), 4-5-3 It Ski Bn (M.Cerv), 3-4-3 It Aslt Eng Bn (30), 2 SPs; C3.32 7-3-3 Hun Inf Div (13, less 1 step); C3.28 4 Hun Corps HQ; C4.30 7-2-2 Hun Inf Div (7), Level 1 Hedgehog; C4.28 12-1-1 Hun Arty Rgt (4); C5.29 7-2-2 Hun Inf Div (10), Level 1 Hedgehog; C5.28 7-3-3 Hun Inf Div (12); C4.27 6-1-1 Hun Arty Bn (150); C6.26 7-2-2 Hun Inf Div (19), Level 1 Hedgehog; C6.25 7-2-2 Hun Inf Div (23); C5.26 7 Hun Corps HQ, 12-1-1 Hun Arty Rgt (7); C6.24 13-4-3 It Mtn Div (Trdntina), Level 1 Hedgehog; C5.23 13-4-3 It Mtn Div (Julia); C6.21 13-4-3 It Mtn Div (Cuneense), Level 1 Hedgehog; C4.23 20-2-2 It Arty Rgt (11); C5.22 9-2-2 It Arty Bn (24, 32); C8.20 12-3-3 It Inf Div (Cosseria), Level 1 Hedgehog; C9.20 8-3-3 It Blackshirt Rgt (23 Mar); C10.19 Breakdown Rgt, 4-3-3 It MG Bn (2); C11.19 12-3-3 It Inf Div (Ravenna, less 1 step), Level 1 Hedgehog; C12.18 20-4-3 Inf Div (298, less 1 step); C8.19 12-2-2 It Arty Bn (31); C10.18 3-3-3 Pol Rgt (14 SS), 4-3-3 It MG Bn (104), 20-2-2 It Arty Rgt (2); C11.18 2 It Corps HQ, 3-4-3 It Aslt Eng Bn (2), 2T; C27.04 22 Pz Div (129 Inf Rgt, 140 PJ Bn), 3-3-7 PJ Bn (611); C27.03 1 Rum Pz Div (2-1 Pz Bn, 3, 4 Inf Rgt, PzJg PJ Bn); C27.02 2-3-3 Bicycle Bn (162), Breakdown Rgt; C27.01 8-3-3 Inf Rgt (190); C11.07 4-3-3 It MG Bn (109, 156); C9.04 2-3-3 Croat Inf Rgt (Legion), 1-0-3 It Territorial Bn (215, 217, 218), 5 SPs; D27.34 Breakdown Rgt; D28.33 2x Alert Bn; D29.33 Alert Bn; D29.32 Alert Bn; D30.31 12-2-2 LW Div (8 Fld); D31.31 Alert Bn; D32.30 1-2-4 Rum Cav Bn (54); D32.29 12-2-2 LW Div (7 Fld, less 1 step); D33.30 2x Rum Breakdown Rgt; D34.30 Alert Bn; D34.29 Alert Bn; D35.30 11 Pz Div (61 Motorcycle Bn, 2-35 Pz Bn); D36.29 11 Pz Div (111 PG Rgt), Breakdown Rgt; D37.30 20-4-3 Inf Div (336, less 2 steps); D37.29 Breakdown Rgt; D35.29 11 Pz Div (110 Inf Rgt, 61 PJ Bn, 119 Arty Rgt); D37.28 2x Alert Bn; D36.27 Alert Bn; D35.26 Alert Bn; D33.26 48 Pz Corps HQ, 11 Pz Div (2x Organic Truck), 3 SPs; D28.30 Wagon Extender; D26.25 Wagon Extender; D24.29 (1)-2-5 RR Bn (83), 4 SPs; D18.27 (1)-2-5 RR Bn (514), 4 SPs; D12.27 (1)-2-5 RR Bn (511); D7.30 3-3-3 Pol Rgt (11 SS).
Air Bases: Level 2: D18.27, D24.29. Level 1: C4.15, C9.04, D6.27.
Air Units: German: 4x Me109g, 2x Fw190a, 5x Ju87d, 2x Me110e, 4x Ju88a, 3x He111h, 1x Hs123b. Rumanian: 1x Me109e, 1x He111h, 1x SM79b, 1x Ju87b. Italian: 1x MC202, 1x SM81.
Reinforcements: 10 SPs per turn on any Supply Source hex. Turn 9 — 6-1-3 It Sec Div (Vicenza) at C1.22. Turn 10 — 6-4-4 It Cav Bde (Barbo) at C1.22, 20-3-3 Inf Div (306) at D1.27. Turn 11 — Ftr-Pco Corps HQ, 17-5-3 Mtn Div (3 Mtn) at D1.34, 19 Pz Div (19 Motorcycle Bn, 2-27 Pz Bn, 73 Inf Rgt, 74 PG Rgt, 19 PJ Bn, 19 Arty Rgt, Organic Truck) at C1.09, 20-2-3 Inf Div (304), 6-5-8 Pz Bn (138) at D1.27. Turn 12 — 6 Pz Div (2-11 Pz Bn, 6 Motorcycle Bn, 4 Inf Rgt, 114 PG Rgt, 76 Arty Rgt, 2x Organic Truck), 2 SPs at D26.19.
Variable Reinforcement Holding Box: None. Variable Reinforcements: None.
Soviet Information
Reserve Markers Available: 20. Supply Sources: See game rule 1.6. Soviet Gauge Railroads: All railroads east and north of the frontline, up to the German gauge railheads. Rail Cap: 25.
Set Up: C1.34 Breakdown Rgt; C2.33 12-2-2 Inf Div (6), Level 1 Hedgehog; C3.34 12-2-2 Inf Div (107), Level 1 Hedgehog; C3.33 Breakdown Rgt; C4.33 13-3-3 Inf Div (20 Gd); C6.33 7-3-6 Tk Bde (14); C5.32 Breakdown Rgt; C5.30 12-2-2 Inf Div (206), Level 1 Hedgehog; C6.29 Breakdown Rgt; C6.28 Breakdown Rgt, Level 1 Hedgehog; C6.27 4-2-2 Inf Bde (129), Level 1 Hedgehog; C7.26 13-3-3 Inf Div (25 Gd), Level 1 Hedgehog; C13.31 40 Army HQ, 5 SPs; C23.34 1 SP; C8.25 12-2-2 Inf Div (161); (anywhere on Map C, North of the Don, West of C32.xx) (1)-0-3 RR Rgt (Voro, Voro); C8.24 2x Breakdown Rgt; C7.24 11-1-1 Inf Div (309), 4-2-4 Tk Bn (292); C6.23 6-2-5 Tk Bde (137), 4-2-2 Inf Bde (106); C7.21 6-2-5 Tk Bde (116), 11-1-1 Inf Div (127); C7.22 12-2-2 Inf Div (160); C7.23 11-1-1 Inf Div (270); C8.21 12-2-2 Inf Div (172), 11-1-1 Inf Div (350), 4-2-4 Tk Bn (212); C8.22 26-1-1 Arty Bde, 2x 16-1-1 Arty Bde; C9.21 4-2-4 Tk Bn (82), 12-2-2 Inf Div (267), (1)-0-0 Pontoon Grp (6 Ar); C9.22 26-1-1 Arty Bde, 16-1-1 Arty Bde, 75-1-0 Katyusha Bde; C10.20 13-3-3 Inf Div (195); C10.21 75-1-0 Katyusha Bde; C17.25 6 Army HQ, 11-1-1 Inf Div (219), 4x Truck Points, 50 SPs; C11.20 13-3-3 Inf Div (41 Gd), 18 Tk Corps (110, 170, 181 Tk Bde, 32 Inf Bde), 7-3-6 Tk Bde (115); C11.21 1 Gd Army HQ, 25 Tk Corps (111, 162, 175 Tk Bde, 16 Inf Bde), 17 Tk Corps (66, 67, 174 Tk Bde, 31 Inf Bde), 2-4-6 Motorcycle Bn (52 MC), 2-3-6 Motorcycle Bn (53 MC); C11.22 Truck Extender; C12.19 14-4-3 Inf Div (44 Gd); C12.20 (1)-0-0 Pontoon Grp (1 Gd); C12.21 14-4-3 Inf Div (35 Gd); C12.22 24 Tk Corps (4 Gd, 54, 130 Tk Bde, 24 Inf Bde); C13.19 13-3-3 Inf Div (38 Gd); C13.20 13-3-3 Inf Div (1), 75-1-0 Katyusha Bde; C13.21 75-1-0 Katyusha Bde; C17.16 12-2-2 Inf Div (153), Level 1 Hedgehog; C18.16 4-2-4 Tk Bn (126, 141); C24.13 4-2-2 Inf Bde (90), Level 1 Hedgehog; C28.21 12-2-2 Inf Div (131), 2x Truck Points, 2 SPs; C30.22 Wagon Extender; C27.13 (1)-0-0 Pontoon Grp (3 Gd); C26.12 Breakdown Rgt; C27.12 12-2-2 Inf Div (278, less 1 step); C25.09 4-2-4 Tk Bn (114), 12-2-2 Inf Div (203); C27.11 3-1-1 Inf Bde (94), 4-2-4 Tk Bn (119); C27.10 12-2-2 Inf Div (197, less 1 step); C26.09 Breakdown Rgt, 7-2-3 Inf Bde (22); C25.08 14-4-3 Inf Div (14 Gd); C26.08 26-1-1 Arty Bde, 16-1-1 Arty Bde; C29.10 3 Gd Army HQ, 10 SPs; C30.09 Wagon Extender; C28.09 1 Gd M Corps (16 Gd, 17 Gd Tk Bn, 1 Gd, 2 Gd, 3 Gd Mech Bde, 116 Gd Arty Rgt); C34.12 5 SPs; C34.13 Wagon Extender; C36.09 (1)-0-0 Pontoon Grp (SW); C26.07 11-1-1 Inf Div (266); C27.08 75-1-0 Katyusha Bde; C27.07 Breakdown Rgt, 4-2-4 Tk Bn (243); C27.06 13-3-3 Inf Div (159, less 2 steps); C27.05 Breakdown Rgt; C28.04 13-3-3 Inf Div (50 Gd, less 1 step); C32.06 5 Tank Army HQ, 3 SPs, (1)-0-0 Pontoon Grp (5 Tank); C33.05 7-3-6 Tk Bde (15 Gd); C28.03 Breakdown Rgt; C43.15 (5)-1-1 UR Bde (159), 2x Wagon Points, 2x Truck Points, 5 SPs; C28.02 12-2-2 Inf Div (346); C28.01 13-3-3 Inf Div (40 Gd); D28.34 8 Cav Corps (112 Cav Bde); D29.34 8 Cav Corps (21 Cav Bde); D30.33 8 Cav Corps (55 Cav Bde); D30.32 3-2-3 Inf Bde (5 Lt); D31.32 12-2-2 Inf Div (321); D32.31 5 M Corps (45 Mech Bde), 8-4-8 Motorcycle Rgt (8 MC); D33.31 5 M Corps (168 Tk Bn, 50 Mech Bde), 2-3-6 Motorcycle Bn (54 MC); D33.32 26-1-1 Arty Bde; D34.31 14-4-3 Inf Div (54 Gd, less 1 step); D35.31 12-2-2 Inf Div (333, less 1 step); D35.32 12-2-2 Inf Div (47 Gd); D36.30 3 Gd Cav Corps (6 Gd Cav Bde); D36.31 26-1-1 Arty Bde; D36.32 75-1-0 Katyusha Bde, Breakdown Rgt; D37.31 Breakdown Rgt; D37.33 1 Tk Corps (44 Inf Bde); D38.29 Breakdown Rgt; D38.30 12-2-2 Inf Div (315, less 1 step); D38.32 3 Gd Cav Corps (5 Gd Cav Bde); D39.32 3 Gd Cav Corps (32 Cav Bde); D40.31 13-3-3 Inf Div (258); (anywhere North of the Don River, West of C46.xx) (1)-0-3 RR Rgt (SW, SW).
Air Bases: Level 2: C14.31, C28.21, C34.25. Level 1: C32.06, C17.25, C40.19, C23.34.
Air Units: 8x Po-2, 4x La-5, 4x IL-4, 3x Yak-1, 5x Yak-7b, 2x SB-2, 6x Pe-2, 12x IL-2m3.
Reinforcements: 20 SPs per turn. No unit reinforcements. Variable Reinforcements: None.
Victory: The Soviet player wins by holding Tatsinskaia or Morozovsk at the end of play. Otherwise, the Axis player wins.
Scenario 6: Little Saturn Campaign Start
This scenario begins the full-map campaign with the situation as of 17 Dec 1942 when the Soviet Little Saturn offensive began. To look at the Little Saturn Campaign in isolation, see scenario 5.
- Map Area: All
- First Turn: 9
- Last Turn: As per 1.5
- Game Length: 25 turns (possibly a few less)
- Special Rules: Apply 1.4c to the first turn (turn 9) and the Soviet player automatically has the initiative on that turn (only).
- Weather: Volga: Frozen. Major Rivers: Frozen. Minor Rivers: Frozen.
- Stalingrad a Fortress? Yes.
Axis Information
Reserve Markers Available: 30. Supply Sources: As per 1.6. Rail Capacity: 17. German Gauge Railroads: All railroads west and south of the frontline, up to the following railhead hexes: D38.30, C2.31, D44.23, A61.33.
Dead Pile: 3 Pz Div (3-6 Pz Bn); 11 Pz Div (3-29 Pz Bn); 13 Pz Div (3-29 Pz Bn); 14 Pz Div (64 Motorcycle Bn, 3-7 Pz Bn, 103 Inf Rgt, 108 PG Rgt); 16 Pz Div (2-2, 2-10 Pz Bn, 79 PG Rgt, 16 PJ Bn); 22 Pz Div (2-240 Pz Bn); 23 Pz Div (2-201, 3-201 Pz Bn); 24 Pz Div (3-24 Pz Bn, 26 PG Rgt, 40 PJ Bn); 29 Mtr Div (29 Motorcycle Bn, 29 PJ Bn); 1 Rum Pz Div (1-1 Pz Bn, 1 Arty Rgt, Organic Truck); 20-4-3 Inf Div (94, 384); 12-2-2 LW Div (15 Fld); 6-3-2 Sec Div (213); 6-2-2 Sec Div (403); 5-5-8 AG Bn (177, 245); 4-4-3 PJ KG (Lepper); 3-3-7 PJ Bn (162); 1-3-2 Pol Bn (521); 10-2-3 Werfer Bn (1-51, 2-51); 4 Rum Corps HQ; 5 Rum Corps HQ; 16-1-1 Rum Arty Rgt (2 Hvy, 4 Hvy, 5 Hvy); 12-3-3 Rum Inf Div (13); 12-2-2 Rum Inf Div (6, 15); 1-3-4 Rum Cav Bn (52, 55); 6-4-4 Cossack Cav Rgt (v.Jung).
Air Losses: 1x He111h, 1x Ju52, 1x Rum Me109e.
Set Up (all units are German, unless noted otherwise): A61.34 7-2-2 Hun Inf Div (9), Level 1 Hedgehog; A62.33 7-3-3 Hun Inf Div (6), Level 1 Hedgehog; A61.33 12-1-1 Hun Arty Rgt (3); A60.32 5-4-6 AG Bn (190), 3-3-3 Pz Bn (700 PzVb); A60.31 3 Hun Corps HQ, 1 Hun Pz Div (51 PJ Bn, Organic Truck), 2T; A61.29 1 Hun Pz Div (2-30 Pz Bn, 1 Inf Rgt, 5 Arty Bn); A62.27 1 Hun Pz Div (1 Rec Bn, 1-30 Pz Bn, 1 Arty Bn); A60.21 6-1-3 It Sec Div (Vicenza, in Move Mode); A49.24 6-4-4 It Cavalry Brigade (Barbo) — then the identical set of C-hex units given for Scenario 5's Axis Set Up above, from C1.33 (7-3-3 Hun Inf Div (20, less 1 step)) through C26.04 (22 Pz Div (24 Motorcycle Bn, 1-240 Pz Bn, 140 Arty Rgt, Organic Truck)) — plus the following additional units extending the line east onto the Chir and south to the Stalingrad relief and pocket sectors: D35.21 6 Rum Corps HQ, 16-1-1 Rum Arty Rgt (1 Hvy); D36.21 12-2-2 Rum Inf Div (2, less 3 steps); D36.22 1-3-4 Rum Cav Bn (56); D37.23 12-3-3 Rum Inf Div (18, less 3 steps); D38.23 17 Pz Div (17 Motorcycle Bn, 63 PG Rgt); D38.22 17 Pz Div (27 Arty Rgt, Organic Truck), 1 SP; D39.23 17 Pz Div (1-39 Pz Bn, 40 Inf Rgt); D40.23 6 Pz Div (6 Motorcycle Bn), 17 Pz Div (27 PJ Bn); D40.22 10-2-3 Werfer Bn (1-1, 2-1); D41.23 6 Pz Div (2-11 Pz Bn, 4 Inf Rgt); D41.22 6 Pz Div (76 Arty Rgt, 2x Organic Truck), 2 SPs; D42.23 6 Pz Div (1-11 Pz Bn, 114 PG Rgt); D43.23 6 Pz Div (41 PJ Bn); D42.22 10-2-3 Werfer Bn (1-52, 2-52, 3-52); D43.22 23 Pz Div (128 Arty Rgt, Organic Truck), 1 SP; D44.23 23 Pz Div (1-201 Pz Bn, 128 PG Rgt); D44.22 23 Pz Div (23 Motorcycle Bn); D44.21 23 Pz Div (126 Inf Rgt); D44.20 7-4-4 Rum Cav Bde (8); D45.20 12-2-2 Rum Inf Div (5, less 2 steps); D45.19 7-4-4 Rum Cav Bde (5); D45.18 12-2-2 Rum Inf Div (1, less 2 steps); D44.18 10-2-3 Werfer Bn (3-1); D45.17 Rum Breakdown Rgt; D45.16 12-3-3 Rum Inf Div (4, less 2 steps); D46.15 Rum Breakdown Rgt; D46.14 1-2-4 Rum Cav Bn (57); D44.15 7 Rum Corps HQ, 16-1-1 Rum Arty Rgt (7 Hvy); D42.15 Wagon Extender; D37.20 9-2-1 Arty Bn (857, 861); D37.18 57 Pz Corps HQ, 2-3-3 Bicycle Bn (326), 1-3-2 Pol Bn (551), 5x Truck Points, 22 SPs; w/i 5 D48.01 16 Mtr Div (165 Motorcycle Bn, 126 Pz Bn, 60, 156 Inf Rgt, 228 PJ Bn, 146 Arty Rgt, Organic Truck), 1-3-3 Kalmyk Inf Bn (450, 782, 811), 2 SPs; D44.35 3 Mtr Div (29 Inf Rgt), Breakdown Rgt, Level 1 Hedgehog; D44.34 3 Mtr Div (103 Pz Bn, 3 PJ Bn), Breakdown Rgt, Level 1 Hedgehog; C45.02 20-3-3 Inf Div (376); D45.35 3 Mtr Div (53 Motorcycle Bn, 8 Inf Rgt, 3 Arty Rgt, Organic Truck); C46.02 20-4-3 Inf Div (44, less 2 steps), Level 1 Hedgehog; D46.35 14 Pz Corps HQ, 5-5-3 MG Bn (9 MG), 12-2-3 Werfer Bn (3-2); D46.34 29 Mtr Div (129 Pz Bn), 2x Breakdown Rgt; D46.33 29 Mtr Div (15 Inf Rgt), Breakdown Rgt, Level 1 Hedgehog; C47.03 20-4-3 Inf Div (76, less 1 step), Level 1 Hedgehog; C47.02 8 Corps HQ, 10-2-3 Werfer Bn (3-53), 9-2-1 Arty Bn (2-53), Level 1 Hedgehog; D47.35 14 Pz Div (2-36 Pz Bn, 4, 670 PJ Bn, 4 Arty Rgt, Organic Truck), Level 1 Hedgehog; D47.34 29 Mtr Div (Organic Truck), 5-5-8 AG Bn (244), 12-2-1 Arty Bn (733), 9-2-1 Arty Bn (616, 855), Level 1 Hedgehog; D47.33 29 Mtr Div (71 Inf Rgt, 29 Arty Rgt), Breakdown Rgt; C48.03 20-4-3 Inf Div (113, less 2 steps), 3-3-7 PJ Bn (521), Level 3 Hedgehog; C48.02 9-2-1 Arty Bn (851), Level 1 Hedgehog; D48.33 12-2-3 Werfer Bn (1-2), 10-2-3 Werfer Bn (2-2); D48.32 5-5-8 AG Bn (243), Breakdown Rgt, Level 1 Hedgehog; C49.03 60 Mtr Div (160 Pz Bn, 120, 160 Inf Rgt, Organic Truck), Level 3 Hedgehog; C50.03 60 Mtr Div (160 Motorcycle Bn, 92 Inf Rgt, 160 PJ Bn), Level 3 Hedgehog; C49.02 8-2-1 Arty Bn (849); D49.34 4 Corps HQ, 1-3-2 Pol Bn (541); D48.35 4-2-1 Arty Bn (2-72), 5x Wagon Points, 2 SPs + 1T; D49.33 20-4-3 Inf Div (297, less 2 steps), Level 1 Hedgehog; C50.02 11 Corps HQ, 16 Pz Div (16 Arty Rgt, Organic Truck), Level 3 Hedgehog; D50.34 10-2-3 Werfer Bn (2-53), 9-2-1 Arty Bn (631); D50.33 12-3-3 Rum Inf Div (20, less 3 steps), 7-4-4 Rum Cav Bde (1), Level 1 Hedgehog; C51.03 16 Pz Div (16 Motorcycle Bn, 1-2 Pz Bn, 64 Inf Rgt), Level 3 Hedgehog; C51.02 9-2-1 Arty Bn (2-46, 430, 2-64); D51.35 51 Corps HQ, 1-3-2 Pol Bn (571), 10-2-3 Werfer Bn (3-51), 4-2-1 Arty Bn (101), 5 SPs; D51.34 20-4-3 Inf Div (71, 371, each less 1 step); C52.02 24 Pz Div (1-24 Pz Bn, 21 Inf Rgt), Level 3 Hedgehog; D52.35 24 Pz Div (89 Arty Rgt, Organic Truck), 10-2-3 Werfer Bn (1-53), 4-2-2 Arty Bn (2-54); D52.34 20-4-3 Inf Div (295, less 2 steps), 15-4-3 Jg Div (100, less 1 step), 5-4-3 Croat Inf Rgt (369); C53.03 24 Pz Div (2-24 Pz Bn, 4 Motorcycle Bn), Breakdown Rgt, Level 3 Hedgehog; C53.02 20-4-3 Inf Div (389, less 1 step); D53.35 20-4-3 Inf Div (79, less 1 step, 305, less 3 steps); any hex of Kharkov 1-3-2 Pol Bn (698), (1)-2-5 RR Bn (2), 4-2-1 Arty Bn (1-77), 5x Truck Points, 20 SPs; A56.10 8-5-3 Inf Rgt (Lehr); B59.34 3-3-3 Pol Rgt (10 SS), 2T; B62.15 3-3-3 Pol Rgt (6 SS); B60.05 6-2-2 Sec Div (454).
Air Bases: Level 3: A11.19, A28.24, B14.27. Level 2: A13.02, B42.26, B59.34, B62.15, D18.27, D24.29, D48.35. Level 1: A60.31, C4.15, C9.04, D6.27, D19.03, D51.35.
Air Units: German: 4x Me109g, 2x Fw190a, 5x Ju87d, 2x Me110e, 4x Ju88a, 5x He111h, 1x Hs123b, 4x Ju52, 1x Ju86. Rumanian: 1x Me109e, 1x He111h, 1x SM79b, 1x Ju87b. Italian: 1x MC202, 1x SM81. Hungarian: 1x Mixed Fighter, 1x Mixed Tactical Bomber.
Reinforcements: As per main Order of Arrival. Supply as per the Supply Table. Variable Reinforcement Holding Box: 3 Pz, SS-W, 13 Pz Divisions. Variable Reinforcements: As per the Axis Variable Reinforcement Tables. Released Forces: None.
Soviet Information
Reserve Markers Available: 25.
Dead Pile: 1 Tk Corps (89, 159, 117 Tk Bde); 7 Tk Corps (62 Tk Bde); 13 Tk Corps (17, 61 Mech Bde); 16 Tk Corps (107 Tk Bde); 26 Tk Corps (157 Tk Bde); 5 M Corps (188 Tk Bn, 49 Mech Bde); 8-4-8 Tk Bde (8 Gd); 6-2-5 Tk Bde (13, 24, 64, 84, 148, 225); 4-2-4 Tk Bn (139, 198); 3-2-1 Cadet Rgt (Vinca); 3-2-2 Naval Bde (154); 12-2-2 Mtn Div (63); 12-2-2 Inf Div (112, 119, 193); 11-1-1 Inf Div (126, 284, 302, 308); 14-4-3 Inf Div (37 Gd, 39 Gd); 4-2-2 Inf Bde (115, 149, 160).
Air Losses: 1x Yak-1, 1x La-5, 2x IL-2m3, 1x I-16.
Supply Sources: See game rule 1.6. Soviet Gauge Railroads: All railroads east and north of the frontline, up to the German gauge railheads. The railroad between D52.30 and D44.24, inclusive, has been converted to Soviet gauge. Rail Cap: 35.
Set Up: A62.34 12-2-2 Inf Div (100), Level 1 Hedgehog — then the identical set of C-hex units given for Scenario 5's Soviet Set Up above, from C1.34 (Breakdown Rgt) through D40.31 (13-3-3 Inf Div (258)) and the North-of-the-Don railroad repair note, which cover the whole of the Voronezh, Southwest, and Don Fronts as of 17 Dec 42 — plus the following units extending the deployment onto the Stalingrad relief and pocket sectors: D39.31 7 Tk Corps (3 Gd, 87 Tk Bde, 7 Inf Bde), 2-4-6 Motorcycle Bn (50 MC); D37.25 4 Cav Corps (81 Cav Bde); D38.24 6-2-5 Tk Bde (85); D38.28 10-0-1 Inf Div (204), 1-1-2 Naval Bn (156); D39.24 4 Cav Corps (61 Cav Bde); D40.24 4 M Corps (55 Tk Bn, 60 Mech Bde); D41.24 4 M Corps (158 Tk Bn, 59 Mech Bde); D41.25 4 M Corps (36 Mech Bde); D40.27 12-2-2 Inf Div (300); D42.24 11-1-1 Inf Div (87); D43.24 4-2-4 Tk Bn (166), 7-3-6 Tk Bde (56); D44.24 13 Tk Corps (62 Mech Bde), 75-1-0 Katyusha Bde, (1)-0-3 RR Rgt (Stgrd); D46.20 12-2-2 Inf Div (91, less 1 step); D45.24 13 Tk Corps (13 Tk Bde); D45.26 7-3-3 Inf Bde (38), 26-1-1 Arty Bde, 5 SPs; D46.24 4-2-4 Tk Bn (35, 41); C47.08 4-3-6 Tk Bn (6 Gd), 20 SPs; C46.06 (1)-0-0 Pontoon Grp (Don); C45.05 65 Army HQ; C45.04 75-1-0 Katyusha Bde; C44.03 75-1-0 Katyusha Bde; C47.06 (1)-0-0 Pontoon Grp (Don); D53.34 13-3-3 Mtn Div (194); D54.34 4-2-2 Inf Bde (92), 12-2-2 Inf Div (95), 75-1-0 Katyusha Bde; D55.35 62 Army HQ; D54.35 11-1-1 Inf Div (138), 4-2-2 Inf Bde (42), 26-1-1 Arty Bde, 75-1-0 Katyusha Bde; C55.02 4-2-2 Inf Bde (124); C55.03 (1)-0-0 Pontoon Grp (Stgrd); C54.02 14-4-3 Inf Div (13 Gd), 12-2-2 Inf Div (45); C54.03 12-2-2 Inf Div (64), 11-1-1 Inf Div (99), Level 1 Hedgehog; C55.05 66 Army HQ; C54.04 75-1-0 Katyusha Bde; C53.04 4-3-6 Tk Bn (7 Gd), 11-1-1 Inf Div (116), 10-0-1 Inf Div (299), Level 1 Hedgehog; C52.03 11-1-1 Inf Div (226), 10-0-1 Inf Div (260), Level 1 Hedgehog; C52.04 26-1-1 Arty Bde; C51.04 11-1-1 Inf Div (233, 343), Level 1 Hedgehog; C51.05 26-1-1 Arty Bde; C50.04 12-2-2 Inf Div (273), 11-1-1 Inf Div (214), Level 1 Hedgehog; C50.05 24 Army HQ; C49.04 12-2-2 Inf Div (24, 49), Level 1 Hedgehog; C49.05 12-2-2 Inf Div (298), 75-1-0 Katyusha Bde; C48.04 4-3-6 Tk Bn (9 Gd), 12-2-2 Inf Div (84, 120), Level 1 Hedgehog; C48.05 26-1-1 Arty Bde; C47.05 6-2-5 Tk Bde (58, 121), 7-3-6 Tk Bde (91), Level 1 Hedgehog; C46.04 16 Tk Corps (109, 164 Tk Bde, 15 Inf Bde); C47.04 11-1-1 Inf Div (173, 304), 4-3-6 Tk Bn (8 Gd); C46.03 13-3-3 Inf Div (51 Gd), 11-1-1 Inf Div (277), 4-3-6 Tk Bn (5 Gd); C45.03 13-3-3 Inf Div (27 Gd), 4-3-6 Tk Bn (10 Gd); C44.02 6-2-5 Tk Bde (10), 11-1-1 Inf Div (252); C43.02 12-2-2 Inf Div (23), 26-1-1 Arty Bde; D43.35 13-3-3 Inf Div (4 Gd), 5-4-8 Tk Bn (4 Gd); D41.34 21 Army HQ, 3-2-3 Inf Bde (1 Lt), 26 Tk Corps (19, 216 Tk Bde, 14 Inf Bde); D42.33 26-1-1 Arty Bde; D43.34 12-2-2 Inf Div (96), 5-4-8 Tk Bn (1 Gd, 2 Gd); D45.34 14-4-3 Inf Div (52 Gd); D44.33 12-2-2 Inf Div (293), (5)-1-1 UR Bde (54); D43.33 2 Gd Army HQ, 26-1-1 Arty Bde; D45.33 14-4-3 Inf Div (15 Gd), 15-1-1 Arty Rgt (5); D46.32 11-1-1 Inf Div (169), 3-1-1 Inf Bde (143), 26-1-1 Arty Bde; w/i 1 D43.32 2 Gd M Corps (21, 22 Tk Bn, 4 Gd, 5 Gd, 6 Gd Mech Bde, 117 Gd Arty Rgt); D47.32 13-3-3 Inf Div (36 Gd), 12-2-2 Inf Div (157); D47.31 57 Army HQ; D47.30 7-3-6 Tk Bde (235); D48.31 11-1-1 Inf Div (38, 422), 75-1-0 Katyusha Bde; D49.32 3-2-3 Inf Bde (20 Lt), 3-1-1 Naval Bde (66), (5)-1-1 UR Bde (118); D50.31 26-1-1 Arty Bde, 15-1-1 Arty Rgt (400); D50.32 (5)-1-1 UR Bde (77, 115, 156); D51.33 7 Rifle Corps (93, 96, 97 Inf Bde); D51.32 75-1-0 Katyusha Bde; D51.31 64 Army HQ, (1)-0-0 Pontoon Grp (Stgrd); D52.30 Wagon Extender, 10 SPs; D63.31 (1)-0-0 Pontoon Bn (8 Hvy); D62.28 4x Wagon Points, 10 SPs; D51.26 7-3-6 Tk Bde (254); D50.28 12-2-2 Inf Div (29); D47.27 51 Army HQ, 4 Tk Corps (45, 69, 102 Tk Bde, 4 Inf Bde), 7-3-6 Tk Bde (90), (5)-0-1 UR Bde (76); D44.28 13-3-3 Inf Div (3 Gd); D43.29 12-2-2 Inf Div (49 Gd, 387); D42.29 13-3-3 Inf Div (98); D41.30 13-3-3 Inf Div (24 Gd); D41.31 5 Shock Army HQ, 12-2-2 Inf Div (33 Gd).
Air Bases: Level 2: C14.31, C28.21, C34.25, C51.14, C58.06, D41.34. Level 1: C32.06, C17.25, C40.19, C46.31, C23.34, D61.33.
Air Units: 8x Po-2, 4x La-5, 4x IL-4, 3x Yak-1, 5x Yak-7b, 2x SB-2, 6x Pe-2, 12x IL-2m3.
Reinforcements: As per the main Order of Arrival. Supply as per the Supply Table. Variable Reinforcements: As per the Soviet Variable Reinforcement Table. Released Mobile Forces: 3 Gd Cav Corps, 8 Cav Corps.
Victory Points at Start: 0 VPs (4x Alert Rolls, less 4 VPs for the 3 Gd & 8 Cav Corps).
Victory: Use game rule 5.0 to determine victory.
Scenario 7: Operation Star
This small scenario deals with only one of the pair of operations the Soviets launched in early February, 1943. Operation Star is the northern drive and is aimed at the capture of Kharkov. Like any of the other small scenarios in the game, this one can be used as an introduction to the system and its techniques.
- Map Area: Map A (North of Axx.15, inclusive)
- First Turn: 23
- Last Turn: 27
- Game Length: 5 turns
- Weather: Volga: NA. Major Rivers: Frozen. Minor Rivers: Frozen.
Axis Information
Reserve Markers Available: 10. Supply Sources: As per rule 1.6. Rail Cap: 5. German Gauge Railroads: All railroads west of the frontline.
Set Up (all units are German, unless noted otherwise): A45.35 Breakdown Rgt; A43.34 20-4-3 Inf Div (168, less 2 steps); A42.33 7-2-2 Hun Inf Div (23, less 1 step); A42.32 7-2-2 Hun Inf Div (10, less 1 step); A41.32 7-3-3 Hun Inf Div (13, less 1 step); A41.33 12-1-1 Hun Arty Rgt (7); A40.33 1 Hun Pz Div (1 Rec Bn, 1 Inf Rgt); A40.32 Cramer Corps HQ, 4 Hun Corps HQ, 5-3-4 AG Bn (201); A40.29 GD Mtr Div (AG Bn); A41.27 GD Mtr Div (Füs Inf Rgt, Arty Rgt, Organic Truck), 1 SP; A38.26 GD Mtr Div (PJ Bn); A38.25 GD Mtr Div (Gren Inf Rgt); A37.26 GD Mtr Div (Rec Bn, 1, 2 Pz Bn, Organic Truck), 2 SPs; A41.24 4-5-8 PG Bn (Begleit); A41.21 SS-R Pz Div (Führer PG Rgt); A42.18 3-3-3 Pol Rgt (11 SS); A43.17 Breakdown Rgt, 7-2-2 Arty Bn (2-71), Wagon Extender, 1 SP; A45.16 20-4-3 Inf Div (298, less 1 step); A34.30 24 Pz Corps HQ, 20-4-3 Inf Div (387, less 1 step), 20-3-3 Inf Div (385, less 2 steps), 2 SPs; A31.22 SS-AH Pz Div (LAH Rec Bn, 1-LAH Pz Bn, LAH AG Bn, 1, 2 Inf Rgt); A31.21 SS-AH Pz Div (2-LAH Pz Bn, LAH PJ Bn, LAH Arty Rgt, 2x Organic Truck), 2 SPs; A29.23 10x Truck Points; A29.22 SS Pz Corps HQ; A28.24 (1)-2-5 RR Bn (511); A28.22 10 SPs; A28.21 10-2-3 Werfer Bn (3-54); A23.22 SS-R Pz Div (2-DR Pz Bn); A22.22 SS-R Pz Div (DR PJ Bn); A21.22 SS-R Pz Div (Deutld Inf Rgt); A20.21 SS-R Pz Div (DR AG Bn, DR Arty Rgt); A19.21 SS-R Pz Div (Organic Truck), 1 SP; A18.20 SS-R Pz Div (Organic Truck), 1 SP; A11.19 3-3-3 Pol Rgt (10 SS); A10.18 SS-R Pz Div (DR Rec Bn, 1-DR Pz Bn, Lngmk Inf Rgt).
Air Bases: Level 3: A11.19, A28.24. Air Units: German: 1x Me109g, 1x Fw190a, 2x He111h, 1x Ju87d, 1x Me110e, 2x Ju88a.
Reinforcements: 8 SPs per turn. Turn 24 — SS-T Pz Div (Thule Inf Rgt, 3 Rec Bn, TK PJ Bn, Organic Truck) at Poltava. Turn 26 — SS-T Pz Div (1-TK, 2-TK Pz Bn, TK AG Bn, 1 PG Rgt, 3 Inf Rgt, TK Arty Rgt, Organic Truck), Raus Corps HQ at Poltava.
Variable Reinforcement Holding Box: None. Variable Reinforcements: None.
Soviet Information
Reserve Markers Available: 8. Supply Sources: Any road hex leading off the east map edge. Soviet Gauge Railroads: A50.24 to A62.33. Rail Cap: 10.
Set Up: A47.35 12-2-2 Inf Div (107); A47.34 4-2-2 Inf Bde (129); A47.33 12-2-2 Inf Div (100, less 1 step); A47.32 4 Tk Corps (69 Tk Bde, 4 Inf Bde); A47.31 6-2-5 Tk Bde (116); A46.30 13-3-3 Inf Div (25 Gd, less 1 step); A46.29 6-2-5 Tk Bde (192); A46.28 4-2-2 Inf Bde (37); A45.28 12-2-2 Inf Div (161, less 1 step); A45.27 11-1-1 Inf Div (219); A45.26 11-1-1 Inf Div (270); A46.25 12-2-2 Inf Div (180); A47.27 6-2-5 Tk Bde (137), 4-2-4 Tk Bn (292); A50.31 69 Army HQ, 7-3-6 Tk Bde (14); A50.24 (1)-0-3 RR Rgt (Voro); A46.24 13-3-3 Inf Div (48 Gd, less 1 step), 26-1-1 Arty Bde; A45.23 12-2-2 Inf Div (160); A46.21 13-3-3 Inf Div (62 Gd); A46.19 11-1-1 Inf Div (111); A46.18 4-2-4 Tk Bn (201); A47.17 11-1-1 Inf Div (350, less 1 step); A48.16 12-2-2 Inf Div (172); A48.19 6 Gd Cav Corps (8 Gd, 13 Gd, 8 Cav Bde, 136, 154, 250 Tk Bn); A48.21 6-2-5 Tk Bde (179); A47.23 12 Tk Corps (30, 97, 106 Tk Bde, 13 Inf Bde); A49.25 15 Tk Corps (88, 113, 195 Tk Bde, 52 Inf Bde); A49.24 3 Tank Army HQ, 12-2-2 Inf Div (184), 10 SPs; A60.31 12-2-2 Inf Div (206), 2x Truck Points, 5x Wagon Points, 10 SPs; A61.34 12-2-2 Inf Div (183).
Air Bases: Level 2: A60.31. Air Units: 2x La-5, 4x IL-2m3, 1x IL-4, 2x Pe-2.
Reinforcements: 10 SPs per turn. Turn 24 — 4-2-4 Tk Bn (59, 60, 61) at A62.30. Variable Reinforcements: None.
Victory: The Soviet player wins if he occupies any three hexes along the west bank of the Donets River at the end of play. Otherwise, the German player wins.
Scenario 8: Operation Gallup
Operation Gallup was the sister offensive to Operation Star. It was an attack to the south of the Donets River in order to dislocate the Mius River defensive line. The result ended in disaster as the Popov Front Mobile Group ended up overextended in the region between the Donets and the Dnepr and unable to breakout from the Germans defending to the northwest of Stalino—a situation offering the perfect target for von Manstein's counteroffensive.
- Map Area: Map A (south Axx.15, inclusive), Map B (all)
- First Turn: 21
- Last Turn: 27
- Game Length: 7 turns
- Weather: Volga: NA. Major Rivers: Frozen. Minor Rivers: Frozen.
Axis Information
Reserve Markers Available: 20. Supply Sources: As per rule 1.6. German Gauge Railroads: All railroads in the play area. Rail Cap: 12.
Set Up (all units are German, unless noted otherwise): A46.14 Breakdown Rgt; A48.12 20-4-3 Inf Div (320, less 1 step); A47.09 19 Pz Div (73 Inf Rgt); A48.07 19 Pz Div (19 Motorcycle Bn); A49.07 19 Pz Div (74 PG Rgt); A49.06 Alert Bn; A49.05 19 Pz Div (19 Arty Rgt, Organic Truck), 1 SP; A50.05 3 Pz Corps HQ, 8-5-3 Inf Rgt (Lehr), 2 SPs; A50.04 Alert Bn; A52.03 27 Pz Div (127 Pz Bn); A53.02 Alert Bn; A55.02 27 Pz Div (127 Schnell Bn); A28.07 20-3-3 Inf Div (333); A22.02 (1)-2-5 RR Bn (514); A14.01 4-1-2 Hun Sec Div (108); A13.03 4-0-2 Hun Sec Div (105); A13.02 4-1-2 Hun Sec Div (102), 10 SPs; A12.02 6-1-1 Hun Arty Bn (88); B11.29 6-1-1 Hun Arty Bn (87); B11.28 4-1-2 Hun Sec Div (124); B12.28 4-0-2 Hun Sec Div (121); B13.28 (1)-2-5 RR Bn (2); B14.28 3-3-3 Pol Rgt (6 SS); B42.27 7 Pz Div (7 Motorcycle Bn, 2-25 Pz Bn, 78 Arty Rgt), 10 SP; B42.26 10 Wagon Points; B43.28 7 Pz Div (1-25 Pz Bn, 6 Inf Rgt, 42 PJ Bn); B43.27 7 Pz Div (2x Organic Truck), 2 SPs; B46.25 (1)-2-5 RR Bn (83); B52.34 27 Pz Div (Organic Truck), 1 SP; B56.34 It Breakdown Rgt; B57.35 It Breakdown Rgt; B58.35 It Breakdown Rgt.
Set Up (continued): A59.02 20-3-3 Inf Div (335); B59.35 6-5-8 Pz Bn (138), Breakdown Rgt; B60.34 17-5-3 Mtn Div (3 Mtn, less 2 steps); B61.34 5-3-3 Inf Rgt (620 Trng); B62.33 Breakdown Rgt; B59.34 Ftr-Pco Corps HQ, 5x Wagon Points, 10 SPs; B60.33 10-2-3 Werfer Bn (1-54), 4-2-1 Arty Bn (1-77); B59.19 3 Pz Div (3 Motorcycle Bn, 3 Inf Rgt); B59.18 3 Pz Div (1-6 Pz Bn, 394 PG Rgt); B60.17 3 Pz Div (543 PJ Bn, 75 Arty Rgt, Organic Truck), 1 SP; B61.16 11 Pz Div (61 Motorcycle Bn, 2-35 Pz Bn, 110 Inf Rgt); B62.15 11 Pz Div (111 PG Rgt), 1-3-2 Pol Bn (685), 10-2-3 Werfer Bn (2-54); B62.14 11 Pz Div (61 PJ Bn, 119 Arty Rgt, 2x Organic Truck), 2 SPs; B61.15 10-2-3 Werfer Bn (1-1, 2-1, 3-1), 3 SPs.
Air Bases: Level 3: B14.27. Level 2: A13.02, B42.26, B59.34, B62.15. Level 1: D6.27.
Air Units: German: 3x Me109g, 1x Fw190a, 3x He111h, 1x Hs123b, 1x Hs129b, 1x Ju86, 4x Ju87d, 1x Me110e, 3x Ju88a, 3x Ju52.
Reinforcements: 12 SPs per turn. No Unit Reinforcements. Variable Reinforcement Holding Box: None. Variable Reinforcements: None.
Soviet Information
Supply Sources: Any road hex leading off the east map edge. Soviet Gauge Railroads: None.
Set Up: A48.15 12-2-2 Inf Div (6, less 1 step); A49.15 7-3-6 Tk Bde (115), 4-2-4 Tk Bn (212); A49.14 4-2-2 Inf Bde (106); A49.13 12-2-2 Inf Div (267, less 1 step); A51.13 3 Tk Corps (51, 103 Tk Bde, 3 Inf Bde); A51.11 6-2-5 Tk Bde (11), (1)-0-0 Pontoon Grp (1 Gd); A48.09 14-4-3 Inf Div (57 Gd), 75-1-0 Katyusha Bde; A48.08 14-4-3 Inf Div (35 Gd); A50.07 13-3-3 Inf Div (195); A50.06 13-3-3 Inf Div (41 Gd); A51.05 11-1-1 Inf Div (78); A52.04 14-4-3 Inf Div (44 Gd); A54.03 14-4-3 Inf Div (58 Gd, less 1 step); A51.10 10 Tk Corps (178, 186 Tk Bde); A51.09 13-3-3 Inf Div (38 Gd), 7 Tk Corps (3 Gd, 87 Tk Bde, 7 Inf Bde), 2-3-6 Motorcycle Bn (53 MC); A51.08 18 Tk Corps (170, 181 Tk Bde, 32 Inf Bde), 2-4-6 Motorcycle Bn (52 MC); A56.10 1 Gd Army HQ, 75-1-0 Katyusha Bde, Truck Extender, 2x Truck Points, 5x Wagon Points, 20 SPs; A58.13 25 Tk Corps (111, 162, 175 Tk Bde, 16 Inf Bde); A56.02 11-1-1 Inf Div (244); A58.02 13-3-3 Inf Div (60 Gd), 4-2-4 Tk Bn (141); A60.02 12-2-2 Inf Div (203); A60.01 13-3-3 Inf Div (50 Gd); A61.01 13-3-3 Inf Div (59 Gd, less 1 step); A57.04 16-1-1 Arty Bde; A58.03 75-1-0 Katyusha Bde; A59.04 26-1-1 Arty Bde.
Air Bases: Level 2: A56.10. Air Units: 2x La-5, 1x Yak-7b, 5x IL-2m3, 1x IL-4, 2x Pe-2.
Reinforcements: 13 SPs per turn. Turn 21 — 1x Truck Point at A58.15. Turn 24 — 26 Tk Corps (19, 157, 216 Tk Bde, 14 Inf Bde) at A56.15, 1x Truck Point at A58.15. Variable Reinforcements: None.
Victory: The Soviet player wins if he holds at least one hex of Stalino AND/OR hex B38.21 at the end of play.
Scenario 9: The Campaign—28 Jan 43 and beyond
This scenario is a campaign start from turn 21. It begins with the Soviets (almost) in position to launch Star and Gallup. It also allows a glimpse into the last days of the Stalingrad Pocket. A pocket which has been cut into three parts (north, center, and south, the last two being in one hex and the northern pocket in a second hex). The last remains of the 6th Army are there and its official death is only a short time away. I'd say its suffering is about to come to an end, but that is not true—for the few survivors must face the vengeful Soviet Union until the last meager remnants are released in 1955.
- Map Area: All
- First Turn: 21
- Last Turn: As per 1.5
- Game Length: 14 turns, possibly a little less
- Weather: Volga: Frozen. Major Rivers: Frozen. Minor Rivers: Frozen.
Axis Information
Reserve Markers Available: 30.
Dead Pile: 3 Pz Div (2-6, 3-6 Pz Bn); 6 Pz Div (2-11 Pz Bn, 114 PG Rgt); 7 Pz Div (7 PG Rgt); 11 Pz Div (1-15, 2-15 Pz Bn); 13 Pz Div (3-29 Pz Bn); 14 Pz Div (64 Motorcycle Bn, 3-7, 2-36 Pz Bn, 103 Inf Rgt, 108 PG Rgt, 4, 670 PJ Bn, 4 Arty Rgt, Organic Truck); 16 Pz Div (16 Motorcycle Bn, 1-2, 2-2, 2-10 Pz Bn, 79 PG Rgt, 16 PJ Bn, 16 Arty Rgt, Organic Truck); 19 Pz Div (2-27 Pz Bn, 19 PJ Bn); 22 Pz Div (1-240, 2-240 Pz Bn, 24 Motorcycle Bn, 140 Arty Rgt); 23 Pz Div (1-201, 2-201, 3-201 Pz Bn); 24 Pz Div (4 Motorcycle Bn, 1-24, 2-24, 3-24 Pz Bn, 26 PG Rgt, 40 PJ Bn, 89 Arty Rgt, Organic Truck); 27 Pz Div (140 Inf Rgt, 127 Arty Rgt); 3 Mtr Div (53 Motorcycle Bn, 103 Pz Div, 8, 29 Inf Rgt, 3 PJ Bn, 3 Arty Rgt, Organic Truck); 16 Mtr Div (126 Pz Bn); 29 Mtr Div (29 Motorcycle Bn, 129 Pz Bn, 15, 71 Inf Rgt, 29 PJ Bn, 29 Arty Rgt, Organic Truck); 60 Mtr Div (160 Motorcycle Bn, 160 Pz Bn, 120 Inf Rgt, 160 PJ Bn, 160 Arty Rgt, Organic Truck); D'Aosta Celere Div (47 Brs Motorcycle Bn, 67 Brs Pz Bn, 13 AG Bn, 3 Brs, 6 Brs Bicycle Rgt, 120 Arty Rgt, 99 Mortar Bn, Organic Truck); 1 Rum Pz Div (1-1, 2-1 Pz Bn, 3, 4 Inf Rgt, PzJg PJ Bn, 1 Arty Rgt, Organic Truck); 1 Hun Pz Div (1-30, 2-30 Pz Bn, 51 PJ Bn, 1, 5 Arty Bn, Organic Truck); 20-4-3 Inf Div (26, 44, 68, 71, 79, 94, 295, 297, 305, 371); 20-3-3 Inf Div (376); 12-2-2 LW Div (7 Fld, 15 Fld); 6-3-2 Sec Div (213); 6-2-2 Sec Div (403); 14 Pz Corps HQ; 4 Corps HQ; 5-5-8 AG Bn (177, 232, 243, 244, 245); 5-4-6 AG Bn (190, 393); 3-3-3 Pz Bn (700 PzVb); 5-5-3 MG Bn (9 MG); 4-4-3 PJ KG (Lepper); 3-3-7 PJ Bn (162, 521); 3-3-3 Pol Rgt (14 SS); 1-3-2 Pol Bn (521, 541, 571); 12-2-3 Werfer Bn (1-2, 3-2); 10-2-3 Werfer Bn (2-2, 1-51, 2-51, 3-51, 1-53, 2-53, 3-53); 9-2-1 Arty Bn (2-46, 2-53, 2-64, 430, 616, 631, 800, 851, 855); 12-2-1 Arty Bn (733); 8-2-1 Arty Bn (849); 4-2-2 Arty Bn (2-54, 842); 4-2-1 Arty Bn (2-72, 101); 6-4-4 Cossack Cav Rgt (v.Jung); 5-4-3 Croat Inf Rgt (369); 2-3-3 Croat Inf Rgt (Legion); 1-3-3 Kalmyk Inf Bn (450, 782, 811); Rum Corps HQ (1, 2, 4, 5, 6, 7); 12-3-3 Rum Inf Div (4, 9, 11, 13, 18, 20); 12-2-2 Rum Inf Div (1, 2, 5, 6, 7, 14, 15); 7-4-4 Rum Cav Bde (1); 5-3-3 Rum Cav Bde (7); 1-3-4 Rum Cav Bn (52, 55, 56); 1-2-4 Rum Cav Bn (51, 54, 57); 1-2-2 Rum Inf Bn (430); 16-1-1 Rum Arty Rgt (1 Hvy, 2 Hvy, 4 Hvy, 5 Hvy, 7 Hvy, 8 Hvy); It Corps HQ (2, 35, Alpini); 13-4-3 It Mtn Div (Cuneense, Julia, Trdntina); 12-3-3 It Inf Div (Cosseria, Pasubio, Ravenna, Szfrzsca, Torino); 6-1-3 It Sec Div (Vicenza); 6-4-4 It Cav Bde (Barbo); 8-3-3 It Blackshirt Rgt (3 Gen, 23 Mar); 4-5-3 It Ski Bn (M.Cerv); 3-4-3 It Aslt Eng Bn (2, 15, 30); 4-3-3 It MG Bn (2, 102, 104, 109, 156); 1-0-3 It Ter Bn (215, 217, 218, 247, 441, 450, 454); 20-2-2 It Arty Rgt (2, 11, 31, 73); 20-2-1 It Arty Rgt (30); 9-2-2 It Arty Bn (24, 32, 34, 50); Hun Corps HQ (3, 7); 7-3-3 Hun Inf Div (6, 12, 20); 7-2-2 Hun Inf Div (7, 9, 19); 12-1-1 Hun Arty Rgt (3, 4); 8-1-1 Hun Arty Bn (101); 6-1-1 Hun Arty Bn (150).
Air Losses: 1x Me109g, 1x Ju87d, 4x He111h, 1x Fw200c, 3x Ju52, 2x Rum Me109e, 1x Rum He111h, 1x Rum Ju87b, 1x Rum SM79b, 1x Hun Mixed Fighter, 1x Hun Mixed Tactical Bomber, 1x It MC202, 1x It SM81.
Supply Sources: As per rule 1.6. German Gauge Railroads: All railroads west and south of the frontline. Rail Cap: 17.
Set Up (all units are German, unless noted otherwise): A45.35 Breakdown Rgt; A43.34 20-4-3 Inf Div (168, less 2 steps); A42.33 7-2-2 Hun Inf Div (23, less 1 step); A42.32 7-2-2 Hun Inf Div (10, less 1 step); A41.32 7-3-3 Hun Inf Div (13, less 1 step); A41.33 12-1-1 Hun Arty Rgt (7); A40.33 1 Hun Pz Div (1 Rec Bn, 1 Inf Rgt); A40.32 Cramer Corps HQ, 4 Hun Corps HQ, 5-3-4 AG Bn (201); A40.29 GD Mtr Div (AG Bn); A41.27 GD Mtr Div (Füs Inf Rgt, Arty Rgt, Organic Truck), 1 SP; A38.26 GD Mtr Div (PJ Bn); A38.25 GD Mtr Div (Gren Inf Rgt); A37.26 GD Mtr Div (Rec Bn, 1, 2 Pz Bn, Organic Truck), 2 SPs; A41.24 4-5-8 PG Bn (Begleit); A41.21 SS-R Pz Div (Führer PG Rgt); A42.18 3-3-3 Pol Rgt (11 SS); A43.17 Breakdown Rgt, 7-2-2 Arty Bn (2-71), Wagon Extender, 1 SP; A45.16 20-4-3 Inf Div (298, less 1 step); A34.30 24 Pz Corps HQ, 20-4-3 Inf Div (387, less 1 step), 20-3-3 Inf Div (385, less 2 steps), 2 SPs; A31.22 SS-AH Pz Div (LAH Rec Bn, 1-LAH Pz Bn, LAH AG Bn, 1, 2 Inf Rgt); A31.21 SS-AH Pz Div (2-LAH Pz Bn, LAH PJ Bn, LAH Arty Rgt, 2x Organic Truck), 2 SPs; A29.23 10x Truck Points; A29.22 SS Pz Corps HQ; A28.24 (1)-2-5 RR Bn (511); A28.22 10 SPs; A28.21 10-2-3 Werfer Bn (3-54); A23.22 SS-R Pz Div (2-DR Pz Bn); A22.22 SS-R Pz Div (DR PJ Bn); A21.22 SS-R Pz Div (Deutld Inf Rgt); A20.21 SS-R Pz Div (DR AG Bn, DR Arty Rgt); A19.21 SS-R Pz Div (Organic Truck), 1 SP; A18.20 SS-R Pz Div (Organic Truck), 1 SP; A11.19 3-3-3 Pol Rgt (10 SS); A10.18 SS-R Pz Div (DR Rec Bn, 1-DR Pz Bn, Lngmk Inf Rgt); A46.14 Breakdown Rgt; A48.12 20-4-3 Inf Div (320, less 1 step); A47.09 19 Pz Div (73 Inf Rgt); A48.07 19 Pz Div (19 Motorcycle Bn); A49.07 19 Pz Div (74 PG Rgt); A49.06 Alert Bn; A49.05 19 Pz Div (19 Arty Rgt, Organic Truck), 1 SP; A50.05 3 Pz Corps HQ, 8-5-3 Inf Rgt (Lehr), 2 SPs; A50.04 Alert Bn; A52.03 27 Pz Div (127 Pz Bn); A53.02 Alert Bn; A55.02 27 Pz Div (127 Schnell Bn); A28.07 20-3-3 Inf Div (333); A22.02 (1)-2-5 RR Bn (514); A14.01 4-1-2 Hun Sec Div (108); A13.03 4-0-2 Hun Sec Div (105); A13.02 4-1-2 Hun Sec Div (102), 10 SPs; A12.02 6-1-1 Hun Arty Bn (88); B11.29 6-1-1 Hun Arty Bn (87); B11.28 4-1-2 Hun Sec Div (124); B12.28 4-0-2 Hun Sec Div (121); B13.28 (1)-2-5 RR Bn (2); B14.28 3-3-3 Pol Rgt (6 SS); B42.27 7 Pz Div (7 Motorcycle Bn, 2-25 Pz Bn, 78 Arty Rgt), 10 SP; B42.26 10 Wagon Points; B43.28 7 Pz Div (1-25 Pz Bn, 6 Inf Rgt, 42 PJ Bn); B43.27 7 Pz Div (2x Organic Truck), 2 SPs; B46.25 (1)-2-5 RR Bn (83); B52.34 27 Pz Div (Organic Truck), 1 SP; B56.34 It Breakdown Rgt; B57.35 It Breakdown Rgt; B58.35 It Breakdown Rgt; A59.02 20-3-3 Inf Div (335); B59.35 6-5-8 Pz Bn (138), Breakdown Rgt; B60.34 17-5-3 Mtn Div (3 Mtn, less 2 steps); B61.34 5-3-3 Inf Rgt (620 Trng); B62.33 Breakdown Rgt; B59.34 Ftr-Pco Corps HQ, 5x Wagon Points, 10 SPs; B60.33 10-2-3 Werfer Bn (1-54), 4-2-1 Arty Bn (1-77); B59.19 3 Pz Div (3 Motorcycle Bn, 3 Inf Rgt); B59.18 3 Pz Div (1-6 Pz Bn, 394 PG Rgt); B60.17 3 Pz Div (543 PJ Bn, 75 Arty Rgt, Organic Truck), 1 SP; B61.16 11 Pz Div (61 Motorcycle Bn, 2-35 Pz Bn, 110 Inf Rgt); B62.15 11 Pz Div (111 PG Rgt), 1-3-2 Pol Bn (685), 10-2-3 Werfer Bn (2-54); B62.14 11 Pz Div (61 PJ Bn, 119 Arty Rgt, 2x Organic Truck), 2 SPs; B61.15 10-2-3 Werfer Bn (1-1, 2-1, 3-1), 10 SPs; B59.27 40 Pz Corps HQ; B62.33 It Breakdown Rgt; B62.32 It Breakdown Rgt; B62.31 It Breakdown Rgt; D1.31 It Breakdown Rgt; D2.30 20-2-3 Inf Div (304, less 1 step); D3.31 Alert Bn; D4.30 20-3-3 Inf Div (302); D5.30 Alert Bn; D3.30 9-2-1 Arty Bn (861), 3-2-2 Arty Bn (2-62); D7.30 6 Pz Div (1-11 Pz Bn, 4 Inf Rgt); D8.28 6 Pz Div (6 Motorcycle Bn); D9.28 6 Pz Div (41 PJ Bn, 76 Arty Rgt); D7.28 10-2-3 Werfer Bn (2-52); D6.27 48 Pz Corps HQ, 6 Pz Div (2x Organic Truck), 4 SPs; D10.28 Alert Bn; D11.28 20-3-3 Inf Div (306); D11.27 22 Pz Div (129 Inf Rgt); D12.26 3-3-7 PJ Bn (611), 2-3-3 Bicycle Bn (162); D12.25 22 Pz Div (140 PJ Bn); D9.25 22 Pz Div (Organic Truck), 1 SP; D13.25 20-4-3 Inf Div (294, less 2 steps); D14.24 8-3-3 Inf Rgt (190); D14.23 12-2-2 LW Div (8 Fld); D14.22 20-4-3 Inf Div (62, less 2 steps); D14.21 20-4-3 Inf Div (336, less 2 steps); D12.24 10-2-3 Werfer Bn (1-52); D13.23 9-2-1 Arty Bn (857); D13.22 10-2-3 Werfer Bn (3-52); D10.23 17 Corps HQ, 1 SP; D13.20 20-4-3 Inf Div (384, less 2 steps); D12.19 Breakdown Rgt; D11.19 Breakdown Rgt; D10.18 2x Rum Breakdown Rgt; D9.18 7-4-4 Rum Cav Bde (8); D8.18 7-4-4 Rum Cav Bde (5); D7.18 1-3-2 Pol Bn (551); D6.17 Breakdown Rgt; D5.17 Breakdown Rgt; D4.17 2-3-3 Bicycle Bn (326); D4.16 Breakdown Rgt; D4.15 1-3-2 Pol Bn (698); D7.22 Wagon Extender; D5.21 29 Corps HQ; D4.14 16 Mtr Div (228 PJ Bn); D6.14 16 Mtr Div (165 Motorcycle Bn); D7.14 16 Mtr Div (60 Inf Rgt, 146 Arty Rgt, Organic Truck), 1 SP; D8.13 16 Mtr Div (156 Inf Rgt); D8.12 17 Pz Div (63 PG Rgt); D9.12 17 Pz Div (17 Motorcycle Bn, 40 Inf Rgt); D9.11 17 Pz Div (139 Pz Bn, 27 PJ Bn); D8.11 17 Pz Div (27 Arty Rgt, Organic Truck), 1 SP; D9.10 23 Pz Div (126 Inf Rgt); D8.09 23 Pz Div (23 Motorcycle Bn, 128 PG Rgt); D8.10 23 Pz Div (128 Arty Rgt, Organic Truck), 1 SP; D7.09 SS-W Div (Ger Inf Rgt, Wiking PJ Bn); D6.08 SS-W Div (Wiking Rec Bn, Wstld Inf Rgt); D5.08 SS-W Div (Wiking Pz Bn, Nrdlnd Inf Rgt); D6.09 SS-W Div (5 Arty Rgt, Organic Truck), 1 SP; D5.09 SS-W Div (Organic Truck), 1 SP; D4.08 Breakdown Rgt; D3.08 Breakdown Rgt; D2.07 Breakdown Rgt; D1.07 20-4-3 Inf Div (111, less 3 steps); D1.08 9-2-2 Arty Bn (731); D2.08 11-2-2 Arty Bn (607); D1.12 5-5-8 AG Bn (203); B62.12 57 Pz Corps HQ, 1-3-2 Pol Bn (682), 2 SP; B62.06 Breakdown Rgt; B61.06 6-2-2 Sec Div (454), 2x Alert Bn; B60.05 5-5-8 AG Bn (210), 6-3-2 Sec Div (444), 7-2-2 Arty Bn (602); B60.06 12-2-2 Arty Bn (732); B60.04 Alert Bn; B59.04 Alert Bn; B58.03 Alert Bn.
The following are Out of Supply and have Exhausted their Internal Stocks: D52.34 51 Corps HQ, 8 Corps HQ, 20-4-3 Inf Div (76, 113, each less 3 steps); C53.03 11 Corps HQ, 24 Pz Div (21 Inf Rgt), 16 Pz Div (64 Inf Rgt), 60 Mtr Div (92 Inf Rgt), 20-4-3 Inf Div (389, less 3 steps), 15-4-3 JG Div (100, less 2 steps).
Air Bases: Level 3: A11.19, A28.24, B14.27. Level 2: A13.02, B42.26, B59.34, B62.15. Level 1: D6.27.
Air Units: German: 4x Me109g, 2x Fw190a, 5x He111h, 1x Hs123b, 1x Hs129b, 1x Ju86, 5x Ju87d, 2x Me110e, 5x Ju88a, 3x Ju52.
Reinforcements: As per Order of Arrival. Supply as per the Supply Table. Variable Reinforcement Holding Box: None. Variable Reinforcements: As per the Axis Variable Reinforcement Table. Released Forces: 16 Mtr Div.
Soviet Information
Reserve Markers Available: 25.
Dead Pile: 1 Tk Corps (89, 117, 159 Tk Bde, 44 Inf Bde); 3 Tk Corps (50 Tk Bde); 4 Tk Corps (45, 102 Tk Bde); 7 Tk Corps (62 Tk Bde); 13 Tk Corps (17, 61, 62 Mech Bde, 13 Tk Bde); 16 Tk Corps (107, 109, 164 Tk Bde, 15 Inf Bde); 17 Tk Corps (66, 67 Tk Bde); 18 Tk Corps (110 Tk Bde); 24 Tk Corps (4 Gd, 130 Tk Bde); 1 Gd M Corps (17 Gd Tk Bn, 116 Gd Arty Rgt); 2 Gd M Corps (6 Gd Mech Bde, 21 Tk Bn); 5 M Corps (49 Mech Bde, 188 Tk Bn); 4 Cav Corps (61, 81 Cav Bde); 7 Rifle Corps (93, 96 Inf Bde); 40 Army HQ; 14-4-3 Inf Div (37 Gd, 39 Gd); 13-3-3 Inf Div (3 Gd, 1, 159); 12-2-2 Inf Div (23, 112, 119, 153, 193, 197, 273, 278, 298); 12-2-2 Mtn Div (63); 11-1-1 Inf Div (126, 127, 284, 302, 304, 308, 309); 4-2-2 Inf Bde (115, 149, 160); 3-2-2 Naval Bde (154); 3-2-1 Cadet Rgt (Vinca); 8-4-8 Tk Bde (8 Gd); 7-3-6 Tk Bde (9); 6-2-5 Tk Bde (13, 24, 64, 84, 148, 225); 5-4-8 Tk Bn (1 Gd); 4-3-6 Tk Bn (10 Gd); 4-2-4 Tk Bn (82, 119, 139, 198, 243); 2x La-5; 1x Yak-1; 1x I-16; 2x IL-2m3.
Supply Sources: As per 1.6. Soviet Gauge Railroads: East of the following rail heads: A54.28, C7.09, D14.26, D9.07. Rail Cap: 35.
Set Up: A47.35 12-2-2 Inf Div (107); A47.34 4-2-2 Inf Bde (129); A47.33 12-2-2 Inf Div (100, less 1 step); A47.32 4 Tk Corps (69 Tk Bde, 4 Inf Bde); A47.31 6-2-5 Tk Bde (116); A46.30 13-3-3 Inf Div (25 Gd, less 1 step); A46.29 6-2-5 Tk Bde (192); A46.28 4-2-2 Inf Bde (37); A45.28 12-2-2 Inf Div (161, less 1 step); A45.27 11-1-1 Inf Div (219); A45.26 11-1-1 Inf Div (270); A46.25 12-2-2 Inf Div (180); A47.27 6-2-5 Tk Bde (137), 4-2-4 Tk Bn (292); A50.31 7-3-6 Tk Bde (14); A54.28 (1)-0-3 RR Rgt (Voro); A46.24 13-3-3 Inf Div (48 Gd, less 1 step), 26-1-1 Arty Bde; A45.23 12-2-2 Inf Div (160); A46.21 13-3-3 Inf Div (62 Gd); A46.19 11-1-1 Inf Div (111); A46.18 4-2-4 Tk Bn (201); A47.17 11-1-1 Inf Div (350, less 1 step); A48.16 12-2-2 Inf Div (172); A48.19 6 Gd Cav Corps (8 Gd, 13 Gd, 8 Cav Bde, 136, 154, 250 Tk Bn); A48.21 6-2-5 Tk Bde (179); A47.23 12 Tk Corps (30, 97, 106 Tk Bde, 13 Inf Bde); A49.25 15 Tk Corps (88, 113, 195 Tk Bde, 52 Inf Bde); A49.24 3 Tank Army HQ, 12-2-2 Inf Div (184), 3 SPs; A60.31 12-2-2 Inf Div (206), 2x Truck Points, 5x Wagon Points, 5 SPs; A61.34 12-2-2 Inf Div (183); A48.15 12-2-2 Inf Div (6, less 1 step); A49.15 7-3-6 Tk Bde (115), 4-2-4 Tk Bn (212); A49.14 4-2-2 Inf Bde (106); A49.13 12-2-2 Inf Div (267, less 1 step); A51.13 3 Tk Corps (51, 103 Tk Bde, 3 Inf Bde); A51.11 6-2-5 Tk Bde (11), (1)-0-0 Pontoon Grp (1 Gd); A48.09 14-4-3 Inf Div (57 Gd), 75-1-0 Katyusha Bde; A48.08 14-4-3 Inf Div (35 Gd); A50.07 13-3-3 Inf Div (195); A50.06 13-3-3 Inf Div (41 Gd); A51.05 11-1-1 Inf Div (78); A52.04 14-4-3 Inf Div (44 Gd); A54.03 14-4-3 Inf Div (58 Gd, less 1 step); A51.10 10 Tk Corps (178, 186 Tk Bde); A51.09 13-3-3 Inf Div (38 Gd), 7 Tk Corps (3 Gd, 87 Tk Bde, 7 Inf Bde), 2-3-6 Motorcycle Bn (53 MC); A51.08 18 Tk Corps (170, 181 Tk Bde, 32 Inf Bde), 2-4-6 Motorcycle Bn (52 MC); A56.10 1 Gd Army HQ, 75-1-0 Katyusha Bde, Truck Extender, 2x Truck Points, 5x Wagon Points, 20 SPs; A58.13 25 Tk Corps (111, 162, 175 Tk Bde, 16 Inf Bde); A56.02 11-1-1 Inf Div (244); A58.02 13-3-3 Inf Div (60 Gd), 4-2-4 Tk Bn (141); A60.02 12-2-2 Inf Div (203); A60.01 13-3-3 Inf Div (50 Gd); A61.01 13-3-3 Inf Div (59 Gd, less 1 step); A57.04 16-1-1 Arty Bde; A58.03 75-1-0 Katyusha Bde; A59.04 26-1-1 Arty Bde; A56.16 26 Tk Corps (19, 157, 216 Tk Bde, 14 Inf Rgt); A57.19 6 Army HQ, (1)-0-0 Pontoon Grp (6 Ar), 5 SP; C3.34 75-1-0 Katyusha Bde; C2.33 11-1-1 Inf Div (340); C2.32 2x 16-1-1 Arty Bde; C2.31 75-1-0 Katyusha Bde; C1.30 11-1-1 Inf Div (305); C2.22 2x 75-1-0 Katyusha Bde; C7.09 (1)-0-3 RR Rgt (Voro); C6.26 16-1-1 Arty Bde; C7.26 26-1-1 Arty Bde; C5.17 Wagon Extender; C7.11 Wagon Extender; C6.10 1 Gd Cav Corps (1 Gd, 2 Gd, 7 Gd Cav Bde, 61, 87 Tk Bn); C11.21 26-1-1 Arty Bde; C11.13 17 Tk Corps (174 Tk Bde, 31 Inf Bde); C13.31 1 SP; C17.25 3 SPs; C34.25 2 SPs; C2.01 2 Tk Corps (26, 99, 169 Tk Bde, 58 Inf Bde); D1.33 11-1-1 Inf Div (243), 4-2-4 Tk Bn (114); D1.32 14-4-3 Inf Div (14 Gd), 4-2-4 Tk Bn (126); D2.31 13-3-3 Inf Div (61 Gd, less 1 step); D2.33 7-3-3 Inf Bde (22), (1)-0-0 Pontoon Grp (3 Gd); D3.32 3-1-1 Inf Bde (94); D4.31 4-2-2 Inf Bde (90); D5.31 8 Cav Corps (21 Cav Bde); D7.31 8 Cav Corps (55 Cav Bde); D8.30 8 Cav Corps (112 Cav Bde); D8.31 75-1-0 Katyusha Bde; D8.34 23 Tk Corps (3, 39, 135 Tk Bde, 56 Inf Bde); C9.03 1 Gd M Corps (1 Gd, 2 Gd, 3 Gd Mech Bde, 16 Gd Tk Bn); C9.04 3 Gd Army HQ, 11-1-1 Inf Div (266), (1)-0-0 Pontoon Grp (SW), 2x Truck Points, 10 SPs; C10.04 24 Tk Corps (54 Tk Bde, 24 Inf Bde); D9.29 13-3-3 Inf Div (20 Gd); D11.29 12-2-2 Inf Div (346); D12.28 7-3-6 Tk Bde (15 Gd), 3-2-3 Inf Bde (5 Lt); D12.27 13-3-3 Inf Div (258), 7-3-6 Tk Bde (90); D13.27 7-3-6 Tk Bde (56); D13.26 8-4-6 Motorcycle Rgt (8 MC), 3-2-3 Inf Bde (1 Lt); D14.25 12-2-2 Inf Div (321); D13.28 16-1-1 Arty Bde; D14.26 (1)-0-3 RR Rgt (SW); D15.27 5 Tank Army HQ, (1)-0-0 Pontoon Grp (5 Tank), (5)-0-1 UR Bde (76); D18.27 5 SPs; D24.29 (5)-1-1 UR Bde (77); D15.25 3-1-1 Inf Bde (143); D15.24 13-3-3 Inf Div (40 Gd, less 1 step); D15.22 11-1-1 Inf Div (87); D14.20 3 Gd Cav Corps (5 Gd, 6 Gd, 32 Cav Bde), 6-2-5 Tk Bde (86); D14.19 13-3-3 Inf Div (4 Gd), 7-3-6 Tk Bde (150), 4-2-4 Tk Bn (41); D13.19 12-2-2 Inf Div (315); D11.18 12-2-2 Inf Div (300, less 1 step); D10.17 12-2-2 Inf Div (333); D19.23 5 Shock Army HQ; D9.17 12-2-2 Inf Div (33 Gd); D8.17 5 M Corps (50 Mech Bde, 168 Tk Bn); D7.17 5 M Corps (45 Mech Bde); D6.16 2-4-6 Motorcycle Bn (50 MC); D5.16 4 M Corps (36 Mech Bde, 55 Tk Bn), 13-3-3 Inf Div (24 Gd); D5.15 4 M Corps (59, 60 Mech Bde, 158 Tk Bn); D6.15 2-3-6 Motorcycle Bn (54 MC); D7.15 12-2-2 Inf Div (387); D7.16 2 Gd Army HQ, 2x 26-1-1 Arty Bde; D8.16 Truck Extender, (1)-0-0 Pontoon Bn (8 Hvy), 5 SP; D9.15 2 Gd M Corps (4 Gd, 5 Gd Mech Bde, 22 Tk Bn, 117 Gd Arty Rgt); D8.14 6-2-5 Tk Bde (85); D9.14 4-2-4 Tk Bn (189); D9.13 14-4-3 Inf Div (54 Gd); D10.12 12-2-2 Inf Div (131); D10.11 13-3-3 Inf Div (98, less 1 step); D10.10 6-2-5 Tk Bde (10, 33); D10.09 12-2-2 Inf Div (47 Gd, less 1 step); D9.09 6-2-5 Tk Bde (58); D8.08 12-2-2 Inf Div (49 Gd), 2-4-6 Motorcycle Bn (64 MC); D7.08 12-2-2 Inf Div (91, less 1 step); D9.08 75-1-0 Katyusha Bde, 15-1-1 Arty Rgt (110); D9.07 51 Army HQ, (1)-0-3 RR Rgt (Stgrd), 10 SP; D10.04 6 M Corps (51, 54, 55 Mech Bde, 76, 80 Tk Bn); D6.07 12-2-2 Inf Div (248); D5.07 4-2-2 Inf Bde (159); D5.06 (5)-0-1 UR Bde (116); D5.05 28 Army HQ, Wagon Extender; D4.05 4-2-2 Inf Bde (152); D3.05 12-2-2 Inf Div (34 Gd), (5)-0-1 UR Bde (78); D3.04 7-3-6 Tk Bde (6 Gd); D2.03 4-2-2 Inf Bde (52); D37.30 13-3-3 Mtn Div (194); C43.15 (5)-1-1 UR Bde (159), 2 SPs; C47.08 (5)-1-1 UR Bde (54), (1)-0-0 Pontoon Grp (Don, Don), 10 SPs; D41.34 1-3-4 Ski Bn (1), Truck Extender; D43.33 1-3-4 Ski Bn (99); D44.34 12-2-2 Inf Div (96, less 1 step); D46.33 75-1-0 Katyusha Bde; D46.34 21 Army HQ, 1-3-4 Ski Bn (21); D50.28 1-3-4 Ski Bn (49), 1-1-3 Ski Bn (48); D49.32 57 Army HQ, 11-1-1 Inf Div (422), 3-2-3 Inf Bde (20 Lt), (5)-1-1 UR Bde (115); D49.33 7-3-6 Tk Bde (235, 254), 4-2-4 Tk Bn (234), 1-1-2 Naval Bn (156); D48.33 11-1-1 Inf Div (38); D48.34 12-2-2 Inf Div (120, less 1 step); D47.35 26-1-1 Arty Bde; D48.35 11-1-1 Inf Div (233); D49.34 2x 75-1-0 Katyusha Bde; D49.35 5-4-8 Tk Bn (2 Gd, 4 Gd), 4-3-6 Tk Bn (6 Gd), 11-1-1 Inf Div (277); D50.33 2x 26-1-1 Arty Bde; D50.34 3-1-1 Naval Bde (66); D52.30 11-1-1 Inf Div (169), 10-0-1 Inf Div (204), (5)-1-1 UR Bde (118), 10 SPs; D51.32 2x 75-1-0 Katyusha Bde, 15-1-1 Arty Rgt (5, 400); D51.33 64 Army HQ, 13-3-3 Inf Div (36 Gd, less 2 steps), 7 Rifle Corps (97 Inf Bde); D51.34 14-4-3 Inf Div (15 Gd), 12-2-2 Inf Div (157), 7-3-3 Inf Bde (38), 4-2-4 Tk Bn (35, 166); D51.35 14-4-3 Inf Div (52 Gd, less 1 step), 13-3-3 Inf Div (51 Gd, less 1 step), 12-2-2 Inf Div (293), 11-1-1 Inf Div (252); D52.33 12-2-2 Inf Div (29); D53.34 11-1-1 Inf Div (138); D53.35 14-4-3 Inf Div (13 Gd), 12-2-2 Inf Div (45), 4-2-2 Inf Bde (42, 92, 124); D54.35 12-2-2 Inf Div (95), (5)-1-1 UR Bde (156); D55.35 62 Army HQ; D63.31 (1)-0-0 Pontoon Grp (Stgrd); C44.03 2x 75-1-0 Katyusha Bde; C45.03 6-2-5 Tk Bde (121); C45.04 75-1-0 Katyusha Bde; C46.03 65 Army HQ; C47.02 2x 26-1-1 Arty Bde; C48.04 (1)-0-3 RR Rgt (SW); C49.02 11-1-1 Inf Div (214); C49.03 11-1-1 Inf Div (173); C49.04 24 Army HQ, 1-2-4 Ski Bn (52); C50.02 4-3-6 Tk Bn (15 Gd); C51.05 Wagon Extender; C52.01 13-3-3 Inf Div (27 Gd, less 2 steps), 12-2-2 Inf Div (24), 7-3-6 Tk Bde (91), 4-3-6 Tk Bn (5 Gd); C52.02 12-2-2 Inf Div (49, less 1 step, 84), 10-0-1 Inf Div (260), 4-3-6 Tk Bn (8 Gd, 9 Gd); C52.03 2x 26-1-1 Arty Bde; C53.03 12-2-2 Inf Div (64), 11-1-1 Inf Div (116), 10-0-1 Inf Div (299), 4-3-6 Tk Bn (7 Gd); C54.02 11-1-1 Inf Div (99, 226, 343); C54.03 2x 26-1-1 Arty Bde; C55.03 (1)-0-0 Pontoon Grp (Stgrd); C55.05 66 Army HQ.
Air Bases: Level 2: A56.10, A60.31, D18.27, D24.29, D41.34, D48.35, C58.06, C51.14, C34.24, C28.21, C14.31. Level 1: C4.15, C9.04, C32.06, D19.03, D51.35, C46.31, C40.19, C17.25, C23.34, D61.33.
Air Units: 4x La-5, 6x Yak-7b, 3x Yak-1, 13x IL-2m3, 4x IL-4, 7x Pe-2, 2x SB-2, 8x Po-2.
Released Forces: 4 Tk Corps, 26 Tk Corps, 8 Cav Corps, 3 Gd Cav Corps.
Reinforcements: As per Order of Arrival. Supply as per the Supply Table. Variable Reinforcements: As per the Soviet Variable Reinforcement Table.
Victory: At Start Soviet VP Total: 15 (16 VPs from the map, 6 VPs from Alert Rolls, 1 VP for 16 Mtr, less 8 VPs for released forces). Use 5.0 to determine the final winner.
Scenario 10: von Manstein's Backhand Blow
In this scenario, the overextended Red Army lays its neck on the chopping block for von Manstein's counteroffensive. The Soviets are beyond the culminating point of their offensive—well beyond the point of diminishing returns—and the Germans have assembled an awesome mass of force in the form of the SS Panzer Divisions and the Wehrmacht's Grossdeutschland Division with which to slice the Soviet advance to ribbons.
- Map Area: Maps A & B
- First Turn: 27
- Last Turn: As per 1.5
- Game Length: 8 turns, perhaps a little less
- Weather: Volga: NA. Major Rivers: Thawed. Minor Rivers: Frozen.
Axis Information
Reserve Markers Available: 30. Supply Sources: As per 1.6. German Gauge Railroads: All railroads not converted to Soviet Gauge—see Soviet Gauge limits below.
Set Up (all units are German, unless noted otherwise): B53.24 20-3-3 Inf Div (306, less 1 step); B53.23 23 Pz Div (23 Motorcycle Bn, 128 PG Rgt); B53.22 23 Pz Div (126 Inf Rgt); B52.22 23 Pz Div (128 Arty Rgt, Organic Truck), 1 SP, 9-2-2 Arty Bn (731); B52.23 9-2-1 Arty Bn (857); B52.24 10-2-3 Werfer Bn (1-52); B49.24 17 Corps HQ, 5x Wagon Points, 3 SPs; B52.21 5-5-8 AG Bn (203); B52.20 2-3-3 Bicycle Bn (162), 1-3-2 Pol Bn (682); B52.19 3-3-7 PJ Bn (611); B52.17 20-3-3 Inf Div (302, less 1 step); B52.18 Breakdown Rgt; B51.16 22 Pz Div (129 Inf Rgt, 140 PJ Bn); B51.17 5-5-8 AG Bn (210), Breakdown Rgt; B51.18 10-2-3 Werfer Bn (1-1); B51.19 11-2-2 Arty Bn (607); B50.16 20-4-3 Inf Div (111, less 2 steps); B50.17 12-2-2 Arty Bn (732); B49.16 6-3-2 Sec Div (444); B49.17 29 Corps HQ, 10-2-3 Werfer Bn (3-1); B48.14 Breakdown Rgt; B48.15 6-2-2 Sec Div (454); B48.16 10-2-3 Werfer Bn (2-1); B47.15 7-2-2 Arty Bn (602); B49.19 22 Pz Div (Organic Truck), 1 SP; B49.20 48 Pz Corps HQ; B50.20 16 Mtr Div (156 Inf Rgt, 146 Arty Rgt, Organic Truck), 1 SP; B48.21 6 Pz Div (76 Arty Rgt, Organic Truck), 1 SP; B47.22 6 Pz Div (6 Motorcycle Bn, 4 Inf Rgt); B46.22 6 Pz Div (1-11 Pz Bn, 41 PJ Bn); B38.15 3-3-3 Pol Rgt (6 SS); A21.35 20-4-3 Inf Div (298, less 2 steps); A19.34 5-3-4 AG Bn (201); A21.33 20-4-3 Inf Div (387, less 2 steps); A21.32 Breakdown Rgt; A20.31 7-2-2 Arty Bn (2-71); A21.31 20-3-3 Inf Div (385, less 2 steps); A20.29 Breakdown Rgt; A20.28 Breakdown Rgt; A20.27 20-4-3 Inf Div (168, less 2 steps); A20.26 Breakdown Rgt; A16.28 Raus Corps HQ, 2 SPs; A20.24 4-5-8 PG Bn (Begleit); A21.22 GD Div (AG Bn, Gren Inf Rgt); A21.20 GD Div (Füs Inf Rgt); A24.19 GD Div (2 Pz Bn, PJ Bn); A19.21 GD Div (Rec Bn, 1 Pz Bn, Arty Rgt, 2x Organic Truck), 2 SP; A17.20 SS-R Pz Div (Deutld Inf Rgt, DR PJ Bn, 2x Organic Truck), 2 SP; A16.19 SS-R Pz Div (2-DR Pz Bn, DR Arty Rgt), 10-2-3 Werfer Bn (3-54); A24.18 3-3-3 Pol Rgt (11 SS); A25.18 Breakdown Rgt; A25.17 20-4-3 Inf Div (320, less 2 steps); A25.16 Breakdown Rgt; A24.14 SS-AH Pz Div (LAH AG Bn); A23.14 SS-AH Pz Div (1 Inf Rgt); A23.13 SS-AH Pz Div (2 Inf Rgt); A22.15 SS-AH Pz Div (LAH Recon Bn, 1-LAH Pz Bn, 2x Organic Truck), 2 SPs; A22.13 SS-AH Pz Div (LAH Arty Rgt); A22.12 SS-AH Pz Div (2-LAH Pz Bn); A21.12 SS-AH Pz Div (LAH PJ Bn); A20.14 SS Pz Corps HQ, 3-3-3 Pol Rgt (10 SS), 5 SPs; A18.15 SS-R Pz Div (DR Rec Bn, 1-DR Pz Bn); A17.16 SS-R Pz Div (DR AG Bn, Führer PG Rgt, Lngmk Inf Rgt); A15.17 SS-T Pz Div (3 Rec Bn, TK PJ Bn); A14.17 SS-T Pz Div (Thule Inf Rgt, Organic Truck), 1 SP; A12.18 SS-T Pz Div (1-TK Pz Bn, 1 PG Rgt); A11.18 SS-T Pz Div (2-TK Pz Bn, TK AG Bn, 3 Inf Rgt); A10.18 SS-T Pz Div (TK Arty Rgt, Organic Truck), 1 SP, (1)-2-5 RR Bn (511); A11.19 7x Truck Points, 10 SPs; A14.02 (1)-2-5 RR Bn (83); A13.03 4-1-2 Hun Sec Div (102); A13.02 4-1-2 Hun Sec Div (124), 5x Wagon Points, 1 SP; A12.02 6-1-1 Hun Arty Bn (88); B14.27 4-0-2 Hun Sec Div (105), (1)-2-5 RR Bn (514), 2 SP; B4.25 (1)-2-5 RR Bn (2); B34.31 20-3-3 Inf Div (333, less 1 step); B35.30 SS-W Div (Ger Inf Rgt); B36.30 SS-W Div (Wiking Pz Bn, Nrdld Inf Rgt); B37.31 SS-W Div (Wiking Rec Bn, Wiking PJ Bn); B38.31 SS-W Div (Wstld Inf Rgt); B38.30 SS-W Div (5 Arty Rgt); B39.32 7 Pz Div (7 Motorcycle Bn, 6 Inf Rgt); B39.33 7 Pz Div (1-25 Pz Bn); B40.33 7 Pz Div (42 PJ Bn); B40.32 7 Pz Div (78 Arty Rgt, 2x Organic Truck), 2 SPs; B41.35 11 Pz Div (61 Motorcycle Bn, 2-35 Pz Bn, 110 Inf Rgt, 61 PJ Bn); B42.34 11 Pz Div (111 PG Rgt, 119 Arty Rgt, 2x Organic Truck), 2 SP; A42.02 Breakdown Rgt; A43.03 3 Pz Div (3 Inf Rgt); A44.03 3 Pz Div (3 Motorcycle Bn, 394 PG Rgt); A45.03 3 Pz Div (1-6 Pz Bn, 543 PJ Bn); A44.02 3 Pz Div (75 Arty Rgt, Organic Truck), 1 SP; A46.03 19 Pz Div (19 Motorcycle Bn, 74 PG Rgt); A47.03 19 Pz Div (73 Inf Rgt); A46.02 19 Pz Div (19 Arty Rgt, Organic Truck), 1 SP; B45.35 3 Pz Corps HQ; B41.27 SS-W Div (2x Organic Truck), 2 SPs; B42.27 40 Pz Corps HQ, 3x Truck Points, 10 SPs; B42.26 10 Wagon Points; B43.27 17 Pz Div (Organic Truck), 1 SP; B46.27 17 Pz Div (1-39 Pz Bn, 63 PG Rgt); B49.28 17 Pz Div (27 Arty Rgt); B50.28 17 Pz Div (40 Inf Rgt); B50.27 17 Pz Div (27 PJ Bn); A48.02 8-5-3 Inf Rgt (Lehr), Alert Bn; B48.35 10-2-3 Werfer Bn (1-54), 9-2-1 Arty Bn (861), 4-2-1 Arty Bn (1-77); A49.02 27 Pz Div (127 Pz Bn, 127 Schnell Bn); B50.35 6-5-8 Pz Bn (138), Alert Bn; B50.34 3-2-2 Arty Bn (2-62); B51.35 2x Alert Bn; B51.34 10-2-3 Werfer Bn (2-52); B52.34 20-3-3 Inf Div (335, less 1 step); B53.34 Breakdown Rgt; B54.33 17-5-3 Mtn Div (3 Mtn, less 1 step); B54.32 Alert Bn; B55.32 20-2-3 Inf Div (304, less 2 steps); B54.31 Alert Bn; B51.30 Ftr-Pco Corps HQ, 5-3-3 Inf Rgt (620 Trng), 5 SP; B51.29 Breakdown Rgt; B51.27 20-4-3 Inf Div (62, less 1 step); B53.28 Alert Bn; B54.28 Alert Bn; B55.28 20-4-3 Inf Div (384, less 1 step); B55.27 20-4-3 Inf Div (336, less 2 steps); B55.26 12-2-2 LW Div (8 Fld); B54.25 20-4-3 Inf Div (294, less 2 steps); B54.26 10-2-3 Werfer Bn (3-52, 2-54); B53.25 1-3-2 Pol Bn (685, 698).
Air Bases: Level 3: A11.19, B14.27. Level 2: A13.02, B42.26.
Air Units: German: 4x Me109g, 2x Fw190a, 5x He111h, 1x Hs123b, 1x Ju86, 5x Ju87d, 6x Ju88a, 3x Ju52, 2x Me110e, 2x Hs129b. Rumanian: 1x Ju87d.
Released Forces: 16 Mtr Division. Reinforcements: As per Order of Arrival. Supply as per the Supply Table. Variable Reinforcement Holding Box: None. Variable Reinforcements: None.
Soviet Information
Reserve Markers Available: 25. Supply Sources: Any road or railroad hex along the east map edge. Soviet Gauge Railroads: A42.16 through A62.33; A56.10 through A47.32; B59.34 through A62.01; B61.15 through B62.12.
Set Up: A22.33 12-2-2 Inf Div (107); A23.34 4-2-4 Tk Bn (61); A23.32 11-1-1 Inf Div (309), 4-2-4 Tk Bn (60); A22.30 12-2-2 Inf Div (100, less 1 step); A25.32 40 Army HQ, 1 SP; A21.29 4-2-2 Inf Bde (129); A21.28 11-1-1 Inf Div (219), 4-2-4 Tk Bn (59); A21.26 12-2-2 Inf Div (180); A21.25 6-2-5 Tk Bde (179), 4-2-2 Inf Bde (37); A21.24 12-2-2 Inf Div (160); A22.25 26-1-1 Arty Bde; A23.27 12-2-2 Inf Div (161, less 1 step); A24.24 6-2-5 Tk Bde (137), 4-2-4 Tk Bn (292); A25.28 6-2-5 Tk Bde (116, 192), Wagon Extender; A28.24 69 Army HQ, 7-3-6 Tk Bde (14); A34.30 13-3-3 Inf Div (25 Gd, less 1 step), 2 Tk Corps (26, 99, 169 Tk Bde, 58 Inf Bde); A40.32 11-1-1 Inf Div (340); A47.32 12-2-2 Inf Div (183), (1)-0-3 RR Rgt (SW); A22.22 11-1-1 Inf Div (305); A22.21 15 Tk Corps (113 Tk Bde); A23.21 15 Tk Corps (195 Tk Bde, 52 Inf Bde); A24.20 13-3-3 Inf Div (48 Gd, less 1 step); A25.20 12 Tk Corps (97 Tk Bde, 13 Inf Bde); A25.19 11-1-1 Inf Div (111), 4-2-4 Tk Bn (201); A26.18 12-2-2 Inf Div (184); A26.17 6 Gd Cav Corps (8 Cav Bde, 154 Tk Bn); A26.16 6 Gd Cav Corps (13 Gd Cav Bde, 136 Tk Bn); A27.16 6 Gd Cav Corps (8 Gd Cav Bde); A29.23 2 SPs; A30.22 Wagon Extender; A30.18 6 M Corps (51, 55 Mech Bde, 76, 80 Tk Bn); A39.19 Wagon Extender; A42.23 75-1-0 Katyusha Bde; A43.24 75-1-0 Katyusha Bde; A47.23 16-1-1 Arty Bde; A48.23 16-1-1 Arty Bde; A49.24 12-2-2 Inf Div (206), 26-1-1 Arty Bde; A27.15 11-1-1 Inf Div (350, less 1 step); A26.14 12-2-2 Inf Div (172); A26.13 Breakdown Rgt; A25.13 12-2-2 Inf Div (6, less 1 step); A24.12 Breakdown Rgt; A23.12 7-3-6 Tk Bde (115), 4-2-4 Tk Bn (212); A22.11 Breakdown Rgt; A21.11 Breakdown Rgt; A20.09 4-2-2 Inf Bde (106); A20.07 12-2-2 Inf Div (267, less 1 step); A22.03 14-4-3 Inf Div (35 Gd); A22.02 25 Tk Corps (111, 175 Tk Bde, 16 Inf Bde); A21.02 25 Tk Corps (162 Tk Bde); A26.05 13-3-3 Inf Div (41 Gd); A28.07 1 Gd Cav Corps (1 Gd, 2 Gd, 7 Gd Cav Bde, 61, 87 Tk Bn); A30.09 11-1-1 Inf Div (244); A32.09 26 Tk Corps (19, 157, 216 Tk Bde, 14 Inf Bde); A34.14 3 Tank Army HQ; A38.10 11-1-1 Inf Div (270), 16-1-1 Arty Bde, 2x Truck Points, 2 SPs; A42.16 (1)-0-3 RR Rgt (Voro); A43.17 2x Truck Points, 5 SPs; A49.17 75-1-0 Katyusha Bde; A50.17 75-1-0 Katyusha Bde; B35.32 10 Tk Corps (178, 186 Tk Bde); B36.31 17 Tk Corps (66, 174 Tk Bde, 31 Inf Bde); B37.32 4-4-4 Ski Bde (7); B38.32 7-3-6 Tk Bde (9), 6-2-5 Tk Bde (11); B38.34 Breakdown Rgt; A39.02 Breakdown Rgt; A41.03 3 Tk Corps (51, 103 Tk Bde, 3 Inf Bde); A41.04 13-3-3 Inf Div (38 Gd, less 1 step); A41.05 75-1-0 Katyusha Bde; A37.03 18 Tk Corps (170, 181 Tk Bde, 32 Inf Bde), 2-4-6 Motorcycle Bn (52 MC); A35.07 6 Army HQ, Truck Extender, 2 SPs; A42.04 14-4-3 Inf Div (57 Gd, less 1 step); A43.04 13-3-3 Inf Div (195); A44.04 12-2-2 Inf Div (279); A45.04 2-3-6 Motorcycle Bn (53 MC), 2-3-3 Czech Inf Bn; A46.04 13-3-3 Inf Div (62 Gd); A47.04 14-4-3 Inf Div (58 Gd, less 1 step); A48.03 11-1-1 Inf Div (78); A49.03 14-4-3 Inf Div (44 Gd); A50.02 Breakdown Rgt; A50.03 26-1-1 Arty Bde; A50.05 1 Gd Army HQ, 75-1-0 Katyusha Bde; A51.02 13-3-3 Inf Div (60 Gd), 4-2-4 Tk Bn (141); B52.35 Breakdown Rgt; B53.35 13-3-3 Inf Div (59 Gd, less 1 step); B54.35 75-1-0 Katyusha Bde; B54.34 13-3-3 Inf Div (50 Gd); B55.35 16-1-1 Arty Bde; B55.34 11-1-1 Inf Div (243), 4-2-4 Tk Bn (114); B55.33 14-4-3 Inf Div (14 Gd), 4-2-4 Tk Bn (126); B56.32 13-3-3 Inf Div (61 Gd); B57.35 7 Tk Corps (87 Tk Bde, 7 Inf Bde); A58.02 5 M Corps (45, 50 Mech Bde, 168 Tk Bn); A56.10 24 Tk Corps (54 Tk Bde, 24 Inf Bde), (1)-0-3 RR Rgt (Voro), 2x Truck Point, 5x Wagon Points, 5 SPs; B59.34 3 Gd Army HQ, 12-2-2 Inf Div (203), (1)-0-3 RR Rgt (SW), 5x Wagon Points, 5 SPs; B57.32 26-1-1 Arty Bde; B56.31 7-3-3 Inf Bde (22); B55.31 3-1-1 Inf Bde (94); B55.30 11-1-1 Inf Div (266); B56.30 4-2-2 Inf Bde (90); B57.30 13-3-3 Inf Div (20 Gd); B58.29 75-1-0 Katyusha Bde; B57.29 12-2-2 Inf Div (346); B57.28 7-3-6 Tk Bde (90), 13-3-3 Inf Div (258); B56.27 8-4-6 Motorcycle Rgt (8 MC), 7-3-6 Tk Bde (56); B51.28 8 Cav Corps (21, 55 Cav Bde), 7-3-6 Tk Bde (15 Gd) (this hex is Out of Supply and all have Low Internal Stocks); B57.27 12-2-2 Inf Div (321); B57.26 16-1-1 Arty Bde; B56.26 13-3-3 Inf Div (40 Gd), 11-1-1 Inf Div (87); B56.25 13-3-3 Inf Div (4 Gd), 7-3-6 Tk Bde (150); B55.25 12-2-2 Inf Div (315), 4-2-4 Tk Bn (41); B54.24 12-2-2 Inf Div (300, less 1 step, 333); B59.27 3-2-3 Inf Bde (1 Lt, 5 Lt); B59.26 5 Shock Army HQ, 3-1-1 Inf Bde (143); B59.25 23 Tk Corps (135 Tk Bde, 56 Inf Bde); B62.26 5 Tank Army HQ, (5)-0-1 UR Bde (76); B54.23 12-2-2 Inf Div (387); B54.22 12-2-2 Inf Div (33 Gd); B54.21 14-4-3 Inf Div (54 Gd), 4-2-4 Tk Bn (189); B53.21 12-2-2 Inf Div (131), 6-2-5 Tk Bde (85); B56.21 2 Gd Army HQ; B53.20 13-3-3 Inf Div (98, less 1 step); B53.19 6-2-5 Tk Bde (10, 33); B54.18 2x 26-1-1 Arty Bde; B53.18 12-2-2 Inf Div (47 Gd, less 1 step); B53.17 13-3-3 Inf Div (24 Gd), 6-2-5 Tk Bde (58); B56.18 51 Army HQ, 4-2-2 Inf Bde (52); B57.19 2 Gd M Corps (4 Gd, 5 Gd Mech Bde, 22 Tk Bn); B57.18 3 Gd Cav Corps (5 Gd, 6 Gd, 32 Cav Bde), 6-2-5 Tk Bde (86), 2-4-6 Motorcycle Bn (50 MC); B56.17 1 Gd M Corps (1 Gd, 2 Gd Mech Bde), 2-3-6 Motorcycle Bn (54 MC); B62.15 (5)-0-1 UR Bde (78); B61.15 (5)-0-1 UR Bde (116), (1)-0-3 RR Rgt (Stgrd), 1x Truck Point, 5 SPs; B53.16 28 Army HQ, 75-1-0 Katyusha Bde, 15-1-1 Arty Rgt (110); B52.16 12-2-2 Inf Div (49 Gd), 2-4-6 Motorcycle Bn (64 MC); B52.15 12-2-2 Inf Div (91, less 1 step); B51.15 12-2-2 Inf Div (248), 7-3-6 Tk Bde (6 Gd); B50.15 4-2-2 Inf Bde (152, 159); B49.15 12-2-2 Inf Div (34 Gd).
Air Bases: Level 3: A28.24. Level 2: A60.31, B59.34, B62.15, A56.10.
Air Units: 5x La-5, 6x Yak-7b, 3x Yak-1, 14x IL-2m3, 4x IL-4, 7x Pe-2, 2x SB-2, 8x Po-2.
Reinforcements: As per Order of Arrival. Supply as per the Supply Table. Released Forces: 4 Tk Corps, 26 Tk Corps, 8 Cav Corps, 3 Gd Cav Corps. Variable Reinforcements: As per the Soviet Variable Reinforcement Table.
Victory: At Start Soviet VP Total: 66 (66 VPs from the map, 7 VPs from Alert Rolls, 1 VP for 16 Mtr, less 8 VPs for released forces). Use either 5.0 or the below to determine the final winner.
To avoid weighting this game as a scenario based on previous success or failure (which is outside either player's control), use the following as an alternative: The player holding both Kharkov and Stalino at the end of play wins, any other result is a draw.
Axis Reinforcements
(All Organic Trucks enter loaded with a full load of SPs)
- Turn 1: None
- Turn 2: 6 Pz Div (1-11, 2-11 Pz Bn, 6 Motorcycle Bn, 4 Inf Rgt, 114 PG Rgt, 41 PJ Bn, 76 Arty Rgt, 2x Organic Truck), 9-2-1 Arty Bn (857, 861), 1x He-111h
- Turn 3: 27 Pz Div (127 Pz Bn, 140 Inf Rgt, 127 Schnell Bn, 127 Arty Rgt, 1x Organic Truck), 1x Ju-52
- Turn 4: 17 Corps HQ, 11 Pz Div (1-15, 2-15, 2-35 Pz Bn, 61 Motorcycle Bn, 110 Inf Rgt, 111 PG Rgt, 61 PJ Bn, 119 Arty Rgt, 2x Organic Truck), 20-4-3 Inf Div (294), 20-3-3 Inf Div (385, less one step), 12-2-2 LW Fld Div (15 Fld), 1x Ju-52. 1st Panzer Army (see 1.6c): 57 Pz HQ. Add to Dead Pile (for rebuild): 6-4-4 Cossack Cav Rgt (v. Jung)
- Turn 5: 5-4-6 AG Bn (190), 3-3-3 Pz Bn (700 PzVb), 1x Ju-86
- Turn 6: 12-2-2 LW Fld Div (7 Fld), (1)-2-5 RR Bn (2), 2x He-111h, 1x Me-109g, 1x Ju-52
- Turn 7: 20-4-3 Inf Div (387), 1x Ju-52
- Turn 8: 17 Pz Div (1-39 Pz Bn, 17 Motorcycle Bn, 40 Inf Rgt, 63 PG Rgt, 27 PJ Bn, 27 Arty Rgt, 1x Organic Truck), 12-2-2 LW Fld Div (8 Fld), 1x Ju-87d, 1x Hs-123b
- Turn 9: 10-2-3 Werfer Bn (1-54, 2-54, 3-54)
- Turn 10: Ftr-Pico Army Abt HQ, 20-3-3 Inf Div (306), 20-2-3 Inf Div (304), 17-5-3 Mtn Div (3 Mtn), 5-3-3 Inf Rgt (620 Trng), 3-2-2 Arty Bn (2-62)
Soviet Reinforcements
- Turn 1: 13-3-3 Inf Div (41 Gd, 195), 12-2-2 Inf Div (131), 7-3-6 Tk Bde (15 Gd), 6-2-5 Tk Bde (24, 225), 1x IL-2m3
- Turn 2: 4-2-4 Tk Bn (126, 141), 14-4-3 Inf Div (35 Gd, 44 Gd), 13-3-3 Inf Div (38 Gd), 12-2-2 Inf Div (315), 11-1-1 Inf Div (87), 1x 16-1-1 Arty Bde, 1x La-5, 1x Wagon Point
- Turn 3: 1x IL-2m3, 1x Truck Point. Guard Exchange: 14-4-3 Inf Div (52 Gd)
- Turn 4: 4-2-4 Tk Bn (139, 198), 13-3-3 Mtn Div (194), 1x 26-1-1 Arty Bde, 2x 16-1-1 Arty Bde, 1x IL-2m3, 2x Pe-2, 1x Wagon Point
- Turn 5: 24 Tk Corps (4 Gd, 54, 130 Tk Bde, 24 Mtrd Inf Bde), 1x 26-1-1 Arty Bde, 1x Yak-7b, 2x Truck Point
- Turn 6: 3 Gd Army HQ, 7 Tk Corps (3 Gd, 87 Tk Bde, 7 Mtrd Inf Bde), 5 M Corps (168, 188 Tk Bn, 45, 49, 50 Mech Bde), 4-2-4 Tk Bn (114, 119, 243), 2-4-6 Motorcycle Bn (50 MC), 2-3-6 Motorcycle Bn (54 MC), 2x Truck Point. Add to Dead Pile: 7 Tk Corps (62 Tk Bde)
- Turn 7: 5 Shock Army HQ, 13-3-3 Inf Div (20 Gd), 4-2-2 Inf Bde (90), 3-1-1 Inf Bde (94), 1x Wagon Point, 1x Truck Point
- Turn 8: 2 Gd Army HQ, 2 Gd M Corps (4 Gd, 5 Gd, 6 Gd Mech Bde, 21, 22 Tk Bn, 117 Gd Arty Rgt), 17 Tk Corps (66, 67, 174 Tk Bde, 31 Mtrd Inf Bde), 18 Tk Corps (110, 170, 181 Tk Bde, 32 Mtrd Inf Bde), 25 Tk Corps (111, 162, 175 Tk Bde, 16 Mtrd Inf Bde), 4-3-6 Tk Bn (5 Gd, 6 Gd, 7 Gd, 8 Gd, 9 Gd, 10 Gd), 13-3-3 Inf Div (3 Gd, 24 Gd, 98), 12-2-2 Inf Div (33 Gd, 49 Gd, 107, 387), 2-4-6 Motorcycle Bn (52 MC), 2-3-6 Motorcycle Bn (53 MC), 1x 75-1-0 Katyusha Bde, 1x 16-1-1 Arty Bde, 1x IL-2m3, 1x La-5, 2x Truck Point. Guard Exchange: 14-4-3 Inf Div (54 Gd)