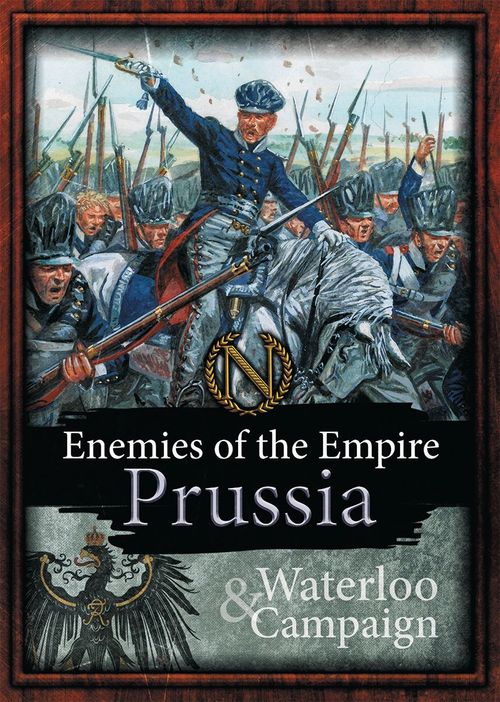
Enemies of the Empire: Prussia
Enemies of the Empire: Prussia Rulebook
Table of Contents
Table of Contents
- The Prussian Army
- New Keywords
- New Unit Type
- National Traits
- Mulligan
- Victory
- Waterloo Campaign
- Scenario #1: The Fighting around Gilly – June 15, 1815
- Scenario #2: The Battle of Quatre-Bras – June 16, 1815, "Crisis in the Centre - 15h00"
- Scenario #3: The Battle of Quatre-Bras – June 16, 1815, "Wellington Reinforces the Allied line - 17h-17h30"
- Scenario #4: The Battle of Quatre-Bras – June 16, 1815, "Kellermann's Charge - 18h"
- Scenario #5: The Battle of Quatre-Bras – June 16, 1815, "Wellington goes on the offensive, 19h-19h30"
- Scenario #6: The Battle of Ligny – June 16, 1815, "The First French attacks, 14h30 -15h30"
- Scenario #7: The Battle of Ligny – June 16, 1815, "First Prussian counterattack, 16h00"
- Scenario #8: The Battle of Ligny – June 16, 1815, "The Second Prussian counterattack, 16h00-16h30"
- F.A.Q.
The Prussian Army
The Prussian army represented in Napoleon Saga corresponds to the army which fought so bravely against Napoleon from 1813 to 1815.
After the terrible defeats of Auerstaedt and Jena in 1806, the Prussian army was forced to drastically reduce its numbers under the terms of the peace treaty of Paris. However, an ingenious method was put in place in 1808 to continue training soldiers despite the imperial ban. This was known as the «Krumper» system and consisted of firstly training recruits and then demobilizing them to train others, without actually increasing the overall number. Thanks to the Krumper system, the Prussian army was able to train soldiers for the inevitable war ahead, waiting for just the right moment. The disaster of the Russian campaign was the signal for action and in 1813 the Prussian army mobilized in its entirety to begin the «War of Liberation». This army fought, under the command of the famous Feld-Marshal Blucher, on Prussian soil in 1813, on French soil in 1814 and finally on Belgium soil in 1815.
The Prussian army, like the other armies, has 16 different units.
Infantry: the Prussian Jägers are given a superior shooting capability. However they do not possess this capability if they are fighting as part of the coalition army.
Cavalry: The Landwehr Cavalry has a new ability: Support. This allows them to absorb the losses of the infantry units directly in front of them.
Unfortunately, the Prussians only have foot artillery, no horse artillery. But this disadvantage is largely offset by the rest of the army.
There are two important Strategy cards that complete the Prussian army, The «Fall of an Empire» which is already present in the coalition army and also most notably «Counterattack!» which allows you to copy the effect of a card.
New Keywords
Dismounted: This describes cavalry that can also act as infantry once you have placed a Dismounted marker beside them. This marker can be removed when you activate the unit, as long as it is not located in a Wood or Building nor is it engaged in Melee. The standard rules applying to both Infantry and Cavalry will also apply depending on the presence or absence of the marker. A unit with a Dismounted marker suffers a -1 penalty in Melee.
Support: If a unit with this keyword is positioned directly behind an Infantry unit that suffers at least 1 Casualty, then it can take 1 Casualty instead of that Infantry unit.
New Unit Type
Light Infantry: When a light infantry unit suffers 2 casualties in a single shot and is in a Building or Wood, then it may pass a Morale test on 7+. If successful this unit suffers only one casualty.
National Traits
Each nation of the Napoleonic era had its own habits, preferences or doctrines in a fight. To represent this, the different armies have the opportunity once per game, to use their national trait.
France: « Call up the Guard! » The French player can use his national trait "Call up the Guard" at the end of Phase II Reform the Ranks! If the French player does not have more victory points than his opponent, then he can search for a Guard unit that is in his Army deck and place it in reserve. If the French player has no other Guard unit in play, then he can immediately move this new unit to the 2nd Line for free.
Coalition: « Espionage » The coalition player may use his national trait of «Espionage» at the beginning of Phase II Reform the ranks! Look at your opponent's hand and discard a Strategy card of your choice.
Prussia: « Army of Liberation » The Prussian player can in Phase III Combat, use his national Trait "Army of Liberation". Give the Support keyword to one of your units for the duration of the turn.
Mulligan
A player who is not satisfied with his starting hand (ie: the units in his army pack and / or strategy cards) may declare a mulligan. When declaring a mulligan, the player shuffles his starting cards in the appropriate deck and draws the same number of cards (12 units and / or 5 strategy cards).
A mulligan can only be declared once and any new cards cannot be changed. In addition, any player declaring a mulligan cannot play his bluff card in the very first phase of initiative.
Victory
Below is a table allowing you to distinguish the different levels of victory. To do this, you just need to work out the difference in victory points between both players:
- 0 = Game Null
- 1-2 = Minor Victory
- 3-5 = Victory
- 6+ = Major Victory
Waterloo Campaign
The eight historical scenarios included in this booklet represent high points of the Belgium campaign of 1815. Playing through them you will relive the moments leading up to Waterloo. Some of them are a bit harder to figure out, so we highly encourage you to test each side multiple times before switching, even if you don't crack them on the first go!
Some of the historical units present in those fights did not have a representation in the base game of Napoleon Saga, and as such some units existing in the game have taken their place in the scenarios. It is a small sacrifice of historical accuracy to make the scenario more playable!
Scenario Rules
- Objective cards and national traits are not used throughout the scenarios.
- Terrain cards cannot be removed from the battlefield, and are therefore not discarded if unoccupied at the end of a round.
- Reminder: a terrain card is occupied if a unit occupies the same battlefield slot.
Rule regarding the initial setup of the scenarios
In a scenario the deployment phase is replaced by a determinate setup. Some cards from your Army deck and your strategy deck will be disposed on the board according to the chosen scenario. The remaining cards will form the decks you'll use to draw cards during the game.
Some advice
Napoleon Saga is first and foremost a positioning game: the exact amount of fire or melee of each unit, while important can be wasted against an opponent that correctly positions his units on the battlefield. As such, the movement of your units can often be the key to succeeding a mission!
During the setup of some of the scenarios contained in this booklet, the battlefield slots might not be fully occupied. It is up to you to determine when and where it is optimal to advance your troops.
In Napoleon Saga, if the first line of your battlefield contains three empty slots at the end of a round you lose the game. However, in some scenarios -such as the first one in this booklet- this rule does not apply. As such, you should pay attention to the rules of such scenario! Focusing on the achievement of 10 victory points when they are not a viable victory condition for a given scenario, or when it could lead you to lose due to another rule is a dangerous pitfall!
Do not forget that, due to a strategy card your opponent might hold, or to an unlucky roll you might end up having to make a morale roll, lose a unit or suffer a penalty. Your 2nd line should be ready to rally any gaps that have been created.
Finally, try to browse through your strategy deck for the mission, in order to know what possibilities lie ahead!
Scenario #1: The Fighting around Gilly – June 15, 1815
Length: 10 turns • Initiative: Normal • Factions: France vs. Prussia
Whilst the French army is crossing the river Sambre and the Belgian border, the Prussian army tries to regroup around the villages of Fleurus and Ligny. In order to successfully achieve this, Blücher's rearguard must slow down and check the advance of Napoleon's troops. Several skirmishes take place, but it is around the village of Gilly that the first engagement took place even if it is only a minor one on the scale of battles of the Napoleonic wars. This scenario simulates the first French attacks on the Prussian defences around 18h00.
Special Rules for This Scenario
- Victory & Defeat: The French player wins the game if at the end of any game turn; he controls the four areas of river terrain and the village that are shown on the board at the outset of the game. The Prussian player wins the game if at the end of the 10th turn; the French player has not achieved the victory conditions as shown above. For this scenario, three empty spaces in the first line do not indicate a defeat.
- Terrain: For this scenario, River Terrain cards cannot be captured.
- Outflank: Players may only attempt to outflank the enemy army on side 'B' of the board.
- Artillery: In this scenario, artillery units are not complete batteries, they represent only a small number of guns. To show this, units of artillery suffer a penalty of -1 to shoot for the duration of the scenario.
- Deployment: All starting units are placed face up, even those in Reserve.
French Army Units (12 cards)
- Reserve Line Infantry (3), marker 1
- Line Infantry (2), marker 2
- Marie-Louise (1)
- Chasseur à cheval (1), marker 3
- Artillery (1), marker 4
- Jeune Garde (1), marker 5
- Dragoons (2), marker 6
- Voltigeurs (1)
Prussian Army Units (9 cards)
- Line Infantry (2), marker 1
- Landwehr (3), marker 2
- Dragoons (1), marker 3
- Musketeers (1), marker 4
- Artillery (1), marker 5
- Landwehr Cavalry (1)
French Strategy Deck – The Fighting around Gilly
- River (4) R
- Ambush (2)
- Confusing order (2)
- Fix bayonets! (2)
- Forward! (2)
- Line formation (2)
- Perfect round shoot (2)
- Skirmishers (2)
- Additional squadron
- A final effort!
- Beat of the drum
- Burn it to the ground!
- Change of direction
- Fall back
- Farm F
- Flag
- Forced march
- Impetuous
- Long range
- Low morale
- Moving fire
- Officer O
- Pour l'Empereur!
- Precise orders
- Sacrifice
- Supply depot
- Take cover!
- Village V
Prussian Strategy Deck – The Fighting around Gilly
- Confusing order (2)
- Defensive fire (2)
- Fix bayonets! (2)
- Line formation (2)
- Perfect round shoot (2)
- Take cover! (2)
- The Fall of an Empire (2)
- A final effort!
- Ambush
- Beat of the drum
- Conscripts
- Do not engage the Guard!
- Flag
- Forward!
- Impetuous
- Long range
- Officer
- Skirmishers
- Spotted!
- Square formation
- Strategic pullback
- Supply depot
- Too far away
- Too many losses!
- Village V
- We can make it!
- Woods W
Scenario #2: The Battle of Quatre-Bras – June 16, 1815, "Crisis in the Centre - 15h00"
Length: NA • Initiative: French • Factions: France vs. Coalition
Quatre-Bras is the first major battle of the Belgian campaign, although minor clashes took place a few days before. Marshal Ney is charged by the Emperor to take control of a crossroads, located about thirty kilometers from Brussels, the latter being of major strategic importance. The control of this crossroads would make it possible for an easy advance towards the Belgian capital, to cut the road off to Wellington's troops and to fall on the rear of the Prussian army which stands before Napoleon at Ligny.
This scenario represents the French assault on the centre-right of the Allied forces. On June 16, 1815, around 15h00, whilst the battle is already raging, the French are trying to break the Allied positions that are in strength around and in the Bossu wood. The control of this wood would lead to taking the village surrounding the intersection and force Wellington back along his line of communication. For the Allies, it is necessary to hold whatever the cost. Reinforcements are already on the way.
Special Rules for This Scenario
- Victory & Defeat: The usual conditions explained in the rules apply to both sides. In addition, the French player wins the game if at the end of any game turn, he controls all Woods (3 Terrain cards) and also keeps control of the farm that he has been initially allocated. To win the game, the Allies player must retain possession of the farm initially allocated to his territory.
- Terrain: The Allies player starts the game with 2 Woods terrain cards in the same location. For this scenario, any location can hold up to 3 Woods terrain cards. The rules for capturing a terrain card are the same as those explained in the rules on page 11-12, but you can only capture one terrain card at a time; even if the location contains more than one card.
- Outflank: Players may only attempt to outflank the enemy army that is deployed on the "B" side of the board and only by using infantry. The Bossu wood on side 'A' prevents any outflank manoeuvres. Any other rules related to Outflank apply as usual.
- Artillery: Units of artillery suffer a penalty of -1 to shoot for the duration of the scenario.
- Deployment: All starting units are placed face up, even those in Reserve. The Allies player begins the game with 2 Woodland cards on the same location (The Bossu wood) to the right of his 1st line.
Note: The French objective is to take control of the Bossu wood on its left flank, and for that it will have to successfully capture at least twice the amount of terrain cards. Whenever a Wood is captured, it is placed as shown in the rules, ie: beneath the card of the unit that has just captured it. For this scenario only, a unit can have up to 3 Woods terrain cards in the same location (the effects are not cumulative).
French Army Units (18 cards)
- Voltigeurs (2), marker 1
- Line infantry (3), marker 3
- Reserve Line infantry (3), marker 2
- Marie-Louise (3), marker 4
- Grenadiers
- Foot Artillery (2), marker 5
- Chevau-légers lancers
- Dragoons
- Cuirassiers, marker 6
- Chasseurs à cheval, marker 7
Coalition Army Units (17 cards)
- Prussian Line Infantry (3), marker 1
- Hanoverian infantry (2), marker 2
- British Infantry (3), marker 7
- Riflemen (2), marker 5
- Foot artillery (2), marker 4
- British Hussars (2), marker 3
- Highlanders, marker 6
- British guard
- Netherlands Carabiniers
Note: The Prussians were not in fact present during the battle of Quatre-Bras; the Prussian units shown in this scenario are representative of other nationalities.
French Strategy Deck – The Battle of Quatre-Bras, 15h00
- A final effort! (2)
- Ambush (2)
- Fix bayonets! (2)
- Forward! (2)
- Line formation (2)
- Officer (2)
- Perfect round shot (2)
- Reservists (2)
- Skirmishers (2)
- Take cover! (2)
- Veteran (2)
- We can make it! (2)
- Additional squadron
- Confusing order
- Defensive fire
- Determination
- Echelon formation
- Fall back
- Farm F
- Flag
- Forced march
- Impetuous
- Long range
- Low morale
- Pour l'Empereur!
- Precise orders
- Press forward!
- Sacrifice
- Too many losses!
- Woods W
Coalition Strategy Deck – The Battle of Quatre-Bras, 15h00
- A final effort! (2)
- Ambush (2)
- Defensive fire (2)
- Fix bayonets! (2)
- Line formation (2)
- Perfect round shot (2)
- Reservists (2)
- Take cover! (2)
- The Fall of an Empire (2)
- Woods (2) W
- Confusing order
- Conscripts
- Determination
- Farm F
- Flag
- Forced march
- Hill H
- Impetuous
- Long Range
- Low morale
- Officer
- Precise orders
- Press forward!
- Sacrifice
- Skirmishers
- Strategic pullback
- Square formation
- Supply depot
- Too far away
- Too many losses!
- Veteran
Scenario #3: The Battle of Quatre-Bras – June 16, 1815, "Wellington Reinforces the Allied line - 17h-17h30"
Length: 10 turns • Initiative: Coalition • Factions: France vs. Coalition
After sustaining the French assaults, the allied positions are reinforced by regular waves of new troops. The balance of power changes and becomes more equal between the opposing sides. The French begin to lose their initial impetus and are then subject to counter-attacks.
This second scenario of Quatre-Bras occurs two hours later and this time is on the Allies left flank. It depicts the Allied counter-attack on the village of Pireaumont currently held by the French. It is 17h30 when Brunswick and Hanoverian troops are massing to launch an assault on Pireaumont, to not only regain control of the village but also any key roads including the main road to Namur. Wellington is gradually gaining the upper hand.
Special Rules for This Scenario
- Victory & Defeat: The usual conditions explained in the rules apply to both sides. The Allied player wins the game if at the end of a game turn, he controls the 2 Villages and the Farm located in the frontline. The French player wins the game if at the end of the 10th turn of play, he controls at least one Village and the Farm located in the front line. If at the end of the 10 turns the two players have not fulfilled their victory conditions and neither side has a total of 10 victory points, then the game ends in a draw.
- Terrain: For this scenario, one location may contain up to 2 Building Terrain cards (the effects are not cumulative). The rules for capturing a terrain card are the same as those explained in the rules on page 11-12, but you can only capture one Terrain card at a time if the location contains more than one. If a unit controls the Farm and the Village terrain cards in the same location then the Farm will always be considered on the top for its effect and order or capture.
- Artillery: In this scenario, artillery units are not complete batteries, they represent only a small number of guns. To show this, units of artillery suffer a penalty of -1 to shoot for the duration of the scenario.
- Deployment: All starting units are placed face up even those in Reserve.
French Army Units (10 cards)
- Reserve Line infantry (3), marker 1
- Line Infantry, marker 2
- Marie-Louise (3), marker 3
- Grenadiers, marker 4
- Chasseurs à cheval, marker 5
- Foot Artillery
Note: Remember even though the main objective is to control the village of Pireaumont (ie: 2 Village and 1 Farm Terrain card) you must have at least three units in the front line so as to not lose the game. The French player must therefore, perform at least one move in the 1st line with a unit in the first round.
Coalition Army Units (12 cards)
- Hanoverian Infantry (2), marker 1
- Prussian Line Infantry (3), marker 2
- British Infantry (2)
- Riflemen
- Foot artillery
- Highlanders
- British Hussars (2)
Note: As the Prussians were not actually present at the battle of Quatre-Bras, the Prussian units used in this scenario are there to represent the Brunswickers.
French Strategy Deck – The Battle of Quatre-Bras, 17h00
- A final effort! (2)
- Ambush (2)
- Confusing order (2)
- Defensive fire (2)
- Fix bayonets! (2)
- Take cover! (2)
- Supply depot (2)
- We can make it! (2)
- Conscripts
- Desertion
- Determination
- Fall back
- Farm (2) F
- Flag
- Hill H
- Line formation
- Low morale
- Officer
- Pour l'Empereur !
- Precise orders
- Press forward!
- Skirmishers
- Strategic pullback
- Veteran
- Village V
- Where are they?
Coalition Strategy Deck – The Battle of Quatre-Bras, 17h00
- A final effort! (2)
- Ambush (2)
- Fix bayonets! (2)
- Beat of the drum
- Burn it to the ground!
- Call the reserve
- Confusing order
- Defensive fire
- Desertion
- Determination
- Fall back
- Flag
- Forced march
- Forward!
- Hill H
- Impetuous
- Line formation
- Long range
- Low morale
- Officer
- Precise orders
- Press forward!
- Reservists
- Skirmishers
- Supply depot
- Take cover!
- The fall of an Empire
- Veteran
- Village V
- We can make it!
- Where are they?
Scenario #4: The Battle of Quatre-Bras – June 16, 1815, "Kellermann's Charge - 18h"
Length: NA • Initiative: French • Factions: France vs. Coalition
With the French assaults failing to break the Allied line, the battle continues without either side taking the upper hand. Marshal Ney then decides to launch his heavy cavalry at the enemy infantry, to break it and then to take Quatre-Bras. Ney believes that he will soon receive reinforcements and so he launches the bulk of his reserves.
This third scenario of The Battle of Quatre-Bras represents the charges by the French heavy cavalry, on the Allied centre, which is already formed in square. Led by General Kellermann, the 8th and 11th regiments of cuirassiers, supported by infantry and light cavalry, charge several times. The question is who will break first?
Special Rules for This Scenario
- Victory & Defeat: The usual conditions explained in the rules apply to both sides.
- Artillery: In this scenario, artillery units are not complete batteries, they represent only a small number of guns. To show this, units of artillery suffer a penalty of -1 to shoot for the duration of the scenario.
- Deployment: The two Hanoverian infantry units of the Allies player start with a «Square Formation» marker. French Cuirassiers deploy on the left, with the «Officer» strategy card.
French Army Units (15 cards)
- Line infantry (3), marker 1
- Reserve Line infantry (3), marker 2
- Cuirassiers (2), marker 3
- Chevau-légers, marker 4
- Marie-Louise (2), marker 5
- Foot Artillery (2), marker 6
- Chasseur à cheval (2), marker 7
Coalition Army Units (15 cards)
- Prussian line infantry (2), marker 1
- Highlanders (2), marker 2
- Hanoverian Infantry (2), marker 3
- Foot Artillery (2), marker 4
- British Infantry (3), marker 5
- British Hussars (2), marker 6
- Riflemen (2)
Note: As the Prussians were not actually present during the Battle of Quatre-Bras, the Prussian units in this scenario represent Anglo-Hanoverian troops.
French Strategy Deck – The Battle of Quatre-Bras, 18h
- Breach through (2)
- Beat of the drum (2)
- Confusing order (2)
- Forward! (2)
- Echelon formation (2)
- Impetuous (2)
- Line formation (2)
- Officer (2) O
- Perfect round shot (2)
- Press forward! (2)
- We can make it! (2)
- Ambush
- Additional Squadron
- Change of direction
- Conscripts
- Desertion
- Determination
- Fall back
- Farm F
- Flag
- Hell for leather
- Low morale
- Moving fire
- Pour l'Empereur!
- Precise orders
- Reservists
- Sacrifice
- Supply depot
- Take cover
- Too many losses!
Coalition Strategy Deck – The Battle of Quatre-Bras, 18h
- A final effort! (2)
- Ambush (2)
- Defensive fire (2)
- Fix bayonets! (2)
- Officer (2)
- Line formation (2)
- The fall of an Empire (2)
- We can make it! (2)
- Where are they? (2)
- Beat of the drum
- Call the reserve
- Confusing order
- Conscripts
- Determination
- Fall back
- Farm F
- Flag
- Forced march
- Hill H
- Impetuous
- Long range
- Low morale
- Perfect round shot
- Precise orders
- Skirmishers
- Spotted!
- Square formation
- Strategic pullback
- Supply depot
- Take cover
- Too far away
Scenario #5: The Battle of Quatre-Bras – June 16, 1815, "Wellington goes on the offensive, 19h-19h30"
Length: NA • Initiative: Normal • Factions: France vs. Coalition
Reinforced by two newly arrived divisions, Wellington takes the offensive to win the battle. These new reinforcements give him both numerical superiority and fresh troops, to confront a French force, exhausted by many hours of combat.
In this last scenario of the Battle of Quatre - Bras, both sides oppose a larger army than in the previous actions. Here the Allied army attempts to push back the French army from the farm of Gemioncourt on its left flank and the Bossu wood on its right.
Special Rules for This Scenario
- Victory & Defeat: The usual conditions explained in the rules apply to both sides. At the end of the game, each Wood and Village terrain card gives 1 additional victory point to the controlling player.
- Terrain: For this scenario, a location may contain up to 3 Woods Terrain cards (the effects are not cumulative). The rules for capturing terrain card are the same as those explained in the rules on page 11-12, but you can only capture one terrain card at a time if the location contains multiple terrain cards.
- Outflank: Players may only attempt to outflank the enemy army on side 'B' of the board. The other rules for Outflank apply as normal.
- Artillery: In this scenario, artillery units are not complete batteries, they represent only a small number of guns. To show this, the units of artillery suffer a penalty of -1 to shoot for the duration of the scenario.
- Deployment: All starting units are placed face up even those in Reserve.
French Army Units (16 cards)
- Voltigeurs (2), marker 1
- Marie-Louise (3), marker 2
- Line Infantry (3), marker 3
- Grenadiers, marker 4
- Reserve Line infantry (3), marker 5
- Cuirassiers (2), marker 6
- Foot artillery, marker 7
- Chasseur à cheval
Coalition Army Units (17 cards)
- Hanoverian Infantry (2), marker 1
- British Infantry (3), marker 2
- Prussian Line Infantry (3), marker 3
- British Guard (2), marker 4
- Foot Artillery (2), marker 5
- Riflemen (2), marker 6
- Highlanders
- British Hussars
- Netherlands Carabiniers
Note: Since the Prussians were not actually present at the battle of Quatre-Bras, the Prussian units in this scenario represent Brunswickers.
French Strategy Deck – The Battle of Quatre-Bras, 19h
- A final effort! (2)
- Ambush (2)
- Confusing order (2)
- Conscripts (2)
- Defensive fire (2)
- Fix bayonets! (2)
- Officer (2)
- Take cover! (2)
- We can make it! (2)
- Woods (2) W
- Breach through
- Call the reserve
- Desertion
- Determination
- Do not engage the guard!
- Fall back
- Flag
- Forward!
- Impetuous
- Line formation
- Long range
- Low morale
- Perfect round shot
- Pour l'Empereur!
- Precise orders
- Recall
- Reservists
- Skirmishers
- Strategic pullback
- Supply depot
- Too many losses!
Coalition Strategy Deck – The Battle of Quatre-Bras, 19h
- A final effort! (2)
- Beat of the drum (2)
- Fall back (2)
- Fix bayonets! (2)
- Forward! (2)
- Officer (2)
- Supply depot (2)
- The fall of an Empire (2)
- We can make it! (2)
- Woods (2) W
- Ambush
- Burn it to the ground!
- Confusing order
- Conscripts
- Defensive fire
- Desertion
- Determination
- Flag
- Hill H
- Impetuous
- Line formation
- Long range
- Low morale
- Moving fire
- Perfect round shot
- Precise orders
- Skirmishers
- Square formation
- Take cover!
- Too many losses!
- Veteran
Scenario #6: The Battle of Ligny – June 16, 1815, "The First French attacks, 14h30 -15h30"
Length: 10 turns • Initiative: French • Factions: France vs. Prussia
Whilst Marshal Ney attacks the crossroads of Quatre-Bras defended by Wellington, Napoleon advances on Fleurus to attack the Prussians, who, under the orders of Blücher, are entrenched in and around the village of Ligny. The position is strongly defended and Blücher is waiting for the arrival of the reinforcements that Wellington has promised.
This scenario represents the French assaults on the villages of St-Amand, The Hague and Wagnelée which form the Prussian line of defence on the right flank.
Special Rules for This Scenario
- Victory & Defeat: The usual conditions explained in the rules apply for both sides, but for this scenario, having three empty spaces in the front line is not a condition of defeat. In addition, the French player wins the game if at the end of a turn, he controls at least 2 Villages and the 3rd is not controlled by either player.
- Outflank: Players may only attempt to outflank the enemy army on side 'A' of the board. To be able to perform an outflank it is necessary to control the village of Wagnelée (C) for the duration of the outflank manœuvre. If at the end of a turn, any of a player's unit has not yet succeeded in its outflank and the village is no longer controlled by that player then the unit returns to reserve according to the rule for reinforcements.
- Artillery: In this scenario, artillery units are not complete batteries, they represent only a small number of guns. To show this, the units of artillery suffer a penalty of -1 to shooting for the duration of the scenario. In addition, during the first round, the French player can only activate one of his artillery units.
- Deployment: All starting units are placed face up even those in reserve.
French Army Units (16 cards)
- Reserve line infantry (3), marker 1
- Line infantry (3), marker 2
- Marie Louise (3), marker 3
- Voltigeurs (2), marker 4
- Chasseurs à cheval, marker 5
- Foot Artillery (2), marker 6
- Grenadiers (2), marker 7
Prussian Army Units (12 cards)
- Line infantry (3), marker 1
- Landwehr (3), marker 2
- Musketeers (2), marker 3
- Foot Artillery, marker 4
- Jägers, marker 5
- Landwehr Cavalry, marker 6
- Uhlans
French Strategy Deck – The Battle of Ligny, 14h30
- A final effort! (2)
- Ambush (2)
- Beat of the drum (2)
- Burn it to the ground! (2)
- Confusing order (2)
- Fix bayonets! (2)
- Impetuous (2)
- Line formation (2)
- Officer (2)
- Pour l'Empereur! (2)
- Taker cover! (2)
- We can make it! (2)
- Conscripts
- Defensive fire
- Determination
- Desertion
- Fall back
- Flag
- Forward!
- Long range
- Low morale
- Perfect round shoot
- Precise orders
- Press forward!
- Sacrifice
- Skirmishers
- Supply depot
- Veteran
Prussian Strategy Deck – The Battle of Ligny, 14h30
- Village (3) V
- A final effort! (2)
- Ambush (2)
- Confusing order (2)
- Defensive fire (2)
- Fix bayonets! (2)
- Officer (2)
- Take cover! (2)
- The fall of an Empire (2)
- We can make it! (2)
- Beat of the drum
- Burn it to the ground!
- Call the reserve
- Conscripts
- Desertion
- Determination
- Fall back
- Flag
- Forward!
- Impetuous
- Line formation
- Long range
- Low morale
- Perfect round shoot
- Precise orders
- Press forward!
- Reservists
- Sacrifice
- Skirmishers
- Strategic pullback
- Supply depot
Scenario #7: The Battle of Ligny – June 16, 1815, "First Prussian counterattack, 16h00"
Length: 10 turns • Initiative: Prussian • Factions: France vs. Prussia
Whilst two of the three villages on the Prussian right flank fell into the hands of the French, Old Marshal "Forwards" Blücher launched a counter-attack to retake these lost villages and outmanoeuvre the French left flank.
This scenario represents the Prussian counter-attack on the villages of The Hague and Wagnelée, and the taking of the road leading to Quatre-Bras (Location C). Both armies are hoping to see fresh reinforcements appear on the enemy flank along this very road.
Special Rules for This Scenario
- Victory & Defeat: The usual conditions explained in the rules apply for both sides but for this scenario, having three empty spaces in the front line is not a condition of defeat. In addition, the French player wins the game if at the end of a turn; he controls the 4 Village Terrain cards and at least one other slot in his front line. The Prussian player wins the game if at the end of any turn he controls the 4 village terrain cards and at least two other slots in his front line. If a player is the only one in control of location C at the end of any round - he gains 1 additional victory point. Note: It is a good idea to use casualty markers to represent any victory points earned for occupying location (C).
- Terrain: For this scenario, a space may contain up to 2 Village Terrain cards. The rules for capturing a terrain card are the same as those explained in the rules on page 11-12, but you can only capture one terrain card at a time if the location has multiple terrain cards.
- Outflank: Players may only attempt to outflank the enemy units on side 'A' of the board.
- Artillery: In this scenario, artillery units are not complete batteries, they represent only a small number of guns. To show this, the units of artillery suffer a penalty of -1 to shoot for the duration of the scenario.
- Deployment: All starting units are placed face up even those in Reserve.
French Army Units (14 cards)
- Reserve Line Infantry (3), marker 1
- Chasseurs à cheval (2), marker 2
- Voltigeurs, marker 3
- Foot Artillery (2), marker 4
- Grenadiers, marker 5
- Line Infantry (2), marker 6
- Marie-Louise (2), marker 7
- Chevau-légers
Prussian Army Units (12 cards)
- Line Infantry (3), marker 1
- Musketeers (2), marker 2
- Foot Artillery (2), marker 3
- Uhlans, marker 4
- Landwehr (2), marker 5
- Hussars, marker 6
- Jägers
French Strategy Deck – The Battle of Ligny, 16h
- A final effort! (2)
- Ambush (2)
- Defensive fire (2)
- Fix bayonets! (2)
- Take cover! (2)
- Village (2) V
- Additional squadron
- Beat of the drum
- Burn it to the ground!
- Call the reserve
- Change of direction
- Confusing order
- Determination
- Desertion
- Echelon formation
- Flag
- Forward!
- Impetuous
- Moving fire
- Line formation
- Long range
- Low morale
- Officer
- Perfect round shoot
- Precise orders
- Press forward!
- Recall
- Reservists
- Sacrifice
- Spotted!
- Strategic pullback
Prussian Strategy Deck – The Battle of Ligny, 16h
- A final effort! (2)
- Ambush (2)
- Beat of the drum (2)
- Fix bayonets! (2)
- Forward! (2)
- Take cover! (2)
- Village (2) V
- We can make it! (2)
- Burn it to the ground!
- Confusing order
- Conscripts
- Defensive fire
- Determination
- Desertion
- Echelon formation
- Fall back
- Flag
- Hell for leather
- Impetuous
- Line formation
- Long range
- Low morale
- Officer
- Perfect round shoot
- Precise orders
- Press forward!
- Recall
- Reservists
- Sacrifice
- Skirmishers
- Supply depot
Scenario #8: The Battle of Ligny – June 16, 1815, "The Second Prussian counterattack, 16h00-16h30"
Length: 10 turns • Initiative: Prussian • Factions: France vs. Prussia
The goal of the Prussian counter-attack is the retaking of the village of St-Amand, but Blücher knows very well that he can only do so if The Hague is also in his hands (scenario # 7, First Prussian counter-attack). Control of The Hague will allow him to outflank and defeat the French troops in St-Amand. The Prussians are undertaking the assault on the French positions under the watchful gaze of their beloved Marshal.
This last scenario of the Battle of Ligny, represents the struggle to capture St-Amand, which will change hands several times throughout the day.
Special Rules for This Scenario
- Victory & Defeat: The Prussian player wins the game if at the end of any turn he controls at least 3 buildings. The French player wins the game if at the end of 10 rounds he controls the 2 villages and at least one farm. For this scenario, The Prussian player (only) is not defeated if he has three empty spaces in his frontline. If at the end of 10 turns neither of the two players has fulfilled their victory conditions and neither side has a total of 10 victory points, then the game ends in a draw.
- Outflank: For this scenario it is not possible to outflank the enemy army.
- Deployment: All the starting units are placed face up even those in Reserve.
Note: Be aware that the French player, unlike the Prussian player, loses the game if at the end of any turn, he has three empty spaces in his front line. At the start of the game, the French artillery cannot fire, because the building terrain cards block line of sight. However, if at least one of the three buildings is captured then it will be able to fire from that location.
French Army Units (10 cards)
- Marie-Louise (3), marker 1
- Reserve Line Infantry (2), marker 2
- Voltigeurs, marker 3
- Line Infantry (2), marker 4
- Grenadiers, marker 5
- Foot Artillery, marker 6
Prussian Army Units (12 cards)
- Jägers, marker 1
- Musketeers (3), marker 2
- Line Infantry (3), marker 3
- Landwehr (3), marker 4
- Foot Artillery, marker 5
- Landwehr Cavalry, marker 6
French Strategy Deck – The Battle of Ligny, 16h30
- A final effort! (2)
- Call the reserve (2)
- Confusing order (2)
- Defensive fire (2)
- Farm (2) F
- Fix bayonets! (2)
- Long range (2)
- Officer (2)
- Pour l'Empereur! (2)
- Strategic pullback (2)
- Take cover! (2)
- Veteran (2)
- Village (2) V
- We can make it! (2)
- Where are they? (2)
- Ambush
- Beat of the drum
- Conscripts
- Determination
- Desertion
- Fall back
- Flag
- Impetuous
- Low morale
- Precise orders
- Press forward!
- Reservists
- Supply depot
- Too many losses!
Prussian Strategy Deck – The Battle of Ligny, 16h30
- A final effort! (2)
- Ambush (2)
- Burn it to the ground! (2)
- Confusing order (2)
- Fall back (2)
- Fix bayonets! (2)
- Forward! (2)
- Long range (2)
- Officer (2)
- Perfect round shoot (2)
- We can make it! (2)
- Woods (2) W
- Beat of the drum
- Conscripts
- Determination
- Desertion
- Do not engage the Guard!
- Flag
- Impetuous
- Line formation
- Low morale
- Precise orders
- Press forward!
- Reservists
- Skirmishers
- Supply depot
- Take cover!
- The fall of an Empire
- Too many losses!
- Where are they?
F.A.Q.
Strategy Cards
Q: Can a cavalry unit with the formation marker "Echelon Formation" be permitted to charge? A: Yes.
Q: If I play the Call the reserve Strategy card and my reserve slots are already full, can I bring the new unit into play? A: Yes, but the usual rules for reinforcements apply in this case.
Q: How do you play the Confusing Orders Strategy card? A: Confusing Orders is a card that can only be played during the initiative phase. Its initiative value is 3 and allows you to win the initiative in the case of a tie.
Q: What happens if I play the strategy card Forward! and my opponent plays the Call the reserve card during the initiative phase? A: In Napoleon Saga, each card played must have its effect resolved. In this case, both players apply the effects of their respective cards and the player who played Forward! wins the initiative for this Turn.
Q: What happens if both players play the Forward! card during the initiative phase? A: Both players place a Casualty marker on any of their units in the 1st Line. Then each player rolls a D6, the player with the highest dice wins the initiative.
Q: If I play the Impetuous card on one of my units in reserve, does it arrive directly in the 1st Line? A: No, the Impetuous card allows you to make two moves and you must respect the movement rule as indicated in the rules. One unit cannot «jump» over another unit!
Q: Can I play the Ambush card twice, at the same time, to gain +2? A: No, you must remember that when a card is played, it takes immediate effect. The first Ambush card gives a +1 in fire, to a unit that has no bonuses. The second Ambush card cannot be played anymore because a bonus has already been given to that unit.
Q: If I play the Flanking card, can I make a melee attack against an enemy unit performing an outflank? A: No, only the 1st Enemy Line can be targeted with this card.
Q: If one of my cavalry units misses its counter-charge, can I play the "Echelon Formation" strategy card? A: Yes, the counter charge is a reaction while the Echelon Formation card is a strategy card.
Q: Can I trade one of my 1st Line units that is in melee with one of my 2nd Line units, if I play the Strategic Pullback strategy card? A: No, disengaging from melee is a completely separate action.
Q: Can I play the card Fall Back, on the unit that my opponent activates to force him to take a morale check before activation? A: No, this card cannot be played in response to a unit being activated.
Q: When I play the Long Range card, is my infantry unit line of fire blocked by any Wood and Buildings in its path? A: Yes, all shots made at least 2 spaces away are subject to the line of sight rules as outlined on page 10 of the rules.
Q: If there are no longer any cards in my Strategy deck, can I re-draw further cards? A: No, once all your Strategy cards have been played, you must finish the game without being able to draw any more cards!
Q: Does the River Terrain card block line of sight? A: No, this is the only terrain that does not block line of sight.
Units
Q: British «Riflemen» get +1 Fire if their target has a Cohesion value of 4. Does this bonus apply if the target has Casualty markers? A: Yes, we take the printed Cohesion value of the target unit.
Q: French Light Infantry Grenadiers earn a +1 bonus for melee in buildings. Does this bonus apply in attack the same as in defence? A: Yes, whether it is in a building or is engaged in melee with an enemy unit in a building, this bonus will apply.
Q: Does a Horse Artillery unit count as artillery or cavalry for objectives? A: Artillery.
Q: If a Horse Artillery unit in reserve is attacked by a unit making an Outflank, what are its bonuses and penalties? A: It suffers -1 for reaction shooting but adds +2 for the Canister Shot keyword.
Q: If a Cavalry with the Impact keyword charges an Infantry Square, it loses its bonus for charging. But does it keep its bonus due to the Impact keyword? A: No, the bonus given by the Impact keyword is related to the charge and Square Formation cancels all charge bonuses.
Q: If a cavalry unit fails their morale test to perform a counter-charge, does it keep the Impact keyword bonus? A: No, unfortunately the Impact keyword is related to the actual charge.
Q: Can a Unit of «French Dragoons» charge if they are located in a Wood or a Building? A: No. French Dragoons must have a Dismounted marker to be in a Wood or Building. This marker means the unit must act as an infantry unit.
Q: «French Dragoons» are Cavalry but are neither light nor heavy cavalry. Can they perform an Outflank? And can they shoot whilst performing a lateral movement? A: Yes and No. French Dragoons were not actually classed as heavy cavalry, so they may attempt an Outflank but they receive no bonus unlike light cavalry. Only light cavalry units can fire after making a lateral movement.
Q: Can a cavalry unit receive multiple Disarray markers? A: No, Disarray markers do not stack.
Q: Can a Landwehr Cavalry unit in reserve use the Support keyword to take a casualty instead of an infantry in 2nd line? A: No, you have to be directly behind the infantry concerned, which can only happen when you are in the 2nd line to «support» infantry in the 1st line.
Q: The Accurate keyword and some strategy cards talk about the Status of a unit. What is the order of Status in relation to units? A: Guard units have a higher Status than all other units. Elite units have a Status higher than those classed as standard units, i.e. those units which do not have a Status shown on their card.