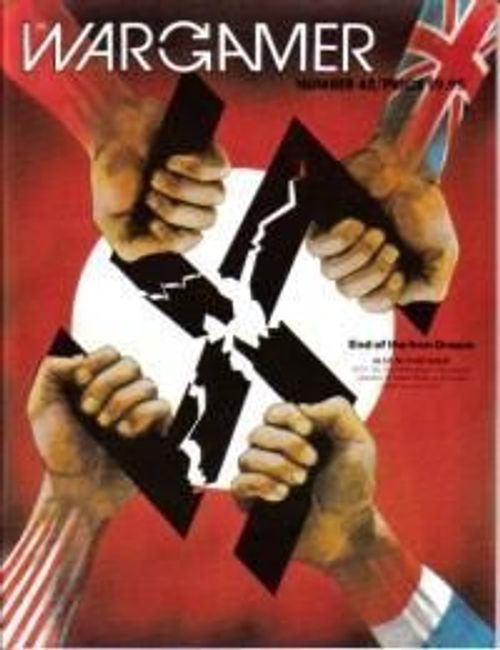
End of the Iron Dream
End of the Iron Dream Rulebook
Table of Contents
Table of Contents
- 1.0 Introduction
- 2.0 Game Components
- 3.0 Setting Up the Game
- 4.0 Definition of Terms
- 5.0 The Turn Sequence
- 6.0 First Turn Special Rules
- 7.0 Reinforcements and Replacements
- 7.1 Western Allies
- 7.2 Effect of German ZOCs on Arrivals
- 7.3 Soviet Reinforcements
- 7.4 Withholding Reinforcements
- 7.5 German Reinforcements
- 7.6 German Wehrkreis Cities
- 7.7 MA of German Reinforcements
- 7.8 Withholding German Reinforcements and Replacements
- 7.9 No MP Cost to Place German Units
- 7.10 Stacking Limits for Newly Arrived Units
- 7.11 Replacements
- 8.0 Stacking
- 9.0 Zones of Control
- 9.1 In General
- 9.2 ZOCs in Mountain and Marsh Hexes
- 9.3 Blocked Hexsides, Lakes, Rivers, and Canals
- 9.4 Port Counters
- 9.5 Yugoslav ZOCs
- 9.6 Entry and Exit MP Costs
- 9.7 Effect of Friendly Units on ZOCs
- 9.8 German Fortifications
- 9.9 Number of Units Projecting ZOC Into a Hex
- 9.10 Effect of Unnegated ZOCs on Retreat and Supply
- 9.11 Movement Between EZOCs
- 10.0 Operational Movement, Terrain, and the Map
- 11.0 Mobile Assaults
- 11.1 Eligible Units
- 11.2 Terrain Restrictions
- 11.3 Effect of Fortifications
- 11.4 Weather Effects on Mobile Assaults
- 11.5 In-Hex Terrain
- 11.6 Launching Mobile Assault From an EZOC
- 11.7 Hexside Terrain Effects on Mobile Assaults
- 11.8 CRT Adjustment
- 11.9 Effect of Combat Losses on Assaulting Units
- 11.10 Assaulting as a Stack
- 11.11 Terrain Effects
- 12.0 Strategic Land Movement
- 13.0 German Sea Movement
- 14.0 Western Allied Sea Movement and Invasions
- 15.0 Supply
- 15.1 General Supply
- 15.2 Checking Supply Status
- 15.3 Lack of General Supply
- 15.4 Defender's Combat Supply
- 15.5 Western GS Line Length
- 15.6 Soviet GS Line Length
- 15.7 Axis Supply Line Length
- 15.8 Restrictions
- 15.9 Effects of Lack of Supply
- 15.10 Tracing Supply Through Allied Territory
- 15.11 Effect of German Fortifications on Supply
- 16.0 German Economic Collapse
- 16.1 Required Hexes
- 16.2 SUs From Control of Required Hexes
- 16.3 Liberation / Blockage of One Secondary Hex
- 16.4 Liberation / Blockage of Two Secondary Hexes
- 16.5 Liberation / Blockage of All Secondary Hexes
- 16.6 Recapture of Economic Hexes
- 16.7 Loss of Berlin or Ruhr
- 16.8 Effects of German Economic Collapse
- 16.9 Effect on GS from Collapse
- 16.10 Effect on Units in Holding Box
- 17.0 First Airborne Army
- 18.0 Prepared Assaults and Combat Results
- 18.1 In General
- 18.2 Limits
- 18.3 Maximum Attacking Units
- 18.4 Defending Stack
- 18.5 Defenders in Multiple Hexes
- 18.6 Withholding Combat Strength
- 18.7 Battle Resolution
- 18.8 Terrain Effects and Column Shifts
- 18.9 Obtaining a Combat Result
- 18.10 Declaring an Assault
- 18.11 Initial Combat Ratio Greater or Less Than CRT
- 19.0 Satellite Nations
- 20.0 Yugoslavia
- 21.0 Special Units
- 22.0 Fortifications
- 23.0 Führer-Mandated Offensives
- 24.0 Stavka Shock Fronts
- 25.0 Special Rules
- 26.0 How to Win
- 27.0 Scenario 2: Let History Choose
- 28.0 The Unit Roster
- 29.0 Designer's Notes
1.0 Introduction
"'What is good?' ye ask. To be brave is to be good." --Friederich Nietzsche, Thus Spake Zarathustra
A. End of The Iron Dream is a strategic-level simulation of the last year of the last war in Europe. Each turn represents the passage of one-half month, and each hexagon on the map equals approximately 48 miles from side to opposite side. Units are corps for the Western Allies and Germans, and armies for the Soviets and minor satellites.
B. The game can be played by one to four people, though solo players will have to jettison the fog-of-war optional rules.
C. In the three-player game, the participants represent Stalin, Hitler, and Eisenhower. (Roosevelt and Churchill were for the most part content to restrict themselves to grand strategy by this time in the war, and left strategy up to the generals.) In the two-player contest, one participant commands all the forces of the Grand Alliance and the other commands the Axis.
D. The game can also be played using a two-person German command team. Special rules regarding allocation of German resources to the various fronts under such situations are provided in 26.7.
E. The game's systems have been designed to reflect decision making at the lofty strategic level, and thus have been stripped of tactical nuance.
F. The political boundaries drawn on the map are configured to match those drawn by Hitler for his various satraps just before the Alliance forces broke into the Reich's heartland areas and put an end to his Völkisch interpretation of European geopolitics.
G. The main body of these rules are written with three-player contests in mind. The few alterations necessary for two or four-player games are located near the end of the rules in 26.0.
H. A hypothetical Third World War in 1945 scenario is also provided. Called Let History Judge, the scenario is strictly a two-player contest, and its special rules can all be found in 27.0.
2.0 Game Components
2.1 Counters
The 300 die-cut unit counters included with the game should be carefully punched out and sorted by side and type before starting the game.
Errata: Make the following corrections on the counters:
A. The 5SS Mtn corps should not have an 8 in its upper-left corner: it should have a Y there, as it is part of the initial Yugoslav garrison (corrected by the replacement SS counters supplied with Strategy & Tactics magazine #123).
B. The 58th Panzer corps should have an F in its upper-left corner; it starts the game in Southern France.
C. There is no 59th Panzer corps.
D. The German 34th infantry corps and 1st Romanian Army need dots in the upper-left corners.
E. The 2nd Soviet Shock Army is missing its ID number on its front; it does appear on the reverse side.
F. The British 13th and P2 corps should have an I in their upper-left corners, as both units start in Italy.
G. The British 61st corps is actually the CI corps.
H. German FLAK corps should have an S (not 5) as their attack factor.
2.2 A Sample Unit
[Diagram of a sample unit counter.]
2.3 Unit Sizes
A. A unit's historic size is denoted by the symbol along the top edge. This is important for stacking (8.0). Most units are armies (XXXX), or corps (XXX).
B. The Soviets also have five cavalry-mechanized groups (GRP), and the Germans have one theater-of-operations headquarters unit (XXXXXX).
2.4 Unit Types
There are nine types of combat units, divided into mechanized and non-mechanized classes.
2.4.1 Mechanized Combat Units
[Unit symbols: Armor, Tank, Mechanized, Panzer, Cavalry Mechanized, Flak, Infantry Mechanized.]
In most games, the Mechanized-Infantry symbol is used for infantry carried into battle in armored personal carriers. That meaning cannot be so strictly applied in this game. Here it represents units (still primarily deploying infantry as their combat edge) on which a degree of mechanization or motorization has been lavished sufficient to noticeably increase their mobility over straight left outfits [sic; printed "left," probably meant "leg"]. In the Soviet unit mix, this symbol also denotes Guards status.
2.4.2 Non-Mechanized Combat Units
[Unit symbols: Infantry, Cavalry, Mountain, Shock, Infantry, Paratroop Infantry.]
Shock are Soviet infantry armies backed by about twice the normal amount of heavy artillery.
2.4.3 Non-Mechanized Non-Combat Units
[Unit symbols: Ober Kommando des Herres (printed spelling) supply unit, Strategic Rockets.]
* German 65 Z.B.V. Corps
2.5 Markers
The game also uses the following types of counters to represent events, things, and conditions that occur throughout play.
[Marker images: Western Allied Out of Supply; Allied Invasion Port; Emergency Supply; Polish Home Army; General Supply; Alpenfestung (Alpine Fortress); Western Allies Second Invasion Chit; Supplied; Attack; Atomic Bomb Blast; Fortifications (Levels 1, 2, 3); Stavka Shock Front (red and white checks, A, B, C).]
2.6 Unit Abbreviations
Various abbreviations appear on some of the units.
2.6.1 German
| Abbr | Meaning | Abbr | Meaning |
|---|---|---|---|
| Cos. | Cossack | HG | Herman Goering |
| FHH | Feld Herrn Halle | Lomb. | Lombardy |
| GD | Gross-Deutschland | SS | Schutzstaffel |
| GUD | Heinz Guderian | Z.B.V. | For Special Employment |
2.6.2 Soviet
The Soviet Cavalry-Mechanized Groups, named after their commanders, bear the following abbreviations:
| Abbr | Name | Abbr | Name |
|---|---|---|---|
| BA | Baranov | OS | Oslikovskiy |
| GO | Gorshkov | SO | Sokolov |
| PL | Pliyev |
2.6.3 Other Unit Abbreviations
| Abbr | Meaning | Abbr | Meaning |
|---|---|---|---|
| B | British | H | Hungarian |
| BUL | Bulgarian | P | Polish |
| C | Canadian | R | Romanian |
| F | Free French | VLAS | Vlasov |
| FX | Free French Expeditionary |
2.6.4 Unit Type Abbreviations
These are used throughout the rules, especially in scenario setup.
| Abbr | Type | Abbr | Type |
|---|---|---|---|
| Cav | Cavalry | Mtn | Mountain |
| Inf | Infantry | Para | Paratroop |
| Mech Inf | Mechanized Infantry | Pz | Panzer |
2.7 Unit IDs
The historical ID of a unit is just that, its numeric or word name as carried in the actual campaigns depicted here.
2.8 Attack Factor
A unit's attack factor (AF) is a measure of its ability to conduct offensive combat.
2.9 Defense Factor
A unit's defense factor (DF) is a measure of its ability to wage defensive battles.
2.10 Movement Allowance
A unit's movement allowance (MA), expressed in movement points (MPs), is a measure of the relative speed when moving across the hexagonal map grid.
2.11 Nationalities and Forces
The units are printed in various colors to make sorting them into their various national and political groupings easier.
| Nationality/Force | Colors |
|---|---|
| German Army* | black on gray |
| German Air Force | black on light blue |
| Nazi Waffen SS | white on black |
| Bulgarian | red on gray |
| Romanian | red on yellow |
| Hungarian | black on yellow |
| Soviet | black on red |
| Yugoslav | black on red (mountain units) |
| British Commonwealth** | black on tan |
| United States/Free French | black on green |
| Vlasov's Free Russian Army | red on white |
* the Wehrmacht ** and associated powers
2.12 The Map
A paper map depicts the area this part of the war took place. Terrain and cities on the map have been slightly altered from their exact real-world configurations to fit within the hex grid. But the relationships between the terrain from hex to hex are accurate to the degree necessary for presenting players with those same space-time dilemmas faced by their historic counterparts in the actual campaigns.
Errata: Modify the map for the following:
The northern border of Bulgaria is missing. It runs along the Danube to the point where hexes G31, G32 and F31 all meet. From there it continues zig-zagging east to the point where F32, F33 and G33 meet.
A. Seven blocked hexsides are missing from the Alps. The following hex-pairs are blocked hexsides: L15/K15, L15/K16, L16/K16, K16/K17, K17/J17, K18/J17, I18/J18.
B. The MTO holding box in the Atlantic Ocean is actually the ETO holding box.
C. Hex J14 is considered a mountain hex; hex F12 is not.
D. Some of the blocked hexsides printed on the map, those in the Adriatic and Baltic areas, have the red block-line symbol shown as running across only a portion of the hexside. Those hexsides are all fully blocked; there is no such thing as a partially blocked hexside.
2.13 Other Components
In addition to the units described above, the other components are the rules and play aids. A standard six-sided die is also needed.
2.14 Reinforcements and Setup Areas
Some of the units carry a number, letter, or asterisk in their upper-left front corners. Those with numbers there are reinforcements, and the number indicates the turn they enter play. Letters represent set-up areas (3.0), and an asterisked unit is a reinforcement that enters when a special event has taken place (25.0, 27.0).
3.0 Setting Up the Game
If this is your first reading of the game rules, skip all of 3.0 for now and go on and read the rest of the rules. After finishing that first read-through, return to this section and set up your first match of Iron Dream.
3.1 Axis Initial Setup
A. The Axis places the Romanian 1st Army and the German 34th and 54th infantry corps (all marked with a dot in their upper-left corners) in the Destroyed-Unit Holding Box.
B. Place the Bulgarian army in Sofia (hex C28).
C. Place the Romanian 3rd and 4th Armies, and the Hungarian 1st, 2nd and 4th Armies on the hexes marked R3, R4, H1, H2, H3.
D. Place the German 68 and 91 infantry corps (marked G in their upper-left corners) in the German Forces Greece Box.
3.2 Soviet Initial Setup
The Soviets set up the 1st, 2nd, and 3rd Yugoslav Partisan Armies, one per hex in any non-coastal hex of Albania or Montenegro, or in any hexes in Serbia or Croatia that border on Montenegro and Albania.
3.3 Yugoslav Setup
A. The Axis place the five corps of the initial Yugoslav garrison (the 15th, 21st, and 22nd Mountain corps, the 5th SS Mountain Corps, and the 69th infantry corps, all marked Y in their upper-left corners) on any five Yugoslavia hexes on or north of row F.
B. At least one of the garrison units must start in Belgrade (F23).
C. Place one supply unit (SU) in Belgrade.
3.4 Axis Russian Front Setup
A. The Axis places units (comprising the majority of Germany's at-start forces) on the Russian Front. These units bear no marks on their upper-left corners.
| Qty/Type | IDs |
|---|---|
| 32 x infantry* | 1, 2, 4, 5, 6, 6SS, 7, 8, 9, 10, 11, 12, 13, 17, 20, 23, 26, 27, 28, 29, 30, 35, 38, 42, 43, 44J (Jaeger), 49 Mtn, 50, 52, 53, 55, 59 |
| 10 x Wehrmacht panzer | 3, 24, 39, 40, 41, 46, 47, 48, 56, 57 |
| 2 x SS panzer | 2SS, 3SS |
* All are 6-7-5/3-4-5, except the 44J, which is a 7-8-5/3-4-5.
B. Place these units on any swastika hex on the eastern front.
C. They may stack with Hungarian and Romanian units.
D. All the front line hexes must have at least one German unit on them, regardless of the presence of satellite armies.
E. Place two SUs anywhere on one or two German controlled hexes within four hexes of a swastika east front hex.
3.5 German Unit Reduction
As soon as that is done, the Soviets (or Grand Alliance in a two-player match) may look through the Axis front, examining stacks, and then may flip over 22 German infantry corps (including Jaeger and mountain), and five Wehrmacht (not SS) Panzer corps to their weaker sides.
3.6 Italian Garrison
A. The Axis then places the seven units of the Italian garrison next.
B. The 73, 75, and 87 infantry corps are marked N; place them, one each, in Genoa, Venice and Milan.
C. Place the other four corps, marked I, one each, on the four setup hexes in the row just north of Rome (1 Para, 51 Mtn, 14 Pz, and 76 Pz).
D. Place one German SU on any German-controlled hex in Italy.
E. All units in Italy start the game at full strength.
3.7 Western European Garrison
A. The Axis places units in France and the Benelux.
B. Place the seven units of the southern France garrison (62R, 64R, 66R, 67, 85, and 90 Inf corps, and 58 Pz corps), with a F in their upper-left corners, so that the infantry are all on French Mediterranean coastal hexes. They cannot be stacked, and there must be one on each of the French Mediterranean ports.
C. The Panzer corps may be set up in any French hex or south of row M.
D. The Reserve (R) corps must be deployed with their 1-14 sides up, but all the others are at full strength. Place one SU with the Panzer corps in its set-up hex.
3.8 Additional Western Europe Setup
A. Place the eleven units marked B in their upper-left corners (2 Para, 1SS Pz, 25, 74, 80, 81, 82, 84, 86, 88 and 89 Inf) so that any one of them is on one of the four coastal hexes between Bordeaux and the river Loire (P1, Q2, R2, S3).
B. Place the remaining corps on any hexes in France or the Benelux. Stacking is permitted, and all are at full strength.
C. Place the 65 Z.B.V., also marked B on any one of the four French Atlantic coastal hexes marked 65 (V7, V8, W9, X9).
D. At least one of the B corps must start in the Hook of Holland (hexes X13, Y13, Y14, Z13, Z14).
E. Place two SUs anywhere in France or the Benelux. Place a SU in Berlin, the Ruhr and Breslau.
3.9 Other German Counters and Units
Place the German fortification counters, Alpenfestung marker, and reinforcement units (coded with their game-turn of arrival in their upper-left corners) off to the side for now. The Axis are now set up.
3.10 Soviet Front Setup
A. Next the Soviets set up all their armies, except for the five marked as reinforcement (19 Inf, 21 Inf, 9 Mech, Polish P2 Inf, Yugoslav Partisan 4 Inf), on the red star frontline hexes opposite the Axis units. All starred hexes must have at least one unit on them.
B. Put the STAVKA Shock Front markers and all SUs off to the side.
3.11 Western Allied Setup
A. Last, the Western Allies (WA) place two invasion-port counters and five SUs in the ETO Holding Box.
B. The third invasion-port counter and one SU go in the Mediterranean Theater of Operation (MTO) Holding Box.
C. Place the four Commonwealth (CW) corps (B5, B10, B13, and P2) and four US corps (2, 4, 6, FX), all marked I in their upper-left corners, along with two SUs, on the four white star front hexes along the southern-most row in Italy. All the star hexes must contain at least one corps.
D. Place the green F1 and F2 corps in the MTO dead pile for now.
E. The six CW corps (B1, B8, B12, B30, C1, and C2) and the seven US corps (5, 7, 8, 12, 15, 19, and 20) that start in the ETO holding box comprise the majority of the Western Allied (WA) forces and therefore carry no marks in their upper-left corners. Place them in the ETO box now.
F. Place the WA reinforcement corps and the Polish Home Army marker off to the side for now.
G. The United States 23 and 36 corps, and the Vlasov Army, do not appear in the Iron Dream scenario, only in Let History Judge.
4.0 Definition of Terms
4.1 Control
A. All land hexes on the map are always controlled by one of the three players. A given hex is considered controlled by one of the players under the following priorities:
- A unit of that player occupies the hex;
- A unit of that player exerts an uncontested zone of control (ZOC) into the hex;
- A unit of that player was last to occupy or exert an uncontested zone of control into the hex;
- The hex started the game as territory controlled by that player.
B. An uncontested ZOC is defined as a unit having a ZOC in a hex that is not occupied by another player's unit or German Volkssturm or fortification factor, and that hex has also no ZOC of any enemy unit exerted into it.
C. The side at any given instant of play with the highest priority above controls the hex. If units of two or more sides simultaneously exert ZOCs into an unoccupied hex (and one that likewise has no Volkssturm or fortification), then priorities 3 and 4 determine control.
D. At the start of the game, all the hexes on the map are controlled by the Axis, except in southern Italy and on the eastern front. In those areas, the front-line swastika hexes are themselves controlled by the Axis; the opposing red or white star hexes are not.
E. The Soviets control their red star front hexes, and all those hexes east of them, along with the hexes in Yugoslavia with partisan armies.
F. The WA start out controlling only the four white star hexes in southern Italy.
4.2 Western Allies
A. The WA control the units of the British CW and associated Canadian and Polish corps and the American and Free French units and supply concentrations.
B. WA SUs, though all shown in American green, may be used to provide supplies for both army groupings. The same individual SU may not provide supply for units of both groupings simultaneously.
C. No hex containing Axis forces may be mobile-assaulted by units from both groupings in the same WA Operational Movement Phase.
D. Under certain circumstances (15.0) the units of the two groupings may make prepared assaults together.
E. [Text omitted in source; lettering skips from D to the 4.3 heading.]
4.3 Soviet
A. The Soviets command the Red Army, and later on, defecting units of Bulgaria and Romania.
B. The Soviets also command the Yugoslav partisan armies. Any victory points (VPs) earned by Yugoslav units are counted in the Soviet total.
4.10 Western Allied Inter-Army Group Cooperation
A. The tan and green WA units comprise separate army groups. Units from the two groups may stack and move together.
B. All SUs are shown in green, but the tan units may use them just the same. However, the same SU may not provide Emergency General Supply (EGS) or Attack Supply (AS) to units of the two different groups on the same player-turn (with some exceptions).
C. WA units beneath an invasion-port counter are always considered to belong to the same army group, regardless of their actual colors. (The Turn 1 WA invasion must be made with two corps from each group.)
D. The two WA airborne corps together comprise the First Allied Airborne Army, and may be considered to belong to either group, whichever is most convenient for the WA at any instant.
E. In each theater of operations, the WA may each turn declare one cooperative prepared assault. Otherwise, green and tan WA units may not make prepared assaults together. They may never mobile assault together, nor may the same Axis-controlled hex be mobile assaulted by units of the two groups during one single WA Operational Movement Phase.
F. Tan and green units stacked together beneath an invasion-port counter which make a prepared assault out of that hex together do not use up that theater's cooperative attack capacity.
4.4 Grand Alliance
A. All forces opposed to the Axis form the Grand Alliance: Soviet, American, British, Canadian, Polish, Yugoslav, Free French, defeated Bulgarian, and defeated Romanian. Grand Alliance (or just Alliance) forces from the two different camps (Soviet and WA) may not share SUs, stack, move together, nor assault the same Axis-controlled hex in the same turn.
B. Grand Alliance forces may not combat one another in any way in the Iron Dream scenario. That is only possible in the Let History Judge scenario.
4.5 Yugoslavia
Yugoslavia is comprised of all the hexes of Croatia, Serbia, the Banat, Montenegro, and Albania, and hexes containing a red Y. The hexes with a red Y are part of Greater Germany in the Iron Dream scenario.
4.6 German
German units are those of the Wehrmacht, Luftwaffe, and Waffen SS. Any rule applicable only to German units applies only to those units.
4.7 Axis
The Axis includes all German units, Hungarian, undefected Bulgarian, and undefected Romanian units. Any rules applicable to Axis units apply to all of these groups.
4.8 Liberation
Any time Grand Alliance forces seize control of a hex from the Axis, that hex is said to have been liberated.
4.9 Western Allied Theaters of Operation
A. The WA must operate within the framework of two geographic theaters of operations: the European Theater of Operations (ETO) and the Mediterranean Theater of Operations (MTO).
B. Any WA unit tracing its general supply line (15.0) to an Atlantic Ocean port or coastal hex is considered to be in the ETO.
C. Any unit tracing its general supply line to a Mediterranean or Adriatic port or coastal hex is in the MTO.
D. In the Let History Judge scenario, the Baltic is considered part of the ETO and the Black Sea is considered part of the MTO.
E. If a unit is in a hex, such as N2, from which it could possibly trace general supply to a source in either of the theaters, the WA may declare it to be in whichever theater is more convenient at that instant.
F. Theaters of operations are important for purposes of WA replacements (7.0), sea movement (14.0), and paratroop airdrop (17.0).
4.11 Other Abbreviations
| Abbr | Meaning | Abbr | Meaning |
|---|---|---|---|
| AF | Attack Factor | FS | Fortress Supply |
| AS | Attack Supply | GS | General Supply |
| CRT | Combat Results Table | MA | Movement Allowance |
| CW | Commonwealth | MP | Movement Point |
| DF | Defense Factor | MTO | Mediterranean Theater of Operations |
| DRM | Die Roll Modification | OOS | Out of Supply |
5.0 The Turn Sequence
All actions in the game take place within the framework of turns. Each side takes its turn separately. While one side is moving and attacking, the others may carry out actions only as called on to do so by the activities of the phasing side (the side whose player-turn it is).
5.1 The Axis Player-Turn
5.1.1 Reinforcement, Replacement, and Fortification Phase
A. Construct new fortifications or enhance existing ones.
B. Place new SUs in Berlin, the Ruhr or Breslau.
C. Place arriving reinforcements on any controlled and in-general-supply Wehrkreis city hex, Warsaw, Prague, or into the Replacement Army Holding box.
D. Flesh-out depleted onboard units with replacements.
E. Place newly reactivated units from the dead pile, weaker side up if they are two-step units, in the same way as reinforcements.
F. Convert Reserve corps to regular infantry. Cannibalize a Wehrmacht 3-4-5 infantry corps if desired.
5.1.2 Initial Supply-Check Phase
A. Determine if any Axis units cannot trace a general supply (GS) line. Mark such units with Out of Supply (OOS) counters.
B. The Axis may now operationally move and then immediately burn off (or burn them off in place, if they are already in the hex desired) any on-board SUs to create EGS for units just determined to have been OOS, or for units in GS intending to move out of GS that turn.
C. Mark units receiving such supply burn-offs with EGS counters.
5.1.3 Strategic Land Movement Phase
A. The Axis may move up to three German combat units up to three times their normal operational MAs, paying all normal terrain costs. Such units may start out in the ZOCs of Soviet and Yugoslav units, as long as at least one other Axis unit also starts this phase in the same hex and remains there to hold the line all throughout the following player-turn. Such hold-the-line units may make prepared assaults and advance after combat.
B. German units may move from the ZOCs of WA units in this way only during foul weather turns.
C. Strategically moving German units may enter only German-controlled hexes in which they can trace a GS line to Berlin or the Ruhr or Breslau.
D. They may never move adjacent to enemy units, except across blocked hexsides.
E. During clear weather turns, German units may not begin or use strategic movement within two hexes of a WA unit in GS.
F. German units that move strategically may not take part in any other activities during this player-turn.
G. Hungarian, Romanian, and Bulgarian units may never move strategically.
5.1.4 Sea Movement Phase
A. One German unit per player-turn that starts this phase in a Baltic Sea port or coastal hex, may sea move to another German-controlled Baltic port. Roll one die and consult the German Sea Movement Table at the instant of disembarking to determine if the unit suffers any damage.
B. SUs may sea move.
C. Units that used strategic land movement earlier in the turn may not sea move this turn.
D. Units that sea move may not take part in any other activities this player-turn.
5.1.5 Operational Movement Phase
A. All Axis units in GS or EGS (and that did not move earlier in the turn, strategically or by sea) may now move up to the limits of their MAs.
B. Units in GS may not voluntarily move out of GS; units with EGS markers on them may do so.
C. Mechanized combat units may make mobile assaults.
D. Units starting this phase without GS or EGS have their MAs halved and may only move into a hex if by entering it they are moving nearer to a source of GS, EGS, or fortress supply (FS).
E. All units are guaranteed the ability to move one hex during this phase, except those that just strategically moved or sea moved. If the only hex an OOS unit could move to is one that would locate it farther away from its nearest source of supply, that move is forbidden. This does not guarantee mechanized units the ability to mobile assault; they must have the MA required to do that or it cannot be done.
5.1.6 Prepared Assault Phase
A. Burn off (remove) the SUs that will provide AS for assaulting units this phase. If a memory aid is needed, use the AS markers (the arrows) to designate assaulting stacks.
B. Conduct prepared assaults, eliminations, step-reductions, advances after combat.
C. Remove all OOS markers atop Axis units.
5.1.7 Terminal Supply-Check Phase
A. Check the supply state of all Axis units again.
B. Deploy FS markers.
C. Remove depleted units (two-step units with their weaker side already showing) and one-step units that have no GS, EGS, or FS at this time. Then deplete any full-strength unit that now likewise is still OOS.
D. Lastly, remove all EGS markers from Axis units, but do not do anything to the units that were underneath those EGS markers.
5.2 The Western Allied Player-Turn
5.2.1 Replacement and Reinforcement Phase
A. Place SUs burned off during the last WA player-turn into either theater holding box. Place arriving reinforcement units there, too.
B. Within WA replacement limits, units in GS on the map or in the holding boxes may now flesh-out with replacements. (Units in the holding boxes always have GS.)
5.2.2 Western Allied Initial Supply-Check Phase
Use the same procedures as in the Axis player-turn, but check the status of WA units.
5.3.2 Soviet Initial Supply-Check Phase
Conduct the same activities as in the Axis phase of the same name, but only check the status of Soviet units.
[Source note: the section numbers 5.3.2 above and the Soviet phases below appear printed within the Western Allied sequence. They are transcribed in the order and with the labels printed.]
5.2.3 Strategic Land Movement Phase
A. Move any number of WA combat units in GS that start this phase in a hex not adjacent to any Axis units across an unblocked hexside, any distance, but only through friendly-controlled land hexes. Such units may never move into or out of Axis ZOCs nor next to any Axis unit across an unblocked hexside.
B. Units that strategically move may take part in no other activities this player-turn.
5.3.3 Strategic Land Movement Phase
A. The Soviets may move one combat unit any distance through friendly-controlled hexes. No entry or exit from Axis ZOCs is allowed.
B. There is no Soviet sea movement of any kind.
C. The strategic land movement capacity may be saved until the beginning of the Operational Movement Phase to bring one newly arrived replacement or reinforcement unit onto the board.
5.2.4 Naval Movement Phase
A. Any WA unit starting this phase in an opened port or invasion-port may now move to its theater holding box or to another opened port or invasion-port counter in its respective theater, or they may move to the other theater's holding box.
B. Units that start this phase on a coastal hex with no opened port city or invasion-port counter in it may be sea evacuated to their respective theater holding box.
C. Units starting this phase in either theater holding box may land at any opened port city or invasion-port counter in their theater or take part in an invasion.
D. Units sea moving from holding boxes to opened port or invasion-port counters pay 1 MP upon landing and may then continue moving and mobile assaulting that same turn. Otherwise, WA units that sea move in any other way may not take part in any further activities that same player-turn.
E. The WA may never have more than four SUs and four combat units (eight total) involved in any kind of sea movement in the same turn.
5.3.4 Soviet Operational Movement Phase
Conduct the same activities as in the Axis phase of the same name.
5.2.5 Operational Movement Phase
Conduct the same activities as in the Axis phase of the same name, with the addition of possible paratroop drops. If such a drop is to be made, it is the first thing done this phase.
6.2 Mobile Assaults
No mobile assaults may be conducted this turn.
[Source note: section 6.2 is printed out of sequence in the source, after 5.2.5; it is placed here with the First Turn Special Rules.]
5.2.6 Prepared Assault Phase
Conduct the same activities as in the Axis phase of the same name, with the additional possibility of a WA heavy bomber strike being conducted in conjunction with one of the assaults (25.5).
5.2.7 Terminal Supply-Check Phase
Conduct the same activities as in the Axis phase of the same name, except there is no WA FS capacity.
5.3 The Soviet Player-Turn
5.3.1 Soviet Reinforcement and Replacement Phase
Conduct the same activities as in the Axis phase of the same name, except new Soviet units enter on controlled hexes along the eastern board edge during the Operational Movement Phase, paying normal terrain costs, or using strategic movement to do so.
5.3.5 Soviet Prepared Assault Phase
Conduct the same activities as in the Axis phase of the same name.
5.3.6 Soviet Terminal Supply Check Phase
Conduct the same activities as in the Axis phase of the same name, but only the status of Soviet units is checked, and the Soviets have no FS capacity.
5.3.7 Soviet STAVKA Shock Front Creation Phase
Create next turn's STAVKA Shock Front.
6.0 First Turn Special Rules
6.1 Axis Restrictions
On the Turn 1, the Axis may perform only these functions:
- It may strategically move up to three corps of its eastern units;
- It may operationally move only its units in Italy, and then only to other hexes in Italy.
6.2 Mobile Assaults
No mobile assaults may be conducted this turn.
6.3 Western Allied Invasion
A. The WA must conduct an invasion on the French, Belgian, or Dutch Atlantic coasts, north of the mouth of the Loire River.
B. Other than the restrictions of 6.2 and 6.3, the WA run a normal turn sequence.
6.4 Western Allied Supply in Italy
The WA units set up on the Italian front at the start of the game are considered to start their player-turn with EGS and AS. They do not need to burn off the two SUs with them to get AS this turn as they already have it.
6.5 Operation Bagration Choice
A. The Soviets must announce at the beginning of their player-turn whether they will run Operation Bagration. If they do not, they take a normal player-turn, observing only the ban on mobile assaults.
B. If they decide for Operation Bagration, the only activities they may perform this turn are the entry and movement of SUs (though they may hold them off the board) and the creation of the first STAVKA Shock Front for use on Turn 3.
6.6 Yugoslav Partisans
Yugoslav partisans may move and attack normally this turn whether or not Operation Bagration is in effect.
6.7 Operation Bagration Effects on Turns 2-3
A. If the Soviets opt for Operation Bagration, on Turn 2 they receive three attack SUs instead of two, and all Soviet mobile and prepared assaults gain a two-column rightward (2R) shift on the combat results table (CRT).
B. On Turn 3, Soviet mobile and prepared assaults gain a 1R shift; after that, Operation Bagration has no more effects.
6.8 Replacements
There are no replacements on Turn 1.
7.0 Reinforcements and Replacements
7.1 Western Allies
A. WA reinforcements are placed into one of the two theater holding boxes at the start of their scheduled turn of arrival (marked in the upper-left corner of all reinforcements). From there they may move by sea, during the WA Movement Phase of the same turn, to any opened port or invasion-port counter in their theater.
B. Such units pay 1 MP to get on shore, regardless of terrain, and may then move normally throughout the rest of the turn.
C. The newly arrived paratroops may airdrop on Turn 7.
7.2 Effect of German ZOCs on Arrivals
A. German ZOCs do not extend into WA invasion-port counters.
B. German ZOCs do extend into regular port city hexes, thus for an WA unit to arrive in such a port, there would need to be at least one other WA combat unit already in the hex to nullify the effect of the enemy ZOC (EZOC).
7.3 Soviet Reinforcements
Soviet reinforcements enter on any friendly-controlled hex along the board's eastern edge. They pay normal movement costs to get on the edge of the board.
7.4 Withholding Reinforcements
A. The WA are not required to move units from the holding boxes onto the map.
B. The Soviets may likewise hold new units off the east edge of the map.
7.5 German Reinforcements
A. German reinforcements enter at any one of the 16 Wehrkreis cities (all in Germany and marked with the Roman numeral of their Wehrkreis) that are in GS and under German control.
B. Under the same restrictions, Warsaw and Prague may also be used to enter new units. Warsaw may no longer be used once the rebellion starts.
7.6 German Wehrkreis Cities
The German Wehrkreis cities are:
| Number | City | Number | City |
|---|---|---|---|
| I | Konigsburg | IX | Kassel |
| II | Stettin | X | Hamburg |
| III | Berlin (Potsdam) | XI | Hannover |
| IV | Dresden | XII | Frankfurt |
| V | Stuttgart | XIII | Nuremburg |
| VI | Essen | XVII | Vienna |
| VII | Munich |
7.7 MA of German Reinforcements
A. German units have their operational MAs doubled the turn they appear on the board as reinforcements or replacements.
B. If they do not move operationally, they may make normal (that is, based on their printed MA) strategic moves, though they do count against the three-corps-per-turn German limit on strategic movement.
7.8 Withholding German Reinforcements and Replacements
German reinforcements and replacements may be held off the board in the Replacement Army Holding Box. Such units still double their operational MAs on their delayed turn of arrival.
7.9 No MP Cost to Place German Units
German units do not expend any MPs when placed on the board.
7.10 Stacking Limits for Newly Arrived Units
Newly arriving units of all sides must observe stacking limits in the hex in which they enter the board. Treat partial hexes on the board edge as full hexes for movement.
7.11 Replacements
Replacements are received in aggregates called steps. Steps may be used to recreate units from the dead pile or to flesh-out depleted units still on the board or in holding boxes.
7.12 Step Values
A. All combat units have a step value. Units with printed attack factors of five or less have no factors on their reverse sides and are therefore worth only one step. If such units suffer a step loss for any reason, they go into their side's dead pile.
B. Units with printed attack factors of six or more have a reduced second-step value printed on their reverse sides. Such units suffer a one-step loss by flipping over to their weaker (depleted) side. A second step loss would eliminate them.
7.13 Western Allied Replacements
A. Beginning on Turn 2, the green army group of the WA receives one step of replacements, either mechanized or non-mechanized in each theater each turn.
B. Beginning on Turn 2, the tan army group receives one step of either kind in either theater (player's choice) each turn.
7.14 Soviet Replacements
Beginning on Turn 2, the Soviets receive one step of replacements, either mechanized or non-mechanized, as desired, each turn.
7.15 Axis Replacements
Beginning on Turn 2, the Axis receives one mechanized and one non-mechanized step each turn. The mechanized step may be used as a second non-mechanized step, but not vice versa.
7.16 Restrictions on Replacements
A. No side may accumulate its replacement steps, and no single unit may absorb more than one step of replacements in a single player-turn.
B. The three three-step elite corps (GD, HG and 1.SS) may not be fleshed out to their highest level after 1944.
C. The Axis may not use German steps to recreate Romanian, Hungarian, or Bulgarian units.
D. Axis cavalry and all SS mountain corps cannot be replaced once lost.
7.17 Effect of Supply on Replacements
Units that are out of GS may not flesh out in the field, and if they are eliminated out of GS, they are permanently eliminated.
Exception: The two WA airborne corps are always replaceable from the dead pile, regardless of the circumstances of their destruction.
7.18 Effect of Loss of German Secondary Economic Hexes
Once any two of the German secondary economic hexes (Ploesti, Nagykanizsa, Breslau) are liberated, no more Axis units may be brought from that side's dead pile.
7.19 Restrictions After Taking Replacements
Units that flesh-out in the field (may not move or mobile assault that turn. They may make prepared assaults and advance or retreat after combat.
[Source note: the parenthesis is unclosed in the printed text.]
7.20 Soviet Replacement Capabilities
Soviet units may be recreated from the dead pile, then stay off the board and flesh-out there, too.
7.21 Western Allied Replacement Capabilities
WA units may flesh-out in the theater holding boxes. Such units may sea move onto an open port or invasion-port that same turn, but they may then move no further. They could make a prepared assault into an adjacent hex and advance or retreat after combat.
7.22 German Holding Box
A. Germany may use its replacement army holding box for replacements in the same way as reinforcements. Units may flesh-out in the box, and replacement units entering at Wehrkreis or Warsaw or Prague must observe stacking when placed, and have their operational movement allowances doubled on the turn of placement.
B. German units, up to the time of that nation's economic collapse (16.0) may stay in the holding box indefinitely.
7.23 German Surge
A. Once per game, the Axis may call for a replacement rate surge ("The complete and utter mobilization of the National Socialist Volkish State"). The surge can be called for at the start of any German Replacement Phase that begins with one or more hexes of Greater Germany under Grand Alliance control.
B. The surge lasts four turns. On the first turn of the surge, effective immediately when called for, one extra mechanized step and one extra non-mechanized step are received.
C. On subsequent turns of the surge, one extra non-mechanized step is received.
D. The surge cannot be called for if two of the secondary economic hexes have already been liberated; and the surge stops immediately if liberation takes place while it is going on.
[Source note: printed "it two of the secondary economic hexes"; read as "if".]
E. The surge cannot be called for at all if the economy has collapsed.
F. Once the surge begins, it cannot be suspended and conserved for later.
7.24 Axis Satellite Replacements
Satellite nation replacement rates are explained in 19.0.
7.25 Western Allied Free French Conversion
A. At the start of the game there is one Free French unit in play, the mountain infantry French Expeditionary (FX) corps on the Italian front. Beginning as early as the start of Turn 2, the WA may withdraw the FX corps permanently from play and convert it into two Free French mechanized units (F1 and F2).
B. To begin this conversion, simply remove the FX corps from the map (it must be in GS at that instant) at the start of any WA player-turn after Turn 1. There is no need to actually march or sail it off the map; just pick it up and put it in the MTO Permanently Destroyed Units Box.
C. At the start of the next WA player-turn, the F1 corps arrives as a reinforcement in the MTO holding box. (This is an exception to the normal ability to choose the holding box for new arrivals). The following turn the F2 corps comes into play the same way.
D. If the FX corps is depleted or in the dead pile at the time of the conversion, it must first be built up to full strength, using green army group replacements, before conversion can take place.
E. The WA are not required to convert the FX corps, but if they do not do they will lose VPs (26.6.3).
7.26 German Reserve Corps Conversions
At the start of the game, the Axis has three German reserve corps (62R, 64R, 66R) in the order of battle in southern France. It may expend one non-mechanized step to flesh the first one to its 3-4-5 side; a second step expended flips the remaining two over to their stronger sides.
Once flipped over, the 1-1-4 sides do not function as a second step for those three corps; the three corps function then in all ways as regular 3-4-5 infantry corps. The Axis is not forced to make the conversion, but not doing so will lose VPs (26.6.11).
7.27 Cannibalization of Wehrmacht 3-4-5 Corps
A. Each Replacement Phase, beginning with Turn 2, the Axis has the option of cannibalizing one 3-4-5 Wehrmacht infantry corps.
B. To perform the cannibalization, simply pick up the desired 3-4-5 and put it in the Permanently Destroyed Units Box. The unit must have been in a hex in Germany or Italy and also in GS at the instant of cannibalization.
C. The turn after the cannibalization, the Axis receives one additional non-mechanized replacement factor.
7.28 The Polish 1st and 2nd Armies
Two Polish armies appear in the Soviet order of battle. The 1st starts the game already on board. The 2nd appears at liberated Warsaw two turns after its liberation. Both armies operate in all ways, including replacement, like any other Soviet army unit.
8.0 Stacking
Stacked units are friendly units occupying the same hex.
8.1 Western Allies and Axis Stacking Limits
A. The Axis and WA may each stack up to four of their own corps in a hex.
B. SUs count for stacking as if they were corps.
C. The German 12th Army stacks as if it were a corps.
8.2 Soviet Stacking Limit
The Soviets may stack four units in a hex, as long as one is a Cavalry-Mechanized Group or a SU.
8.3 When Limits Are in Effect
Stacking limits are in effect throughout the turn.
8.4 Hex X12
All normal stacking limits are halved in hex X12 (by Rotterdam), an estuary hex, the only one on the board.
8.5 Markers
German fortification markers, the Alpenfestung counter, supply state markers, WA invasion-port counters, and STAVKA Shock Front markers (printed "Shack") do not count for stacking.
8.6 Hungarian, Romanian and Bulgarian Units
A. While under Axis command, Hungarian, Romanian and Bulgarian units stack as if they were corps.
B. When under Soviet command, Romanian and Bulgarian units stack as if they were full-sized armies. That is, they could not be the fourth unit in a Soviet stack.
8.7 Movement Complete
Once the movement of a stack of units or a single unit is completed and the owner's hand is removed from the unit(s), the movement of those pieces is completed for the turn, and no further adjustments in its position may be made without the opponent's consent.
8.8 Stacking During Mobile Assaults
When conducting mobile assaults (11.0) into an enemy-occupied hex, the stacking of the enemy units in the hex receiving the assault and the stacking of the friendly units conducting the assault are mutually exclusive and do not affect each other.
8.9 Transitory Limits
There is no limit of the number of units that may pass through a hex during a player-turn. At any instant, however, the hex may not contain more units than are allowed by stacking limits.
9.0 Zones of Control
9.1 In General
A. All combat units exert a ZOC in the hex they are in and the six surrounding hexes at all times.
B. Supply state has no effect on ZOCs except that German units drawing FS do not exert ZOCs.
9.2 ZOCs in Mountain and Marsh Hexes
ZOCs do not extend into mountain or marsh hexes; they do extend out of such hexes into other non-marsh or non-mountain hexes.
9.3 Blocked Hexsides, Lakes, Rivers, and Canals
A. ZOCs do not extend across blocked or lake hexsides.
B. ZOCs do extend across rivers and canals.
9.4 Port Counters
Axis ZOCs do not extend into WA invasion-port counters. WA ZOCs do extend out of such hexes.
9.5 Yugoslav ZOCs
A. Yugoslav units may retreat into and through Axis ZOCs. Axis units may retreat into and through Yugoslav ZOCs.
B. Yugoslav ZOCs do not extend into hexes outside of Yugoslavia. Axis and Yugoslav units must still pay normal ZOC entry and exit MP penalties.
9.6 Entry and Exit MP Costs
It costs +2 MPs (beyond terrain costs) to enter an EZOC, and +2 MPs to leave an EZOC.
9.7 Effect of Friendly Units on ZOCs
A. Friendly combat units in a hex negate EZOCs projected into that hex for purposes of tracing supply and conducting retreats.
B. Friendly combat units do not negate ZOCs for movement purposes.
Exception: German hold-the-line strategic movement (12.4.2).
9.8 German Fortifications
German fortification counters of any level, do count as friendly units for purposes of negating EZOCs as in 9.7.
9.9 Number of Units Projecting ZOC Into a Hex
A. The number of units projecting a ZOC into a given hex has no qualitative effect on the ZOC in that hex.
Exception: Calculating mobile assault costs (11.6).
B. If units from more than one side simultaneously project ZOCs into the same hex, then the ZOCs from all those units are considered to mutually and simultaneously exist within that hex.
9.10 Effect of Unnegated ZOCs on Retreat and Supply
No unit may ever retreat into or through a hex containing an unnegated EZOC, nor may supply lines be traced into or through such hexes.
9.11 Movement Between EZOCs
Units may move directly from one hex containing an EZOC to another hex containing an EZOC.
9.12 Invading Units
WA units making invasions do not project any ZOCs until they actually get into the invaded coastal hex. Their ZOCs then instantly extend normally.
10.0 Operational Movement, Terrain, and the Map
Operational is a term used only to describe normal, hex-to-hex type of movement from the strategic movement that takes place in the third phase of all player-turns.
10.1 Operational MA
Each unit has an operational MA, printed as the right-most number along its bottom edge, representing the number of clear terrain hexes it may move into in a single Operational Movement Phase. Each clear hex costs 1 MP to enter.
10.2 Operational Movement
Each side moves only its own units during the friendly Operational Movement Phase. Combat does not occur during this phase, but mobile assaults, a form of combined movement and combat, may occur during this phase.
10.3 Terrain Costs
All terrain costs for entering hexes, crossing water hexsides, and entering and leaving EZOCs, are cumulative.
10.4 Minimum One-Hex Movement
A. Regardless of terrain costs, a unit may move one hex by expending all of its MPs.
B. This does not guarantee an ability to cross blocked or lake hexsides.
C. OOS units can only make use of this guarantee if the hex moved into brings the unit closer to its nearest potential supply source.
10.5 Mechanized Units and Mobile Assaults
Likewise, mechanized units wishing to make mobile assaults must have the MPs available to pay all the costs inherent in such operations or the assault cannot be made.
10.6 Terrain Costs
Terrain costs are:
| MPs | Terrain | MPs | Terrain |
|---|---|---|---|
| 1 | Clear | 3 | Mountain |
| 2 | Rough | +2 | Entering an EZOC |
| 3 | Marsh | +2 | Leaving an EZOC |
10.7 Hex Terrain in General
If a hex contains any portion of rough, marsh, or mountain symbols, then the entire hex is considered to consist of that type of terrain.
Errata: Hex J14 is considered a mountain hex; hex F12 is not.
10.8 Hexside Terrain
Rivers and canals run between hexes and are called hexside terrain. Crossing such hexsides costs +1 MP beyond the normal terrain costs for entering the hex in question.
Example: A unit entering a rough terrain hex across a water hexside, and into an EZOC, would expend a total of 5 MPs: 2 (for rough) +1 (for water) + 2 (to enter ZOC) = 5 MPs.
10.9 Dike Hexside
A. The blocked hexside between hexes Z14 and Z15 is actually crossed by a causeway/dike. Units may operationally move across that dike, treating it as a river hexside, but only if both sides are friendly-controlled at the instant the crossing is made.
B. The hexside prevents strategic movement, mobile assaults, and prepared assaults across it.
Exception: The WA may make an amphibious assault across it (14.33).
C. Supply may be traced across it.
10.10 Roads: Locations
There are three symbols on the map, one by Cluj in Hungary, and by Salzburg and Innsbruck in the Alps. They are what appear to be super highways cut into the rough and mountain terrain. They actually represent agglomerations of transport arteries of all types in those areas so dense as to alleviate the normally heavy movement penalties inherent in crossing those kinds of terrain. For simplicity's sake, these agglomerations will be referred to as roads.
10.11 Roads: MP Costs and Effect on ZOCs
A. When a unit enters a hex through a road hexside, it pays only the cost for moving one hex along the road regardless of the type of terrain entered. The cost for moving along a road is 1 MP per hex.
B. A road has no effect on movement if it is entered from a non-road hexside.
C. Roads do not affect the status of ZOCs.
11.0 Mobile Assaults
11.1 Eligible Units
A. Only mechanized combat units may make mechanized assaults.
B. Flak units, through mechanized combat units, may never make mobile assaults.
[Source note: the printed text of 11.1 B reads "Flak units, through mechanized combat units"; transcribed as printed.]
11.2 Terrain Restrictions
A. Mobile assaults may never be launched into hexes containing marsh or mountain terrain, regardless of the presence of roads.
B. Units in terrain containing marsh or mountain terrain may never launch mobile assaults from out of those hexes, though they could conceivably move to another hex, not containing the prohibited terrain, and launch one from there.
11.3 Effect of Fortifications
Mobile assaults may not be conducted into hexes containing Level 3 German fortifications. Mobile assaults may be launched from out of such hexes, barring the presence of mountains.
11.4 Weather Effects on Mobile Assaults
During foul weather turns (25.11), mechanized units may make only one mobile assault per turn, no matter how many MPs they have available. Even then, the mobile assault can only be conducted into the first hex in which the mechanized units move in that phase.
11.5 In-Hex Terrain
In-hex terrain costs are ignored by mobile assaulting units. They instead pay 1 MP to enter the enemy-occupied hex itself, and +2 MPs to actually conduct the assault (for a total expenditure of 3 MPs).
11.6 Launching Mobile Assault From an EZOC
A. If the mobile assaulting units launch their assault from a hex that contains EZOCs of enemy units other than the ones about to be assaulted, the cost of the mobile assault is increased from +2 MPs to +4 MPs.
Example: A stack of WA units on hex V4 will mobile assault in German-occupied hex U4. The normal cost would be 3 MPs (1 MP for the hex and +2 MPs for the assault), but there are also German combat units in hex U5 that also exert a ZOC into the launch hex (V4), so the cost for the assault is +4 MPs, instead of the normal +2 MPs.
B. Mobile assaults never cost more than +4 MPs.
[Source note: the example's own arithmetic ("instead of the normal +2 MPs") is printed as written.]
11.7 Hexside Terrain Effects on Mobile Assaults
A. The +1 MP cost to cross a water hexside (rivers and canal) is still paid when making a mobile assault.
B. Defenders are doubled (18.22).
11.8 CRT Adjustment
Mobile assaulting units suffer a 2L shift on the combat results table when launching mobile assaults.
Example: A 3-1 attack reduces to 1-1.
11.9 Effect of Combat Losses on Assaulting Units
A. Mobile assaulting units must absorb all combat results as step losses, and such losses immediately end the movement of those mobile assaulting units for that turn, in the hex from which they launched that assault.
B. Such units may still make a prepared assault later that turn (provided normal rules for prepared assaulting and supply are followed), and could then advance or retreat after combat.
11.10 Assaulting as a Stack
To mobile assault together, units must be stacked together at the start of the friendly Operational Movement Phase during which the mobile assault is to be launched.
11.11 Terrain Effects
The terrain in the hex of the defending units is considered when selecting the proper odds column on the CRT.
11.12 Defender's Hex Vacated
A. Mobile assaulting units that force defenders to vacate their hex must occupy that hex, and may continue moving if they have the MPs remaining. They may continue mobile assaulting in clear weather.
B. There is no free advance after combat in mobile assaulting as there is with prepared assaults: the mobile assaulting units pay the assault movement cost, move into the assaulted hex if successful, and then may continue moving if the MPs are available to do so.
11.13 Multiple Assaults Against the Same Hex
If defending units in a mobile assault elect to absorb their combat result by remaining in their original hex and taking step losses, the assaulting units (as long as they did not absorb a step loss of their own) could launch a second mobile assault into that same hex again, against the newly reduced defending force, in a last-ditch effort to dislodge or destroy them. The assaulters must have the MPs available to pay for the second mobile assault.
11.14 Other Considerations
A. Since movement of units is conducted one stack at a time (8.7), a mobile assault can be made only from one hex at a time. Thus, the flanking column shift (18.23) can never be applied to mobile assaults.
B. It is possible for one stack of defenders to be mobile assaulted by successive stacks of assaulters during the same movement phase, provided that the assaulter maintains stacking limits in the hexes from which it is launching.
Example: Continuing the example from 11.6, the WA have two units stacked in V4 to make the mobile assault into U4. They absorb a step loss and thus are stymied in V4. The four-corps-high stacking limit would allow the WA to move another two-unit stack into V4 from elsewhere, and make another stab at the assault. In this way it is possible to attempt to ram through a defensive line by launching successive waves of assaulters at a given hex.
11.15 Use of Tactical Air Power in a Mobile Assault
A. Tactical air power can be used by the WA to assist in launching mobile assaults in clear weather.
B. It may also be used to assist WA in defending against such assaults during clear weather.
11.16 Supply Requirement
Assaulting units need only be in general or EGS to launch a mobile assault; AS is not needed.
11.17 Determining Supply Status for Additional Assaults
When occupying the defender's vacated hex with mobile assaulters, the attacker must make note of the supply state in that new hex before resolving the assault. If that would place the assaulters OOS, then one unit in the assaulting stack would have to stay behind and not participate the assault to hold the supply line open for the advancing units.
12.0 Strategic Land Movement
12.1 Procedure
Strategically moving units do so with three times their printed operational MAs, paying all normal terrain costs as they do so. Only units beginning this phase in GS may move strategically.
12.2 Other Restrictions
Units from any side that strategically move may not take part in any other function that player-turn.
12.3 Restrictions
All hexes entered by strategically moving units of all sides must be friendly-controlled and in GS at the instant the unit enters the hex. No EZOC, regardless of the presence of other friendly units, may ever be entered during a strategic move.
12.4 Germany
A. Germany may move up to three German corps during its Strategic Land Movement Phase.
B. Bulgarian, Hungarian, and Romanian units may never be strategically moved by the Axis.
12.4.1 Effect of EZOCs
German units to be strategically moved may start the phase in the ZOC of Soviet or Yugoslav units, but in such cases at least one other Axis unit must also start the phase in that same hex and stay there to hold the line throughout the rest of the German player-turn. Such moving units still do pay the +2 MP cost to exit an EZOC.
12.4.2 Units Holding the Line
Units staying behind to hold the line may make prepared assaults later that same player-turn, provided normal prepared assault requirements are met (such as for supply), and they could then also advance or retreat after combat.
12.4.3 Weather Effects
A. German units may use the hold the line ploy to exit WA ZOCs only during foul weather turns.
B. German units may not use strategic movement to come within two hexes of any WA unit in GS during clear weather.
Play Note: Because air-dropped WA paratroops have EGS, not GS, in the hex in which they dropped, German units can approach within two hexes of such units.
12.5 Western Allies
A. The WA may strategically move any number of units each turn, any distance through friendly-controlled and in GS land hexes.
B. WA units may not make use of the German hold the line ploy.
12.6 Soviet Union
A. The Soviets may strategically move any one combat unit of their choice in their Strategic Movement Phase, any distance through friendly land hexes in GS.
B. The Soviets may not use the hold the line ploy.
C. Defected Romanian and Bulgarian units may be moved strategically by the Soviets.
13.0 German Sea Movement
A. The Soviets have no sea movement capabilities at all.
B. WA sea movement is described in 14.0.
13.1 Requirements
A. Germany may move one unit per turn that starts the phase in a Baltic Sea port or Baltic Sea coastal hex, by sea to any other German-controlled Baltic port (but not to another coastal hex without a port in it).
B. The Baltic Sea ports are: Kiel, Lubeck, Rostock, Stettin, Danzig, Königsburg, Memel, and Riga.
13.2 Ineligible Units
Units that just completed a strategic land move in the previous phase of the same player-turn may not sea move on that same player-turn.
13.3 Sea Movement of SUs
SUs, including OKH, may attempt sea movement just as combat class units.
13.4 Losses Due to Sea Movement
A. Roll one die and consult the German Sea Movement Chart at the instant of disembarkation. Follow the instructions located there.
B. Units destroyed while sea moving are placed in the Permanently Destroyed Units Box.
13.5 Restrictions
A. No unit may remain at sea from one turn to another.
B. Units that sea move may not take part in any further activity during that German player-turn.
13.6 Supply Status
The supply state of a unit has no bearing on its ability to attempt sea movement.
13.7 Scheldt Sea Movement
A. There is one instance of German sea movement capabilities outside of the Baltic.
B. This ability can only be used once on one turn, and then only during clear weather turns in 1944.
C. One or two non-mechanized steps (not supply) may move across the mouth of the Scheldt River Estuary (the blocked hexside between hexes X11 and X12).
D. Both hexes must be under German control at the instant the crossing is made.
E. Any units to be moved must start the Sea Movement Phase in X11 or X12. They then move to the other hex. No sea movement die roll is made.
F. Supply state has no bearing on the ability of a German unit to make this sea move.
14.0 Western Allied Sea Movement and Invasions
Sea movement and naval movement are interchangeable.
14.1 Per Turn Limit
The WA may have up to four corps, four SUs, and one invasion-port counter in sea movement in a single turn.
14.2 Eligibility
Units starting the WA Naval Movement Phase in one of the two theater holding boxes may sea move that phase to:
- The other theater holding box;
- An opened port on the European mainland within the same theater of operations as the holding box just left;
- An invasion-port counter in a coastal hex of the same theater of operations as the holding box just left.
14.3 Restriction
WA units may never remain out at sea between player-turns.
14.4 Procedure
WA units starting the Naval Movement Phase sitting in an opened port or beneath an invasion-port counter on the coast of Europe may move from there to another opened port or invasion-port counter within that same theater of operations or into the holding box of their theater of operations.
14.5 Restrictions
- Units moving from the holding box to Europe may keep moving and fighting, provided they did not just flesh out with replacements.
- Units moving from port to port or invasion-port (and vice versa) may not continue moving after landing. Nor could they launch any kind of assault.
14.6 Sea Evacuation
WA units may be sea evacuated off a non-port coastal hex, in the same fashion as the Germans in the Baltic. Such units must land in their theater holding boxes.
14.7 Baltic and Black Seas
In the Iron Dream scenario, there is no WA sea movement at all in the Baltic and Black Seas. In the Let History Judge scenario, the Baltic coast becomes part of the WA ETO, and the Black Sea coast becomes part of their MTO.
14.8 Invasion Port Counters
A. In both scenarios, the WA start with three available invasion-port counters: one in the MTO holding box and two in the ETO holding box.
B. During the course of a game the WA will use those counters to launch amphibious invasions against invadable coastal hexes on the European mainland.
14.9 Invadable Coastal Hexes
A coastal hex is considered invadable if it has a white arrow pointing to it.
Examples: Calais, hex X9, is invadable through three hexsides. Hex Z14 is not invadable at all.
14.10 Moving Invasion Port Counters
The invasion-port counters themselves may be moved from theater holding box to theater holding box any number of times. Once committed to an invasion of the mainland, however, they remain in the invasion hex for the rest of the game. They never remain at sea from turn to turn.
14.11 Iron Dream Scenario Requirements
A. The WA must start the Iron Dream scenario on Turn 1 by launching an invasion on a French or Belgian or Dutch coastal hex between T2 and Z13, inclusive.
B. There is no invasion requirement in the Let History Judge scenario.
14.12 Chit for Second Invasion
A. At the instant the WA corps step ashore during the first invasion, the WA secretly draw one of the second invasion chits from an opaque container. (The second invasion chits are the three white counters marked A, B, and C.) The WA may immediately look at the drawn chit.
B. The chit determines the earliest possible turn of the second invasion:
| Chit | Turn |
|---|---|
| A | 3 |
| B | 5 |
| C | 7 |
C. The instant the second invasion is launched, the WA should reveal the chit to the Axis to certify the legality of the move.
D. The WA are not required to launch their second invasion in the first allowable turn, and could decide never to launch it.
14.13 Third Invasion
A. The WA third invasion is any invasion they launch after Turn 9.
B. If the WA refrain from launching a second invasion, they lose the ability to ever launch it. In that situation, any invasion launched after that time would be considered a third invasion, even though there was no actual second invasion.
C. In two-player games of Iron Dream, a WA third invasion is not possible.
14.14 VP Cost of Third Invasion
If the WA launch a third invasion, they must deduct 10 VPs at the end of the game.
14.15 Let History Judge Invasions
In the Let History Judge scenario, the WA are not restricted by 14.12-14.14. They may make three invasions during the scenario, with a limit of one invasion per turn, and could run all three on three consecutive turns if so desired.
14.16 Invasion Setup
A. An invasion is the only method for WA invasion-port counters to move from a holding box to the European mainland. To make an invasion, move the desired invasion-port counter from its holding box to an invadable coastal hex within that same theater of operations.
B. Up to four WA corps may accompany the invasion-port.
C. SUs may never be carried along on an invasion.
D. Always keep the invasion-port counter as the top unit in a stack; they do not count toward the stacking limit.
E. At least one corps must accompany the invasion-port.
14.17 Moving the Invasion Force
A. Place the invasion force on an all-sea hex opposite an invadable coastal hex at the start of the WA naval movement phase.
B. Drop paratroops if available and participating (17.0).
C. If the coastal hex is empty of any combat units of the enemy, immediately move the invasion force ashore. The invasion force may not move or attack any further that player-turn.
D. If the hex to be invaded is defended by an enemy combat unit or fortification, the force must fight its way ashore.
14.18 When to Conduct Invasion Battles
Invasion battles are always resolved first during the Prepared Assault Phase of the player-turn in which they are launched.
14.19 Airpower and Naval Support
A. Invading WA units, in addition to the tactical airpower shift on clear weather turns, receive a further 1R shift for naval support. Thus, an invasion launched on a clear weather turn would receive a 2R shift on its odds.
Example: 3-1 odds would become 5-1.
B. During foul weather, the naval support is still available, but the tactical airpower is not.
C. Heavy bomber strikes may not be launched in conjunction with invasion attacks.
14.20 Defender Against Invasion
The DFs are doubled for German or Soviet units defending solely against an amphibious invasion. That is in addition to any column shifts applied for cities and fortifications.
14.21 Invasion Example
A. Two WA 10-9-7s and two 9-10-7s, with an invasion-port counter, invade hex V6 (Le Havre). It is defended by a German 3-4-5 infantry corps, in a Level-2 fortification.
B. Compute odds as follows: Germany has a total defense strength of eight factors in the hex as the infantry's DF of 4 is doubled to 8. The WA AFs total 38, making initial odds ratio 4-1 in clear terrain.
C. Adjusting for column shifts: 1R for tactical airpower, and 1R for invasion naval support makes the odds 6-1. The German Level 2 fortification provides a 2L shift, one column for each level, reducing the odds to 4-1. Then the city of Le Havre provides a 1L shift, to 3-1. The WA add one to the die roll (a +1 die roll modification, DRM) because of the presence of the fort. (The moral of this story is it's very difficult to invade garrisoned and fortified port cities.)
D. If the situation were the same, except that the 3-4-5 were not present, the WA would again have 38 AFs with a 2R shift. The Axis would now have only a defense factor of one, though, because ungarrisoned fortifications, no matter what their level, always defend alone with 1 DF.
E. The odds would therefore be 38-1, shifted right two columns to 40-1, then back down to 37-1 for Le Havre and the Level 2 fort. The actual roll of the die would be resolved on the clear terrain line of the CRT at 7-1 odds, since final odds ratios at levels above those shown for their terrain on the CRT are resolved at the highest odds shown there (18.0). A +1 DRM still applies because of the fort.
[Source note: the odds arithmetic in 14.21 D and E is printed as written.]
14.22 Failed Invasion
A. If invading units fail to clear the defender's hex of enemy units, the invasion has failed, and the invasion force is sent back to its holding box after absorbing an additional step loss incurred in evacuating from a hostile beach.
B. Failed invasions do count as invasions launched, and do decrease the number available to the WA.
14.23 Combat Losses to Invading Force
Invading units must absorb all adverse combat results as step losses; retreats are not allowed. Likewise, there is no advance after combat, beyond occupying the beach hex itself, when invading.
14.24 Invasion-Ports in General
A. An invasion-port successfully ashore is thereafter permanently located in that hex and instantly functions as a source of GS and AS for WA units. Units beneath or adjacent to an invasion-port counter always have AS available to them (15.0).
B. EZOCs never extend into invasion-port counters, whether or not garrisoned by WA units.
C. Victorious attacking enemy units may advance after combat into a hex containing only an invasion-port counter or SUs; they could not, however, retreat into one. This is the only way an invasion-port can be removed from its coastal hex.
14.25 Landing Additional Units at an Invasion-Port
A. Invasion-port counters can land one corps and one SU per turn at the start of the WA Naval Movement Phase. If such units are arriving from that theater's holding box, they expend only 1 MP to come ashore and then may continue moving and assaulting normally throughout the remainder of the player-turn.
B. If such units first flesh out with replacements in the holding box that same player-turn, or if they sea moved in from another opened port or invasion-port, they may not move any further than the hex of landing nor may they attack in any way.
14.26 Landing Additional Units at a Port City
A. A port city has its name printed in blue ink.
B. The landing capacity of a port city is the same as those of a WA invasion-port counter. That is, one corps and one SU may come ashore per turn.
Exception: Antwerp (14.30).
14.27 Opening a Port City
A. Port cities do not automatically start to function just because they have been liberated. The WA roll the die at the instant of a port's liberation and consult the Port Opening Chart.
B. The result is the amount of time, in turns, that the WA must wait until the port opens and can start to function as a landing platform and GS source.
Example: The WA liberate Cherbourg in Turn 3. A 4 is rolled, so Cherbourg starts to function as a port at the start of Turn 7.
14.28 Subsequent Capture and Liberation
If a liberated port is subsequently recaptured by Germany and then liberated again, it never reopens.
14.29 Invasion-Port in Port City
If an invasion-port counter exists in a hex along with an opened city port, then the landing capacity of that hex is two corps and two SUs per turn.
14.30 Antwerp
Once opened, Antwerp has a landing capacity of one corps and three SUs per turn.
14.31 Inland Ports
A. Amsterdam (Y14), Antwerp (V12), Bordeaux (Q2), Hamburg (Y19), Nantes (S3), and Rotterdam (Y13) are inland ports.
B. Besides the procedures described above, the WA must also control all the hexes around those ports containing the initial of the port in question.
Example: Bordeaux cannot be opened unless hex Q2 is also WA controlled).
C. Hexes X12 and W13 contain the letters AR. Both hexes apply to the ports of Antwerp and Rotterdam.
D. Roll for the opening of the inland ports at the time the city itself is liberated. Regardless of the turn the port opens, the WA still have to liberate the labeled hexes before using the port.
14.32 Western Allied Emergency Beach Supply
A. This capability may be called for on any WA turn that begins with one or more enemy units (not drawing FS) in any of the hexes adjacent to an invasion-port counter across an unblocked hexside.
B. No invasions may be launched on the turns in which emergency beach supply (EBS) is used.
C. EBS allows the WA to move corps and SUs from the theater's holding box, up to the normal per-turn capacity for the hex, into the hex with the invasion-port counter at any time during the WA player-turn.
Example: The WA have an invasion-port counter with four corps underneath, sitting on V5 at the start of this turn. There are enemy units in all surrounding hexes. Enemy presence in only one surrounding hex would be enough to trigger the possibility of the Allies calling for EBS. During the Sea Movement Phase, the WA cannot get any more units ashore into V5, despite their availability in the holding box, because the stacking limit in that hex forbids it. During the Prepared Assault Phase, however, the WA launch a successful attack from V5 into a surrounding hex, clearing it of enemy defenders. Three attacking corps advance into the hex. This leaves the invasion-port counter vulnerable to a German counterattack. The WA call for EBS, and immediately after advancing after combat with the V5 attackers, move another corps from the ETO holding box onto V5. That corps cannot move or attack further that turn.
D. EBS is a capacity used instead of, not in addition to, normal sea movement capacities into a landing hex.
Example: In the previous example, had the WA started their turn with only three corps under the invasion-port counter, and used normal sea movement to bring a fourth corps over during the regular Sea Movement Phase, they could then not also have called for EBS after the prepared assault.
If there is an opened port in the hex along with the invasion-port counter, the emergency capacity would then be two corps and two SUs per turn instead of one.
14.33 Amphibious Coastal Attack
A. Once per player-turn, during the Prepared Assault Phase, the WA may make one amphibious coastal attack. This allows one stack of WA units to make a prepared assault across a blocked or lake hexside, treating it as if it were a river or canal hexside.
B. Victorious Allied units may then advance after combat across that hexside. Retreats across blocked or lake hexsides are never allowed.
C. Amphibious coastal assaults cannot be made into hexes H15 or G16.
15.0 Supply
15.1 General Supply
GS is that needed by all combat units to simply maintain themselves in the field. A unit is considered to be in GS if a supply line can be traced through a path of friendly-controlled hexes from a supply source to the unit in question.
15.2 Checking Supply Status
The supply state of the phasing side's units is checked twice per player-turn, during the Initial Supply Check Phase and during the Terminal Supply Check Phase.
15.3 Lack of General Supply
A. A friendly unit determined to be without GS during the Initial Supply Check Phase should have an OOS marker placed atop it.
B. Such units may not make strategic moves, and their operational MAs are halved for that player-turn (round fractions down).
C. OOS units may move only if each hex entered brings the unit closer to a hex containing its nearest potential source of GS, EGS, or FS.
15.4 Defender's Combat Supply
Check the supply state of units at the instant they defend against a mobile or prepared assault. Units without GS at that instant suffer a 2R shift.
15.5 Western GS Line Length
The maximum length of an WA GS line is ten hexes from the supply source to the tracing unit. Count the hex the unit is in, but not the one the supply source is in.
15.6 Soviet GS Line Length
The maximum length of a Soviet GS line is 20 hexes from the eastern board edge to the tracing units.
15.7 Axis Supply Line Length
There is no maximum length for Axis supply lines; they may be of any length.
15.8 Restrictions
A. Supply lines may not be traced across blocked or lake hexsides.
Exception: Supply across the dike (10.8).
[Source note: the printed cross-reference reads "10.8"; the dike rule is 10.9.]
B. Supply may be traced only through friendly-controlled hexes. The presence of a friendly combat unit in a hex containing an EZOC does negate the effect of that EZOC for purposes of tracing GS into and through that hex.
15.9 Effects of Lack of Supply
A. Units found to be without GS or EGS during the friendly Terminal Supply Check Phase are reduced one step in strength. Germany may use FS to prevent this in certain cases (15.16). Two-step units are flipped to their weaker sides, and one-step units are permanently destroyed.
B. WA airborne corps are the only units in the game not permanently removed from play if destroyed while OOS.
C. German units drawing FS at the instant of their destruction are also permanently destroyed.
D. When a stack of units must suffer attrition due to lack of supply, each unit in the stack (not just one) suffers a one step loss.
15.10 Tracing Supply Through Allied Territory
In the Iron Dream scenario, the WA and Soviets may grant each other permission (or withhold it) on a case by case basis, to trace GS lines through each other's territory.
15.11 Effect of German Fortifications on Supply
German fortification counters, just like combat units, do serve to negate the effects of EZOCs in their hexes for the purposes of tracing supply lines.
15.12 German Supply Sources
Germany may trace GS from the Ruhr (U16), Berlin (T21), or Breslau (R23), whichever is the most convenient at any given instant. Relative distance between a unit and any of the supply source hexes has no bearing on which must be used as the GS source.
15.13 Soviet Supply Sources
The Soviets may trace GS from any friendly-controlled hex on the east edge of the board. The partial edge hexes do count as full hexes in the line.
15.14 Western Allied Supply Sources
A. WA GS sources are any opened Atlantic, Mediterranean, or Adriatic port, any deployed invasion-port counter, and the two holding boxes.
B. In the Let History Judge scenario, Baltic and Black Sea ports may be used.
C. Additionally, a WA unit on any Atlantic, Mediterranean, or Adriatic coastal hex is in GS in that hex, whether or not there is a port in it.
D. In the Let History Judge scenario, Baltic and Black Sea coastal hexes may be used.
E. But supply in coastal hexes may not be traced inland out of such hexes. Units might move along the coast, from coastal hex to coastal hex, but they could not, if coastal GS were their only source of supply, be allowed to dash inland.
F. If the WA makes an amphibious assault across a lake hexside, GS may be traced through the just-crossed lake hexside as long as one corps remains in the landing hex on the assaulted side of the lake. When using the amphibious capability to assault across coastal blocked hexsides, the WA units will use their coastal GS capacity to remain in supply.
15.15 German Coastal Supply
A. Germany has a similar, and in one respect superior, GS coastal capacity in the Baltic Sea.
B. Any German unit on a Baltic Sea coastal hex, or in a hex adjacent to a friendly-controlled Baltic Sea coastal hex, is in GS as long as Germany also controls at least one Baltic port in Germany from which a regular GS line can be traced to Berlin, the Ruhr, or Breslau, and the German economy has not yet collapsed. (In other words, given a functioning German economy, and at least one German-controlled Baltic Sea port city, German coastal supply extends one hex inland.)
15.16 German Fortification Supply
A. German units may draw FS from fortified port cities in France, Oostende (X11), the fortified estuary hex (X12), Antwerp, Königsburg, and any other Baltic port that becomes fortified.
B. Each source hex of FS may support one step of any combat units indefinitely, but only within the same hex as the FS source.
Exception: Königsburg may support up to four corps of German units.
Example: Four corps of German units are sitting in Königsburg, surrounded by Soviet units and enjoying the German Baltic Sea coastal GS rule. Then the German economy collapses. If the four corps were on any other Baltic coast hex other than Königsburg, they would start attriting away during such subsequent German Terminal Supply Check Phase in which they had found no other source of GS. But because they are in Königsburg, they may go over to FS and sit out the siege.
15.17 Exiting Fortress Supply
Once units go over to FS, they may not voluntarily leave FS until such time as other German units in GS move adjacent to the FS hex and thus free the fortress-supplied units.
15.18 Supplying German Fortification Counters
A. German fortification counters need GS just as combat units. If such counters were cut off in a hex that had no FS capabilities, the fortress counters would be removed along with the last mobile German defenders in the hex, or at the end of the first turn of isolation if ungarrisoned by German field units.
B. A Level 3 fort would not attrite down to Level 2, then to Level 1. It would simply come off the board.
15.19 Fortress Supply Effects
A. Units drawing FS lose their ZOC, may never attack, and may not move until freed as described above.
B. Units drawing FS do not suffer any adverse combat column shifts due to being out of GS, and may never be flanked (18.23).
15.20 Excess Units in FS Hex
If more than one step's worth of units became trapped in a FS hex that could only maintain one step, the units would attrite down as normal until the one step limit were reached.
15.21 Emergency General Supply
All sides may use their SUs (which are normally used to generate AS, 15.22) to generate EGS. This is the only time any movement takes place during the Initial Supply Check Phase, and only SUs to be immediately burned off (removed) in the creation of EGS may move.
15.21.1 EGS Procedure
A. Units found to be without GS during the initial supply check phase may be granted EGS.
B. One SU can generate EGS to all the units in its own and one other adjacent hex, or in any two mutually adjacent hexes.
Example: A SU is in hex R17 in Greater Germany. In burning off, it can create EGS in R17 and one other hex adjacent to R17 (R16, R18, S17, S18, Q17, or Q18). Or it could burn off without creating EGS in its own hex, and thus create the supply in any two hexes mutually adjacent to each other and the hex of the burn off. Such hex pairs could be R16/S17, S17/S18, S18/R18, R18/Q18, Q18/Q17, or Q17/R16.
15.21.2 Effects of EGS
A unit with EGS functions in all ways as if it had normal GS. Additionally, such units have the ability to voluntarily move out of GS in any direction and out to any distance their MA can carry them.
15.21.3 EGS in Initial Supply Check Phase
During the Initial Supply Check Phase, a unit does not have to be out of GS in order to receive EGS. The owner might provide EGS to move such units out of GS.
15.21.4 EGS and Enemy-Controlled Hexes
A unit does not need to have EGS simply to enter enemy-controlled hexes.
Example: If a stack of WA units were in hex V5, and that was the only Allied controlled hex in all of Europe, but there were no German units anywhere around to block supply line tracing, the Allied stack could simply take off from that hex and start moving. The conversion of each hex to WA control would take place the instant those units entered each new hex, and hence the ability to immediately trace supply into those hexes would likewise be immediate.
Alternately, assume again the Allied units are in V5, but this time there are also German units in V4, V6, and U5. Two of the Allied corps enter U6. They are still in supply there, but if they wanted to push on to T6, they would need to have EGS. In leaving U6 they would allow an unnegated German ZOC to be projected into the hex, thus cutting their own GS line, and necessitating EGS to make such a move.
15.21.5 EGS Beyond Supply Line Limits
Because the GS lines of the Soviets and the WA are of a finite length (20 and 10 hexes, respectively), Grand Alliance units wishing to move beyond their supply line radii need EGS to do so even without the presence of German units.
15.21.6 EGS in Terminal Supply Check Phase
Units underneath EGS markers during the friendly Terminal Supply Check Phase do not suffer any step loss due to lack of supply. The EGS counters are, however, removed from such units at that time and supply attrition might then be suffered by those units on subsequent turns, unless new lines of GS were opened up to them or more SUs were brought up and burned off to make more EGS for them.
15.22 Attack Supply
A. Mechanized units in general or EGS need no further supply in order to be able to mobile assault during their Operational Movement Phase. But to participate in a prepared assault, another kind of supply, AS, is needed.
B. Each side's AS comes only from its own SUs.
Exception: WA units starting their Prepared Assault Phase in or adjacent to an invasion-port hex are always in AS for that phase.
15.22.1 GS/EGS Requirement for AS
Units without GS or EGS may not be granted AS. If such OOS units had a SU with them and wished to burn it off, it would first have to be for the creation of EGS. If there were another SU on hand, they could then burn it off to have AS.
15.22.2 Expending SUs for AS
When creating AS, SUs burn themselves off producing the same kind of supply radius as in the EGS example in 15.21.1.
15.23 Supply Units
A. SUs do not themselves require GS, FS, or EGS to stay in the field. SUs always have their full, printed, operational MAs available (Exception: weather effects, 25.11), and may move out of GS range, but only into friendly-controlled hexes.
B. SUs do count for stacking. They have no step value in combat situations, and share the fate of the combat units with which they are stacked if attacked. They may never be given up to satisfy step losses. If alone in a hex they have no ZOCs.
C. If alone in a hex (or there only with other SUs), they are destroyed the instant an enemy moves or assaults into their hex. When using the fog of war rules (25.3), Germany may not place a dummy unit atop a stack containing only SUs.
D. If a SU is removed from the board for any reason other than the burn off process of emergency or AS creation, it is permanently destroyed.
Exception: Voluntary SU Removal (15.23.1).
E. SUs are considered corps-sized for purposes of WA and Axis stacking, and they may be the fourth unit in a Soviet stack.
F. SUs may not move strategically, and they may never operationally move into an EZOC unless there is already a friendly unit present in that hex.
G. SUs stacked with victorious attacking units may not advance after combat along with them. They may go along on retreats.
15.23.1 Voluntary SU Removal
A. At the end of each friendly player-turn, the phasing side may voluntarily remove any or all SUs from the map. Such SUs must be able to trace a GS line at the instant of removal. (This is the only time SUs need bother with a GS provision.)
B. Such units are placed back in the pool of SUs available for future placement.
C. The purpose of such a removal is to prevent possible permanent loss due to some anticipated enemy action, or perhaps to simply redirect logistical surplus as quickly as possible from a remote front.
15.23.2 Exclusive Use of SUs
SUs of the various sides may not be captured or used in any way by any other side than the one that owns it. SUs may be destroyed by enemy action (15.23.C).
15.23.3 Replacing SUs
A. Germany reintroduces burned off SUs per the provisions of 16.0.
B. The Soviets receive two SUs per turn (three on the first turn of Operation Bagration), taken from the pool of available units.
C. The WA each turn place all burned off SUs from the previous turn into their holding boxes, and must sea move them ashore normally from there.
16.0 German Economic Collapse
16.1 Required Hexes
A. The German war economy is supported by control of five hexes: Ploesti, Nagykanizsa., Breslau, Berlin, and the Ruhr.
B. Ploesti, Nagykanizsa, and Breslau are all hexes of secondary importance. Berlin and the Ruhr are of primary importance.
16.2 SUs From Control of Required Hexes
A. As long as all five of the economic hexes are German-controlled and a path of German-controlled hexes can be traced from both oil fields to all three of the cities, Germany receives one SU each turn at Berlin, the Ruhr, and Breslau.
B. German SUs start the Operational Movement Phase of their turn of placement with their operational MAs doubled; they may not strategically move.
16.3 Liberation / Blockage of One Secondary Hex
When one of the secondary economic hexes is liberated, or Alliance forces so interpose themselves that a line of German-controlled hexes can no longer be traced from the hex to Berlin or the Ruhr, the creation of German attack SUs is decreased to two per turn: one appearing at Berlin and one at the Ruhr.
16.4 Liberation / Blockage of Two Secondary Hexes
A. When another of the secondary economic hexes is liberated or blocked, the creation of German SUs drops to one per turn, appearing at Berlin or the Ruhr (Germany's choice). Further, the German may then no longer use replacement steps to recreate units from the dead pile, only to flesh-out units still on the board.
B. If any two of the secondary economic hexes are lost to before Germany has called for its replacement surge, the surge ability is lost.
16.5 Liberation / Blockage of All Secondary Hexes
A. When the last of the secondary economic hexes is liberated or blocked, Germany loses all further mechanized replacements. They do not convert to non-mechanized steps; they are simply lost.
B. The OKH counter is permanently removed from play at that time.
16.6 Recapture of Economic Hexes
A. Economic hexes, once liberated, may never be brought back on line by Germany even if recaptured.
B. Economic hexes that were merely blocked, however, could be brought back on line by reopening the required German-controlled hex paths.
16.7 Loss of Berlin or Ruhr
If Germany loses control of either Berlin or the Ruhr hex, regardless of the status of Breslau or the oil fields, or if Grand Alliance units interpose themselves between the two primary cities in such a way that a line of German-controlled hexes cannot be traced between them, even for an instant, German economic collapse occurs irreversibly.
16.8 Effects of German Economic Collapse
When the German economy collapses per 16.7, the following effects come permanently into play:
- Germany receives no more SUs;
- Germany loses all strategic movement capacity;
- The Alpenfestung counter is placed (26.12);
- All German replacements stop;
- OKH is removed if still on the board (25.10);
- Any units in the Replacement Army Holding Box must be brought out and placed normally at the start of the next German Replacement Phase;
- German sources of GS and EGS are reduced to the SUs actually on board at the instant of economic collapse and the Berlin hex itself (provided Berlin is still under German control);
- Special reinforcements are triggered: the Flak corps (25.2) and 12th Army (25.9) enter play.
16.9 Effect on GS from Collapse
When the collapse occurs, GS may no longer be traced by Germany from Berlin: only those units actually in the city have GS.
16.10 Effect on Units in Holding Box
GS is for once not a consideration when Germany places any units in its holding box at the time of collapse. They appear in any Wehrkreis still under German control, regardless of supply state.
17.0 First Airborne Army
17.1 In General
A. The two WA paratroop corps, arriving as reinforcements on Turn 7, and together comprising the 1st Allied Airborne Army, are the only air-droppable units in the game. They may also function as regular infantry if the WA desire to use them that way.
B. Both paratroop corps may be considered tan or green at any given instant, whichever color is more convenient for the WA to have them be for whatever function they are to be used.
17.2 Requirements to Air Drop
To be air dropped, the paratroops must start the WA turn in either theater holding box or in an WA-controlled hex on the map that is in GS and has no adjacent German units.
17.3 When to Drop
A. The corps are dropped at the very start of the WA Operational Movement Phase.
Exception: Paratroops may be dropped in conjunction with a second or third invasion. In such cases they are dropped when the invasion force goes ashore during the sea movement phase.
B. Paratroops do serve to undouble invasion defenders and do count toward Allied stacking limits in the hex into which they drop.
17.4 Determining Theater of Operations
A. Judge the paratroops' theater of operations by the hex or box they were in at the instant of takeoff for the drop.
B. It is possible to launch paratroops out of hexes that could be claimed to be in either theater of operations. In such cases the WA select the theater at the instant of takeoff.
C. Judge the theater of their drop hexes in the same way.
D. Paratroops can only be dropped into a hex within the same theater of operations as the one from which they just took off.
E. They must drop into hexes within two hexes of other WA units in GS at the time of the drop.
17.5 Restrictions
A. Both corps may be dropped on the same turn, into the same or different hexes, in the same or different theaters.
B. Paratroops may not land in mountain or marsh hexes.
C. They may not land in hexes containing German cities before its economy collapses. Once the German economy collapses (16.7), they may then land on German cities, but never atop Flak corps.
D. Dropped paratroops may not move or even retreat from the hex into which they were dropped until a GS line is opened to them.
E. Paratroops do not exert a ZOC throughout the turn in which they are dropped, except in the hex they actually occupy.
F. If paratroops land in a hex empty of enemy defenders, they may not attack at all.
G. Paratroops are considered to have AS as well as EGS on the turn they drop.
H. The paratroops' air assault is the only case wherein non-mechanized units may conduct a mobile assault.
17.6 Paratroops in Combat
A. If paratroops drop in a hex with enemy defenders, the WA can choose from two methods of battle resolution: attack alone or with other combat units.
B. The WA declaration of the type of paratroop attack will be run must be made at the instant of the drop, and it cannot be changed later.
17.6.1 Paratroops Alone in Combat
A. If the enemy units underneath the just-dropped paratroops are going to be assaulted only by those paratroops, then the paratroops immediately run one or two rounds of mobile assaults.
B. The defender may retreat from the hex with the paratroops to satisfy combat results, but the paratroops themselves can only take step losses.
C. If there are still enemy units underneath the paratroops at the end of the second round of mobile assaults, the paratroops are eliminated at that instant.
D. When air-dropped paratroops are assaulting alone, the tactical airpower column shift is not available to them.
17.6.2 Paratroops Attacking With Other Combat Units
A. If ground units move up and assist in the attack on the enemy units in the paratroops' drop hex, the paratroops do not run any mobile assaults. Instead, they simply sit in the hex, atop the enemy defenders, and await the start of the WA Prepared Assault Phase.
B. If the start of that phase finds the WA unable or unwilling to meet their earlier pledge of support for the paratroops, the paratroops are destroyed and the enemy defenders remain unscathed in their hex.
C. In a combined paratroop/ground unit assault, the paratroops' presence always serves to undouble enemy units beneath them with a river hexside between them and the assisting ground units.
17.7 Refit Process
A. Paratroops must refit between drops, with at least four turns between them. Refitting can only be done in the holding boxes or by sitting motionless throughout the refit period in a hex with GS, not adjacent to any enemy units. The WA should record when the period starts.
B. If this is interrupted during the course of a refit, the four-turn period must completely start again.
C. Paratroops are available for instant use when they first appear on Turn 7, but after that, if they flesh out with replacements or are totally recreated from the dead pile, they must go through the refit process before dropping again.
Example: Paratroops airdrop on Turn 7. The WA open a GS line to them with ground units in same turn. On Turn 8, they move to a suitable refit area. The refit period does not start until Turn 9, and so the earliest they could drop again would be Turn 13.
17.8 Securing Bridgeheads
A. If paratroops drop into a hex, any side of which is a river or canal hexside, and they drive off any enemy defenders in their drop hex via mobile assaults, they may then attempt to secure a bridgehead across any of their hex's water hexsides.
B. Roll one die. On a 1-4, they succeed. Other Allied ground units may then move into the paratroops' hex and attack across that river hexside as if the river did not exist. On a 5-6, there is no effect.
C. Each airdropped paratroop unit in a hex may attempt to seize a bridgehead across any number of water hexsides, but apply a +1 DRM to each subsequent attempt after the first.
18.0 Prepared Assaults and Combat Results
18.1 In General
During the Prepared Assault Phase, the phasing side may initiate combat against enemy units. Prepared assaults are always voluntary on the part of the phasing side. The defender does not have the right to decline participation.
18.2 Limits
A. No unit may make more than one prepared assault per phase.
B. No defending unit may be the object of more than one prepared assault per phase.
18.3 Maximum Attacking Units
All friendly units adjacent to the defender can participate in the assault on that unit, as long as the required AS has been provided.
18.4 Defending Stack
Total the DFs for defending units in the same hex as if they were all one unit.
Exception: Units that retreat into a hex which then undergoes a prepared assault in the same Prepared Assault Phase as that retreat do not add their DFs to those of the other units in the hex. If the defending units suffer an adverse result (step loss or retreat), the previously retreated units are eliminated.
18.5 Defenders in Multiple Hexes
More than one hex may be the object of the same prepared assault. The only restriction is that all attacking units must be adjacent to all defending units to conduct the assault as one large battle.
18.6 Withholding Combat Strength
No portion of a unit's AF or DF may ever be withheld from an assault in which it participating.
18.7 Battle Resolution
The attacker totals the AFs of the units involved in the prepared assault and divides that total by the total DFs of the defending units. The resulting ratio is called the initial combat ratio, and is rounded down to the nearest whole number.
Example: 36 AFs attack 7 DFs. The ratio is 36 divided by 7, which equals 5.14, rounded down to 5, so the initial combat ratio would be 5-1.
18.8 Terrain Effects and Column Shifts
A. Locate the terrain type of the defender's hex in the upper-left side of the CRT, and follow that row rightward to the column containing the initial combat ratio.
B. Apply relevant column shifts (18.24) to the initial combat ratio in this specific situation. These modified odds are called the final combat ratio.
18.9 Obtaining a Combat Result
A. The attacker rolls one die, cross-indexing the number rolled with the final combat ratio column.
Example: A 5-1 assault against a defender in clear terrain, with a roll of a 6, yields a 1/2 result.
B. The indicated result is applied immediately before resolving any other assaults.
18.10 Declaring an Assault
A. The phasing side must announce all of its prepared assaults before resolving any of them.
B. Each assault must specify the attacking units and defending hex(es).
C. The phasing side may then resolve them in any desired order, completing each before moving to the next.
Exception: WA invasions and Soviet Shock Fronts must always be resolved first.
18.11 Initial Combat Ratio Greater or Less Than CRT
If the initial combat ratio is higher or lower than the highest or lowest column shown on the CRT for that type of terrain, that ratio is still used as the basis for computing the final combat ratio.
18.12 Final Combat Ratio Greater or Less Than CRT
If the final combat ratio is higher or lower than the highest or lowest column shown for that type of terrain, it is then simply treated as the highest or lower column of odds available on the table.
Example: A 15-1 ratio against defenders on clear terrain is resolved using the clear terrain 7-1 column on the CRT, since there is no column higher than 7-1 for that type of terrain on the table.
18.13 Combat Results
A. The symbols on the CRT indicate how the participating units in a prepared or mobile assault are affected by the combat result.
B. There are five possible combat results: 0, 1, 2, 3 or E.
C. Results to the left of the slash apply to the assaulting units; results to the right of the slash apply to the defenders.
18.14 Explanations of Combat Results
Generally, the owner chooses how to apply its losses. If taking a combination of step losses and a retreat, the step losses must [sic: printed "mut"] be taken first.
| Result | Explanation |
|---|---|
| 0 | Units receiving this result do not suffer any losses. |
| 1 | One unit of the affected side must lose one step, or all the units of that side retreat one hex. |
| 2 | The affected unit(s) must lose two steps, or all retreat two hexes and lose no steps, or one unit loses one step and all retreat one hex. |
| 3 | The affected unit(s) must [lose] three steps, all retreat three hexes and lose no steps, or a combination of step losses and retreated hexes that sums to three.* |
| E | If the defender incurs this, all defending units are removed from the board and placed in the dead pile. If the attacker incurs this, it must take step losses to reduce its AFs at least equal to the total DFs of the defender. |
* If the attacker receives this result, it must [absorb] at least one step loss. The greatest distance the attacker can retreat is two hexes.
18.15 Both Sides Suffering Loss
Some results affect both the attacker and defender. In such cases the defender applies its losses before the attacker.
18.16 Advance After Combat
A. If any assaulting units remain in their original hex(es) after their result has been absorbed, they may advance after combat if the defender's hex is vacant.
B. The victorious attackers may advance the same number of hexes as the defenders just retreated. If all the defenders were eliminated, the attacker may advance only two hexes.
C. The first hex of an advance must always be into the defender's vacated hex.
D. Only mechanized units may advance more than one hex. Subsequent hexes may be any that are adjacent and vacant (but not across blocked hexsides).
E. Ignore all EZOCs when making advances after combat. Units are still prohibited from advancing out of GS. By leaving at least one unit in each hex of the advance path, however, the attacker could create its own supplied salient through a breach in the enemy line, up to a depth of three hexes.
F. Units with EGS may advance after combat ignoring GS requirements.
G. Stacking limits apply throughout all advances.
18.17 Marsh Hexes
A. If the first hex of an advance is a marsh hex, only Soviet cavalry-mechanized groups may advance any further.
B. Other units must stop if the first hex is a marsh hex.
18.18 Mountain Hexes
Units may only advance into a mountain hex if that hex is the first hex of the advance, and then they may not go any further even if they are mountain troops.
18.19 Retreats
A. Retreats are conducted by the owner of the units to be retreated.
B. Units retreating from the same hex may retreat into different hexes. Retreat stacked units one at a time.
C. For the purpose of conducting retreats, EZOCs are negated by the presence of friendly units; otherwise retreating is not allowed through EZOCs.
D. A retreat can be in any direction or combination of directions, as long as each hex entered is one hex further away from the defender's original hex.
E. Units that cannot retreat within those strictures must absorb their battle result as step losses, even if in so doing they are completely eliminated.
F. Stacking limits apply throughout all retreats.
18.20 Defender Advance After Combat
If there are defending units still in their original hex after all combat results have been applied, but no attacking units are in their original hex(es), the victorious defenders may occupy the vacated attacker's hex, but may never advance further than that one hex.
18.21 Probing Attacks
Assaulting units may launch a prepared assault into hexes that are totally empty of forts and combat units. Such probing attacks do consume AS. The probe does not, however, require a die roll. The assaulters simply burn off supply and advance one or two hexes (within normal terrain and mechanized/non-mechanized strictures).
18.22 Water Barrier Effects on Combat
A. Defending units being attacked (mobile or prepared assault) across river or canal hexsides have their DFs doubled.
B. In the case of prepared assaults, doubling does not apply if units with AFs at least equal to that of the defender's printed DFs are assaulting via non-river/canal hexsides.
C. Any paratroops, regardless of their numeric strength, dropped atop defenders serve to undouble them.
18.23 Concentric Attacks
A. If the attacker launches a prepared assault into a defending hex in such a way that all attacking units are located in or adjacent to all the hexes around the defender's hex, the attack is said to be concentric and the defenders are flanked.
B. Concentric attacks earn the assaulters a 2R shift on the CRT.
Examples: Defender is in hex T24 and the attacker is in T23 and T25, the assault is concentric. Defender is in T24 and the attacker is in T23, S25, and U25, the attack is concentric.
C. The units making up the ring must actually burn off supply and assault; if they do not participate, the assault is not concentric.
D. Units drawing FS and WA units beneath invasion-port counters [cannot] be flanked.
[Source note: the printed sentence 18.23 D lacks a verb ("Units drawing FS and WA units beneath invasion-port counters be flanked."); the bracketed word is supplied for readability and is the only inserted word. Read with 15.19 B, the sense is that these units may not be flanked.]
18.24 Column Shifts Summary
Shift the initial combat ratio to the right or left if any of these circumstances apply to the battle. All shifts are cumulative.
| Shift | Situation |
|---|---|
| 2R | Defender is OOS at the instant of receiving a mobile or prepared assault. |
| 2R | Defender is flanked by a concentric prepared assault. |
| 2R | All Soviet mobile and prepared assaults made during the first turn of Operation Bagration. |
| 1R | All Soviet mobile and prepared assaults made during the second turn of Operation Bagration. |
| 1R | WA units [printed "ranking"] mobile or prepared assaults with tactical airpower present. |
| 1R | WA units making amphibious invasions with naval gun support. |
| 1R | OKH is supplying a German prepared assault. |
| 1R | per Flak corps attacking in conjunction with at least one non-Flak combat unit |
| 1L | WA defending units have tactical airpower present. |
| 1L | Defender is in a city hex. |
* Also apply +1 DRM.
19.0 Satellite Nations
Hungary, Romania, and Bulgaria are the satellite nations. These special rules govern the behavior, abilities, and replacement of their units and politics.
19.1 Romania
19.1.1 Romanian Defection
A. During the course of most games, Romania will defect from the Axis camp to the Soviet camp.
B. At the start of the game, the Soviets already control 11 Romanian hexes. At the end of any Soviet player-turn in which that total has increased to 14, Romania is declared to have left the Axis.
C. Immediately remove all Romanian units from the map and the dead pile and give them to the Soviets.
D. Beginning with the Soviet Replacement Phase after Bucharest is liberated (assuming it has regular GS to the eastern board edge), the Soviets can place one of the Romanian armies in that city. On each subsequent turn in which the same conditions are met, place another Romanian army there until all three are back in play, this time on the Soviet side.
E. Romanian defection, unlike Bulgarian defection (19.2.2), does not automatically switch control of any Romanian hexes from one side to the other.
19.1.2 Capabilities Under Soviet Control
A. Soviet-Romanian armies function in all ways like regular non-mechanized Russian armies, except they may not serve as garrisons, even in Romania itself, and may not take part in shock fronts or attack the Berlin hex.
B. Soviet-Romanians may leave Romania.
19.1.3 Replacements
Romanian armies, no matter what side they are functioning on at the instant of destruction, may never be replaced once destroyed, except during the one-time alliance switching (19.1). That remobilization by the Soviets does not require use of any replacement capacity to place the Romanian units into play.
19.1.4 Romanian Restrictions Under Axis Control
A. Romanian units, while still in the Axis camp, may never leave Romania, stack with Hungarian units, or take part in any kind of assault. They may simply sit in hexes from which German units are launching an assault.
B. Axis Romanians trace their GS line to Bucharest.
19.2 Bulgaria
Bulgaria is nominally in the Axis camp at the start of the game. German units may transit through the country, using strategic or operational movement, but they may not end any phase of their player-turn there. Retreats through, but not ending in, Axis Bulgarian territory are likewise allowed.
19.2.1 Supply While Axis-Controlled
Axis-Bulgaria's army traces its GS to Sofia, which is also the hex where that army must remain until the Soviet player-turn after a Red Army unit has entered the country.
19.2.2 Bulgarian Defection
Bulgaria defects to the Soviets the instant a Soviet combat unit moves into any hex adjacent to the country's border, All hexes in Bulgaria then instantly switch to Soviet control, and the restrictions of 19.2 cease.
19.2.3 Capabilities Under Soviet Control
The Soviet-Bulgarian army acts like any regular Soviet army, except that it may never attack Berlin, take part in a shock front, or serve as a garrison, even in Bulgaria itself. The Bulgarian army may not be replaced if destroyed.
19.3 Hungary
A. Hungary never defects from the Axis camp. The Hungarian 1st Army is the only Hungarian unit outside of Hungary at the start of the game; it may only leave its placement hex if it is to enter a hex in Hungary. No Hungarian units may ever leave Hungary for any reason.
B. Hungarian units may not move strategically. They function in all ways, except replacement, like German corps-sized units.
C. Hungarian ZOCs do extend into hexes outside of Hungary.
D. Hungarian units trace their GS to Budapest or to a German GS source (Germany's choice on a case-by-case basis).
E. Hungarian units within Hungary may not launch attacks into hexes outside of Hungary. The 1st Army, starting the game outside the country, may launch such extra-territorial assaults, but could still only leave that placement hex to get back into Hungary. And once there, it may never leave Hungary.
F. One Hungarian unit may be replaced from the dead pile during the course of the game. It appears at Budapest (assuming the city is still under Axis control) two turns after its destruction. This does not use any German replacement steps.
20.0 Yugoslavia
20.1 Control
The Soviets always command the Yugoslavs, but may only move and assault with them within the confines of Yugoslavia (4.5).
20.2 Capabilities
A. Yugoslav units are always in GS and AS.
B. They may ignore German ZOCs only to retreat.
C. Yugoslav ZOCs do not extend outside of Yugoslavia.
D. German units may ignore Yugoslav ZOCs when retreating.
20.3 Restrictions on Entry in Yugoslavia
Non-Yugoslav Soviet-controlled units may only enter Yugoslav clear terrain hexes and the Y hexes.
20.4 Liberation
If Yugoslav units alone liberate a Yugoslav city in 1944, the Soviets earn double the normal VPs for that city. If Germany subsequently recapture that city, it receives only the normal amount for National Socialist Ardor (26.6.7).
20.5 Replacements and Reinforcements
A. Yugoslav units may not be replaced.
B. The Yugoslav 4th Army, arriving on Turn 14 as a reinforcement, must be placed atop an already existing Yugoslav army. If none is available, the 4th can never arrive, and Germany earns the appropriate VPs.
20.6 Opening Trieste
Yugoslav units can open Trieste for the WA, but must, as usual in such cases, roll on the port opening chart.
21.0 Special Units
21.1 Mountain Units
A. All units with the mountain symbol on them have mountain unit capabilities.
B. Mountain units treat rough terrain as clear terrain, and mountain hexes as rough terrain for all operational and strategic movement purposes, but not for advance after combat.
21.2 Luftwaffe Paratroop Corps
The two Luftwaffe paratroop corps, despite the fact that no one carried them on their books as mountain airborne, are still considered to have all the characteristics of mountain units described above. The mountain symbol appears next to their historic IDs as a reminder.
21.3 Soviet Cavalry Mechanized Groups
A. Soviet cavalry mechanized groups may be the fourth unit in Soviet stacks.
B. For all movement purposes, these units treat rough terrain as clear and marsh as if it were only rough.
C. Cavalry mechanized groups may advance after combat into and through marsh hexes as though they were only rough hexes.
22.0 Fortifications
22.1 Fortification Units
A. Germany has 36 fort factors available for placement throughout the entire game. They may be placed in Greater Germany or Italy in any hex other than Berlin.
B. Germany may deploy 0-4 factors per turn, beginning with the start of the Turn 2 Replacement Phase.
C. Fort factors are not required to be deployed on adjacent hexes.
D. The hexes receiving fort factors must have GS.
E. Forts may be built in the Y hexes of Greater Germany.
22.2 Limits
A. Fort factors may be used to enhance existing forts by one level or to create a new fort in a previously unfortified hex.
B. Only one fort factor per turn may be placed in a hex.
22.3 Levels
A. Forts have 1-3 levels with Level 3 forts having the greatest defensive benefits and Level 1 forts the least.
B. Forts have different defensive effects depending on whether they are occupied by German combat units when assaulted.
22.4 Mobile Assaults Against Forts
Level 1 and 2 forts may be mobile assaulted; Level 3 forts may not be.
22.5 Vacant Forts
A. Vacant forts exert no ZOC, and defend with only 1 DF, no matter what their level is.
B. Forts may never retreat. Any step loss destroys them when vacant.
C. Forts defending alone with their intrinsic defense value do generate the column shifts appropriate to their level of strength (22.6).
22.6 Occupied Forts
A. Whenever friendly combat units defend in a fort hex, each fortification level provides a 1L shift when determining the final combat ratio.
B. When combat units or Volkssturm garrison a fort hex, the intrinsic fort defense strength of one is ignored, not added to the garrison's DFs.
22.7 Retreat From Fort
A. If combat units retreat out of a fort due to combat, the fort is automatically destroyed the instant any victorious Alliance attackers advance after combat into the fort hex.
B. If all German combat units in a fort hex are destroyed, the fort is destroyed along with the last step of combat units.
22.8 Intrinsic Supply
Forts do not have an intrinsic supply capacity, though some do exist in hexes which have such capacities.
22.9 ZOCs of Units in Forts
Mobile units do retain their ZOCs while in forts, but forts do not in any way negate the terrain values, characteristics, or costs of the hex they occupy.
Example: Forts in mountain hexes would not permit units adjacent to them to exert ZOCs into the fort hex as if it were not a mountain hex under the fort.
22.10 Stacking
Forts are always the top unit in any stack they are part of, and they do not count for stacking.
22.11 Fort Construction During Occupation of Economic Hexes and Economic Collapse
A. Once all three of the secondary economic hexes are liberated, no more forts can be built.
B. If the economy is made to collapse before all the secondary hexes are liberated, no forts can be built.
22.12 Effect of EZOCs on Fort Construction
Germany can build and enhance forts in EZOCs, provided it controls the hex as per 4.1.
22.13 Forts Outside Germany and Italy
At the start of the game there are hexes outside of Germany and Italy that already contain fortifications. None of those forts may ever be enhanced during the course of a game.
22.14 Combat DRM
Whenever a fort is assaulted in any way, apply a +1 DRM.
22.15 Let History Judge Scenario
There are no forts in the Let History Judge scenario. Ignore the ones printed on the board.
23.0 Führer-Mandated Offensives
23.1 Eligible Units
A. Any German unit can perform Führer-Mandated Offensives (FMOs).
B. Hungarian units may also participate in FMOs, but do so only at their regular combat strength.
23.2 Effects
A. FMOs affect only prepared assaults.
B. All German units making a FMO have their printed AFs doubled for that assault.
C. The SU used to supply a FMO is permanently removed from play when burned off to create AS for the assault.
23.3 Procedure
To create a FMO, burn off AS as usual, announce the launch of the FMO, and put the SU in the Permanently Destroyed Units Box.
23.4 OKH Unit
The OKH unit may not be used to generate FMO supply.
23.5 Limits
Other than the availability of SUs to burn off, there is no limit to the number of FMOs that may be launched on any given German prepared assault phase.
24.0 Stavka Shock Fronts
24.1 Stavka Shock Front Marker Placement
A. Starting on Turn 1, the Soviets may place up to three Stavka Shock Front markers at the end of the turn. They may be placed atop any Soviet units in GS and do not count for stacking.
B. If more than one marker is placed, each must be placed in a hex next to another hex with a Stavka marker.
C. Shock Front markers may never be placed in hexes without at least one combat unit in them at the time of placement.
24.2 Removal Due to Combat
A. During the German player-turn immediately after a Shock Front's creation, if Germany succeeds in making any Soviet unit beneath the flags retreat or take a step loss, immediately remove all Shock Front markers.
B. The markers may then be placed again in the same or different hexes in a subsequent Soviet player-turn.
24.3 Requirements Prior to Assault
A. Soviet units underneath Shock Front markers may not move or leave the hex during the turn between the markers' placement and the execution of the Shock Front assault.
B. If the hexes of the Shock Front are not stacked to maximum capacity at the time of creation, however, the Soviets may reinforce those hexes as long as the original units remain unmoved.
24.4 Effects
A. All Soviet units beneath the flags have their AFs doubled for prepared assaults during the next Soviet Prepared Assault Phase.
B. Normal AS burn off is still required for those units to attack.
C. Conceivably, though, the Soviets could use Shock Front placement as a bluff, voluntarily canceling the assault and redirecting their efforts elsewhere.
24.5 Restrictions
A. Shock Front units do not all need to attack into the same enemy hex.
B. Shock Front units may not, however, combine in an assault with Soviet units that are not part of the front.
C. When multiple flags are placed by the Soviets, it still constitutes only one front.
24.6 Echeloned Assault
A. By burning off double the normal AS requirement, the Soviets may make an echeloned assault with the Shock Front.
B. The SUs are burned off at the normal time in the turn sequence, the echeloned assault is announced, and the units of the front then make two prepared assaults in a row.
C. Both must be rolled for before any non-Shock Front prepared assaults can be resolved in that phase.
24.7 Conduct of Echelon Assaults
A. Echeloned assaults might conceivably be launched into the same hex in each round (assuming there were still some defenders remaining the first die roll), or each could be directed into different hexes.
B. When making a second attack against the same hex, recalculate the odds ratio before rolling the second assault.
C. Front units can advance after combat as a result of the first round's assault, take their flag markers with them, and then assault into another hex for the second round of assault.
D. Shock Fronts never survive retreats, however (24.2).
24.8 Canceling Second Assault
A. If the Soviets cancel their second Shock Front assault, they would not automatically get the extra SU back.
B. Supply burned off for echeloned Shock Front assault, unlike the supply used for FMOs, is not permanently out of the game. Such SUs do go back into the pool of available Soviet SUs. C. Echeloned Shock Front assaults need not be called off because losses were suffered in the first round.
25.0 Special Rules
The following rules have been grouped together in this one section because each concerns just one specific occurrence or feature of play, rather than dealing with features of the game's overall systems.
25.1 Berlin
A. The city of Berlin is worth 25 VPs and cannot be fortified. It does have its own line on the CRT.
B. Units move through the Berlin hex as if it were a clear terrain hex with only a normal city in it.
C. Berlin's Volkssturm strength (25.7) is 3 DFs instead of the normal one.
D. Bulgarian and Romanian units can never assault Berlin.
E. Any units assaulting Berlin must suffer any combat results as step losses.
F. Any units defending in Berlin must also suffer any combat results as step losses.
G. German units in Berlin always have GS.
25.2 Flak Corps
A. On the German player-turn immediately after its economy collapses, six Luftwaffe Reich Air Defense Flak Corps arrive as reinforcements for field use.
B. If the collapse occurs before Turn 17, Germany receives only five Flak units; the sixth is permanently lost from play.
C. The units appear in any German cities still under German control, not more than one per city.
D. Flak corps are considered mechanized combat units, but they cannot make mobile assaults.
E. If alone in a hex, or stacked there with only other Flak units, they cannot make prepared assaults, and defend with 1 DF.
F. They do exert ZOCs, require supply, count for stacking, and are worth one step of losses in combat situations.
G. When stacked with one or more non-Flak combat units, they have special attack and defensive capabilities, represented by the S on the counter.
H. For each Flak corps making a prepared assault in conjunction with at least one non-Flak combat unit in the same hex, apply a 1R shift.
I. For each Flak corps defending in a hex with other non-Flak combat units, apply a 1L shift.
J. If an Alliance force suffers any result in any kind of assault on a combined Flak/non-Flak defensive stack, and the Alliance force contained any mechanized units, remove one step from one mechanized unit in addition to the normal combat result itself is absorbed by retreats or other step losses.
K. When a German assault or defense uses the Flak support bonus, the Flak corps must be eliminated as a loss before any non-Flak units take any loss.
L. In such cases, if a German force elects to retreat instead of taking losses, there is no extra step loss penalty to that force.
25.3 Fog of War
A. This rule is optional, and players should agree among themselves on its use or discarding before play begins.
B. Under the provisions of this rule, no player may examine the stacks of any other player until committing forces to a mobile or prepared assault into the enemy-occupied hex. The player may still examine Axis stacks during the setup procedure.
C. Because of his [printed "hithes"] ULTRA code-breaking operations, however, the WA may always examine German stacks located in France and Italy.
D. Germany receives four blank dummy counters to deploy as desired with real units in any stack outside of France and Italy. Dummy units may never be deployed alone in a hex. They may be deployed under fort counters with or without German combat units.
E. Within the above restrictions, Germany may deploy and redeploy its dummy counters at any time during any player-turn. The Alliance players must turn their heads when requested to do so for purposes of dummy deployment. The German player should keep in mind that it is a serious war crime to cheat by moving real units during dummy deployment interludes.
F. When using this optional rule, all players may also keep the various troop holding boxes covered with blank note cards or pieces of paper.
G. In the Let History Judge scenario there are no dummy units, and the WA may examine the stacks of the Soviets at any time. The Soviets may not do so with stacks, however, until committed to an assault in the hex.
25.4 Greece
A. The two German corps that start the game in the German Forces Greece box may not leave there until the Operational Movement Phase beginning after the defection of Bulgaria has been declared (19.2.2).
B. At that time, place the two corps on any rough or mountain hex in Albania or Bulgaria along the southern edge of the map. They do pay terrain costs to get on the board edge, and are considered to have EGS and AS throughout the player-turn of their entry. They also have their printed operational MAs doubled for that turn's movement.
25.5 Western Allied Heavy Bomber Strikes
A. The WA may call for a heavy bomber strike two times during the game. The first must be during Turns 3-6, and the second during Turns 20-23.
B. This is done before any other action during the friendly Prepared Assault Phase.
C. The strike may be called on any German unit next to an WA ground force that is about to launch a prepared assault into that German unit's hex. There may be more than one German unit in the hex to be struck, but only one of them, designated by the WA, actually gets bombed.
D. If the strike is taking place outside of France or Italy, and the Fog of War rules (25.3) are in effect, place all the units in the hex in a cup and draw one out blindly. That unit receives the bombs even if it is a dummy.
E. The bombed unit suffers a one step loss. Bombed supply concentrations are permanently destroyed.
F. If ungarrisoned forts are struck, remove the fort counter. If there are mobile units in the fort at the time of the strike, however, the fort itself can then not be struck; one of the mobile units takes the hit instead.
G. The WA cannot cancel the ground assault linked to the bomber strike. They must burn off the attack SU before the bomb run is made, and if the strike leaves the hex empty of defenders, the assault becomes a probing attack.
H. WA units advancing after combat into a just bombed hex must halt in that hex, even if the assault became a probing attack.
25.6 Polish 2nd Corps
The tan colored Polish 2nd Corps may not assault on Turns 19 and 20.
25.7 Volkssturm
A. The Volkssturm function as intrinsic defense for each German city. Each German city on the board, excluding Trieste, Ljubljana, and Berlin, has a 1 DF Volkssturm. Trieste and Ljubljana have no Volkssturm. Berlin has a 3 DF Volkssturm.
B. Volkssturm factors may not assault, have no ZOC, are always in GS (even after economic collapse), may not retreat, and are irreplaceable.
C. If a German mobile unit moves into the city to share in the hex's defense, add the Volkssturm DF on to the mobile unit's DF.
D. The Volkssturm DF may not be taken as a separate step loss; if all the mobile units are lost, it, too, is lost.
E. Volkssturm alone cannot trigger Flak defensive bonuses.
25.8 Western Allied Tactical Air Power
A. During fair weather turns (25.11), all WA units in GS have tactical airpower available to them. TAC AIR results in a 1R shift in the odds ratio of all WA mobile and prepared assaults. It also causes a 1L shift in all WA defenses against German mobile and prepared assaults.
B. WA airborne corps are considered to be in EGS during the turn in which they air drop into any enemy-controlled hex. They therefore do not have TAC AIR benefits until a regular GS line is opened up to them.
C. TAC AIR is available to the WA on fair weather turns in the Let History Judge scenario.
25.9 German 12th Army
A. The 12th Army is another German reinforcement that appears the turn the economy collapses.
B. Place it on the clear hex nearest to Berlin that is still under German control at the instant of the collapse (Germany's choice if there is more than one such hex).
C. The unit functions like a corps-sized formation for stacking, and is considered to have EGS and AS for one complete turn, measured from the instant of placement.
25.10 Ober Kommando des Herres (OKH)
A. This German unit appears as a reinforcement on Turn 4 at Berlin. To get the OKH unit, Germany must permanently remove one of its on-board SUs from play.
B. OKH may only operate in hexes east of the inter-theater boundary line (26.0), and it may also never enter Yugoslavia.
C. OKH stacks like a corps-sized unit.
D. OKH has all the characteristics of a regular German SU, with the following additions:
- OKH may provide AS to Axis units in any two adjacent hexes up to four hexes away from its own position. This four-hex path must be made up only of German controlled hexes.
- Units receiving OKH supply for a prepared assault, even if operating in conjunction with other Axis units utilizing only normal AS, receive a 1R shift in their odds ratio.
- OKH, unlike normal German SUs, is not removed from the board after providing AS. OKH may move strategically, and counts as one corps toward the German total, but may not provide AS on the turns it does so.
- OKH may not be used to generate supply for FMOs, though it may be used to provide supply for some German units going into an assault with other German units that are part of a FMO.
- The OKH odds shift is received even if only a portion of the units involved in the assault are being supplied by OKH.
- Remove OKH when the third of the German secondary economic hexes is liberated or when the economy collapses, whichever comes first.
- OKH may not be replaced.
25.11 Weather
A. Weather is either fair or foul. Turns 10-19, inclusive, are foul weather. The rest are fair weather.
B. During foul weather turns, all operational MAs of 7 are reduced to 6. WA SUs have their MAs reduced to 5.
C. The WA may not use tactical air power (25.8).
D. During foul weather, mechanized units may make only one mobile assault per turn, and that may only be into the first hex they enter.
E. German units may use the hold the line ploy to exit from WA (as well as Soviet) ZOCs during foul weather.
F. When good weather returns on Turn 20, all the effects of foul weather are canceled.
G. In the Let History Judge scenario, foul weather also starts on Turn 10, and remains so for the remainder of the game.
25.12 Southern Italy
A. At the start of the game, the WA control two ports in Italy, Rome and Southern Italy.
B. Southern Italy is the portion of the Italian peninsula existing off the south edge of the map. It is accessible from any hex along the southern edge of Italy. Units moving onto those hexes do pay terrain costs to get on and off the map.
26.0 How to Win
26.1 Three-Player Game
A. Each match can only be won by one of the three players. Victory is determined on the basis of VPs earned during play of the game, and the player with the greatest total of VPs at the end of Turn 23 is the winner. Tied games are theoretically possible.
B. Every city on the map board has a VP value from 1-25. If there is a circled red number next to the city dot, that number is the city's VP value. If there is no circled red number, the value is 1 VP.
Examples: Warsaw is worth 5 VPs and Königsburg is worth 3 VPs.
C. Ploesti and Nagykanizsa are not cities and do not have a VP value, though they are critical for tracking German economic decline (16.0).
D. The factory symbol in the city of Breslau also carries no special VP significance; it is there only to serve as a reminder that the place is also an economic hex.
26.2 VPs in General
Players can also earn and lose VPs through a combination of occurrences and situations described below. There is no qualitative difference between city and special event VPs.
26.3 Two-Player Matches
A. In two-player games, one commands the Axis and the other commands both the WA and Soviet forces. VP calculation is somewhat different than in three-player matches, however, since the east-west inter-theater boundary line now comes into play.
B. The east-west theater boundary line is the dotted line originating in the north and south apexes of the Berlin hex. It has no significance for three-player matches. In two-player matches the Grand Alliance player may move Soviet forces to the west of that line and WA forces to the east of it. However, any city VPs earned by Alliance forces on the wrong side of the line are only deducted from the German total, and are not added to the Western Alliance's total.
Example: In a two-player game, the WA forces crossed the line and liberated Bucharest. The German player loses 3 VPs for not controlling that city at game's end, but the WA forces do not get to add those VPs into their total. We are assuming that Yalta stays in effect, and the WA would therefore pull back to their own side of the east-west dividing line. But, since the Soviets themselves did not liberate the city, they, too, are denied the right to add those VPs into their own total.
26.4 Berlin's VPs
Berlin is considered to be on the east side of the line if the Soviets liberate, and on the west side of the line if the WA liberate it.
26.5 VPs in Two-Player Game
A. At the end of a two-player game, count the VPs earned by the WA forces of the Grand Alliance within the above strictures.
B. In all scenarios, when tallying city control points at the end of match, supply considerations have no significance. Control of city hexes is determined solely by the provisions of 4.1.
C. Germany counts all city VPs earned on the west side of the east-west line. If Berlin is still German, count it as 25 VPs in this Western German total.
D. Both players should now add in any special VP debits or bonuses for events that took place on the west of the line.
E. Record these two totals as separate West German and WA VP totals.
F. Then Germany adds up all the city and special VPs earned for actions on the east of the line. And, again, if Berlin is still German-controlled, count its full value again in this East German total.
G. The Grand Alliance player should compile a similar total of city and special VPs earned by the Soviet forces and record it as a separate figure.
H. Compare the West German total to the WA total. If one is higher than the other, award that side one Final VP. If the totals are equal, no point is awarded.
I. Make a similar comparison between the East German and Soviet totals. Award a Final VP again in the same way.
J. The player with the greater total of Final VPs is declared the winner. If the totals are the same, the game is a draw.
26.6 Special VPs
The following events and situations can cause VPs to be added or subtracted from the player's totals. It is best to keep a written record of the numbers involved, to minimize argument at the post-war conference.
26.6.1 Western Allied, Late Game Casualties
Each WA step loss, for any reasons, after the collapse of the German economy has taken place, costs that player 1 VP.
26.6.2 Bulgarian and Romanian Non-Defection
If Bulgaria or Romania comes remains in the Axis camp at the end of the game, award the German player 4 VPs for each country.
[Source note: printed "comes remains"; transcribed as printed.]
26.6.3 The French Army in France
A. Stating with the end of the WA-turn following the player-turn in which the liberation of Paris takes place, subtract ½ VP per French mechanized corps that is not in France, the Benelux, or Germany at the end of each WA-turn thereafter.
Example: Paris is liberated on Turn 7. If at the end of Turn 8's WA player-turn, the French 1st and 2nd corps are not anywhere in the countries above, the WA would lose a total of 1 VP.
B. The maximum point total the WA can lose under these provisions is 6 VPs.
26.6.4 Soviet Garrisons
A. To secure their line of communications and supply outside of the USSR, the Soviets must maintain a garrison in every non-Soviet city they liberate; however, Odessa, Kiev, Bobruisk, and Vitebsk never require garrisons.
B. A city worth 1 VP requires a garrison of one step. Cities worth more than 1 VP require a garrison of two steps.
C. Begin checking for the garrisons for each city at the end of the Soviet player-turn during which the city was liberated. Every city failing the check each turn causes the Soviets to lose 1 VP.
D. If the Axis retake a liberated city, the Soviets are freed from his garrison check there until such time as the city is liberated again.
[Source note: printed "from his garrison check"; transcribed as printed.]
26.6.5 The Hook of Holland
A. Marsh hexes X13, Y13, Y14, Z13, and Z14 make up the area known as the Hook of Holland. While all five remain Axis controlled territory, the Axis may treat them as clear hexes for all purposes.
B. The instant an Alliance unit attempts to move or assault into any of those hexes, they all permanently become marsh. At that time, the WA must permanently remove one SU from play and subtract 3 VPs.
C. If a Soviet unit is the first Alliance force to enter the Hook, the marsh conversion still takes place, but no SU or VP loss occurs at all.
D. There are two cities in the Hook, Rotterdam and Amsterdam, each worth 1 VP. To claim those VPs at the end of a game, Germany must actually have units in those hexes. If German units are not there at game's end, the player controlling Antwerp is then also awarded the VPs for those cities.
26.6.6 Alpenfestung
A. At the instance of its economic collapse, Germany places the Alpenfestung counter in any one of the three mountain hexes next to Munich. If none of those hexes is German-controlled at that time, or if collapse does not take place at all, ignore this rule.
B. The redoubt has no ZOC, does not count for stacking, and has no fortification value. If alone, it is destroyed the instant an Alliance unit enters its hex.
C. If the redoubt counter is still on the board at the end of the game, subtract 4 VPs from the WA total.
D. Any German steps destroyed in the redoubt hex, or in any mountain hex adjacent to the redoubt, give the WA 1 VP each.
26.6.7 National Socialist Ardor
A. Germany is immediately and permanently awarded the VPs for any liberated city it retakes during the course of the game, including those cities starting the game in a liberated state.
Example: On Turn 12, Germany retakes the previously liberated city of Antwerp. It is immediately awarded 1 VP for ardor. That point remains his even if it subsequently loses control of Antwerp again. If Germany still held Antwerp at the end of Turn 23, it would get the normal VP award for city control at the end of the game.
B. Germany may earn ardor points for taking and retaking a liberated city any number of times.
26.6.8 The 65th Z.B.V. Corps
A. The 65th was the outfit responsible for raining V-1s (rocket bombs) on London.
B. The 65th deploys on one of the four hexes on the French Atlantic coast marked 65 (V6, V7, V8, and W9).
[Source note: 26.6.8 B lists V6, V7, V8 and W9; section 3.8 C lists V7, V8, W9 and X9 for the same four hexes. Both are transcribed as printed.]
C. The unit may only move along those four hexes, and is removed permanently from play the instant it is forced to draw FS or EGS or for any reason moves or retreats into a hex without a 65 in it.
D. The unit moves and stacks like a regular German corps, but exerts no ZOC if alone in a hex, and has no step value in combat.
E. It is destroyed the instant an WA unit enters its hex. If stacked with other German units, it shares the fate of those units in any battle.
F. The 65th Z.B.V. may never be the target of a Heavy Bomber Strike.
G. At the end of any WA-turn, starting with Turn 2, if the 65th is still on the board, subtract ½ VP from the WA.
H. There is no limit to the total number of VPs that player can lose this way.
26.6.9 Warsaw Rebellion/Uprising
A. The Warsaw Rebellion begins the instant a Soviet unit comes within two hexes of the city. The WA place the Polish Home Army Counter (red and white checks) in the Warsaw hex immediately. The uprising lasts four consecutive turns from that time.
B. Starting the turn after the rebellion erupts, if there are not [at] least two steps of German units in Warsaw, Germany loses 2 VPs. There is no penalty after the rebellion ends. The rebellion does not count as the liberation of Warsaw.
C. If a Soviet unit enters Warsaw or makes a prepared or mobile assault into it, or if the Warsaw hex is cut off from German GS, while the uprising is still going on, then the VPs for the eventual liberation of the place are awarded to the WA.
D. Once the rebellion starts, no German replacements or reinforcements may ever again enter play through Warsaw.
E. The Polish Home Army has no ZOC, no step or combat values, and cannot launch assaults. The rebellion is a political happening, and then it is over.
F. In two-player matches, if Soviet forces liberate Warsaw while the rebellion is going on, award the city's VPs to the WA forces' total just as in a three-player game. Then also deduct 5 VPs from the Soviet total.
26.6.10 Destruction of the Yugoslavs
A. When the first Yugoslav army is destroyed for any reason, award Germany 1 VP.
B. When the second is destroyed, award Germany 2 VPs.
C. When the third destroyed, award 3 VPs.
D. When the fourth is destroyed, award 4 VPs. Thus, 10 VPs are possible.
26.6.11 German Reserve Corps
Germany loses 1 VP per reserve corps (62R, 64R, 66R) that goes into the dead pile or remains on the map at the end of the game while still in its unconverted (1-1-4) state.
26.6.12 Western Allied Third Invasion
If the WA makes a third invasion, they lose 10 VPs.
26.7 Dual German Commanders
A. It is possible to play a four player match using two people as east and west front German co-commanders. The Germans win or lose as a team. Use the theater boundary line as the German theater boundary line, too, but Yugoslavia should be commanded by the west front player.
B. If the two cannot agree between themselves as to the allocation of a resource, such as a fort point or reinforcement unit, they may go to the Führer with their problem. Roll one die.
- On a 1-2, the Führer decides in favor of the westerner.
- On a 3-6, he sides with the easterner.
26.8 General Conduct
Players should realize that just because a unit starts the game in a given area or front does not mean it has to stay there or go back there if brought out of the dead pile. Players are free to deploy and redeploy their units within the constraints of all the above rules; the mistakes (or successes) of the past need not restrict their thinking.
27.0 Scenario 2: Let History Choose
"How I Learned To Stop Worrying and Love The World We Live In"
27.1 Introduction
A. In this scenario we postulate the start of World War III coming hard on the heels of World War II.
B. In this what-if world, FDR died shortly before Yalta, thus sending Truman in his place. At Yalta, Truman quickly learned to fear and loathe Stalin, and fell under the sway of the arch-conservative Churchill.
C. The conference broke up with most issues left in angry deadlock, and in secret conference on their way home, the two western statesmen formulated the NATO alliance as a new anti-Comintern pact. (Look, do you want to play this scenario or not?)
D. A press campaign was unleashed throughout the west, aimed at psychologically preparing the populace to accept the necessity of carrying the war out to its logical conclusion.
E. Turkey and neutral Scandinavia were quietly dragooned into NATO, along with the rest of western Europe. The war against Japan was put on hold, being restricted to an ever tighter naval blockade and ever hotter incendiary raids on its cities. As Churchill quipped, "Don't worry, Harry, after we've got the Bolshies we'll take Japan by telephone."
F. Meanwhile, the Manhattan Project was pushed full speed toward completion. Pro-west nationalist agents were clandestinely inserted into the Soviet controlled Bulgarian, Romanian, and Polish armies. Contacts were made with the Nazi intelligence net still extant throughout eastern Europe. A furious new strategic bombing campaign was planned.
G. The goal would be to lever the Reds back behind their 1939 borders by the end of 1945. Then, when good weather returned in 1946, if Stalin (or perhaps his generals) still would not see reason, on to Moscow.
H. By the first week of May, even as the last embers in the Third Reich's ashes cooled, all was as ready as could be. Only a final pretext was needed. General Vlasov's free Russians and the Prague Uprising provided that by June.
27.2 Duration
- This is a 14 turn scenario. It starts on June I, 1945, and ends at the end of the December II, 1945, turn.
- Foul weather starts on Turn 10 (October II, 1945).
- The NATO player is the first player every turn.
27.3 Soviet Setup
A. The Soviets set up first.
B. The Soviets have all units in their full order of battle available except for the Polish, Romanian, and Bulgarian armies. (They all disperse homeward or into the underground at the start of hostilities.)
C. The Soviets cannot create STAVKA Shock Fronts in this scenario.
D. The Soviets receive no replacements or reinforcements.
E. The following units begin on their depleted side:
| Qty | Strength |
|---|---|
| 7 | 7-8-5 |
| 2 | 9-9-6 |
| 3 | 8-9-6 |
| 1 | 12-9-5 (printed with a trailing dash) |
F. The four Yugoslav armies set up anywhere in Yugoslavia except Trieste.
G. The line of red triangles running through the middle of Germany down to the Yugoslav border delimits the area of Soviet control at the start of this scenario. Normal Soviet garrisoning requirements are in effect.
H. Depleted units may not be used as at-start garrisons; they must all be on the frontline triangle hexes.
I. The Soviets must deploy as follows:
| Location | Units |
|---|---|
| Within 1 hex of Königsburg | 6 x 7-8-5, 1 x 8-9-6, 1 x 9-9-6 |
| Within 2 hexes of Riga | 5 x 7-8-5, 1 x 8-9-6 |
J. All triangle hexes must have at least one Soviet unit on them.
K. All eight Soviet SUs are on board at the start. In this scenario the Soviets receive only one SU per turn.
L. The Soviets have no strategic land or sea movement capabilities.
27.4 NATO Setup
A. The NATO side has all the forces in its order of battle available at full strength, except for the FX corps, which is permanently out of play.
B. The Vlasov army becomes part of the NATO forces and must be set up in Prague.
C. The US 23rd and 36th corps (marked with asterisks) may start out in either theater holding box, along with three invasion-port counters. (The 23rd and 36th were two corps that were sent to Europe but were never fleshed out with troops historically. They certainly would have been brought on line for this mess.)
D. Any one of the CW corps marked with an I in the upper-left corner must be set up in Trieste. All the other NATO units so marked may be set up anywhere in NATO-controlled territory south of row N.
E. The rest of NATO forces set up anywhere in friendly-controlled territory anywhere in Europe. They may set up in the Soviet ZOCs westward from the front line of triangles.
F. The paratroops are jump-ready.
G. All the rules of WA inter-army group cooperation still do apply in this scenario.
H. Vlasov is considered part of the green army grouping, and stacks as a corps. It cannot be replaced.
I. The green NATO army grouping receives its normal allotment of replacements throughout this scenario, starting with Turn 2.
J. The tan NATO army grouping receives no replacements in this scenario.
K. All eight SUs may be set up anywhere in NATO territory, including holding boxes.
L. TAC AIR is available.
M. The NATO supply line length is 12 hexes in this scenario.
27.5 Freikorps
A. Starting with Turn 3, NATO may take one German 3-4-5 infantry corps and place it on any supplied, controlled city in Germany, excluding Trieste. NATO receives one 3-4-5 each subsequent turn until the end of the game.
B. These units may never leave or assault out of Greater Germany. They may not enter the Y hexes. Their ZOCs do extend over the border.
C. German Freikorps may not enter play via Trieste or Ljubljana.
D. These units may never stack or assault in conjunction with any other NATO units.
Exception: They may do stack and assault with Vlasov. They may not be replaced.
27.6 A-Bombs
A. At the start of the game the NATO player secretly draws a second invasion chit from a cup to determine the turn A-Bombs become available (four in each case).
| Chit | Turn |
|---|---|
| A | 4 |
| B | 6 |
| C | 8 |
[Source note: the printed lettering runs from A to F; paragraphs B through E are not printed in the source and are not supplied here.]
F. When the first one is detonated, the NATO player should show the verifying chit to the Soviets.
G. The NATO player announces the detonation of an A-Bomb at the very start of any turn after they become available. They may be saved for later turns or all dropped on one turn. NATO never receives more than the initial shipment of four bombs.
H. To detonate, point to any Soviet stack on the map, loudly say "Boom!," place a mushroom cloud marker there, and roll one die.
- On a 1-4, all units in the bombed stack are destroyed.
- On a 5-6, only one unit is destroyed, and the rest (if any) are retreated two hexes in any direction by the NATO player.
I. The mushroom cloud remains in the hex throughout the ensuing turn. No units of either side may enter the hex while the mushroom is in it. Remove the cloud at the very end of that turn.
J. Port cities that have been nuked may never again function as ports.
K. No NATO strategic movement may ever take place through or into a hex that has been nuked, even after the cloud is gone.
L. NATO liberated and A-bombed cities still do count for VPs.
27.7 Yugoslavia
A. If the NATO unit that starts in Trieste is pulled out of Yugoslavia before the end of the first NATO player-turn, Yugoslavia declares its neutrality. In that case the Soviets could still continue to maneuver Yugoslav units inside their country, but their ZOCs would not extend outside, and they could not assault until such time as NATO violated their neutrality.
B. If Yugoslavia remains neutral throughout the game, the VPs for Belgrade cannot be counted in the NATO total.
27.8 Ports as NATO Supply Sources
A. All ports under NATO control at the start of the game are functioning as GS sources.
B. The port capture table must still be consulted when new ones are seized.
27.9 Greece
A. Greece exists off the south edge of the Balkan peninsula in this scenario in the same way that southern Italy extends off the map in the Iron Dream scenario.
B. NATO can invade Greece from the MTO holding box. Simply set the invasion-port counter off the south edge of Bulgaria. Up to two corps and two SUs per turn may enter along the south edge of Bulgaria or Turkey.
C. Count the 12 hexes supply line radius from the south edge hex.
D. It is impossible for Soviet units to move off the south edge of the board into Greece.
E. NATO units may not set up in Turkey, but they may enter clear terrain hexes in this scenario, and trace supply through them.
27.10 Winning
A. In this scenario only NATO earns VPs. VPs are awarded for the capture of certain cities, and for points lost by the Soviets for garrison violations.
B. The following cities earn 12 VPs: Belgrade, Bucharest, Budapest, Kiev, Königsburg, Minsk, Odessa, Prague, Riga, Sofia, Vienna, and Warsaw. No other cities earn VPs.
[Source note: the printed list reads "Riga Sofia" without a comma; transcribed with the comma added.]
C. Berlin has no VP value, but before summing VPs at the end of the game, NATO must check for control of that city. If NATO does not control Berlin, the NATO player cannot win the game, regardless of the total VPs earned.
D. NATO also cannot win the game if the end of Turn 14 finds a Soviet unit west of the triangle scenario start line. (Remember, Yugoslavs can never leave Yugoslavia, neutral or not. Once the triangle line reaches the Yugoslav border it is considered to run along that country's western edge, including the Y hexes as part of Yugoslavia.)
E. Given those pre-conditions, the NATO player wins by earning at least 84 VPs.
F. The Soviets win by merely preventing a NATO victory.
28.0 The Unit Roster
The number in parentheses indicates the total of that type of unit in the counter mix. Units with two steps have their reduced strengths shown to the right of the slash mark. All units are regular infantry unless otherwise noted.
[Source note: in the extracted source the Qty, Type and Strength/IDs columns of the German, Western Allied and Soviet tables are split across page breaks. Quantities below are transcribed as printed where legible and otherwise counted from the printed ID lists; the Type column is shown only where it is printed beside the strength line. Where a printed quantity does not match its ID list, both are shown.]
28.1 Satellite Forces
| Qty | Type | Strength/IDs |
|---|---|---|
| 3 | Hungarian Armies XXXX | 4-5-4 (H1, H2, H3) |
| 3 | Romanian Armies XXXX | 3-4-4 (R1, R3, R4) |
| 1 | Bulgarian Army (Mtn) XXXX | 3-4-4 (BUL) |
28.2 German Forces
All units are corps (XXX), unless otherwise noted.
| Qty | Unit | Strength/IDs |
|---|---|---|
| 10 | SU | 0-0-4 (numbered 1-10, no size symbol) |
| 1 | Alpenfestung | no size symbol |
| 1 | Rocket bombs | 0-0-4 (65 Z.B.V.) |
| 1 | OKH (XXXXXX) | 0-0-5 |
| 6 | Luftwaffe Flak | S-1-6 (1, 2, 3, 4, 5, 6) |
| 3 | Reserve corps | 3-4-5/1-1-4 (62R, 64R, 66R) |
| 4 | Cav / Inf | 2-3-4 (16SS, 101, Lomb, Feldt Felber) |
| 1 | Cav | 2-4-6 (15SS) |
* Elite corps with two counters to show three steps. ** For fog of war rules.
[Source note: the printed 28.2 list has 4 Cav / Inf counters for 2-3-4 and lists 16SS, 101, Lomb and Feldt Felber; "Feldt Felber" is transcribed as printed. The 4 Pz* line is printed as 4 counters for two corps (11SS, HG), consistent with the elite-corps note.]
28.3 Western Allied Forces
| Qty | Type | Strength/IDs |
|---|---|---|
| 1 | Inf (XXXX) | 4-5-5 (VLAS) |
| 2 | Mech Inf | 8-8-7/4-4-7 (F1, F2) |
| 17 | Mech Inf | 10-9-7/5-4-7 (2, 3, 4, 5, 6, 7, 8, 12, 13, 15, 16, 19, 20, 21, 22, 23, 36) |
| 1 | Mtn | 7-7-5/3-3-5 (FX) |
| 1 | Airborne | 7-8-5/3-4-5 (18) |
| 3 | Invasion-ports | PORT |
| 1 | Polish Home Army | red and white checks |
| 8 | SU | 0-6 (numbered 1-8) |
28.4 Soviet Forces
| Qty | Type | Strength/IDs |
|---|---|---|
| 3 | STAVKA | Flags |
| 2 | Inf | 4-5-5 (P1, P2) |
| 4 | Yugoslav Mtn | 5-6-6 (1Y, 2Y, 3Y, 4Y) |
| 35 | Inf (XXXX) | 7-8-5/3-4-5 (3, 5, 8, 13, 17, 18, 19, 21, 22, 27, 28, 31, 33, 37, 38, 39, 40, 42, 43, 46, 47, 48, 49, 50, 51, 52, 53, 54, 57, 58, 60, 61, 65, 67, 69, 70) |
| 12 | Mech Inf* | 8-9-6/4-5-6 (1, 2, 3, 4, 5, 6, 7, 8, 9, 10, 11, 17) |
| 6 | Tank Armies | 9-9-6/5-5-6 (1, 2, 3, 4, 5, 6) |
| 5 | Shock Armies | 12-9-5/6-4-5 (1, 2, 3, 4, 5) |
| 8 | SU |
* Guards armies.
[Source note: the printed quantity for the 7-8-5/3-4-5 Soviet infantry line is 35, but its ID list as printed contains 36 numbers. Both are transcribed as printed.]
28.5 Markers
| Qty | Type |
|---|---|
| 6 | OOS/EGS |
| 7 | FS |
| 16 | Fortification markers: "Level 2 level on one side, OOS on the other" (as printed) |
29.0 Designer's Notes
A. I owe an apology to all who play and enjoy this game. That is, I'm sorry, because there's no reason you couldn't have been playing and enjoying it a decade ago. That's how long I carried this simulation around in my head before committing it to paper.
B. The original inspiration for Iron Dream was the 1965 publication of SPI's Battle for Germany game. That was, and long remained, an extremely popular title throughout the ranks of our hobby. The situation was dramatic, the mechanics simple, and the fighting bloody and tense.
C. Unfortunately, Battle for Germany was prevented from being all it could've been by coming out in that disappointing "folio-game" era SPI was then passing through. The high drama of Nazi Germany's close-out needed more than a 17" x 22" map, 100 counters, and 7 pages of rules could deliver.
D. That became particularly apparent when playing the three-player version. (Which was where play in my group gravitated, once we got over the newness of the two-player scenario's you-command-forces-on-both-sides-of-the-alliance-rules.)
E. The first turn was always a lot of fun for the German, but each succeeding one was less so. There was a totally unexplained rule denying even the possibility of a final donnybrook for Berlin. And in squashing the orders of battle down to 100 units, SPI seemed to have made a deliberate effort to leave out the really colorful and unique aspects of all three major army groupings.
F. It's ironic that Battle's designer, Jim Dunnigan, was also the man who created the folio-game straight-jacket. By forcing Battle into that cramping mold, what could've been one of his best simulations had to remain only a good game.
G. So that's what put the idea for this game into my head ten years ago. What finally levered it out of the realm of the mind and on to your gaming table was this past year's publication of H.P. Wilimott's terrific little history, June 1944.
H. By backing off the start-date six months, enough geographic, chronologic, and strategic slack is put back into the situation to make the game as exciting and varied a proposition for the German side – throughout all the turns – as it is for its opposition.
I. In the "Game Notes" to Battle, we were told: "Historically the game develops fairly accurately, but without the large thrusts and long periods of waiting that were evidenced, particularly on the Eastern Front."
J. That statement is, of course, self-contradictory and therefore logically meaningless. What SPI was trying to crab-walk away from there, was (again) nothing more than the restrictions and contradictions inherent in any game birthed after a shotgun wedding of an inappropriate system to a demanding historical situation.
K. Battle developed "fairly accurately" only in the very limited sense that all the armies tended to gang up around Berlin during the last turns of play. That the hows and whys of getting them there in the game bore little or no relationship to those of the historic campaign under study should not surprise you, when you reflect that the source of Battle's system was one originally designed to recreate brigade-level fighting in the American Civil War (and was, at that, only a partial success on its historical home turf).
L. I have tried to redress Battle's wrongs in Iron Dream while still maintaining the artful simplicity of its progenitor. The mobile assault, Anglo-Allied paradrop, Stavka Shock Front, Führer-Mandated Offensive, and special victory point rules have all been created to enhance the historicity and color (cynics would say "chrome") of my game over earlier one.
M. Having said that, however, I must still caution you that your games will probably not develop along the same lines as the historic campaigns. But that divergence is not in this case due to a failure of the game system.
N. The divergences will be caused by the fact that German strategic performance during last year of the war was so abysmal as to almost any competent player to better them. And my philosophy of game design and play does not compel me to hobble that player terminally frustrating stand-fast-and-die rules.
O. If you want to find out what happens if Germany consistently draws up its defenses in the most forward lines possible, then stands on them until all its forces are either shoved or shot off of them, do not play my game. Instead, pick up and read any good military history of the period. You'll save yourself a lot of frustration.
P. In the game, the Alliance players will ably find themselves with far fewer chances to use mobile-assault and paradrop successfully than their historic counterparts did. The mechanics allowing for simulation of those historically deadly techniques are all manageably recreated in the game's rules, but the German side that successfully extricates its armies from France and "Ostland" will have operated so as to radically decrease the possibilities for doing so.
Q. But enough of comparisons. There are many unique aspects to Iron Dream.
R. For instance, the frustration involved in digging up a World War II order of battle at this level is not so much involved with the who-was-where aspect of the search, as it is with assigning reasonably accurate factor values to all the myriad corps and armies.
S. Excluding a brief and non-productive German flirtation with the idea of a fixed-strength armored corps in 1945, none of the units depicted in Europe '44 had standard organizations.
T. The German 90 corps is a good example of how these units could evolve from one kind of beast to another, be destroyed or transferred, and then become something else again.
U. 90 corps was originally created to handle part of the German 1942-43 front in Tunisia. When that front went down the tubes, 90 corps, of course, went along with it. The corps designation then remained in limbo until the autumn of 1944, when the designation was given to the erstwhile 4th Luftwaffe "Field" corps.
V. How, then, to handle such a situation? With a 5-6-5 90 corps starting the game in the dead pile, representing the lost combatants of North Africa? No – that 90 corps was definitely lost "out-of-supply" in game-terms, and hence was not replaceable.
W. A 2-3-4 Luftwaffe corps back-printed with a 3-4-5 Wehrmacht corps, flippable with the expenditure of one replacement point? No – no German would expend the point in so inefficient a manner. And yet the 4th Luftwaffe Field corps had to go, because one of the historic truths (albeit a minor one) of this final period of the war was that Goering took his organization out of the whole "field" corps business.
X. I finally settled for Occam's ever sharp razor, and put "90" on the corps in southern France that did, just turns later, really become 90 corps.
Y. And that was pretty much the same approach I used through all the rest of the cannon-counting: take all assets available to that broad class of corps, divide by the total number of corps/armies so represented, add or subtract a factor here and there for historic color or the quirkiness of some outfit that shone brighter or failed worse than objective counting can account for, and (Voila!) an OB is born.
Z. If you are disappointed at all by this, it'll probably be by the armies produced on the Anglo-Allied side. But, especially after the conversion of the Free French, I simply could find no basis for objectively distinguishing among the potential capabilities of one A-A corps and another. Divisions, certainly, but corps, no.
AA. The abundance of uniform American equipment by this stage of the war, the increasing A-A mastery of a combined-arms tactical doctrine seemed second to none, and a command determination to conduct the campaign on lines as flexible and unnationalistic as possible, frustrated all attempts at differentiation.
BB. The A-A just did not think in terms of elite or substandard corps. To them, the "corps" was nothing more than the name given to one level of organization in a huge army. One that could be fleshed-out or stripped-down quickly and at will.
CC. Another, final, OB note. Historians among you will notice immediately that all but one of the Soviet Tank Armies carried the appellation "Guards" by the end of the time simulated here. As far as my research could uncover, however, that's all the promotions involved: an appellation. Soviet players should therefore feel free to grant the "Guards" designation to their tank armies when and as they deem it appropriate.
DD. Despite my earlier proclaimed aversion for special rules forcing players to follow strategies other than those of their own choosing, I had to generate some of the very same to get Turn 1 off the ground in some historic (or believable alternate-historical) fashion.
EE. No matter what starting point you pick for a simulation, that date has in the make-up of its situation unalterable antecedents. And 6 June 1944 had more than its fair share of such antecedents. So much so, that to allow any of the three players a totally free hand on Turn 1, and yet remain connected to the history begun that hot summer, you'd actually have to move back and start play far earlier.
FF. For instance, having the Soviet player flip over the initial German east front weakened corps is my attempt to get at simulating the hard-learned (and earned) Red ability to "read" Hitler by this point of the conflict, and thus use his determination to hold forward points, no matter how battered the units, to their advantage.
GG. The German player steps into der Führer's shoes on 6 June 1944, and is free to operate as s/he sees fit thereafter – s/he does not get to undo what went before.
HH. As for providing you with the usual "strategy tips," I prefer to leave the fun of discovering the peculiarities of each front to the players themselves. For that was surely more than half the fun of the playtest games I watched and took part in. Every commander at last got his/her chance to trot out his/her favorite pet theories on this final, crucial, phase of the war.
II. There is a tendency – and for the most part it's a good one – to manage the various and repetitive crises on each front in ways determinedly more "flexible" than those adopted by A. Hitler and company. Do remember that in the end, victory or defeat is largely predicated on the control of Reich real estate.
JJ. At a certain point, therefore (and at what specific point that changeover occurs will have to be determined by you), Hitler's summary dismissal of retreating as nothing more than "moving the catastrophe one place to another does become operable. Apply your fanaticism flexibly.
KK. As to what didn't get into my game (all for one or another good reason), here's a list: SS Panzer Division breakdown counters. Otto Skorzeny, the Kriegsmarine surface fleet, Dora, Thor, victory points for liberating Nazi death camps, the Schwarze Kapelle, and chemical warfare. All of which came (or, thankfully, didn't get to come) together to provide you with what I believe is a successful example of the much-liked kind of game the old SPI-staffers used to call a "mini-monster." One too detailed and rich-of-possibility to play through comfortably in one sitting, but at the same time small enough physically to allow most players living in anything larger that a puptent to keep it set up between sessions.
LL. One postscript: Before some reviewer claims that my wonderful Luftwaffe FLAK corps are "probably just some end-game play balance device," let me head him off by denying that charge now.
MM. 'Their designations are historically correct, their strength as considerable as the rules make out, and their appearance valid.
NN. They represent a total of 10,600 superheavy anti-aircraft guns, released from Reich Air Defense duty at the last by Anglo-Allied curtailment of their strategic air offensive (no worthwhile targets left).
OO. Their historic strategic effects were greatly diminished, of course, by the overall hopelessness of the German situation in April. And their tactical limitations, despite their amazing potential throw weight, were many, because the guns lacked the shielding that 88s originally manufactured for anti-tank use would have been given, and the crews lacked even rudimentary in AT warfare.
PP. Still, the Soviets lost over 2,000 tanks in getting from the Oder, where the bulk of the FLAK was deployed to downtown Berlin.
[Source note: the Bibliography (30.0) and Credits (31.0) pages are not reproduced. The bibliography is a reference list rather than rules, and the credits are attribution. The 2023 revision and Word-version credits are named in the source note at the top of this file.]