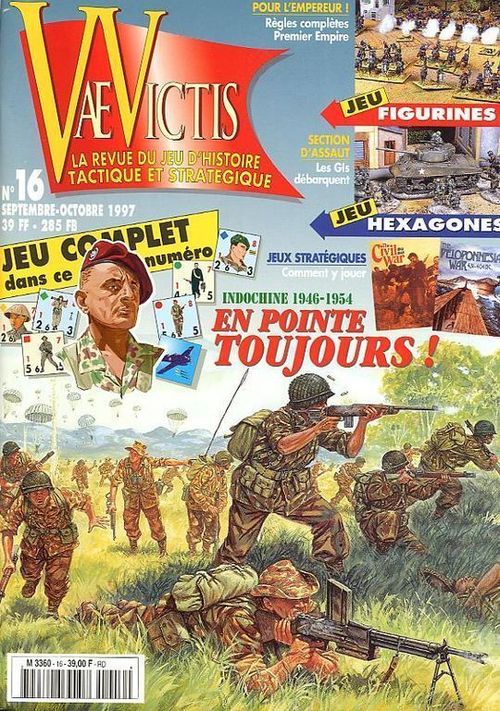
En Pointe Toujours!
En Pointe Toujours! Rulebook
Table of Contents
Table of Contents
- 0. Introduction
- 1. Units and Organization
- 2. Sequence of Play
- 3. Organisation and Command
- 4. Line of Sight and Line of Fire
- 5. Formation Activation
- 6. Actions and Reactions
- 7. Movement
- 8. Concealed Units
- 9. Direct Fire
- 10. Artillery
- 11. Combat Results
- 12. Formation Morale
- 13. Assault
- 14. Air Support
- 15. Special Rules
- Tables
- Scenarios
0. Introduction
0.1 Game scales
One game turn is equivalent to roughly 10 minutes of real time. The distance from the center of one hex to the center of another is around 50 meters. The contour levels represent a change in elevation of between 10 and 50 metres depending upon the theatre of operation. Each unit counter represents a section, squad or fireteam or a leader.
0.2 Maps
The maps of En Pointe are geomorphic, that is to say that they can be combined in various ways to get different battlefields. For this first module, two maps are supplied, representing typical Indochinese terrain. A hexagonal grid is superimposed on the map to govern movement and combat.
Terrain pieces (which need to be cut apart) are also included in this issue and are placed on the map according to the instructions in each scenario. Vae Victis will provide additional maps and terrain pieces for other theaters of operation in later-published extensions.
0.3 Terrain
There are four basic types of terrain in this game:
- open terrain: tracks, roads, streams, clear terrain;
- light cover: rice paddies, brush, hedges, groves, wooden rubble;
- medium cover: jungle, wood buildings, walls, stone rubble, entrenchments;
- heavy cover: prepared position, stone buildings.
Terrain effects on movement and combat are listed in the Modifier Table and the Terrain Effects Table (see page 38).
0.4 Elevation and crests
There are four elevation levels, level 0 being lowest, level 3 being highest. A unit is considered always as being on the highest elevation present in the hex.
The crests that run between hill hexes represent the tops of the hills or the highest point of a ridge. Hills can be either gentle or steep, as specified in the scenario.
0.5 Scenarios
Games of En Pointe Toujours are from historical scenarios. Each scenario gives the order of battle, which maps to use and their placement, and special rules for that scenario. Many aspects are variable (formation morale, command level, etc.) and will be specified in the scenario.
1. Units and Organization
1.1 Combat units
Units are represented by counters and have several pieces of information on them. Combat units include leaders, infantry units and heavy weapons.
1.2 Unit Reduction
Every unit possesses one or two combat steps. When the unit suffers a loss, the unit is flipped to indicate its new state. Units with only one remaining combat step are destroyed by the first loss. Units can also be in several operational states: normal, pinned or neutralized (see 11.1 and 11.2). These last two states are represented by corresponding markers.
1.3 Commanders
Leaders represent either formation commanders or higher-echelon commanders. For convenience, the term HQ (command post) will be used to include all leaders. Leaders have different attributes. The front of a leader counter indicates that the formation he commands has not been activated; the back, that has been activated (see 5). HQ have only one combat step.
Leader loss: if during a turn a formation commander is killed before activating its formation, that formation can be activated but with a negative modifier (see table). In the Administrative Phase (at the end of a turn), an aide takes over command of that formation. The quality of the aide is determined by a die roll (see table). The counter of the eliminated leader is returned to the map, on or adjacent to a unit of that formation, with a marker indicating the morale modifier.
If a higher-echelon commander is killed, one of the formation leaders (owning player’s choice as to which) takes its place in the Administrative Phase. This leader retains command of his formation but in addition is assigned all the abilities of a higher-echelon leader.
1.4 Organization
Generally, the combat units are organized in formations (see 3.1). When a formation activates, all the units of that formation can act. The formations are indicated in every scenario, as per the historical orders of battle. Also, each formation can be in a morale state of normal, hesitant or demoralized (see 11).
2. Sequence of Play
Each scenario lasts for a specified number of turns, each consisting of five phases:
A. Artillery Phase
- Players resolve any artillery missions plotted for this turn (see 10) after checking the Delay Table.
- Each player secretly jots down next turn’s target hex for each artillery battery (see scenarios).
B. Air Support Phase
- The players resolve any air support planned for this turn (see 14) after consulting the Delay Table and resolving any anti-aircraft fire.
- Each player jots down air support requests for the following turn.
C. Command Phase
The two players check whether their units are in command. Units which are out of command are marked with an ‘OoC’ marker; units once again in command remove this marker.
D. Operations Phase
During this phase, the players alternate activation of their respective formations and can undertake, under certain conditions, reaction actions.
- Initiative Segment. Each player rolls 1d6, whoever rolls the highest is the first player to become active for the turn; the other player is called the passive player. A scenario may provide a modifier for this die roll or even assign the initiative.
- Operations Segment. The active player performs an operation, after which a new operations segment is commenced.
An operation for the active player consists of:
- attempting to activate one of his formations (see 5);
- or passing, if he doesn’t wish to activate one of his formations.
If the activation attempt fails or if he passes, the active player becomes the passive player and a new operations segment begins. If the activation attempt succeeds, the active player undertakes actions with the units of the active formation (see 6.1), the passive player can undertake Reaction (see 6.4) which in turn may generate Reactions from the active player under certain conditions. When all the possible and desired actions and reactions are done, the active player can begin a new operations segment (attempt a new activation or pass). Operations segments continue until:
- there are no further activations possible or
- the players pass in consecutive Operations Segments or
- only one player has units remaining to be activated, and rolls 9 or higher on the activation dice (see 5.4).
E. Administrative Phase
All the following actions are carried out in the indicated order:
- artillery markers are removed;
- smoke markers are flipped or removed;
- Fire (‘Tir’), Move (‘Mouvement’) and Pin (Stoppée) markers are removed;
- HQ counters are flipped to their active side, any eliminated leaders are replaced;
- Neutralised leaders and combat units attempt to remove their Neutralised (Neutralisé) marker;
- hesitant formations that have reached their demoralisation threshold check their morale;
- units attempt to repair malfunctioned weapons;
- camouflage units.
At the end of the phase, the Turn marker is advanced one space.
3. Organisation and Command
3.1 Formation Organization
Generally a formation is composed of a leader and a certain number of units attached to him. Each formation has a unique code color for identification.
Example: a section leader and three squads represents a formation. Sometimes, in order to represent the doctrine of certain armies, special rules (scenario rules, for example) may impose constraints on the actions of the units of a formation.
3.2 Batteries and Artillery
Only the mortar batteries that are on the map use the unit-activation rules. Off-map mortar batteries and artillery batteries (light, medium and heavy) have their own rules and their own phase of the game turn (see 10).
3.3 Command Range
There are two levels of command in En Pointe Toujours: from the Commander in Chief (higher echelon commander if present in the scenario) to the formation leaders, and from them to their units.
At the start of each turn, the players check whether:
- each formation leader is within command range of their superior commander (this range is given in each scenario). In-command leaders can activate normally; the activation of Out-of-Command formations is subject to a negative die-roll modifier (see table);
- the units of each formation are within command range of their formation leader.
Depending upon the scenario, each chief has a command range expressed in hexagons. All units within this command radius are considered in command, regardless of line of sight or intervening terrain. Units that are beyond command range are marked with an Out-of-Command marker and may not be activated with their formation (see 5). Conversely, units which were Out-of-Command but are now within command range of their leader remove the Out-of-Command marker and can act normally this turn.
Exception: a unit that is Out-of-Command but which is adjacent to or stacked with either the leader of a different formation or the higher echelon HQ during the Command Phase can, at the owning player’s choice, be temporarily attached to this formation. The unit will then activate with this formation this turn.
3.4 Out of Command units (OoC)
A unit which is out of command may not be activated when its formation activates. However, the player may attempt to activate each Out-of-Command unit, as if it was a formation (with a negative modifier, see the Activation Table). An OoC unit checks for activation using its morale value, modified as per the Activation Table. Even if it succeeds, it can only perform a limited number of actions (see 6.1). This activation counts as a formation activation.
4. Line of Sight and Line of Fire
4.1 Definitions
The line of sight (LoS) is a straight line drawn from the center of one unit’s hex to the center of another unit’s hex. The Line of Fire (LoF) is the same but it is limited to the weapons range of the two units. When these lines are blocked by a Terrain element, the line is not valid: the target may not be seen and the firer thus cannot shoot it. Normally, the maximum daytime visibility is limited to 60 hexes.
4.2 Light Weapons range
All units that have a fire strength (infantry counters, machineguns, etc) have a range limit noted on the counter. The fire strength of a unit firing direct fire is modified according to the range (see Table P. 30).
4.3 Line of Sight (LoS)
For a line of sight to be valid, it must not cross an obstacle. To determine if a line of sight traverses an obstacle, the players trace a line from the centre of the starting hex to the center of the target hex (with a ruler or string for example).
The line of sight is blocked if it touches the drawing of an obstacle: building, wall, woods, crest (except when either the firer or the target is adjacent to the crest), smoke or higher elevation. Smoke does not block a LoS if it passes exactly along a hexside and the adjacent hex does not also contain smoke. Adjacent units always have a valid LoS regardless of the terrain.
Sighting Hindrances
Certain terrain elements (rice paddies, brush, orchards) do not block LoS but provide a sighting hindrance and thus penalties for firing (see table). If there are more than five hexes of sighting hindrances in the LoS, it is blocked (this rule also applies to mortars).
Sighting hindrances represented by symbols on the map (orchards, as opposed to terrain drawn ‘realistically’) are considered to occupy the entire hex. The penalty is applied if the line of sight traverses the hex, not just the symbol. Exception: if the line of sight runs along a hexside, the penalty is not applied unless the adjacent hex has exactly the same Terrain type.
1. Units at the same elevation
A hex containing an obstacle blocks the line of sight between units on the same level. Each hex on the map is considered to be at a single elevation level, that of the highest elevation in the hex. Any hex which contains an elevation higher than that of the two units OR a terrain element that can block LoS, blocks the LoS between them. On the other hand, if the hex in question is at the same elevation (without obstacles) or at a lower elevation, the LoS is valid. Specifically:
- obstacles don’t block the line of sight between hills if they are at a lower level.
- units don’t block the line of sight.
- walls and hedges: walls and hedges, located on hexsides, do not block the line of sight to the hex directly behind them. They do block Line of sight to more distant hexes, however.
2. Units at different elevations
A hex which contains an obstacle but which is lower than the elevations of both units doesn’t block the LoS between them. If this hex is higher than both units, the LoS is blocked. If this hex is higher than one of the units but lower than the other, the LoS is blocked to the hex directly behind the hex which contains the terrain feature terrain. However the LoS is valid to hexes beyond this ‘blind’ hex. The LoS between two units at different elevations is only blocked by a hex higher than both. A difference in elevation does not block LoS in itself, unless a crest or terrain feature is between the two units.
5. Formation Activation
Except for the Reaction, a unit cannot act unless the formation to which it belongs is activated. The term formation is used regardless of the size of the formation whatever size formation (squad, section, company or OoC unit). Important: the higher-echelon HQ (battalion or company), if present, can be activated in order to activate any attached units, but its activation DOES NOT allow the activation of lower level formations. Example: an active company leader cannot activate the three sections under his command, but only the units which are directly attached to him (normally heavy weapons units).
5.1 Activating a formation
In order to activate one of his formations, the player designates the formation that he wishes to activate and must roll, with 2d6, a total equal to or lower than the morale of the corresponding HQ (or of the OoC unit) adding any applicable modifiers. A formation can only be activated ONCE per turn but players can make multiple attempts to activate a formation that has not yet been activated (the only penalty being that failure means the initiative passes to the other player).
5.2 Effect of activation
If the activation check is passed, the chosen formation becomes activated. The units of this formation (included the HQ) can then each undertake one action in whatever order the player chooses. When the player has finished using these units, he indicates the end of this activation (the HQ piece is flipped or an ‘Activated’ marker is placed on the OoC unit) and a new Operations Segment takes place. If the player doesn’t succeed in activating his formation, the initiative passes: the enemy player becomes the active player. It is then up to him to attempt to activate a formation.
5.3 Activation Modifiers
The modifiers indicated on the Activation Table affect the morale of a HQ or of a OoC unit (modifiers are cumulative). See activation table page 38.
5.4 End of the Operations Phase
There are two ways for the Operations Phase to end:
- if the two players PASS successively, the Operations Phase automatically ends (note that the phase doesn’t end if the players fail in successive activation attempts, only if they actually pass);
- if one of the players has activated all of his formations, the other player can then attempt to activate all of his remaining formations. He rolls 2d6 as usual, but if the result is greater than or equal to 9 (or whatever number specified by the scenario) for an activation, then the Operations Phase automatically ends, regardless of how many formations remain unactivated.
6. Actions and Reactions
When a formation is activated, each unit of this formation can do one (and only one) action. The player determines and conducts the actions of the units, one after the other, in whatever order he wants. Exception: see Assault (12) and Fire Group (9.2).
6.1 Active unit actions
An active unit can do one (and only one) of the following actions:
- MOVE some or all of its Movement Points [OoC*];
- FIRE at full strength [OoC];
- MOVE half or less of its MPs and FIRE at a reduced strength (in whatever order desired) [OoC*];
- MOVE ONE HEX (tactical movement) and fire or not at a reduced strength (in whatever order desired) [OoC*];
- MOVE half or less of its MPs and PLACE SMOKE (in whatever order desired) [*];
- MOVE half or less of its MPs and make an ASSAULT [*];
- GO INTO BATTERY and fire (for heavy weapon with crew);
- LIMBER and move up to half of his MPs (for a heavy weapon with crew);
- construct an ENTRENCHment [*];
- COMMAND action (all types of HQ only, see 6.2).
- COORDINATE mortar fire (higher-echelon HQ only, see 10.7 [sic: the fire coordination rule is printed as 10.9]).
*: these actions are forbidden to heavy weapons in battery. Crews of a limbered heavy weapon act as though they were infantry. OoC: These actions are the only ones permitted to an uncommanded unit. A neutralized active unit cannot take any action (see 11.2). A Move marker is placed on a active unit that makes ANY move action.
6.2 Offensive Fire
An active unit can always make an automatic Offensive First Fire. If the result of the colored die is less than or equal to the Rate of Fire indicated on the counter, it can IMMEDIATELY fire again. If the player decides not to fire, the unit’s offensive fires are over. As long as the colored die roll is less than or equal to the Rate of Fire the unit can continue to fire. If the colored die roll is higher than the Rate of Fire, the unit’s Offensive Fire is finished. Rate of Fire modifiers (see 6.5) apply to the colored die roll, and only for determining whether the unit can continue to fire.
6.3 Command Action
In addition to the above actions, an unpinned and unneutralized HQ can choose as its action:
- to give another activation to a unit of its formation (or any formation for the higher-echelon HQ). The ‘reactivated’ unit must be stacked with or adjacent to the HQ.
- or remove a PINNED marker from a unit of the same formation, which is stacked with or adjacent to the HQ, without the unit losing a step (see 11.1). The unit can be activated immediately if it has not already been.
6.4 Reactions of the passive units
During an enemy Operations Segment, a passive unit could undertake one of the following reactions: Defensive Fire or Withdrawal before Assault.
6.5 Defensive Fire
A passive unit can Defensive Fire at an activated enemy unit. Every passive unit can automatically make a first Defensive Fire. It then receives a ‘TD= test’ marker.
Rate of Fire check
A unit with a TD marker can attempt additional defensive fire. Each time, it tests its defensive Rate of Fire with 2d6. If the dice roll is less than or equal to the Rate of Fire value, the unit fires (and can attempt subsequent Defensive Fire when the player wishes); If the Dice Roll is higher than the Rate of Fire value, the unit does not fire and the marker is flipped to ‘Pas de TD’. The unit can not then make any more Defensive Fire this turn. Rate of Fire modifiers apply (+1 for pinned or hesitant).
Defensive Fire Conditions:
- a passive player’s unit can make a Defensive Fire on a moving enemy unit.
- a passive player’s unit can make a Defensive Fire on an unit enemy that has just fired (this type of Defensive Fire is limited to units which do not have Movement markers).
- an inactive unit of the ACTIVE player can make a Defensive Fire on an enemy unit that has just fired (this type of defensive fire is limited to units which do not have Movement markers).
Defensive Fire is limited to direct fire (including mortars). The target must be in the LoF of the firing unit (or of the observer for mortars, see 10.6 [sic: the mortar observer rule is printed as 10.8]).
-
Against a MOVING unit, the passive player halts the movement of an active unit as it enters a hex and announces his intention to fire. He can then fire all the units that he wishes (after passing any Rate of Fire checks). Once all fire is resolved, the active player can continue movement. A passive unit can fire ONLY ONCE PER HEX against the same unit. In each new hex an active unit enters, the passive player can attempt Defensive Fire so long as a unit is able to. ONLY THE MOVING UNIT IN THE HEX IS ATTACKED (the other units present are not affected by Defensive Fire provoked by movement). A unit which has a Move marker and that fires Defensive Fire against a moving enemy unit has its fire strength halved.
-
Against a FIRING active unit, after that fire is resolved, the passive player indicates his intention to fire. He can then fire any units WITHOUT a Movement marker (after any required Rate of Fire checks) against this unit. A passive unit may only fire ONCE for each fire of the target unit, (but if that target fires again, then passive units may again attempt to fire, and so on). With each Defensive Fire of a PASSIVE unit of the PASSIVE player, the ACTIVE player can attempt defensive fire with one of his INACTIVE units (that doesn’t have a Move marker), this fire can in turn trigger Defensive Fire from a unit of the passive player, and so on. ONLY THE UNIT WHICH FIRED SUFFERS THE EFFECTS OF DEFENSIVE FIRE (other units in the hex are not affected, except in case of a fire group).
Important: Defensive Fire doesn’t prevent a unit which has not yet been activated from taking an action when its formation is activated. Conversely, a unit that has already been activated can still use defensive fire without modifiers (except for the movement penalty).
6.6 Withdraw before assault
A passive unit that is subject to assault (see 12) can attempt to withdraw in order to avoid the combat. A unit can attempt to retreat just before an active enemy unit enters its hexagon. The passive player interrupts the movement of the active unit and withdraws his unit to an adjacent hex of his choice which is not occupied by an enemy unit. A unit can withdraw ONLY ONCE per Action Segment. This withdrawal movement is considered tactical movement and the unit receives a Move marker. This unit is considered to have been ACTIVATED for this turn and thus cannot be activated again this turn. Neutralized and pinned units cannot withdraw. The unit making the assault must enter the vacated hex, and can continue its movement if it still has MPs, and can even attempt a new assault on the same or another unit.
6.7 Malfunction and Ammunition
When they fire, heavy weapons run a risk of malfunction or ammunition depletion. If, when the unit fires, the unmodified dice roll is equal to N (see below), the weapon is either broken, or out of ammo:
- heavy machine guns malfunction on n= 11 or 12, but can be repaired. At the end of each turn, in the Administrative Phase, the player makes a dice roll for each malfunctioned weapon: on a result of 8 or minus, the weapon is again functioning. Otherwise, a new attempt can be made the following turn but the weapon cannot fire. A broken weapon remains unlimbered and must be limbered in order to move.
- mortars and recoilless rifles are out of ammunition on n= 12 and can not fire for the remainder of the scenario. The counter is placed on its crew side, who can then act normally.
7. Movement
7.1 Introduction
An unit spends movement points (MPs) in order to move from hex to hex, according to the terrain. Infantry and limbered heavy weapons have 4 MPs each turn. A unit can spend all or part of its MPs during movement. The MPs cannot be saved from turn to turn. Regardless of the terrain cost, a unit can always move one hex. The Terrain Effects Chart (TEC) gives the MP cost for each unit type. An unit which moves receives a Move marker.
7.2 Stacking
There can not be more than one combat section or equivalent per hex and two vehicles, but this stacking limitation does not apply while units are moving. Unit size is indicated in ‘section equivalents’ for each scenario and each nationality. HQ and supporting weapons (mortars, medium and heavy machine guns, recoilless rifles, etc.) DON NOT COUNT against stacking limits. When direct or indirect antipersonnel fire is aimed at a stack, ALL the units in the stack are affected (except for Defensive Fire).
7.3 Tactical Movement
An infantry unit that only moves one hex, is using tactical movement; it will be less vulnerable to fire combat and less easily spotted. The player must announce before it begins its movement if he is using tactical movement, and the unit can then advance only one hex, regardless of fire results against it. A Move marker is placed on the unit.
7.4 Road Movement
An INFANTRY unit that starts its move on a road or track and moves solely on roads or tracks during its movement gets a bonus of +2 MP.
8. Concealed Units
Concealed units and dummies allows the simulation of uncertainty on the location and exact nature of enemy units. ‘Concealed’ markers and dummy units are identical. All units begin a scenario concealed, as do any units that enter as reinforcements. A Concealed marker (and one only) is placed on every counter or stack. During the game, when a pile of concealed units splits up every unit receives a Concealed marker; in the same way, when some concealed units stack, one Concealed marker remains, the others are removed. Unsighted units or unrevealed dummies are less vulnerable to fire (see Fire Table). Further, stacks covered by a Concealed marker may not be examined by the opposing player.
Dummies
The players also receive a fixed number of dummies (specified by the scenario). During set up, these dummy counters may be used to make stacks containing nothing but dummies or combined with real units. A stack of dummies does not get an additional Concealed marker at the time of placement. Revealed dummies are removed from the game, no additional dummies can be created during the game. Dummies act as normal units until they are revealed: they can be activated and move.
Discovery of unit
A concealed unit or a dummy are REVEALED in the following way:
- it FIRES and is in a valid LOS of an enemy unit;
- it makes an assault in clear or light cover: the marker is removed BEFORE the assault;
- it makes an assault in medium or heavy cover or is assaulted. The Concealed marker is removed at the moment of the resolution of the assault, after the test of initiative;
- It is immobile or moves and is in the valid LOS of an enemy unit, within observation distance. This observation distance depends on the target and is indicated in the Observation Table (page 38). If a sighting Hindrance is present along the line of sight, the target is considered to be in light cover.
- It is fired upon with a result other than ‘no effect’ (the effect of the fire is resolved normally).
The Concealed marker is then removed from the counter. In a stack of units, only those which fall into the above categories are revealed.
Camouflage
When a revealed unit is once again out of observation distance from enemy units, the owning player can, at the end of the turn (in the Administrative Phase), replace a Concealed marker on that unit.
NOTE: In order to hide the location of a concealed HQ when its formation activates, the player may place an Activated marker on any unit of that formation.
9. Direct Fire
Direct fire requires a valid line of fire on the revealed target (see 4.1). The units that can fire direct fire are: armor, infantry units, antitank guns, machineguns, recoilless rifles (see particular case of mortars, 10.4). Direct fire is always against all targets in the target hex. Direct fire may be from active units or Defensive Fire of inactive units (of the active or passive player).
9.1 Direct Fire Procedure
The player designates the firing unit or units and the target, within direct fire range. The LOF is checked after this declaration: if it turns out to be blocked, the fire is still performed (for Rate of Fire and Malfunction, etc.) but without effect on the target. The fire is then resolved normally.
9.2 Fire groups
If they are part of the same activated formation, units stacked or adjacent may combine their fire on the same target, they are therefore all activated SIMULTANEOUSLY for the fire. Pinned units, those part of a hesitant formation or who have performed a MOVE + FIRE may not be part of a fire group. In Defensive Fire, the passive player can combine the fire of several stacked or adjacent units of the same formation, but every unit must make a Rate of Fire check individually. In a fire group made up of adjacent units, a unit that fails doesn’t prevent the other adjacent units from combining their fire (the group being adjacent at the moment the fire is declared is sufficient).
9.3 Fire Resolution
The procedure is as follows:
- Calculate the attack factor. The attack factor is modified (distance, state, etc) to obtain the final attack factor for each unit. For Fire Groups, add the modified strengths.
- Determine the result. The attacking player rolls 2d6 for every unit in the target hex. Each dice roll is altered by the table modifiers, and indexed with the attack factor on the Combat Results Table (p 38) to determine the final result (see 11).
The lowest column below the attack factor is used if the attack factor is not on the table. Example: a fire of strength 13 is resolved on the 12 column of the CRT.
10. Artillery
Fire by artillery or mortars, whether from offboard or on the map are INDIRECT fires with High Explosives or Smoke. All OFF-BOARD artillery fire is resolved at the start of the turn during the Artillery Phase.
10.1 Introduction
Indirect fire does not require a line of sight between the firer and the target, another friendly unit can have a LOS to direct the fire. Only OBSERVERS can direct artillery fire. Observers are either HQ units or OA (Observer-Artillery) counters. Planning artillery fire: during the Artillery Phase, the players SECRETLY note the hexagons to be fired at by each battery. During the following turn, each player places his markers on the target hexes and resolves the fire by the following procedure. The order of resolution is not important but all artillery fire is considered simultaneous.
10.2 Indirect Fire Procedure
The following procedure applies only to OFF-BOARD batteries. It thus does not apply to the fire of on-map mortars. In the Artillery Phase, both players place and resolve their artillery fire. In case of multiple fires on the same target, the artillery attack values are added (see example), after accuracy check of each fire.
Procedure: the entire procedure is applied for each requested fire.
- Without indicating the target hex, the player checks whether the artillery fire lands this turn (see 10.5). If the fire is delayed, the process halts.
- The player places in the target hex an Impact (or Smoke) marker corresponding to the caliber used (light, medium or heavy), and checks the LOS of the observer (this check can be made in secret, even if the observer is not concealed).
- The player checks for fire accuracy, applying the modifiers.
- The artillery marker is moved and the fire is resolved with the corresponding attack factor on the affected hexes, with a dice roll for every unit in each hex.
10.3 Fire Restrictions
In order to be able to request fire (that is to say secretly note the target hex) and the following turn place a resolution marker, a unit of capable directing this fire must have a LOS to this hex. Directing fire doesn’t count as an action. When he places the marker, the player verifies the LOS in order to calculate the accuracy modifiers. A LOS is not necessary in order to place the marker (it is only required in order to request fire) but a penalty applies to the accuracy. The same penalty applies if the observer was eliminated in the meantime but the fire is nevertheless resolved. The scenario special rules indicate what units in the order of battle can direct the fire of each battery (certain units can direct the fire of several batteries, some units one particular battery, etc.).
Fire Cancellation: the player could cancel the resolution of a fire, by not placing the marker (or by removing the waiting marker), if the observer is still on the map; he can also in the same phase choose another target hex for the following turn. However, he cannot delay the resolution of a fire.
10.4 Corrections and time limits for fire
After resolving their artillery fire, each player can note a new target hex for each battery. If the target hex remains the same, a favorable modifier applies to the fire accuracy.
Fire Delay
Artillery fire may be delayed. Before placing an artillery fire marker, the player rolls 2d6 and checks the Delay Table, in order to know if the artillery mission arrives this turn. If the mission is delayed, the fire is conducted again the following turn where the same procedure will be repeated (a favorable modifier applies for every delayed turn).
10.5 Artillery Effects
An artillery marker placed at beginning of the turn stays on the map for the entire turn. During the Operations Phase, a unit that MOVES into a hex affected by the artillery suffers an artillery attack (strength indicated by the diagram). A unit can suffer a fire in every hex moved through within the blast area. Only the MOVING unit is affected by artillery fire during the Operations Phase.
10.6 Firing Smoke
Designed to conceal movement, Smoke hinders the lines of sight and of fire (see 4). The fire procedure is the same as for high explosives, but if the firing check is passed, a Smoke-1 or Smoke-2 marker is placed in each hex affected by the bombardment. This Smoke marker has a value indicating its duration in turns (1 or 2), and is flipped or removed during the Administrative Phase. Smoke is considered to be the same height as the hex it is located in. Combat units place a Smoke marker of VALUE 1 in their own or an adjacent hex.
10.7 Effects on buildings
If the result on the CRT is at least a loss result (l or E):
- an off-board ARTILLERY fire of any type rubbles a wooden building and may set fire to it (see 15.3). Further, a Burning marker is placed in the hex on a result of 1-3 on 1d6;
- medium or heavy ARTILLERY rubbles stone buildings. Further, a Burning marker is placed in the hex on a result of 1-2 on 1d6.
Effects on a building have no additional effect on units in the hex.
10.8 On-map Mortars
The mortars on map do indirect fire (with observers) but their fire is resolved as direct fire. They can also fire Smoke at the target hex. A mortar fires when it is activated or as Defensive Fire. A mortar can fire on a hex when either it has a LOS, or when the HQ of its formation (or the higher-echelon HQ) has a LOS to the target hex. Mortar fire is resolved as regular fire, using the fire strength on the counter. Note, only the modifiers for INDIRECT FIRE apply. Mortars have a minimum range, they cannot fire closer than this range. A mortar can only form a fire group with other stacked or adjacent mortars. Remember: Hindrance hexes do not affect mortar fire but the LOS is blocked by more than five hexes of Hindrances.
10.9 Fire Coordination
During its activation the higher-echelon HQ can choose an action of coordinating mortar fire (or other weapons according to the scenario). When he is activated, this HQ can activate all (or only some) of the in-command mortars of in-command formations, to have them fire on one or more targets to which it has a valid LOS. This fire counts as an action for both the HQ and the mortars, and the mortars will not be able to fire when their own formations are activated. Similarly, an already-activated mortar cannot take part in this fire.
11. Combat Results
A direct or indirect fire attack affects all units in the hex, with a dice roll giving the result for EACH unit in the hex. There are five possible results:
- no effect (-);
- Pin Check (S, S1, S2): the unit must roll less than its morale (normal or modified: S2 indicates that 2 is added to the result of 2d6) and receives a Pinned marker if it fails;
- Neutralisation Check (N, N1, N2, N3): the unit must roll less than its morale (normal or modified: N1 indicates that one is added to a roll of 2d6) and receives a Neutralised marker if it fails;
- one step loss (1): the unit loses one combat step and it is automatically PINNED;
- eliminated (E): the unit is eliminated.
11.1 Pinned units
A pinned unit cannot move, and its fire strength is reduced. To remove a Pinned marker:
- a unit which receives a Pinned marker may remove it immediately or when it activates by suffering a step loss.
- all Pinned markers are removed at the end of the turn in the Administrative Phase.
11.2 Effects of Neutralization
A neutralized unit cannot move or fight. A neutralized unit who becomes neutralized a second time LOSES ONE STEP and remains neutralized. A Pinned result on a Neutralized unit has no effect.
- A neutralised unit can only remove its marker in the Administrative Phase, by rolling less than or equal to its morale minus 1 (M-1) with 2d6.
Modifiers: presence of a non-neutralised HQ not neutralised (of the same formation or of the higher echelon) in the hex: -2 to the dice; adjacent HQ: -1 to the dice. A HQ can only receive this modifier from a higher-level HQ.
12. Formation Morale
12.1 Hesitant Formation
After a certain number of combat steps lost by a formation (indicated by the scenario), the formation becomes hesitant. A corresponding marker is placed on the HQ of this formation during the administrative phase of the turn that this level of loss is reached. The units of this formation are considered hesitant and have their morale reduced by 1 (including for activation). Every step loss to a HQ counts as TWO STEPS of loss for this rule.
12.2 Demoralised Formation
After a certain number of combat steps lost by a formation (indicated by the scenario), it can become demoralized. The morale of this formation is checked during the Administrative Phase of the turn that this level of loss is reached. The player must roll, with 2d6, less than or equal to the modified morale (M-1) of the formation HQ.
- if the check is passed, the formation remains hesitant.
- if the check is failed, all units of that formation are considered eliminated and removed from the map.
The formation must check, using the same procedure, if it suffers additional losses in subsequent turns (one check per turn no matter how many losses). A formation that becomes hesitant and demoralised in the same turn checks with its morale - 1. Each scenario indicates the two values for hesitation and demoralisation of the formations.
13. Assault
An assault takes place when an unit or a stack of units (these units must be activated together and start their movement stacked) enter a hex occupied by an enemy unit (this is the only case where two opposing units can stack together) while doing an Assault action. The assaulting units must pay the MP cost to enter the hex. This assault is resolved immediately. A pinned, neutralized or hesitant unit cannot assault but can defend if attacked. A unit capable of performing Defensive Fire on the assaulting unit may do so, BEFORE in the case of normal movement, but only after in the case of tactical movement.
Assault Resolution
Each player rolls 1d6 for each of their units and adds the morale of the unit and any modifiers. The sum obtained by each unit indicates the order of combat, the unit with the highest sum goes first attacking the unit of its choice, and so on in decreasing order. Units with the same total conduct their assaults simultaneously. The choice of the target is made at the moment when a unit actually attacks. When a unit resolves its assault, the player rolls the dice, applies the modifiers and reads the result on the Assault Table. Troop quality (elite, veteran, etc.) is indicated by the scenario. The target unit can be unaffected, suffer one step loss or be eliminated. Once all the assaults are resolved, the defender has the option of withdrawing one or more of his surviving units. Each unit can freely stay or withdraw. A unit which withdraws is placed in a adjacent hex which is free of enemy units and automatically becomes Pinned. The attacking player can then do the same (also becoming Pinned). The units remaining in the hex must then resolve a new assault, repeating the procedure, and so on.
Assault example
A unit of French paratroops (elite, morale 8) assaults a hex of medium cover containing two VC units (line, morale 7). The two players roll for initiative: the French player rolls a die and adds 8, for a total of 11; the VC throws a die for each unit and totals 12 and 8. The order of resolution is: VC - Paratroops - VC. The first VC throws the dice and gets 6. That’s enough to cause a loss to the paratroopers (it would have been necessary to make 4 or less to eliminate them). The French choose of course to attack the other VC and he rolls the dice, with +1 (loss) and +1 (medium cover). He gets 4, direct elimination! The combat ends because the VC player decides to withdraw his surviving unit. Victory!
14. Air Support
14.1 Air Support Request
The number and the quality of the aerial missions are given by scenarios. The request procedure is exactly the same as that for the artillery, except that the secretly-chosen target hex doesn’t need to be in the LOS of any unit. Any mission delay is determined by the Delay Table.
14.2 Mission Resolution
When the air support arrives, it is placed on the target hex. The accuracy table is consulted, rolling 2d6. The marker is then placed in the final destination hex, in the direction chosen by the player. The mission altitude may be either imposed, or up to the player, depending on the aircraft type. The altitude choice is made before the accuracy determination. If the enemy player possesses an anti-aircraft weapon capable of firing on the aircraft (that possesses a LOS and is within range), he can attempt to interrupt the mission. The LOS against an aircraft at middle or high altitude is considered as being versus a hex of higher elevation than all of the hexes on the map (the blind-hex rule applies however). An aircraft at low altitude is considered like level 3. In order to resolve his AA fire, the player rolls 2d6, applies the modifiers and must get a result less than or equal to the FIRE VALUE of the firing unit. If the fire succeeds, the air support marker is removed and the mission ends. An anti-aircraft unit can only fire once per Air Support Phase, which doesn’t prevent the unit from being activated normally in the Operations Phase.
14.3 Aerial Missions
Generally, an aerial mission affects the target hex in which the marker is placed and the two hexes immediately behind for bombing and the two hexes in front for ground support. The marker must therefore be placed in a particular direction (see diagram). For this first module on Indochina, there are three types of air missions:
- bombing: the target hexes and the two hexes immediately around it are attacked as per INDIRECT fire (see table).
- napalm bombing: the target hexes and the two hexes immediately around are attacked as per indirect fire.
- ground support: only the target hexes are attacked as DIRECT fire, with the value indicated on the marker.
Bombing can be done from medium or high altitude, ground support can be done from low or medium altitude, at the player’s choice and announced at the beginning of the mission.
14.4 Terrain Effects
Effects on buildings are the same as for artillery (bombardment only, see 10.7). A napalm bombardment also ignites the three target hexes regardless of their nature after resolution of the bombing (a Burning marker is placed in these hexes, see 15.3) and Smoke markers are placed in the adjacent hexes.
15. Special Rules
15.1 Parachute drops
Air drops are resolved at the start of the Operations phase, before the Initiative Phase by the owning player. The owning player is automatically the FIRST player to become active in the turn that the parachute drop takes place. The Drop Zone marker is placed in the hex indicated or chosen (according to the scenario) and in a direction chosen by the player. He rolls 1d6 in order to determine which direction the marker moves, and another d6 for the distance of movement, affected by the weather (see page 38). The distance die is then rerolled using the same procedure for each unit dropped, to determine their scatter on the ground from the DZ marker. The units are dropped in the same direction as the marker, in front of it (see example). If a unit lands:
- in an enemy-occupied hex, there is an assault. Paratroop survivors are Pinned;
- in a jungle, steep hill, building or Burning hex, the player rolls 1d6. On a result of 1 or 2, the unit suffers 1 step loss (a leader is thus killed), 3 to 6 it is Pinned.
- off map: it can enter the map ON THE FOLLOWING TURN in the hex closest to its point of landing, by spending all its MP.
15.2 Entrenchments
Entrenchments represent all the possible efforts to improve individual protection (foxholes, machine gun nests, etc.). They provide a favourable defense modifier (against fire and assault) and require two turns to build. The marker has an ‘Under Construction’ side, and a ‘Constructed’ side. If the unit which is building the entrenchment leaves the hex before construction is finished, the marker is removed. Once constructed, all units can benefit from entrenchment. The entrenchments provide medium cover. Also, prepared positions (bunkers, trenches, etc.) are available in certain scenarios. They are placed according to scenario instructions. Prepared positions can never be built during the game. They provide heavy cover.
15.3 Burning
Fires can erupt following artillery fire on buildings or a napalm bombardment: a Burning marker is placed in the hex. A Burning hex acts like Smoke for lines of sight. Units are forbidden to enter a Burning hex. A unit situated in a Burning hex becomes Pinned. At the beginning of the Administrative Phase, it is placed in an adjacent hex free of enemy units, at the player’s choice (even if it is neutralized), respecting stacking limits. If this movement is impossible, it is eliminated.
Errata (as printed in the translation)
- Ground support attacks with a value of 12 for the French IndoChina scenarios
- There are no ‘Malfunctioned Weapon’ markers - make some
- There are no Artillery Observers - HQ act as observers in the scenarios
- All heavy-weapon infantry units have 4 Movement points.
Tables
Scatter Table
1d6 = direction (1=North, 2=NE, 3=SE, 4=S, 5=SW, 6=NW) 1d6 = distance (0-2 = target hex, 3-4 = one hex, 5-6 = two hexes, 7 = 3 hexes)
Distance modifiers:
- Second fire without correction: -1
- Third fire without correction: -2
Distance from the Observer:
- less than 10 hexes: -1
- more than 20 hexes: +1
- more than 30 hexes: +2
- No Observer: +3
Air modifiers:
- Low altitude: -1
- Medium altitude: 0
- High altitude: +2
Artillery and Bombing Table
Type: Range from marker / Strength (Smoke for Smoke Missions and Napalm):
- Light: 0/10(2); 1/4(1)
- Medium: 0/12(2); 1/7(2); 2/4(1)
- Heavy: 0/16(2); 1/10(2); 2/6(2); 3/4(1)
- Ground Support: 0/12
- Bombs: 0/14; 1/8; 2/5
- Napalm: 0/16 (Flame); 1/9(2); 2/4(1)
Terrain Effects on Indirect Fire:
- Medium Cover: +1
- Heavy Cover: +2
- Concealed Unit: +1 (mortars only)
No other terrain modifiers apply.
Artillery and Air Delay
Artillery: Base 7
- French: -1
- Each additional turn: -1
Air: Base 6
- Bad Weather: +1
- Each additional turn: -1
- Ground Support: -1
Anti-Aircraft Fire
Type (12.7 mm):
- Low: +1
- Medium: -
- High: Impossible
Aides
Die roll / value:
- 0 / +1
- 1 / 0
- 2 / 0
- 3 / -1
- 4 / -1
- 5 / -1
- 6 / -2
- 7 / -2
Die modifiers:
- +1 Elite
- -1 Green
Spotting (Day / other)
| Infantry Move Status | Clear | Light Cover | Medium Cover | Heavy Cover |
|---|---|---|---|---|
| Immobile | 10/5 | 2/0 | 0/0 | 0/0 |
| Tactical | 12/6 | 3/1 | 1/0 | 1/0 |
| Moving | 20/10 | 8/4 | 3/1 | 2/1 |
If a Hindrance is between the observer and the concealed unit, it is considered to be in Light cover.
Fire Modifiers
- Firer: attack strength
- Distance: against adjacent hex: x2; greater than normal range but within twice normal range: x0.5
- Move and Fire: x0.5
- Pinned Firer: x0.5
- Firer in Smoke: x0.5
- Target: Dice
- Target in tactical movement: -1
- Target in movement: -2
- Target concealed: +2
- Target in Smoke: +1
- Terrain: Dice
- Light Cover: +1
- Rice Paddy, Brush (per hex traversed): +1
- Medium Cover: +2
- Heavy Cover: +3
- Rate of Fire Check: Pinned or Hesitant Unit (cumulative): +1
Parachute Drop
DZ Marker
- Direction = 1d6
- Distance:
- light wind: 1d6-2 (results less than 0 = 0)
- medium wind: 1d6
- strong wind: 1d6+2
Unit Placement: 1d6 in the drop direction for each unit.
Assault Table
Initiative Check Modifiers (cumulative):
- Pinned Unit: -1
- Neutralised Unit: -2
- Hesitant Unit: -1
- Concealed Unit: +2
- Paradropping Unit: -2
Assault Combat Results (roll less than the indicated number with 2d6)
Assaulting unit quality: roll to cause a step loss / roll to eliminate
- Elite: 9/6
- Veteran: 8/5
- Line: 7/4
- Green: 6/3
Dice Roll modifiers (cumulative):
- Crew or HQ: +2
- Pinned: +1
- Hesitant: +1
- Neutralised: +3
- Loss: +1
- Lower Elevation: +1
- Higher Elevation: -1
- Defender in Medium Cover: +1
- Defender in Heavy Cover: +2
- Against a Parachuting unit: -1
- Target has Move Marker: -1
Unit/Formation Activation Modifiers (cumulative)
- HQ out of Command: M-1
- Hesitant Formation: M-1
- HQ Pinned: M-1
- HQ Neutralised: M-2
- HQ Eliminated: M-3
- Unit out of Command: M-1
- If Pinned: M-1
- If Hesitant: M-1
Terrain Effects on Movement
Terrain Type: Movement Cost
- Clear: 1
- Road/Trail: 1 (bonus of 2 MP if move is entirely on roads or trails)
- Grove: 1
- Buildings: 1
- Rice Paddy: 1.5
- Brush: 1.5
- Jungle/Forest: 2
- Gentle Hills: +1
- Steep Slope: +2
- Stream: 3
Modifiers by Unit Type (Att./Def.)
Printed as a matrix with the attacker type in each row and the defender type in each column. The Att./Def. table in the source file gives the Ch, Ha, Ar and Ab rows only; the At row is absent from the translation and is not reconstructed here.
| Att./Def. | Ch | Ha | Ar | Ab | At |
|---|---|---|---|---|---|
| Ch | 0 | +1 | +2 | +2 | +2 |
| Ha | 0 | 0 | +1 | +2 | +2 |
| Ar | -1 | -1 | 0 | +1 | +2 |
| Ab | -2 | -2 | -1 | 0 | +1 |
| At |
Scenarios
Rail Battle in Annam
Tam Quan, 19-22 July, 1949
Operation BETA, southern Annam. Various units take part in an amphibious operation whose objective is the destruction of the railroad station at Tam Quan. Despite a Viet Minh counterattack, after the parachute drop of a ton of explosives more than six locomotives and twenty railroad cars are destroyed, a serious blow to Viet Minh logistics in Annam.
Viet Minh - set up first, troops shown plus 6 dummies Battalion of Viet Minh recruits
- Unit quality: 1st company, green; 2nd company and heavy weapons section: line
- Unit size: section
- Command Range: 3 hexes
- Set up: 1st company is placed in Tam Quan (villages 1 and 2); the heavy weapons section is placed IN BATTERY in An-Son (village A); 2nd company enters from the west edge of board B on turn 4.
French Union troops - set up second, troops shown plus 6 dummies 3rd Combat Group of the 2nd BCCP, Navy commandoes, and Foreign Legion.
- Unit Quality: elite
- Unit Size: half-section
- Command Range: 3 hexes
- Air Support: 2 missions of Ground Support
- Set up: Enter the east edge of board A, or along the railroad on the north edge of board A.
Special Rules
- RED numbers indicate the hesitation and demoralisation levels of each formation.
- Only mortars may place Smoke.
- Only hexrows Axx01 through Axx07 are playable.
- Game Length: 10 turns
- Initiative: the French have the initiative for the first turn, on subsequent turns the French have a +1 die-roll bonus for initiative.
- Weather: Good
- Visibility: Day
Terrain:
- place a railroad from A101 to A2301;
- village 1: 1a in A1102, 1b in A1302
- village 2: 2a in B1213, 2b in B1214
- hills are gentle
Victory Conditions: The French player wins by completely capturing Tam Quan (villages 1 and 2, no more Viet Minh in either) and holding it until the end of the scenario. Otherwise the Viet Minh win.
A Blow for Nothing
Dong Khe, 27-28 May 1950
The Viet Minh capture the fort at Dong Khe on the RC4, but the 3rd BCCP is immediately parachuted in to recapture it and link up with the 10th Morrocan Tabors arriving from That Khe. In less than an hour the Viet Minh are swept away by the paratroopers who retake both the citadel and the village. Unfortunately the Viet Minh will again capture the position in September to seal the fate of the Lepage and Charton columns during the RC-4 disaster.
French Union - Elements of the 3rd BCCP
- Unit Quality: elite
- Unit Size: 1/2 section
- Command Range: 3 hexes
- Higher Echelon: 10 hexes
- Air Support: 3 missions of ground support
- Setup: GC1 and GC2 are parachuted on turn 1, by formations. The PC Ops (Operations Headquarters, ie Higher Echelon) is parachuted on turn 2.
Viet Minh - set up first, units shown plus 5 dummies - Elements of the 308th brigade
- Unit Quality: line
- Unit Size: section
- Command Range: 3 hexes
- Higher Echelon: 10 hexes
- Support: TWO missions of light artillery directed by the Batallion HQ or the heavy Weapons HQ.
- Set up: The 1st company units are placed in A0412, A1010 and within a radius of 5 hexes from A1011. The heavy weapons company is placed in village 1. The 2nd company enters on turn 3 through hex A1001 with the batallion HQ.
Special Rules:
- Only rows Axx09 to Axx15, A06xx to A23xx et B01xx to B18xx are playable.
- Only mortars and artillery can place Smoke.
- Game Length: 10 turns
- Initiative: on the first and second turns, the French have the initiative; on subsequent turns the French have a +1 die roll modifier.
- Weather: Good, Light Wind
- Visibility: Day
Terrain:
- village 1: 1a in A1208, 1b in A1008
- prepared position in A1010
- entrenchment in A0412
- steep hills
Victory Conditions: The French player wins if he captures the Dong Khe citadel (no Viet Minh units in the prepared position in A1010), and the ‘Montmartre’ position (the entrenchment in A0412) and controls at least two hexes of the village. Otherwise the Viet Minh player wins.
The Long March
Tu Le, 16 October 1952
Bigeard’s 6th BPC is parachuted over Tu Le, to gather the garrisons of various posts in Thai country which are retreating before the irresistible Viet Minh drive on Laos. Barely escaping encirclement, the 6th BPC crosses 50 miles of jungle with the Viets on their heels, before rejoining the French forces waiting for it on the Black River.
French Union - set up first, the Garrison units are not concealed - Elements of the 6th BPC and the garrison of Gia Hoi
- Unit Quality: elite for the paras, line for the Thais
- Unit Size: 1/2 section
- Command range: 3 hexes
- Higher Echelon: 15 hexes
- Support: TWO bombing missions
- Set up: The HQ and the garrison are placed in Tu Le, the other units are placed on Map B outside the Viet Minh entry zone.
Viet Minh - Elements of the 308th Division
- Unit Quality: veteran
- Unit Size: 1 section
- Command Range: 3 hexes
- Higher Echelon: 10 hexes
- Setup: Enter through the north and east edges of map B between hexes 0107 and 1104, one company per turn. The HQ can enter with any company. The reinforcements (renforts) enter on turn (5+1d6) through the north or south edge of Map A. At the start of the game the player makes a secret die roll for when they will enter.
Special Rules
- Only rows A06xx to A23xx are playable.
- Civilians have 4 MPs.
- Only mortars can place Smoke.
- The two Medium Machineguns of the French heavy weapons section can be divided among the other formations of the company. If eliminated they still count as losses for the heavy weapons section.
- Game Length: 15 Turns
- Initiative: on the first turn the Viet Minh have the initiative, roll normally on subsequent turns
- Weather: Good
- Visibility: NIGHT for the first three turns, Day for the rest of the scenario
- Terrain:
- Hill 2: 2a in B1411, 2b in B2105, 2c in B1914
- Steep Hills
Victory Conditions: The French player wins by exiting through hex A0608 after turn 7, without losing more than 10 combat steps. Eliminated Civilians each count as 3 combat steps. Otherwise the Viet Minh player wins.
In the Valley of the Viets!
Khau Vac, 6 October 1951
Parachuted into the rear of the Viet Minh who are attacking the post at Nghia Lo in force, the 2nd BEP and the 8th BPC are tasked with harassing the Viet Minh communications. While the bo-dois are continuously attacked by aircraft in front of the post, the paras violently engage their reinforcing units, managing to break the morale of the Viet Minh, who retreat across the Red River on October 15.
French Union - set up first, troops show plus six dummies - Elements of one company of the 2nd BEP (Foreign Legion Parachute Battalion)
- Unit Quality: elite
- Unit Size: 1/2 section
- Command Range: 3
- Setup: anywhere between rows B05xx and B19xx except in village A.
Viet Minh - Elements of Regiment 209
- Unit Quality: Line
- Unit Size: 1 section
- Command Range: 3
- Setup: Enter through hex 0107
Special Rules
- Only mortars can place Smoke.
- Game Length: 10 Turns
- Initiative: Viet Minh on the first turn, French have a +1 modifier on subsequent turns
- Weather: Good
- Visibility: Day
- Terrain:
- Hill 1: 1a in B0312, 1b in B1011, 1c in B0714
- Hill 2: 2a in B1411, 2b in B2105, 2c in B1914
- steep hills
Victory Conditions: The Viet Minh player wins if he exits 10 combat steps through hex B2303 before the end of the scenario. Otherwise the French win.