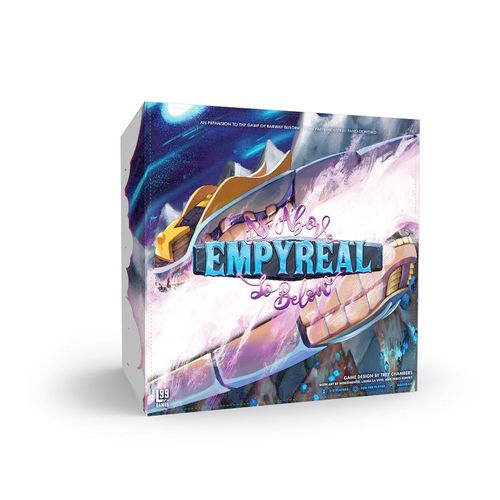
Empyreal: As Above, So Below
Empyreal: As Above, So Below Rulebook
Table of Contents
Table of Contents
Components
- 2 Company Folios
- 2 Terrain Boards
- 8 Metro Tiles
- 70 Train Car Minis (35 each)
- 10 Captain Placards
- 24 Spellcars Tiles
- 56 Automata Cards
- 8 Award Tiles
- 17 Specialist Tiles
- 10 Wasteland Tiles
- 2 Conductor Pawns (1 each)
- 8 Advisor Tokens
- 6 Demand Tiles
- 20 Mana Crystals
7-8 Player Setup
Following the steps on page 5 of the Empyreal: Spells & Steam rulebook, use the same setup as a standard game.
To build the map (step 1), assemble the terrain boards according to the configurations shown below. When selecting terrain boards, make sure that you have a total of twelve Cities and each color City is represented twice.
The printed board configuration diagrams are not reproduced here; see page 3 of the rulebook.
- 7 players: Use five A or B boards and two C boards.
- 8 players: Use four A or B boards and four C boards.
Place Goods (step 2) as normal, then Demand Tiles (step 3). Each City gets only 1 Demand Tile of each denomination. Follow steps 4-8 as written.
Awards
If you choose to play with Awards, after setting up the Specialist Market (step 5), shuffle the Award tiles and deal three of them face-up near the map. Return the other tiles to the box. See page 11 for a list of new Awards.
Metros
Metros add a 4-hex City to the center of the map, providing a new destination with special delivery conditions and a unique reward for successful deliveries!
Metro Setup
Following the steps on page 5 of the Empyreal: Spells & Steam rulebook, use the same setup as a standard game. Do not use Metros in 7- or 8-player games.
While building the map (step 1), choose a Metro and place it in the center of the map, as shown below. If the Metro is next to a City, move it away from the City one space at a time until that is no longer the case.
The printed layout diagrams for 2-3, 4, 5, and 6 players are not reproduced here; see page 4 of the rulebook.
Once the map is built, check the reference for the selected Metro's rules, and then place Goods (step 2) and Demand Tiles (step 3), Spellcars (step 4), and Specialists (step 5) accordingly.
You may need to move a Demand Tile from each City to the Metro in order to meet the Metro's Demand requirements if there are none left in the supply.
It may be advisable to play the Epic variant with Metros so that you have more opportunity to see your rewards in action!
Metro Gameplay
Gameplay remains largely unchanged while playing with Metros. For the purposes of abilities, Metros are considered Cities, but Cities are not considered Metros. Players may look through the Gesselheimian Spellcar, Willati Spellcar, or Argent Advisor piles at any point during the game.
Deliver to Metros
Metros are large cities with a ton of demand, so you may Deliver Goods of any color to any Metro (one color per delivery). This means you may not always claim a Demand Tile when you deliver—only take a Demand Tile if you meet the demand for the color matching the available tile(s) on the Metro.
Metro Transfer
Though they are much larger, a Metro Transfer costs the same as a City Transfer. Pay 3 mana to Build Track on any side of a Metro.
Metro Reference
Ahemusei
Place one Triple Demand Tile of each color into Ahemusei.
If you Deliver to Ahemusei and claim one of its Demand Tiles, you may Gain Mana. This is in addition to your Company Upgrade.
Druid's Point
Place one Triple Demand Tile of each color into Druid's Point.
If you Deliver to Druid's Point and claim one of its Demand Tiles, you may Build Track anywhere on the map. This is in addition to your Company Upgrade.
Galston House
At the end of the game, each player gains 2VP for every City connected to Galston House by an unbroken chain of their Company train cars.
Rubara
Place one Triple Demand Tile of each color into Rubara. Place the nine Gesselheimian Spellcars near the board. Do not shuffle them in to the Market.
If you Deliver to Rubara and claim one of its Demand Tiles, you may take any Gesselheimian Spellcar. This is in addition to your Company Upgrade.
Argent University
Place one Quadruple Demand Tile of each color into Argent University. Place the eight Argent Advisors near the board. Do not shuffle them in to the Market.
If you Deliver to Argent University and claim one of its Demand Tiles, you may take any Argent Advisor and Refresh your Captain and Engineer instead of your Company Upgrade. You can only have one Advisor. (See page 11 for a list of Advisors and their abilities.)
Empyreal City
Place one Quadruple Demand Tile of each color into Empyreal City.
If you Deliver to Empyreal City and claim one of its Demand Tiles, you may Gain Specialist or Refresh Captain or Engineer. This is in addition to your Company Upgrade.
Kingspeace
Place one Double Demand Tile of each color into Kingspeace.
If you Deliver to Kingspeace and claim one of its Demand Tiles, you may Gain Spellcar. This is in addition to your Company Upgrade.
Willat City
Place one Double Demand Tile of each color into Willat City. Place the nine Willati Spellcars near the board. Do not shuffle them in to the Market.
If you Deliver to Willat City and claim one of its Demand Tiles, you may take any Willati Spellcar of its color (or one not associated with a color) in addition to the Demand Tile. This is in addition to your Company Upgrade.
Metro Spellcar Reference
Do not add these Spellcars to the Spellcar Market.
Gesselheimian Spellcars
- Gesselheim Builders (Common): Build Track on each of the terrain types shown in an order of your choosing. (These have an inherent cost of 3 mana.)
Willati Spellcars
- Willat Movers (Common): Move one of your train cars from the terrain type shown to another hex of the same type anywhere on the map. (These have an inherent cost of 1 mana.)
- Sludge Slinger (Unique): Place Wasteland, then Build Track on that Wasteland. (This has an inherent cost of 1 mana.)
- Transmogrifier (Unique): Remove an opponent's train car from a Network-Adjacent hex and return it to their supply. Place one of your own train cars on that hex. (This has an additional cost of 1 mana.)
Solo Mode
Solo Setup
Following the steps on page 5 of the Empyreal: Spells & Steam rulebook, use the same setup as a standard 2-player game. Do not use awards when playing with the Automata.
Choose a Company to play against and take its five Company cards as the Automata's starting deck. The 16 generic cards are the upgrade deck.
If there is ever ambiguity for the Automata, you decide what action it takes.
The player will take the first turn in the game, which means the Automata will place their Headquarters first. The Automata will place two of their train cars on the map—the first on a hex matching the Home Terrain (shown on their folio), as close to the center of the map as possible and as close to a city as possible. The second is placed on an adjacent hex of any type except City or Wasteland.
The player places their Headquarters, and then the game begins!
Solo Gameplay
On the Automata's turn, draw a card from the Automata deck and resolve its effect(s) to the best of its ability. When there is one card left in the Automata deck, it gains a card from the upgrade deck. Shuffle this card and all discarded cards into the Automata deck, then resume play (drawing and resolving a card if it was the Automata's turn).
Player Specialists
If you draw a Specialist that deals with Awards or copies abilities from another player, discard and replace it. Do not copy an Automata card.
Automata Actions
Build Track
When resolving Build Track effects, the Automata goes through the following list of priorities:
- Build towards the nearest City not yet connect to their Network, if possible.
- If it can't build towards a City not in its network, it will build on a legal hex that contains a Good. If it can't build on any hexes that contain a Good, it will build towards the nearest Good. In either case, when given multiple options it will prioritize options further away from the player's network.
- If it can't possibly Build Track with its drawn card, then it does not build. It will still resolve any other effects on the card. (This may happen several times in your play. It's normal!)
Transfer
The Automata will never Transfer unless its card specifically allows it to. When it can Transfer, it still follows the above Build Track priorities.
Delivery
The Automata will always Deliver the largest number of Goods possible when a Delivery card is drawn. It takes and scores the Goods and Demand Tiles, just like a player. If there are different colors tied for largest possible delivery, use the priority listed on its Delivery card, from left to right.
Move Goods
When moving Goods, the Automata will first try to move Goods that are in the player's Network, but not in its own, into a hex in which it is the sole occupant. If it cannot, it will move a Good from a hex it shares with the player into a hex in which it is the sole occupant. (For both of these, it will prioritize Goods that the player has the most opportunity to Deliver.)
If it can't make either of these moves, it will move a good that is:
- Of a color matching a City to which it's connected, and
- Closest to the player's Network.
Place Wasteland
The Automata must always Place Wasteland in a Network-Adjacent hex. It will never place a Wasteland on a hex with one of its own trains or in a direction that will impede its progress towards the nearest unconnected City.
With those two things in mind, the Automata will first try to Place Wasteland on a hex in the player's Network that contains a Good. If it cannot, it will place it in a hex that contains a Good closest to the player's Network. (Remember, if there is ambiguity, you decide between the possible choices!)
Automata Card Reference
Automata cards use the same iconography you'll find in the rest of Empyreal. Here are a few special cases to look out for:
- Delivery: Resolve the effect shown, then Deliver. Always attempt to Deliver the largest number of Goods. If there is a tie, refer to the priority listed on the bottom of the card. Deliver the leftmost Good of those that are tied.
- Exhaust Captain: Build Track on the terrain type shown, then Exhaust a player's Captain, turning it face down. In a free-for-all game, Exhaust each player's Captain. In a co-op game, Exhaust only the Captain of the player directly to the Automata's left.
- Exhaust Mana: Resolve the effect shown, then Exhaust one of the player's mana, moving it off the folio. In a free-for-all game, Exhaust mana from each player. In a co-op game, Exhaust mana only from the player directly to the Automata's left.
- Gain Upgrade: Build Track on any terrain (except Wasteland) and gain a card from the upgrade deck. Shuffle that card into the Automata deck. Do not Shuffle in the discarded cards yet. If there are no cards left in the upgrade deck, ignore the Gain Upgrade icon.
- Transfer: Build Track on each of the terrain types shown. Perform one Wasteland, City, or Competitor Transfer for one of these builds.
Adjusting Difficulty
Think you can take on the most cutthroat business competition? Give the Automata a starting advantage, or try a more challenging Company!
- Hard Mode: The Automata gets to place three train cars during setup instead of two.
- Expert Mode: The Automata gets to place four train cars during setup instead of two.
Automata Difficulty Rating (Easiest to Hardest)
- Kerigan Transcontinental
- Golden Sands Company
- Afterworld Express
- King's Line
- Gesselheim Imperial
- Caterpillar Conveyance Consortium
- Underlands Dispatch
- Starchaser Rails
Multiplayer and Co-op
You can use the Automata to add a player to any multiplayer free-for-all game or fill a space in a team game—as a teammate or opponent. You can also team up with a friend to face off against a team of Automata!
Follow these same rules using the appropriate map size, but give a token to the last human player in turn order. (You may use a train of a color not in play for this purpose). If an ambiguous situation comes up, the player with the token makes the decision, then they pass this token counter-clockwise. The player that receives the token will resolve the next ambiguous situation.
In team games, do not ignore Specialists and Spellcars that copy other players, and do not award the bonus 5VP for each Good at the end.
Specialist Reference
Captains and Their Company Spellcars
Telthurias (Starchaser Rails)
- Captain: Pay 1 mana to Place Wasteland onto an unoccupied edge space anywhere on the map, then Build Track in it.
- Company Spellcar: Move one of your train cars to an adjacent hex. (This has an inherent cost of 1 mana.)
Raith Dularis (Underlands Dispatch)
- Captain: Up to three Wasteland Transfers, City Transfers, or Competitor Transfers are free this turn.
- Company Spellcar: Swap an In-Network Good with a Good in a hex adjacent to it.
Alternate Captains
Neuromille Alcient (Starchaser Rails)
- Captain: Choose a Network-Adjacent hex. Treat that hex as if In-Network for this turn. (Hexes adjacent to it are considered Network-Adjacent.)
Kirland Tok Kall (Underlands Dispatch)
- Captain: Pay 1 mana to move one of your train cars from a Wasteland to another Wasteland anywhere on the map or Build Track on Wasteland.
Alternate Captains (Base Game)
Drexl (Afterworld Express)
- Captain: Swap the position of one of your train cars with a competitor train car in an adjacent hex.
Koul Zenanen (King's Line)
- Captain: Place up to two In-Network Goods next to your folio, reserving them for a future delivery. (You can hold a maximum of four reserved Goods at a time.)
Liris Aldezhi (Caterpillar Conveyance Consortium)
- Captain: Pay 2 mana to Build Track on Forest two hexes away from your Network. This hex cannot be Network-Adjacent.
Mars Kerigan (Kerigan Transcontinental)
- Captain: Pay 2 mana to Activate Spellcars a second time after you Move. (You must pay all Activation and inherent costs.)
Millicent Guthe (Gesselheim Imperial)
- Captain: Place a Demand Tile from a Network-Adjacent City or Metro next to your folio, reserving it for a future delivery. You can claim this tile for one fewer Good than normally required. (You can hold only one reserved Demand Tile at a time.)
Verikalcides (Golden Sands Company)
- Captain: Gain Mana or Gain Spellcar.
Common Specialists
Add these nine common Specialists to the Specialist Market.
Engineers
- Lynssara Yuuno: Pay 2 mana to Build Track on any terrain (except Wasteland) anywhere on the map that does not have a Good on it.
- Megana Dalevan: Pay 2 mana to choose a Network-Adjacent Hex. Treat one hex adjacent to it as In-Network for this turn. (Hexes adjacent to it are considered Network-Adjacent.)
- Nilara Torn: Pay 2 mana to copy the effect of an opponent's face-up Captain. You do not have to pay any costs to Activate that Captain. That Captain is not Exhausted by the action.
Surveyors
- Arianna Tzaar: Draw three Awards from the supply. You may choose one and put it into play. (Return the other two to the supply.) The chosen Award is scored the same as the two drawn at the beginning of the game. If Awards are not in play, return Arianna to the supply and draw a new Surveyor.
- Marigold: Gain Spellcar. Refresh Mana or Gain Mana. Gain Specialist or Refresh Specialists.
- Tezola Telmorre: When it is your turn to make a final delivery at the end of the game, deliver three types of Goods instead of one. You are eligible for a Demand Tile for each of these deliveries.
Station Masters
- Iain Bergham: Each time an opponent Builds Track on a hex where you have a train car, Reclaim 2 mana.
- Quadrana Sekten: Whenever you Deliver, if you can Deliver enough Goods to fulfill more than one demand, you may claim more than one Demand Tile.
- Wilhelm Barts: When you Administrate, Gain Spellcar.
Spellcar Reference
Add these six common Spellcars to the Spellcar Market.
- Build and Add a Good (Ehrlite Echoer): Build Track on the terrain type shown. Place a Good that matches that terrain from the supply onto that hex. (These have an inherent cost of 1 mana.)
Note: the printed page for this section shows only this one Spellcar, although the heading calls for six common Spellcars and the components list includes 24 Spellcar tiles. The five other common Spellcars are not printed in this rulebook and are not transcribed here.
Advisor Reference
Do not add these Specialists to the Specialist Market.
- Exhufern le Marigras: Place Advisor at Start. When you Move and Activate, choose either the Advisor or Conductor to complete this action. If both are in the same space, activation and inherent cost of Spellcars in that space is zero.
- Jesca Renetton: Place Advisor in any hex with a Good. You may Deliver this Good even if it is not In-Network. If you do, also Deliver an additional Good of the same type from the supply. You may move your Advisor when you reach the End of Line.
- Lavanina: Place Advisor in any hex. If any opponent builds track in or adjacent to that hex, Refresh 1 mana for each track built. You may move your Advisor when you reach the End of Line.
- Luna van Kassel: Place Advisor on a City. If anyone (including you) Delivers to that City, Gain Mana or Refresh 3 mana. You may move your Advisor when you reach the End of Line.
- Monad Riverime: Place Advisor on an opponent's Spellcar and immediately Activate it for free. If you Move to the End of the Line, before delivering you may move your Advisor to a new Spellcar and immediately Activate it for free.
- Nostros Calahaan: Place Advisor on an opponent's Station Master to gain that ability. You may move your Advisor to a different Station Master when you reach the End of the Line.
- Riflam Lenshear: Place Advisor on any Spellcar. Activation and printed costs of that Spellcar are zero. You may move your Advisor to another Spellcar when you reach the End of the Line.
- Rikhi Kanhamme: Place Advisor in any hex. When opponents Deliver from a hex that your Advisor is on or adjacent to, Reclaim 2 mana for each Good delivered from those hexes. You may move your Advisor when you reach the End of Line.
Awards
- Everywhere: Most train cars on the terrain board with the fewest of your train cars (If any board has 0 of your trains, your number for this award is 0.)
- Explorer: Fewest train cars on your Home Terrain type
- Frontier Forger: Most train cars on spaces containing no competitor cars
- Looking Forward: Most train cars adjacent to Cities that still have at least one Demand Tile
- Minimalist: Fewest train cars on the map
- Monopoly: Most Goods of a single type delivered
- Preferred Supplier: Most train cars adjacent to Cities that no longer have any Demand Tiles
- Specialist: Most train cars on your Home Terrain type
Frequently Asked Questions
If I use Telemyr to steal Koul, Millicent, or Lynssara, do I also steal any reserved Goods/Demand Tiles they had?
No, those remain with the original owner of the Specialist, and the original owner may still use them (though they no longer get the discount from Millicent).
If I reserve a Demand Tile from a Metro, do I still get the Metro bonus when I fulfill that demand?
Yes. If reserving a Metro Demand Tile from a Metro with a delivery bonus, place a mana from supply on the reserved Demand tile as a reminder to gain the Metro bonus when it's fulfilled.
Icon Reference
Terrain and location icons: Desert, Forest, Glacier, Lake, Lava, Mountain, Wasteland, City, Any Terrain Except Wasteland, Any Hex on the Edge of the Map, Your Network, Competitor Network.
Action and component icons: Home Terrain, Transfer, Your Train Car, Competitor Train Car, Start, End of the Line, Deliver, Move, Activate, Spellcar, Activate Spellcar, Gain Spellcar, Mana, Gain Mana, Reclaim Mana, Gain Specialist, Captain, Engineer, Station Master, Surveyor, Place Wasteland, Global, Administrate, Demand Tile, Good, Any Color Good, Take Another Turn, Refresh, Exhaust, Destroy.