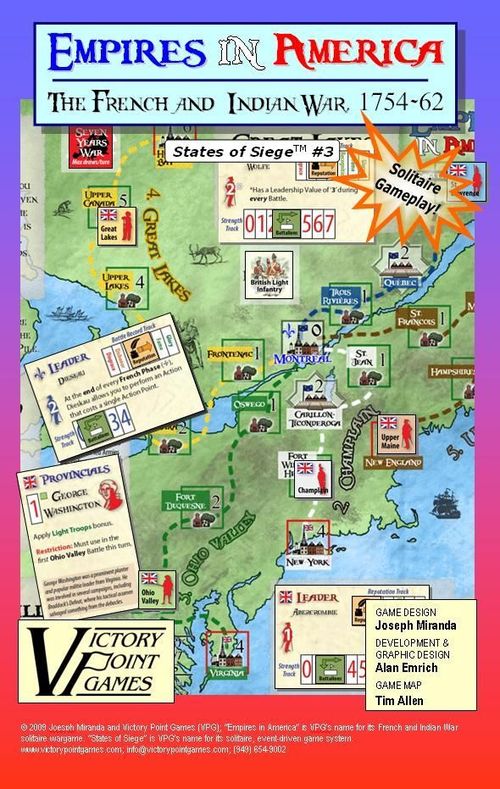
Empires in America: The French and Indian War
Empires in America: The French and Indian War Rulebook
Table of Contents
Table of Contents
- [0.0] Using These Rules
- [1.0] Introduction
- [2.0] Game Equipment
- [3.0] Set Up
- [4.0] Sequence of Play
- [5.0] Victory & Defeat
- [6.0] Historique Phase
- [7.0] Leaders
- [8.0] The British Phase
- [9.0] The French Phase
- [10.0] Combat
- [11.0] Minor Engagement
- [12.0] Fortresses
- [13.0] Auxiliary Forces
- [14.0] Fort Markers
- [15.0] Trading Posts
- [16.0] Housekeeping
[0.0] Using These Rules
New gaming terms, when they are initially defined, appear in dark red lettering for quick referencing.
The instructions for this game are organized into major "Rules" sections as shown in large green CAPS font, and represented by the number to the left of the decimal point (e.g., rule 4.0 is the fourth rule). These rules generally explain the game's components, procedures, core systems and mechanics, how to set it up, and how to win.
With each Rule, there can be "Cases" that further explain a rule's general concept or basic procedure. Cases might also restrict the application of a rule by denoting exceptions to it. Cases (and Subcases) are an extension of a Rule shown in the way that they are numbered. For example, Rule 4.1 is the first Case of the fourth Rule; and Rule 4.1.2 is the second Subcase of the first Case of the fourth Rule.
[1.0] Introduction
Empires in America (EIA) is a solitaire States of Siege™ Series game of the conflict in North America between the French and British in the mid-18th century.
[2.0] Game Equipment
Parts Inventory
- 1 11" x 17" game map
- 12 3/4" square game pieces
- 40 5/8" square game pieces
- 48 Historique cards
- 1 Rules booklet
Not included are at least two 6-sided dice needed for resolving battles (we recommend a red and a blue die), although several more would be useful. A musket or two might also provide some atmosphere.
Glossary
Advance: When a British army is instructed to move to the next-lower numbered box (closer to Montreal; e.g., from box #3 to box #2) along its Track (e.g., St. Lawrence).
Army: The markers that move along each of the Tracks between their respective Colonies and Montreal.
Bottom: Cards sent, conspicuously face-up and perpendicular to, the bottom of the Draw Pile and reshuffled into it during Housekeeping Phases (but only on turns after the Seven Years War event occurs).
Box Control: A box is British controlled if a British Army is in it, plus every higher numbered box along that Track is also British controlled. All other Track boxes that are not British controlled are French controlled (i.e., the remaining, lower-numbered boxes approaching Montreal).
Discard: Placed, face-up, in the Discard Pile (and may be freely examined).
Remove: Set to one side (not placed in the Discard Pile). These cards are usually out of play for the rest of the game.
Retreat: This is the opposite of Advance, when a British Army is instructed to move to the next-higher numbered box along its Track (i.e., away from Montreal and back towards its own Colony).
Sack: When a Leader is Relieved of His Command ("sacked"), his Leader card is Bottomed; his Reputation and Battalion markers are returned to the unused stock. When that Leader card returns to play it actually represents a different personage (but with the same special abilities). He once again becomes a Mediocrity and has all of his Battalions restored.
Tableau: The area directly in front of the player where cards are laid face-up indicating that they are available for use.
[2.1] The Game Map: The game map shows that part of Canada which was then "New France," and adjoining regions of the Thirteen British Colonies. French possessions further west along the Mississippi Valley, known as "Louisiana," are not shown. Historically, they had little impact on the French and Indian War.
The game map presents Montreal as its central hub. The five Tracks (St. Lawrence, Upper Maine, Champlain, Ohio Valley, and Great Lakes), each four to six boxes in length, radiate outward from Montreal like spokes; each represents a military approach vector representing the major campaigning lines of communications during the French and Indian War.
These Tracks reflect the abysmal roads in this Theater of Operations; indeed, many of the main avenues of approach were along rivers, lakes and other waterways.
Terrain Types
British Colonies: These are the highest numbered boxes along each Track with red borders.
Fortresses: These include Carillon-Ticonderoga, Quebec, Louisbourg (not locations with "Fort" in their name; e.g., "Fort Detroit"), and any box containing a Fort marker (as per Rule 14.0). These are major fortified cities and other improved locations.
Wilderness: Every other non-Fortress/Colony box (except Montreal) is considered Wilderness and has a green box outline. These represent lightly-settled areas of North America.
Montreal: This is the French home base (or "capital" of New France, if you will). It is neither a fortress nor a wilderness; it is a "clear" box representing an unfortified city location.
Montreal is the center of action because it was the geographical center of New France and the last French stronghold to fall.
The map also includes an Actions Track, British Leader Holding Boxes for their assignments, and the Draw and Discard Pile boxes for the Historique cards, etc.
[2.2] Historique Cards: These cards are drawn, held, played, and/or discarded as instructed. They provide the narrative for the activities and heroics of the player defending New France.
There are four types of Historique cards in the game as explained below. The opposing sides are symbolized by their flags:
French: (Blue) — British: (Red)
The cards are distinguished between French (blue), British (red) and Neutral (black) symbol cards. Generally, you (the player) can hold and play French cards, using them at various points in the game.
British cards, however, representing the "Opposing Player," must be played as they are revealed and the instructions printed on them strictly adhered to.
How to Read the Cards
Leaders: A Leader card shows the Name of the Historical Personage; the Title/Type (in setup color; 3.0); that Leader's Reputation (each begins at "Mediocrity," tracked along the Reputation Track: Disgrace, Dishonor, Disrepute, Mediocrity, Recognition, Fame, Glory); the Leader Rating; Special Notes and/or Abilities; and the Starting/Maximum number of Battalions (tracked along the Strength Track).
Rating: This is the Leader's ability to command in battle and organize activity. It determines Tactical Initiative and how far Armies under that Leader's command Advance or Retreat as a result of battles. For French Leaders, it also determines how many Action Points (APs) the player will have available to spend each turn.
Battalions: "Battalions" can be thought of as the "Strength Points" available to a Leader. They represent his command's offensive (i.e., the number of dice it throws in a Battle) and defensive (i.e., the number of losses it can sustain before being Removed) capabilities.
Events: An Event card shows the Type of Event (World or British), the Event Title and Graphic, Event effects and instructions, and Historical narrative text (no gameplay effect).
Event cards come in two types, British Events and World Events. Both types are implemented when revealed, but the player might be able to negate or postpone the effects of a British Event.
Provincials: A Provincials card shows the Name of Force, Title/Type, Offensive Battalion Strength, Playable Box/Track Mnemonic symbol(s), Instructions/restrictions and special notes, and Historical narrative text (no gameplay effect).
These represent various local and colonial forces (note that French Militia requires the expenditure of an Action Point to be "organized" and brought into play). Each has a Combat Strength (i.e., it adds that number of dice to those rolled for that side in a Battle) but no actual "Battalions" (i.e., Provincials do not 'take damage').
Generally, after their employment at a Battle, Provincial cards leave the tableau, but they might return to play later.
Action: Action cards are held in your hand. Usually, they are played during the French Action Phase, as desired, at a cost of one Action Point each.
[2.3] The Playing Pieces: The various square playing pieces are explained here:
British Armies: These five units keep track of British progress along each Track.
Note there are no pieces representing the French armies in North America; they are represented by the various French Leader cards.
Reputation: These markers are placed on Leader cards (starting at "Mediocrity") to keep track of that Leader's net military defeats and victories. Leaders with a bad military record are in danger of being Sacked.
Battalions: These markers are placed on Leader cards to keep track of their current Battalion Strength.
Leaders enter play with a full complement of Battalions, but this total fluctuates over time due to Battle Losses and Replacements.
Action Taken: These 'reminder' markers are placed on French Leaders to indicate that their once-per-turn Special Ability has been used for this turn and cannot be used again until next turn.
- Event Reminder: There are certain Events that require noting their occurrence: Seven Years War Erupts!, British Develop Light Infantry, Royal Navy Sails up the St. Lawrence, French Command Disputes, and British Colonial Disputes. When these Events occur, place their reminder markers on their respective on-map boxes (i.e., Europe at Peace and British Infantry Tactics).
[3.0] Set Up
Follow these steps to set up the game:
-
Place the five British Army markers on the highest numbered box (#4, 5 or 6) on their corresponding Track (i.e., at their respective British colonies), and the Action Points marker in the '0' box on its Track along the right side of the map.
-
Sort through the cards and separate them into three piles based on the color of their titles: red (24), white (4) and blue (20)
-
The white title cards are set up first. The Quebec Militia card forms your starting card hand (or "hand"). Cards in your "hand" are played later.
-
Place the French Leader Langlade and the 1st Marine Regiment face-up in front of you. This area, called the tableau, represents "available" forces (i.e., Leaders and the Battalions under their command, plus auxiliary troops not yet committed to Battle).
Important: All newly placed Leaders (e.g., Langlade) receive their Reputation and Battalions markers (as illustrated, indicating "Mediocrity" and the maximum number of Battalions).
-
Similarly, place Braddock in the Ohio Valley British Leader Holding Box and set up his information markers.
-
Shuffle the twenty blue titled cards together and place them, face-down, in a stack on the Draw Pile box of the map.
-
Take the remaining twenty-four red titled cards and "Bottom" them. That is, place them at, and conspicuously face-up and perpendicular to, the bottom of the Draw Pile. These cards get shuffled into the deck after the Seven Years War Event is drawn from among the blue cards.
-
Set aside the "stock" of unused markers where they will be handy, grab some dice and you're ready to go!
Once set up is complete, play is ready to begin by performing the Sequence of Play.
[4.0] Sequence of Play
You, the French Player, conduct each turn (representing one "Campaigning Season," of which there might be one or two per year) through a series of 'Phases' in the order listed below:
- (Historique Phase): As per Rule 6.0, a certain number of cards from the top of the Draw Pile are revealed. Each newly-revealed card is resolved as it is drawn.
- (British Phase): The following Steps are performed in order (as per 8.0):
- A. Rally a British Leader (if necessary)
- B. Advance each led (i.e., assigned a British Leader) British Army in priority order, engaging in a British Assault vs. enemy Fortresses boxes
- C. Declare Defeat if Montreal falls (5.2)
- (French Phase): The following Steps are performed in order (as per 9.0):
- A. Rally a French Leader (if necessary)
- B. Receive Action Points
- C. Spend Action Points
- (Housekeeping): In order:
- A. Sack incompetent French Leaders
- B. Return Information markers and captured Trading Posts to stock. Used British Militia cards are either Discarded or Bottomed at this time.
- C. Reshuffle the Draw Pile during this and all subsequent Housekeeping Phases if the Seven Years War Erupts! Event has occurred and there are any Bottomed cards there (ignore if no Bottomed cards are present)
At the conclusion of the Housekeeping Phase, begin a new turn by repeating these steps and continue to do so until the game is won or lost (see below).
[5.0] Victory & Defeat
Historically, the French lost this war.
[5.1] Victory: If, after completion of the French Phase (), the only cards remaining in the Draw Pile are Bottomed cards (but only after the Bottomed cards have been reshuffled into the deck at least once) or there are no cards remaining, the game ends in a French victory.
You have saved New France!
The degree of success achieved is measured in Victory Points (VPs) on the table below by adding the current Box # location of each British Army and French Trading Post on the map, then subtracting two (-2) points for each Fort/Trading Post marker eliminated during play and British-controlled Fortress box on the map.
| VPs | Result |
|---|---|
| 25+ VPs | Crushing Victory |
| 20 to 24 VPs | Decisive Victory |
| 15 to 19 VPs | Substantial Victory |
| 14 or fewer VPs | Marginal Victory |
[5.2] Defeat: If, during the British Phase (), a British Army marker is instructed to Advance placing it in the last box on its Track (i.e., #0, Montreal), you immediately lose the game.
Certain cards might delay this day of reckoning; e.g., the Delaying Action card.
The degree to which you are defeated is measured by counting the number of cards remaining in the Draw Pile (including Bottomed cards) upon losing and consulting the following table:
| Cards remaining | Result |
|---|---|
| 0 to 7 | Stalemate |
| 8 to 13 | Marginal Defeat |
| 14 to 19 | Substantial Defeat* |
| 20 or more | Decisive Defeat |
*Historical outcome
[6.0] Historique Phase
General Rule
During the Historique Phase, a certain number of cards are drawn and, as each card is revealed, it is resolved (6.2) before the next card is drawn.
Important: Any Event that is impossible to fulfill has no effect and is Discarded; do not make a replacement card draw for it.
Each Historique card tells a part of the story of the French and Indian War and its flavor text explains the narrative through the myriad historical events from this era.
[6.1] How Many Cards are Drawn: The number of cards drawn each turn varies:
- Before the Seven Years War occurs, three cards are drawn each turn.
- Beginning the turn after the Seven Years War breaks out, four cards are drawn per turn.
- If the Draw Pile is exhausted, stop drawing. Do not shuffle any Bottomed cards!
[6.2] How Card Draws are Resolved: Each card drawn must be resolved immediately in the manner listed below before the next card is drawn
Important: If a drawn card is Bottomed (i.e., not resolved when drawn according to its text), you do make a replacement card draw for it (unless instructed otherwise).
[6.2.1] French Action Cards: Add these to your hand. They may be played later as Actions (see 9.3.1).
[6.2.2] French or British Provincials: Place these face-up in the tableau.
[6.2.3] French Leaders: Place these face-up in the tableau along with their Reputation (set to "Mediocrity") and Battalions (set to full strength) markers.
[6.2.4] British Leaders: See Rule 7.0 for the deployment procedure of newly arrived British Leaders.
[6.2.5] British or World Events: These cards are resolved immediately as per the instructions printed on them. Note that certain Event cards go into effect during later Phases that turn.
[6.3] "Safe" Card Draws: There are some instances where you may make "safe" Historique card draws. A safe card draw is applied as per 6.2, with the exception that British Leader cards (6.2.4) are Bottomed (6.4) without drawing a replacement card.
So drawing "safe" cards is not without its hazards, but chances are that such draws will be to your advantage.
[6.4] Deck Organization: There are four dispositions for cards not in your hand currently in play on the map or tableau:
- The Draw Pile consists of unrevealed, face-down cards in a stack placed in the Draw Pile box on the map.
- Certain cards may not take immediate effect when drawn or are recycled after their use. Such cards are "Bottomed." That is, these cards are placed, when instructed, face-up, at the bottom of the Draw Pile and perpendicular to it (i.e., these cards should be very conspicuous).
- The Discard Pile consists of revealed, played, face-up cards in a stack placed in the Discard Pile box on the map.
- Removed Cards are set aside and not placed in the Discard Pile!
Some cards in the Discard Pile might later get Bottomed and returned to the Draw Pile. Removed cards are never Bottomed.
[6.5] Examining Cards: You may freely examine all face-up cards and cards in your hand. Conversely, you cannot examine face-down cards in the Draw Pile until they are actually drawn/revealed during play.
[6.6] Organizing the Tableau: The cards face-up in front of you in the tableau are all "available" for use. Generally, the best way to organize these cards is to place them in three groups as follows:
- British Provincials on the left
- French Leaders in the center, and
- French Provincials on the right.
In this manner, you should be able to find the cards you're looking for among the tableau very quickly and in the order that you're most likely to use them.
[6.7] Army Events: Certain Events might cause an Army to Advance or Retreat (during the Historique Phase); this happens regardless of the presence or absence of a British Leader with that Army (8.4), but see the note below:
Fortress Boxes: Armies with British Leaders can Advance into an enemy Fortress box via an Army Event (triggering an immediate British Assault, see 10.0). An Army without a British Leader, however, cannot Advance into a Fortress box.
[6.8] Used Cards: Case 6.2 explains what to do with a card as it appears after being drawn. But what do you do with them after they have been used or played?
[6.8.2] French Action Cards: After their use, these cards are Discarded.
[6.8.3] Provincials: After their use at a Battle, these cards are Discarded, but many have special instructions that might see them Bottomed instead (13.3).
Also note the Special Ability of the French Leader, Langlade.
[6.8.4] Leaders: These cards are Bottomed when sacked and Removed when their last Battalion is eliminated in Battle (10.3).
[6.8.5] British Events: After their use, these cards are Discarded.
[6.8.5] World Events: After their use, these cards are Removed.
[6.9] The Seven Years War Erupts! Event: This represents a change in European policies that greatly escalated the importance of the fighting in the North American colonies. When this Event occurs, its marker is placed in the Europe at Peace box on the map to denote its permanent effects.
- The card draw rate during the Historique Phase () is increased to four cards.
- Reshuffle Bottomed cards (only) into the Draw Pile during this and all subsequent Housekeeping Phases ().
[7.0] Leaders
Leaders who are active and in play (British Leaders on the map and French Leaders in the tableau) represent themselves and their command (Battalions) engaging in battles where British Army markers are located in boxes on the map.
Common Leader Rules
- Leaders remain in play until a specific game Event removes them (e.g., they are relieved of duty or killed in action).
- Active Leaders can be used any number of times over the course of a game.
- Their Ratings are used to determine who fires first at a Battle and affect the maximum number of boxes its affected Army marker moves when Advancing or Retreating.
- Battalions indicate that Leader's Combat Strength (e.g., a Leader card with four Battalion boxes has an initial and maximum Combat Strength of '4').
- A maximum of one French and British Leader may be committed to a Battle.
- Each Leader card has a Reputation Track where that Leader's victories and defeats are noted and that Leader's net difference is indicated.
- Some British and all French Leaders have Special Abilities.
British Leader Rules
Placement of a British Leader card, when drawn, follows this procedure:
-
Apply for a Job: Roll two dice and sum their results. Compare this value to the British Leader Placement spreads on the map on the British Leaders Table and in the British Leader Holding Boxes (see illustration).
Example: A new British Leader card is drawn. He applies for a job by rolling the dice whose total is '9.' The Leader Placement spread for the Champlain Track is "8-10," so that is where this new Leader wants to be placed.
-
Taking That Job: If the British Leader Holding Box for the Track rolled is vacant, simply place that Leader card in that box. He takes command of that Army and activates that Track during British Phases.
If there is already a British Leader card occupying that Holding Box and his Reputation is one of Disrepute, Dishonor or Disgrace, that current job-holding Leader is Sacked and replaced by the new Leader applying for that job.
There can only be one British Leader in a Holding Box at a time.
-
Taking A Different Job: If there is already a British Leader card occupying that Holding Box and his Reputation is one of Mediocrity or higher, that Leader keeps his job for the time being and the newly drawn Leader applying for it must apply for a different command according to the following Track Priority List (also as shown on the map near that Track's name):
- St. Lawrence
- Champlain
- Ohio Valley
- Great Lakes
- Upper Maine
Example continued: That newly drawn Leader finds another British Leader in the Champlain box and his Reputation is one of Mediocrity. The current job-holding Leader's position is safe (for now), so the newly drawn British Leader goes down the Track Priority List applying for those jobs in that order.
Checking the St. Lawrence (which is first on the list) finds a successful Leader there with a Reputation of Fame, so he's not going anywhere. Champlain has already been ruled out. Ah ha! The Ohio Valley leader, who is next on the list, has a Reputation of Disrepute! That idiot is Sacked, his card is Bottomed, and the newly drawn Leader takes his command of the Ohio Valley Track.
If there are no job vacancies available (because every Track is currently led by a Leader who is not incompetent), the newly picked Leader applying for a job has his card Bottomed.
French Leader Rules
- French Leaders always "get the job" and are added to the tableau when drawn. Because the French have the central position in this war, their Leaders can fight on any Track when desired, rather than being specifically assigned to one as British Leaders are.
- French Leaders have Special Abilities that can be used once per turn each, some saying "As an Action" (which means that you must spend an Action Point to use that ability). When so used, you may mark them with an Action Taken marker as a reminder.
- A French Leader whose Reputation is "Disgrace" is automatically Sacked during the Housekeeping Phase. Exception: If that is the only French Leader on the Tableau, he is not Sacked.
[8.0] The British Phase
General Rule
During the British Phase (), each British Army, in Track Priority order, Advances a number of boxes down that Track toward Montreal equal to the value of its Leader Rating (e.g., the British Leader Forbes, with a Leader Rating of '2' would normally Advance two boxes along his Track).
Procedure
[8.1] Rally/Recall Leaders: If this Phase begins without a British Leader card in play, one randomly returns from among those Removed from play. Assign him a job as per Rule 7.0.
If the British begin this Phase with two or more Leaders than the French have, Sack British Leaders until they have only one more Leader than the French. Sack the Leader(s) with the worst Reputation first; if those are tied, the one with the lowest Leader Rating is Sacked; if those are also tied, the one with the fewest number of Battalions left is Sacked. If those are also tied, it is the player's choice.
[8.2] Advance: During the British Phase, the player must Advance each Leader led Army according to the Track Priority List (as shown on the map).
[8.3] Advance Distance: The number of boxes advanced by each British Army is equal to its commander's Leader Rating.
- Exception: Fortresses stop an Advancing Army when entered (12.1).
- A British Army never Advances past box #0 (Montreal). That's game over (5.2).
[8.4] Required Leadership. If an Army does not have a British Leader assigned to it, then the marker on the map representing that Track does not advance during the British Phase. (This does not affect Events.)
[8.5] Fortresses: Advancing (and Retreating) British Armies must always cease their Advance (or Retreat) immediately upon entering a Fortress box.
An Advancing British Army entering a French Fortress box launches an immediate British Assault (10.0) at that location.
British Phase Example: Along the Champlain Track, the Army resides in the Fort William Henry (#3) box. Amherst (with his '2' Leader Rating) is in command during the British Phase, so normally this Army would Advance two boxes at this time. However, box #2 (Carillon-Ticonderoga) is a fortress. This means that the Champlain Army must stop its advance there and initiate an immediate British Assault.
Carillon-Ticonderoga is a Fortress, so the Champlain Army must stop in that box.
[9.0] The French Phase
General Rule
The French Phase () is the player's main decision making part of each turn. First, the player receives Action Points from his available Leader cards, and then he may spend those Action Points to play Action cards, Attack, or Govern.
[9.1] Rally/Recall Leaders: If this Phase begins without a French Leader card in play, one randomly returns from among those Removed from play. Place him, face-up, in the tableau.
If the French begin this Phase with two or more Leaders than the British have, Sack French Leaders until they have only one more Leader than the British. Sack the Leader(s) with the worst Reputation first; if those are tied, the one with the lowest Leader Rating is Sacked; if those are also tied, the one with the fewest number of Battalions left is Sacked. If those are also tied, it is the player's choice.
[9.2] Receiving Action Points Step: Total the Leader Ratings of all French Leader cards in the tableau and set the Action Point marker to that value on its track, which cannot exceed 5.
[9.3] Spending Action Points Step: Action Points (APs) are spent as listed below (and some French Leader's Special Abilities also require spending an AP). You may spend up to the number of Action Points you have available for that turn and no more.
[9.3.1] Play a French Action Card: Unless it is denoted as a "free Action," playing a French Action card is done during this Phase and costs 1 AP.
Note that while it costs 1 AP to play a French Militia or Marine Action card to the tableau, once there, employing it in a Battle is 'free.'
[9.3.2] Launch an Attack: Designate a British Army marker as the target you are attempting to force to Retreat back toward its Colony and the French Leader that will Attack it at its current box location. Each French Attack launched costs 1 AP. See 10.0 for the Rules about conducting Battles.
Generally, each French Leader can only engage in one Battle per turn (see 10.6).
[9.3.3] Govern: Administrative functions can be performed thus:
Recruiting a Replacement Battalion costs 1 AP (limit 1 per Trading Post per turn; see 15.2). A French Leader may receive more than one Replacement Battalion in a single turn.
- Building a Fort costs 2 APs. See 14.0 for the Rules about the construction and use of Forts.
- Building a Trading Post also costs 2 APs. See 15.0 for the Rules about the construction and use of Trading Posts.
The counter mix is a finite limit when building Forts and Trading Posts!
In New France, Leaders were not just military men, but also administrators sent to improve and develop their colony.
Example: The player has one 1-Rating and one 2-Rating French Leaders on the tableau this turn, so 3 Action Points (APs) are available. (The 2-Rating Leader is not Dieskau.)
With those 3 APs, the player could Attack with one Leader and Build a Fort (3 APs total); attack with both Leaders and play an Action card (3 APs total); play three Action cards, etc.
[9.4] Historique Cards: Certain cards might increase, decrease, or award 'free' Actions as indicated.
[9.5] Action Point Min-Max: The player can never receive more than 5 or fewer than 1 APs per turn during this Phase.
[9.6] Ending French Actions: This Phase ends when the player runs out of APs or simply desires to spend no more APs that turn. Unspent APs cannot be saved between turns; if they are not spent on the turn they are received, they are lost.
[10.0] Combat
General Rule
Combat occurs when a British Assault takes place any time an Army enters a French controlled Fortress box, or when the player voluntarily conducts a French Attack (against any type of British-controlled box) as an Action using an available French Leader.
Procedure
Where combat occurs, a "Battle" takes place. Each Battle is conducted separately and completed before the next is begun.
Battles are conducted according to the following Battle Sequence by conducting these steps in order:
-
Leaders Commitment: The player notes whether there is a British Leader assigned to that Army who must fight in the Battle.
- The player must commit a French Leader who has not yet fought a Battle that turn* if this Battle is a result of the player launching a French Attack (9.3.2).
- The player may commit a French Leader who has not yet fought a Battle that turn* if this Battle is the result of a British Assault on a French fortress box (10.0).
*With exceptions for the Brilliant Maneuver Action and Montcalm.
-
Minor Engagement?: If only one side has a Leader at the Battle (this can happen if the player Attacks an Army that has no British Leader commanding it or if a British Assault is taking place and the French player opts not to commit a Leader as per Step 1, above), the Battle is declared a Minor Engagement. This Battle Sequence is ended and the Battle is resolved as per Rule 11.0 instead.
-
Commit Auxiliary Forces: If both sides have a Leader at the Battle, inspect the British Provincials cards on the tableau and commit all of those that must be committed to this Battle as described on the individual cards. Physically move these cards from the tableau and place them next to the engaged British Leader's card so that you visualize the exact forces arrayed against you.
With that done, you may then commit to the Battle any or all available French auxiliary cards (i.e., Provincials, and Militia/Marine Action cards that are available on the tableau and within the restrictions listed on those individual cards). Physically move these cards adjacent to the engaged French Leader's card on the tableau to visualize the exact forces you have deployed at this Battle.
-
Determine the Tactical Initiative: Roll a die for each side's Leader present at that Battle, modifying each roll thus:
-
- its Leader Rating (e.g., Wolfe adds 3)
-
- 1 if the Battle is taking place in a Wilderness box and that side has Light Troops present (but never more than +1 no matter how many Light Troops bonuses might apply)
-
- 1 for the side controlling that Fortress box if the Battle is taking place there
- +/- any special Tactical Initiative modifiers for certain Leader and/or cards in play
-
[10.1] Combat Strength: Each side's Combat Strength in a Battle is equal to its committed Leader's (Step 1) current number of Battalions plus the Combat Strength of any auxiliary forces committed (Step 3).
Example: The British Leader Braddock is committed to a Battle and has only 1 Battalion remaining. Since the Rogers' Rangers card, with its Combat Strength of 2, is on the tableau and the Battle is taking place in a Wilderness box, it is committed as an auxiliary force. The British have a total Combat Strength of 3 (1 + 2).
[10.2] Firing: When it is its time to fire (either Step 5 or 6), a side rolls one die for each point of its Combat Strength (10.1) at that Battle. Each roll of 1, 2, 3, or 4 has no effect; each roll of 5 or 6 scores one "hit" on the enemy force at that Battle.
[10.3] Applying Hits: Hits suffered by a side reduce the number of Battalions its Leader has (adjust its Battalions markers to the left accordingly to reflect its new, lower, Battalion strength).
Elimination: If a Leader card is reduced to 0 (or fewer) Battalions, it is Removed and its Reputation and Battalion markers are placed back in the stock. Auxiliaries can still conduct return fire even if their Leader's Battalions have been wiped out.
[10.4] Replacements: Certain Historique cards, etc. provide "Replacements." Receiving Replacements works the opposite way as applying Hits, in that each Replacement received increases the number of Battalions its Leader has by one (adjust its Battalions marker one number to the right, thus reflecting its new, recovered, Battalion strength). A Leader card's Battalion strength can never be increased above its original, printed value.
[10.5] One Round of Battle: Each side fires only once per Battle. Unless otherwise instructed by a card, there is only one "round" of fire exchanged in a Battle.
[10.6] Sustained Campaigns: A British Leader conducts one Assault against a French Fortress per Advance, either from a card during the Historique Phase (e.g., Pitt Takes Control or Northwest Passage) and/or again during normal British Phase activity (8.0). Afterward, that Advance ends (12.1).
A British Leader can be the target of multiple French Attacks in a single turn and must defend as many times as he is attacked each turn.
A French Leader can participate in only one Battle per turn (with exceptions for the Brilliant Maneuver Action and Montcalm Special Ability). This can be either a Fortress box defense against a British Assault (during the Historique or British Phase) or a French Attack (during the French Phase), but not both (with the above exceptions). Place a Battle Fought marker on that Leader as a reminder.
Intelligence: Note that when you conduct multiple French Attacks in a turn, you may do so in any order you want (even attacking the same British Army multiple times in the same turn). You are entitled to know the results of the first (or second, etc.) Battle before deciding where (or whether) to conduct the next one.
[10.7] British Colonies: Army markers will not Retreat past, nor can you attack Army markers in, the highest-numbered box along their Tracks (i.e., their red-bordered Colony box).
The logistical issues for the French to invade a British Colony would be prohibitive, particularly as British Colonies had large numbers of militia and Royal Navy support along coastal positions.
Battle Example: It is the French Phase and the player pays an Action Point to Attack the British Army in the Ohio Valley. Braddock, with only two Battalions and a Reputation of "Fame" currently commands that Army which resides in the 2 box (Ft. Duquesne).
The player has Vaudreuil available, with his full compliment of four Battalions and a Reputation of "Mediocrity," and commits him to the Attack (Step 1). Since both sides have a Leader present, this is not a Minor Engagement (Step 2).
British auxiliary forces on the tableau include George Washington, who hastens to the Battle with his Light Troops, raising the British Combat Strength to a total of three (2 + 1). Wanting a smashing victory, the player commits both of his available auxiliary cards on the tableau: the 1st Marine Regiment and the Shawnee Indians, raising the French Combat Strength at this Battle to seven (4 + 2 + 1) to conclude Step 3.
The Tactical Initiative is rolled for, with the modifiers being equal as both sides have a 1-Rated Leader and Light Troops. The British out-roll the French and gain first fire (Step 4).
British fire of three dice results in one Hit, and Vaudreuil's Battalion strength is reduced to three (Step 5).
French fire of six dice inflicts two Hits. Braddock loses his last two Battalions, is eliminated and his card Removed (Step 6).
The French have clearly won (Step 7). The British army is retreated one box (Vaudreuil's Rating value) to the 3 box (Alleghenies) and Vaudreuil's Reputation rises to "Recognition."
[11.0] Minor Engagement
If only one side has a Leader at the Battle (this can happen if the player Attacks an Army that has no British Leader or if the player does not commit a French Leader in response to a British Assault), that Battle is only a Minor Engagement and is resolved according to the following Cases:
[11.1] The Battle Must Go On: The side with a Leader present must still engage in combat, commit auxiliary forces, and fire (10.2) normally.
The side without a Leader present is considered to have a Leader Rating of 0, a Combat Strength of 0, cannot commit auxiliary forces, and does not return fire.
[11.2] Winning a Minor Engagement: If the side with a Leader present inflicts at least one Hit (not that any will do actual damage, as no enemy Battalions are present at that Battle), it is the victor. If it inflicts no Hits at all, the Battle's result is a draw.
[11.3] Minor Engagement Aftermath: If a Leader wins a Minor Engagement, his Reputation marker is not adjusted. Other Battle aftermath effects occur normally.
[12.0] Fortresses
Fortress boxes have various gameplay effects as summarized here.
[12.1] Halt: British Army movement via Advance is stopped when entering a French-controlled Fortress box and a British Assault (10.0) immediately ensues.
British Army movement via Retreat is also stopped when entering a British-controlled Fortress box that is printed on the map.
[12.2] Optional Defense: The player does not have to commit a Leader to the defense of a Fortress box when a British Assault is being conducted against it.
[12.3] Initiative: At a Fortress Battle, the side controlling the Fortress box receives a +1 Tactical Initiative die roll modifier.
Player's Note: Fortress boxes are more useful for holding up British Advance if you actively defend them. Otherwise, a British Army under the command of a Leader will Advance unimpeded until you Attack it and push it back. Consider carefully your ability to build Fort markers and where you might place them to improve your defenses!
[12.4] What Fortress Boxes Don't Do: Fortress boxes have no other combat effects. They do not affect firing or the application of Hits.
[13.0] Auxiliary Forces
Auxiliary force cards (i.e., Provincials, Militia, Marines, etc.) have various gameplay effects as summarized below:
[13.1] They're Here: An auxiliary force card must be face-up on the tableau (i.e., "available") to be committed to a Battle. French auxiliary Action cards in the player's hand are not available until 1 AP has been paid to place them thus on the tableau.
[13.2] Ouch: Auxiliary forces have a Combat Strength for firing purposes only. They do not have Battalions, per se, and thus don't lose any at a Battle. Exception: the New York Militia and Troupes de la Marine cards can each "absorb" a Hit at a Battle (i.e., it is still inflicted, but not lost by their Leader). If they absorb a Hit at a Battle, these cards are Discarded when their time on the Tableau is over.
[13.3] Goodbye: After firing their shot, auxiliary force cards are Discarded. However, many auxiliary cards have special rules on them to the effect that, for example, if their side is sufficiently successful at the Battle where they were committed, they are Bottomed instead.
[13.4] Leaderless: Auxiliary forces require a Leader to join a Battle. They cannot, on their own, be sent to fight a Battle.
[14.0] Fort Markers
Fort markers represent temporary strong points, detached garrisons, or simply places where the French have committed to 'make a stand.' Their placement on the map can greatly enhance your military position.
[14.1] Placing Forts: After spending the required 2 APs during the French Phase, place a Fort marker on the map in any Wilderness or the Montreal box that is French controlled and does not already have a Fort marker in it. Forts cannot be placed in British Colony boxes or boxes that are already fortresses.
[14.2] Fort Marker Effects: A box with a Fort marker in it is considered a Fortress box for all purposes (12.0).
[14.3] Fortifying Montreal: If Montreal has a Fort marker in it, the game is not instantly lost when a British Army marker advances into that space. Instead, the British Assault there must be resolved, and only if the French fail to win that Battle (i.e., to Retreat that British Army away from Montreal) do they lose the game.
[14.4] Removing Fort Markers: The player can never voluntarily remove a Fort marker. It is permanently removed from the game (i.e., it is not returned to the stock) when a British Army marker occupies its box at the end of a Battle.
[15.0] Trading Posts
Trading Post markers represent centers of French trade, as well as colonized areas. They allow the French player to influence the economics of New France.
[15.1] Placing Trading Posts: After spending the required 2 APs during the French Phase, place a Trading Post marker on the map in any French controlled box that does not already have a Trading Post marker in it.
- Exception: There can be only one Trading Post maximum on each Track plus one in Montreal (which is not considered on any Track for this purpose).
- Trading Posts can be placed in boxes with Fort markers and vice-versa.
[15.2] Trading Posts and Replacements: During the French Phase, the player may spend 1 AP to add a Replacement Battalion (10.4) to a French Leader card on the tableau. You may 'purchase' Replacements thus multiple times per turn, but never more than there are Trading Post markers on the map. That is, each Trading Post on the map allows you to purchase one Replacement Battalion per turn.
[15.3] Trading Posts and Victory: If you win the game (5.1), you receive a number of Victory Points equal to the box number for the location of every Trading Post on the map. Yes, a Trading Post in Montreal is worth 0 Victory Points.
[15.4] Removing Trading Post Markers: The player can never voluntarily remove a Trading Post marker. It is permanently removed from the game (i.e., it is not returned to the stock) when a British Army marker occupies its box, or a lower-numbered box along that Track, at the end of a Battle.
Be very careful about your placement of these scarce Fort / Trading Post pieces!
[16.0] Housekeeping
During the Housekeeping Phase (), certain administrative functions must be performed to prepare for the next turn.
Declare French Victory: If there are no Unbottomed cards in the Draw Pile, the game ends immediately in a French Victory (see 5.1). Vive la Nouvelle France!
-
Heads Will Roll: Each French Leader whose Reputation is "Disgrace" is automatically Sacked at this time.
Exception: When there is only one French Leader left on the Tableau, he is not Sacked! If all remaining French Leaders should be Sacked that turn, the player decides which one remains on the tableau.
-
Reset Markers: Return to the stock all Action Taken, Battle Fought, Inactive Leader, etc. markers if in play and check to see if the Royal Navy marker exits with the St. Lawrence Army as per that British Event card.
-
The New Deal: Reshuffle the Draw Pile if the Seven Years War Erupts! Event has occurred. Note that this is only necessary if there are currently any Bottomed cards appearing in the Draw Pile.
Extra Pieces Note
The Replacement Leader markers are not used in the Standard Game. They have been provided for use with an Expansion Kit to be published later.