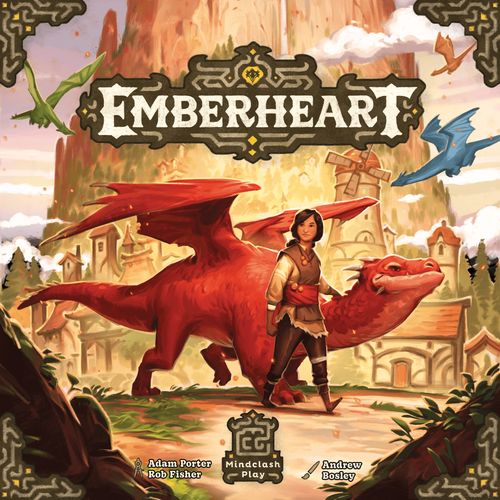
Emberheart
Emberheart Rulebook
Table of Contents
Table of Contents
Components
- 4 Player boards (1 per player color)
- 4 Dragon Companion meeples (1 per player color)
- 20 Crest tokens (5 per player color)
- 4 Flame markers (1 per player color)
- 1 First player marker
- 4 Aide tokens
- 12 Attribute markers (4 per Attribute color)
- 12 Two player mode cards
- 1 Scoring pad
- 50 Grunt tokens
- 35 Scout tokens
- 30 Ranger tokens
- 30 Warden tokens
- 35 Gear tokens
- 1 Main board
- 45 Dragon cards
- 30 Mountain Dragon cards
- 15 Captive Dragon cards
- 15 Preserve cards
- 1 Round marker
- 10 Raid cards
- 15 Tavern cards
- 15 Garrison cards
- 27 Hero cards
Setup
- Place the Main board in the middle of the playing area.
- Each player takes a Player board. Make sure all players use the same "A" or "B" side.
- If it's your first game, we recommend using the "A" side (without player skills).
- Each player takes their Dragon Companion meeple and 5 Crest tokens matching their Player board.
- Each player places an Attribute marker on each of their 3 Attribute tracks on their Player board. Then, each player moves one marker of their choice one step higher.
- If it's your first game, we recommend all players move the marker on the leftmost (Strength) track.
- Each player takes 10 Grunt tokens.
- Each player takes 2 Gear tokens.
- Separately shuffle the Hero (7a), Tavern (7b), Captive Dragon (7c), Mountain Dragon (7d), and Preserve (7e) cards to form face down decks and place them next to their respective Locations. Then, fill up the card slots of the Heroes' Guild (7a), Tavern (7b), Poachers' Camp (7c), Mountain (7d), and Preserve (7e) Locations with face up cards drawn from their respective decks.
- Sort the Garrison cards into three decks by their color (red, blue and green) and organize them in ascending order by their Glory value. Place the three decks face up (with cards of 3 Glory on top) next to the Main board near the Garrison area. Then, draw the top card of each deck and fill up the Location's card slots with them.
- Shuffle all Raid cards to form the Raid deck and place it face down next to the Main board near the Poachers' Raid area. Draw the top 2 cards from the deck and place them face up on Poachers' Raid card slots.
- Place each player's Flame marker on the Flame icon on the Flame track.
- Place the Aide tokens on their respective slots on the Ambassador's Aides area.
- Place the Round marker on Round I.
Game Overview
In a game of Emberheart you take on the role of champions and compete to gain the most Glory by hindering the plans of the evil poachers and rescuing dragons from their grasp. Each round, you send Parties of Hirelings to various Locations across the island to carry out tasks on your behalf (see Action phase on page 8). The larger your Party, the faster they work—allowing you to claim rewards earlier (see Reward phase on page 13).
At the end of each round, you must assign Hirelings to repair the damage caused by the poachers' raid (see Raid phase on page 20).
By the end of the game, you will have recruited unique Heroes, improved your Dragon Companion's Attributes, led daring assaults from the Garrison, and, most importantly, rescued magnificent Dragons—all bringing you closer to glorious victory (see End Game Scoring on page 21).
And if you kept your Flame lower than the other champions, your final Glory will shine even brighter (see Flame on page 21).
Game Structure
A game of Emberheart lasts five rounds.
Each round consists of 4 phases:
I. Action phase II. Reward phase III. Raid phase IV. Reset phase
After completing the fifth Raid phase, proceed to the End Game Scoring.
I. Action Phase
During the Action phase, players take turns one after the other. On your turn, you must do one of the following three actions:
- Sending a Party to a Common Location
- Using a Special Location
- Taking an Aide
The Action phase lasts until the last Aide is taken (see End of Action phase on page 12).
Sending a Party to a Common Location
The Locations with numbered spaces are called Common Locations and you must place a Party of Hirelings there to be able to claim their Rewards in the Reward phase. A larger Party can claim a reward earlier than smaller ones.
When performing this action, create a Party by forming a stack of 1-5 Hireling tokens and placing your Crest on top of it. Then, place the Party on an available space on a Common Location that shows the exact number as the number of Hirelings in your Party.
Do not claim any card when placing a Party. Cards can be claimed during the Reward phase (page 13). You cannot place your Party on a space that is already taken, but you can have more than one Party at the same Common Location.
Hirelings
The bustling Village of Emberheart is home to many diligent and hardworking people. Hireling tokens represent these villagers you can recruit for your cause to complete errands at the Common Locations.
There are two categories of the Hirelings you can use to form a Party: Grunts and Experts. There are three types of Experts: Scouts, Rangers, and Wardens.
Grunts are common workers who know a little about everything, but they are neither committed, nor resolute.
Grunts can be placed on any Common Location, but they are discarded after they claim a reward for you.
Experts, on the other hand, are loyal to your cause and stay by your side, though they can only perform specific tasks.
Once they have claimed a reward for you, they return, ready to be placed again in future rounds. However, they can only be assigned to certain Common Locations, depending on their class.
Scouts excel at working with people, making them the best at recruiting Heroes from the Guild and Hirelings from the Tavern. They can also infiltrate the poachers' camp in disguise, rescuing captured dragons without being detected.
Scouts can only be sent to the Heroes' Guild, the Tavern, and the Poachers' Camp.
Rangers are the dragons' closest allies, riding them into battle from the Garrison to strike against the poachers. They also play a vital role in finding the safest and most suitable sanctuary within the Preserve for the rescued dragons.
Rangers can only be sent to the Garrison and the Preserve.
Wardens are the steadfast guardians of Dragon Mountain, tirelessly roaming the wilderness to free dragons caught in the poachers' traps.
Wardens can only be sent to the Mountain.
Grunts and eligible Experts, as determined by the Common Location's restrictions, can be combined freely to form a Party.
Gear
Gear tokens represent the tools and equipment provided to your Hirelings, enabling them to specialize in certain tasks and remain prepared for long-term assignments.
On your turn, you may spend a Gear token to swap one of your Hirelings in your personal supply for another type of your choice. You can do this multiple times as long as you have enough Gear tokens and only during your turn.
However, Hirelings that are already placed on the Main board as part of a Party cannot be replaced.
Typically, you will upgrade Grunts to Experts to prevent them from being discarded after claiming rewards. However, you may also swap one Expert for another or, in rare cases, even revert an Expert back to a Grunt.
During End Game Scoring, you can still use your leftover Gear—you may reduce your Flame by 1 for every third Gear you discard.
Dragon Companion Attributes
When the champions arrived on the island, each of them was joined by a young dragon with whom they instantly formed a strong bond. Though these loyal companions are still inexperienced, they will surely grow and learn by the champions' side.
Once per round, your Dragon Companion can accompany a Party and use its Attributes. To do this, place your Companion meeple on your Crest atop the Hireling stack. A Companion can only be used once per round. Once placed, it stays with the Party until the end of the Reward phase, when you retrieve it to use again in the following round.
As you spend time on the island, you will gain valuable knowledge and experience, which you can pass on to your Dragon Companion by improving its Attributes, represented by the three Attribute tracks on your Player board: Strength, Senses and Speed. Moving up the marker on an Attribute track either unlocks a stronger placement effect (step 1, 3, or 5) or increases the Glory you will earn from that track.
When you place your Companion on a Location space, you may use and combine the top unlocked placement effect (that is at or below your marker) of each track.
You cannot send your Companion to Special Locations (the Warehouse and Firestation).
It is possible to place a Party with no Hirelings if the accompanying Companion's Strength fully substitutes for all required Hirelings in the Party.
Strength track:
| Step | Effect |
|---|---|
| Strength | Your Companion can take on the role of a number of Hirelings to help you complete errands at the Common Locations. |
| Step 1 | The Party with your Companion needs 1 fewer Hirelings when placed on a Location. |
| Step 2 | Gain 2 Glory at the end of the game. |
| Step 3 | The Party with your Companion needs 2 fewer Hirelings when placed on a Location. |
| Step 4 | Gain 5 Glory at the end of the game. |
| Step 5 | The Party with your Companion needs 3 fewer Hirelings when placed on a Location. |
| Step 6 | Gain 8 Glory at the end of the game. |
| Step 7 | Gain 12 Glory at the end of the game. |
Senses track:
| Step | Effect |
|---|---|
| Senses | Your Companion can find some extra Gear for you if placed on the right spot. |
| Step 1 | If the Party with your Companion is placed on space number 3 of a Common Location, you immediately gain 1 Gear token. |
| Step 2 | Gain 2 Glory at the end of the game. |
| Step 3 | If the Party with your Companion is placed on space number 3 of a Common Location, you immediately gain 2 Gear tokens. |
| Step 4 | Gain 5 Glory at the end of the game. |
| Step 5 | If the Party with your Companion is placed on space number 3 of a Common Location, you immediately gain 3 Gear tokens. |
| Step 6 | Gain 8 Glory at the end of the game. |
| Step 7 | Gain 12 Glory at the end of the game. |
Speed track:
| Step | Effect |
|---|---|
| Speed | If your Companion is the first to arrive at a Common Location, it will have time to heal your burns (see Flame on Page 21). |
| Step 1 | If there's no other Parties present at the Common Location when you place this Companion, decrease your Flame by 1. |
| Step 2 | Gain 2 Glory at the end of the game. |
| Step 3 | If there's no other Parties present at the Common Location when you place this Companion, decrease your Flame by 2. |
| Step 4 | Gain 5 Glory at the end of the game. |
| Step 5 | If there's no other Parties present at the Common Location when you place this Companion, decrease your Flame by 3. |
| Step 6 | Gain 8 Glory at the end of the game. |
| Step 7 | Gain 12 Glory at the end of the game. |
Example: Astrid has improved her Dragon Companion's Attributes as shown on the image. To make use of all its Abilities, Astrid forms a Party of 2 Grunts, places her Companion meeple on top of the stack, and places them on space number 3 of the Tavern.
- Even though she has only 2 Grunts in her Party, Astrid can place her Party with the Companion on space number 3 as she has unlocked the placement effect of Step 1 on the Strength track and now it counts as +1 Hireling.
- Since the Companion was placed on space number 3, Astrid can also use her Companion's Senses. She has unlocked the second placement effect of Step 3 on the Senses track which now gives her +2 Gear tokens.
- Astrid was fast enough to place her Companion at the Tavern before anyone else. Since there are no other Parties at the Location, she can use her Companion's Speed. Her marker on Step 4 allows her to activate the placement effect of Step 3 on the Speed track, decreasing her Flame by 2.
If the game would end at this point, she would earn a total of 7 Glory from her Attribute tracks (Strength: 0 Glory, Senses: 2 Glory, Speed: 5 Glory).
Player Skills
During setup, all players must agree on whether to use the "A" or "B" side of their Player boards. The "A" side is recommended for new players, as it does not include Player Skills. On the "B" side, however, each player has a unique Player Skill, which are as follows:
- Until the end of the last Reward phase, you may place a Gear on one of your Dragon cards and attach that Dragon to any Preserve or Hero card, regardless of color. Keep the Gear on the Dragon until the End Game Scoring, where each of your Dragons with a Gear is worth +1 Glory.
- Whenever you increase your Flame, you may choose to either gain a Grunt for each step taken on the Flame track or ignore the Flame increase by discarding an Expert for each step you would have taken on the Flame track.
- Whenever you advance on an Attribute track (regardless of the number of steps), you may spend one Gear to move an additional step on that Attribute track.
- Each time you attach a Dragon card to a Hero or Preserve card, you may choose to either gain a Grunt or swap a Grunt in your personal supply for an Expert of your choice.
Using a Special Location
There may be times when you find yourself short on resources and in urgent need of extra manpower or equipment. In that case, you can use the Special Locations–the Firestation and the Warehouse–to get instant rewards without even using Hirelings.
The Special Locations have no numbered spaces (as their reward is instant and not tied to player order), therefore Hirelings are never placed on the Warehouse and the Firestation. To use a Special Location, simply place one of your Crests on it. There is no limit to the number of Crests that can be placed on a Special Location, and a player may use a Special Location multiple times in a round.
Warehouse
In the heart of the Village, easily accessible to all, stands the Warehouse—a central hub for storing tools, equipment, and special gear that the townsfolk can borrow for their daily tasks. If your Hirelings need extra Gear right away, this is the place to get it instantly.
As an action, you may place a Crest on the Warehouse (without Hirelings) to immediately gain 2 Gear tokens from the common supply.
Firestation
On an island full of dragons, the occasional fire is hardly a surprise. But standing tall in the center of the Village, Emberheart's Firestation watches over its people like a silent guardian, ensuring that the brave firefighters are always ready to respond to sudden blazes. However, if they work for the King's champions, who will stop the flames?
As an action, you may place a Crest on the Firestation (without Hirelings) to immediately gain 4 Grunts from the common supply, but you must also increase your Flame by 1.
Taking an Aide
The Dragon Ambassador is deeply grateful for your efforts against the poachers and will do everything in his power to help you in your fight. To support your cause, he places his most loyal aides at your disposal.
On your turn, you may decide to take an available Aide token from the Ambassador's Aide area instead of placing a Party on a Common Location or using a Special Location for instant benefits.
Taking an Aide does not require placing a Crest.
There are four Aide tokens, representing the Ambassador's loyal assistants ready to help your cause, each with a unique ability:
- Leader: Take this Aide and you will be the first player in the next round. Additionally, when you take this token, you may recall a Party from any of the Common Locations and then immediately choose to place a new Party with the same or a different composition. You may recall your Companion this way, but cannot place it again this round.
- Defender: When you take this Aide, discard one of the two Raid cards face up (see Raid phase for details on page 20).
- Survivalist: When you take this Aide, immediately gain a Gear token. Additionally, you break ties when claiming rewards from the Mountain.
- Healer: When you take this Aide, decrease your Flame by 2.
Each Aide can be taken once per turn. Do not return a taken Aide until the Reset phase.
End of Action Phase
When a player takes the last available Aide, finish the current turn until the last player in player order has finished their Action phase.
If you take the last Aide and the next player has the First player marker, the Action phase immediately ends, and the game proceeds to the Reward phase.
If you have no Crests left and there are no more Aide tokens available, simply skip your final turn.
It's possible to finish the Action phase with an unused Crest. This may happen if you take too many Aides, so plan your actions wisely.
II. Reward Phase
During this phase, players claim rewards from the Common Locations' offer in the order determined by the Location spaces they occupied during the Action phase. The resolution of Locations follows a strict order:
- Heroes' Guild
- Tavern
- Poachers' Camp
- Mountain
- Preserve
- Garrison
In other words, starting from the bottom-left corner of the Main board, resolve the Locations in a clockwise order.
Resolving a Common Location
When resolving a Common Location, players claim cards in a descending order of Party size: the player occupying the highest-numbered space chooses first from the available cards, then the player occupying the space with the second highest number selects from the remaining offer, followed by the third player, who takes the last available card.
If you choose not to take a card or there are no cards left for you, you may recall your entire Party (including Grunts) and gain 2 Gear tokens from the common supply.
Example
- At the Poachers' Camp, Astrid chooses first and she claims the green dragon.
- Then, Helga chooses from the remaining two dragons and she claims the red one.
- The next Party in order also belongs to Astrid, so she claims the last dragon on the offer.
- Brandon has now nothing left to choose, so he recalls his entire Party and also gains 2 Gear tokens.
After resolving a Common Location, discard all Grunts from that Location and return all Experts, Crests, and Dragon Companions to the players' personal supplies (except when resolving the Mountain, see its special rules on page 15). Do not refill the offer with new cards until the Reset phase! (see Reset phase on page 20).
Common Locations' Cards
This section provides detailed information on each Common Location and the rewards available to claim.
Heroes' Guild
The Guildhouse, located at the edge of the Village, serves as the gathering place for Emberheart's local Heroes. To maximize your deeds' efficiency and Glory, recruit Heroes for your cause that align best with your strategy.
Allowed Hirelings: Grunt, Scout.
Hero cards provide the player with an Ability and a Scoring Condition, but they can only be used if a Dragon card with the same color is attached to the Hero card.
When you claim a Hero card, place it in your player area. You may attach a Dragon of the same color to it anytime, but once a Dragon is attached to a Hero, it cannot be detached or reassigned to another card. Only one Dragon can be attached to a Hero.
Once the relevant Dragon is attached, you may use the Hero's Ability as described on the Hero card. Hero Abilities can override general game rules.
At the end of the game, if their condition is met and a Dragon of the same color is attached, you will gain Glory equal to the Hero's Scoring Condition.
You can find a detailed description for each Hero Ability and Scoring Condition on page 22.
Tavern
Emberheart's busiest place is always alive with fun and entertainment, drawing in villagers with time to spare. If you need extra manpower, head to the Tavern, where eager Hirelings are always ready to be recruited. And while you're there, have a nice cold pint of ale to cool your burns.
Allowed Hirelings: Grunt, Scout.
Tavern cards offer a combination of Hirelings you can claim in the Reward phase, as well as an increase or decrease to your Flame level.
When you claim a Tavern card, take the specified number and type of Hirelings from the common supply as indicated on the card, then increase or decrease your Flame accordingly. Then, discard the claimed Tavern card.
Poachers' Camp
The far shore of the island has recently been taken over by the poachers' camp, where dragons trapped on the Mountain are being dragged and prepared for transport. Sneak into the camp and break the chains of the weakened dragons to set them free!
Allowed Hirelings: Grunt, Scout.
The Poachers' Camp offers a variety of Captive Dragon cards representing weakened dragons with lower Glory value. In addition to the usual red, green, and blue dragons, the Poachers' Camp is the only place where you might find exotic dragons that once roamed that shore.
When you claim a Dragon from the Poachers' Camp, you may immediately attach it to an available Hero or Preserve card of yours or simply place it in your player area. You can choose to attach it later at any time during the game, but once a Dragon is attached, it can not be detached or reassigned to another card.
An Exotic Dragon counts as any color of your choice when evaluating a Raid card, completing a Garrison card, or if the Hero's Ability or Scoring Condition requires Dragons—until it is attached to a Hero card or a Preserve card. Once attached, it permanently adopts the color of the Preserve or Hero card it is attached to.
Example
Astrid has two blue dragons and two exotic dragons. The exotic dragon on the right now counts as green because it is attached to a green Preserve card. The exotic dragon on the left is unattached, meaning it can count as any color. Astrid also has a Hero whose Ability requires at least two blue dragons. Since she has one blue dragon and an unattached exotic dragon, she meets the requirement and can use the Hero's Ability.
Mountain
Legend has it that the Mountain is the cradle of all life on the island, where the first dragons appeared centuries ago and where the mightiest ones still live. However, nowadays, Dragon Mountain is filled with the poachers' elaborate contraptions, and the trapped dragons, frightened and upset, await being taken to the poachers' camp–or saved by the King's champions.
Allowed Hirelings: Grunt, Warden.
The Mountain is a unique Common Location with three levels, where a single Party can rescue up to three Dragons. Some of the most majestic creatures—those with exceptionally high Glory values—can be found only on Dragon Mountain. However, freeing multiple Dragons trapped on the Mountain comes at a cost; they may inadvertently burn you during their struggle, increasing your Flame, and the harsh climb will exhaust your Wardens, forcing you to discard them. Yet, reaching the peak is a challenge worth taking, as it rewards you with Attribute improvement.
Below you can find a step-by-step guide on how to resolve the Mountain:
I. Bottom Level
- Players take turns claiming Dragon cards from the bottom level in a descending order of Party size, as usual. Immediately increase Flame and/or discard a Warden, if a claimed Dragon card requires it.
- Return all Grunts from Parties to the common supply (and retrieve Companions, if any), but leave the Wardens on their Location spaces.
- Move the remaining Parties (now including only Wardens) to the vertically aligned Warden spaces, placing them top to bottom in a descending order of Party size. In case of a tie, the player with the Survivalist Aide token decides the order.
II. Middle Level
- Players take turns claiming Dragon cards from the middle level in a descending order. Immediately increase Flame and/or discard a Warden, if a claimed Dragon card requires it.
- Discard 1 additional Warden for each claimed card as indicated on the Main board.
- Retrieve any Party that did not claim a card.
III. Top Level
- Players decide in descending order of Party size if they want to claim the final Dragon card. The player who claims it also moves 1 step up on an Attribute track of their choice. Ties are broken by the player holding the Survivalist Aide token. Immediately increase Flame and/or discard a Warden, if the claimed Dragon card requires it.
- The player who claims the final card must also discard 1 additional Warden and increase their Flame by 1, as indicated on the main board.
Restrictions & Special Cases
- If a player has no Wardens in their Party, they cannot ascend beyond the bottom level.
- Some Dragon cards require a Warden to be discarded. They can only be claimed if the player has a Warden to discard when claiming that Dragon.
- If a player loses their last Warden on the middle level, they cannot continue to the top.
- If a player loses their last Warden on higher levels due to claiming a Dragon and therefore they can't discard the additional 1 Warden as indicated on the Main board, they increase their Flame by 1 instead.
- During bottom-level resolution, if a player cannot or does not want to claim a card, instead recall their entire Party as usual (gaining 2 Gear tokens and keeping their Grunts).
- If a player wishes to avoid increasing their Flame or losing Wardens at higher levels, they can retrieve their Party before claiming a card at the current level, but they do not gain any Gear tokens.
When you claim a Dragon from the Mountain, you may immediately attach it to an available Hero or Preserve card of your player area. You can choose to attach it later at any time during the game, but once a Dragon is attached, it can not be detached or reassigned to another card.
Example 1, Bottom level:
- Astrid has a Party of 5 (2 Grunts and 3 Wardens) so she chooses first. She claims the green dragon and discards 1 Warden from her Party as instructed by the card.
- Brandon has a Party of 3 (3 Wardens), so he chooses next. He claims the red dragon and increases his Flame by 2 as instructed by the card.
- Then, Helga claims the last remaining dragon with her Party of 2 (1 Warden and 1 Grunt) and increases her Flame by 1 as instructed by the card.
- Astrid has a second Party of 1 Grunt at the Mountain, but since there are no cards left to claim, she recalls her entire Party and gains 2 Gear tokens.
Then, Astrid and Helga discard the Grunts from their Parties, and Brandon recalls his Companion, leaving Brandon with a Party of 3 Wardens, Astrid with a Party of 2 Wardens and Helga with a Party of 1 Warden. They move their Parties to the Warden spaces in a descending order of Party size.
Example 1, Middle level:
- Brandon chooses first and claims the blue dragon, discarding a Warden and increasing his Flame by 1 as instructed by the card.
- Astrid chooses second, claiming the remaining dragon.
- Helga recalls her Party as there is nothing left to claim. She does not gain any Gear tokens as her Party already claimed a card at the bottom level.
- Then, both Brandon and Astrid discard a Warden from their Parties as they claimed a card from the middle level (indicated on the Main board).
Example 1, Top level:
Brandon and Astrid both have one Warden left in their Party and now it's a tie. Since Astrid has the Survivalist Aide token, she decides to claim the remaining card first and increases her Flame level as instructed by the card. Because she claimed the dragon from the top level, as indicated on the Main board, she also discards her last Warden, increases her Flame by 1, and increases one of her Companion's Attribute by 1.
Brandon recalls his Party without gaining or losing anything else.
Example 2, Bottom level:
- Helga has a party of 4 (3 Grunts and 1 Warden) so she chooses first. She claims the blue dragon and increases her Flame by 2 as instructed by the card.
- Brandon has a Party of 3 (3 Grunts), so he chooses next. Since he doesn't have a Warden to discard, he cannot claim the green dragon (which requires a Warden to discard when claimed), so he claims the red dragon.
- Then, Astrid claims the last remaining dragon with her Party of 2 Wardens and discards a Warden from her Party as instructed by the card.
- Then, Helga and Brandon discard the Grunts from their Parties, leaving both Helga and Astrid with a Party of 1 Warden.
- Since Brandon doesn't have any Wardens left in his Party, he retrieves his Crest, too, without gaining any Gear as he already claimed a card.
- Now Helga and Astrid should move their Parties to the Warden spaces in a descending order of Party size, but since it is a tie, Brandon–who has the Survivalist Aide token–decides the order and he places Helga's Party the top space and Astrid's Party on the second space.
Example 2, Middle level:
- Helga decides not to claim a card so she recalls her Party without gaining or losing anything.
- Astrid chooses to claim the red dragon, increasing her Flame by 1 and discarding her last Warden as instructed by the card. Astrid should discard an additional Warden as indicated on the Main board, but since she doesn't have any Warden left, she increases her Flame by an additional one. Then, she retrieves her Crest and the Mountain's resolution ends, leaving the remaining cards to be discarded in the Reset phase.
Preserve
At the foot of Dragon Mountain lies a clearing that falls under the Dragon Ambassador's authority. This area has been repurposed for the rescued dragons' needs, allowing them to live in a natural environment while still being kept safe within the borders of the Village.
Allowed Hirelings: Grunt, Ranger.
This Common Location allows you to claim sections of the Ambassador's land to provide sanctuary for your rescued dragons, represented by Preserve cards.
When you claim a Preserve card, place it in your player area. You may attach a Dragon card of the same color to it anytime, but once a Dragon is attached to a Preserve, it cannot be detached or reassigned to another card. Only one Dragon can be attached to a Preserve.
When you attach a Dragon to a Preserve of the same color, move up the marker 2 steps on the corresponding Attribute track.
Garrison
Although Emberheart is a place of peace and harmony, the King always knew the Village would need a stronghold in times of danger. Now, as trouble looms, dragon riders gather at the Garrison to organize and launch counterattacks against the poachers.
Allowed Hirelings: Grunt, Ranger.
Garrison cards represent plans of counterattacks against the poachers, launched from the Garrison. During setup, these cards were sorted into separate decks by color and arranged in ascending order based on their Glory value. As a result, in each round, one Garrison card of each color will be available, with increasingly higher Glory values as more cards of that color are claimed by players.
The requirements to complete these cards vary, but they always involve Dragon cards of the corresponding color. Additionally, as their Glory value increases, so does their difficulty.
When you claim a Garrison card, place it in your player area, regardless of whether you meet its requirements or not. To complete a Garrison card, you simply need to own the required items shown on it.
Requirement clarifications
- Dragons: All your Dragons count toward the requirement, whether they are attached to a card or not.
- Heroes: All your Heroes count toward the requirement, whether they are attached to a Dragon or not.
- Hirelings: All your Hirelings count toward the requirement, including those in your personal supply and those on the Main board.
Once you meet the requirements, move one step up on the Attribute track as indicated on the card, then tuck the completed Garrison card under your Player board—covering its requirements but leaving its Glory value visible to indicate its completion.
III. Raid Phase
The poachers won't stand idly by as the King's champions work against them. In response, they raid the Village from time to time, causing a lot of trouble to its residents. As a result, the champions must take on additional duties, sacrificing valuable manpower to repair the damages.
After the Reward phase, all players must discard the specified type and number of Hirelings shown on the remaining Raid card on the Main board.
You must discard:
| Amount | Item |
|---|---|
| -1 | an Expert of your choice (you may mix them if several is required) |
| -1 | a Grunt |
for each:
| Item | Discard |
|---|---|
| Hero / Preserve card you have (regardless of whether they are attached or not) | 1 |
| Garrison card you have (regardless of whether they are completed or not) | 1 |
| step your highest positioned marker has moved on an Attribute track | 1 |
| Red / Blue / Green Dragon you have (regardless of whether they are attached or not) | 1 |
| Ranger / Warden / Scout you have | 1 |
In case you don't have enough Hirelings, increase your Flame by 1 for each Hireling you can't discard, but as long as you have the right type of Hireling, you must discard them.
IV. Reset Phase
At the end of each round (except the last one), reset the Main board as follows:
- Discard any remaining cards from the Common Locations, but keep all unclaimed cards on the Garrison.
- From left to right, fill up the empty card slots on each Common Location (except the Garrison) with face-up cards drawn from the Location's corresponding deck.
- At the Garrison, fill up the empty card slots with the top card of the corresponding deck (red, blue and green). This way, there will always be a Garrison card of each color available in an increasing Glory order.
- Pass on the First player marker to the player with the Leader Aide token.
- Return all 4 Aide tokens to the Ambassador's Aide area.
- Discard the Poachers' Raid cards and fill up the card slots with 2 new face-up Raid cards.
- Move the Round marker to the next round.
The Flame track is never reset. Keep your Flame markers where they are during this phase.
End Game Scoring
After the fifth Raid phase is resolved, skip the Reset phase and proceed to the End Game Scoring.
Calculate your Final Glory in the following order:
- The Glory value of each of your Dragons, regardless of whether they are attached or not.
- The highest unlocked Glory value on each Attribute track (Glory values within a single track do not accumulate).
- The Glory value of each Hero card, provided that a Dragon of the matching color is attached and the scoring condition is met.
- The Glory value of each completed Garrison card.
- The final position of your Flame marker on the Flame track. You may reduce your Flame by 1 for every third Gear you discard. You may decrease your Flame this way only during step 5 of the End Game Scoring.
The player with the most final Flame—i.e., who has the rightmost marker on the Flame track—gains no extra Glory. All other players gain extra Glory based on the number of steps between their marker and the rightmost marker. The exact amount of extra Glory gained based on the step difference is indicated below the Flame track on the Main board.
Example
The rightmost marker belongs to Astrid, so she doesn't gain any extra Glory. Helga's marker is 3 steps away from Astrid's marker, so she gains +3 Glory. Brandon's marker is 6 steps away from Astrid's marker, so he gains +8 Glory.
Flame
As you get used to the way of life on the island, you might get burned from time to time. However, if you can keep the flames lower than the others, your Final Glory will shine even brighter.
Sometimes, the game will instruct you to increase or decrease your Flame. When this happens, move your marker right or left on the Flame track by the number of steps shown by the arrows next to the Flame icon.
When determining the final position of your Flame marker, you may reduce your Flame by 1 for every third Gear you discard. You may decrease your Flame this way only during step 5 of the End Game Scoring.
As the champions successfully drive the poachers away, the King will appoint the most glorious champion as the next Dragon Ambassador–and the player with the highest Final Glory wins the game. In case of a tie, the player with the most Dragon cards wins. If there is still a tie, the victory is shared.
2 Player Mode
During Setup, shuffle all Two player mode cards to form a deck and place it face down next to the Main board. Then, reveal the top card and place a non-player Crest on each Location space indicated on the revealed card.
During the Action phase, these non-player Crests will block the specified Location spaces for that round, but they do not count as a Party.
During the Reward phase, when it's their turn to claim a card, discard the leftmost card on offer. At the Mountain, discard a card this way only from the bottom level. At the Garrison, discard the card with the lowest Glory value; if there's a tie, discard the leftmost card.
At the end of the Reset phase, reveal a new Two player mode card for the next round and adjust the non-player Crests' positions to block the Location spaces according to the newly revealed Two player mode card.
Hero Abilities and Scoring Conditions
Hero cards are grouped by color: red, blue, and green. A Hero's Ability and Scoring Condition can only be used or scored while a Dragon card of the matching color is attached to it.
Red Heroes
| Name | Hero Ability | Scoring Condition |
|---|---|---|
| Apprentice | Before the first turn of the Action phase, you may claim a Hero card from the offer at the Heroes' Guild and refill the empty slot with a new card. You may use this Ability once per game. This Hero will add +4 to your Final Glory. | — |
| Bard | Before the first turn of the Action phase, draw 2 Hero cards, discard 1, and add the other as a fourth card to the offer. Only you may claim it. | Add +7 to your Final Glory if no other player has more Garrison cards than you (regardless whether they are completed or not). |
| Fire Sage | During the Raid phase, you may increase your Flame by 1 to reduce the number of Hirelings you must discard by 2. | Add +7 to your Final Glory if no other player has more Red Dragons than you. |
| Outfitter | Each time you gain Grunts from the Firestation, you may discard any number of them and gain the same number of Gear. | Add +7 to your Final Glory if no other player has more Preserve cards than you (regardless whether they are attached or not). |
| Paragon | Before the first turn of the Action phase, you may increase your Flame by 1 to discard exactly 2 Grunts and gain 2 Scouts, or gain 2 Rangers, or gain 1 Scout and 1 Ranger. | Add +5 to your Final Glory if no other player has more Dragon cards than you. |
Blue Heroes
| Name | Hero Ability | Scoring Condition |
|---|---|---|
| Blazebinder | Each time you claim a Preserve card, you may decrease your Flame by 1. | Add +7 to your Final Glory if no other player has more Grunts than you. |
| Dragon Knight | Each time you complete a Garrison card, you may advance on a different Attribute track than what the completed card would allow. | Add +7 to your Final Glory if no other player has more Blue Dragons than you. |
| Fire Marshall | On your turn, you may place 2 of your Crests on the Firestation at the same time to gain a total of 8 Grunts and increase your Flame by only 1. | Add +1 to your Final Glory for each Gear you have. You may not gain more than +10 Glory this way. |
| Infiltrator | Each time you place a Party on a Poachers' Camp Location space, you gain +1 Grunt. | Add +7 to your Final Glory if no other player has more Hero cards than you. |
| Master Scout | Each time you place a Party on a Location space numbered 4 or 5, you may swap up to 2 Grunts for the same number of Scouts or swap up to 2 Scouts for the same number of Grunts. This Hero will add +4 to your Final Glory. | — |
| Mentor | Each time you gain Experts from claiming a Tavern card, you may discard up to 2 of the claimed Experts and gain the same number of Experts of any other type. |
Green Heroes
| Name | Hero Ability | Scoring Condition |
|---|---|---|
| Caretaker | Each time you place a Party on a Preserve Location space, you gain +1 Grunt. | Add +7 to your Final Glory if no other player has more Green Dragons than you. |
| Custodian | During the Raid phase, you may reduce the number of Hirelings you must discard by 1. | Add +5 to your Final Glory, if no other player has an Attribute marker of your choice in a higher position than you. |
| Dragon Trainer | After resolving all Locations in the Reward phase, you may discard a Dragon card to move your marker one step up on the Attribute track of the same color. | Add +7 to your Final Glory if no other player has more Rangers than you. |
| Dragonspeaker | Each time you claim a Dragon card from the Poachers' Camp Location, you may decrease your Flame by 1. | Add +7 to your Final Glory if no other player has more Hirelings than you. |
| Master Ranger | Each time you place a Party on a Location space numbered 4 or 5, you may swap up to 2 Grunts for the same number of Rangers or swap up to 2 Rangers for the same number of Grunts. This Hero will add +4 to your Final Glory. | — |
| Overseer | Each time you place a Crest on the Warehouse Location, you also gain a Grunt on top of the 2 Gear you gain from that Location. |
Iconography
- Hero card
- Mountain Dragon card
- Garrison card
- Captive Dragon card
- Preserve card
- Raid card
- Tavern card
- Defender Aide
- Healer Aide
- Leader Aide
- Survivalist Aide
- Gear
- Crest
- Party
- Glory
- Flame
- Grunt
- Scout
- Ranger
- Warden
- Blue Dragon
- Green Dragon
- Red Dragon
- Exotic Dragon
- Senses Attribute
- Speed Attribute
- Strength Attribute