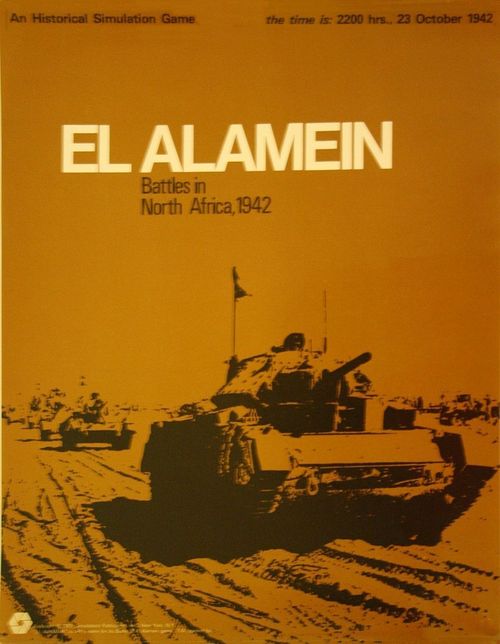
El Alamein: Battles in North Africa, 1942
El Alamein: Battles in North Africa, 1942 Rulebook
Table of Contents
Table of Contents
- 1.0 Introduction
- 2.0 General Course of Play
- 3.0 Game Equipment
- 4.0 Sequence of Play
- 5.0 Movement
- 6.0 Road Mode Movement
- 7.0 Zones of Control
- 8.0 Stacking
- 9.0 Combat
- 10.0 Combat Results Table
- 11.0 Minefields
- 12.0 Engineers
- 13.0 Supply
- 14.0 Isolation
- 15.0 Roads
- 16.0 Map Edges
- 17.0 Victory Conditions
- 18.0 Scenarios
- Scenario Variations (18.5)
1.0 Introduction
El Alamein is a simulation of the Battle of El Alamein which occurred in North Africa in 1942. The three scenarios in the game consist of "The First Battle of El Alamein" (July, 1942), "Alam Halfa" (September, 1942), and the "Battle of El Alamein" (October, 1942). Each scenario portrays the actual forces which took part in each of the battles. Optional "What if?" scenarios offer variations in forces and set-up to demonstrate how history might have been different.
2.0 General Course of Play
El Alamein is basically a two-player game. It is played in sequenced turns called Game-Turns, during which Players move units on the map, have combat, and attempt to achieve certain objectives. The Axis forces must attempt to worsen the Allied manpower shortage in North Africa by eliminating units. The Allied objective is to prevent the Axis powers from knocking out their supply, eliminating their units, or isolating their units. The Allies are in a weak position at the start of the game due to their shortage of troops.
The game is won by scoring Victory Points (for the Axis) or preventing the Axis from scoring Victory Points (for the Allies) as calculated by totalling an assigned Victory Point value to each Axis Supply unit exited (in the October scenario) and each British Combat unit which is eliminated or isolated by the end of the game.
2.1 Game Length
Each complete Game-Turn represents one day (24 hours) of real time. The July Scenario extends 7 days; the September Scenario, 7 days; and the October Scenario, 15 days.
2.2 Game Scale
Each hex on the map represents 5 kilometers of land. Each brigade-sized unit represents 2000 to 4000 men.
3.0 Game Equipment
3.1 The Game Map
The 22" x 28" mapsheet represents the area of Egypt from the Mediterranean Sea to the Qattara Depression in the south where the three Battles of El Alamein were fought. A hexagonal grid, with each hex numbered, is superimposed upon the mapsheet to regularize the movement and position of the playing pieces. The numbers in the grid run from left to right (i.e., west to east) in rows, and top to bottom (i.e., north to south) in columns.
3.2 Game Charts
Various visual aids are provided for the Players in order to simplify and illustrate certain game functions. The Combat Results Table illustrates the resolution of Combat. The Terrain Effects Chart depicts and explains the illustrations appearing on the map which represent various types of terrain features. The Turn Record Chart records the progress of the game. The Set-up charts show where the counters should be placed at the start of each individual scenario. The Supply Effects Chart details the effects of Supply on units for the Combat Strength and Movement Allowance.
3.3 The Playing Pieces
Two, differently colored sets of playing pieces (counters) are supplied. These counters represent the actual forces or historically possible forces controlled by each side in the battle (these counters will hereafter be called units). There are other various counters supplied to be used as markers to indicate such things as locations of Minefields, portions of the Road usable to obtain Supply, and status of units and the game's progress. The opposing sides' unit counters are distinguished by color. Each unit has identifying marks showing what kind of unit it is (Engineer, Supply, or Mechanized or Non-Mechanized Combat unit); its maximum Combat Strengths and its Movement capabilities. It is recommended that the Players sort and store their counters by type and color as this reduces set-up time.
3.31 Sample Unit
The sample unit counter is labelled with the following parts: Size Symbol, Type Symbol, Designation, Nationality, Combat Strength, and Movement Allowance.
3.32 Summary of Unit Types
Mechanized Units:
- Armor
- Recon
- Armored Infantry
Non-Mechanized Units:
- Infantry
- Glider Infantry
- Airborne Infantry
- Paratroops
- Engineers
- Anti-Aircraft
Non-Combat Units:
- Supply
3.33 Definition of Terms
- XX — Division
- X — Brigade
- III — Regiment
- II — Battalion
Unit Designation is the nationality and specific name of the historical formation represented.
- Bs = Bersagliere (Italian Light Inf.)
- Gf = GGFF (Young Fascists)
- Gk = Gurka (Nepalese Infantry)
- Kl = Kiel (officer's name)
- Ramcke = German Officer's name
- S = Special (Italian)
- TK = Tank
Nationality Codes: Aus = Australia; Bel = Belgian; Fr = French; Grk = Greek; Ind = Indian; It = Italian; NZ = New Zealand; Pol = Polish; SA = South Africa; US = United States. All other Axis units are German; all other Allied units are British.
Combat Strength is the basic fighting (Attack or Defense) power of a unit. It is a numerical expression of the effectiveness of the unit (see Combat) in terms of Combat Strength Points. A unit with a Combat Strength of "4" has four Combat Strength Points.
Movement Allowance is the maximum number of Movement Points a unit may expend in one Movement Phase. A units expends Movement Points to move to an adjacent hex (see Terrain Effects Chart), and also to enter or leave a hex containing other friendly units (see Stacking), and also to enter or leave road march formation (see Road Mode).
3.34 Status Markers
Minefield Markers are used to illustrate the status of particular terrain: i.e., whether that terrain has been mined by either side and whether it had been mined and is now clear. (This affects Movement and Combat Capabilities.)
Road Mode Markers are used to indicate whether a particular unit is traveling in road march formation.
Supply Vanguard Markers are used to illustrate the length of Road that has previously been used for a Supply Dump, or along which Supplies have been traveling and which has not been taken over by the Enemy.
Game-Turn Markers are used to indicate, on the Game's "Turn Record Chart," the progress of the game.
3.4 Game Equipment Inventory
A complete game of El Alamein should include:
- one game Map
- one set of Die-cut Counters
- one set of Rules
- Combat Results Table
- Terrain Effects Chart
- Scenario Variations Chart
- one die
4.0 Sequence of Play
El Alamein is played in turns. Each Game-Turn consists of two Player-Turns. Scenarios indicate which Player's turn is first. Each Player-Turn is composed of four Phases. The Player executing any Phase of his Player-Turn is the Phasing Player. Whenever the term "Friendly" is used, it applies to the Phasing Player. A typical Game-Turn will proceed as outlined below:
4.1 Sequence Outline of Player-Turns
A. FIRST PLAYER-TURN
- Initial Movement Phase: the Phasing Player may move any or all of his units as permitted by the Movement Rules.
- Combat Phase: the Phasing Player may attack Enemy units adjacent to his own at his option. At the start of each Attack, the Supply condition of the Defending Enemy units is determined. (A Player determines his own route to Supply. See Supply).
- Mechanized Movement Phase: the Phasing Player may move again, but ONLY his Mechanized units (units with a Movement Allowance of six or more) which have not attacked during the Combat Phase. This Movement is in addition to that of the Initial Movement Phase. No Combat occurs during or after this phase (see 5.26).
- Supply Movement Phase: the Phasing Player may now move his Supply units.
B. SECOND PLAYER-TURN
The Enemy Player becomes the Phasing Player executes Phase 1 through 4 above. (Consequently, all rules applying to the "Friendly Player" now apply to him.)
C. END OF GAME-TURN
The Game-Turn Marker is advanced one space on the Game-Turn Track, signaling the start of a new Game-turn.
NOTE: The above sequence is repeated for as many Game-Turns as indicated in the Scenario instructions.
4.2 Special Deployment and First Game-Turn Rules
GENERAL RULE:
Each Player sets up his forces as called for in the Scenario to be played. The Phasing Player then deploys (See Scenarios, 18.11, 18.21 and 18.31).
CASES:
[4.21] In the September Scenario (Alam Halfa), the following holds true only during the first Game-Turn: the Allied Player does not have an Initial Movement Phase: he goes directly into his Combat Phase.
[4.22] During the first Game-Turn of the September Scenario, Axis Attack Strength is doubled.
5.0 Movement
GENERAL RULE:
During either Movement Phase, the Phasing Player may move as many or as few of his units as desired and as allowed according to the units' Mechanization. Units must move hex by hex through the grid. Entering a hex costs the unit a minimum of one Movement Point [exception: see Road Mode (8.12)].
PROCEDURE:
Move each unit individually, tracing the path of Movement through the hexagonal grid. The unit may not move again, nor retrace or change its path during that Movement Phase. All units must move individually.
CASES:
5.1 How to Move Units
[5.11] Movement is never required: it is always voluntary. The Phasing Player may move all, some, or none of his movable units. During a Movement Phase, only the Phasing Player's units may be moved. No Enemy Movement and no Combat may occur.
[5.12] Each hex contains (represents) a certain type of terrain. The number of Movement Points a unit must expend to enter a hex varies with the terrain (See the Terrain Effects Chart for a full list of these different "entry costs").
[5.13] Units may be moved into as many or as few hexes as the Phasing Player desires as long as the unit's Movement Allowance is not exceeded during the Movement Phase. Unused Movement Points may not be accumulated from Phase to Phase, nor may they be transferred from unit to unit.
[5.14] A unit may move over different types of terrain in the same Movement Phase provided the Unit has enough Movement Points to expend when entering each type of hex. Example: An Allied armored unit wishes to enter an adjacent ridge hex. The armored unit moves onto the ridge hex paying four additional Movement Points (Terrain Effect), plus one to enter a hex, for a total of five Movement Points expended.
[5.15] Each unit must be moved individually, although units may begin and end their Movement Phase in a stack. Stacks may never be moved together.
5.2 Movement Prohibitions and Inhibitions
[5.21] Units may never enter a hex occupied by an Enemy Combat unit.
[5.22] A unit may voluntarily enter a hex which is in an Enemy Zone of Control. (Exception: see 16.03).
[5.23] A single unit (i.e., one not in a stack) may not leave an Enemy Zone of Control.
[5.24] A unit may not be voluntarily moved into a hex containing a Friendly unit without sufficient Movement Points to pay the Stacking Penalty. Units which do not have the Movement Points to enter a hex may not enter that hex.
[5.25] Non-Mechanized units may not move during the Mechanized Movement Phase (see Sequence of Play).
[5.26] Only those Mechanized units which did not participate in Combat may move during the Phasing Player's Mechanized Movement Phase (see Sequence of Play and Combat).
[5.27] A unit may move from a hex containing a Friendly unit(s) into another hex containing a Friendly unit(s) if the moving unit has a Movement Allowance sufficient to pay all the Stacking and Unstacking costs.
NOTE: See Cases under Stacking, Combat, Minefields, Engineers, Road, Road Mode, Supply, and Zones of Control for further explanation of Movement Prohibitions and Inhibitions.
6.0 Road Mode Movement
COMMENTARY:
The following rules simulate the effects of placing a unit in road march formation. Such a formation substantially increases the speed with which a unit may move along a road. A unit deployed in the road march formation cannot fight as effectively, however, and therefore, its Combat Strength is reduced.
A unit may move along a road regardless of whether or not it is in road march formation. Road march formation has certain benefits and certain restrictions not found in normal movement along a road. These will be explained more fully in the following rules.
The deployment of a unit into or out of road march formation takes time. On the scale of this game (basically regiment level), a unit consumes the better part of a day deploying into or out of road march formation (hereafter referred to as Road Mode). Thus, to simulate time expended, the Road Movement rules call for the expenditure of Movement Points when units change their mode of Movement.
GENERAL RULE:
Units may be deployed and moved in either of two fashions: the normal mode, or the road march (columnar) formation (Road Mode). A unit does not have to be in Road Mode in order to move along the Road. Any Combat unit may enter into Road Mode. The Road Mode increases mobility at a cost to Combat effectiveness and deployment capability.
CASES:
6.1 Entering Road Mode
[6.11] During a Player's Initial Movement Phase, the Player may enter as many units as he desires into Road Mode. The Phasing Player should place a Road Mode Marker on each unit as it enters Road Mode.
[6.12] Non-Mechanized units may enter Road Mode only during the Initial Movement Phase. Non-Mechanized units pay a Movement Penalty of one additional Movement Point to enter Road Mode.
[6.13] During either Movement Phase of his Player-Turn, a Player may enter only Mechanized units into Road Mode. Mechanized units pay a Movement Penalty of three additional Movement Points to enter into Road Mode.
[6.14] In order to enter into Road Mode, a unit must be Supplied.
[6.15] A unit in a stack, an Enemy Minefield hex, an Enemy Zone of Control, or in a Depression or Ridge hex may not enter into Road Mode.
[6.16] Mechanized units may enter into Road Mode only on the Road. Non-Mechanized units may enter Road Mode from any clear hex (clear of Enemy Zones of Control, Depressions, or Enemy Minefields).
While in Road Mode, Mechanized Units must move on the road, whereas non-Mechanized Units may move (at the Road Mode rate) in any clear terrain.
[6.17] In order for a unit to enter into Road Mode, the hex immediately in front of and directly behind the unit must be vacant. During the unit's Movement in Road Mode, all hexes passed through must be vacant of other units, rough terrain, or Enemy minefields.
[6.18] A unit's "Facing" during Road Mode is determined by the direction that the unit started out in upon entering Road Mode. The Road Mode Marker's arrow should constantly "face" in the direction the unit is traveling.
The sole purpose of the arrow on the Road Mode Marker is to determine the two hexes which constitute the unit's Zone of Control.
6.2 Movement in Road Mode
[6.21] A unit moves five (5) times its Movement Allowance while in Road Mode — after the Penalty to enter Road Mode has been subtracted from the Phasing Player's Movement Allowance. Example: A unit with a Movement Allowance of eight (8) enters Road Mode (since it is a Mechanized unit, the Road Mode Penalty is 3, leaving 5 Movement Points in its Allowance). The unit's maximum movement during that Movement Phase is 25. A unit may move any number of hexes up to its maximum Road Mode Movement Allowance. [Note: for any Road Mode movement not a multiple of 5, divide the number of hexes moved into by 5, drop the fractions and add one (1) to get the total Movement Points expended. Example: If a unit has a Movement Allowance of 8, its maximum movement in Road Mode is 25. If it moves into any number of hexes from 21 to 25, the total Road Mode Movement expenditure is 5 Movement Points. (For 16 to 20 hexes, it would be 4 Movement Points expended, etc.)]
[6.22] Units in Road Mode have no Zone of Control except for the hex immediately in front of the unit and the hex immediately behind the unit (see 6.18).
These two hexes are also known as the unit's Road Movement Space. During the entire time that a unit is in Road Mode, these two hexes must obey the same restrictions as the hex the unit occupies, i.e., must be clear terrain, may not have Friendly units in them, etc. Mechanized units on the road therefore occupy the road hex contiguous in front and back, regardless of the orientation of the road or facing marker. Road Movement Spaces may also not overlap. If these restrictions are involuntarily violated, units automatically come out of Road Mode, at no movement cost.
[6.23] A unit in Road Mode may remain in Road Mode for as many Player-turns as the owning Player desires or until it is forced to leave Road Mode.
6.3 Combat in Road Mode
[6.31] Units in Road Mode Attack and Defend at half their normal Combat Strength (fractions are dropped). Whenever a unit in Road Mode either Attacks or Defends, the unit automatically leaves Road Mode after the Combat has occurred (the Road Mode Marker should be removed immediately). The unit does not pay the penalty for leaving Road Mode.
[6.32] A unit may not stack while in Road Mode. Other units may not stack with units which are in Road Mode.
[6.33] A unit may not enter an Enemy Minefield hex while in Road Mode.
[6.34] Mechanized units, which are forced to retreat as a result of Combat while in Road Mode, do not have to be retreated along the Road.
6.4 Leaving Road Mode
[6.41] The Movement Penalty for leaving Road Mode is the same as for entering Road Mode: three additional for Mechanized units; one additional for Non-Mechanized units.
[6.42] A unit in Road Mode automatically leaves Road Mode (there is no penalty for so doing) if it becomes isolated or if it is unsupplied — or partially supplied.
[6.43] A unit which enters an Enemy Zone of Control while in Road Mode may not leave that Zone of Control during that Player-Turn. The unit may remain in Road Mode only if it does not participate in Combat.
[6.44] A Mechanized unit automatically leaves Road Mode when it leaves the Road (and must pay the penalty for leaving Road Mode).
[6.45] A unit which enters an Enemy Zone of Control while in Road Mode may (if it has sufficient Movement Points) leave Road Mode immediately by paying the penalty to leave Road Mode.
6.5 Terrain Effects Chart
[6.5] EL ALAMEIN TERRAIN EFFECTS CHART
| Terrain Type | MP Cost to Enter: Mechanized | MP Cost to Enter: Non-Mechanized | Combat Effect |
|---|---|---|---|
| Clear or Clear Road | 1 MP | 1 MP | No effect on units not in Road Mode. Combat Strength halved for units in Road Mode. |
| Ridge* | +4 MP | +1 MP | Defense doubled. Attack normal. "D1, 2 or 3" Combat Result has no effect. |
| Depression* (All units are isolated in Depressions) | +3 MP | +1 MP | (Isolation effect) |
| All-sea and Sea Hexsides** | Prohibited | Prohibited | Prohibited |
* Ridges and Depressions are alternately referred to as "Rough Terrain." The movement costs indicated for Rough Terrain is a cost which is in addition to the normal 1 MP cost as well as any other movement costs.
** Sea hexsides and all-sea hexes are alternately referred to as "Impassable Terrain." Non-Friendly Map Edges are also Impassable Terrain. Units entering such are automatically eliminated.
7.0 Zones of Control
GENERAL RULE:
The six hexagons immediately surrounding a given Combat unit (or a stack of units) constitute that unit's Zone of Control. These Zones of Control have an inhibiting effect upon Enemy Movement, but do not affect Enemy Combat. Hexes upon which a Combat unit is exerting its Zone of Control are called controlled hexes.
CASES:
7.1 Negation of Enemy Zones of Control
[7.11] If more than one Friendly unit (either Supply, Engineer, or Combat) are in a hex adjacent to an Enemy occupied hex, only one of the stacked Friendly units must remain in that hex until the adjacent hex is no longer occupied by an Enemy unit. All but one of the Friendly units are free to leave that hex during a Friendly Movement Phase (in conformity with the unstacking rules and Movement Point penalties.
[7.12] If one or more Friendly units (either Supply, Engineer, or Combat) are in a hex adjacent to an Enemy occupied hex, the Friendly Player may trace Supply through or to that hex containing the Friendly unit(s) or may retreat through or onto that hex containing the Friendly units.
NOTE: THESE TWO CASES (7.11 and 7.12) ARE STATED IN OTHER RULES SIMPLY AS "FRIENDLY UNITS NEGATE ZONES OF CONTROL."
7.2 Effect on Movement
[7.21] All units must cease Movement upon entering an Enemy Zone of Control. A unit may never voluntarily leave an Enemy controlled hex (unless there is another Friendly unit remaining in that hex).
7.3 Effect on Retreats
[7.31] Units may retreat out of an Enemy Zone of Control as a result of Combat.
[7.32] Units may not retreat (as a result of Combat) into an Enemy Controlled hex. Zones of Control have no other effect on Combat Results (see 7.12).
7.4 Effect on Supply
[7.41] Supply may not be traced through an Enemy Controlled hex (exception: 7.12).
7.5 Degrees of Zones of Control
[7.51] A particular hex may be either controlled or not controlled. There is no difference in degree of a controlled hex's effect, no matter how many units exercise control upon it.
8.0 Stacking
GENERAL RULE:
Stacking refers to having more than one Friendly unit (Combat or Supply) in the same hex at the same time. A maximum of three (3) Allied Combat and/or Supply units may be stacked in any given hex. A maximum of four (4) Axis Combat and/or Supply units may be stacked in a given hex. This limitation applies at all times (exception: see Combat Resolution, [10.23] and Engineers [12.13]).
PROCEDURE:
During either Friendly Movement Phase, the Phasing Player places units on top of one another to form a stack, or he removes units to "unstack."
CASES:
[8.01] Mechanized units (any unit with a Movement Allowance of six or above) must expend three additional Movement Points either to stack or leave a stack (unstack). Non-Mechanized units must expend one (1) additional Movement Point in order to stack or unstack. These costs are in addition to the normal Movement costs for entering a hex.
[8.02] Units may not be moved together in a stack. Units in a stack must be moved individually, each paying the appropriate unstacking cost.
[8.03] The relative position of a unit in a stack has no bearing on its ability to unstack. Thus, it is not necessary to unstack the top unit in a stack in order to move a lower unit off the stack; a Player may simply removed the unit from underneath.
NOTE: For further restrictions and qualifications on stacking, see Cases under Road Mode, Engineers, Combat, Movement, Minefields, Isolation, and Zones of Control.
9.0 Combat
GENERAL RULE:
Combat occurs between adjacent opposing units at the discretion of the Player whose Combat Phase it is. This Player is considered to be the Attacker, while the other Player is the Defender, regardless of the overall strategic positions of the two Players.
PROCEDURE:
Total Combat Strengths of the Attacking units involved in a specific Attack. Compare this total Strength to the total combined Combat Strengths of the Defending units in the hex under Attack. State the comparison as a probability ratio: Attacker's Strength to Defender's Strength, rounded down to the nearest "whole" number, to yield the simplified odds found on the Combat Results Table. Roll the die and read the results under the appropriate odds column for that die roll. Apply the result of Combat immediately before going on to resolve any other Combat.
CASES:
9.1 Units Which May Attack and/or Defend
[9.11] During the Combat Phase of his Player-Turn, a Player may only Attack those Enemy units in hexes to which his Friendly units are adjacent. Only those Friendly units directly adjacent to a given Enemy unit's hex may participate in the Attack upon those Enemy units.
[9.12] Friendly units in hexes adjacent to Enemy units are not compelled to Attack. The Attacking Player does not have to Attack from every adjacent Friendly hex. Attacking is always completely voluntary (exception: see Cases 9.25, a and b.
[9.13] All units in a Defending hex must Defend. However, a unit may not defend at a Combat Strength of less than one (1).
[9.14] No unit may Attack or be Attacked more than once per Combat Phase.
Units with their Combat Strength in parentheses may not attack, nor be forced to attack. They may only use their strength to defend.
[9.23] Units in a stack must defend collectively, totalling their individual Strengths into a single Combat Strength. Defending units in a stack must be Attacked as a single combined Combat Strength, i.e., the Attacker may not Attack individual units which are stacked together in the same hex.
9.2 Multiple Unit and Multi-hex Combat
[9.22] Units in a Stack may Attack either as individuals or collectively. When units in a stack Attack collectively, their Combat Strengths are totalled to yield a single Combat Strength.
[9.21] A single Attack may be made against more than one Enemy Combat unit: the Enemy Combat units may be in any hex adjacent to the Attacking unit (exception: see Minefields, [11.26]).
[9.24] As many Attacking units as are adjacent to a hex containing a Defending unit may Attack. Units in a Stack may make separate Attacks on Enemy units in separate Enemy occupied hexes.
[9.25a] If a hex containing a Friendly Combat unit has more than one Enemy occupied hex adjacent to it, and that Friendly Combat unit Attacks during a particular Combat Phase, then all the Enemy Combat units in hexes adjacent to that Friendly Combat unit MUST be Attacked. If there are no other Friendly occupied hexes adjacent to the Enemy occupied hex, the Friendly Combat unit must Attack all the Enemy Combat units in adjacent hexes in a single Attack if that Friendly Combat unit Attacks at all during that Combat Phase (Enemy Combat units' Combat Strengths are totalled into one total Strength). Note: if either one or more of those Enemy occupied hexes contains an Enemy Minefield, the Friendly Unit may Attack no more than one of those Enemy occupied hexes.
[9.25a1] EXAMPLE — [Diagram: example hex layout with units A, W and Y.]
If "A" attacks during the Combat Phase, then it must attack both "W" and "Y," treating their Defense Strengths as one combined value. Note that if "W" were resting on a mine (friendly to "W") then "A" could choose to attack "W" or "Y," but could not attack both.
[9.25b] If a hex containing a Friendly Combat unit has more than one Enemy occupied hex adjacent to it and there is another Friendly Combat unit adjacent to any of those Enemy occupied hexes, the second Friendly Combat unit may Attack the Enemy Combat unit adjacent to both Friendly Occupied hexes. [Note: if the first Friendly Combat unit Attacks the Enemy Combat unit adjacent to it, but not adjacent to the second Friendly Combat unit during the Combat Phase, then the second Friendly Combat unit MUST attack the Enemy Combat unit between the two Friendly occupied hexes during that Combat Phase. In effect, the second Friendly Combat unit attacks, in a kind of diversionary effort, the potential Combat Strength of the Enemy unit between itself and the other (first) Friendly Combat unit.]
[9.25b1] EXAMPLE — [Diagram: example hex layout with units A, B, C, V, W, Y and Z.]
If "C" is used to attack "V," then neither "A" nor "B" are obligated to make attacks. If "A" attacks then "B" is obligated to make an attack (and vice-versa). This is because "A" and "B" are mutually adjacent to Enemy unit "Y." If "Y" were not present, independent decisions about "A" and "B" could be made. Because of "Y," however, if "A" attacks "W," then "B" is obligated to attack both "Y" and "Z" (or, alternatively, "B" could attack "Z" and obligate "A" to attack "W" or "Y"). Note that if "Z" were on a minefield (friendly to "Z") then "B" could attack "Z" without obligating "A" to attack.
9.3 Combat Resolution
[9.31] Effects of Supply, Terrain, and Minefields upon Combat Strengths are simultaneous. Supply Effects are always calculated before Terrain or Minefield Effects.
[9.32] When a Combat Strength is halved, the fractions are dropped (half of nine is four). (see 9.13).
[9.33] Combat Odds are rounded off in favor of the Defender. For example, an Attack with a total Combat Strength of 26 versus a hex Defended by a total Combat Strength of 9 would round off to a 2 to 1 odds situation, and the 2-1 column of the Combat Results Table would be used.
[9.34] If, as a result of a Combat action, a hex is completely cleared of Enemy units, and if otherwise also clear of rough Terrain and Enemy Minefields, only one of the Friendly units which had Attacked the given hex may advance into that hex. Such an advance occurs immediately after the particular Combat, before any other Combat actions are resolved. (This Advance is separate and different from Movement; it is at the option of the Attacker and does not expend Movement Points.)
[9.35] Defending units may advance one unit into any one hex vacated by the Attacker after Combat if the Combat Results Table yields any Attacker Retreat (A1, A2, A3) or Attacker Eliminated (Ae). (This advance is separate and different from Movement; it is at the option of the Defender and does not expend Movement Points.)
NOTE: For other special effects on or regarding Combat, see Cases in Zones of Control, Road Mode, Movement, Engineers, etc.
10.0 Combat Results Table
(see mapsheet)
[10.0] COMBAT RESULTS TABLE — Combat Odds (Attacking Strength-to-Defending Strength)
| Die Roll | 1-4 | 1-3 | 1-2 | 1-1 | 2-1 | 3-1 | 4-1 | 5-1 | 6-1 | 7-1 | Die Roll |
|---|---|---|---|---|---|---|---|---|---|---|---|
| 1 | A3 | A2 | A1 | D1 | D1 | D1 | Ex | Ex | De | De | 1 |
| 2 | Ae | A3 | A2 | A1 | D1 | D1 | D3 |
Odds less than 1-4 are treated as 1-4; greater than 7-1 are treated as 7-1.
(Printed note on the Combat Results Table sheet: "See 10.1 in the rules folder for an explanation of the Combat Results Table.")
10.1 Explanation of Combat Results
A1, A2, A3, etc.: the Attacking unit(s) must retreat the number of hexes given in the result. See Retreat and Advance Case, below. (A = Attacker Retreat.)
D1, D2, D3, etc.: The Defending units must retreat the number of hexes given in the result. (D = Defender Retreat.)
Ex: The Defending units are completely eliminated (removed from the map). The Attacker must eliminate units whose Combat Strength total at least that of the eliminated Defending units. In calculating the strength of the eliminated Defending units, count only the face value of the units; disregard Terrain, Minefield, Stacking, and Supply effects (Attacker's option as to which of his units are eliminated). (Ex = exchange.)
Ae: All Attacking units are eliminated. They are removed from the game Map and placed on the Turn Record Chart. (Ae = Attacker eliminated.)
De: All Defending units are eliminated. They are removed from the game Map and placed on the Turn Record Chart. (De = Defender Eliminated.)
10.2 How to Retreat and Advance after Combat
Due to an "A" (A1, A2, A3) or "D" (D1, D2, D3) Combat Result, units will retreat after Combat. Units may not be retreated into an Enemy occupied hex, an Enemy Zone of Control, or an Enemy Minefield hex. The Victor determines the path of the retreating units according to the following priorities (NOTE: "Friendly" refers to the retreating unit):
- Toward the Friendly Supply Sources
- to or though clear Terrain
- to or through Friendly Minefield hexes
- to or through ridge hexes
- to or through hexes containing the least number of Friendly units.
CASES:
[10.21] Units may not retreat into the Sea or off a Non-Friendly Map Edge.
[10.22] The retreated unit must come to rest the full number of hexes away from its initial position called for in the result as traced by the most direct path in accordance with the above priorities. Units which are unable to retreat safely because of the interposition of Enemy controlled hexes and/or the position of Impassable Terrain or Enemy Minefields are eliminated and placed upon the Turn Record Chart.
[10.23] If, as a result of Combat, a unit has only one possible path for retreat and that path is over or ends upon a stack of Friendly units, the retreating unit may enter that stack over and above the stacking limitation. Any unit in such a stack must move during the next Friendly Movement Phase before any other Movement takes place so that stacking limitations are again met. If such Movement out of the stack is not possible, excess units must be eliminated and removed from the map. (The Friendly Player has the option as to which units he will remove in order to conform to stacking limitations.) Unstacking penalties must be paid.
NOTE: Although during an Advance or Retreat after Combat there is "movement" of units from one hex to another or other hexes, Advances and Retreats are not, strictly speaking, Movement, in that no Movement Points are expended and no Stacking or Terrain effects cause an expenditure of Movement Points.
11.0 Minefields
GENERAL RULE:
Minefield Markers are set upon the mapsheet during the Set-up (as indicated by the Set-up Chart) for each Scenario. A hex which contains a Minefield is referred to as a Minefield hex until that hex is cleared of the Minefield. The presence of a Minefield in a particular hex inhibits Enemy Movement through that hex, increases Friendly Defense Strength and has an effect on Supply.
CASES:
11.1 Entering Enemy Minefield Hexes
[11.11] In order to enter an Enemy Minefield hex, a Mechanized unit must expend eight (8) additional Movement Points. A Non-Mechanized unit must expend two (2) additional Movement Points in order to enter an Enemy Minefield hex.
[11.12] Engineer units may enter an Enemy Minefield hex with no additional Movement Penalty.
[11.13] As many units as the owning Player desires may stack in an Enemy Minefield hex as long as each has sufficient Movement Points to pay the stacking penalty and conform to stacking limits.
[11.14] After a Friendly Combat unit has entered an Enemy Minefield hex, that unit may not voluntarily leave the Enemy Minefield hex until it has been cleared.
[11.15] Supply units may not enter Enemy Minefield hexes.
11.2 Minefield Hexes' Effect on Combat
[11.21] Combat units on Friendly Minefield hexes are normal in Combat Strength for Attack but doubled for Defense.
[11.22] Combat units on Enemy Minefields may not attack until the Minefield has been cleared.
[11.23] The Combat Strength of a Friendly Combat unit on an Enemy Minefield hex is not affected by the Minefield.
[11.24] Friendly Combat units on an Enemy Minefield hex may retreat from that hex as a result of Combat.
[11.25] Minefield hexes do not exert a Zone of Control of their own. However, a unit on either a Friendly or an Enemy Minefield hex exerts a Zone of Control. Zones of Control extend into both Friendly and/or Enemy Minefield hexes.
[11.26] A Friendly Combat unit may not Attack an Enemy unit on a Minefield hex at the same time the Friendly unit is Attacking a unit(s) on another Enemy occupied hex(es).
11.3 Clearing Enemy Minefield Hexes
[11.31] An Engineer unit may clear an Enemy Minefield hex simply by moving onto that Enemy Minefield hex during the Initial Movement Phase of the Friendly Player-Turn.
[11.32] A Friendly Combat unit may clear an Enemy Minefield hex by entering the Enemy Minefield hex and remaining there until the Friendly Player has rolled a die during the Combat Phase and received a satisfactory result (i.e., one (1) for the Allied; and either one (1) or two (2) for the Axis forces. A higher die roll indicates that the Minefield hex has not been cleared by that Combat unit and the unit must remain in the Enemy Minefield hex until the Minefield hex is cleared).
[11.33] Minefield hexes are cleared at the beginning of the Combat Phase before any Combat occurs.
[11.34] An Engineer unit may clear only one Minefield hex per Game-Turn. A Combat unit may clear only one Minefield hex per Game-turn.
[11.35] The Phasing Player may stack more than one Combat unit on an Enemy Minefield hex. In order to clear the Minefield hex without the aid of an Engineer unit, the Phasing Player may roll the die once for each Friendly Combat unit stacked in the Enemy Minefield hex. He may roll one time for each stacked Combat unit every Game-Turn until the Minefield hex has been cleared or until all Combat units in that stack have been eliminated. Any die roll sufficient to clear the Minefield hex, clears the hex for all units in that hex.
[11.36] Immediately after the Minefield hex has been cleared, the Phasing Player should turn the Minefield Marker upside-down to indicate that the Minefield hex has been cleared during that Player-Turn. No Attacks may be made from that cleared Minefield hex for the remainder of the Player-Turn. After the Combat Phase of that Player-Turn is completed, the Minefield Marker from that cleared Minefield hex should be removed from the map.
[11.37] Once a Minefield hex has been cleared, it is cleared for the remainder of the Game. No more Minefield Markers may be placed on the Mapsheet. No more than the number of Minefields indicated in the Set-up chart may be placed on the Mapsheet.
11.4 Minefield Effect on Supply
[11.41] Supply may not be traced through an Enemy Minefield hex. However, a Friendly unit on an Enemy Minefield may have Supply traced to it.
12.0 Engineers
GENERAL RULE:
Engineer units have special capabilities to clear Enemy Minefield hexes or to aid Friendly Combat units in Attacks upon Enemy units which are on Enemy Minefield hexes. An Engineer unit may move only during the Initial Movement Phase and may clear only one Enemy Minefield hex per Player-Turn or may aid in only one Attack per Player-Turn.
CASES:
12.1 How to Clear Enemy Minefields
[12.11] Engineers may move onto Enemy Minefield hexes with no additional Movement Penalty for entering the Enemy Minefield hex (They do expend Movement Points for stacking and for moving through clear or rough terrain).
[12.12] Each Engineer unit may clear one Enemy Minefield hex per Friendly Player-Turn. The Engineer unit clears the Minefield hex simply by moving onto that hex during the Initial Movement Phase. The Enemy Minefield Marker is turned upside-down immediately after the Engineer unit enters the hex which it is clearing during that Player-Turn. At the end of the Combat Phase of that Friendly Player-turn, the Minefield Marker is removed from the hex.
[12.13] Engineer units must pay stacking costs to stack with Friendly, non-engineer units, but do not themselves count for Stacking.
[12.14] An Engineer unit may move out of and then enter Enemy Minefield hexes in the same Movement Phase. If an Engineer unit enters more than one Enemy Minefield hex in a single Movement Phase, then only the first Enemy Minefield hex entered into is considered to be cleared. Engineer units may clear only one Enemy Minefield hex per Movement Phase per Engineer unit.
12.2 Engineer Units' Effect on Combat
[12.21] An Engineer unit may assist Friendly Combat units in Attacks against Enemy Combat units on Enemy Minefield hexes provided the Engineer unit has not cleared an Enemy Minefield hex during that Player-Turn. The Friendly Engineer unit may assist Friendly Attacks against Enemy units on Enemy Minefield hexes if the Friendly Engineer unit is adjacent to the Enemy occupied Minefield hex at the start of the Friendly Combat Phase. The Enemy unit(s) on the Enemy Minefield hex are no longer doubled in Combat Strength (i.e., they are at Supply State Value Combat Strength) when Attacked by Friendly Combat units assisted by a Friendly Engineer unit (the Friendly Engineer unit does not necessarily have to be stacked with the Attacking Friendly Combat units.)
[12.22] Friendly Combat units may not Attack an Enemy unit in an Enemy Minefield hex from a hex which was cleared of an Enemy Minefield during the same Player-Turn, nor can a second Engineer unit aid in an Attack from such a hex.
[12.23] Engineer units "negate" Zones of Control (See Zones of Control, 7.11 and 7.12).
13.0 Supply
GENERAL RULE:
Access to a Supply Source affects a unit's Movement, Attack, and Defense capabilities. The effect is determined through reference to the Supply unit counter's characteristics and/or the position of the affected unit on the mapsheet.
A Supply unit is considered to be a Supply Source if it is within four (4) hexes (exclusive of its own hex) of another Supply Source, or an Active Road Section (see Roads). An Active Road Section is an invariable Supply Source from which all Supply units must "chain" in order to be considered Supply Sources (see Roads, Case A). ["Chaining" is being able to trace a line from the Active Road Section to a Supply unit 4 hexes from the Road (that unit is now a Supply Source), to a second Supply unit 4 hexes from that Supply Source, and so on, up to the unit whose Supply State is being determined.] A Player determines his own route to a Supply Source (i.e., "traces Supply").
PROCEDURE:
Supply is judged for movement purposes at the beginning of the Movement Phase, and for combat (offensive or defensive) at the instant of combat.
Supply lines may not be traced through Enemy occupied or controlled hexes, or Enemy Minefield hexes, or Sea hexes, or Depression hexes. If a unit cannot trace a line of supply of any length not blocked, it is isolated.
13.1 Supply Unit Characteristics
The Supply unit counter carries four values: Attack Support Allowance (upper left), Attack Supply Range (upper right), Defense Strength (lower left, in parentheses) and Movement Allowance (lower right). The sample Supply counter shows an Attack Support Allowance of 3, an Attack Supply Range of 6, a Defense Strength of (1) and a Movement Allowance of 3.
Attack Support Allowance — the number of attacks (by any number of units) that a Supply Source may support during one Combat Phase.
Attack-Supply Range — The maximum distance in hexes from the Supply Source (exclusive of the Supply Source's hex) to the hex from which Attacks may be launched at full strength. Within a range from one hex above that number to double the Attack-Supply Range number, the affected Combat unit's Attack capabilities are halved.
13.2 Supply Effects Chart
| Effect | Supplied | Partially Supplied | Unsupplied | Isolated |
|---|---|---|---|---|
| Effect on Movement Allowance | Normal | Normal | Halved | Halved |
| Effect on Attack Strength | Normal | Halved | Halved | Zero: may not attack |
| Effect on Defense Strength | Normal | Normal | Normal | Halved |
13.3 Supply States
[13.31] There are four kinds of Supply States: Supplied, Partially Supplied, Unsupplied and Isolated. At a given time, a unit (Supply, Engineer, or Combat) is in any one of these states.
[13.32] A unit is considered to be Supplied if it is within the number of hexes equal to or less than the number of the Attack-Supply Range of the Supply Source to which it is tracing Supply, or within four (4) hexes from the Friendly Map Edge, or within 6 hexes of an Active Road section.
[13.33] A unit is considered to be Partially Supplied if it is distant the number of hexes from one above and up to twice (if 6H then from 7 to 12) the number of the Attack-Supply Range of the Supply Source from which it is tracing Supply; or within 7 to 12 hexes distant from an Active Road Section; or within 5 to 8 hexes from a hex on the Friendly Map Edge, which is not an Enemy Zone of Control.
[13.34] To be a Supply Source, a Supply unit must be Supplied (i.e., it must meet the "Chaining" requirements). A Supply Source can never be Partially Supplied.
[13.35] A unit is Unsupplied when it is more than double the Attack-Supply Range (in hexes) distant from the nearest Supply Source. An Unsupplied unit's Movement and Attack Strength are halved (A unit may remain Unsupplied indefinitely, i.e., it is never lost through lack of Supply alone).
[13.36] If the Friendly Map Edge Road hex is occupied by an Enemy Combat unit, all Friendly units must be able to trace Supply to the Friendly Map Edge (through any hex adjacent to the Friendly Map Edge and not an Enemy Zone of Control) in order to be Supplied. In such a case, there are no Supply Sources, only Supplied units.
[13.37] In all situations where a unit's Combat or Defense Strength or Movement Allowance is halved, round downwards.
14.0 Isolation
GENERAL RULE:
Isolation is the state of a unit (either Combat, Supply or Engineer) being unable to trace a line of hexes back to a Supply Source. This occurs when a unit is surrounded by any combination of any enemy units, Zones of Control, Enemy Minefield hexes, Depressions, Non-Friendly Map Edges, or the Sea.
CASES:
[14.01] An isolated unit may not Attack, and its Defense Strength is halved.
[14.02] An isolated unit's Movement Allowance is halved.
[14.03] An isolated unit may not Defend at less than one (1).
[14.04] If an Isolated unit is still isolated by the end of the same Phase of the next Game-turn (same Phase that it became isolated), that unit is automatically eliminated. (Note: Players should make a written note of which units were isolated and which Phase of which turn they became isolated. Allied isolated units which are eliminated are counted towards Victory Points and so should be placed upon the Turn Record Chart).
[14.05] As soon as a unit becomes Isolated, the unit counter must be turned upside-down to denote its isolated state. It is turned proper side-up when and if it again becomes unisolated.
15.0 Roads
GENERAL RULE:
In El Alamein, there is one Road which runs along a row of hexes near the Sea from the West Edge of the Map (Axis) to the East Edge of the Map (Allied). The Road is divided between the Axis and Allied forces from their respective Map Edges to the hex containing their respective Supply Vanguard Markers.
A Road Section is that number of hexes from the Friendly Map Edge Road hex, along the Road hexes, up to and including the hex containing the Friendly Supply Vanguard Marker.
15.1 Road Sections: Active and Inactive
There are two kinds of Road Sections: Active and Inactive. A Road Section is considered Active for a particular Player in the Road Section is not blocked by an Enemy Zone of Control between the Friendly Supply Vanguard Marker and the Friendly Map Edge Road hex. If the Road Section contains a hex which is in an Enemy Zone of Control, the Road Section is considered to be Inactive until the Road Section is cleared of Enemy units.
15.2 Supply Vanguard Marker
The Supply Vanguard Marker is simply a marker indicating the number of hexes from the Friendly Map Edge Road hex to the Road hex which is most distant from it but which contains Supplies. [Note: although a hex may have at one time during the game been a Supply Source, when there is Enemy blockage between it and the Friendly Map Edge, that hex no longer is considered a Supply Source. Although that hex was Supplied at one point in the game, and theoretically supplies were dumped into it and have neither been destroyed, removed, or in any way consumed, Enemy blockage prevents it from being a Supply Source until there is no longer Enemy blockage.]
15.3 Advancing the Supply Vanguard Markers
[15.31] The Friendly Supply Vanguard Marker is advanced by having any Friendly Combat unit placed upon it and moved along the Road. An Enemy Player may "push" the Friendly Supply Vanguard Marker closer to the Friendly Map Edge Road hex (thus shortening his opponent's Friendly Road Section) by advancing any of his own Combat units along the Road one hex directly behind the Friendly Supply Vanguard Marker.
Note: The Supply Vanguard Marker has no Movement or Combat Capabilities of its own. It may not be attacked or destroyed.
[15.31a] SUPPLY VANGUARD MARKER EXAMPLE
The Allied Supply Vanguard Marker (located in hex 3108) has an Axis unit ("A") directly adjacent to it at the beginning of the Axis Movement Phase. Since the Allied marker is in an Axis Zone of Control, the Allied Active Road Section begins in the first hex to the east of the marker (3208). The Axis Active Road Section begins, and runs westward, from where the Axis Vanguard Marker is situated (2805) — since there are no Allied units adjacent to it. The Road Section in between the two Vanguard markers is Inactive for both Players.
By the end of the Axis Movement Phase, Axis unit "B" has moved to cut the road behind the Allied Supply Vanguard Marker. The Allied Active Road Section now begins in hex 3610 and runs eastward from there. The inactivated section of road can only be regained by the Allies by removing the influence of the Axis unit (through combat or maneuver). Note, however, that the Allied Supply Vanguard Marker has been pushed back (to 3309) by the advance of Axis unit "A."
[15.32] An Active Road Section is an invariable Supply Source from which all units must "chain" to be considered supplied. An Inactive road Section is not a Supply Source.
[15.33] An Active Road Section's Attack-Supply Range is 4 hexes to a Supply unit and 6 hexes to a Combat unit.
[GAP IN SOURCE: the scan's page 7 is a duplicate of page 6, so the rules text that should follow rule 15.33 and precede rule 16.0 is missing from this transcription. The missing text covers the rest of Section 15.0 (roads, Supply Vanguard and active road section cases) and is not reproduced here.]
16.0 Map Edges
GENERAL RULE:
There are two kinds of Map Edges: Friendly and Non-Friendly. A Friendly Map Edge is (for the Allies) the entire eastern Map Edge (external to the map, it is not the most distant row of hexes), or (for the Axis) the entire Western Map Edge. A Non-Friendly Map Edge is the entire Enemy Map Edge (West for Allies, East for Axis), the entire Southern edge and/or the Sea for both Players.
CASES:
[16.01] Friendly Map Edges are Supply Sources. Their Attack-Supply Range is equal to four (4) to either a Supply unit or a Combat unit.
[16.02] A Friendly Map Edge does not exert a Zone of Control into the row of hexes nearest the Map Edge.
[16.03] If a Friendly Combat unit retreats (as a result of Combat) off the Friendly Map Edge, it must re-enter the map through the same hex it retreated through. It may re-enter only if the entry hex is not an Enemy Zone of Control. It may re-enter at any time, but must do so before the end of the game or be considered eliminated.
[16.04] Friendly Combat units retreated off the Enemy Map Edge are considered eliminated.
[16.05] Units may never voluntarily leave the Map (exception: see 17.23).
17.0 Victory Conditions
Axis Victory is determined by the number of Victory Points the Axis Player accumulates during each of the scenarios. Allied Victory consists of the Allied Player's preventing the accumulation of Victory Points by the Axis Player. For each scenario, the Axis Player begins with an assigned number of Victory Points. This number indicates his historical advantage (a positive number) or disadvantage (a negative number). This number is added to the total number of Victory Points gained throughout a scenario to determine actual Victory. Personal Player Victory consists in bettering the historical outcome.
17.1 Victory Point Schedule
| Total Axis Points | Type of Victory |
|---|---|
| 60 or more | Axis Decisive |
| 50 to 59 | Axis Substantive |
| 40 to 49 | Axis Marginal |
| 30 to 39 | Draw |
| 20 to 29 | Allied Marginal |
| 10 to 19 | Allied Substantive |
| 9 or fewer | Allied Decisive |
17.2 Added Victory Points
In all three scenarios, the Axis Player receives one (1) additional Victory Point for each Allied Combat unit eliminated by a Combat Result of "Ae" or "De," or elimination due to blocked retreat (but not by an "Ex"). For each Allied unit eliminated by isolation before the final Game-Turn ends, the Axis Player receives one (1) additional Victory Point.
17.21 July Scenario: Special Victory Conditions
Historical Outcome: Draw
Axis start with: 25 Additional Victory Points
Add Victory Points for: Each column of hexes between column 3400 (exclusive of itself) and the Combat unit farthest east of column 3400 (ADD 3 VICTORY POINTS). (Example: If the Easternmost Axis Combat unit is on hex number 3812, there are 4 columns between it and column 3400. That number times 3 equals 12 additional Victory Points.)
17.22 September Scenario (Alam Halfa): Special Victory Conditions
Historical Outcome: Axis Marginal Victory
Axis start with: 35 Additional Victory Points
Add Victory Points for: Each Allied Minefield hex cleared by the Axis Player's units (ADD 3 VICTORY POINTS).
17.23 October Scenario: Special Victory Conditions
Historical Outcome: Allied Decisive Victory
Axis start with: minus twenty (-20) Victory Points
Add Victory Points for: Each Axis Supply unit exited off the Western Map Edge after Game-Turn 10 (ADD TEN VICTORY POINTS EACH). For each Axis Combat unit exited off the Western Edge of the Map after Game-Turn 10, (ADD THE TOTAL OF THE FACE VALUE OF COMBAT STRENGTH POINTS). [Explanation: After a British attack upon the Axis, Rommel held the Axis line for three days, but began too strongly to feel the pressure of the British. Hitler game Rommel a "stand-fast" order. By Game-Turn ten, Rommel feels he must disregard the order form the Fuhrer in order to save his men, and so retreats to the West.]
18.0 Scenarios
GENERAL RULE:
The three main battles which took place at El Alamein are presented as the July, September, and October Scenarios. Except for the following special cases pertaining to individual scenarios, all of the standard rules apply to each scenario. Each of the three scenarios has its own Set-up Chart (with historical set-up indicated) and its own Victory Conditions.
18.1 Special Cases: July Scenario
[18.11] The July Scenario extends through seven Game-Turns. In the July Scenario the Axis Player moves first.
[18.12] Certain hexes are designated as Boxed Areas (as indicated by the "□" symbols on the map). One hex or a group of hexes may be considered a Boxed Area. Allied Units which either begin the scenario in a Boxed Area, or which enter the Boxed Area at any time during the game, may not leave the Boxed Area except as a result of Combat (exchange, elimination, or retreat).
[18.13] If, as a result of Combat, no Allied units are left remaining in a Boxed Area, the Boxed Area's influence is extinguished. Any Allied unit may move freely through any of the hexes which had made up that particular Boxed Area. Also, if an Axis unit enters a Boxed Area hex, that hex is no longer considered a Boxed Area.
[18.14] Boxed Areas exist only for Allied units. They have no effect on Axis units, and no other effect on Allied units except as described in above cases 18.12 and 18.13.
18.2 Special Cases: The September Scenario (Alam Halfa)
[18.21] The September Scenario extends through seven Game-Turns. In the September Scenario, the Axis Player moves first.
[18.22] The first Game-turn of the Alam Halfa Scenario differs from the other scenarios' first Game-Turns in that during this Game-Turn only, the Allied Player does not have an Initial Movement Phase: he goes directly into his Combat Phase.
[18.23] During the First Game-turn of the Alam Halfa Scenario, the Axis Combat Strength is doubled for Attack only.
18.3 Special Cases: The October Scenario
[18.31] The October Scenario extends through fifteen Game-Turns. In the October Scenario, the Allied Player moves first.
[18.32] Up until and including the tenth Game-Turn, the Axis Player may not move westward any units which are between the Retreat Line and the Axis Starting Line.
[18.33] Any units which move east over the Retreat Line, may not move west again until after the tenth Game-Turn.
[18.34] Any units which are west of the Axis Retreat Line before the tenth Game-Turn may move in any direction while they are west of the Axis Retreat Line.
18.4 Free Set-Up Scenario
[18.41] Free Set-Up may be used only in either the September or October Scenario. All other rules, except those listed below, apply, including those pertaining to each particular scenario. (18.1, 18.2, 18.3).
[18.42] All the available unit counters and Minefield Markers as listed in the individual scenario's set-up sheet may be placed behind each Player's respective starting line as indicated on the mapsheet.
[18.43] Players may not place any more units or Minefield Markers behind their Starting Line than there are in the historical scenario. However, fewer may be placed on the mapsheet.
[18.44] In both the September and October Scenarios, the Allied Player may place Minefield Markers in either of two ways: either one after another in the column of hexes directly adjacent to the Starting Line beginning at hex number 3208 (September) or hex number 3208 (October) and ending with hex number 3134 (September) or hex number 4024 (October); or the Allied Player may choose to instead place his Minefield Markers as indicated on the historical scenario. There may be no variation from either of these two options.
18.5 Scenario Variations Chart
(See separate sheet — the chart is reproduced in full in the Scenario Variations section below.)
Scenario Variations (18.5)
[18.5] SCENARIO VARIATIONS
The accompanying table lists possible "What-If?" situations that could have occurred in the Battles of El Alamein. The "units lost" column refers to the unit counters which should be removed from the particular scenario (July, September or October) when other units are added ("units added" column). Each scenario variation is coded, since some of the variations may be combined with other variations. (The column labelled "not usable with these variations" implies that the use of any of the variations in this column with the referent variation would be either very unbalanced, historically impossible, or impossible because of too few counters). The column labelled "Effect on Victory Points" is a measure of the effect of the variation in terms of what kind of advantage or disadvantage the difference in units available would have made in the historical situation. Where there is a minus sign (-) preceding a number, subtract this number from the Axis starting Victory Points (these variations would give the Axis a military advantage, so the Victory Point totals are adjusted to compensate for that advantage). A plus sign (+) preceding the number of Victory Points indicates that this number should be added to the starting number (to compensate for an Allied advantage).
Transcriber's note: the unit-number and designation print on the small counter faces of this chart is too small to read reliably in the scan, so only the strength and movement figures, nationality and unit type are given below. Where a figure is not legible it is marked "[illegible]".
18.51 Allied Scenario Variations
| Code | Allowable Scenario(s) | Units Added | Units Lost | Not Usable With Variations | Effect on Victory Points |
|---|---|---|---|---|---|
| (A) | October or September | US 8-10; US 8-10; US 3-10 (these three are marked with a star and used in the September variant, which uses U.S. units only); US 8-8; US 8-8; US 8-8 | 12-8; 12-8; 9-8 (no units lost in the September variant) | — | +20 (October); +15 (September) |
| (B) | October | Pol 3-4; Pol 3-4; Pol 3-4 | None | D | +15 |
| (C) | October | Bel 3-4 | None | — | +5 |
| (D) | October | Ind 6-8; Ind 4-4 (Gurkha) | Ind 3-4; Ind 3-4; Ind 3-4 |
18.52 Axis Scenario Variations
| Code | Allowable Scenario(s) | Units Added | Units Lost | Not Usable With Variations | Effect on Victory Points |
|---|---|---|---|---|---|
| (E) | October | 6-10; 3-10; 3-10 | 2-4; 2-4; 2-4 | G, J | -5 |
| (F) | October | 6-10; 3-10; 3-10 | 2-4; 2-4; 2-4 | G, J | -5 |
| (G) | October | 2-4 (Ramcke); 2-4; 2-4 | 2-10 (Ramcke) | E, F, J, H | -10 |
| (H) | July or September or October | 2-4 | None | G, J |