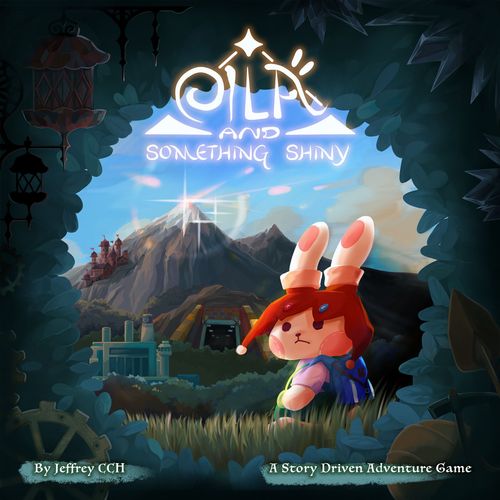
Eila and Something Shiny
Eila and Something Shiny Rulebook
Table of Contents
Table of Contents
- Components
- Read Before You Start
- Setup
- Gameplay Overview
- Gameplay: Day Phase
- Resources
- Meaning of Symbols
- Gameplay: Night Phase
- Ending the Chapter
- Chapter 2: The Factory
- Other Additional Rules
- Chapter 3: The Mine
- Chapter 4: The Castle
- Chapter 5: The Mountain
- Appendix: Further Explanations of Item and Support Cards
- Advanced Mode
- The Creation of Eila
Components
- 1 Game Board
- 1 Eila's Diary
- 1 Save Box
- 1 Card Stand
- 6 Chapter Boxes (with event cards and special contents inside)
- 7 Habit Cards
- 22 Advanced Event Cards
- 32 Item Cards
- 14 Support Cards
- 18 Food Tokens
- 18 Coin Tokens
- 18 Knowledge Tokens
- 18 Energy Tokens
- 16 Fear Tokens
- 8 Magical Stone Tokens
- 12 Heart Tokens
Read Before You Start
For the most immersive experience,
- DO NOT open any chapter boxes before you are told to do so.
- DO NOT unwrap, read, or shuffle any cards/decks before you are told to do so.
- DO NOT read the rules of future chapters beyond your current chapter.
- DO NOT spoil any content when sharing the game with friends.
In chapters 0 to 1, you will learn the basic rules. In future chapters, new rules will be added into the gameplay. When you see this:
Additional Rules ##:
It means the rule will be applied to the current and future chapters.
4 Decks in the Gamebox
Other than the event cards in the chapter boxes, you will find 4 additional decks, including: item cards, habit cards, advanced event cards and support cards.
For chapter 0 to 1, you will only use item cards and habit cards. Support cards will be used later in the story.
Read more about Advanced Mode below. However, this mode is not recommended if you are playing this game for the first time.
Habit cards and advanced event cards look like other event cards. Be careful not to mix them up.
- Habit cards are indicated with an H and have a card-stand icon on the right.
- Advanced event cards are indicated with a gear icon above the card number.
Setup
For chapter 0, there should be no cards in the Save Box. Starting from chapter 1, during setup you should check the Save Box and take the saved cards out for use.
For the acquired Habit cards, start from chapter 2, during setup, put them on the bottom of the green deck before placing them on the card stand. You can decide the order of the Habit cards.
The general setup of the game is the same for all chapters:
- Open the chapter box.
- Arrange the cards by their numbers in ascending order without flipping the cards over. There should not be any repeating numbers. For Chapter 0, you should find 001 to 011.
- Separate the cards into stacks according to their colors.
- Set up the card stand on the corresponding space. Put all green event cards inside the card stand to form the upcoming deck. For chapter 0, the cards are 001 to 005.
- Take out the habit card deck from the gamebox and place it face down on the corresponding space.
- Set red event cards face down in the corresponding space. For chapter 0, the cards are 009 to 011.
- Place the goal card in the centre of the game board. Each card has two different modes: normal and advanced. Use the normal mode for your first playthrough. Fill up all the heart spaces with Heart tokens.
- Place the blue event cards face down in the corresponding space. For chapter 0, the cards are 006 to 008.
- Take out the item card deck from the gamebox and set it face down on the corresponding space.
- Now, read the prologue to start your adventure! Set up starting resources, if any, according to the instructions in the comic. Chapter 0 is the only chapter without a prologue.
Gameplay Overview
- Each chapter consists of 7 days. Your objective is to achieve the chapter goal before the end of the 7th day.
- The chapter goal is written on the last page of the prologue. In chapter 0, the goal is to submit 2 [Food] within 7 days.
- Each day consists of the Day Phase and the Night Phase.
- The game ends when you either win or lose the chapter. You win when you achieve the chapter goal. You lose when you run out of HP or failed to achieve the goal when the Night Phase of the 7th day ends.
- During the game you will come across a lot of event cards. Each event card shows a card number, card name, and chapter icon, some flavour text, and one or more lettered options (Option A, Option B, etc.).
Gameplay: Day Phase
Step 1: Reveal Upcoming Card
Reveal an event card from the upcoming deck. Place it in the Present and proceed to the next step.
If the upcoming deck is empty, day phase ends and night phase begins.
Step 2: Execute an Option
Study your options and their effects. Make a choice. To learn more about the meaning of the symbols, refer to the Meaning of Symbols section below.
Using event card 001 as an example, you may choose Option A to gain food or choose Option B to proceed the story.
Some options have a prerequisite. For example: "You can pick this option only if you have a toolbox."
Golden Rule: The execution of an option always starts from left to right, up to down.
Step 3: Resolve the Event Card
After executing an option, place the card according to the direction indicated.
- This event card goes to the Future face down.
- This event card goes to the Past face down.
- This event card returns to its original deck.
Resources
There are 6 types of resources, 3 are tangible and 3 are intangible. You can only keep a maximum of 8 resources for each type.
Tangible Resources
- Food
- Coin
- Magical Stone
Intangible Resources
- Knowledge
- Energy
- Fear
You should always put a resource in the corresponding storage space when you acquire it.
Anytime during the game, you may discard resources except Fear. Fear can only be discarded by card effects.
You acquire resources when you execute a + effect, for example: +2 Food, +3 Knowledge, +2 Fear.
It is not necessary to acquire the full amount indicated, except when acquiring Fear.
Fear must be acquired upon indication. When you acquire Fear but there is insufficient storage space, you must discard other resources to make room for it. After you exceed the maximum (8 Fear), you instead lose 1 HP for each further Fear acquired and discard it.
You must discard resources when you execute a − effect, for example: −1 Magical Stone, −2 Energy, −2 Fear.
You cannot choose an option with a − effect unless you have enough resources to discard. However, Fear is the exception. For example, you may choose an option with a −2 Fear effect even when you have only 1 Fear.
Special Conversion of Resources
Examples of conversion: 2 Food converts to 1 Energy; 5 Knowledge converts to 1 Magical Stone.
Whenever desired, you may convert these resources as a free action subject to the following 2 rules:
- You can only convert resources in the storage spaces.
- You cannot convert while resolving a single effect. For example, you are going to acquire 4 Food and want to convert them into 2 Energy. You can only do so after you have acquired all the 4 Food and placed them in the storage space. You are not allowed to acquire 2 Food first, convert them to 1 Energy immediately, and acquire the remaining 2 Food for the second conversion.
Meaning of Symbols
- +X — Acquire a number of the resource of your choice. It can be zero.
- −X — Discard a number of the resource of your choice. It can be zero.
- Conversion arrow — Symbol of conversion. Pay the cost on the left to get the reward on the right.
- Night phase icon (crescent moon) — Marks the night phase.
- Blue card-deck icon — Find the corresponding number card from the blue event card deck and put it in the Future.
- Red card-deck icon — Find the corresponding number card from the red event card deck and put it on top of the upcoming deck. This will become the next card to be revealed.
- H (habit deck icon) — Find the corresponding number card from the habit card deck and put it on top of the upcoming deck. This will become the next card to be revealed.
- Item-search icon — Search item deck, acquire the stated item. If you possess the item already, ignore this effect. When two item icons are separated by a slash, it means you can acquire either one of the items.
- Item-discard icon (crossed out) — Discard the specific item card. Place it back to the item deck. When two such icons are separated by a slash, it means you have to discard either one of the items.
- Double item-discard icon — Discard either two of the items indicated. Place them back to the item deck.
- Heart icon — Gain 1 HP. You cannot gain HP beyond your maximum HP of the current chapter.
- Broken heart icon — You lose 1 HP. Losing the last HP makes you lose a chapter.
Gameplay: Night Phase
After the end of day phase, night phase begins.
- You may place the corresponding resources onto the goal card from your storage. For Chapters 0 and 1, you can only place a maximum of 2 resources in a night phase.
- Place 1 Energy from your storage onto the smallest number of the time track. If you do not have any, you lose 1 HP instead (put the Heart token you lost onto the time track instead).
- Shuffle all the cards in the Future and put them into the upcoming deck with the card back facing you. Night phase ends and a new day begins!
Ending the Chapter
The chapter ends when you win or lose.
You win immediately when…
- The goal is achieved.
Then:
- Read the ending comic of the chapter.
- Record your progress.
- Proceed to the next chapter.
You lose when…
- You run out of HP, or
- When the 7th slot of the time track is occupied.
Then reset the chapter by the following steps:
- Return the cards you have acquired in this chapter.
- Rearrange all the event cards to the original setting of the chapter.
You must win to proceed to the next chapter. Try again! If you face difficulties, you may check out the strategy guide (Diary page 14-15).
How to record your progress
- You will keep all acquired Item and Habit Cards throughout the chapters. DO NOT put them back to the original decks.
- Mark your acquired Item and Habit Cards in the Diary using a pencil. You will use the same page for the whole journey.
- If you wish to pause the game, put these cards inside the save box for later use. When you resume your journey, remember to get everything back from the Save Box first.
Don't turn over until you start Ch.2
Chapter 2: The Factory
Additional Rule 01: Additional Setup
From now on, reserve the 2 areas beside the game board during set up.
The area on the left is the Item & Support Area. Place all the item and support cards you acquired in this area.
The area on the right is the Chapter Element Area. Set up the unique elements of the chapter in this area.
Additional Rule 02: Unique Elements of the Chapter
From now on, each chapter has at least one unique element. Before you start the chapter, the rulebook will teach you how to set up those additional components and how it affects the gameplay.
Unique Element - Quiz Cards
Additional Setup
- Separate the quiz card deck into EQ and AQ decks.
- Put them on the "Chapter Element Area" face down.
Changes in Gameplay
- In chapter 2, some events will tell you to draw an EQ or AQ quiz card. To do so, shuffle and draw one EQ or AQ card from the appropriate deck. Reveal it and study the question.
- You may find hints to the answers by observing the artwork on the cards of this chapter. Keep an eye on the details!
- Whenever you feel confident to answer a quiz card, choose an answer and check rulebook page 15. If it is correct, you get the award stated on the bottom of the quiz card. If it is not correct, you cannot get the reward.
- Then, turn over the card and the award is not available anymore.
(The Item & Support Area holds all the item and support cards you have acquired; the Chapter Element Area holds the unique elements of the chapter — in Chapter 2, the EQ and AQ quiz decks.)
Other Additional Rules
Additional Rule 03: Enemy Cards and Combats
The crossed-swords symbol is the symbol of Eila's combat value.
From now on, you may encounter enemy cards. When facing them, you need to throw Eila's combat die (the red die). The result of the die is Eila's combat value.
After throwing the die you may spend any number of Energy to boost your combat value. Each Energy can boost your combat value by 2. This method can help you get more than 6 combat value.
If your combat value is larger than or equal to the enemy's combat value, execute the winning option. If it is lower than the enemy's combat value, execute the losing option. Cancel 1 HP loss if you rolled a shield icon.
- The die's paw face = combat value 1.
- The die's shield face = combat value 2 + prevent 1 HP loss.
Some enemies have their own weaknesses. If you fulfill the condition, the combat value of the enemy will be lowered — an enemy card that shows "If you do not have [Fear icon]" with a lowered number is an example of this.
Additional Rule 04: Support Cards
Unwrap the support card deck and put them face down under the item deck. Starting from chapter 2, find the right support card by the number and acquire it when you see the support-card acquisition icon. Like items and habits, you should record and keep support cards along the journey.
You may only use support cards in the specific timing stated on the card. For example, Fireball can only be used in combat.
Some of the cards allow you to convert resources. For example, you may convert 1 Magical Stone to 10 combat value in combat if you have Fireball. In addition, like item cards, there are options which require you to possess a specific support card. For example, you need to have S02 to choose a particular option in an event.
You may use a spell multiple times in a single combat if you have enough Magical Stone.
If you find it hard to understand an item or a support card, you may check out the Appendix below. There is a further explanation for some of the item and support cards.
Additional Rule 05: Alternative Endings
From now on, each chapter has more than one ending. The goal card will always show you the default objective to win the chapter. If you complete the goal card objective, you reach ending A and you could read the ending A comic.
Alternative ending is hidden in the chapter and it is triggered by some event cards. When you encounter those cards, you will win the game and the card will tell you to read the alternative ending comic.
Will the alternative ending affect your journey? This is left for you to discover!
Answers of EQ and AQ
EQ-1: c EQ-2: b EQ-3: d EQ-4: b EQ-5: c AQ-1: c AQ-2: a AQ-3: d AQ-4: d AQ-5: a
Don't turn over until you start Ch.3
Chapter 3: The Mine
Remark: In case you have forgotten the basic rules (e.g. set up, enemy encountering, item & support card etc), you may refer to the rules of Chapter 0-2.
Unique Element - Map and Locations
Additional Setup
Take out the 11 map tiles from the chapter box. In each playthrough, 9 of them will be used to form the mine for you to explore. Set up the mine in the chapter element area (on the right side of the game board) as follows:
- Set the M1 tile face up on the bottom left corner.
- Shuffle the M2 tiles and place them face down.
- Shuffle the M3 tiles and place them face down.
- Shuffle the MC tiles, draw 1 and place it face down. The 2 remaining MC tiles will not be used in this playthrough.
- Shuffle the M4 tiles and place them face down.
- Place the location event deck (card number 340-352) beside the mine face down.
- Each map tile consists of 4 grids. Place the Eila & Leo token on the left bottom grid of the M1 tile.
Changes in Gameplay
- The Eila & Leo token represents your current location. You may move and explore the mine by some of the event cards, for example an event with the option "Explore the maze — Move by 0-2 grids. Then trigger the event located there."
- To do so, move the token on the map. You cannot move diagonally.
- The following map features may affect movement:
- A. Cliff: Cost 1 Energy or 1 HP to pass through it. Ignore the cost if you possess a rope.
- B. Hidden passage: Cannot be passed through unless you possess a magnifier.
- C. Wall: Cannot be passed through.
- D. Dark area: You acquire a Fear when entering. Passing is also counted as entering.
- When you are about to enter a face-down map tile, flip it over and move to the grid adjacent to your current location.
- In some rare cases, you may encounter a wall when entering a face-down tile. In this case, you will return to the previous grid without spending the move.
- Cards with number 340-352 are the events located in the location matching the corresponding number. When you trigger one, search the location event card deck and reveal the event matching the number at your current location. If you are in a location without a number, skip triggering.
- When you see an option that you cannot choose it unless you are in a grid with the shelter icon (e.g. "Flee and hide").
- When the event tells you to cover your location, cover the location number of your current location with a cover token. That location event could not be triggered again. It will not affect the shelter icon.
Additional Rule 06: The Green Die
Start from some point in chapter 3, you may also roll the green die for your combats.
The combat value of the green die will be added to your combat result. If you roll one of its shield faces, you can prevent 1 HP loss. Therefore, you may prevent 2 HP loss with both 2 dice.
However, your item and support cards only affect Eila's die and Eila's combat value.
Additional Rule 07: "If You Possess" Events
Start from chapter 3, you may encounter events asking if you possess specific items. For this kind of event, execute the effect one-by-one, checking if you possess the required item.
You can have already acquired both, either one, or even none of them on your journey. If you possess none of the items, this event has no effect on you. Just place it on the Past and continue the game.
Don't turn over until you start Ch.4
Chapter 4: The Castle
Remark: In case you have forgotten the basic rules (e.g. set up, enemy encountering, item & support card etc), you may refer to the rules of Chapter 0-2. Besides, you should sell the gem items at anytime. They have no other usage after Ch.3.
Unique Element - Contracts & Privileges
Additional Setup
- Take out the contract cards (C01-C09) and privilege cards (P01-P09). DO NOT reveal them.
- Randomly draw 5 of each type and place them face up in the Chapter Element Area.
- Put the other contract cards and privilege cards back to the chapter box. They will not be used in this playthrough.
Contracts and Privileges are drawn randomly, these may not be the same 10 cards in your setup.
Changes in Gameplay
Contract cards and privilege cards are beneficial to you in this chapter. In the event card "Opportunities," you may spend Knowledge to acquire contract cards, or spend Coin to acquire privilege cards.
If you select option A, you may choose any number of contract cards in the Chapter Element Area and place them to the Future. Each contract card costs you 1 Knowledge.
If you select option B, you may choose any number of privilege cards in the Chapter Element Area and place them to the Future. Each privilege card costs you 3 Coin.
In a playthrough, there is no way to choose the contract or privilege cards that were returned into the chapter box during setup.
Now, you may start chapter 4! Don't forget to save your progress after the end of the chapter.
Don't turn over until you start Ch.5
Chapter 5: The Mountain
Remark: In case you have forgotten the basic rules (e.g. set up, enemy encountering, item & support card etc), you may refer to the rules of Chapter 0-2.
Unique Element - Locations Cards
Additional Setup
- Separate cards L01-L10 from the deck. They are the location cards. Place them face down.
- Reveal L01 and place it beside the deck.
Changes in Gameplay
- The top face-up location card represents your current location; you will reveal a new location and cover it when you proceed.
- The options on the location card are the location actions. You may choose to execute one of them when an event tells you to do so. Choosing the action that leads onward will lead you to the next location. Reveal the next location card according to the number indicated. The location cards overlap except the artwork on the bottom.
- Like chapter 3, when you see an option that requires it, you cannot choose it unless you are in a location with the shelter icon (e.g. "Stay in the shelter").
Unique Element - Harsh Environment
Changes in Gameplay
- The mountain is full of determined enemies. Some of the enemies will repeatedly attack you until defeated. There is a new type of option ("Fight on despite injuries"). It means you need to repeat the combat if you lose. The only way to get rid of the combat is to win it.
- Effect from your spells and Energy will not be carried to the next occurring combat. Every repeated combat starts like your first encounter with the enemy.
- Apart from enemies, because of the extreme climate, it is necessary to consume food at night! At the beginning of each night phase, you lose 1 Food or 1 HP.
Now, you may start chapter 5! Enjoy the final chapter of Eila's adventure!
Appendix: Further Explanations of Item and Support Cards
To avoid spoilers, you should not read the explanation of the card that you do not possess!
- A support card showing a shield can prevent 2 HP loss in total.
- A "combination" item does not provide any effect if you do not possess ALL the items stated.
- A "pocket watch"-type item helps you to preview which event you will encounter first in the next day. If you prefer facing it later, you may instead resolve it as the last event of the day.
- A "flower"-type item: you lose the chapter immediately when you run out of HP. Therefore, if you lose your last HP, you cannot use this item to heal after taking the damage.
- Spells can be used before or after rolling the dice in combat. For example, you may use Fireball to win the combat after you rolled a bad result.
- Support card S02: you lose the chapter immediately when you run out of HP. Therefore, if you lose your last HP, you cannot use this spell to heal after taking the damage.
- To choose an option requiring a specific support card, you need to possess the stated support card. If it is a spell, you DO NOT have to pay the cost of the spell when choosing the option.
- Support card S14: with this support card, the combat value gained from the green die is doubled. However, the shield is not doubled.
Advanced Mode
Additional Setup
- After your first playthrough, you may try out a more challenging journey!
- During setup, use the side labelled "advance" for the goal card. The goal will be much more difficult to fulfil and the maximum HP will be lowered.
- Take out the advanced event cards and replace the original cards according to the card number. For example, you should replace card number 216 with its advanced version.
Chapter → Advanced event cards
| Chapter | Advanced event cards |
|---|---|
| 1 | None |
| 2 | 216, 227, 236, 240, 242 |
| 3 | 331, 346, 349, 351 |
| 4 | 403, 418, 430 |
| 5 | 533, 535, 536, 537, 538, 539, 540, 545, 546, 547 |
The Creation of Eila
The rulebook closes with a behind-the-scenes gallery of the game's development art: early concept versions of Eila (versions A, B and C), gesture and character sketches, a character reference sheet, and colour scheme studies of Eila and her neighbours.