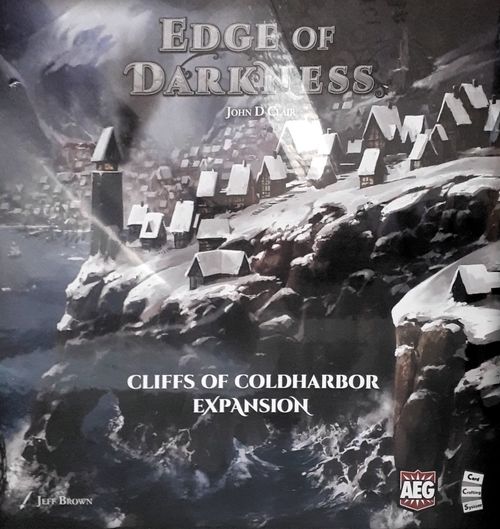
Edge of Darkness: Cliffs of Coldharbor
Edge of Darkness: Cliffs of Coldharbor Rulebook
Table of Contents
Table of Contents
Components
Your game of Edge of Darkness Cliffs of Coldharbor should include the following. If it does not, contact [email protected] for assistance.
- 12 Location boards
- 82 Card advancements
- 12 Randomizers
- 1 Player Handbook
Tale: Cracks in the Ice
This Tale plays out over several games, called "Chapters", and offers a more thematic way to explore the Cliffs of Coldharbor over a series of consecutive varied setups.
Chapter 1: A Frosty Welcome
Difficulty: Low. Complexity: High.
Use locations 2, 6, 30, 41, 43, 46, 53, 54, 56 and 59.
You may replace Gates of Dunestar, Beacon of Light and The Scale by Watchtowers, Monument Park and Almshouse respectively if you do not own Sands of Dunestar.
Chapter 2: A Chilling Truth
Difficulty: Moderate. Complexity: High.
Use locations 2, 9, 27, 41, 43, 52, 54, 57, 59 and 61.
You may replace Beacon of Light and The Scale by Monument Park and Almshouse respectively if you do not own Sands of Dunestar.
Chapter 3: The Blustery Wind
Difficulty: Moderate. Complexity: High.
Use locations 9, 13, 16, 17, 39, 50, 51, 58, 60 and 61.
You may replace Sandslayer Encampment and Rattlesnake Hideout by Ranger's Outpost and Fairgrounds respectively if you do not own Sands of Dunestar.
Chapter 4: An Imminent Thaw
Difficulty: Low. Complexity: High.
Use locations 3, 4, 8, 20, 27, 30, 42, 56, 57 and 59.
You may replace Mahj Kennels by Grand Library if you do not own Sands of Dunestar.
Recommended Setups
This section includes a number of recommended setups if you are looking for already curated sets. That said, not all of these sets will necessarily be "balanced".
For example, some of them may cause a fairly tight game in regards to Coin while others may have the ability to get lots of Coin. It will be up to the players to identify and determine the best way to exploit or deal with the imbalance.
Cultural Exchanges
Difficulty: High. Complexity: Moderate. Combative.
Locations:
- 5 Hunters' Guildhall
- 9 Fairhollow Academy
- 16 Riverhollow, Fishing Town
- 19 Explorers' Society
- 20 Fairgrounds
- 51 Coldharbor Citadel
- 55 Mud District
- 58 Border Towers
- 60 Coldharbor Homesteads
- 62 Shorehollow Isle
You may replace Shorehollow Isle by Harbor if you do not want a Combative setup.
Stretched Thin
Difficulty: Moderate. Complexity: High. Combative.
Locations:
- 51 Coldharbor Citadel
- 52 Coldharbor Barracks
- 53 Northstone Academy
- 54 Chasm Road
- 56 Break Point Bluffs
- 58 Border Towers
- 59 Coldharbor Docks
- 60 Coldharbor Homesteads
- 61 Coldhollow, Northmost Town
- 62 Shorehollow Isle
You may replace Shorehollow Isle by Harbor if you do not want a Combative setup.
Heeding the Call
Difficulty: High. Complexity: High. Combative.
You must own Sands of Dunestar to play this setup.
Locations:
- 7 War Council
- 18 City Treasury
- 34 Labor Exchange
- 38 Embassy of Dunestar
- 40 The Pits
- 47 Debtors' Prison
- 58 Border Towers
- 60 Coldharbor Homesteads
- 61 Coldhollow, Northmost Town
- 62 Shorehollow Isle
On Every Front
Difficulty: Low. Complexity: High.
Locations:
- 51 Coldharbor Citadel
- 52 Coldharbor Barracks
- 53 Northstone Academy
- 54 Chasm Road
- 55 Mud District
- 56 Break Point Bluffs
- 57 Ice Hills Mine
- 58 Border Towers
- 59 Coldharbor Docks
- 61 Coldhollow, Northmost Town
Locations and Advancements Clarifications
This section contains all the locations and corresponding advancements in Cliffs of Coldharbor, with their abilities and effect(s) clarified.
Coldharbor Citadel
This location has a start of round ability.
In the case of the Coldharbor Citadel, it means that at the start of every odd-numbered round (1, 3, 5 and 7), an Influence is placed on top of each stack of advancements that still contains at least one advancement.
When a player chooses to sleeve an advancement from any stack, they get the Influence on that stack and add it to their coffers.
Councillor to the Viceroy (contact)
This contact has one effect.
When you resolve it, pay 10 Coins to claim Allegiance of a Neutral card in the tower or in your hand, gain Influence and 4 Coins.
Remember that you must have the requisite amount of Coins to pay the effect's cost, so while the Councillor to the Viceroy gives you 4 Coins back, you must have the 10 Coins in your coffers to resolve the effect in the first place.
There are 3 middle and 3 bottom advancements with this contact.
Banished Envoy (threat)
This threat has a reactive effect: when you reveal it, its owner gains Reputation.
This threat contributes 2 Damage to the total Damage of the card it is sleeved in.
This threat has two rewards. When you defeat it, you may choose either, but not both:
- Gain Influence,
- OR dispatch 2 Agents to location of your choice.
There are 3 middle and 3 bottom advancements with this threat.
Coldharbor Barracks
This location has a start of round ability.
In the case of the Coldharbor Barracks, it means that at the start of each round, each player may dispatch an Agent to the Coldharbor Barracks.
Winter Champion (contact)
This contact has two effects.
When you resolve it, you may resolve either, or both of them:
- Dispatch an Agent to the Coldharbor Barracks at no cost,
- AND/OR return 4 Agents to your Trained Agents pool to Hunt Threats at any point this turn.
You do not have to Hunt Threats immediately when you use this effect, you may do so later in the turn after resolving other effects or using other abilities.
There are 4 middle and 4 bottom advancements with this contact.
Storm Spawn (threat)
This threat contributes 2 Damage to the total Damage of the card it is sleeved in.
This threat has one reward. When you defeat it, you gain 2 Influence.
There are 4 middle and 4 bottom advancements with this threat.
Northstone Academy
On your turn, you may move one of your Agents from any location to the Northstone Academy. You cannot move an Agent from your Trained Agents pool to the Northstone Academy, only from another Location Board.
Students of Northstone (contact)
This contact has two effects. You may resolve either but not both:
- Dispatch up to 3 Agents to the Northstone Academy at no cost,
- OR return 2 Agents from the Northstone Academy to your Trained Agents pool to train an Agent.
There are 4 middle and 4 bottom advancements with this contact.
Corrupting Mentor (threat)
This threat contributes 2 Damage to the total Damage of the card it is sleeved in.
This threat has two rewards. When you defeat it, you may choose either but not both:
- Gain Influence,
- OR train an Agent.
There are 4 middle and 4 bottom advancements with this threat.
Chasm Road
This location has no ability.
You will not be dispatching an Agent to the Chasm Road. It is possible to dispatch one or more Agents here resolving effects that can "dispatch anywhere", but generally there will not be a benefit to do so.
Spy (contact)
This contact has one effect.
When you resolve it, pay 2 Coins to discard a card in the tower and replace it with the card on which Spy is sleeved.
Note that you can replace a Neutral card, your card or any other player's card. If you discard your card or another player's card, then that card goes to your or their Guild Hall, respectively.
There are 4 middle and 4 bottom advancements with this contact.
Spy (threat)
This threat does not contribute Damage to the total Damage of the card it is sleeved in, nor does it give you a reward when it is defeated.
It, however, has an ongoing effect: While it is in the tower, the owner of the card it is sleeved in has +2 Battle Strength when hunting threats.
There are 4 middle and 4 bottom advancements with this threat.
Mud District
This location has no ability.
The associated contact's effect (Gang Boss) will be doing all the dispatching and returning of Agents to and from the Mud District.
Gang Boss (contact)
This contact has two effects. You may resolve either, but not both.
- Dispatch up to 3 Agents to the Mud District at no cost,
- OR return 1 Agent from the Mud District to your Trained Agents pool to gain 2 Battle Strength.
Remember, Battle Strength is only useful when you hunt threats. So, if you aren't hunting threats this turn, this effect will not be useful to you.
There are 3 middle and 3 bottom advancements with this contact.
Slum Prowler (threat)
This threat contributes 2 Damage to the total Damage of the card it is sleeved in.
This threat has one reward. When you defeat it, you gain 3 Reputation and Influence.
This threat has an ongoing effect. While it is in the tower, it has -2 Damage when the owner of the card is hunting threats.
There are 3 middle and 3 bottom advancements with this threat.
Break Point Bluffs
This location has two distinct abilities.
The first one is a reactive ability. This means that the ability can be used when one or more conditions are met.
In the case of the Break Point Bluffs, the condition is:
- If you sleeve a Smuggler contact.
When the condition is met, you must move down 1 space on your own Defense track.
The second one is a start of the round ability.
In the case of the Break Point Bluffs, it means that at the start of each round, 3 Coins are placed on this location, plus 1 Coin for each player still in the game. These are taken from the coffers.
For example, in a 4-player game, if the Carnival of Shadows player is starting the round, they add 7 Coins to the Break Point Bluffs at the start of the round (3 plus 1 for each of the 4 players in the game).
Smuggler (contact)
This contact has one effect.
When you resolve it, gain half (rounded down) of all the Coins on the Break Point Bluffs.
For example, if you resolve the effect of Smuggler and there are 3 Coins on the Break Point Bluffs, you get 1 Coin. However, if there are 4 Coins there, you get 2 Coins.
There are 3 middle and 3 bottom advancements with this contact.
The Ferryman (threat)
This threat has a reactive effect: when it is revealed, place 5 Coins on the Break Point Bluffs.
This threat contributes 1 Damage to the total Damage of the card it is sleeved in.
This threat has one reward. When you defeat it, you gain Influence.
There are 3 middle and 3 bottom advancements with this threat.
Ice Hills Mine
This location has an ongoing ability. These abilities are often powerful but generally very intensive.
In the case of the Ice Hills Mine, it means that at the start of each round, place 2 Coins under each Agent at the Ice Hills Mine, from the Coffers.
Master Refiner (contact)
This contact has two effects. You may resolve either, or both of them:
- Dispatch an Agent to the Ice Hills Mine at no cost,
- AND/OR return 1 or more Agents from the Ice Hills Mine to your Trained Agents pool to gain all the Coins that were placed under the Agents that were returned.
For example, you have 3 Agents at the Ice Hills Mine, 2 of which have 2 Coins under them and one has 4 Coins. If you return the Agent with 4 Coins, then you gain those 4 Coins. However, if you return all 3 Agents, you would gain all 8 Coins under the 3 Agents.
There are 3 middle and 3 bottom advancements with this contact.
Cursed Beggar (threat)
This threat has a reactive effect. When it attacks a player, that player may pay 8 Coins to reduce the Damage of that threat against them to 0. This means they would successfully defend against the threat and gain Influence.
Note that the reduction of Damage only affects the player that paid 8 Coins. If the threat is attacking multiple players, then each of them have the option to pay 8 Coins and those who do reduce the Damage. Those who don't are attacked by the threat at full Damage.
This threat contributes 2 Damage to the total Damage of the card it is sleeved in.
This threat has one reward. When you defeat it, you gain 2 Influence.
There are 3 middle and 3 bottom advancements with this threat.
Border Towers
This location has two distinct abilities.
- You may use the first one exactly once, during your Action Phase. When you do, you may dispatch an Agent to the Border Towers.
- The second one is a reactive ability. This means that the ability can be used when one or more conditions are met.
In the case of the Border Towers, the condition is:
- When a threat attacks you.
When the condition is met, (even if it is not your turn) you may return 0 or more Agents from the Border Towers to your Trained Agents pool and remove 1 or more of your colored cubes from the Border Towers (these cubes are placed with the other discarded cubes). For each Agent returned or cube removed, that threat gets -1 Damage.
For example, you have 2 Agents and 3 cubes at the Border Towers when you get attacked by a 4 Damage threat. You can return 1 Agent and remove 3 cubes or 2 Agents and 2 cubes to reduce the Damage to 0 and successfully defend against it. Because you successfully defended, you gain Influence.
Another example. You still have 2 Agents and 3 cubes at the Border Towers when you get attacked by a 2 Damage threat and a 3 Damage threat. You can return 0 Agents and remove 2 cubes to successfully defend against the first threat and then you can return 2 Agents and remove 1 cube to successfully defend against the second threat. Because you successfully defended twice, you gain 2 Influence.
Border Guard (contact)
This contact has two effects. You may resolve either, or both of them:
- Dispatch an Agent to the Border Towers at no cost,
- AND/OR remove a cube from the tower or a Threat Zone and place it on the Border Towers.
There are 3 middle and 3 bottom advancements with this contact.
Ice Troll (threat)
This threat contributes 4 Damage to the total Damage of the card it is sleeved in.
This threat has one reward. When you defeat it, you gain 3 Influence.
This threat has an ongoing effect. If you defeated a different threat this turn, Ice Troll gets -3 Damage until the end of the turn. As a result, it contributes only 1 Damage to the total Damage of the card it is sleeved in. For example, if you hunt threats and defeat another threat, if Ice Troll is on a different threat card, it now gets -3 Damage so if you have enough Battle Strength still left, you could now also defeat the Ice Troll card more easily.
There are 3 middle and 3 bottom advancements with this threat.
Coldharbor Docks
This location uses a new layout and a new way to dispatch Agents to it.
Once each turn, you may dispatch Agents to the Coldharbor Docks and assign them specifically to an ability slot. You may not assign Agents to an ability that already has Agents assigned to it or if you had Agents assigned there at the start of your turn. If you use an effect that lets you dispatch or move agents "anywhere" they may be moved to this location, but they are not placed on one of the 6 actions slots, they do not activate any of those actions, and do not block any of those slots; they are just on the location and do nothing.
This location has six abilities. Each ability can only be used once per turn:
- Pay 7 Coins to claim Allegiance of a Neutral card in your hand,
- Pay 5 Coins to train an Agent,
- Pay 5 Coins to hunt threats,
- Pay 3 Coins to gain 2 Battle Strength,
- Pay 2 Coins to draw a card,
- Exchange any amount of Coins for Reputation or any amount of Reputation for Coins.
Remember, Battle Strength is only useful when you hunt threats. So, if you aren't hunting threats this turn, the fourth ability will not be useful to you.
Note, you only get the ability the turn you place an Agent there. For example, you have an Agent already on the fourth ability from a prior turn (gain 2 Battle Strength), and you dispatch an Agent to the Coldharbor Docks to the third ability slot (pay 5 Coins to hunt threats). In this case you don't also get to use the gain 2 Battle Strength from the other ability this turn, since that Agent was placed there on a prior turn.
Dock Master (contact)
This contact has two effects. You may resolve either, or both of them:
- Gain Coins,
- AND/OR return an Agent from the Coldharbor Docks to your Trained Agents pool.
There are 3 middle and 3 bottom advancements with this contact.
Devil's Maw (threat)
This threat has a reactive effect: when it is revealed, all players return their Agents from the Coldharbor Docks to their respective Trained Agents pools.
This threat contributes 3 Damage to the total Damage of the card it is sleeved in.
This threat has one reward. When you defeat it, you gain 3 Influence.
There are 3 middle and 3 bottom advancements with this threat.
Coldharbor Homesteads
This location uses a new layout and a new way to dispatch Agents to it.
Once each turn, you may dispatch Agents to the Coldharbor Homesteads and assign them specifically to an ability slot. You may not assign Agents to an ability that already has Agents assigned to it or if you had Agents assigned there at the start of your turn. If you use an effect that lets you dispatch or move agents "anywhere" they may be moved to this location, but they are not placed on one of the 6 actions slots, they do not activate any of those actions, and do not block any of those slots; they are just on the location and do nothing.
This location has six abilities. Each ability can only be used once per turn:
- Pay 7 Reputation to have other players give you Influence each or move them down 1 space on their respective Defense Track,
- Pay 4 Reputation to hunt threats,
- Pay 3 Reputation to gain 2 Battle Strength,
- Pay 2 Reputation to gain 3 Coins,
- Pay 1 Reputation to gain Influence,
- Gain Battle Strength.
Remember, Battle Strength is only useful when you hunt threats. So, if you aren't hunting threats this turn, the third and sixth abilities will not be useful to you.
Note, you only get the ability the turn you place an Agent there. For example, you have an Agent already on the sixth ability from a prior turn (gain Battle Strength), and you dispatch an Agent to the Coldharbor Homesteads to the second ability slot (pay 4 Reputation to hunt threats). In this case you don't also get to use the gain Battle Strength from the other ability this turn, since that Agent was placed there on a prior turn.
Homestead Hero (contact)
This contact has two effects. If you resolve one, you must resolve the other:
- All players return all their Agents from Coldharbor Homesteads to their respective Trained Agents pool, if possible,
- AND gain Battle Strength.
Remember, Battle Strength is only useful when you hunt threats. So, if you aren't hunting threats this turn, the second ability will not be useful to you.
There are 3 middle and 3 bottom advancements with this contact.
Exiled Raiders (threat)
This threat contributes 2 Damage to the total Damage of the card it is sleeved in.
This threat has one reward. When you defeat it, you gain 2 Influence.
There are 3 middle and 3 bottom advancements with this threat.
Coldhollow, Northmost Town
This location has two distinct abilities.
- When you successfully defend against or defeat a threat, take any cube of your choice from the tray associated with that threat and place them in your coffers.
- The second one is an End of Game ability. At the end of the game, each player gains 1VP for each cube color they have the most of among all players (including ties). For example, in a 2-player game, if the Anointed player has 2 white, 2 purple, and one black, and the Fede Cartel player has 1 white, 1 purple, and 1 black, then the Anointed player would score 3 VP for having the most in all 3 colors, and the Fede Cartel player would score 1VP for having tied for the most black cubes.
For example, if you defend against a threat you may take 1 cube from the tray associated with the threat. If multiple players successfully defend against the same threat, then starting from the active player and going clockwise, those players take cubes from the tray.
Please note that black cubes are a specific color once they are in your coffers and do not add to each other color's total. So if you have 2 red, 1 green and 3 black, this means that you do not have 5 red and 4 green.
Coldhollow Traveler (contact)
This contact has one effect.
When you discard this contact at the end of the turn, you may put it at the bottom of the deck, instead of in the Discard pile.
Note, if you need to shuffle the Discard pile to create a new deck at the end of your turn, if you choose to resolve this effect, it resolves first, before shuffling, and simply becomes the leftmost card in the Street.
There are 4 middle and 4 bottom advancements with this contact.
Children of the Ice Hills (threat)
This threat contributes 1 Damage to the total Damage of the card it is sleeved in.
This threat has one reward. When you defeat it, you gain Influence.
This threat has an ongoing effect. When it attacks the owner of this card, it gets -3 Damage, meaning it is much easier for the owner of the card to defend successfully.
There are 4 middle and 4 bottom advancements with this threat.
Shorehollow Isle
This location has a reactive ability. This means that the ability can be used when one or more conditions are met.
In the case of the Shorehollow Isle, those conditions are:
- Any time a card is discarded from a player's hand (this includes discarding a card to the Discard pile or to a player's Guild Hall),
- AND a Shorehollow Priestess is on that card.
When both conditions are met, you will gain a benefit based on the number of Agents you have at the Shorehollow Isle; if you have 0 Agents there, you gain nothing; if you have 1 Agent there, you gain 1 Coin; if you have 2 Agents there, you gain 2 Coins; if you have 3 Agents there, you gain 2 Coins OR you can sleeve an advancement on any card in the Street; finally, if you have 4 Agents there, you can choose any other reward listed on the card, or return 3 Agents from the Shorehollow Isle to your Trained Agents pool to claim Allegiance of another player's card in your hand or in the Street. If you do so, that player gains Influence.
Note that this location is the only location in the game that allows to claim Allegiance of another player's card. As a result, if you play with it, make sure everyone is ok with that kind of effect in the game before the game starts.
Shorehollow Priestess (contact)
This contact has one effect.
When you sleeve this contact on a card you don't own, dispatch an Agent to the Shorehollow Isle at no cost.
There are 4 middle and 4 bottom advancements with this contact.
Salt Spawn (threat)
This threat contributes 1 Damage to the total Damage of the card it is sleeved in.
This threat has two rewards. When you defeat it, you may choose either, but not both:
- Gain Influence,
- OR dispatch an Agent to the location of your choice.
There are 4 middle and 4 bottom advancements with this threat.
Coldharbor Locations in Voiceless Guild Games
Below is a table referencing all the locations available in Cliffs of Coldharbor and whether or not they can be used in Voiceless Guild games, as well as their Difficulty Rating were you to want to calculate your Success Score (see Voiceless Guild Rules).
| Number | Location Name | Voiceless Guild Difficulty | Difficulty Rating |
|---|---|---|---|
| 51 | Coldharbor Citadel | Easy | 1 |
| 52 | Coldharbor Barracks | High | 3 |
| 53 | Northstone Academy | Moderate | 2 |
| 54 | Chasm Road | Moderate | 2 |
| 55 | Mud District | Moderate | 2 |
| 56 | Break Point Bluffs | Easy | 1 |
| 57 |