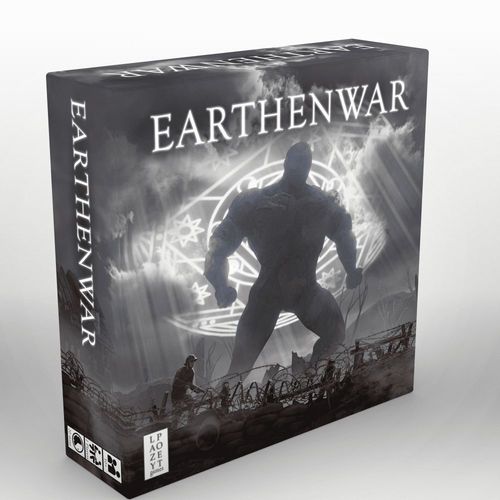
Earthenwar
Earthenwar Rulebook
Table of Contents
Table of Contents
Setting Up
Set up the contents as shown below.
Place the Golems on the starting squares (marked with a ✳) as shown.
It does not matter which way your Golem piece faces.
To the side of the main Board, place two Control Grids oriented with the central arrow in each Grid pointing to the opponent's Grid.
Each player starts with a white dice showing a 1 at the top moon in each Control Grid.
Components:
- 2 x Golems
- 1 x Board
- 10 x Black D3 dice
- 10 x White D3 dice
- 2 x Control Grids
- 1 x Manual
- 8 x Corner Damage Tokens
- 8 x Side Damage Tokens
- 2 x Central Damage Tokens
- 10 x Shell holes (optional)
- 2 x Soldier pieces (optional)
Introduction
A Golem is a powerful being made of clay brought to life to defend people in a time of need.
The object of the game is to defeat your opponent's Golem.
Your Golem can move and attack in 8 directions, represented by the 8 squares on the outside of your personal 3x3 Control Grid.
To do this, WHITE dice represent MOVEMENT, and BLACK dice represent ATTACK.
The NUMBER on the dice represents the DISTANCE you can move, or attack.
Adding more dice, or improving the ones already on the Grid, allow you to move and attack further.
If you successfully land an attack on your opponent, they place a DAMAGE TOKEN on a square of their Control Grid.
Once they have THREE damage tokens in a row — horizontally, vertically, or diagonally — their Golem is destroyed.
To get started, set up the Board as shown on the previous page. Each player rolls 2 dice, the highest scoring player goes first.
There are additional variants for the game on pages 12 – 14.
Your Control Grid
Each player has a 3x3 Control Grid representing their Golem's abilities. Players place dice in this Grid to allow their Golem to move, or attack.
Colour
White dice represent the movement of your Golem.
Black dice represent the attack ability of your Golem.
Number
The number on each dice corresponds to the DISTANCE of movement/attack.
After using a black 2 or 3 to attack, it is always downgraded to a 1 immediately.
After using a black 1 to attack, it is removed from your Grid and put back in the supply.
White dice are not reduced, and remain the same number after use.
Position
The location of the dice on the 3x3 control grid indicates the DIRECTION of that possible movement or attack, in relation to the central square.
Each square contains a sun with a small black arrow as one of the points. This arrow indicates the direction of a movement or attack for dice in that square.
The central square cannot contain dice. It can, however, be damaged.
Example Control Grid
The example grid shows eight directions around the central square: Forward, Forward Right, Right, Backward Right, Backward, Backward Left, Left, and Forward Left.
- A white dice with THREE dots on the upper-middle square means that Golem can move THREE distance forward.
- A white dice with ONE dot on the top-right square means that Golem can move ONE square diagonally forward-right.
- A black dice with TWO dots on the middle-left square means that Golem can attack TWO squares left.
- A black dice with ONE dot on the lower-middle square means that Golem can attack ONE distance backward.
The small black and white dots at the edges of the Grid are used as coordinates when damaging enemy Golems (see page 11).
Phases of a Turn
Each turn, players work through the following phases in the following order:
- Refresh — Reposition all dice onto the inner 'refreshed' MOON symbols on your Control Grid, indicating they are available to use.
- Improve — Take a new dice, OR upgrade/downgrade one you already have (optional).
- Swap — Rearrange your dice into a different strategic position (optional).
- Use — Use the dice in your grid to move and attack (optional). When a dice is used, move it to the outer 'used' SUN area of its square (to keep track of which have been used this turn), and downgrade if necessary.
Phase 1: Refresh
Individual dice can only be used ONCE per turn.
To help indicate whether a dice has been used that turn, they should be moved OUTWARDS towards the edge of the Grid, from the MOON half to the SUN half of their grid square immediately upon use.
At the start of your turns, 'refresh' all dice by moving them INWARDS to the MOON side again.
This is purely to help you and your opponent keep track of which dice have and have not been used.
The diagram shows each grid square marked A (Available) or U (Used). A dice in its moon half is available; a dice in its sun half has been used.
Phase 2: Improve
Each turn, you can IMPROVE your Control Grid.
You can choose to EITHER: ADD one extra dice to your grid, UPGRADE one dice, DOWNGRADE one dice, or do nothing.
If you choose to ADD a dice, you can choose the colour, EITHER black (attack) or white (movement).
To add the new dice, you first ROLL it, to find the starting number (1-3) and then place it anywhere you choose on your Grid.
To UPGRADE/DOWNGRADE a dice, turn it so that one additional/fewer dots are on the upward face. (When upgrading or downgrading a dice, the colour remains the same.)
You may only have one dice per Grid square.
If you want to add a dice of a certain colour, but there are no more left, you must choose a different colour.
You can downgrade a 1 to remove it from the board.
The improve options are: Add new white dice; Add new black dice; Downgrade a dice by 1; Upgrade a dice by 1; or Do nothing.
Phase 3: Swapping
You can make ONE move to rearrange your Control Grid per turn.
You can SWAP two adjacent dice (in this game, adjacent includes diagonals).
You may also swap a single dice with an empty square (this is a special version of a swap, called a 'slide').
For clarity, squares on opposite sides of the Grid are not adjacent as the central square is in the way.
Phase 4: Use Dice — Moving
Each individual white dice can be used once per turn to move your Golem.
When each dice is used, it should be moved outward from the 'available' MOON section to the 'used' SUN section of its Grid square.
The distance your Golem can move is given by the number of dots on the dice.
The direction moved is given by the position of the dice on the Grid (the small arrows in the suns can also be referred to).
Your Golem can only move that EXACT number of squares (i.e. if the white dice has 2 dots, it can move two squares only, not one, not three).
You cannot move into the same square as another Golem, or 'through' a Golem.
You may use white dice one after another to move across the board, until all your white dice are used.
You may use white and black dice in any order (for example, you may choose to move with a white dice, then attack with a black dice, then use a second white dice to move out of harm's way).
You can choose to not use any dice on your turn.
After leaving the starting squares, neither piece may return there.
Example: this Golem can move two squares forward-right, one square right, and one square backward (in any order).
Phase 4: Use Dice — Attacking
Each individual black dice can be used ONCE per turn to attack.
When each dice is used, it should be moved from the 'available' MOON section outwards to the 'used' SUN section of its Grid square.
After using a black 2 or 3 to attack, it is always downgraded by 1 immediately. After using a black 1 to attack, it is removed from your Grid and put back in the supply.
You can attack empty squares (to strategically downgrade your dice).
You can attack more than once per turn.
You can choose to not use any dice on your turn.
The distance your Golem can attack is given by the number of dots on the dice.
The direction attacked is given by the position of the dice on the grid.
Your Golem can only attack that EXACT number of squares (i.e. if the black dice has 2 dots, it can attack a distance of two squares only, not one, not three).
If you hit your opponent, place a damage token on their Control Grid (see next page).
Example: the white Golem can attack two squares forward-left, one square left, and one square right (in any order).
Phase 4: Damage
Damage placement is determined by the moon symbol in the square the attack came from. Place a damage token in the square in your opponent's Grid which has the matching symbol. (EXAMPLE: if you attack from the quarter-moon with a dot, place a damage token on their square with a quarter-moon with a dot). For clarity, you may also compare the two co-ordinate dots on the outer edge of the Grids, which will also match.
The printed row of moon symbols shows the eight moon phases used for damage placement (the dotted moons mark the matching co-ordinate squares on the outer edge).
If you land an attack on a square which is already damaged, roll TWO dice (one black, one white). This will give you a 3x3 co-ordinate, which determines which square on your opponent's Grid to place to damage on. See the dots at the edge of the grids for the co-ordinates.
Rolling co-ordinates "2, 2" is the only way to damage the central square.
If there is already a damage token on the location determined by the dice, no damage is taken.
If you manage to create a line of THREE tokens on your opponent's grid, their Golem is destroyed and the battle ends.
If a square is damaged, then any dice on that square are NOT removed, and that square may still be used in the same way as when it was undamaged.
Example: the white attacking player attacks from their quarter-moon square (1,1), so the damage counter is placed in the quarter moon square (1,1) of the black opponent's Grid.
Scenarios
There are variations of Earthenwar that you can play. Different variants may be played at the same time. You can choose which combinations to play. Alternatively, you can generate a combination of Scenarios randomly using the 'Scenario generator' (page 15).
Shell Holes
Shell hole counters indicate impassable pieces of terrain. At the start of the game, randomly distribute shell hole counters on the board. Attacking a shell hole removes it (black dice downgrade as normal when used).
Ammo Box
Golems can use their central Grid square to 'store' a dice. This square is considered 'adjacent' to all other squares for the purposes of swaps. A new dice may be placed here during the 'improve' phase (providing it is empty beforehand).
Ammo Box Plus
Same rules as Ammo Box, but during Phase 3, players may have additional swap (or slide, see page 8), which must be with the central square.
Scenarios (continued)
Scramble
Each player starts with 3 randomly rolled black and 3 randomly rolled white dice, placed anywhere they choose on their Grid. Players hide their Grids from opponents until all dice are placed.
Precision Engineering
Each player chooses up to 5 white and 5 black dice. Players may choose the number and position of these dice in their Grid. Players hide their Grid from their opponent until all dice are placed.
Fog of War
Players play with their Grids hidden from their opponent's view. The game box may be used as a visual blocker. When either Golem crosses the central line (3 rows distance from either trench), both players' Grids become visible as normal for the rest of the game. Whilst the Grids are hidden, players can still attack and be attacked. Players can comunicate to indicate the co-ordinate dice have been used, if an attack is a hit or miss, and if they have been defeated.
Dense Fog of War
Same rules as FOG OF WAR, except Grids are hidden until the Golems are adjacent to each other. They then remain visible for the rest of the game.
Over the Top
Each player uses a Soldier Token which matches the colour of their Golem. In addition to normal victory conditions, if your Soldier reaches your opponent's trench, you win.
During their first Refresh Phase, each player places their Soldier Token in a square on their back row (the side of the board closest to them, ignoring the * starting square). A player may not place their Soldier opposite another Soldier on the board.
At the end of the Use Phase, that player's Soldier Token moves one square forward on the board, towards the opponent's trench. Soldiers can only be eliminated by Golem attacks. Golems and Soldiers may not share a square or move 'through' one another. If a Soldier is blocked, the Soldier does not move that turn. Soldiers cannot pass over shell-holes.
If a Soldier is eliminated by a Golem, the player whose Soldier was eliminated may replace it back in their back row, on their next turn. Two Soldiers may never be placed opposite one another. Players may only have one active Soldier each at any one time.
Example: the two Soldier Tokens are placed so they are not opposite one another (in different rows).
The Big Push
Same rules as OVER THE TOP, but Soldiers may move in any direction at the end of the Use Phase.
Scenario Generator
Generate a combination of Scenarios randomly using this Scenario Generator.
Roll a D3 for each row, to determine the extent to which that Scenario is used.
(You may choose to roll only for certain rules and not for every row.)
| Roll | 1 | 2 | 3 |
|---|---|---|---|
| Golem Build | Normal rules | Scramble | Precision Engineering |
| Board | Normal rules | 6 Shell Holes | 10 Shell Holes |
| Central Square | Normal rules | Ammo Box | Ammo Box Plus |
| Visibility | Normal rules | Fog of War | Dense Fog of War |
| Game Type | Normal rules | Over the Top | The Big Push |
For example, you might roll a '2' for Golem Build, a '3' for Board, a '1' for Central Square, a '2' for Visibility and a '3' for Game Type.
This would mean you play with the rules for Scramble, 10 Shell Holes, normal rules for the Central Grid Square (it does nothing), Fog of War (invisible until a Golem reaches the halfway line), and The Big Push (Soldier tokens may move in any direction).