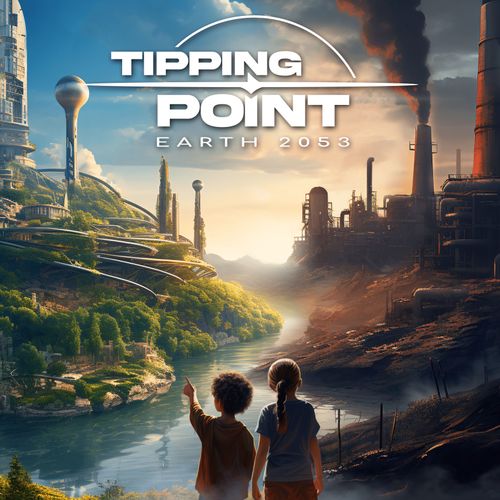
Earth 2053: Tipping Point
Earth 2053: Tipping Point Rulebook
Table of Contents
Table of Contents
- Components
- Setup
- General Concepts
- Gameplay
- Increasing a Need Fulfillment Level
- Flipping Projects
- Placing Influence Tokens
- Solving Crises
- Placing Preservation Tokens
- End of Round
- Conclusion & Income Phase
- Placing Pollution Tokens
- Placing Crisis Cards
- Difficulty Adjustment
- Expert Mode
- Solo Rules
- Competitive Variant Rules
- FAQ
- Glossary
Components
- 30 Crisis Cards (6 cards in each of the 5 Crisis levels)
- Climate Seesaw, with slots for Preservation tokens on the left and for Pollution tokens on the right
- 10 Country Cards (round overview on back)
- 126 Project Cards
- 13 Advisor Cards (double-sided)
- Influence Tokens (4 x 25)
- Credit Coins (121)
- 25 Prevention & 25 Pollution Tokens (printed as "Prevention" on the component list; the rules call these Preservation tokens)
- 4 Country Boards
- 9 Need Markers per player color
Setup
Country Selection
Shuffle the 126 Project cards into a shared deck. Each player chooses a Country card and draws the number of Project cards indicated on the "Starting Setup" side.
Additionally, players choose a color for their Influence tokens and place the corresponding Need markers at the starting levels indicated on their Country card. Some categories will not have a marker at all during the game. Put the Credits for each category on the edges.
If no level or Credits are indicated, do not place a Need marker or Credits on these categories. You can count the fields from the center to determine the levels. Then flip the Country card over for an overview of Conclusion & Income.
Those markers represent the fulfillment of various needs in their country: Justice, Housing, Infrastructure, Energy, Water, Nutrition, Health, Work, Education.
Crisis Deck
Sort the Crisis cards into 5 piles based on their number. Take the first pile of Crisis level 1. Remove cards according to the number of players from the game:
- 4 players: 0 cards
- 3 players: 1 card
- 2 players: 2 cards
- 1 player: 4 cards
Repeat the removal of cards based on the number of players for the pile of level 2, 3 and 4. Do NOT remove any cards from the pile of level 5.
Then stack the prepared piles in descending order of Crisis levels, starting with the highest. The final Crisis card deck should be arranged so that the level 1 Crisis cards are on top.
You can increase the difficulty by drawing and removing one additional card from the prepared Crisis deck for each difficulty level, on top of any cards that may have already been removed in the previous step (see "Difficulty Adjustment" on page 9).
Placing Initial Crisis
Draw as many Crisis cards from the Crisis deck as there are players (see "Crisis Deck" above). Place the drawn Crisis cards face-up and in the same orientation, leaving one open card slot between each, as shown in the example on the page.
Then, draw ONE Project card from the Project card deck and place it face-down on one of the positions with the most Influence icons (small fists) pointing to it. In case of a tie, decide as a group together where to place the Project card.
Setting Up the Seesaw
Set up the Seesaw by putting the two supports into the slit of the Seesaw. Then place the Seesaw on the table without any discs.
Advisor Selection
Each player chooses an Advisor card.
On one of the two sides of four Advisor cards, you will find the text "Introduction Advisor" in the bottom box. These are a great choice for getting started. If you want more variety, you can flip these cards or choose another Advisor with a unique ability.
Place the remaining Credits, Preservation, and Pollution tokens in the common supply, and you're ready to start the game!
General Concepts
In Earth 2053: Tipping Point, players act as representatives who must meet the various needs of their nations' populations while simultaneously working to prevent a global climate collapse.
The game centers around a delicate balancing act, visualized by the Climate Seesaw: Preservation tokens help protect the climate, while Pollution tokens push it toward collapse. Players must carefully manage their resources (Credits, Project cards, and Influence tokens), resolve escalating Crises, and play Project cards strategically — all while working together to ensure the Seesaw never tips completely toward the Pollution side. Victory is achieved through cooperation, as the fate of humanity depends on collective action.
Gameplay
Objective of the Game
The goal of Earth 2053: Tipping Point is to fill the Preservation side of the Climate Seesaw without it ever tipping to Pollution. Place Preservation tokens to prevent tipping.
If the Seesaw tips or the Pollution side fills up with tokens, all players lose. Fill Preservation first, and you all win!
Turn Sequence
Players take turns playing Project cards. The youngest player starts. Play then proceeds clockwise until all players have passed in turn. A player may take additional actions later, as long as not everyone has passed.
In advanced play, players may perform actions in any order, provided each action is fully completed before moving to the next. Once all players have passed, the round ends and the next one is prepared (see "End of Round" on page 8).
Advisor
Each player has an Advisor, who defines:
- the number of Credits earned for discarding a Project card.
- the type and number of resources gained as a Synergy Bonus (when playing Projects adjacent to others of the same category).
- the amount of Credits of the same category that can be exchanged at any time to gain an Influence token.
In the box at the bottom of the Advisor card, you can find the Advisor's special ability. These are the different icons:
- Influence tokens: Required to resolve Crisis and win the game. Can be freely placed on face-down Projects (see "Solving Crises" on page 8).
- Synergy: when you play a Project card next to a Project or Crisis border of the same category, you create a Synergy.
- Discard the indicated number of Project cards from your hand.
- Credits are gained or have to be paid.
Playing Project Cards
To play a card from your hand, pay the Project card's cost (shown in the top left). There are generic and specific costs. Generic costs can be paid with Credits from any categories — in any combination. Specific costs, however, must be paid with Credits from the indicated category.
Additionally, the card may require you to lower the fulfillment level of another category. If there is no Need marker in that category, you may ignore this cost. However, if the Need marker is at level 1, you cannot reduce the fulfillment level further and therefore cannot play the card.
- Pay Credits from the respective category budget (in the example: Education).
- Pay Credits, freely combined from the budgets of any categories.
- Lower the Need fulfillment level of a category by 1 (in the example: Water).
Note: You can also pay Credits by discarding Project cards of the respective category. How many Credits you get for discarding a card of that category is specified on your Advisor card.
Note: The category is indicated by the frame-color of a card and the category icon in the top right corner.
Placing Project Cards
After paying the costs, place the card in the same orientation adjacent to a Project or Disaster. You may place it on an open card slot or on face-down Projects. In this case, redistribute the Influence tokens onto other face-down Projects. If no such cards are available, return the Influence tokens to the respective players' supply. It is NOT allowed to place Project cards or Influence tokens on face-down Crisis.
Note: There are no limitations on the grid size.
Synergy Bonus
If you place a Project card adjacent to a side of a card (Project or Crisis) of the same category, you gain a Synergy Bonus as indicated on your Advisor card. For each additional matching side, you gain an additional Synergy Bonus.
Effects of Project Cards
After placing the card, execute the Project card's effects. These may include effects such as drawing a Project card or removing a Pollution token from the Seesaw.
Additionally, for each Need-Icon you find on a Project card, you separately can decide, if you use that icon to:
- Increase the Need fulfillment level of that category on your Country board. If you do so, you gain Adjacency Bonuses — except from adjacent categories that are at a lower level (see "Adjacency Bonus" below). Or:
- Flip a Project of the same category (see "Flipping Projects" below).
If the Need-Icon shows the Country board, you may choose the category freely.
Need-Icons and other icons on Project cards are read as follows:
- Drawing cards: the number shown is the number of Project cards to draw (two in the example) into your hand.
- Taking a Pollution token from the Seesaw.
- Increase the Need fulfillment level of the indicated category (in the example: Work) or flip a Project card of the same category.
- Increase any Need fulfillment level or flip any Project card.
Note: A Project card can also be flipped by its own effect. Example: If you play a Water Project card that allows you to increase the Water Need fulfillment level or flip a Water Project, you may choose the card itself as the target and flip it.
Other effects that may appear on Project cards:
- Gain Influence tokens and immediately place them, in any distribution, on face-down Projects in the grid.
- Gain Credits and distribute them freely between any categories on your Country board.
- Remove pollution by returning the indicated number of Pollution tokens from the Climate Seesaw to the supply.
- Draw Project cards from the Project card deck into your hand.
Note: If no face-down Projects are available, any gained Influence tokens are returned to the supply.
Increasing a Need Fulfillment Level
Adjacency Bonus
When you increase a Need fulfillment level, you receive an Adjacency Bonus for each of the two adjacent Need categories.
If an adjacent Need is at a lower level after your increase, you do NOT receive an Adjacency Bonus. To gain the bonus, the adjacent category must be at least at the same level or have no Need marker at all.
Example above: Health is increased by one level (from 1 to 2). Both Education and Nutrition are not at a lower level afterward. Education is at level 2, and there is no Need marker on Nutrition, which always counts as a higher level. Therefore, the player receives Adjacency Bonuses on both sides. In the case of Health/Education, the bonus is 3 Credits, which can be freely distributed across all categories. In the case of Health/Food (the source prints "Food" here; the category is named Nutrition elsewhere in the rulebook), the player receives 2 Influence tokens, which are immediately placed on face-down Projects in the grid. If none are available, the Influence tokens are discarded.
Types of Adjacency Bonuses
The type of bonus is shown on the outer edge of the Country board. The amount you receive is determined by the numbers between the Need categories.
- Gain Influence tokens and immediately place them, in any distribution, on face-down Projects in the grid.
- Gain Credits and distribute them freely between any categories on your Country board — you can even split between different category budgets or put it on categories without a Need marker.
- Remove pollution by returning the indicated number of Pollution tokens from the Climate Seesaw to the supply.
- Draw Project cards from the Project card deck into your hand.
Pollution from Increasing Needs
Whenever you increase a Need fulfillment level and reach a space with one or more Pollution icons, place the corresponding number of Pollution tokens on the Seesaw.
Maximum Need Level
A Need fulfillment level can be increased beyond the maximum level. In this case, the rules for the Adjacency Bonus and pollution apply as if the Need had just been raised to the maximum level.
Flipping Projects
Instead of increasing a Need, you can always choose to instead flip any Project card of the same category in the grid. Face-down Project cards serve as "containers" for any number of Influence tokens and are required to resolve Crises (see "Solving Crises" below).
Placing Influence Tokens
When a player gains Influence tokens, they place them on face-down Projects (see "Flipping Projects" above). The Influence tokens can be freely split on different face-down Projects.
Note: If no face-down Projects are available, any gained Influence tokens are returned to the supply.
Solving Crises
A Crisis card shows: its name; the category on this side (for Synergy Bonus); the Pollution token placed on the Seesaw at the end of the round if not solved; the amount of Preservation tokens placed on the Seesaw once solved; the amount of required Influence tokens in each direction to solve the Crisis; the Crisis effect, which is active as long as it is not solved; and the Crisis level, which is also shown on the back side.
The number and position of Influence icons along the edges of a Crisis card indicate how many Influence tokens are required on that side to resolve the Crisis. To do so, there must be a face-down Project on each side with the corresponding number of Influence tokens (see "Flipping Projects" above). These tokens are then moved onto the Influence icons of the Crisis. Afterwards, the used Influence tokens are returned to the supply. If multiple players have contributed tokens, the player who placed the final required token resolves the Crisis.
Once a Crisis is resolved, required Influence tokens are removed and Preservation tokens are placed on the Seesaw as indicated on the Crisis card (see "Placing Preservation Tokens" below). Then, the Crisis card is turned face-down, immediately canceling its end-of-round Pollution production and any passive effects it had.
Note: Crisis cards with hints in the lower right corner block players as long as they are active: Credits of certain categories cannot be spent, Need levels cannot be increased, and the synergy bonus is lost.
Placing Preservation Tokens
Preservation tokens are placed on the Seesaw in rows, filling a full row before starting on the next one, and from the edge of the Preservation side to the center (left to right in the above image). When starting a new row, you choose an empty one closest to the middle.
Note: The player gains Influence tokens as an Adjacency Bonus for increasing Need levels or through the abilities of their Advisor.
End of Round
If a player cannot or does not want to play another card, they pass. The round only ends once all players have passed consecutively. Otherwise, players who have already passed may rejoin and continue playing cards during the current round.
Conclusion & Income Phase
After each round ends, all players follow these steps simultaneously:
- Pollution caused by active Crises: As a global action, jointly place the Pollution caused by all unresolved Crises onto the Climate Seesaw (see "Placing Pollution Tokens" below). The game is lost if the Pollution side of the Seesaw touches the table or becomes completely filled.
- Draw and place a Crisis card: Draw a Crisis card and place it adjacent to a Project of the same category — but never adjacent to another Crisis (see "Placing Crisis Cards" below).
- Gain Credits: Gain Credits in each category equal to its current need fulfillment level. Place them in the supply areas of your player board. Start at the top with Justice and proceed clockwise. Skip categories without a Need marker.
- Draw Project cards: Draw Project cards according to the number per round indicated on the back of your Country card. There is no hand limit.
- Providing Project cards: Choose two of your Project cards, place them face down on the table, and pass them to your left-hand neighbor in clockwise order. Passing two Project cards is mandatory.
Placing Pollution Tokens
Pollution is produced by any Crisis still active at the end of the round and placed on the Seesaw. (The Pollution amount is shown on each Crisis card as the end-of-round Pollution; the example on the page is marked "2x per round".)
The produced Pollution tokens are placed on the Seesaw in rows, filling a full row before starting on the next one, and from the center to the edges (left to right in the above image). When starting a new row, you choose an empty one closest to the middle. If the game is not lost after placing the Pollution, continue with Crisis placement.
Placing Crisis Cards
In step 2, each player draws a Crisis card from the Crisis card deck and decides where to place it. Players may choose the order in which they place their newly drawn Crisis cards. Crisis cards are placed adjacent to a Project (either face-down or face-up), following the rules below:
- Crisis cards MUST NEVER be placed orthogonally adjacent to a Crisis (whether face-up or face-down).
- Place the Crisis in the same orientation adjacent to a Project card that shares the same category on at least one adjacent side. If this is not possible, you are not bound to the category. Players may act strategically by deliberately blocking potential Crisis placement spots of other players. As a result, the affected players may place their Crisis card freely (Rule 1 still applies).
- A face-down Crisis is treated as an empty space for placement purposes, meaning you can place a Crisis card on it. Face-down Projects do NOT count as free spaces for Crises.
Note: Placing a Crisis does not award a Synergy Bonus.
Difficulty Adjustment
Increasing difficulty: To increase the game's difficulty, remove one or more Crisis cards from the prepared Crisis deck (see "Setup" – "Crisis Deck"). The highest difficulty level is 10, requiring the removal of 10 Crisis cards.
| Cards to be removed | Difficulty |
|---|---|
| 0 | Level 0 – Learning the game |
| 1 | Level 1 – Starting |
| 2 | Level 2 – Easy |
| 3 | Level 3 – Average |
| 4 | Level 4 – Hard |
| 5 | Level 5 – Very hard |
| 6-10 | Level 6+ – Extreme |
Expert Mode
In a more challenging game variant, each category without a Need marker receives a Need marker on Level 2 and 2 Credits in its respective budget. All other rules remain unchanged.
Solo Rules
In the solo variant, most rules of the cooperative game apply. The player places one Crisis card each round. When setting up the Crisis decks, 4 Crisis cards per level (for levels 1 to 4) are removed based on the number of players (as described above in "Setup" – "Crisis Deck").
Providing Cards Phase
In the final phase of Income, when you would normally pass two of your Project cards clockwise, place them on the discard pile instead. Then, draw two Project cards from the draw deck.
Competitive Variant Rules
To add a competitive element to the game, you can choose the semi-cooperative variant. All standard rules remain in place, but players now compare the Influence tokens they contributed to resolved Crises to determine who has collected the most Victory Points.
Players earn Victory Points for each Crisis to which they contributed the most Influence tokens compared to other players. The number of points awarded equals the Crisis level. If multiple players contributed the same highest number of tokens, all of them receive the full number of Victory Points for that Crisis.
Example: All 5 required Influence tokens are placed for the Crisis "Shrinking Ice Sheets." The Crisis is resolved. Stephan contributed 2 Influence tokens, Lea also contributed 2, and Sandra contributed 1. Since Stephan and Lea contributed the most Influence tokens to resolve a level 2 Crisis, they each receive 2 Victory Points. Sandra receives no Victory Points.
For hidden score tracking, players use Credits and slide them underneath their Country card.
FAQ
Project Cards
Am I allowed to use two icons of a Project card the following way: Flip a Project card with one of the icons and then increase a need to gain Influence tokens that I immediately put on the card I just flipped?
Yes, you are allowed to choose the order of using and resolving the played Project card's effects in any order — once you paid all the costs of course.
Am I allowed to pay a Project card with the Synergy bonus from placing that card?
No, you must pay all costs before placing a Project card and receiving any Synergy Bonus.
Am I allowed to flip a Project card I just played by using an icon on that card itself?
Yes, you may flip a Project card you just played using a symbol on that same card — provided all costs have been fully paid beforehand.
Am I allowed to place a Project card on top of another Project card, if there are Influence tokens on it?
Yes, it is allowed to place another Project card on top of a face-down Project that contains Influence tokens. In this case, the player placing the new Project card redistributes the Influence tokens. If no other face-down Project is available, the tokens are returned to the respective players' supply.
Is it possible to lower a need fulfillment to level 0?
No, it is not. When you are at level 1 you cannot play Project cards that reduce the need fulfillment of that category anymore.
Crisis
Do I have to place a new Crisis on the spot with the most adjacent color matches?
No, you only need to place the Crisis card on a valid card slot with at least one adjacent matching category (if possible; otherwise, choose any valid card slot) — even if there is a card slot with two or three matching sides. Note that a valid card slot must never be directly adjacent to another Crisis card.
Can I choose not to finish a Crisis yet when all the Influence tokens are present (e.g., to wait for another Crisis to solve)?
No, that is not possible. The player who placed the last Influence token that is required to solve a Crisis solves it immediately.
What should I do if there is no face-down Project a Crisis is pointing to?
If there is no face-down Project that an adjacent Crisis points to, place your Influence token on a face-down Project that you consider most likely to be affected by a Crisis in the future. Remember that it is possible to place Project cards on other face-down Projects and to place Crisis cards on face-down (resolved) Crises. If no face-down Project cards are available to place the Influence token, return it to the supply.
How can I make sure I remember that a Crisis in play prevents me from spending specific Credits or increasing a certain need fulfillment?
Place an unused Need marker or Influence token in the Credits area of the corresponding category as a reminder of the Crisis's passive effect. Once the Crisis is resolved, return the token to the supply.
Miscellaneous
How to check whether the Seesaw has tipped completely?
Try and shove a card under the lowered side of the Seesaw. If you can shove it under the Seesaw from the side without resistance, the Seesaw has not tipped completely yet.
What do I do when I run out of Influence tokens or money?
Game components are not intended to be a limiting factor. Feel free to use material from other players if you run out, ideally choosing a color not currently in use. If you run e.g. out of Influence tokens take those of another player.
Glossary
Advisor Cards — Cards that provide unique abilities and bonuses to players based on their chosen Advisor. Advisors affect resource generation, card discards, and Synergy Bonuses.
Adjacency Bonus — A bonus gained when increasing a need fulfillment level that is adjacent to another higher- or non-leveled need. The bonus may include drawing Project cards, gaining Credits or Influence tokens, or removing Pollution tokens.
Climate Seesaw — A visual and mechanical representation of the balance between climate preservation and pollution in the game. Preservation and Pollution tokens are placed on it, causing it to tip in one direction or the other.
Credits — The currency used to pay for Project cards. Credits are earned through need fulfillment levels and Synergy Bonuses and are required for both generic and specific project costs.
Country Cards — Country cards determine each player's starting needs, starting Credits, and the number of Project cards at the beginning and in each round of the game.
Crisis Cards — These cards represent challenges that players must resolve and that increase in intensity as the game progresses. After each round, each player places a new Crisis card.
Crisis Deck — A deck of Crisis cards in various Crisis levels. At the beginning of each round, one card is drawn. Before the game starts, cards are removed from the deck depending on the number of players and the chosen difficulty level.
Crisis Placement — At the beginning of each round, new Crisis cards must be placed according to fixed rules (e.g., never adjacent to another Crisis card).
Crisis Levels — The levels of Crisis cards that increase in difficulty as the game progresses, usually marked by red numbers. Higher levels mean more severe Crisis.
Project Cards — Project cards represent initiatives to combat climate change that a country can implement during the game. They are played by paying Credits and can trigger a variety of effects — such as drawing new cards, increasing need fulfillment levels or removing Pollution tokens. When placed adjacent to cards of the same category, they may generate Synergy bonuses. Once played and all effects have been resolved, they become "Projects".
Flipping Cards — The action of turning a Project card face-down to use it as a container for Influence tokens. Flipping is also required to store Influence tokens for solving Crises.
Project Phase — The phase of the game where players play Project cards by paying their costs and placing them adjacent to other cards on the board.
Influence Tokens — Tokens placed on face-down Projects to resolve Crises. A specific number of Influence tokens is required to resolve (flip) Crises and gain Preservation tokens.
Resources — Resources include Project cards, Credits, and Influence tokens.
Seesaw — A visual and mechanical representation of the game's balance between Preservation and Pollution. Players win by filling the Preservation side and lose if the Pollution side tips over.
Need Fulfillment — A mechanic where players increase various Needs (e.g., Justice, Energy) for their country. Need fulfillment affects income and bonuses and is critical for maintaining societal balance.
Synergy Bonus — A bonus granted when a Project card is placed adjacent to another Project or Crisis of the same category. Synergy bonuses provide extra Credits, Influence tokens, or Project cards.
Need Marker — A Need marker placed on a player's Country board to indicate the current level of fulfillment for a specific category (e.g., Health, Energy). The position of the Need marker determines the income and potential bonuses from adjacent categories.
Victory Points — In the competitive variant, Victory Points are earned by contributing the most Influence tokens to solve a Crisis. Points are awarded based on the Crisis level of the solved Crisis.
Pollution Tokens — Tokens placed on the Pollution side of the Climate Seesaw represent environmental damage. Players lose together if the Pollution side of the Seesaw either touches the table or becomes completely filled with Pollution tokens.
Preservation Tokens — Tokens placed on the Preservation side of the Climate Seesaw, representing efforts to protect the climate. The game is won when the Preservation side is completely filled before the Pollution side either touches the table or becomes fully filled.