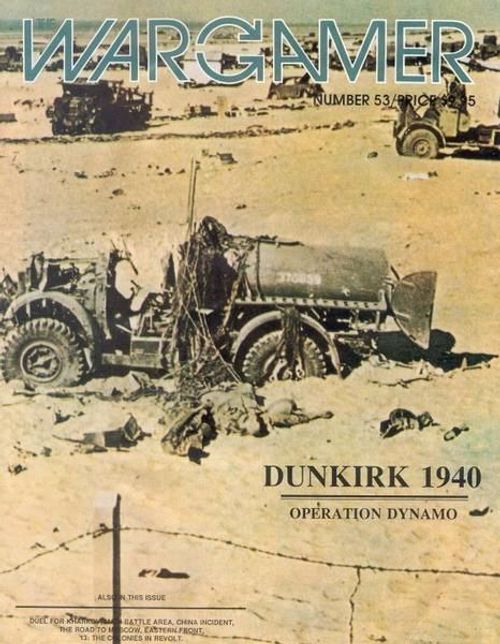
Dynamo: Dunkirk, 1940
Dynamo: Dunkirk, 1940 Rulebook
Table of Contents
Table of Contents
- 2.0 Game Components
- 3.0 Set-Up
- 4.0 Turn Sequence
- 5.0 Supply
- 6.0 Zones of Control (ZOC)
- 7.0 Stacking
- 8.0 Luftwaffe Air Support and RAF Intervention
- 9.0 Movement and Terrain
- 10.0 Franco-British Cooperation
- 11.0 Fog-of-War
- 12.0 Blitzkrieg Assaults
- 13.0 Korps Schwerpunkt
- 14.0 Guderian's 19th Panzer Korps
- 15.0 Kampfgruppen and the British 3rd Division
- 16.0 Prepared Assaults and Die Roll Modifications
- 17.0 Combat Results, Advances and Retreats
- 18.0 FLAK and Task Force Units
- 19.0 Friendly Board Edges
- 20.0 Evacuations and Withdrawals
- 21.0 Reinforcements
- 22.0 How to Win
- 23.0 Scenario I: The Campaign Game
- 24.0 Scenario II: No Halt Order (or "The End of the Middle of the Beginning of the Iron Dream")
- 25.0 Designer's Notes and Bibliography
- Errata
2.0 Game Components
2.1 The 200 die-cut unit counters included in the game should be carefully punched out and sorted by side and type before starting to play the game. The unit density on some areas of the map can get quite high, so I suggest trimming the dog-ears off their corners with a fingernail clipper. That will ease handling and stacking, and also impress your opponents with your professionalism and samurai-like determination.
2.2 A Sample Unit: [Diagram labels: Turn of Entry; Parent Organization; Unit's Size; Historic I.D.; Unit Type; Attack Factor; Defense Factor; Movement Factor.]
This unit is the "Gross Deutschland" Motorized-Infantry Regiment, belonging to the 19th Panzer Korps. It enters the game on turn 2, and has an attack strength of 2, a defense strength of 3, and a movement factor of 10.
2.3 A unit's historic organizational size is denoted by the symbol along its top edge. These size symbols are important in the game for stacking (see 7.0):
- xxx = Luftwaffe FLAK Korps (About 98 heavy anti-aircraft guns)
- xx = Division
- KG = Kampfgruppe
- x = Brigade
- FH? = Regimental-size (approx.) task force or ad hoc unit
2.4 All units represented in the Dynamo counter-mix function as combat units. They are divided into two groups: Motorized-Mechanized, and Straight-Leg. The first group, hereafter referred to as "Moto-Mech" units, are those kinds of formations whose primary means of locomotion is provided by wheeled or tracked motor-driven vehicles. Straight-Leg outfits are those that depend on the legs of men or animals to move about the battlefield.
Moto-Mech Units:
- Tank (Panzer)
- Light Tank (Reconnaissance)
- German all-arms Kampfgruppe or French DLM Division
- Motorized Infantry
- Motorized FLAK
Straight-Leg Units:
- Infantry
- Mountain Infantry (treat like regular infantry)
- Fortress (Garrison) Infantry
- Horse Cavalry
2.5 There are also Luftwaffe air support markers with a strength of one, two, three or four, and an undesignated Royal Air Force marker. [Counter illustrations: Luftwaffe air support marker; RAF marker.]
2.6 The counters marked "Dummy" are used for the fog-of-war rules (see 11.0), and the "Game Turn" and "Out of Supply" markers are provided as memory aids.
2.7 Various abbreviations appear on the counters.
On the German units these are:
- LW - Luftwaffe
- G.D. - Gross Deutschland
- KG - Kampfgruppe
- S.S. - Schutzstaffel
On British units they are:
- G - Guard
- RAF - Royal Air Force
- PF - Pol Force
- D - Devons
- QOCH - Queen's Own Cameron Highlanders
- RN - Royal Norfolk
- FF - Frank Force
- MF - Mac Force
- UF - Usher Force
On French units they are:
- M - Moroccan
- NA - North African
- Lt. - Light
- C - Colonial
- BPG, CPG, DPG - Boulogne, Calais, Dunkirk Port Garrisons
- SFF - Flanders Fortified Sector Troops
- DCR - Division Cuirassee
- DLM - Light Mechanized Division
2.8 Only a portion of the units (most German moto-mech, the S.S., and the Luftwaffe FLAK) carry the designation of their parent organizations on their counters. For example, 19th Panzer Korps consists of the 1st, 2nd and 10th Panzer Divisions, and the G.D. Motorized Infantry Regiment. See 13.0 for the full explanation of the significance of this in play.
2.9 In their upper-left corners most units carry either a black dot or a number. A dot indicates those units start Scenario I on the map (see charts 27, 4, 5, and 6). A number there indicates the game turn during which the unit may make its earliest appearance as a reinforcement. A unit with a blank upper-left corner is a substitute or break-down unit.
2.10 A unit's attack factor is a measure of its ability to conduct offensive combat.
2.11 A unit's defense factor is a measure of its ability to wage defensive battles.
2.12 A unit's movement factor is a measure of the relative speed it can use to move across the hexagonal grid printed on the map.
2.13 The counters are printed in various colors to make sorting them into their various national groupings easier.
- Wehrmacht and Luftwaffe - Black on Gray
- Nazi S.S. - White on Black
- British - White on Red
- French - Black on Blue
2.14 In addition to the units described above, the other components to a complete Dynamo game are the rules and play aids (which you are now reading), and the map. A standard six-sided die will also be needed.
3.0 Set-Up
3.1 After deciding whether to play Scenario I or II, players should place all the units directly on their spaces on the three set-up and reinforcement charts 27.5, 27.6 and 27.4.
3.2 When playing Scenario I, all "At Start" units have a specific set-up hex listed underneath their space on the chart. Players may set-up simultaneously to save time, and the "Game Turn" marker should be placed on the turn one space on the turn record chart (27.1).
3.3 When playing Scenario II, remove the appropriate units from the charts and set them up according to the information found in 24.0. Put the Game Turn marker on space 5.
4.0 Turn Sequence
4.1 All actions taken during a game-turn of Dynamo take place within the framework of two player-turns, each of which is subdivided into smaller segments called phases. Actions taken out of sequence are illegal, and once a player completes a phase and has moved on to the next he may not go back to perform some forgotten action in that earlier phase without his opponent's permission.
4.2 Below is the complete turn sequence in outline form. The rest of the rules are organized so as to duplicate as much as possible that same structure.
I. French and German Mutual Supply Check Phase
II. German Player Turn
- A. Luftwaffe Commitment Phase
- B. German Movement and "Blitz" Phase
- C. German Prepared Assault Phase
- D. German Dummy Deployment Phase
III. Allied Player Turn
- A. Allied Sea Evacuation Phase (Beginning turn 3)
- B. Allied Movement Phase
- C. Allied Prepared Assault Phase
- D. Allied Dummy Deployment Phase
5.0 Supply
5.1 All British Units are always in supply throughout all turns of both scenarios.
5.2 French and German units, however, to be in supply must be able to trace a path of hexes to a friendly supply source. Such supply lines consist of a path of hexes of any length, traced from the unit to the supply source. The path may not go through hexes occupied by enemy units or their zones of control (see 6.0 for explanation of ZOCs). Friendly units do negate the presence of enemy zones of control (EZOC) in the hexes they occupy for the purposes of tracing a supply line through the hex.
5.3 French units can trace supply to any of the urban hexes on the map. Once an urban hex is entered by German units, however, that hex can no longer function as a source of French supply even if retaken by that army.
5.4 French units may also trace their supply line off their "Friendly South Board Edge", hexes 1010 to 2121, inclusive (see 19.0). Those hexes do not cease to be French supply sources if entered by German units. If the situation changes so that the French can again trace a supply line into a previously German-occupied or blocked friendly board edge hex, that hex is again a supply source.
5.5 German units, under the same strictures as the French above, trace their supply to the "German Friendly Board Edge", hexes 2221 to 3413 (after Belgium surrenders [see 19.2] that extends to 3406), inclusive.
5.6 German moto-mech units do not need to begin tracing supply lines until the supply check phase of game-turn four. Before then they are always considered in supply. German straight-leg outfits must trace supply from turn one on. (In Scenario II, all types of German units must trace supply from the start.) 5.7 All units may voluntarily move out of supply, but units that start their player-turn out of supply lose the ability to move from EZOC to EZOC. Once back in supply, of course, they regain the ability to make such moves.
5.8 German and French units have their supply states judged simultaneously during the mutual supply check phase that starts each game-turn. Units then judged out of supply remain in that state until the next supply check phase. Likewise, units then judged in supply remain in that state until the next check phase.
5.9 Units judged out of supply have their attack and movement factors halved (round fractions up) for that game-turn. Defense factors remain unchanged. Units may remain out of supply indefinitely, and are not subject to any kind of automatic elimination.
5.10 Reinforcement units are always in supply throughout the game-turn of their entry into play.
5.11 Luftwaffe air support points and the RAF unit need no supply, and they have no effect on enemy or friendly units' supply states.
5.12 Out of supply German moto-mech units may not make Blitz Assaults (see 12.0).
6.0 Zones of Control (ZOC)
6.1 All ground units in Dynamo exert a zone of control (ZOC) in the hex they are in and the six surrounding hexes at all times. Luftwaffe air support counters and the RAF counter exert no ZOCs. ZOCs inhibit enemy movement, retreat, and supply.
6.2 ZOCs in Dynamo do not extend across all-sea hexsides. Other than that, ZOCs are not affected by the terrain in the hexes into which they are projected.
6.3 Supply state has no affect on a unit's ability to project ZOCs; out of supply units project them just as in supply units do.
6.4 It costs one additional movement factor, above normal terrain costs, to enter a hex into which an enemy zone of control (EZOC) is being projected. Likewise, it costs one additional factor to leave such hexes. Hence, units may move from EZOC to EZOC at a cost of two additional movement factors per hex.
6.5 Units that begin their player-turn out of supply lose the ability to move from EZOC to EZOC until such time as they are again judged to be back in supply.
6.6 Friendly units in a hex negate EZOC projected into that hex for purposes of tracing friendly supply lines and conducting retreats of friendly units into and through that hex. Friendly units, however, do not negate EZOC for the purposes of calculating normal friendly movement costs. (And, of course, friendly ZOC have no affects at all on other friendly units.)
6.7 The number of enemy units projecting a ZOC into a given hex has no qualitative or quantitative affect on the ZOC in that hex. And it is possible for units of both sides to simultaneously project ZOCs into the same hex.
6.8 No unit may ever retreat into or through a hex containing an un-negated EZOC, nor may supply lines be traced into or through such hexes. Combat is never caused by the mere presence of hostile units in each others' ZOCs.
6.9 Though moto-mech units may never enter the three marsh hexes on the board, their zones of control do extend into those hexes.
7.0 Stacking
7.1 The process of piling more than one unit into a single hex is called "stacking". Each unit in the game has a stacking-value, and the amount of units in a given hex at any one instant may never exceed 14 points of stacking-value.
7.2 The stacking limitation of 14 points is in effect all through the game-turn. That is, any number of units may pass through a given hex throughout the game-turn, but at any one instant the 14 point limit must be observed. Example: Say the German player has 6 stacking points worth of units sitting in hex 2316. He has another stack of 10 points in hex 2417. Only 8 of those 10 points can move into 2316 without violating stacking limits. The German could get around the problem by first moving away the units in 2316, thus clearing the way for his stack in 2417. Or he could break up the stack in 2417 and move the units there through 2316 in increments small enough to stay within stacking limits (but that might foul up plans for a Blitz Assault - see 12.0).
7.3 Retreat stacked units from combat simultaneously (see 17.12, 17.17). Terrain has no affects on stacking limits. The penalty for over-stacking is instant death for the violating units.
7.4 The owning player may combine or break up stacks at any time during his movement phase. But once the movement of a unit or stack is completed, and the player's hand removed from the unit(s), the movement of those pieces is finished and may not be altered unless the opposing player consents.
7.5 When the German player conducts Blitz Assaults, the only method whereby opposing units may simultaneously occupy a single hex, the stacking values of the two sides' are mutually exclusive and do not affect each other in any way.
7.6 The stacking values of units in the game are as follows:
- 6 pts. - German panzer division
- 4 pts. - All other divisions in the game
- 3 pts. - German KG units
- 2 pts. - All other non-division-sized units except British FLAK
- 1 pt. - British FLAK brigades
- 0 pts. - Luftwaffe air support and the RAF counter
7.7 The stacking value of a unit is not reduced because it loses steps in battle (see 17.0).
8.0 Luftwaffe Air Support and RAF Intervention
8.1 The German player must commit his three (four after turn eight) available air support counters during the "Luftwaffe Commitment Phase" of each turn. Place the air support counter atop the ground unit(s) to be supported. If more than one factor of support is to be assigned to one hex, use the higher-strength substitute counters to avoid unwieldy high stacks.
8.2 If a stack of air-supported German units splits up during movement, retreats, or advance after combat, the German player may then split up his air support, too. If the Luftwaffe factor was originally committed to a single ground unit, however, it must remain with that same unit until the next commitment phase. (If other unsupported German units move into a hex with supported units, those new units do then receive all support benefits.)
8.3 Any number of available support factors may be assigned to even just one ground unit.
8.4 In German prepared and Blitz assaults, each Luftwaffe support factor causes a -1 (minus one) die roll modification to the German die roll.
8.5 On the defense, each Luftwaffe support factor present in the defending German ground units' hex causes a +1 (plus one) modification to the Allied die roll.
8.6 Luftwaffe air support is unaffected by the presence of British FLAK units, and the support counters do not exert ZOCs or count for stacking. (Neither does the RAF count for stacking.)
8.7 The RAF may carry out one massive intervention in the ground battle per game. There must be at least one division-sized British unit involved in a particular fight for the RAF to be able to intervene there. Once an RAF intervention is made, remove the counter from the game. Used up RAF is not considered destroyed, however, and the German thus does not gain any victory points for it.
8.8 The Allied player may call for a defensive RAF intervention in any battle where there is at least one British division defending. He announces the intervention after the German has committed himself to make the assault, but before the die is rolled. A defensive RAF intervention causes a +2 (plus two) die roll modification to the German's roll.
8.9 Alternately, the Allied player may use the RAF offensively. In such cases there must again be at least one British division involved, and the intervention must be declared before the German stack is examined (see Fog-of-War, 11.0) and the die rolled. An offensive intervention causes a -2 (minus two) die roll modification to the Allied die roll.
8.10 When making an offensive intervention, the Allied player must take into account the possible presence of one or both of the German FLAK Korps in the hex he is attacking. Each korps present reduces his RAF die roll modification by one. Thus, if both korps are present, the RAF is completely nullified and wasted. (On defensive RAF interventions, the presence of German FLAK among the attackers has no affect on the RAF.)
8.11 The range and movement factors of both sides' air units in the game are unlimited. They cannot be killed or in any way given up as step losses in battle. The Luftwaffe air units may advance and retreat after combat along with their supported ground units (splitting up if the stack splits up).
8.12 Both the Luftwaffe and RAF may simultaneously operate in the same combat. Die roll modifications are cumulative, however, and therefore may be mutually cancelling. (See 16.0 for a full explanation of the die roll modification process.)
8.13 In any game, the Allied player gets one RAF intervention, either offensive or defensive - not both. The Luftwaffe, on the other hand, is available every turn.
9.0 Movement and Terrain
9.1 Every ground unit in the game has a "movement factor" printed as the rightmost numeral along its bottom edge. This represents the maximum number of hexes the unit may move into in a single movement phase.
9.2 Both players move only their own units during the movement phase of his own player-turn. Combat does not occur during these phases, but "Blitz Assault", a form of combined movement and combat, may occur during the German movement phase (see section 12.0).
9.3 All terrain costs for entering hexes, crossing water barrier hexsides, and entering and leaving enemy zones of control are cumulative.
9.4 Regardless of movement cost totals, however, a unit may move into a hex adjacent to the hex in which it began the movement phase by expending all its movement points. There are only two exceptions to that rule: 1) Out of supply units lose the ability to move directly from EZOC to EZOC, no matter how many movement points they have available; and 2) German moto-mech units making Blitz Assaults must have the needed number of movement factors available to do so.
9.5 Terrain costs are as follows:
- Clear, Watergangs, and Broken Terrain all cost only one movement point each to enter.
- Marsh hexes cost straight-leg units three movement points per hex entered. Moto-mech units may never enter marsh hexes. Supply lines may be traced into, but not through, marsh hexes.
- Waterbarriers (rivers and canals running between hexes) cost one extra movement to cross. That penalty is not paid, however, if the hex the unit is crossing into or from is an urban hex.
9.6 All-sea hexsides (Example: the hexside shared by hexes 1308 and 1408 is all-sea.) do not constitute "water barriers" as described above. All-sea hexsides are normally impassable, and may only be crossed by certain British reinforcements and by Allied sea evacuation units (see 20.0 and 21.0).
9.7 Units may be moved either individually or in stacks. Stacks may break up and combine during movement (Exception: see 12.12), but one unit may never lend movement points to another. Nor may movement points be saved up from turn to turn. Units do not need to expend any or all of their movement points in a turn.
9.8 At two times during the game, units of the 19th Panzer Korps may exceed their printed movement factors. Those are the only times that is possible in the game (see 14.0).
9.9 The combat effects of terrain are described in section 16.0, and a complete tabular summary of all terrain effects are given on chart 27.2.
9.10 All land hexes on the board are playable hexes as long as they contain a four-digit locator number. [Errata, Wargamer #55, applied to 9.10: "All land hexes on the board, both partial and full, are considered to be playable hexes." Errata, Wargamer #56, then superseded it: "Ignore Rule 9.10. It was originally to cover 1/2 hexes, a condition which doesn't exist on the finished map." The printed text above is therefore to be ignored; see the Errata section at the end.]
10.0 Franco-British Cooperation
10.1 The command liaison system set up between the two Allied armies was one more suited to the tempo of 1918 than 1940. And even by that earlier standard, it never worked up to its full capacities. The following rules are therefore in effect throughout all games.
10.2 Any British and French units that begin the Allied movement phase stacked in the same hex with each other have one movement factor deducted from their normal allowances for that turn. That is true even if the stack splits up during movement.
10.3 Any Allied attack that contains both British and French units among the assaulters suffers a +1 (plus one) die roll modification. There is no penalty for British and French units defending in the same hex.
11.0 Fog-of-War
11.1 During the set-up of Scenario I, none of the three British, three French, and four German dummy units are deployed. Each player may deploy his side's dummy units starting with his own "Dummy Deployment Phase" of game-turn one.
11.2 During your opponent's dummy deployment phase of every turn, you should turn your face away from the board to allow him to deploy them in secrecy. That is the only time players may not keep the board and pieces on it under observation. [Errata, Wargamer #55, added to Rules Section 11.2: "It is, however, forbidden to either player to inspect the stacks of his opponent's units until such time as he has already committed himself to make some kind of assault into that hex."]
11.3 Dummy units have no stacking value, and may be deployed atop or underneath real units in a stack. There may be more than one dummy unit in a stack, but there must always be at least one real ground unit in a stack with dummies. Dummies may never exist alone in a hex, and have no combat values.
11.4 The movement factor of dummies is that of the fastest real unit with which they are stacked.
11.5 French and British dummies may be deployed by the Allied player in stacks without regard to their color of nationality. Allied dummy units may affect the movement costs paid for German Blitz Assaults (see 12.5).
11.6 In Scenario II, dummy units should be deployed when both sides set-up (German first).
11.7 Players should also keep each other's reinforcement charts covered or out of sight of the enemy player.
12.0 Blitzkrieg Assaults
12.1 Only German moto-mech units, individually or in one-stack assault columns, may make "Blitzkrieg Assaults". Further, there must always be at least one panzer or kampfgruppe unit involved in each Blitz assault. That is, motorized infantry and FLAK can in no way make Blitz assaults unless at least one panzer or KG is stacked with them to lead the way.
12.2 Procedure: After entering a hex in an enemy zone of control, the German player announces that his moving stack (or single unit) is going to "Blitz" the Allied unit(s) in the adjacent hex. Because such "Blitzing" units are launching an assault while moving swiftly in road formations, their tactical flexibility is restricted. Accordingly, blitzing units suffer a +2 (plus two) die roll modification when assaulting. (Of course, that disadvantage can be nullified by other factors such as Luftwaffe air support, Korps Schwerpunkt, etc. - see 16.0.)
12.3 After announcing his intention to "Blitz", the German player moves his units atop the Allied units to be assaulted. (Only one single hex may be blitzed at a time.) To be able to blitz, he must expend one movement factor to enter the hex (plus one for crossing any hexside water barrier), plus three extra to make the assault itself. No other movement costs are paid (Exception: see 12.4 below).
12.4 That plus-three movement cost can be modified downward if the Blitz is carried out at higher odds. If the odds of the Blitz are 5-1, the German need only expend +2 (plus two) movement points. If the odds are 6-1, he only expends +1 (plus one). And if the odds are 7-1 or more, he expends nothing extra at all. In that last situation, however, other Allied units, themselves not being assaulted but projecting a ZOC into the hex of the Blitz, need to have their ZOC-entry-cost (only) of +1 (plus one) paid.
12.5 If, because of the fog-of-war rules, the German cannot state with mathematical certainty what his Blitz odds are, he must have the full +3 (plus three) factors available to expend on the assault or he can't carry it out. Once he commits himself (assuming he has the movement points to do so), and examines the Allied stack, lifting dummies, etc., he then gets back any excess points expended if the odds are revealed to be in fact higher than 4-1.
12.6 The German is not allowed to guess at the strength of the defending stack in order to go in with the lower movement costs. "Knowing with mathematical certainty" means there is a single uncovered unit in the defending hex, or the stack was just blitzed earlier that movement phase, thus revealing its strength. Likewise, the German is considered to "know" if he can state the historic I.D. numbers and current defense strengths of the defending units. Keeping "intelligence" notes is permissable.
12.7 Blitzes at odds of 4-1 and lower are always carried out with a +3 movement cost. Calculate combat odds just as you would for a prepared assault (see 16.0).
12.8 Allied defenders in marsh hexes may never be blitzed, and out of supply German moto-mech units may never carry out blitzes.
12.9 German units carrying out a Blitz must always suffer combat results as step losses, never as retreats. If the Blitz fails to dislodge (or destroy) the defenders from their hex, the assaulters are placed back into the hex from which they just launched the Blitz. (They don't expend any movement points to do so.) Allied defenders do have the normal retreat or step loss option when receiving a Blitz assault.
12.10 The same German unit may carry out more than one Blitz in a single turn. Losing one Blitz does not stall out an assaulting force; it may go in again on the same or different hex (recalculating odds) or just move away (always assuming the movement points are available to do so). And moto-mech that carry out Blitz assaults may still make prepared assaults later that same turn.
12.11 There is no automatic advance after combat when Blitz assaulting as there is with prepared assaults (see 17.0). Blitzing is part of movement, and units may continue moving and blitzing as long as all the above strictures are met and they've got the movement points to expend.
12.12 In order to carry out a Blitz assault together, units must be stacked together at the very start of the movement phase in which the Blitz is to be made. Blitz assaults may never simultaneously be carried out by more than one stack, though it is possible for the same defending units to be sequentially blitzed by different German stacks during the same turn.
12.13 German straight-leg and all Allied units may never conduct Blitz assaults.
13.0 Korps Schwerpunkt
13.1 There are four panzer korps in the game: 15, 16, 19 and 41. 15th Panzer Korps is made up of the 5th and 7th Panzer Divisions. 16th Panzer Korps holds 3rd and 4th Panzer Divisions. 19th Panzer Korps holds the 1st, 2nd and 10th Panzer Divisions, plus the Gross Deutschland (G.D.) Motorized Infantry Regiment. 41st Panzer Korps holds the 6th and 8th Panzer Divisions. (Those Korps designations are carried on the left side of all the named counters.)
13.2 9th Panzer Division is an organizational orphan in the game. Unlike the other panzer divisions, the 9th carries no Korps designation on its counter. For play purposes, the 9th doesn't belong to any Korps, and though it may carry out Blitz assaults, it may never function as part of any of the four panzer korps.
13.3 The German military term "Schwerpunkt" means "stress point" or "point of concentration". When a Schwerpunkt has been achieved, it means the units of a panzer korps have been so concentrated that korps-held combat support units, and more rapid command control, can effectively be brought into play and thus enhance combat capabilities. In Dynamo there are three kinds of Schwerpunkt: offensive, defensive, and Blitz.
13.4 A "Blitz Schwerpunkt" is used to enhance Blitz assaults. When one is achieved, the German has a -2 (minus two) die roll modifier added to that particular Blitz assault's die roll. A Blitz Schwerpunkt is achieved when two panzer divisions of the same korps make a Blitz assault together.
It is possible for one of the Luftwaffe FLAK Korps or the SS LAH Regiment to ride along on such blitzes without destroying the Schwerpunkt. Likewise, the G.D. Regiment may ride along on 19th Korps Schwerpunkts.
13.5 An "Offensive Schwerpunkt" is achieved when all the units of a particular korps are involved in the same prepared assault. The units of that korps must all be in the same hex or two adjacent hexes. Luftwaffe FLAK and SS units may assault with the korps units, even stacking with them, without destroying the Schwerpunkt.
Any other German units, both moto-mech and straight-leg, may also take part in offensive Schwerpunkt assaults, and still preserve the advantageous die roll modification, as long as they do not actually stack with any of the korps' units. (They may stack with the FLAK and SS.)
An offensive Schwerpunkt always gives the German a -2 (minus two) die roll modifier for that particular prepared assault. And no matter how many of the four panzer korps take part in a given Schwerpunkt assault, that modifier is never increased beyond -2. And if more than one panzer korps is involved in one Schwerpunkt assault, they must all maintain the pure korps stacking as described in the first paragraph above.
13.6 A "Defensive Schwerpunkt" is used to enhance defense against Allied prepared assaults. This is achieved when all the units of a particular panzer korps are stacked in the same or two immediately adjacent hexes. In two-hex Schwerpunkts, both hexes get the modifier. A defensive Schwerpunkt causes a +2 (plus two) die roll modifier to be added to the Allied player's die roll for that assault.
SS and Luftwaffe FLAK units may also be in the defensive Schwerpunkt hex(es) without destroying the Schwerpunkt. If any other German units are there, however, the Schwerpunkt is lost.
13.7 A korps can no longer form any kind of Schwerpunkt once one of its component divisions is destroyed. (The 19th Korps may lose the G.D. Regiment and still form Schwerpunkt.) Likewise, if one of a korps' component divisions is broken down into Kampfgruppen, it may not form Schwerpunkts until such time as that division(s) is reformed.
13.8 Luftwaffe air support points may always participate in any kind of Schwerpunkt.
13.9 A korps may form all three kinds of Schwerpunkt on the same turn, and there is no limit to the number of Schwerpunkt the German may achieve on any one turn.
13.10 The German player should think of his Luftwaffe FLAK and SS units as "floaters" - units that can be assigned and reassigned to work as part of any korps on any mission. They cannot, however, serve to reestablish a korps' organizational integrity once one of the original component divisions has been destroyed.
14.0 Guderian's 19th Panzer Korps
14.1 Heinz Guderian was the man who transformed Blitzkrieg from theory into practice. The units under his command several times amazed the world with their speed and daring during this campaign.
14.2 2nd Panzer Division was given the mission of reaching the coast and thus completing the strategic isolation of the Allied northern armies. As a result of those orders, and a grim commitment within the 2nd to carry them out, that division travelled faster and even more determinedly than usual on May 20.
On turn one of Scenario I, 2nd Panzer has its printed movement factor doubled to twenty for that one turn's movement. In order to make use of those extra points the unit may not carry out any prepared assaults that turn (it may Blitz), and it must end its turn within one hex of a coastal hex.
If the division breaks down into Kampfgruppen, only one of the KG must end the move within one hex of the coast. The other KG may end anywhere within two hexes of the first KG.
If 2nd Panzer makes this "force march" (the German player is not required to have it do so), the 19th Panzer Korps cannot achieve any kind of Schwerpunkt on turn one.
14.3 Once during Scenario I, on turn 2 or 3 or 4 or 5 or 6, the German player may force march the entire 19th Korps (including the 2nd Panzer again). On this force march, all units of the korps have five movement points added to their normal limit. On that turn no unit of the korps may make a prepared assault (they may Blitz), and no kind of Schwerpunkt can be achieved.
This force march may no longer be made once the 19th has lost the ability to form Schwerpunkt, as described in 13.7.
At the start of Scenario II, the force march is already considered to have been made.
15.0 Kampfgruppen and the British 3rd Division
15.1 All German panzer divisions, except the 9th, may break down into two kampfgruppen. No panzer division may do so, however, once it has taken any step losses. The 9th never forms KG.
15.2 The purpose of forming KG is to give the division more flexibility in forming tactical encirclements or covering more frontage. The break down into KG may occur at any time during the German movement phase and during advance after combat and during retreats from combat. The resultant KG have only the movement points left to the division at the instant of breaking down.
15.3 KG may reform into their parent division in the same way and at the same times as the break down process described above. And, of course, the reformed division has only the movement points left to the KG at the instant of reforming. The process of breaking down and reforming carries no intrinsic movement costs, so units performing either function at the very start or very end of a movement phase do so without expending any movement points.
15.4 If a division's KG "A" has lost a step, or its KG "B" been destroyed, that division may never be reformed. KG from different parent divisions may never form into a "new" division.
15.5 KG may lead Blitz assaults.
15.6 Bernard Montgomery's 3rd (British) Division may detach its reconnaissance element for separate operations at the start of any British movement phase (only). The division must be at full strength to do so. Simply flip it over to its weaker side and place the recon unit atop it. The division may similarly be reformed at the start (only) of any British movement phase.
16.0 Prepared Assaults and Die Roll Modifications
16.1 Combat is only ever possible between adjacent opposing units. Units are never forced to attack, however, simply because they are adjacent to enemy units; combat is always voluntary.
16.2 In any prepared assault phase, the player whose turn it is is considered the attacker, and the other player the defender, no matter what the overall strategic situation.
16.3 To resolve a battle, add up the attack factors of all units making the assault; then add up the defense factors of all enemy units receiving the assault. Divide the defenders' total strength into the attackers' total strength to obtain an odds ratio. Always round off fractions in favor of the defender. (Example: 26 attack factors versus 8 defense factors yields an odds ratio of 3-1.)
16.4 Next look at the Combat Results Table and find the terrain type listed in the upper left of the chart that the defenders occupy. Looking across that line from left to right, find the appropriate combat odds column. Roll the die under that column heading, add on any die roll modifier, and then apply the combat results immediately before resolving any other battle. (Example: if the 3-1 odds shown in the previous example were against a unit in "Watergangs" terrain, the attack would be resolved on the fourth column in from the left on the chart. When the die was rolled, assuming no modifiers are in effect, say a 3 was obtained - the combat result would be 1/1.)
16.5 There is no limit to the number of prepared assaults a player can make in any given assault phase. A defending unit(s) may be attacked by units in any or all of the six surrounding hexes. But no unit may attack more than once in any given assault phase, and no enemy unit may be attacked more than once per assault phase. The attacker may resolve his battles in any order he wishes.
16.6 Units in two or more hexes may combine their attack factors and all attack a single hex. Defending units stacked in a single hex, however, may not be attacked separately; they may only be assaulted as if they were one large unit.
16.7 Assaults may involve any number of attacking and defending units. For assaults to be resolved as a single battle, all the assaulting units must be adjacent to all the defending units.
16.8 In cases where the phasing player has a stack of units, not all those units must assault into the same hex. Some could assault into different hexes or simply not assault at all.
16.9 Attack and defense strengths are always indivisible. A unit's strength may never be divided among different battles, either on attack or defense.
16.10 Only defending units benefit from the terrain in the hex they occupy and any water barriers around that hex's perimeter. Terrain in hexes occupied by the assaulting units has no effect on combat.
16.11 Defenders in a single hex do not benefit from water barrier hexsides unless all assaulting units are coming across such hexsides. The water barrier die roll modification is +2 (plus two).
16.12 The effects of terrain have been built into the Combat Results Table. Find the terrain which the defending unit benefits from, trace over to the correct combat odds column, and roll the die under that heading.
16.13 Defending units in the same battle always benefit from the most advantageous terrain to which they are entitled. For example, if two adjacent defenders are being assaulted in one single battle, and one occupies clear terrain and the other watergangs behind a water barrier, the watergangs line is used to resolve combat and the defenders get the water barrier +2 (plus two) die roll modification.
16.14 If odds are obtained higher or lower than the most extreme odds shown for that terrain type, use the extreme (high or low) column to resolve the battle. (Example: a 9-1 assault against units on clear terrain would be resolved on the 8-1 column.)
16.15 Various conditions can increase or decrease the combat effectiveness of assaulting units. These changes occur as additions of positive or negative numbers to the result shown when the die is rolled to resolve combat, and they are called "Die Roll Modifiers".
There is no limit to the number of positive or negative modifiers that may apply to one battle. Before applying them, combine them all into one grand positive or negative modifier. (Example: A battle is fought in which modifiers +2, +1, -3 and -1 all apply. The final grand modifier added to the die roll here would be -1.)
16.16 If after adding on the final die roll modifier, a result lower than -2 or higher than 9 is obtained, treat that result as -2 or 9, respectively.
16.17 The following modifiers apply to German assaults:
- -3 (minus three) if a German prepared assault is concentric. A prepared assault is said to be "concentric" if the defenders are being actively attacked from two diametrically opposite hexes or from three non-adjacent hexes or more than three hexes (that is, the defenders are "surrounded"). The presence of other units friendly to the "surrounded" defenders in hexes adjacent to the concentric assaulters in no way negates this attacking benefit. This die roll modifier never applies to Blitz assaults, and it may never be obtained against units defending in Boulogne, Calais or Dunkirk.
- -2 (minus two) if the German has achieved a Blitz or offensive Schwerpunkt (see 13.0).
- -1 (minus one) for each factor of Luftwaffe air support the German has supporting his prepared or Blitz assault.
- +1 (plus one) if the Allied defenders are in a village hex. One hex, 2711, has two villages in it - ignore the second village, the modifier there is still only +1.
- +2 (plus two) if the Allied defenders are on the other side of a water barrier.
- +2 (plus two) if the German is making a Blitz assault.
- +2 (plus two) if the RAF is making a defensive intervention.
16.18 The following modifiers apply to Allied prepared assaults:
- -3 (minus three) if the Allied prepared assault is concentric (same strictures as for the German).
- -3 (minus three) if the Allied prepared assault is conducted as part of the "counter stroke" (see 16.19 below).
- -2 (minus two) if the RAF is making an offensive intervention (but German FLAK may nullify, see 8.10).
- +1 (plus one) if the German defenders are in a village hex (same treatment for hex 2711).
- +1 (plus one) if both British and French units are involved in the same Allied prepared assault.
- +2 (plus two) if the German defenders are on the other side of a water barrier.
- +2 (plus two) if the German has achieved a defensive Schwerpunkt.
16.19 Once during the game the Allied player may announce at the start of his combat phase that he is launching his "Counter Stroke". On his first assault that turn, he automatically gets the -3 counter stroke modifier. If the German defenders are all destroyed or forced from their hex and at least one Allied unit occupies their vacated hex, the Allies are said to have "won" that battle. In that case, if the Allied player has another assault set up elsewhere he may now launch it with the same -3 modifier. That process may continue until a battle is fought which the Allied player does not "win". Even if the Allied player "wins" all the battles of his counter stroke turn, however, the bonus may never be carried over to a subsequent game turn.
Losing a counter stroke battle does not force the Allied player to end his combat phase at that point; it simply denies him any further use of the -3 modifier that game.
17.0 Combat Results, Advances and Retreats
17.1 All combat results are absorbed in terms of step losses or hexes retreated. Results to the left of the slash apply to the attacker, and those on the right to the defender.
17.2 Units with printed attack factors of "3" or less have no reduced strengths on their reverse sides, and are said to be worth one step of combat losses. That is, if in combat they absorb a "1" result as a step loss they are totally destroyed.
17.3 Of the units in the game with printed attack factors of more than "3", most have just a second, reduced, step printed on their reverse side. (Example: A German 6-8-6 infantry division has its second step, 3-4-6, printed on its reverse.) Those units are flipped over to their weaker side when absorbing a one step loss, and are completely destroyed by a second step loss.
17.4 All the German panzer divisions are represented by two counters - only one of which will ever be in play at any one time. All panzer divisions but the 9th are four-step units. For example, the 1st Panzer Division starts play as a 12-7-10, and reduces down to a 9-5-10, then a 6-3-10, and finally to a 1-1-10.
The 9th is the only three-step panzer division, thus one side of its second counter is blank.
17.5 The Kampfgruppe substitute counters have nothing to do with the step reduction of panzer divisions. The KG are used to enhance tactical flexibility (at the loss of some combat power) of full strength panzer divisions (see section 15).
17.6 There is no "replacement" system in Dynamo. That is, once a unit has given up one of its steps or been destroyed, there is no way to regain that step or rebuild that unit during the game. 17.7 When assaulting units obtain an "E" result on the Combat Results Table all of them are completely destroyed. Simply pick up all affected units and remove them from play.
17.8 When defending units obtain an "E" result, all the affected units must lose one step (thus destroying them if they are only one-step units) and make a two-hex retreat. This is the only instance in play when a retreat is mandatory, and if the affected units for any reason cannot make that full retreat they are completely destroyed in their original hex.
17.9 When a dot appears on either side of the slash, that means all units of that side are not affected in any way: "no effect". There may be an advance after combat if units of the other side suffered a result leading them to abandon their hex (see 17.20).
17.10 A numeric result of 1, 2 or 3 means that the affected unit(s) must either lose that number of steps or all be retreated that number of hexes or some combination of the two. For example, if absorbing a "3" result, the player could lose one step from just one unit and then retreat all his involved units two hexes or he could lose two steps from one or more units and then retreat all involved units one hex or he could lose three steps and keep all the survivors in place.
When apportioning out multi-step losses, the owning player has complete freedom. That is, he may have one unit suffer all the losses or he may split them up among several units.
17.11 Anytime both the attackers and defenders are called on by the chart to absorb a result the situation is called a "split result". In split results, the defender's result is always applied first, followed by the attacker's. If any attacking units remain in their original hex they may advance after combat if the defending hex was vacated. Victorious defenders may never advance after a split result.
17.12 Each player retreats his own units. Stacking limits may not be violated during or at the end of retreats, and units attacked in the same hex are considered to be retreated simultaneously. All retreats must be in as straight a line as possible away from the battle hex, and units must end their retreat the stated number of hexes away from the original hex. No hex in the path of retreat may be entered more than once during the retreat.
17.13 Whenever possible, German units must be retreated in a direction that brings them closer to a hex of their "Friendly Board Edge" (see 19.1). Allied units must likewise retreat either toward one of their two friendly board edges or toward any one of the three port cities (Boulogne, Calais, Dunkirk) that is still under Allied control at that instant. Only if a direction following those conditions is impossible, may a unit ignore those restrictions and go off in other directions.
17.14 Units of both sides may retreat off their respective friendly board edges, but only if no alternative on-board route is open. Such units are not destroyed, but see section 19 for a full discussion of their possible fate.
Zones of control are considered to extend off the board edge for purposes of blocking retreat routes.
17.15 It is impossible to retreat through an EZOC, but friendly units do nullify EZOC projected into their hex for purposes of conducting retreats through that hex.
17.16 Retreats are always optional except in the case of a defender "E" result. If for any other reason units cannot make a legal retreat, they must then stay in place and absorb all retreats as step losses.
17.17 Stacked units being retreated as a result of a single battle may be retreated into different hexes. The retreat of such units is still considered to be simultaneous, however, and stacking restrictions still do apply all throughout the retreat.
17.18 If a unit ends a retreat in a friendly occupied hex, and that new hex then undergoes an assault that same combat phase, the originally retreated unit(s) does not contribute to the defense of its new hex. Further, if that new hex suffers any combat result (loss or retreat) the previously retreated units are destroyed. None of this applies to units retreated by Blitz assaults.
17.19 In a split result, if the defending units have been retreated or eliminated and the attacker decides to retreat, the assaulting units may not be retreated into any hex that was defender-controlled or occupied at any time during the battle.
17.20 If all enemy units have been forced to retreat or are eliminated in battle, friendly involved units may make an "advance after combat". This does not require an expenditure of movement points (and does not pertain to Blitz assaults).
17.21 Victorious straight-leg units can never advance farther than occupying the defender's vacated original hex. Victorious moto-mech of both sides can advance up to the number of hexes retreated by the defeated defenders. They may ignore EZOC when making such advances, but the first hex they move into must be the defender's original hex. After that they may continue on in any direction(s).
17.22 Any time defending units are completely eliminated in battle, the victorious moto-mech attackers may advance two hexes. Victorious defenders may never advance more than one hex.
17.23 Victorious units are never forced to advance after combat, and victorious moto-mech attackers need not advance the full distance allowed them by their victory. Stacked victorious attackers may go off in different directions after occupying the original hex of the defender.
17.24 All advances and retreats, eliminations and losses, for a particular battle must be applied and completed before play can proceed on to the next combat.
18.0 FLAK and Task Force Units
18.1 If FLAK units (of either side) are attacked by a force consisting of only infantry or mountain infantry or horse cavalry or fortress troops or motorized infantry, then that defending FLAK unit's attack factor is used as its defense strength for that battle. This applies even if the defending FLAK is stacked with other friendly units of any kind.
18.2 If any tank, light tank, FLAK, air support, KG or French DLM units assault an enemy FLAK unit, then its printed defense strength is used as its defense factor.
18.3 British FLAK never has any special effects on Luftwaffe air support. German FLAK can, however, nullify an RAF offensive intervention (see 8.10).
18.4 The twelve British and three French task force units (showing a bracket atop their regimental size symbol) function like normal units except that they may never choose a retreat option when defending against a prepared assault, unless they are stacked with at least one non-task force unit. They may retreat as usual in Blitz assault situations.
19.0 Friendly Board Edges
19.1 The German "Friendly Board Edge" consists of the line of contiguous hexes running from 3413 down to the map corner at 3421 then over to 2221. Iron cross symbols are printed in those two end hexes as reminders.
19.2 Beginning with the very start of game-turn 9, the board edge hexes from 3412 to 3406 are also considered to be German friendly board edge hexes. At that time, any Allied units being held off that stretch of board edge are considered destroyed.
19.3 The Allied player's main (or "south") friendly board edge runs from 1010 down to the map corner at 1021, then over to 2121. The stretch of board edge from 3412 to 3406 is also considered Allied friendly board edge until the beginning of game turn 9, at which time it switches to German friendly board edge. Allied blue, white, and red roundels are printed in 1010, 2121, 3406 and 3412 to serve as reminders.
19.4 Friendly board edges are a source of supply (see section 5), and provide a direction for retreat priorities (see section 17).
19.5 Units may retreat off the map through their side's friendly board edge(s), but only if there is no legal on-map alternative retreat route open to them. And EZOC are considered to extend off the map for purposes of blocking retreats. (Example: A German unit on 3410 and another on 3412 assault an Allied unit on 3411. That Allied unit cannot retreat off the map.) Units may never retreat off the board through an enemy board edge hex.
19.6 Units that retreat off a friendly board edge may re-enter the game on subsequent turns anywhere along that same friendly board edge. They pay one movement factor to get back on the board, and they may enter in a hex with an EZOC in it.
20.0 Evacuations and Withdrawals
20.1 Twice during the game, during his movement phase on turn 9 and again on turn 10, the German player must withdraw (move) a full-strength infantry division off the board between hexes 2221 and 2621, inclusive.
If all of those five hexes are blocked by Allied units or their ZOCs at that time, the withdrawals must still be made, but through the passable friendly board edge hex nearest to that blocked stretch.
If the German fails to make the withdrawals, the Allied player may do it for him by simply removing the full-strength German infantry division(s) of his choice at the end of the German's movement phase.
German withdrawn units are not considered destroyed, but they may never re-enter play.
20.2 The Allied player may evacuate units overland through his south friendly board edge or he may evacuate them by sea. Evacuated units earn the Allied player victory points (see section 22).
20.3 There is no limit to the number of units the Allied player may evacuate overland through his south friendly board edge. To do so, he simply moves them off the board edge, paying one movement factor to do so.
Units retreated off the south friendly board edge as a result of combat may also be declared to be evacuated by the Allied player.
Overland evacuations may take place on any and all game turns. Evacuated units are permanently out of play.
20.4 Allied sea evacuations cannot begin until turn 3. During the sea evacuation phase of turns 3 through 6, inclusive, the Allied player may sea evacuate any 3 steps worth of his units off any coastal hex. Task force units count as a half-step for sea evacuation purposes.
The units to be evacuated must be on the coastal hex(es) at the start of the sea evacuation phase in order to go that turn. There are no movement costs involved; simply lift them off the map.
The evacuees may come from one, two or three coastal hexes. The total number of steps "evacuated off the beach" in this way, however, may never exceed three steps on any one turn.
20.5 From turn 7 through the end of the game, the Allied sea evacuation is increased to 6 steps per turn. Four of those steps, however, must now come from any single one of the three port cities (Boulogne, Calais, Dunkirk), while the fifth and sixth steps must come from any other coast hex(es). (It doesn't matter if these last two steps also come out of hexes with ports in them, just as long as the first four do come out of one port.)
The four-step port city to be used may be switched from turn to turn, but on any one turn the four port-evacuee steps must all come from just one port hex. The evacuation procedure remains otherwise unchanged from 20.4.
20.6 If any German ground unit is next to a hex from which Allied units are to be sea evacuated, at least one step of the Allied troops must be left behind as a "rearguard" (task force units do count as a whole step for this purpose). If there is only one step of Allied troops in such a hex to begin with, roll the die; on a 1, 2 or 3 the unit evacuates, on a 4, 5 or 6 it fails and cannot move at all (except to retreat after combat) that turn.
20.7 The Allied player may run both sea and overland evacuations on the same turn. The two processes are separate, but in terms of victory points yielded, there is no difference between sea and overland evacuees (see section 22).
20.8 If a port city is once entered by German ground units, it may never again serve as an Allied sea evacuation embarkation point, even if retaken by the Allies. (It could serve as a hex for beach evacuation.)
21.0 Reinforcements
21.1 Both sides receive new units as reinforcements as specified on their reinforcement charts. If two hex numbers appear beneath a unit's place on the chart, that unit may enter play through either of those two hexes or any hex between them. Reinforcements may enter play stacked.
21.2 Four British units are listed as entering through "B, C, D". That means the Allied player may bring them into play through Boulogne, Calais or Dunkirk. It costs one movement point for them to disembark there.
Normally, reinforcements may be voluntarily delayed and entered on a later turn than that specified on the chart. Those four port-entering British units may only enter via a port if they do so on the turn specified. If they are held back at all, they may then only enter play via the map edge hexes shown as alternatives.
21.3 If overland reinforcements are held back, when they do finally enter, they must still do so through the hexes specified on the chart. It costs one movement point for units to enter their first board edge hex. After that, reinforcements may continue moving and fighting that same turn and in all ways function as regular units.
21.4 A player is never forced to enter reinforcements into play, and Allied reinforcements never entered are counted as evacuated for victory points purposes.
21.5 Reinforcements may enter the board in a hex in an EZOC, but never in a hex with an actual enemy unit in it. Reinforcements are always in supply throughout the game turn of their entry.
21.6 Once a port city has been entered by a German ground unit, it may never again serve as an Allied reinforcement entry hex.
22.0 How to Win
22.1 The game is won by accumulating victory points. Both players score points for destroying enemy steps, and the Allied player also scores points for evacuating steps.
22.2 The German player scores points as follows:
- 4 points for each destroyed British step of any kind except task force units.
- 4 points for each destroyed step of French moto-mech units.
- 2 points for each British task force unit and any French straight-leg step.
22.3 Allied units with no line of com- munications to the south friendly board edge or a functioning port city at the end of the game are considered destroyed. A line of communications is traced exactly like a supply line (see section 5), but now British units must also trace one.
Allied units that can trace a line of communications to the south board edge are considered evacuated for purposes of totalling victory points. But Allied units that can only trace communications to a functioning port do not earn evacuation victory points (but, as stated above, neither are they considered destroyed).
22.4 The Allied player scores points as follows:
- 4 points for each German moto-mech step destroyed except for Kampfgruppe steps.
- 2 points for each German straight-leg step destroyed.
- 5 points for destroying the first KG step of a particular panzer division.
- 5 points for destroying the second KG step of a particular panzer division.
- 6 points for destroying the third KG step of a particular panzer division.
- 1 point for each French or British step evacuated except for task forces.
- 1 point for each three task force steps evacuated (fractions of three count as zero).
22.5 After both players have added up all their victory points, divide the Allied total into the German total. The resultant number (called the "quotient") is compared to the chart below to determine the winning player and the degree of his victory.
If you are playing Scenario I, and the quotient is:
- 3.0 or greater - German total victory.
- Between 2.00 and 2.99 - German substantial victory.
- Between 1.50 and 1.99 - German marginal victory.
- Between 1.00 and 1.49 - Allied marginal victory.
- Between 0.50 and 0.99 - Allied substantial victory.
- Less than 0.50 - Allied total victory.
22.6 The above chart is set up for the Campaign Game (Scenario I). When playing Scenario II, the victory levels all move down a notch. That is, an Allied total victory is not possible, and the German wins a total victory if he scores over a 1.99.
23.0 Scenario I: The Campaign Game
23.1 The first scenario is the campaign game. All the rules as described in the sections above apply. Set-up according to the instructions given in section 3.
The German player is the first player every game-turn.
24.0 Scenario II: No Halt Order (or "The End of the Middle of the Beginning of the Iron Dream")
24.1 Scenario II assumes the German panzers were never forced to stop for two critical days by "Higher Authority".
The German player sets up first, placing his units exactly as described in the following list. The Allied player sets up second and has some latitude in his exact placements.
The scenario begins with the Allied portion of game-turn 5. The Allied counter stroke has already been used up, but the RAF is still available to intervene. All Allied units except the turn 5 French reinforcement (2nd Cavalry) and the French 68 Infantry Division have their movement factors halved on the first turn of this scenario (round fractions up).
The Allies have so far evacuated only the British 20G Motorized Infantry Brigade. Place the following units in the dead pile: German Kampfgruppe 7/B, any 9 of the British task force units, 1st British Tank Brigade; the French CPG and BPG units, French 21 Infantry Division, French 5 Motorized Infantry Division and the 101 Fortress Infantry Division.
24.2 The Germans set-up as follows:
- Hex 1412 - 2nd Motorized Infantry Division.
- Hex 1615 - 29th Motorized Infantry Division.
- Hex 1815 - 9th Panzer Division.
- Hex 1517 - 13th Motorized Infantry Division.
- Hex 1819 - 9th Infantry Division.
- Hex 2120 - 87th Infantry Division.
- Hex 1903 - 1st LW FLAK, 2nd Panzer Division (this unit is deployed at a strength of 6 - 3 - 10).
- Hex 2105 - G.D. Motorized Infantry Regiment.
- Hex 1910 - 10th Panzer Division.
- Hex 2109 - 20th Motorized Infantry Division.
- Hex 2112 - 4th Panzer Division.
- Hex 2212 - 3rd Panzer Division.
- Hex 2302 - 2nd LW FLAK.
- Hex 2403 - 1st Panzer Division.
- Hex 2304 - 6th Panzer Division.
- Hex 2505 - SS LAH Motorized Infantry Regiment.
- Hex 2604 - Kampfgruppe 8/A.
- Hex 2507 - Kampfgruppe 8/B.
- Hex 2509 - SS V Motorized Infantry Division.
- Hex 2511 - SS T Motorized Infantry Division (reduced).
- Hex 2512 - Kampfgruppe 7/A.
- Hex 2514 - 5th Panzer Division (deployed at a strength of 7 - 4 - 10).
- Hex 2416 - 11th Motorized Infantry Brigade.
- Hex 2517 - 12th Infantry Division.
- Hex 2617 - 32nd Infantry Division.
Place one Luftwaffe air support point on hexes 2403, 2512 and 2604.
24.3 The Allies set up second as follows:
-
On hex 1016 - British 1/2 Tank Brigade.
-
Within one hex of hex 1216 - French 5C Infantry Division.
-
Within one hex of 1219 - French 7C Infantry Division.
-
Within two hexes of 1512 - French 4 DCR, 3 Cavalry, 4C, 7NA, 3Lt., and 19th Infantry Divisions.
-
Within two hexes of 3116 (but must be south of the Escault) - British 42 and 48 Motorized Infantry Divisions; the French 1M, 1NA, 2NA, 1 Motorized, 12 Motorized, 15 Motorized, 4th Infantry and 32 Infantry Divisions.
-
Within two hexes of 2816 - British 50 division; French 1 DLM, 3DLM, 5NA, 25 Motorized, 43 Infantry divisions.
-
Within two hexes of 3113 - All three British FLAK units, British 1, 3 and 4 Divisions, 25 Motorized Brigade, 1 Recce Brigade.
-
Directly on hex 2612 - British 2nd Motorized Division.
-
Within two hexes of 2911 - Two British task force units and the British 44 and 46 Motorized Divisions.
-
Within two hexes of 2808 - French 2 DLM (reduced), British 5 Motorized Division and one task force unit.
-
Directly on hex 2904 - French DPG unit.
-
Directly on hex 2704 - French SFF Fortress Infantry.
-
Directly on hex 3005 - French 68 Infantry Division.
-
Directly on hex 2402 - British 30 Motorized Brigade.
[Errata, Wargamer #56, for the "Within two hexes of 1512" entry above (the French units listed there): "should actually start 'within two hexes of 1521'." The entry is transcribed here as printed; see the Errata section at the end.]
25.0 Designer's Notes and Bibliography
25.1 Notes: Rather than use this space to write myself another paean, I'll just use it to answer the questions that came up most often during playtesting.
The name "Dynamo" comes from the British naval command group put in charge of the evacuation operation. They convened in their headquarters' old generator room. A "generator" is a "dynamo" in the King's English; hence they became "the dynamo group", and you can figure the rest.
Yes, there is far more air and naval activity going on in the game than you actually get to see. But I figure you're playing the opposing ground commanders here. So we assume the RN uses whatever resources are necessary to get the boys home, sinkings or not, and the Luftwaffe uses historic force levels to plaster the embarkation points.
The 3rd British Motorized Division did not at this time have an officially designated reconnaissance unit on its table of organization. Monty put one together, though, by grabbing up every tank and armored car that came his way. Its independent maneuverings were critical during the Belgian-collapse phase of the battle.
Gort reported to the British cabinet around May 20 that he had sufficient supplies with him "for four days and one major battle". The course of the battle showed, however, that he had much more than that. We initially ran up some tonnage figures and had a British supply consumption chart, but no matter what strategy the Allied player chose, the game always ran out before the BEF's supplies did.
The German panzer divisions had left much of their combat service support elements back in Germany in order to travel hard and fast. But they did literally cram each tank and vehicle in the divisions full of all kinds of supplies.
The British 1-2-9s represent the 12th and 23rd British Territorial Divisions, which Viscount Gort broke up into "defensive stop" units upon realising his whole army had been flanked. These units were augmented by some of the heartier in the retreating rear-area elements of the army.
Contrary to all military logic, these "penny packets" often gave better service as parts than they probably would have yielded in the whole.
I've put names on some of them to represent the handful of regular and ad hoc units that shone brightest on this flank guarding mission. The others remain anonymous in the game just as they did in history.
The terrain effects on movement are so minor here because the map depicts one of the best roaded areas of the 1940 world.
The game ends on 31 May because that's when the moto-mech was withdrawn for refitting before the last phase of the 1940 Blitzkrieg. That date gives a good cut-off for comparing game performances with historical ones.
Hammering together the victory conditions was still the most difficult part of this design. Should units evacuated overland count as much as those taken out by sea? The overlanders take their equipment with them, true, but they are then more likely to get a final bashing in the next offensive. But then the historic commanders didn't know that, did they?
And by any reckoning, we must figure the Allies "won" some kind of victory here. Yet the BEF alone lost 2,472 guns, 63,879 vehicles, 20,548 motorcycles, 76,097 tons of ammunition, 416,940 tons of stores, 164,929 tons of gasoline, and 2,090,000 (pounds sterling) worth of other materiel.
The final victory determination method seemed to yield both the most competitive games, while still reinforcing players for adopting one or another historically plausible strategy.
25.2 Bibliography:
- Astell, John M., et al. The Fall of France. Bloomington, Ill.: Game Designers' Workshop, 1981 (a simulation game).
- Collier, Richard. The Sands of Dunkirk. New York: E.P. Dutton & Co., Inc., 1961.
- Guderian, Heinz. Panzer Leader. New York: Random House, Inc., Ballantine Books, 7th ed., 1980.
- Harmon, Nicholas. Dunkirk: The Patriotic Myth. New York: Simon and Schuster, 1980.
- Hart, B.H. Liddell. History of the Second World War. New York: G.P. Putnam's Sons, 1970.
- Horne, Alistair. To Lose a Battle: France, 1940. Boston: Little, Brown and Co., Inc., 1967.
- Lombardy, Dana, et al. Dunkerque-1940. San Diego: Simulations Design Corp., 1972 (a simulation game).
- Lord, Walter. The Miracle of Dunkirk. New York: Penguin Books, 1984.
- Madej, Victor. "The Blitzkrieg: An Analysis". Strategy & Tactics 29 (Nov., 1971), 3-13.
- Parker, Danny S., et al. Battle For The Ardennes. New York: Simulations Publications, Inc., 1978 (a simulation game).
- Patrick, Stephen B. "Combined Arms: Combat Operations in the 20th Century". Strategy & Tactics 46 (Sept./Oct., 1974), 5-19.
[Illustration on the final page: a map of the Dunkirk-area embarkation points (British and French), with the June 1 and May 31 German advance arrows, is not reproduced here.]
Errata
The following errata were published by The Wargamer in issues #55 and #56 for this game and are applied in the text above as noted.
- Rule 9.10: Wargamer #55 gave the replacement text "All land hexes on the board, both partial and full, are considered to be playable hexes." Wargamer #56 then said: "Ignore Rule 9.10. It was originally to cover 1/2 hexes, a condition which doesn't exist on the finished map." Rule 9.10 is therefore to be ignored.
- Rule 11.2: add the following: "It is, however, forbidden to either player to inspect the stacks of his opponent's units until such time as he has already committed himself to make some kind of assault into that hex." (Added to 11.2 above.)
- British units: the five unnamed 1-2-9 ad hoc units in the countermix, along with the 4th FLAK Brigade, should be considered motorized (moto-mech) and carry the little dots under their unit symbols.
- Abbreviations (as printed in the errata): LAH = Leibstandarte Adolf Hitler; T = Totenkopf; V = Verfugungs.
- Scenario II, French set-up (24.3): the French units listed as starting "within two hexes of 1512" should actually start "within two hexes of 1521". (Errata text: "In Scenario 11, the French units listed as starting 'within two hexes of 1512', should actually start 'within two hexes of 1521'.")