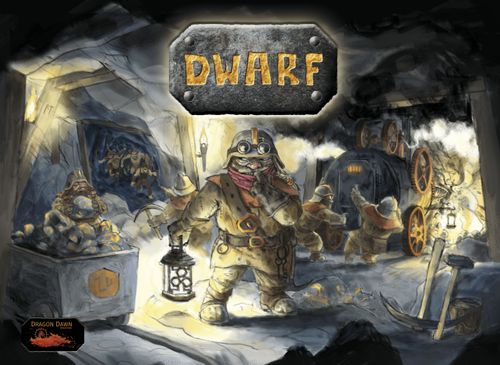
Dwarf
Dwarf Rulebook
Table of Contents
Table of Contents
Aim of the Game
A dwarf's legend lives on through their contribution to society. This is measured by the resources they have contributed and defended. At the end of the game, players each count the amount of Steel, Gold and Items they have amassed.
The winner becomes "Hero of Society" and is the player who leads in the majority of these three categories. Ties are won by the player with the most Medals. If players are still tied, Iron is the second tie breaker and Items the third.
Symbols
DWARF uses the following set of symbols as reminders for the basic actions.
- 1st Player
- All players
- Supply
- Occupying player
- Undefended
- Defended
- Steel
- All gold
- Gold
- Iron
- Item
- Medal
- Prevented from (crossed-out arrow)
- Leads to / Take from (arrow)
- Worker
- Action type: Forge (hammer)
- Action type: Mine (pick)
- Action type: Defend (shield)
- Action type: Get Help (cross)
Alloy steel example: Return three iron tokens to the supply. Take two steel tokens from the supply.
The Glossary on the back of the rulebook fully explains all the card symbols.
Game Setup
Organise the starting cards into a 3 x 3 grid, representing the locations in the Mine, by placing each of the nine Starting Cards (1 lit lantern) in the position matching the orange solid box printed on the reference grid on the card. Shuffle the nine Special Action cards, and deal them, Worker-icon side face up, into three piles of three and place them to the side of the Mine. Shuffle the Mountain cards and place them face down next to the Mine, to create The Mountain draw pile.
Each player chooses a colour and takes 2 matching Workers. Place the remaining Workers (marked with a red X) of the same colour, plus all resource counters, somewhere within reach of all players, to create the supply area.
All resources in the game are considered infinite, but note that a player cannot have more than 4 workers. If ever a player needs to take a resource and there are none left in the supply they should proxy something else.
Alternative Mountain setup: For a less random game, all cards with 2 lit lanterns and 3 lit lanterns should be shuffled separately. The cards with 2 lit lanterns should then be placed on top of the cards with 3 lit lanterns to form The Mountain.
How to Play
DWARF is played over a series of rounds. Each round consists of three phases (Mining, Action Selection and Action Resolution). Play continues until one player crafts 4 Items or players need to draw cards from The Mountain and cannot. The game then ends when the current round is over.
To start give the 1st Player marker to the player who has most recently done an unselfish thing. (Or choose at random.)
Mining Phase
Draw two cards from The Mountain and place them, one at a time, onto the relevant location in the Mine, denoted by the orange box on the card's reference grid. New cards cover any previous cards in that space. If both drawn cards need to be placed in the same location, discard the second and draw and place a third card. If the third is also the same, discard it. Do not draw a fourth card.
When a card should be drawn from The Mountain and there are no Mountain cards remaining the game ends immediately.
Action Selection Phase
Beginning with the start player and moving clockwise, each player decides to either place a Worker on an available location in the Mine or select a Special Action card.
-
Place a Worker - A Worker may be placed on any of the nine locations not already occupied by another Worker. Placing a Worker in the Mine triggers an Action in the Action Resolution Phase.
-
Special Action - To select a Special Action, no Worker is placed in the Mine. Instead, a player either places both of their regular Workers, or spends 4 Medals and places one Worker, on one of the Special Action card piles and draws the top card of that pile. In either case, the pile is not blocked in the way that locations in the Mine are, and another player may use the same Special Action card pile on the same turn. The visible Worker-icon side of the card's effects are resolved immediately, then the card is turned over and placed in the Mine as per the process described in the Mining Phase. If there is a Worker already on this location, the player owning that Worker now resolves the action of the original Mine card just before the new card is placed. The Worker then remains in place, essentially blocking the new location for this round. This Worker does not resolve again this round.
When all players have had one action, anyone who has a Worker remaining may now place a second, also restricted to available locations. This second placement is done in reverse order, beginning with the last player and going round in an anticlockwise direction. Any player who has no remaining Workers is skipped.
Action Resolution Phase
Once all workers have been placed, players resolve each of the Actions in order as follows:
Get Help (cross) – Any additional Workers (X) garnered from a Get Help location are placed now. The additional Workers (X) cannot be used to take a Special Action. If two or more players took a Get Help action, Workers (X) are placed in the order they took the Action, alternating placing the third and fourth Workers (X). If no Mine location is available by the time a Worker (X) is to be placed, that Worker (X) is lost. The Actions associated with any Worker (X) are Resolved after the regular Workers. If the current 1st player took a Get Help action, the 1st Player marker is passed along clockwise to the next player.
Defend (shield) – Monsters in Defend locations containing a Worker are successfully defeated, and their effect is ignored. Players take a Medal for each Worker of theirs defending. Monsters in Defend locations with no Worker will now attack and their effect will impact all players, as detailed on the individual card. Defend locations are resolved beginning with the location in the top left of the Mine, moving left to right along the row, then top to bottom.
Mine (pick) – All Workers in Mine locations are now resolved, following the instructions on the card. Mine locations can be resolved in any order.
Forge (hammer) – All Workers in Forge locations are now resolved, following the instructions on the card. If the 1st player took a Forge action, the 1st Player marker is passed along clockwise to the next player.
End of Round
Recover all Workers from the play area. Return any Workers (X) to the supply area.
Final Scoring Examples
At the end of the game:
- Tom has 4 Items, 9 Gold and 8 Steel. He loses to Sarah, who has 2 Items but 10 Gold and 12 Steel because she has more of two of the three main resource categories.
- Tom has 4 Items, 9 Gold and 8 Steel, but Sarah has 2 Items but 9 Gold and 14 Steel. Both players have more of one resource than the other player but are tied for the third resource, making a tie overall. Sarah has 9 Medal discs, though, compared to Tom's 7, so she wins the tie and the game.
- Tom and Sarah are tied for the main resources as well as for Medals. Sarah has 5 Iron compared to Tom's 1 Iron, so she wins the tie and the game.
- Tom and Sarah are tied for the main resources as well as for Medals and Iron. Tom wins the game, because he has forged more Items.
Combining Sets
One copy of DWARF can be used to play the game with up to three players. With a second copy, the player count can be increased to five, as follows:
Set up each copy of the game as per the usual instructions, creating two play areas. Players using the same Worker colour should use one set standing, the other lying down, to distinguish between them.
During the Mining Phase, two cards are drawn from each Mountain and placed in their respective play areas.
Play continues normally through the Action Selection and Action Resolution Phases, with players being able to place their Workers on any available location, in either or both of the Mines. Any rules referencing affecting an entire Mine will apply across both play areas, to all 18 locations.
Solitaire Play
In a solitaire game of DWARF, you'll face one of three levels of automated opponent, Eldhúsfífl, Andvéttr and Andvéttr faðir. Eldhúsfífl is your earliest opponent and will help you learn the basics of the game. Beat him to earn the right to challenge Andvéttr, who is a worthier opponent. Defeat Andvéttr, and you are ready to take on the mightiest of Dwarf lore, Andvéttr faðir.
Play proceeds the same as a two player game, with the following exceptions. Regardless of difficulty level, the automated opponent:
- Always begins the round. Player order is never altered by any means.
- Places his second Worker immediately after your first.
- Immediately places his extra Workers (X) gained from a Get Help action and does not wait until the Action Resolution Phase.
- Never takes a Special Action.
Eldhúsfífl
Within the Mine reference grid found on each card, there is a black Worker icon. This icon determines Eldhúsfífl's primary worker placement location.
For the first Worker placement each round, he checks the reference grid on the Mountain card that was most recently drawn and added to the Mine in the Mining Phase. The first Worker is placed in the location denoted by the black Worker icon. For the second placement, he checks the reference grid on the card where your first Worker was placed. Again, his Worker is placed in the location denoted by the black Worker icon.
If Eldhúsfífl is unable to place his Worker there, due to it being occupied already, he selects the location matching the white Worker icon instead. If you forgo placing a Worker, and instead take a Special Action, he follows the reference grid on the Special Action card.
If Eldhúsfífl ever selects a Get Help action space, he places the two extra Workers (X) in the same row as the Get Help location. If that is not possible, he places them in the same column as the Get Help location. If neither is possible, he places one Worker in the same row and the other in the same column.
Andvéttr
In general, Andvéttr looks to place his Workers in the same way as Eldhúsfífl. However, as a savvier opponent, there are situations where he chooses a different location:
If ever a Get Help location remains unoccupied when selecting a location for his second Worker, he will take it. If more than one Get Help location is viable, he selects the first space encountered when moving left to right, top to bottom through the Mine.
The third and fourth Workers are placed in the same manner as Eldhúsfífl does.
If ever Andvéttr cannot use a location fully, such as not having the necessary resources to Forge an Item, he attempts to find an alternate location to place his Worker. Moving left to right in the same row as his rejected location, he takes the first location that he can occupy. If there is none, he reverts to the original location even though he cannot use it.
In addition to the placement rules above, Andvéttr has two other powerful features:
Andvéttr is a master at the anvil. Whenever Andvéttr uses a Forge action during the Action Resolution Phase, he does so twice, if he has the required resources to do so.
Andvéttr revels in the glory of battle and seeks renown as a warrior. In addition to gaining Medal discs whenever he takes a Defend action, every time you take a Special Action, Andvéttr gains Medal discs, thus:
For the first Special Action, he gains one Medal, for the second he gains two, and the third, three.
You may not take more than three Special Actions during the game.
If Andvéttr amasses 12 Medal discs at any point, he instantly wins the game.
Andvéttr faðir
Andvéttr faðir follows all the same rules as Andvéttr, except that he never selects a location he cannot use.
If Andvéttr's placement rules fail to yield a usable location, Andvéttr faðir assesses all locations in the Mine, moving left to right, top to bottom until one is found.
Contents
66 cards:
- 54 language independent cards (9 starting cards & 45 Mountain cards)
- 9 Special Action cards
- 3 reference cards
12 Workers in 3 colors, 4 of each color
106 Resource cubes (1x, 3x and 9x)
- 32 Gray cubes for Iron
- 32 Golden cubes for Gold
- 32 Blue cubes for Steel
- 10 Purple cubes for Items
- 24 Green discs for Medals
Start player marker
Mountain Card Glossary
Mine (pick)
- Iron Seam: Take three Iron from the supply.
- Gold Seam: Take one Gold from the supply.
- Alloy Steel: Return three Iron to the supply then take two Steel.
Forge (hammer)
- Forge Sword: Return three Steel to the supply then take one Item.
All forge actions are similar in that they create and Item but the requires resources vary - return the appropriate supplies and take an Item.
Defend (shield)
- Orc Raiders: If undefended at the end of the round, players cannot take Mine actions.
- Knockers: If undefended at the end of the round, each player must return 1 Iron to the supply.
- Dragon: If undefended at the end of the round, each player must return 1 Gold to the supply.
- Great Dragon: If undefended at the end of the round, each player must return all Gold they possess to the supply.
- Sidhe: If undefended at the end of the round, each player must replace two Gold they possess with two Iron. If a player only has one Gold, they must replace that with one Iron.
- Reward for Valour: Any player with a Worker on the location earns 1 Medal per Worker. This occurs on all Defend locations.
Get Help (cross)
- Get Help: You may place your 2 additional Workers this round.
- Move 1st Player: If the player taking this Action is currently 1st player they must pass the 1st Player marker to their left. This occurs on Forge and Get Help locations.