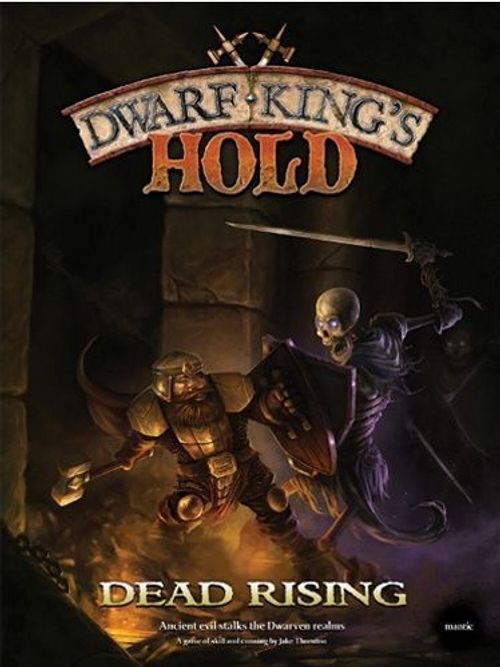
Dwarf King's Hold: Dead Rising
Dwarf King's Hold: Dead Rising Rulebook
Table of Contents
Table of Contents
- Preparing to Play
- Game Overview
- Setting up a Game
- Playing the Game
- Tools of the Necromancer
- Game Values
- Special Rules
- Scenarios
- Scenario 1: Break In
- Scenario 2: Kill Them All!
- Scenario 3: Damned If You Do...
- Scenario 4: They Shall Not Pass!
- Scenario 5: To The Rescue!
- Scenario 6: The Magnificent Seven Dwarfs
Preparing to Play
Before you play for the first time you will need to carefully push the card pieces from their frames and assemble some of the models.
If you are an experienced modeller then these models should pose no problems for you. If you have not assembled miniatures before then you will be happy to know that these kits are simple to put together.
Firstly, read Scenario 1 and look at the plastic sprues (the frames that hold the model parts) to decide which pieces you need. Use the photographs of the finished models on the game box as reference if you are unsure. Only take off the bits as you need them. This helps you to avoid losing any of the smaller pieces. Gently twist off each piece, taking care not to break the model itself. An even better option would be to use a pair of clippers such as the ones in the Mantic Tool Set (which also includes some extra Undead models).
Once you have taken off all the parts for the model you are building then you need to assemble them. You will notice that some of the models have pegs on one part and holes on the other so that they will clip together. These are the easiest models to assemble and will allow you to play the first scenario.
Of course, you'll eventually want to assemble the rest of the models too. You can stick these together with a small blob of adhesive putty (such as Blu-Tack, Elmer's Tack or Buddies) for a temporary assembly, and use plastic glue or superglue for a permanent bond.
Always be sure to follow the safety instructions on all your tools and glues.
The Models
The plastic models in this game represent a number of different types of fighter.
The Dwarfs have their Warriors, Shieldbreakers and trusty Mastiff. There are two Shieldbreakers in the game. These are the models with the two-handed hammers. The five Dwarf Warriors have a mixture of weapons, but are easily distinguishable from the Shieldbreakers as they all carry shields.
The Necromancer's troops consist of Skeleton Warriors and Revenants as well as Skeleton Hounds. The Revenants have better armour with decoration and plumed helmets.
In addition, the plastic sprues contain the Pit of Souls counters and a model of a dead Dwarf that makes a perfect objective.
Game Overview
Dwarf King's Hold - Dead Rising is a two-player game where one player takes the part of the devious Necromancer Mortibris and the other player controls the stalwart Dwarfs who oppose him. The game is set in the echoing tunnels of an ancient Dwarf Hold whose generations of ancestral tombs attract the Undead as much as they inspire the Dwarf defenders.
There are six scenarios to choose from, and each uses the tiles provided with this game to make a different board. In each scenario you control a number of models representing your warriors or minions, which you move across the board and use to fight your opponent's models to achieve the scenario's objective. Different scenarios have different ways of winning, so you will need all your skill and cunning to adapt your tactics to each new challenge.
Each side has its strengths and weaknesses that combine to form a unique style of play. By swapping sides and trying each scenario from both perspectives, you can gain a better understanding of how both forces work.
Setting up a Game
Follow these simple steps:
- Decide who will play the Dwarfs and who will play the Necromancer.
- Choose a scenario to play (see pages 14-21).
- Set up the tiles, models and counters as shown on the scenario's map. The player controlling each model decides which direction it faces at the start of the game.
- Each player takes their own set of 24 tokens and shuffles them face down to form a Reserve pile.
- Each player draws the number of tokens specified in the scenario from their Reserve to form their Token Pool.
- Each player may discard their initial starting Token Pool if they so choose, and replace it with a new starting Token Pool drawn from their Reserve. This option is only available once at the start of the scenario and, if chosen, the player must keep their second Token Pool. Discarded tokens are placed in the Discard pile.
- Before playing, be aware of any special rules that may apply to the scenario.
- Start the game.
Playing the Game
Turn Sequence
The Dwarf player always takes the first turn. After that, players alternate.
During his turn, a player can spend any number of tokens to activate models. When a player has finished his turn, play passes to his opponent. A turn consists of a number of steps carried out in the following order:
- Spend a token to activate one or more models, resolving the Actions one at a time if the token represents two or more Actions. Repeat this step until you choose to stop or have run out of tokens or models to spend Actions on.
- Make any Follow On Actions (Dwarf player only).
- Discard any unwanted tokens (Dwarf player only).
- Produce Skeleton Warriors from Pits of Souls (Necromancer player only).
- Utilise the Baleful Gaze ability (Necromancer player only).
- Replenish your Token Pool from your supply (up to the maximum given in the scenario).
Tokens
Each side has a set of 24 tokens to draw from. These sets are different for each side, but are based on the same types. Tokens will either have a number of Actions on them (1 to 4 per token) or allow a Follow On Action.
The Dwarf player's token set is made up of 2 x 2 Actions, 14 x 1 Action, and 8 x Follow On Actions.
The Necromancer's token set is made up of 4 x 1 Action, 8 x 2 Actions, 8 x 3 Actions, and 4 x 4 Actions.
During a game, tokens will either be in the Reserve pile (a face-down supply of tokens waiting to be drawn), in a player's Token Pool (the tokens a player can play immediately in his turn) or in the Discard pile (containing used or discarded tokens).
At the start of the game, each player takes their own set of 24 tokens and shuffles them into a Reserve. This can be done by shuffling them together face down on the table to one side of the board, or alternatively you could place them in a cup and draw from that. All that matters is that you draw the tokens at random and avoid mixing up the two sets of tokens.
At the start of a game, each player draws the number of tokens specified in the scenario from their Reserve to form their Token Pool. Each player has a one-off opportunity at the start of the game to discard their starting Token Pool and draw a new one. If they do this then they must use the second Token Pool they draw.
During the game, when it comes to a player's turn they must play at least one token (of any type) from their Token Pool, and can play as many more as they want to and have models to act with. Any tokens that are used are placed in the Discard pile. In addition, the Dwarf player can choose to discard tokens he doesn't want. Place these in the Discard pile too.
At the end of his turn, the Necromancer player draws one (and only one) new token from his Reserve.
At the end of his turn the Dwarf player draws as many tokens as he needs to fill up his Token Pool up to the maximum allowed by the scenario.
If you need to draw more tokens and your Reserve is empty then shuffle up the Discard pile to form a new Reserve pile.
Playing Tokens
When it comes to your turn, look at the tokens in your Token Pool. Firstly you must play any Action tokens you want to. Often you will not have enough to act with all of your models, so plan carefully. If you are the Dwarf player then you have the option of spending Follow On Action tokens once you have spent all the Action tokens you want to use. Note that a model does nothing unless you spend an Action (or Follow On Action) token on it.
Actions
These tokens are spent to move and fight with your models. Each of your models can have only one Action spent on it in each turn. Spend these tokens one at a time, resolving each completely before moving on to the next. In the case of a token with more than one Action on it, spend the Actions one at a time, resolving each Action completely before moving on to the next.
Each Action allows a single model to move (up to its maximum Move value - see Game Values on page 12) and then fight (if it ends its movement adjacent to an enemy model in its front arc).
Follow On Actions
Only Dwarfs have Follow On Actions. They are both better and worse than normal Actions. They are better because you can play as many as you like on one model, regardless of whether that model has already had an Action spent on it or not. They are worse because they only allow that model to either move or fight - not both. Apart from this they work exactly like Action tokens.
Once you have spent a Follow On Action token, you may not spend any more Action tokens in that turn. However, you may continue to play additional Follow On Action tokens.
Facing
Each model has a front and rear arc (see Diagram A). A model can only attack a target in its front arc. A model that has had an Action spent on it, or is using a Follow On Action to move (not fight), can change the direction it is facing at any point during its movement (including before it moves) and as many times as it likes in a turn. If a model has not had an Action spent on it, or is not using a Follow On Action to move, then it cannot change facing.
Diagram A: each model has a Front arc and a Rear arc.
Movement
Unless specifically mentioned otherwise, a model can only move if it has an Action (or Follow On Action) spent on it. A model can move one square for each point of Movement it has - see the Game Values section on page 12. For example, a Skeleton Warrior has Movement 4, so can move four squares. Move the model one square at a time. A model can move into any empty adjacent square. Facing is irrelevant for movement. Other than the two exceptions detailed below, a model may not move into a square that is already occupied by anything else.
- A model can move into (and stop on) a square containing a Pile of Bones counter.
- One of the Necromancer player's models may share a square with a Pit of Souls.
The only time a model cannot move into an adjacent empty square is if it has to move diagonally and the space is too narrow (see Diagram B).
If a model moves into a square that is adjacent to an enemy model then it ends its movement immediately. Pits of Souls and counters of any sort do not count as models for this rule.
'Adjacent'
Throughout these rules, whenever the text reads 'adjacent' it always means diagonally as well as orthogonally (across shared sides of a square - up and down, left and right). This means that a model standing in the middle of a large room (away from any walls) would have eight adjacent squares (see Diagram C).
Diagram B: The model at square A wants to move to square B. This is possible as long as the model could legally move to one or other (or both) of the squares marked X. If both of the squares marked X are blocked, then square B is also blocked. Note that this restriction applies to all types of movement, not just normal Actions. For example, it also applies to movement into rear arcs caused by shield bashes.
Diagram C: All eight shaded squares are considered to be adjacent to this model.
Fighting
While it is activated, a model can attack an enemy model in an adjacent square to its front facing, even diagonally. A model can never attack an enemy in its rear facing. A model cannot attack a Pile of Bones or a Pit of Souls. Each fight is between a single model on one side and one or more models on the other. If a fight has more than one model on both sides then it needs to be split (see Splitting Fights on pages 7-8).
To resolve an attack, start by working out how many dice each model has and what their effective Armour is. Each model starts with its basic number of dice and Armour as listed in the section on Game Values (see page 12). It then loses 1 dice if it is:
- Outnumbered.
- Injured.
- Attacked by a model in its rear arc.
- Attacked by a Free Strike (page 9).
Note that these modifiers are cumulative. For example, a model that is both outnumbered and injured fights at -2 dice.
Also note that you only lose 1 dice for being outnumbered by any amount of enemy, not one dice per enemy model.
Minimum Dice & Armour
Each model must roll a minimum of 2 dice. If a model starts with 2 dice, or when it is reduced to 2 dice by modifiers, then any further modifiers reduce the model's Armour value instead of the number of dice thrown.
The Armour value cannot be reduced to less than 1. Once a model has been reduced to 2 dice and 1 Armour it cannot get any worse and any extra penalties are ignored.
For example, an outnumbered Skeleton Warrior that is attacked from behind should lose 2 dice, but starts on 2 dice and so the penalty comes off its Armour. However, that is only 2 to begin with, and so it is reduced to 1 Armour and the extra penalty is lost. Skeleton Warriors are such poor fighters in the first place that they can't get much worse. If a Revenant were in the same position, it would go down from 3 dice and 3 Armour to 2 dice and 2 Armour - a notable drop in resilience.
Damage Table
| Damaged Model is... | 1 Damage | 2 Damage | 3+ Damage |
|---|---|---|---|
| Any Dwarf | Injured | Dead | Dead |
| Any injured Dwarf | Dead | Dead | Dead |
| Mastiff | Injured | Dead | Dead |
| Injured Mastiff | Dead | Dead | Dead |
| Skeleton Warrior or Revenant | No effect | 'Boned' - replace the model with a Pile of Bones counter. | Dead |
| Skeleton Hound | Dead | Dead | Dead |
Resolving Attacks
Both players roll all of their dice at once and sort them out in numerical order, highest to lowest. Pair up the attacker's and defender's dice: highest attack dice with highest defence dice, second highest with second highest, and so on. If the attacker has more dice than the defender, then each extra, unopposed dice is resolved as if the defender had rolled a 1 against it.
For each pair of dice where the attacker has rolled higher than the defender, compare the result scored on the attacker's dice to the defender's Armour. If this result is higher than the defender's Armour then that dice has caused a point of damage.
Total up the damage inflicted and apply the result. If the attacker has inflicted 3 or more damage then his target is dead. If he only inflicted 1 or 2 damage then refer to the Damage Table on the opposite page for the effect. When a model is injured, place an Injured marker underneath it as a reminder of its condition.
Only the attacker can cause damage in a fight. No matter how badly you roll, you can't be hurt on your own Action (unless you are Breaking Off from a fight - see page 8).
Splitting Fights
A fight normally consists of one model on each side, but sometimes several models from both sides meet up to battle over an important junction or for control of a room. When this happens you need to split up the fight to see who is fighting whom.
A fight needs to be split if there are more than two models from each side in a Ruck. A Ruck is defined as a group of models standing in a linked series of adjacent squares (see Diagram D).
The following rules must be followed when splitting fights in a Ruck:
- Every model in the Ruck that has an enemy model in its front arc must be allocated an opponent, even if neither model is currently spending an Action.
- Models that are adjacent to an enemy model may be left without an opponent only if they do not have one in their front arc. However, they may be allocated as an opponent of an enemy model (and thus be involved in a fight anyway) if one is facing them.
- Fights must be split as evenly as possible, so a Ruck containing two models from each side must be split into two one-to-one fights if at all possible. A two versus three Ruck must break down into a one-to-one fight and a one-to-two fight if possible, and so on.
Diagram D: a Ruck of Dwarfs and Skeletons in a linked series of adjacent squares.
Diagram E: This diagram shows how to split the fight from Diagram D. There is only one legal way to split this fight. Skeletons 3 and 4 must fight Dwarf B because they are not in contact with any other enemy. Skeleton 2 must fight Dwarf A because Dwarf A must be involved in a fight. Skeleton 1 must fight Dwarf C for the same reason.
Diagram F: When you choose how to split this Ruck, Skeleton 1 must fight Dwarf A and Skeleton 2 must fight Dwarf B. This has to happen because Skeleton 1 and Skeleton 2 have no other possible opponents, and as they are adjacent to an enemy model in their front arc, they must be allocated an opponent when the fight is split.
This leaves Skeleton 3, who could fight either Dwarf A or Dwarf B. The Dwarf and Necromancer player will split this fight very differently (as they are allowed to). Remember also that a player may split a Ruck differently for each Action.
The Dwarf player can allocate Skeleton 3 to fight Dwarf B when he spends an action on Dwarf A, and allocate Skeleton 3 against Dwarf A when he spends an action on Dwarf B. This means that the Dwarfs only fight one-on-one which is to their advantage.
The Necromancer, on the other hand, is best served by ganging up on his opponents. In the same situation he would allocate Skeleton 3 to fight Dwarf A when he attacks with Skeleton 1, and when Skeleton 2 fights Dwarf B then Skeleton 3 will back him up. In each case the Dwarf being attacked will suffer the penalty for being outnumbered.
Breaking Off
A model that starts its turn adjacent to an enemy model may attempt to Break Off from it. This is only possible as long as the first square the model moves into is not adjacent to any enemy models. After moving in to this square, the moving model can move where it likes within the normal rules, stopping immediately if it subsequently moves adjacent to any enemy model.
When the controlling player states that he is trying to Break Off with a model, before he moves it, his opponent gets a Free Strike against the moving model with each of his own models that can attack it (see below). If the moving model survives the Free Strike(s) then it may continue its movement as normal.
Free Strikes
A Free Strike is an attack that takes place out of the normal sequence of play. It does not cost a token to activate. The player conducting the Free Strike chooses how to split the fight. Other than that, resolve the combat normally and in an order chosen by the attacker. As long as the moving model survives the attacks and remains in play it may continue its movement after all eligible models have made their Free Strikes. It survives a Free Strike even if it sustains an Injured marker in the process.
An Example Fight
Imagine that a Dwarf Warrior is fighting a Skeleton Warrior in a one-to-one battle with no other modifiers. The Dwarf has 4 dice and 3 Armour. The Skeleton has 2 dice and 2 Armour. It is the Dwarf's turn and the model has an Action token spent on it. In the movement part of the Action the Dwarf could Break Off from combat or could change his facing. Let's imagine that he's happy where he is and move straight on to the fight itself. The Dwarf player rolls all his dice and gets 6, 3, 2, 1. The Necromancer player rolls for his Skeleton Warrior and gets 5, 4. Pairing up these dice we get the following:
- The Dwarf's 6 against the Skeleton's 5: The Dwarf wins and beats the Skeleton's Armour, causing 1 damage.
- The Dwarf's 3 against the Skeleton's 4: The Skeleton wins and blocks the attack. It suffers no damage.
- The Dwarf's 2 (unopposed): The Dwarf wins, but doesn't beat the Skeleton's Armour. He causes no damage.
- The Dwarf's 1 (unopposed): The Dwarf wins, but doesn't beat the Skeleton's Armour. He causes no damage.
The total result is 1 damage on the Skeleton Warrior. Looking at the Damage Table we find that Skeletons ignore a single point of damage, so there is no effect.
During the Necromancer player's turn, the Skeleton fights back. Let's imagine that both players get the same result on their dice rolls. The results would be:
- The Dwarf wins and blocks the attack. He suffers no damage.
- The Skeleton wins and beats the Dwarf's Armour, causing 1 damage.
- The Dwarf wins and blocks the attack. He suffers no damage.
- The Dwarf wins and blocks the attack. He suffers no damage.
The total result is 1 damage on the Dwarf Warrior. An Injured marker is placed underneath the model to show this. If the Dwarf takes another point of damage, he will be killed.
Tools of the Necromancer
Pile of Bones
The ancient Dwarf Hold is full of old bones from ransacked tombs and long-forgotten battles. Some of these bones have been gnawed and scattered, but a few piles are actually minions of Lord Mortibris, waiting for the moment to be called to battle once more.
A Pile of Bones counter can be resurrected by the Necromancer. This costs an Action and can only be done if there is no model on top of the counter. The Necromancer can replace the counter with a Skeleton Warrior model, choosing its facing as it is placed. Note that a Pile of Bones always resurrects as a Skeleton Warrior regardless of where the bones came from. This newly resurrected model counts as having acted that turn.
If you resurrect a model in a square that is adjacent to an enemy model and in its front facing then that enemy gets a Free Strike against the Skeleton Warrior that forms from the bones. Place the resurrected model on the board and follow the normal Free Strike rules (see page 9).
Pit of Souls
These are gateways to nether realms where unquiet spirits writhe in torment. The Necromancer can tap into this dark energy and use it to add to his Undead legions.
At the end of each of the Necromancer's turns he may choose to have each Pit of Souls produce one Skeleton Warrior model. This works in the same way as resurrecting a model from a Pile of Bones counter except that the Necromancer does not have to spend an Action and the Pit of Souls is not replaced. It does, however, have to be the only thing on the square. For example, if you haven't moved off a Skeleton Warrior that was produced in an earlier turn then the square is full and there is no room for a new model.
On a turn when a new Skeleton Warrior is produced, the Necromancer must roll a dice after it has been placed on the board. On a roll of a 1 or a 2, the Pit of Souls has sealed up - remove it. On a roll of 3 or higher, the Pit of Souls remains in play.
Game Limits
Although it is very rare, it is just possible that you could run out of one or other of the counters or models required to play. E.g. it is possible, though unlikely, that you will have more than four injured Dwarfs at once. If you run out of something that you need, then see the list below for what happens instead.
Situation: A model gets an Injured result when all four Injured counters are in play. What Happens... The model is killed instead of injured.
Situation: A model gets a Boned result when all 12 Pile of Bones counters are in play. What Happens... The model is destroyed instead of Boned.
Situation: You want to resurrect a Skeleton Warrior from a Pile of Bones counter or a Pit of Souls when all of the Skeletons are already in play. What Happens... Don't be greedy! Even a powerful Necromancer can only control a certain number of minions at once. You will have to wait until a Skeleton Warrior is destroyed before you can raise another.
Baleful Gaze
The Necromancer can turn his attention to a specific area of the conflict, concentrating his power to squeeze a burst of activity from his shambling minions. The Necromancer can use this power only a limited number of times in each scenario. Note that this limit is per game, not per turn. Each time it is used, the Necromancer must choose one of the following effects:
- Do It Now! He may choose one of his models to make an additional full Action (move and fight).
- Kill Him! He chooses one enemy model. All of his models that are in a position to attack the chosen enemy model will do so immediately. Ignore normal fight splitting restrictions.
- Shuffle. All of his models that are not currently adjacent to an enemy model may move one square.
- Meditate. He may immediately replenish his Token Pool to the maximum allowed by the scenario.
These effects override the normal rule restrictions. For example, a model that had been resurrected that turn would count as having had its Action, but could still be moved by the Do It Now! or Shuffle special rules.
Game Values
Different types of model have different skills and abilities in the game, as shown on the table below.
| Model | Movement | Dice | Armour | Special Rules |
|---|---|---|---|---|
| Skeleton Warrior | 4 | 2 | 2 | - |
| Revenant | 4 | 3 | 3 | - |
| Skeleton Hound | 6 | 2 | 1 | - |
| Dwarf Warrior | 6 | 4 | 3 | Son of Stone, Shield Bash |
| Shieldbreaker | 6 | 4 | 3 | Son of Stone, Hammer Time |
Special Rules
The special rules for Dwarf Warriors, Shieldbreakers and Mastiffs are described below.
Son of Stone
Dwarfs claim the rock itself as a distant ancestor and their affinity for stone is second to none. In their ancient tunnels, Dwarfs can choose to move silently and secretly. If a scenario allows the Dwarfs to use their Son of Stone special rule then you can choose to start the game with some, all or none of your Dwarf and Mastiff models hidden.
There are two Hidden counters in the game (A & B), each of which can represent one or more Dwarf or Mastiff models. If you choose to hide models then allocate each hidden model to one of the counters and place the models themselves to one side of the board, making clear to the Necromancer player which models are represented by which counter (A & B). You may only use a Hidden counter (and the attendant Dummy counters - see below) if at least one model is represented by it.
When you set up the scenario, place each Hidden counter in the starting square of any one of the models that begin the game hidden by either counter.
In addition to the Hidden counters marked A and B, there are four Dummy counters. Place two Dummy counters for each Hidden counter in use. The Dummies are placed in the same way as Hidden counters. You may have several Hidden and Dummy counters in the same square (though they may not share a square with any model). All counters should be face down so that the Necromancer cannot see where the Dwarfs are.
A Hidden/Dummy counter is moved like a normal model but can only move four squares per turn. Each Hidden/Dummy counter can only make one Action per turn regardless of the number of Dwarf models under it. A Hidden/Dummy counter may make Follow On Actions as normal. A Hidden/Dummy counter cannot attack another model.
During his turn, the Dwarf player can spend an Action on a Hidden counter to reveal the Dwarfs it represents instead of moving and fighting with it. Once the Action is spent, the Hidden counter is discarded and the Dwarf models are placed on the board. The first model must be placed in the square the counter occupied. Additional Dwarfs must be placed as close as possible to the first. If two squares are equally close then the Dwarf player chooses. The Dwarf player also chooses each model's facing. All of these models count as having spent their Action this turn, but may make Follow On Actions as normal.
A model controlled by the Necromancer can attempt to reveal a Hidden/Dummy counter by carefully examining the area it is in. To do this, the model 'fights' the Hidden/Dummy counter using the normal rules for combat. This represents the model thoroughly exploring the area and poking about in the shadows rather than making a real attack.
The Dwarf player rolls 3 dice for the counter (regardless of what it represents), while the Necromancer rolls his model's normal amount of dice, and no modifiers apply. If the Necromancer's model wins then no damage is caused, but the counter is revealed. If it is a Dummy it is discarded - the searching model now knows there is nothing there. If it is a Hidden counter then the Dwarf player must place the associated models on the board following the rules explained above.
If a Hidden/Dummy counter Breaks Off from an enemy model then it triggers a Free Strike as normal. This is resolved as above - it represents the enemy model reacting to sound or movement with extra vigilance.
Note that the movement rules mean that Hidden/Dummy counters must stop when they move adjacent to an enemy model (see page 5), but that enemy models can move past Hidden/Dummy counters unhindered.
Shield Bash
Dwarfs are solid folk, and can use their mass to barge enemies out of their way. Instead of making a normal attack, a model with this rule can choose an enemy and push it back into one of its own rear arc squares. There must be an empty square available for the target model to move into. The attacker does not move. The target keeps the same facing and is not damaged. A model cannot be pushed off the board.
Hammer Time
The massive hammers of the Shieldbreakers are swung with such force that they make a mockery of all but the heaviest armour, shattering steel plate as easily as they crush flesh and smash bone. When working out a combat with this model, count its opponent's Armour as 2 lower than it would otherwise be. Remember that the minimum value for Armour is 1.
Bone Collector
Mastiffs are very fond of bones and want to keep them all for themselves. The Necromancer cannot resurrect a Skeleton Warrior from a Pile of Bones counter adjacent to a Dwarf Mastiff. A Pit of Souls is not affected by this rule.
Scenarios
There are six scenarios included in this game. Each scenario includes a map showing the set-up for the tiles and any models or counters that start on the board. You will also find information concerning the size of Token Pools available to each side, how many times Mortibris can use his Baleful Gaze, and how to win the game.
It's a good idea to play through the scenarios in order, as they start simple and gradually use more of the rules as they go. This way you will have a good understanding of the basics by the time you come to the more challenging scenarios. When you have played through a scenario, you may want to swap sides and try it again to see how well you do. You may be surprised how different a scenario feels from the other side.
Control of a Tile
Sometimes the rules refer to a player needing to 'control' a tile to do something; for example, using secret doors or fulfilling a scenario's victory conditions. The way in which a tile is controlled is the same for each scenario.
A tile can either be controlled by one of the players, or it can be contested (with neither player in control). A tile is contested as long as there are models from both sides on it. If at any point there are models from both sides on a controlled tile then it becomes contested. A player controls a tile if he is the only one with models on it.
Once a player controls a tile, he remains in control of it even if he subsequently moves all his models away. If a model moves onto an empty tile under enemy control, it takes control of that tile.
Moving off the Board
Sometimes a scenario requires models to 'move off the board', usually to fulfil a victory condition. A model can only move off the board at an area marked as an exit point on the scenario map.
Moving off the board is simply a case of spending Movement points to move a model up to the edge beside an exit point, and then spending one more Movement point to move off. If this last point is spent Breaking Off from a fight then the enemy model(s) get their Free Strike(s) as normal and the moving model must survive these attacks in order to count as having moved off. A model that moves off the board cannot return to play later.
Note on scenario maps: each scenario's printed map (tile layout, starting models and counters, exit points) is a graphic and is not reproduced here; the rules text of each scenario is transcribed in full.
Scenario 1: Break In
Not far now. If your map is right, the tomb of your noble ancestor Thranalf Griefsson lies just around this corner. Finally you can fulfil your vow and return his fabled hammer to your family. A pity there are none of the Undead around to make your tale of victory all the more glorious...
- Dwarf Token Pool: 4
- Necromancer Token Pool: 3
- Baleful Gaze: 1
The Dwarfs win if any of their models recover the heirloom from the tomb.
The Necromancer wins if the Dwarfs cannot play a token OR if he kills all of the Dwarfs.
Map key: Dwarf Warrior, Skeleton Warrior, Pile of Bones.
Special Rule: Last Will and Testament
Use the dead Dwarf model to represent the two squares of ancestral tomb (see the map). In order to recover the heirloom from the tomb, a Dwarf must spend an Action (not a Follow On Action) whilst he is adjacent to the tomb and not adjacent to any enemy models. The Dwarf cannot move or fight during a turn when he performs this action. If a Dwarf fulfils all these criteria he automatically recovers the heirloom.
Special Rule: Time Limit
For this scenario, the Dwarf player does not reshuffle his Discard pile to create a new token Reserve as he usually would. Instead, if he needs to draw more tokens and his Reserve is empty then he is out of luck and must simply continue with whatever he already has in his Token Pool.
If it comes to the Dwarf player's turn and he cannot play a token then the game ends, and the Necromancer wins. Remember that the Dwarf player must play at least one token a turn.
Tactical Thoughts: Know Your Foe
Whilst the later scenarios look exciting and you'll want to dive right in, it's probably better to play through Scenario 1 a few times first in order to grasp the basics fully. Swap sides, try out different tactics, and see if a lone Dwarf can rush through on his own or whether 'slow and steady' wins the day. After a couple of games, Scenario 1 will only take about 15 minutes, which makes it an excellent training ground.
Scenario 2: Kill Them All!
Foolish mortals! They interrupt your studies and still they cannot capture you. They rot where they stand now, mewling for help that will never come. Curse them all! Curse their... ah, but you must calm yourself. Rest now; catch your breath. Concentrate on that distant cavern, where your minions still battle against the Dwarfs. Quickly now, my children. Before you are once more reduced to dust!
- Dwarf Token Pool: 3
- Necromancer Token Pool: 3
- Baleful Gaze: 1
The Dwarfs win if there are none of the Necromancer's models on the board at the end of any of their turns.
The Necromancer wins if he kills all of the Dwarfs.
Special Rule: I'm Melting!
Meddling witch hunters have discovered the Necromancer's lair, forcing him to flee. His hurried flight is tiresome and inconvenient, but more importantly puts him increasingly far away from his minions who need his presence nearby to keep their unnatural semblance of life.
At the end of each of the Necromancer's turns, he must choose one of his models or Pile of Bones counters on the board. It crumbles to dust immediately and is removed from play.
Tactical Thoughts: Die, Die!
It's very easy for the Necromancer to forget to kill off one of his own models at the end of the turn - it just ain't natural. For that reason it's a good idea for his opponent to give him a friendly reminder to do so if he seems to have forgotten.
Scenario 3: Damned If You Do...
You are glad you spent the time to talk to the greybeards about these tunnels, for now their secret knowledge may just save your lives. Foul and unnatural creatures swarm everywhere. You and your brothers in battle are determined, but the odds are not good. Choose your way carefully and you may yet break through.
- Dwarf Token Pool: 4
- Necromancer Token Pool: 2
- Baleful Gaze: 2
The Dwarfs win if they move any model off the board on the exit point shown.
The Necromancer wins if he kills all of the Dwarfs.
Map key: Dwarf Warrior, Shieldbreaker, Skeleton Warrior, Revenant, Pile of Bones, Exit Point.
Special Rule: Secret Doors
The small corridor tile marked '?' on the map is hidden by a secret door. The concealed tile is not set up initially. Instead it is placed on the board in the spot shown only when the Dwarfs search the tile on either side of it and reveal the secret door.
A Dwarf can reveal any secret doors leading off the tile he is on by having an Action (not a Follow On Action) spent on him to do so whilst he controls the tile. He cannot move or fight during a turn in which he searches for secret doors. If the Dwarf fulfils all these criteria, he is automatically successful in discovering any secret doors in the tile. Immediately place the revealed tile once the secret door has been discovered.
Scenario 4: They Shall Not Pass!
No mercy! The Dwarfs must all die! You are tired of your Great Work being interrupted, and survivors will only bring more trouble...
- Dwarf Token Pool: 4
- Necromancer Token Pool: 1
- Baleful Gaze: 3
Dwarfs may use Son of Stone if they choose to.
The Dwarfs win if they move any model (or Hidden counter concealing a model) off the board at one of the exit points shown.
The Necromancer wins if he kills all the Dwarfs and their Mastiff.
Special Rule: Barrels
A barrel occupies a single square, cannot be moved or damaged, and completely blocks all movement into that square.
Tactical Thoughts: Hide & Seek
The Dwarfs need to use their hidden status to mislead and distract the Necromancer. Then they can make a break for it. There are only a few Undead models present, and the Necromancer has just one token a turn to activate them. The Necromancer has to second-guess the Dwarfs' plan and try to keep his models where they can be relocated easily. Easier said than done if he gets several low tokens in a row - that's why he has three Baleful Gazes. He should also watch out for those cheeky 'Follow On' dashes and avoid leaving gaps.
Scenario 5: To The Rescue!
Time is short. The Undead are everywhere and in far greater numbers than anyone feared. You must get word to your thane immediately. It will be a tough fight, but one of you must survive to tell the story. You even slipped a message inside the collar of your faithful Mastiff. Perhaps your foes will not notice as he slips by.
- Dwarf Token Pool: 5
- Necromancer Token Pool: 3
- Baleful Gaze: 1
Dwarfs may use Son of Stone if they choose to.
The Dwarfs win if they move any Dwarf Warrior or Mastiff model (or Hidden counter concealing such a model) off the board at the exit point shown.
The Necromancer wins if he kills all the Dwarf Warriors and their Mastiff.
Tactical Thoughts: Can't Touch This
This should be the hour of glory for the Shieldbreakers. They cannot win the game by running away - only by smashing their way through to their beleaguered cousins (and their dog). The Necromancer needs to overwhelm the Dwarf Warriors before help can arrive, so he must act boldly. However, anything he puts in front of the Shieldbreakers will probably get obliterated, and without anything to stop them on the return journey, the Dwarf Warriors are only a couple of Follow On Actions away from escape. You should consider saving some piles of bones to resurrect behind the Dwarfs as an unwelcome surprise for the return trip.
Scenario 6: The Magnificent Seven Dwarfs
These Dwarfs are more cunning than you had expected, but you are wiser now. Their stealth was a surprise. No longer. Now you have used stealth for your own ends. The surviving Dwarfs are surrounded in the tomb of one of their long-dead kings. They will soon be joining him, and shortly after that they will join your ranks as willing slaves. Guards have been posted at all the exits. They will not escape.
- Dwarf Token Pool: 7
- Necromancer Token Pool: 3
- Baleful Gaze: 2
Dwarfs may use Son of Stone if they choose to.
The Dwarfs win if they move any model (or Hidden counter concealing a model) off the board at one of the exit points shown OR if they control all three tiles marked A, B and C at the end of one of their turns.
The Necromancer wins if he kills all seven of the Dwarfs.
Map key: Dwarf Warrior, Shieldbreaker, Dwarf Mastiff, Skeleton Warrior, Revenant, Skeleton Hound, Pile of Bones, Pit of Souls, Exit Point.
Tactical Thoughts: Give the Dog a Bone
The Mastiff can claim victory for the Dwarf player by getting off the board (carrying a message to alert the rest of the clan). However, killing it is irrelevant to the Necromancer's main task. The Necromancer never has enough Actions to throw them away so he will have to judge carefully whether (or when) to kill the beast or ignore it. On the other hand, the Dwarf player can use this situation to either force his opponent to burn tokens he could use elsewhere, or make a break for it with the Mastiff for real.