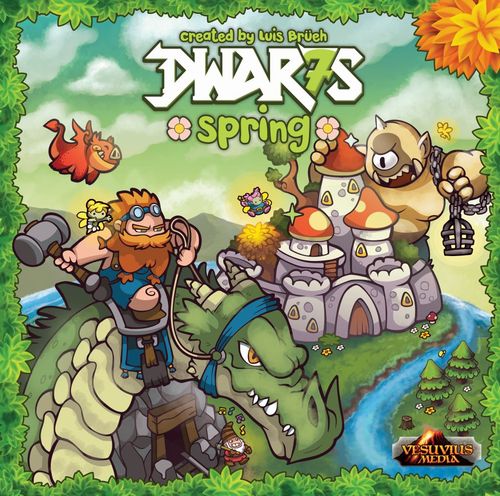
Dwar7s Spring
Dwar7s Spring Rulebook
Table of Contents
Table of Contents
Game Setup
World Map
- Shuffle the wildland petals, take one and place it face up at the middle of the table.
- Shuffle all the remaining petals together (both wildlands and grasslands) and place them randomly circling the center piece.
Expedition Area
- Create a deck of all monster cards. Shuffle it and reveal the top 3 of them, placing them face up on the table. For each card, place the monster miniature on the location indicated on their card. If that location is already occupied by another monster, spawn the new monster to the closest unoccupied wildland.
- Get the next top 6 monster cards from the monster deck and shuffle them along with all quests. Place the rest of the monster cards back to the box.
- From this new deck reveal 3 cards and place them face up on the table. If any of them is a monster, follow the same placement rules as before.
- Place the deck face down beside the 6 revealed cards.
1st Player Token
The youngest player receives the 1st player token.
Empires
Starting with the 1st player, each player gets their Empire board. Then chooses a color and gets the following components that match it: 12 Settlements; a Fortress; 7 Dwarf tokens; 7 Starting Heroes.
Dragons
Shuffle Level 1 dragons and give 1 to each player. Then place the remaining Level 1 dragons face down on the table. Place the Level 2 and Level 3 dragon cards in separate decks next to the board.
Faeries
Shuffle the Faerie cards and place them face down on the table. Each player gets one Faerie card in their hand.
Supply
Place the Resource Tokens (wood, food and gold) in separate piles next to the Game Board within easy reach of all the players. These tokens form the Supply. Whenever a Resource is discarded, it is returned to the Supply. Whenever you gain a Resource, unless otherwise stated, you take it from the Supply.
Treasury
Each player gets 4 Exhaust tokens and places them beside their Player Board to form their Treasury. Whenever a player gains Resources, they are placed into their Treasury; unless otherwise stated, whenever a player must discard Resources they are discarded from their Treasury.
Bastion
Place your dwarfs into the Bastion spots.
Production Lines
Your board has 3 Production Lines, one for each Resource. Place a settlement on each of their spots.
Capitol
Place your fortress on top of your capitol spot.
Dragons Nest
Place your Level 1 dragon face up next to your Empire board to form your Dragons Nest.
Heroes Deck
Shuffle your starting hero cards and place them face down. This is your personal Heroes deck.
Starting Settlements Placement
Starting with the 1st player and proceeding clockwise, each player chooses one of their settlements from a leftmost spot of any production line and places it in any place on the world map following the rules below. After all players place their first settlement, starting with the last player, and proceeding counter-clockwise, each player chooses a second settlement from a leftmost spot of any production line, and places it on the world map.
- You cannot place a settlement on any spot in wildlands.
- You cannot place a settlement on water spots.
- You cannot place a settlement in a spot that already has another settlement.
- You can place a settlement in field spots.
- If you place a settlement in resource spots you get the indicated resources instantly...
- ...but keep in mind that there might be monsters active that will change the amount of resources collected.
Starting placement example: The starting player places their first blue settlement in a 2 Faeries spot. As there are no monsters affecting Faeries, they draw 2 Faerie cards. Then proceeding clockwise, the other players place their settlements and gather resources accounting for any monsters that may affect the specific resource type. As green is the last player to place a settlement into the world map, they place the 2nd settlement first and then all other players place their 2nd settlement counter-clockwise. At the end of the setup phase: Blue has 5 Faerie cards; Red has 1 Wood, 1 Gold and 1 Faerie card; Yellow has 1 Wood and 1 Faerie card, Green has 1 Food and 1 Faerie card.
The game setup is now complete. Proceed to the Start of a New Era.
Game Round Overview
A game of Dwar7s Spring lasts 4 (or less) Eras, each of them divided into: Start of a New Era, Production Phase, Actions Phase and End of Era. All players finish a phase, and then you all move to the next one.
Start of a New Era
Dwarfs return to the Bastion: During this Phase, all dwarfs will return (even from the world map!) to their starting spots on each player's Bastion.
Rest Dragons: Remove any Exhaust tokens from your dragons, placing them to your Treasury. Your dragons are now ready to be used again!
Production Phase
Resource Production: For every settlement you have built, a Resource has been revealed from one of your Production lines. During this phase, you gain an amount of Resources equal to what has been revealed from all your Production Lines.
Warehouse Limit: You may not have more than 7 of each type of resources (food, wood, gold) at the end of this phase. If you go over this limit, discard any extra resources from your Treasury to the Supply.
Actions Phase
During this phase, players will send their dwarfs to perform actions. Starting with the 1st player and proceeding clockwise, players take turns executing actions. There are two types of actions: Dwarf actions which require the use of a Dwarf to be executed, and free actions. You must execute only one Dwarf action and as many free actions as you want in your turn and then the next player plays. Each player takes one turn per round, and the Action Phase lasts 7 Rounds.
A Dwarf action can be any of the following: Build a Settlement, Build your Fortress, Explore, Summon a Faerie, Command Dragons, Fulfill a Goal. In your turn you may also perform any number of the free actions such as: Train your Dragons or Play Faerie Cards.
When all players have no dwarfs left in their starting positions to perform actions, it's time to proceed to the End of Era.
Build a Settlement
By placing one of your dwarfs in one of the unoccupied building spots you may build the leftmost settlement of that production line. Pick the settlement off your Empire's board and place it on the World Map following the rules below.
Adjacency: you can only build settlements adjacent to former buildings of yours or adjacent to dwarfs of yours on the world map. Any Dwarf on a Wildland is considered to be adjacent to all spots surrounding that Wildland.
Keep in mind that: the last settlement of each production line grants you extra resources and victory points.
- You cannot place a settlement on wildlands.
- You cannot place a settlement on water spots.
- You can place a settlement in field spots following adjacency rules.
- You may place a settlement in resource spots to get resources instantly following adjacency rules.
- Wildlands are considered adjacent to all grasslands spots surrounding them.
You may never place settlements in spots that are already occupied by Settlements or Dwarfs.
Build Your Fortress
By placing one of your dwarfs onto the Build a Fortress spot, you may spend 7 of each resource to place your fortress in the world map, following the same rules as building a settlement.
Building your fortress increases your Dragon's Nest capacity by 1.
A fortress cannot be targeted by any Faerie cards, or suffer any effects from monsters while you place it. For example it can not be moved by a Faerie card that affects settlements, and you always get the full amount of a resource spot even if a monster is in play affecting that spot.
Explore
You may place dwarfs on the world map as long as they are placed adjacent to former settlements (or dwarfs) of yours. You may never place dwarfs in spots that are already occupied by Settlements or Dwarfs.
Placing a dwarf in grassland spots has the sole purpose of reaching areas far away or crossing rivers.
Placing a dwarf into a wildland allows you to perform one of the following actions: Fighting or Gathering.
Fighting: Every time you place a dwarf in a wildland with a monster present, you may fight it right away. To do so, you will shuffle your personal heroes deck and reveal as many cards from it as the sum of: the number of your dwarfs in this wildland petal, plus one card for each adjacent settlement of yours, plus 2 if you have your fortress adjacent to it.
When you are fighting, your goal is to get as many axes as possible. If the number of axes shown in your revealed hero cards are equal (or higher!) to the number of axes shown in the monster card that you are fighting, congratulations! you have defeated it! When you defeat a monster: Add the defeated monster's card into your Heroes deck, remove the monster's miniature from the board, draw 2 Faerie cards and reveal a new card from the expedition deck. Saving Faeries from monsters is an exhausting task and comes at a cost, the monster cards will clog your Heroes deck but they also award you Victory Points at the end of the game.
Gathering: Every time you place a dwarf in a wildland that has no monsters you may gather resources. The mechanic is the same as fighting, but your goal this time is to get as many backpacks as possible! For each backpack you reveal, you gain one resource.
Gathering example: the blue player reveals 1 card for the dwarf in the wildland, plus one for having a settlement, plus 2 for having their fortress adjacent (4 cards total). They reveal 3 backpacks, and as the blue player is on a Forest, they gather 3 wood. Then, in their next turn, the blue player decides to go gather again, by sending another of their dwarfs to the same wildland. They shuffle their heroes deck and now reveal 5 cards, instead of 4. This time the blue player gets 2 backpacks and gathers 2 wood.
Summon a Faerie
By placing one of your dwarfs in the Faerie spot, draw one Faerie card from the deck. You may never have more than 5 Faeries in your hand.
Faerie Power: You start with a Faerie Power of 1 and you can increase it by 1 if you activate both Dragon Spots on your Empire board.
Playing Faerie cards: playing Faerie cards is a free action that you can do at any given moment during your turn. It doesn't require you to send any dwarfs to any spot and you may play as many Faerie cards from your hand as you want. Each Faerie card has a special ability which you apply that many times as your current Faerie Power. For example if your Faerie Power is 2 you can move either the same Dwarf twice or move two different Dwarfs when using the "Move one of your dwarfs" Faerie.
The Faerie cards are: Move one of your dwarfs to an adjacent spot; Swap one of your dwarfs with an opponent's one; Get a success while fighting; Swap one of your settlements with an opponent's one; Get a resource of your choice.
You don't get resources by swapping settlements; nor go fighting or gathering by swapping or moving dwarfs.
Command Dragons
By placing one of your dwarfs in one of the dragon spots you may activate your dragons. Each Dragon spot allows you to activate up to 2 of your dragons by placing an Exhaust Token on one of your dragons in your Dragon Nest that has no Exhaust Token on them. That dragon's ability will immediately award you some resources and/or successes for future fights or gatherings. The second Dragon spot (the blue one) can only be used if the first has already been used. It will also award you +1 Faerie Power for the duration of this Era.
Train Your Dragons
Training your dragons is a free action that you can do in any given moment during your turn. It doesn't require you to send any dwarfs to any spot and you may train as many dragons as you want as long as you have the resources to spend.
When you spend the resources required, search the next level deck for the upgraded dragon, and place it on top of its last form. You may train an already exhausted Dragon, but in this case, keep the exhaust token on top of it.
Go on a Quest
By placing one of your dwarfs in one of the expedition spots, you may fulfill a quest provided that you meet its requirements. When you complete it, as a prize, draw a dragon egg from the level 1 pile and place it face up in your Dragons Nest. Add the quest card to your personal heroes deck. You don't need to spend any resources to fulfill a quest. The limit of dragons that your Dragons Nest can hold is 5, but it becomes 6 when you have built your fortress. In addition to fulfilling a quest, the 2nd expedition spot gives you the option of removing any one of the cards in your heroes deck to make it more effective. Discard this card back to the box.
Example quest requirements include: having a Level 2 Dragon, a Level 3 Dragon, or 2 Dragons; having defeated a monster or 2 monsters, or having 5 settlements on the world map; having built all settlements in the gold, food, or wood production tree; having a combination of food, wood, gold and Faeries; and having a set number of settlements on the world map combined with Faeries, wood, gold or food.
Quests and monsters are shuffled together and you should always have six of them face up in the expedition area. Every time you defeat a monster or fulfill a quest, immediately reveal a new card. If you reveal a monster you have to spawn their miniature in their starting wildland or (if its already occupied by a monster) to the closest unoccupied wildland. As soon as a monster enters play, their ability is in effect and will remain in effect until the monster is defeated.
Monster Effects
- A monster that spawns in Forest 1 or 2 places web tokens in the nearest resource spots; you can't build settlements there until this monster is defeated.
- A monster that spawns in Plains 1 or 2 causes all food resource spots to give only 1 food when you build settlements there (instead of 2 or 3).
- A monster that spawns in Mountain 1 or 2 causes all gold resource spots to give only 1 gold when you build settlements there (instead of 2 or 3).
- A monster that spawns in Forest 1 or 2 causes all Faerie spots to give only 1 Faerie card when you build settlements there (instead of 2 or 3).
- A monster that spawns in Plains 1 or 2 prevents you from going on Quests while it is in play.
- A monster that spawns in Mountain 1 or 2 causes all wood resource spots to give only 1 wood when you build settlements there (instead of 2 or 3).
Actions Phase Example
This example starts at the beginning of the 1st Era, after the end of the production phase in a 2 players game. Yellow player has: 2 wood, 2 food and one Faerie card. At the same time, due to their strategy while placing their starting settlements, Blue Player has: 4 gold, 3 Faerie cards and 1 food.
Turn 1: Yellow Player starts the game by using their dwarf to build a settlement in a food resource spot. As there is a witch in play, they will get 1 food, instead of 2. Blue Player places their dwarf adjacent to their settlement, so as to open a path to the nearest resource spots.
Turn 2: Yellow Player sends a Dwarf to fight the monster. Shuffles their heroes deck and reveals 2 cards (one for the dwarf and one for the adjacent settlement). They get 2 Axes and lose the fight as the monster needs 3 to be defeated. Blue Player, as a free action, uses their Faerie card to swap their settlement with an opponent's one. Then places a Dwarf to fight the monster. Shuffles the heroes deck, reveals 3 cards and gets 3 Axes defeating the monster. Takes the defeated monster card as a prize shuffling it into their Heroes deck, and also draws 2 Faerie cards. Finally, removes the monster miniature from the board and reveals a new card in the expedition area.
Turn 3: Yellow Player activates a Faerie card as a free action to swap 2 dwarfs in play. After the swap and within reach of the resource spots, the yellow player uses a dwarf to build a new settlement in the wood resource spot, collecting 2 more wood (Now they have 4!). As a free action, the yellow player spends 4 wood from their treasury to upgrade their dragon to Level 2. Finally, places the Level 2 Dragon card on top of the Level 1 card. Blue Player uses a dwarf to get a Faerie card. Now they have 4.
Turn 4: Yellow Player uses a dwarf to go on a Quest. As they have a Dragon Level 2, they are able to fulfill one of the available Quests. Take its card, place it in their Heroes deck and also draw a new Level 1 Dragon and place it in their Dragons Nest. Finally they refill the expedition area. Blue Player also decides to use a dwarf to go on a Quest. As they have 4 Faerie cards, they are able to fulfill one of the available Quests, take its card, place it in their Heroes deck and draw a new Level 1 Dragon too. They also refill the expedition area again.
The players continue taking turns executing actions until everyone has used all their Dwarfs.
End of Era
If, in this phase your expedition area has less than 6 cards in it or if this is the end of the 4th Era, proceed immediately to Endgame.
If not, pass the 1st player token, clockwise, to the next player and proceed to the Start of a New Era.
Endgame
At the end of the game the player with the most Victory Points (VP) wins. You score Victory Points from all the following:
- Completed Quests: Every quest in your Heroes Deck is worth as many Victory points as shown on its card.
- Defeated Monsters: Every monster in your Heroes Deck is worth as many Victory points as shown on its card.
- Dragons you trained: At the end of the game any Level 2 or Level 3 Dragon awards you the number of Victory Points shown on its card.
- Empire Board: You get 2 Victory Points for each Production Line that you have built all 4 of its Settlements. Building your fortress grants you 5 Victory Points.
- Exceeding Resources: Sum up all your Resources together. For every 7 in your Treasury, you gain 1 Victory Point. For example, if you have 5 Wood, 3 Gold and 7 Food, that gives you a total of 15 resources which means you gain 2 Victory Points.
In case of a tie, the player with the most cards in their Heroes deck wins. If it is still a tie, the player with the most Exceeding Resources is the winner.