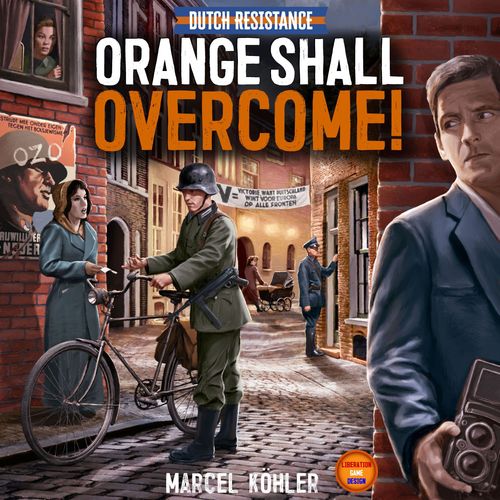
Dutch Resistance: Orange Shall Overcome!
Dutch Resistance: Orange Shall Overcome! Rulebook
Table of Contents
Table of Contents
- Goal of the Game
- Components
- Game Setup
- Key Game Elements
- Playing the Game
- Character cards
- Morale Action Tokens
- Standard Actions
- Occupier cards
- End of the Action phase
- Nighttime
- End of a round
- End of the Game
- Solo modes and solo variant
- Simplified play
- Variety in scenarios
- Commemoration and Special thanks
- Character information
- Rules summary
Goal of the Game
Dutch Resistance: Orange Shall Overcome! is a cooperative, Scenario-based game in which players assume roles as members of the Dutch Resistance during the final years of WWII. Players work together to complete Scenarios to help end Nazi occupation of The Netherlands by weakening occupying forces and preparing the country for life after the war. You must work to keep yourselves, your family, and your friends safe.
During setup, you choose a Scenario, which includes specific goals. These goals include non-violent forms of resistance such as expanding a network, keeping people safe, or moving important objects between places. To win the game, all Scenario goals must be achieved. There are different difficulty levels and the game is played over a series of rounds, based on the number of players.
It is recommended to begin with Scenario 1 and play the Scenarios in order. Each following Scenario will increase in complexity with more components and special rules.
Losing the Game
You immediately lose the game if you meet one of the loss conditions. These always include:
- A Character's Alibi drops below 1
- Group Morale drops below 1
- An Occupier card has to be drawn, but the deck is empty
Each Scenario may also have additional loss conditions listed on the Scenario card.
Orange Shall Overcome?
The name of the game comes from a phrase used by the Dutch resistance. "Oranje zal overwinnen", often abbreviated to O.Z.O., which was written in public places to show the Resistance was still active. "Orange" refers to the Dutch royal family, Van Oranje-Nassau.
Components
1 Game board
5 Player boards
47 Scenario tokens
16 Location tiles
32 Resource tokens, made up of: 5 x Documents, 5 x Contacts, 8 x Rations, 8 x Money, 6 x Information
47 Basic tokens, made up of: 5 x Morale Action, 3 x Solo, 20 x Occupier, 1 x Officer, 2 x Secure, 5 x Tracking, 9 x Person in Hiding, 13 x Spot, 6 x Number
26 wooden components: 5 x Character Meeple, 5 x Alibi Cylinder
162 standard Cards (63x88 mm): 32 x Character, 10 x Identity, 64 x Occupier, 4 x Task card for Scenario 5
36 small Cards (44x68 mm): 20 x Patrol, 18 x Raid!, 12 x Officer, 2 x Solo, 8 x Ausweis
56 Large Cards (80x120 mm): 20 x Helper, 8 x Ticket, 5 x Reference, 5 x Task card for Scenario 3, 46 x Halt!, 5 x Scenario Difficulty Cards
11 x Items: 4 Telephone, 3 Newspaper, 1 Baby Stroller, 1 Suitcase, 1 Camera, 1 Chessboard
Each Character card has an Action Point that can be used to take a single Standard Action, and a unique Special Ability, shown with "AND" or "OR" printed on the card (see Character cards). Occupier cards, Patrol cards, Raid! cards, and Halt! cards each have their own deck used during play. Ticket cards, Ausweis cards, and Task cards are Scenario- and action-specific rewards kept face-down next to a Player Board until used.
Game Setup
These instructions are for multiplayer setup. If playing Solo, there are a few small changes to this setup. You can choose a Solo Mode or the Solo Variant and follow the adjusted setup instructions (see Solo Modes and Solo Variant).
The game offers 5 Scenarios. Only 1 is used per game. You can find the specific setup rules for each Scenario on the back of its Scenario card. The front of the Scenario card covers unique win and loss conditions as well as Scenario-specific rules and actions.
- Choose a game board side and place it in the center of the table. The only differences are the colors used and some details removed. It is recommended to use the darker side for your first game.
- Select the Scenario you want to play and choose a difficulty level. Place the Scenario card on the table with the "setup" side face-up.
- Prepare and place the Occupier deck by following these steps:
- Take the 24 Base Occupier cards, with grey border and numbers in the top left. Split the base deck into Threat Level 1 (Soldier back) and Threat Level 2 (Officer back) decks. Shuffle these decks separately.
- Remove the top 4 cards from each deck. Return them to the box without looking. For a 5-player game, remove 3 Threat Level 1 cards.
- Take the 8 Scenario Occupier cards for the chosen Scenario with black border and numbers on the top right. Their first number is the Scenario number. Shuffle Scenario Occupier cards 1-4 into the Threat Level 1 deck and cards 5-8 into the Threat Level 2 deck.
- Place the Threat Level 1 deck on top of the Threat Level 2 deck.
- Place this fully prepared Occupier deck of 24 or 25 cards in its place on the game board. See Occupier cards for more information on these cards.
- Take all Raid!, Patrol, Halt!, Ticket, and Ausweis cards. Shuffle each type of card separately and form a deck for each type. Place each deck face-down on its designated spot on the board.
- Shuffle all Helper cards, split the cards into two even decks of ten cards each, and place each deck face-up on its designated spot on the board.
- Place Location tiles on the board as indicated by the Scenario card and place a black Safety cube on each tile above the number with an orange or lighter line above it.
- Place Policeman and Soldier Occupier tokens on Road Letters (the letters at the top of the colored signposts, roughly in the middle of the Roads) as indicated by the Scenario card's chosen difficulty level.
- Follow all Scenario Placement rules except for the Character meeple placement, and set aside any required tokens as listed on that section on the Scenario card.
Key Game Elements
Gain/raise or lose/spend
Gaining or raising something (such as Morale, Safety, or Resources) is shown with a black-bordered orange circle.
Losing or spending something (such as Morale, Safety, or Resources) is shown with an orange-bordered black circle.
Resources
The game uses 5 Resource types, representing multifunctional assets: Money, Contacts, Rations, Documents and Information. Whenever a Resource is spent, return the token to the supply.
When you gain a Resource, place it on the leftmost available Resource slot on your Player Board and continue towards the right as you gain more Resources.
When you spend Resources, simply remove the ones you use and rearrange any remaining resources in any order, always starting from the "1" on the Player Board. The number of Resources a Character possesses affects Location Safety during the Danger Phase of a round. See Danger Phase.
You may discard any amount of Resources during the Action Phase. You may not leave Resources on a Location for other Characters to pick up later.
Important: You can spend an Information token to re-roll any one die whenever one or two dice have been rolled. You may do so even when you are not part of the action for which the die was rolled.
Costs tokens
Costs tokens are Scenario-based and indicate which Resources you need to resolve Scenario Actions. You always need to spend all the Resources at the same time when completing a Costs token.
Morale
Morale represents the measure of your group's shared belief in the Resistance!
Characters can gain or lose Morale mostly while resolving Location-related Actions, as bonuses for completing parts of the Scenario goal or while resolving any type of card. The group's Morale cannot be raised above 21.
If the group's Morale drops below 1, faith in the resistance is lost, and the game is immediately lost.
Alibi
Alibi represents how much Occupiers know about your personal Resistance-related activities!
Characters gain or lose Alibi mostly while resolving Location-related Actions, or when resolving cards. A player's Alibi cannot go higher than 10. If any Character's Alibi level drops below 1, the Occupiers immediately arrest that Character and you lose the game.
Action Points
Action Points are the basis of the Action Phase and can be gained from Character cards and Morale Action tokens. They are spent to perform Actions. See Playing the Game and Standard Actions for more information on Action Points.
Player terms
First Player: Starting with the First Player and going clockwise, players take turns being the Active Player. This player gets to make some decisions when mentioned on a card.
Active Player: The player performing their turn. All Actions and effects during that turn refer to this player, except when a Non-active Player is using a Morale Action token. If that is the case, then this other player is temporarily the Active Player for the duration of that Morale Action.
Non-active Player: All players other than the Active Player.
Player Boards
Player Boards have a summary of the round order and the Standard Actions. They also have a number below the Identity card matching your Character Meeple to help make it easier to see your Character on the board. They have an Easy side and a Standard side, offering another way to adjust Scenario difficulty. See Variety in Scenarios for more about Scenario variety.
Item and Person in Hiding tokens
Person in Hiding and Item tokens are used for Scenario goals. The Scenario cards describe their specific rules for that Scenario. Most Items are square with an orange border, whereas each Person in Hiding has a hexagon shape that can have different border colors. For special movement rules about Persons in Hiding or Items, see Moving with a Person in Hiding or Item. For Raids on Locations with these tokens, see Raids.
Helper cards
You can gain Helper cards at the University Location and from specific game effects. You always choose one of the 2 visible face-up cards, and may never search through the deck for a specific one. When you draw one of these cards, you immediately gain the reward on the card. Once that is resolved, put the card back face-up on the bottom of the deck it was drawn from.
Note: Any "flavor" texts and/or historical references on the following card types have no effect on the gameplay: Ausweis cards, Helper cards, Identity cards, Scenario cards and Ticket cards.
Location terms and Areas
City Locations: The 7 Locations on the board with a white number in a blue square. This is the City Area.
Countryside Locations: The 6 Locations on the board with a white number in a green square. This is the Countryside Area.
Adjacent Location: A Location connected to this Location with a Road.
Regions
There are 5 Regions on the board. Each Region consists of 4 Roads with a Region color and signpost shape. There are 3 City and 2 Countryside Regions. Patrol cards and some Occupier cards affect these Regions.
Road terms
Road Letter: The letter inside the Region signpost at a Road.
Connected Road: A Road connecting your Location with an Adjacent Location.
Occupier token: A token with Policeman and Soldier sides.
Safe Road: A Road without an Occupier token.
Controlled Road: A Road with at least 1 Occupier token.
The game may require you to Intensify or Reduce the Occupier token Level on a Road. When that happens do the following:
Intensify: If there is at least 1 Policeman token on the Road when resolving this effect, flip 1 of them to its Soldier side. Otherwise, place a Policeman token. There is no limit to the amount of Occupier tokens on a Road. Intensify affects a Road of your choice, but adjacent to the affected Location. When a Halt! card causes Intensify, it affects the same Road the Halt! card was drawn for, unless otherwise specified.
Reduce: Either flip a Soldier token to the Policeman side or remove a Policeman token from a Road of choice, unless otherwise specified.
Movement Points
The number inside the icon represents your Movement Points: the number of moves you can or should move. This is up to two moves with the Standard Movement Action. However, certain cards and tokens let you move only once or up to 4 times. A single number means you have to make that exact number of moves. A 0-1 or 0-2 means you may move once or twice, but don't have to. Any number above 0 means you must move when resolving that effect. For full movement rules, see Action 4: Movement and Moving with a Person in Hiding or Item.
Location Safety
Safety represents how safe it is to be at a Location before the occupation forces perform a raid there.
Location Safety is represented by a track on the bottom of each tile. Each Location starts with a Safety value indicated by the orange or lighter colored line above that number on the track. This is the starting value. The maximum Safety of each Location is 7, with the exception of the Zoo.
Losing and raising Safety
Location Safety will change as a result of game effects. For example, Danger and Patrol Phases, Occupier, Halt!, and Raid! cards, and some Location Actions that are all described later, will lower Safety. The "Raising Safety" Action (see Action 1: Raising Safety) and some effects from Location Action, Character, and Helper cards will raise Safety for that Location.
Losing and raising Safety is always linked to a specific Location. For example, effects may impact the Safety of the Location your Character is on, a Location of choice, or even a random Location.
Halt! cards primarily affect the Safety of Locations you are moving to or from. Each of these options is indicated by a specific icon described below.
Any Safety you lose or raise applies to only one Location. For example, if you use the Farm's Location Action, you may raise Safety by five at a Location of choice. For this action, you can only choose one Location to raise Safety by five. If there are multiple icons, you could choose the same Location twice, unless otherwise specified.
The Location you lose or raise Safety at can be: your current Location or the directly affected Location; a Location of choice (if choices are mentioned, you may only choose from these Locations); the Location you moved from; the Location you are moving to; a City Location based on a die roll; a Countryside Location based on a die roll; or a City or Countryside Location, based on a die roll and a specified condition.
Raids
When Location Safety drops below 1, you have to resolve a Raid! card. If this happens at any point during the Action Phase, immediately resolve the top Raid! card using the instructions below. If it happens in the Danger or Patrol Phase, resolve it at the end of the phase.
You resolve raid effects even if there are no Characters or tokens at the Location when the raid happens, as Raid! cards have a Morale effect as well as other effects that are always resolved.
Raid! cards
Raid! cards consist of Arrest/Capture and Raid effects.
Arrest/Capture: If there is a Person in Hiding token and/or Item token present on the Location, roll two dice. If the sum of the dice is greater than or equal to the number on the Raid! card in the upper-right corner, the raid does not find anything. The token stays safely hidden on the Location. If you roll lower than that number, the token is removed from the board and you resolve all effects indicated on the Scenario card.
Raid: Resolve all effects on the card for the Characters on that Location. These should be resolved even if there are no Characters present. Most will cause Morale loss. Multiple raid effects are indicated by pieces of paper on the card. Red-bordered Raid! cards remain in effect, as indicated on the card, for the rest of the game.
Return the Location Safety to its starting value (orange / lighter line) after resolving the effects on the Raid! card. Some Raid! cards make you lose Safety after the Raid! card has been resolved and the Safety has returned to its starting value.
Resolving cards
You always resolve (card) effects from left to right and top to bottom. When you have to make a choice between two known options, you cannot choose an option that you cannot fully complete. Halt! cards have a replacement if you don't have something, so you can always resolve either option fully. When a card seems to contradict the rulebook, always follow the text on the card. After you have resolved a card that has a deck on the board, place the card back at the bottom of that deck, except for Occupier cards, which have to be discarded face-up sideways next to their deck.
Playing the Game
The game is played through a series of rounds. The number of rounds is based on the number of players. See the table below for an overview. Each round every player gets an Occupier card. The number of Occupier cards per Character corresponds with the number of rounds in the game. Each round is built up in the following way:
Daytime: Start Phase, Action Phase
Nighttime: Danger Phase, Patrol Phase
Number of game rounds:
- 1 player: 12 rounds
- 2 players: 12 rounds
- 3 players: 8 rounds
- 4 players: 6 rounds
- 5 players: 5 rounds
Daytime
Daytime 1: Start phase
Each player takes their three Character cards and draws one Occupier card. You keep this Occupier card in your hand together with the Character cards, hidden from other players. You may and should look at it yourself, but are not allowed to share anything about it.
At the Morale Track, turn the Morale Action token that is next to the Morale Tracker token face-up. Then turn every token underneath that one face-up as well. This is the pool of shared Action Points for this round.
Any Scenario bonus in this phase is resolved before you reset the Morale Action tokens.
Example: The Morale Track is at 15. Therefore, you turn over 4 Morale Action tokens, which can be used during the Action Phase of this round. The remaining top one stays face-down and cannot be used this round. See Morale Action Tokens for more.
Note: When you resolve certain Location-specific effects, such as at the Forger Location, you do not lose the Safety for that specific effect (see the Forger's Location Action).
Daytime 2: Action phase
The First Player starts as the Active Player and resolves all their Character cards. Once they are resolved, this player resolves their Occupier card. Then, in clockwise order, go to the next Player, who then becomes the Active Player.
Additionally, you may use any available Morale Action tokens from the shared pool, regardless of whose turn it is. Loss of Morale during a round does not impact the available amount of Morale Actions for the current round. See Character cards and Morale Action tokens below.
Each action and each Character card must be fully resolved before a new action can start or a new Character card can be played.
Character cards
Each Player has three Character cards. Each Character card has an Action Point that can be used to take a single Standard Action. It also has a unique Special Ability. If the card says Action Point "AND" the Special Ability, you may resolve both. If the card says "OR", you may only resolve one, either the Action Point or the Special Ability.
You must fully resolve a Character card before resolving another card or a Morale Action token. When a Character card is resolved, discard it from your hand by placing it face-up next to your Player Board.
If you decide to use the Special Ability, you must resolve everything in that section. You also always follow the general rule of resolving card effects left to right and top to bottom for the whole section under the Action Point.
"AND" Character card
If a Character card has "AND" on it, you may use the Action Point on the card as well as the Special Ability on the bottom of the card. You decide whether the Special Ability takes place before or after spending the Action Point.
However, you must fully resolve either the Action Point or Special Ability before resolving the other, as both are considered separate effects. The Special Ability section on "AND" cards is always optional. Some even have 2 optional Special Abilities on the card and you may resolve both, one or none of these options.
"OR" Character card
If a Character card has "OR" on it, you may use either the Action Point to take one of the six Standard Actions or the Special Ability listed at the bottom of the card. The Special Ability effects can only be used during your own turn, as they are not Standard Actions.
Discarding a Character card
You may discard Character cards during your turn without taking an action and consider it resolved, but this might harm your interests.
Remember: Discarding your last Character card does not prevent you from resolving your Occupier card as described in Occupier cards. This is because Occupier cards will always be resolved at the end of your turn, regardless of whether you used and/or discarded your Character cards.
Morale Action Tokens
Morale Action tokens are a shared asset. They provide 1 Action Point each when used. The Action Point gained must immediately be used to take a Standard Action. The tokens can be used by any player, at any time during the Action Phase. This means including outside of their own turn, as long as no other action, Character card Special Ability or any type of other card is currently being resolved.
When a Morale Action token is used, turn it face-down. Depending on Morale at the next Start Phase, it may be reactivated next round.
You have to use all available Morale Action tokens each round. You cannot save Morale Action tokens for later rounds.
Standard Actions
All Standard Actions can be taken by spending 1 Action Point.
Action 1: Raising Safety
Roll a single die and raise the Safety level of your current Location by the number you rolled. See Location Safety.
Example: You rolled a 5 with your die roll, increasing the Safety of the Café Location from 1 to 6.
Action 2: Gather Information
Lower the Safety of your Location by 1 and gain 1 Information token. See Resources.
Action 3: Location Action
When your Character is at a Location, spend 1 Action Point and, if necessary, the listed Resources to resolve your current Location's Action. When a Location Action makes you lose Safety, it is always at your Location. If it is possible to gain more than one of the same thing, for example at the Bank or the Station, you may choose to take just one.
Location Tiles
Location tiles represent places in the City and Countryside, each with their own Location Action and a Safety Track. The top half of a Location tile, the image, is used for the Characters and Scenario tokens. The bottom half features its Location Action and its Safety Track.
Example: When your Character is at the Church, you can spend 1 Action Point and 1 Contacts token to gain 6 Morale.
Overview of Location Actions
Resource Locations
- Bank: Gain up to 2 Money.
- Café: Gain 1 Contact.
- Distribution Office: Gain up to 2 Rations.
- Meeting Place: Gain 1 Document.
- Printer: Gain up to 2 Information and gain 1 Morale.
Other Locations
- Black Market: Spend 2 Resources to gain 1 Resource of choice and gain 1 Morale.
- Church: Spend 1 Contact to gain 6 Morale.
- Farm: Spend 1 Rations and 1 Resource of choice to raise Safety of 1 Location by 5 and gain 3 Morale.
- Forger: Spend 1 Documents to gain 1 Ausweis card and 1 Morale. Keep the Ausweis card face-down next to your Player Board until you use the card.
- Hairdresser: Spend 1 Rations to gain 6 Alibi.
- Hospital: Lower the Safety of the Hospital by 1 to gain 3 Alibi.
- Informant: Spend 1 Information, and 1 Document; Reduce (see Road terms) one Road of choice, choose one Location to raise its Safety by 3 points, and gain 2 Morale.
- Police Station: Spend 1 Money to move a Policeman to an adjacent Road, gain 1 Information and 1 Alibi.
- Station: Spend 1 Money, and lose 1 Safety at the Station; gain up to 2 Ticket cards. Keep the Ticket cards face-down next to your Player Board until you use them.
- University: Spend 1 Contact to choose two Helper cards and resolve their special effect. You can first choose one Helper card and then decide if you take the second card from the same or the other Helper card deck.
- Zoo: This Location has no Location Action. However, it starts with and has a higher maximum Safety.
Action 4: Movement
Movement is a Standard Action that gives you two Movement Points. You may move over one Road for each Movement Point you spend, from your current Location to an adjacent Location. For more on Movement Points, see Key Game Elements.
You resolve one move at a time. This means you complete the first move fully, before you can make the second move.
Movement can be over either Safe Roads with no Occupier tokens, or Controlled Roads with Occupier tokens. If you move over a Controlled Road, certain things, such as a Halt! card, resolve immediately.
Movement example over Safe Roads: Marcel spends 1 Action Point and wants to move twice over Safe Roads. He goes from City Location 2, the Bank, to City Location 7, the Printer using Road O. He then goes further with his second Movement Point over Road M to arrive at City Location 6, the Hospital. There are no Occupiers on these Roads, so he makes those moves without any effect.
Halt! cards
When moving over a Road with just one Occupier token, you resolve the effect of this token, as follows:
Another player draws the top card from the Halt! deck and reads the main text below the title out loud. Do not read the options text yet. When the Active Player has made a choice, the other player reads the text for the chosen option and you resolve the effects of that option.
With Halt! cards, there is always an alternative if one part of that effect can't be resolved. For example, if you don't have the requested resources of the chosen effect, you would lose Morale or Alibi instead.
Once the Halt! card is fully resolved you continue your move action. You may move further if you still have Movement Points left.
For a Policeman (Occupier level 1) on the Road: Resolve the Policeman section of your choice on the card.
For a Soldier (Occupier level 2) on the Road: Resolve the Soldier section of your choice on the card.
Movement example passing an Occupier token: Marcel spends 1 Action Point and wants to move just once: From City Location 2, the Bank, to City Location 3, the University, using Road C. There is a Policeman token on that Road. Anastasiia therefore draws a Halt! card from the Halt! deck for Marcel and reads the main text. Marcel chooses option 1, and since it is a Policeman, he resolves the top part of option 1. The card instructs him to Intensify that Road, so he turns the token over to make it a Soldier.
Intensifying a Road from a Halt! card
Unless otherwise specified on the card, you always Intensify the Road you just passed over when resolving the Halt! card. For the rules on Intensify, see Road terms.
Losing Safety because of a Halt! card
The Safety loss icons (see Key Game Elements) shown on Halt! cards indicate where the Safety is lost. This is often the Location you are moving to or from.
Example: You move over Road C and pass a Soldier. With this Halt! card you choose option 2. You lose 4 Safety at the Location you are moving to. This means Safety changes from 5 to 1 on City Location 2, the Bank.
Multiple Occupiers on a Road
Multiple Occupiers may end up on the same Road. When there is more than one Occupier on the Road, only resolve a Halt! card effect relating to the highest ranking Occupier. Any Occupier beyond the first reduces your Alibi: 2 for each additional Soldier and 1 for each additional Policeman.
Example: There are two Policemen and a Soldier on one Road. You first fully resolve a Halt! card as normal for a Soldier, and then lower your Alibi by 2 more for the second Soldier, and lower Alibi with 1 more for the Policeman.
Ausweis card
You may spend an Ausweis card to prevent drawing a Halt! card while you are using Movement Points to move over a Controlled Road. When you use an Ausweis card, flip it face-up and gain the listed bonus. Then, put it back face-down on the bottom of the Ausweis deck. An Ausweis card (identification card), can be acquired at the Forger Location. Some cards can also provide you with an Ausweis card. Once gained, an Ausweis card stays face-down next to your Player Board until you use it.
Action 5: Train Ride
Use a Ticket card to move to any Location, ignoring normal movement rules, as well as any Occupiers on Roads. To use this action, you must have a Ticket card. Place your Character on any Location on the game board. After using a Ticket, the Player must flip the card over and resolve the front.
After resolving a Ticket card, place it back face-down on the bottom of the Ticket deck. Ticket cards are acquired at the Station Location. Some cards can also provide you with a Ticket card. Once gained, a Ticket card stays face-down and unread next to your Player Board until you use it.
Example: You move directly from City Location 7 to City Location 4, bypassing the Soldiers on the Roads. You then resolve the face-up side for the Ticket you used for this movement.
Moving with a Person in hiding or Item
When moving over Roads, you may take only one Person in Hiding or one Item, as it is just too dangerous to take more. When traveling by train using a Ticket card, you cannot take a Person in Hiding or an Item, unless your Character card says so. For example, Filips, Frits, Jo and Joke all have cards related to these tokens.
These tokens always stay on the board, unless otherwise specified. You can leave them at Locations for other Characters to pick up later.
Action 6: Scenario Action
The Scenario Action is a unique type of action that varies between different Scenarios. Scenario Actions always require an Action Point as usual. There is a reminder of this in the description of each Scenario Action. However, you may need to meet additional requirements as described with the action on the Scenario card. You can't use "OR" effects for a Scenario Action that uses movement.
Exchange
As an option that does not cost an Action Point, you can give or receive Resources, Ticket cards, and Ausweis cards as long as you are on the same Location as another Character.
This means, for example, that you can even give or receive Resources, Ticket cards, and Ausweis cards in between the moves of a Movement Action where you are temporarily on the same Location as another Character.
Remember: You can't leave resources on a Location for another Character to pick up later. You can only leave Items and Person in Hiding tokens.
Occupier cards
Occupier cards represent what the Occupation forces do during the Daytime Period of a round. You are not allowed to discuss what is on your card. You must make decisions without interacting about the card with other players.
Your Occupier card is always resolved at the end of your turn, after resolving your third Character card. Some Occupier cards have an effect based on your Location, others have options. Always resolve one of the options on the Occupier card.
These options are divided by a tilted line with wooden background. Each piece of paper is therefore 1 full option to choose from. Straight pieces of paper on Occupier cards are mandatory and are thus always resolved.
Occupier cards have 2 Threat Levels. Level 1 cards have a German Soldier on the back. Level 2 have a German Officer on the back. The Threat level changes halfway through the game. The effects of cards from the Level 2 Threat deck are more dangerous than those from the Level 1 Threat deck.
Threat Level 1 cards are for the first half of the game. You can recognize them by their image and the helmet at the top.
Threat Level 2 cards are for the second half of the game. You can recognize them by their image and the cap at the top.
Remember: You resolve the Occupier card directly after you fully resolved your third Character card. Other players are not allowed to help you make your decision.
There are two different types of Occupier cards:
- Basic Occupier cards and Scenario-specific Occupier cards.
Basic Occupier cards are numbered from 1-12 for each Threat Level. In each game, you use either 16 or 17 total basic cards, depending on the number of players. See Game Setup for setup instructions. Basic Occupier cards have a gray border with a black symbol and card number on the top left.
There are 8 Scenario Occupier cards for each Scenario. Cards 1-4 are for Threat Level 1 and cards 5-8 are for Threat Level 2. The backs of these cards match the basic Occupier card backs.
The Scenario Occupier cards have a black border with a grey symbol and card number on the top right. The first number is the Scenario number the card belongs to. The second number is to make sure you have the correct 8 cards for that Scenario.
End of the Action phase
The Action Phase ends when all Characters have completed their turn. This means all Character cards are resolved, all Morale Action tokens are used and all Occupier cards are resolved. You then continue with the Danger Phase.
Nighttime
Nighttime 1: Danger phase
The Danger Phase affects the place where each Character stays for the night. The Safety loss in this phase is based on the amount of Alibi and Resources you possess at this moment, as detailed on your Player Board. This is resolved separately for each Character. Certain Scenario effects or tokens may also lower Safety or have a different effect during this phase. This will be indicated with the red Danger Phase header on the Scenario card or on Scenario Task cards for that specific Scenario.
Example: Your Alibi is at 8, so you will lose 1 Safety at your Location for that. You also have 2 Rations, for a further 1 Safety loss at your Location.
Reminder: If Safety drops below 1 in one of the two Nighttime phases, a Raid happens at the end of that Phase. See Raids.
Nighttime 2: Patrol phase
During the Patrol Phase the Occupiers move. Reveal the top Patrol card of the deck and resolve this card. They match a Region on the board.
Move the Occupiers in alphabetical order based on the Road Letter they are on to ensure you can easily keep track of which tokens have moved. This could mean that multiple Occupiers end up on the same Road or that they move to a different Region.
Policeman: Each Policeman that moves lowers the Safety of the Location it passes by 1. In addition, if a Policeman passes a Location with a Character, that Character loses 1 Alibi.
Soldier: Each Soldier that moves lowers the Safety of the Location it passes by 2. In addition, if a Soldier passes a Location with a Character, that Character loses 2 Alibi.
Occupier movement
Each Road Letter has 2 black-and-white signs under it, pointing in the direction of the next Road Letter that is shown inside the sign. The icons on the left show the direction and number of Roads the Occupier token moves over to reach his destination Road Letter. This movement is often one Road, but could also have another number in it.
These show a specific type of Occupier that can be moved one step in a direction of choice, following either the white or the black arrow. For example, the Police Station Location lets you move a Policeman.
Patrol cards
Patrol cards represent Occupier movement, as well as some tips they get from people informing occupation forces, and the overall dread of living in an occupied country. Each card shows one of the Regions on the board (see Regions). They all have these effects:
- 1 Morale loss.
- A die roll for the Area (City or Countryside) that the Patrol is in.
- The movement of the Occupiers in the Region.
- Listed at the bottom of the card, there is an effect in case there are currently no Occupiers in that specific Region.
Example card: First lower Morale by 1. Then roll 1 die for the City, because the icon is blue. The number rolled determines the City Location that loses 1 Safety. Then, all Soldiers on a Road in the green Region move to the next Road Letter in the white arrow direction below the Road Letter they leave from. All the Policemen in the same Region move 1 Road to the next Road Letter as indicated by the black arrow.
Example of a Patrol card effect with multiple Occupiers on the same Road: There are one Soldier and two Policeman on a Road. The Soldier moves over a Location with a Safety of 6, which loses 2 Safety. This Location is now at 4 Safety. The 2 Policeman move the other direction over a Location with Safety 7 and a Character on it with 8 Alibi. The Location would lose 2 Safety from the two Policeman, bringing it back to 5 Safety on that Location. The Character would lose 2 Alibi from the two passing Policemen, bringing the Alibi of that Character to 6.
End of a round
Pass the First Player marker in clockwise order to conclude the round. Prepare to begin a new round, starting with the Start Phase. If there are no Occupier cards left in the deck, it means you have lost the game and you don't start a new round.
End of the Game
The game is finished if one of the following happens:
- The players complete the goal. The players win the game.
- Group Morale drops below 1. The players lose the game.
- A Character's Alibi drops below 1. The players lose the game.
- The players can't draw an Occupier card in the Start Phase because the deck is empty. The players lose the game.
Solo modes and solo variant
There are 2 Solo Modes and 1 Solo Variant for the game:
- Solo Mode 1: One Character with another Resistance Group
- Solo Mode 2: One Character with Helpers
- Solo Variant: Playing multiple Characters
Resolving Halt! cards when playing Solo
No matter the chosen variant, when you play solo, cover the middle and right side of the Halt! card with a face-down Halt! card. This could be one you resolved in an earlier game, or the bottom card of the deck. Make your decision by reading the left side of the card. After making the decision, remove the covering card and resolve the chosen option.
Set up in Solo Modes
Set up the game as normal but for 1 Character. This will be the only Character you play with. Do not build the Occupier deck as normal.
Add 2 base Occupier cards to the 4 Scenario Occupier cards for each Threat level. Build the deck as normal using these cards. You should now have a total deck of 12 cards, 6 for each Threat level.
Take 1 Occupier card during the Start Phase. Resolve it immediately after you resolve your 3rd Character card as normal.
Character adjustments when playing solo
Solo play with a single Character changes the effects of some cards. For example, you can't choose another Character as is required on some Halt! cards. Specific Character cards and tokens, like Vonk tokens from Anton de Kom, also require modifications.
Resolve these effects as though your Character is the "Other Character" referred to. If you have to resolve an effect that says to choose another Character, you always choose your own Character. This means that Anton de Kom can pick up his own Newspapers when you play his Character solo. Filips Douma's Character card called "Shielded Place", for example, still allows you to choose either Filips Douma or a Person in Hiding for the card effect.
Solo Mode 1: another Resistance Group
Choose one of the two Resistance Group cards. Each group has a unique combination of a Request and Unused effect, as explained in the Request tokens section below. Also, they each have an extra rule that affects how the group works. These are resolved during specific phases.
These cards are double sided, with an easier version on the Basic side and a more difficult version on the Challenging side of the card.
Request tokens
During each Start Phase, put the 3 Resistance Group (Solo) tokens on different Locations of your choice with the Request side up. During the Action Phase, these Resistance Group tokens have a unique Request option that can be used when your Character is on their Location.
When you are on a Location with a token showing the Request side, you can use it for free, resolve it fully, and then turn it over to the Used side. If it stays on the Request side till the end of the Action Phase, it will give you a bonus during the Danger Phase as listed on the Group card.
Safety is sometimes raised on the Location of the token, so it is important to place them strategically during the Start Phase. When their effect is resolved during the Danger Phase, turn these over to the Used side as well.
During the Start Phase, take all the Resistance Group tokens from their Locations and immediately place them again with the Request side face-up, on the same or a different Location of choice.
These tokens cannot be moved after the Start Phase. For ALL other game effects, the Resistance Group tokens count as a Person in Hiding.
Example: The Solo token gets activated and turned over to the Used side. You gain the bonus of the use section on the Resistance Group card.
Raid on a Location with Resistance Group token
If there is a raid on a Location with a Resistance Group token, you lose 1 Morale in addition to the effects of the Raid. It does not matter if the token is used or not. Normal Arrest rules also apply (see Raids). If a Resistance Group token is arrested, it is removed from the game and you have 1 less token to place during the next Start Phase.
Solo Mode 2: Helpers
Playing a Character with Helpers introduces one additional step to the Start Phase of each round.
During the Start Phase, before turning available Morale Action tokens face-up, choose one of the two face-up Helper cards. You may resolve its effects. This means you may have an additional Morale Action that round if you increase Morale enough with the chosen Helper card. After it is resolved, place it back on the bottom of the Helper deck that the card came from.
Solo Variant: multiple Characters
This is the multiplayer version played solo. For this solo variant, set up the game as normal for the desired number of Characters and choose your Characters. From the Start Phase until it's their turn, keep the Character cards and their Occupier card face-down on the table instead of in your hands.
During the Action Phase, pick up each Character's cards and Occupier card when they become the Active Player. Play them in clockwise order. All other rules are the same as with a multiplayer game and you may decide yourself which Character(s) use Morale Action tokens.
Simplified play
First-time players are recommended to play Scenario 1 on Normal difficulty and using the Easy side of the Player Board. After playing the game once, you can increase or decrease the difficulty by using the Easy side or Standard side of the Player Board and/or changing the difficulty level of the Scenario. Some changes seem small, but they have a big impact on the difficulty of the game.
To simplify the game for first-time play or to play a quicker version, you can make the following changes:
- Only use the Action Point on the Character cards. Do not use the "AND/OR" effects on these cards. The easiest and least distracting option would be to turn them over and only use the 3 Character cards as a way to track the 3 Action Points you have each round.
- Instead of giving each Character an Occupier card during the Start Phase, discard one card for each Character during the Start Phase, so that it still functions as a way to track the turns. You still lose the game when the Occupier card deck is empty and you have to draw an Occupier card.
These adjustments will make the game a little bit easier and a lot quicker as they take away a lot of decisions, while still keeping the core gameplay.
Keep in mind that this does remove the special abilities and some of the hidden information that may influence each Character's decisions.
Variety in scenarios
You can adjust the difficulty level, make scenarios more varied, and increase the replayability of the game in several ways:
- Adjust the challenge through the chosen Scenario difficulty level as well as using the Player Board. Player Board difficulty affects raid frequency, and creates certain setbacks, resulting in fewer Morale actions and lower Alibi. This means more Actions must be used to raise Safety, Morale and Alibi.
- You can randomize Location placement, while still using the same Locations listed on the Scenario card. Scenarios may change in difficulty as Locations that are purposely close together or far apart might move, such as the Forger and Meeting Place in Scenario 2.
- Add elements from different Scenarios together. For example, you may add the Officer and his special deck to any Scenario. Here, you resolve one of his cards during the Patrol Phase to make it more dangerous. Or, you may add the Nurse or Doctor to avoid Safety Loss on their Locations, making it easier to win. More options are available on the following two websites: liberationgamedesign.com and boardgamegeek.com.
- Control more than one Character, following all rules as though they are separate players, to try how it plays with different numbers of Characters.
Commemoration and Special thanks
I have dedicated this game to all the people who helped the Dutch resistance in any way they could. Risking their lives to stand up to tyranny and oppression. Trying any way they could to make sure they did what they could to help others in these dangerous times. I am happy that I could include so many different people in the game, from different backgrounds, all using their unique skills to try to make a difference. Some had to pay the highest price for their resistance. But there are so many more that need to be remembered and I hope this game helps to keep the memory of all these people alive.
Personally, there are two people who have a special place in my heart. My grandparents, Paul Glasbergen and Cornelia Glasbergen – Keukenmeester, who inspired me through their own stories of their time during the war to make this game. Without them I would not have had the strength to keep learning more about history and game design to make this game a reality, bringing joy to many people.
You helped me understand the important things in life, and the ways to support myself and others. I am very grateful that Cornelia is a part of this game as one of the characters, and Paul as one of the helpers, for people to discover what the impact of small acts of resistance had been.
From the bottom of my heart, thank you for all you have done.
Also a special thanks to my girlfriend Anastasiia for helping me all those years with proofreading, at conventions, helping to make difficult decisions, and just being very supportive of this project. I could not have done this without you.
I want to thank Andrew Haught for the countless moments that we worked on the game, trying to find better and more thematic ways to do something in the game, playtesting it and discussing it in great detail. All to create the best possible version of the game. I also want to thank Rik, Sytske, Rijnyr, Floris, Reinier and Andrew for their help during the different conventions to show, demo, and discuss the game. I want to thank Jan Willem Lokerman, grandson of Jo Lokerman, for his help and support over the last few years. I want to thank Museum Overloon and the Veteraneninstituut for their donations, helping to make the game become better. I want to thank Kristiyan Nedelchev for his help with getting all the files ready. I want to thank Fabio Leone for putting so much time, patience and effort into making and adjusting many different art pieces. And I want to thank all the backers from the Voordekunst and the Kickstarter crowdfunding campaigns for helping with their funding and trust to make this game possible.
Character information
These are the Characters in Dutch Resistance: Orange Shall Overcome! Every Character has their own specialty. You can see Character specializations on the top left of their Identity card. Some Characters are slightly better in some Scenarios than others because of these specialties.
Anda: has easy access to Ausweis cards, which means she can more safely move herself and others. She can also gain 1 Morale if she gives 1 or more Resources or Ausweis cards when ending her movement with another Character, and get them back immediately. She just has to have the Resources and/or Ausweis cards in her possession when playing the card.
Jacoba: is very good at transporting Resources safely. Jacoba has the ability to gain 4 Resources before you place them on your Player Board. This also means she has a larger maximum number of Resources she can carry because of her special card. It might be best to focus on Resources as much as you can. Getting the right Helper cards can be really useful.
Anton: supports other Characters by placing his Newspaper tokens that have a diverse set of options. He works slightly better with more Characters, as it will be easier to place Newspapers close to other Characters. All the Newspaper token rules are on his accompanying Special Character card.
Jo: can get anywhere on the board without negative effects because he can easily get Tickets and combine his cards to pass by the Station and get some things done there as well. However, this will cost most of his turn. So sometimes it's enough to just move to the Station and continue from there.
Cornelia: can easily get and use Rations in different ways. Her Character cards are made to allow using Rations without worrying about getting them again. Using her Special Abilities for adjacent Locations is a great way to give Resources or keep Locations safe when there is an Occupier between her and that other Location.
Joke: can use her abilities to help other Characters as well as People in Hiding avoid passing Occupiers if she positions herself well. Having the ability to easily get Tickets will also help her move to the right places in a safer way. She is the only Character that has such flexibility with moving People in Hiding.
Filips: raises Alibi in a few different ways. You can use his abilities to ensure Alibi stays high for all Characters. If that is already the case, he can also choose something else with all his cards, making him very versatile. Some of his bonuses are related to where you or somebody else is, so keep that in mind when using them.
Selma: is a courier who can move very quickly over the Roads. Each of her cards enables movement. She's also the only Character who can move four times over the Roads with one card. Keep in mind that you can move back and forth over the same Road, giving you the option to pick up or deliver Resources, Items and People in Hiding more easily.
Frits: is great at raising Safety at many Locations. Thus, he really excels at preventing raids. If possible, collect a few extra Contacts, so you can use them consecutively for a few rounds. This way, you can keep Safety and Morale high, without having to move back for the Resources, wasting valuable Action Points.
Wim: is good at knowing Occupiers' plans. When you see the top Patrol card, you will also see the color of the one underneath, which helps to plan for the future. You can also move an Occupier out of the Region of the next Patrol card to reduce its effect. And just passing an Occupier with a single move, without any negative effects can save you some movement.
Rules summary
Important general rules
- Resolving cards: Always resolve (card) effects from left to right and top to bottom. When choosing between two known options, you cannot choose an option that you cannot fully complete. Halt! cards have a replacement if you don't have something, so you can resolve either option fully. When a card seems to contradict the rulebook, always follow the text on the card.
- Morale Action tokens: Only get reset during the Start Phase, so losing Morale during any other turn will not affect the amount of available Morale Action tokens during the current round. Any Scenario bonus in this phase is resolved before you reset the Morale Action tokens. See Morale Action Tokens.
- Raid! cards: These cards are always resolved immediately after an action or resolving a card during the Action Phase, and at the end of the phase if it happens during any other phase. Safety is reset to its starting value (orange / lighter line) after the card is resolved. See Raid! cards.
- Danger Phase: Don't forget to look at the Scenario card for potential extra effects. Those are always resolved first, before the standard Safety loss. Remember that in this phase you lose Safety based on your current Alibi and Resources, and not Lose Alibi. See Nighttime 1: Danger phase.
- Exchanging: It does not cost Action Points to Exchange Resources, Ticket cards or Ausweis cards whenever you are on the same Location as another Character, even during movement. See Exchange.
- Leaving things on the board: You can't leave Resources, Ticket cards or Ausweis cards on a Location for another Character to pick up later.
- Costs tokens: You cannot spend only part of the Resources listed on a Costs token. You must spend all the Resources at the same time.
Occupier token effects
When Policemen or Soldiers move, they always have the same effect listed below. Only the Officer from Scenario 5 has its own rules for movement.
- Policeman that moves over a Location: -1 Safety, -1 Alibi (Policeman Level 1)
- Soldier that moves over a Location: -2 Safety, -2 Alibi (Soldier Level 2)
1 Policeman or 1 Soldier on a Road you move over: Resolve the top Halt! card with the corresponding effects of the chosen option next to their icon on the card. See Halt! cards.
More than 1 Occupier on a Road you move over: Resolve the top Halt! card for the highest Occupier level present. After the Halt! card is resolved, lower your Alibi by 1 for every additional Policeman on the same Road and lower your Alibi by 2 for every additional Soldier.
Important icons on cards
- Gaining or raising something (such as Morale, Safety, or Resources) is shown with a black-bordered orange circle.
- Losing or spending something (such as Morale, Safety, or Resources) is shown with an orange-bordered black circle.
- You use Action Points from Character cards or Morale Action tokens to perform actions during the Action Phase of a round.
- You gain or lose Alibi. Unless mentioned specifically, this is always for your own Character.
- You gain or lose Morale. Move the Morale Track marker on the right side of the board accordingly.
- You gain or lose Safety on your current Location or a directly affected Location based on the number in the top right corner. On Raid! cards it is the raid Location. On other types of cards, if it is not your Location, there will be text explaining which Location it is.
- You raise or lower Safety on a Location of choice. If choices are mentioned, you may only choose from these Locations.
- You raise or lose Safety on the Location you moved from with this step of your movement.
- You raise or lose Safety on the Location you are moving to with this step of your movement.
- You raise or lose Safety on a City Location. Roll a die and resolve the effect for the corresponding City Location.
- You raise or lose Safety on a Countryside Location. Roll a die and resolve the effect for the corresponding Countryside Location.
- You raise or lose Safety on a City or Countryside Location. A text will describe which one it is. Roll a die and resolve the effect for the corresponding Location in that Area.
- Intensify: You add an Occupier token with the Policeman side face-up or flip an Occupier token already on the board from the Policeman to the Soldier side for an adjacent Road of your current Location or the affected Location. With Halt! cards, resolve it for the Road you just moved over instead.
- Reduce: You turn an Occupier token from the Soldier to Policeman side or remove a Policeman on a Road of choice.