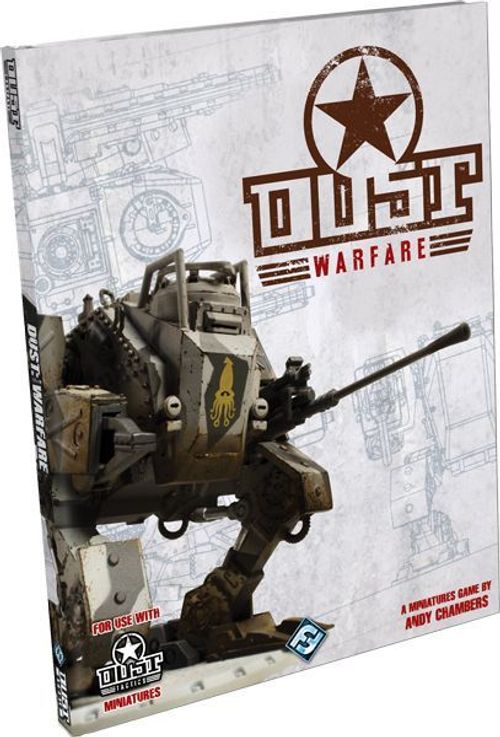
Dust Warfare: Core Rulebook
Dust Warfare: Core Rulebook Rulebook
Table of Contents
Table of Contents
How to Use This Book
The Dust Warfare rulebook is divided into six chapters, each detailing an important part of the game.
The Basic Training chapter describes how things work in a tabletop game. It is designed to give new players an overview of how to measure distances, roll dice, and perform other common game play tasks. This chapter also covers how units (groups of miniatures) work together, and how characteristics are used to denote the differences in units.
The Game chapter details the game rules. It covers the different phases of a game turn, as well as the various actions units can take.
The Spec Ops chapter lists the various special abilities that both units and weapons might have. These rules help to further differentiate units on the battlefield.
The Battles chapter provides a variety of scenarios that make Dust Warfare an exciting and tactical game.
The final two chapters, The Allies and The Axis, describe the individual Allied and Axis blocs, and the units that make up their platoons. These chapters explain how players choose their forces.
The History of Dust
Another Earth. A different 1947. The Second World War has raged for nearly a decade and its grip has spread to every continent on the planet. Entire nations have been stamped out, whole peoples subjugated, and great cities beaten flat by the titanic conflicts unleashed across the globe. Three monolithic power blocs have emerged from the threats, machinations, diplomacy, and outright conquests perpetrated by the major nations' strife. For some, that victory means conquest, glory, and world domination; for others, freedom – but few now talk of simple peace. This is the world of Dust.
Timeline
1937 — July: Japanese forces invade mainland China. World War II starts in Asia.
1938 — March: A German military expedition led by Manfred Kreuzer returns from Antarctica under great secrecy. A U-boat bearing "vital cargo" is sent directly back to Germany. April: The Blutkreuz Korps is formed in Berlin under the leadership of Baron Leopold von Thaler. Its goal is to study the Antarctica discoveries.
1939 — September: Germany invades Poland. Great Britain, France, Australia, and New Zealand declare war on Germany. World War II starts in Europe.
1940 — March: Blutkreuz Korps scientists make a breakthrough in their research, opening the "vital cargo" and waking an alien life form. June: Paris falls and the first Battle for Britain starts the following month. Saigon becomes the new capital of the French Republic. September: Germany, Italy, and Japan sign the Tripartite Pact. The foundations of the Axis bloc are made. December: The war reaches North Africa. The next month, Allied troops take Tobruk.
1941 — June: Operation Barbarossa is launched. The invasion of the USSR begins. December: The Japanese navy attacks Pearl Harbor. The USA enters the war. The Battle for Moscow occurs. Newly arrived Soviet ski troops push back the Wehrmacht.
1942 — February: Japanese forces attack Darwin, Australia. A few days later, a Japanese submarine bombards Santa Barbara, CA. Mainland USA is vulnerable to attack. April: The first American raid on Tokyo is achieved by flying Army bombers from Navy carriers and then landing in China. August: The first American offensive begins with the Battle of Guadalcanal. October: The Germans test fire the first V2 missile. The Second Battle of El Alamein occurs. Allied troops inflict their first serious defeat on the Afrika Korps. Axis forces field test the new Panzer Kampfläufer. Mass production is slowed by difficulties importing the VK mineral from Antarctica. November: Operation Torch begins. Allied forces land in North Africa. Operation Uranus begins. Russians launch a massive offensive around Stalingrad. The Axis-dominated part of the city holds, thanks to the new walkers.
1943 — February: The Wehrmacht finally conquers Stalingrad. Axis forces occupy the entire west bank of the city. The Eastern Front will stay stable in this region for a long time. All is not lost for the Soviet army; it captures a brand new Axis walker in perfect working condition amid the fighting. March: To make up for the huge number of casualties among Axis forces, the Blutkreuz Korps starts testing the Wiederbelebungsserum on fallen German soldiers. The experiment looks promising. April: Adolf Hitler organizes a victory parade in Berlin for his birthday and to celebrate taking Stalingrad. During the parade, Hitler is assassinated. A few well informed people connect the killing to the Blutkreuz Korps but find no culprits. May: German troops are disorganized on all fronts for weeks; the chain of command is in chaos and nobody really knows who now controls the country. What remains of the Afrika Korps and the Italian army surrenders to the Allies in North Africa. The war there is over, for now. After a brief but bloody power struggle in Berlin, the military aristocracy asserts control. Grand Admiral Karl Dönitz is appointed Protector of the Axis. Field Marshal Erwin Rommel takes control of the whole Wehrmacht. Nazis are arrested all over the Reich and SS troops are disbanded or integrated into the Army. Many are put on trial. June: The Axis bloc is reformed around Germany. The official flag of the new bloc is the black Ritterkreuz (Knight's Cross) on a red background. July: The battle of Kursk starts on the Eastern front. Allied troops land in Sicily. August: The battle of Kursk ends. It's a strategic defeat for the Axis whose walkers aren't yet efficient on open ground. Still, the front stabilizes itself. September: Allied forces land on mainland Italy. October: Axis and Allied talks take place to negotiate a separate peace on the Western Front. The Battle of Kasserine Pass takes place. The US Army is defeated for the first time by Axis forces in a ground battle. November: German troops are on defensive positions on the Eastern Front. Soviet attacks are deadly but are pushed back. December: The peace talks for the Western Front prove indecisive. When Stalin learns of these secret meetings, he severs all relations with the Allies. The Soviet army retakes Kharkov. They lose it again shortly afterwards along with fifty-two divisions destroyed or captured. The new German walkers are deadly, and the Russians still don't have anything to counter them.
1944 — January: The battle for Monte Cassino in Italy begins. The Soviet winter offensive starts around Leningrad and Novgorod. After a few initial successes the offensive breaks on German defense lines. The Soviet army entrenches. In San Juan in Argentina, German scientists in a secret laboratory build a new VK-enhanced bomb. An accident causes the device to explode and unleashes an earthquake that kills over 10,000 people. Further research of this type is completely banned by the Axis amid fears of causing catastrophic damage to the Earth's crust. Allied forces land in Anzio, Italy. The bridgehead is attacked day and night for four months. Allied soldiers have to fight Axis walkers in close combat. June: Allied forces enter Rome, the first Axis capital to fall. Operation Overlord begins. Allied forces land in Normandy. The first V2 missile is launched at London. To counter American landings in the Pacific, Japan asks for Germany's military help. Whole regiments of walkers are sent via U-boat to the Pacific theatre along with German pilots. July: During a bold amphibious operation, Soviet troops overwhelm the French and British garrison on Madagascar. The USSR is now at war with the Allies. August: Japan starts the "Steel Samurai" program to develop its own war walkers. Turkey stops all economic and diplomatic relations with Germany and declares its neutrality. Istanbul quickly becomes the most dangerous spies' nest in the world. Allied troops liberate Paris. December: An Axis counter-offensive opens in the Belgian Ardennes. Allied forces are slowly pushed back.
1945 — January: The Second Battle for France takes place. During a covert operation, Captain Joe Brown captures the VK technology from the Axis army. Japanese troops invade Ceylon with the assistance of Axis walkers. The island falls rapidly. March: The first Allied base is built in Antarctica. American and British scientists quickly find what they were looking for. July: From Ceylon, Japanese forces threaten the supply lines of all Allied armies in Southeast Asia. The USA decides to use a VK-enhanced nuclear bomb on the island before attacking it. The result is beyond their imagination; the whole island is wiped out by the blast. The earth cracks and the ocean swallows 90% of the land. The Allies ban any further use of nuclear weapons. August: The Japanese Empire, terrified by the new weapons, formally joins the Axis bloc. Emperor Hirohito now has only a symbolic role. September: Fighting in France is fierce as Allied forces are slowly pushed back to their landing points by Axis troops in Normandy. October: Japanese forces simultaneously land on the west coast of Australia and in New Zealand. Many Commonwealth regiments are pulled back from the war in Europe to defend their homeland. November: The USSR and Communist China join forces for good, forming the Sino-Soviet Union. December: Axis forces invade Nepal and Tibet. Nobody understands how they got there, and the region, poorly defended by the Allies and the SSU, is quickly overrun.
1946 — March: The SSU organizes a series of Marxist revolutions in South America. As soon as the regimes change, Sino-Soviet troops arrive. May: The Allies are pushed back to the sea on the Normandy Coast. The Allied army sails back to Great Britain for the second time. July: Operation Red Sun commences. SSU forces land in Alaska and in Florida on the same night. They manage to claim control of a large portion of the Alaskan coast before the Allied army joins the fight. In Florida, the Allies react more quickly and the Soviet advance is stopped by the Second Marine Division in the Everglades. August: As their situation deteriorates everywhere, the western powers join forces to officially form an alliance. The third bloc is born out of the Allies. Operation Highjump begins. Allied forces launch a massive assault on Antarctica. September: The revived Afrika Korps lands on the coast of Libya and the gulf of Guinea. The war in Africa begins anew with bloody conflict. December: The NNO – Neutral Nations Organization – is created in Bangkok, Thailand.
1947 — January: The Axis launches a massive offensive on all fronts and on all continents. Operation Blue Thunder begins in Antarctica, followed up by Operation Cyclone. The Axis airdrops walkers on Dover in Operation Seelöwe and Operation Cerberus, the Axis invasion of England, begins.
1939-1940: War in the West
The Axis bloc sparked the European conflagration with Germany's invasion of Poland, the most flagrant in a series of increasingly expansionistic moves by Germany's egomaniacal Führer, Adolf Hitler. In response, Britain and France formed the Allied bloc and declared war on Germany. The Allies proved to be only a short-lived foe for the triumphant German Wehrmacht streaming back from their victories in Poland and Norway. In 1940, mainland France was overwhelmed by the Wehrmacht's terrifying new doctrine of Blitzkrieg – "lightning war" – in just six weeks. Britain and France were unable to stop Hitler's legions as they swept through neutral Belgium and the Low Countries. The Allied armies were broken and driven back by a relentless tank battalion blitz and overwhelmed by Axis air power supremacy, even as a flanking Axis thrust emerged from the "impassable" Ardennes region to complete their encirclement. Britain's army barely escaped disaster through the miracle of Dunkirk, evacuating hundreds of thousands of French and British soldiers while under continual air attack. Axis armored spearheads then swept south, relentlessly carving through the Allied lines until mainland France was forced to capitulate weeks later. Bitter resistance stymied any immediate invasion attempt of the British Isles, but the Führer's attention was already being drawn elsewhere. Why bother with the British when U-boats and bombers would soon reduce them to ruins? Meanwhile, ambitious, unscrupulous men of many nations were lining up to join their fates to Germany's rising star.
With mainland France conquered and the whole of Western Europe overrun, Germany found willing allies to the east and south. Nations that resisted the Führer's overtures were ruthlessly subjugated and forcibly joined to the Axis bloc under puppet governments. Efforts by the British Commonwealth forces to stem the tide proved futile and they were pushed back across the Mediterranean to North Africa and the vital artery of the Suez Canal. America strained the limits of its declared neutrality by supplying arms to Britain, but it was too little, too late. Disaster loomed everywhere. Only a handful of brave airmen, the constant vigilance of the Royal Navy, and the onset of winter saved the Allied cause from being extinguished in 1940.
1941-1942: War in the East
1941 brought an unexpected reprieve for the nascent Allies as the mighty Axis juggernaut swung east. The Führer had set his sights on the Soviet Union as the philosophical, political, and cultural antithesis of Greater Germany and the Third Reich. Bolshevism would be destroyed root and branch, while the wide lands of the Soviet Union would be rendered little more than fiefdoms of the Axis bloc. The Allies' last weapons against the Axis – embargo and blockade – would be rendered useless by the vast resources that could be plundered from the east.
Operation Barbarossa opened the greatest invasion in history as millions of Axis troops and thousands of tanks crossed the Soviet border. The vast Red Air Force, the VVS, was caught on the ground by the attack and lost most of its planes in the first days of the invasion. The lethal prongs of Panzer armies thrust across Russia on a grand scale, bringing Blitzkrieg on a new level. They surrounded tens and then hundreds of thousands of Russian soldiers in a tightening net of steel. The Red Army resisted bitterly but their bravery could not stop the mass of war machines ranged against them.
In the Pacific, Japan had already been at war for four years, following its invasion of China in 1937. The blockades and embargoes imposed on the Axis were having little effect in occupied Europe, but against Japan their grip would soon become decisive. Even as the home islands suffered privation, the colonial possessions of the shattered European powers lay ready for the taking all across the Pacific with only hesitant, isolationist America standing in the way.
In December, as Hitler's legions ground to a halt just short of Moscow, Japan struck at the American Pacific Fleet base at Pearl Harbor. Of the eight American battleships of the Pacific Fleet, four were sunk and all the others critically damaged. At a stroke, Japan held naval supremacy in the Pacific. From Malaya to the Indonesian archipelago, Japanese invasion forces were already on the way.
While the USA joined the Allies, Japan called upon Germany and Italy to declare war on the USA in accordance with the Tripartite Pact. In 1942, war fully encircled the globe. On the Russian front, the Wehrmacht recovered from winter fighting and unleashed a formidable campaign in the south. Panzers crashed through Soviet lines at multiple points and drove east, their objectives the mighty river Volga and the oil-rich Caucasus region. In North Africa, Rommel's Libya-based Afrika Korps consistently outfought or outthought Allied forces, seriously threatening Egypt and the vital Suez Canal.
In the Pacific, the Japanese routed the Allies from Indonesia, Malaya, Thailand, Singapore, and Burma in quick succession. They even went so far as to raid India and Australia with their superior air and naval power. By June, Japan had achieved all of its strategic objectives but overreached itself and lost its carrier superiority at the battle of Midway. Naval balance in the Pacific was altered, now in the Allies' favor, as the lessons of carrier-based warfare were absorbed and integrated into the modern fighting doctrine.
The Axis offensive against Russia terminated in an apocalyptic struggle for the city of Stalingrad on the banks of the Volga river. Red Army soldiers of the 62nd Army clung doggedly to the ruins, replenished continuously from the eastern bank. The Axis employed previously unseen new technologies in the battle for the city. Walking tanks appeared that proved to be murderously efficient in street fighting. Only their limited numbers prevented the Axis walkers from pushing the Soviets completely into the Volga.
On other fronts the Axis was beginning to feel pressure from the constant Allied build-up. The Afrika Korps was driven back from Egypt at El Alamein. A month later, Operation Torch saw major landings by Allied forces in Morocco and Algeria. The Soviets launched a long-planned offensive against the over-extended Axis army embroiled at Stalingrad. The steel vice of Red Army troops struggled to close around the embattled Axis forces, but once again the new Axis walkers proved unbeatable and the encirclement failed.
1943-1944: The World in Flames
As 1943 opened, the Axis had reached its greatest extent, and everywhere along its borders conflict fumed and spat dangerously. By February, weary Axis troops finally cleared Stalingrad's west bank of Soviet forces. However, another Red Army offensive into Kharkov absorbed all available forces into a huge battle that eventually dealt the Red Army a serious defeat. In North Africa, resurgent Axis forces temporarily routed the Allies at Kasserine Pass. A breathing space had been gained but the most far-sighted Axis leaders could read the writing on the wall. Axis armed forces were already stretched to their limits and their casualties were mounting inexorably. An ongoing war under current conditions was unjustifiable.
In April, the Führer attended a victory parade in Berlin to celebrate his recent triumphs and his birthday. Under circumstances that remain shrouded in mystery, Adolf Hitler was assassinated at the parade. The Axis splintered apart in the aftermath, confusion bringing its far-flung legions to a temporary halt. In North Africa, the Afrika Korps was forced to capitulate under pressure from Allied forces advancing from the east and the west.
Eventually the military leadership of the Axis reasserted itself, cleansing the armed forces of Nazi supporters and placing Grand Admiral Karl Dönitz in control. Field Marshal Erwin Rommel was placed in overall control of the Axis armed forces. The Axis bloc was formally re-established in June 1943, with Japan choosing to remain a separate sovereign state under the terms of the Tripartite Pact. A fresh Axis offensive at Kursk on the Eastern Front restored some stability to the lines, but only at a terrible cost in men and machines. The Allies capitalized on Axis difficulties by making landings in Sicily and then Italy, directly threatening one of the Axis nations for the first time.
In the Pacific, Japan was already struggling to keep American warships and submarines out of its extended "Co-Prosperity Sphere." Toward the end of 1943, the western Allies were approached with proposals to make a separate peace for themselves and abandon Russia to its fate. Experienced Axis generals from the Eastern Front warned the Allies that they might soon find themselves facing the Red Steamroller as Stalin's ambitions extended far into Europe. Ultimately the peace talks failed to achieve anything other than the alienation of Stalin. When Stalin became aware of the negotiations between the Axis and the Allies, his most deeply held suspicions about the West were confirmed. The Soviet Union promptly severed all relations with the Allies.
1944 opened with no end to the war in sight. The Axis stayed on the defensive, husbanding its strength against the Allies and the Soviet Union. Allied bombing campaigns against the industrial heartland of Germany resulted in huge aerial battles that dwarfed the aerial Blitz against Britain but produced a similar lack of results. The Soviet winter offensives made little progress against entrenched Axis forces.
In July, Soviet troops seized control of the island of Madagascar through a bold and unexpected coup. The Allies were unwillingly plunged into war with the USSR. Their intelligence services were barely able to explain how Soviet forces had suddenly appeared thousands of miles away from their territory. Strong suspicions emerged that the Soviets were utilizing captured Axis technology to make great strides of their own. Under the circumstances the Allies, already fully committed in Northwestern Europe and the Pacific, could make no effective response.
Japan struck suddenly to occupy Ceylon, key to the Indian Ocean. Axis walkers shipped in secret from Europe assisted in the rapid conquest of the island. Its occupation left the whole of India's long coast open to attack, while blocking all shipping into the western Pacific. President Truman believed that a rapid Allied recapture of the island was of such importance to the war effort that he sanctioned the use of an entirely new weapon, the atomic bomb. Enhanced by VK technology, the first A-bomb exceeded all expectations. Ceylon was all but obliterated, wiped from the map. Tsunamis caused by the detonation spread devastation throughout the region.
1945-1946: The Rise of the SSU
At the end of 1944, an Axis counter-offensive crashed into the Allied lines in France from the previously quiet sector of the Ardennes. The Allies were pushed slowly backwards, their defenses beaten back by massed Axis walkers. Despite Axis success, this operation would lead to the capture of a new Axis walker in early 1945. Allied scientists would finally gain their first real glimpse of its new technology. The "VK" power source of the machine exceeded anything encountered previously, and the Allies' failure to create their own walkers using conventional engines was explained. Within weeks, scientists narrowed down the properties of the strange VK ore sufficiently to identify its most likely point of origin – Antarctica. Allied landings were made there in March and Axis forces were found to be heavily entrenched at many sites. VK ore was positively identified soon afterwards.
The battle for France raged relentlessly throughout 1945. The Allied forces were slowly driven back, unable to defeat a veritable torrent of new troops and machines from Germany. There seemed to be no end to the grisly inventiveness of the Axis laboratories. Ghastly new weapons were unleashed alongside frightening Axis "soldiers" reanimated from the dead or created from intelligence-enhanced apes. Axis jet-powered fighters scoured the skies and long-range rockets bombarded London. The horrors of the Western Front came to mirror those of the East.
In June, the Allies delivered two heavy blows to the Axis. After six months of stalemate, Allied forces in Italy fought their way through to Rome, effectively knocking Italy out of the war. Axis forces moved swiftly to take over Northern Italy and establish a virtually unbreakable defensive line along the Po Valley. Meanwhile, in Normandy, a vast armada of ships landed Allied forces in the first stage of Operation Overlord, the liberation of mainland Europe. Fierce fighting on the beaches did not prevent the Allies gaining the shore and pouring massive reinforcements into France. Throughout the rest of the year the Axis were pushed back, and Paris was finally liberated in August. But by this time other events had overshadowed the achievement.
The impact radiated political as well as physical shock waves. Japan formally joined the Axis bloc, accepting German leadership out of fear of the new weapon. The Allied governments were shaken to their very core by public outrage. An absolute ban was placed on all future development and use of the atomic bomb, a declaration tacitly agreed to by the Axis and the USSR. There could be little doubt that all three would continue to pursue their research in secret for "deterrent" purposes, but none of them could dare risk its use.
As 1945 drew to a close, a renewed Axis offensive in France drove the Allies inexorably back toward Normandy. The Allies began to discuss plans for a complete withdrawal from occupied Europe. These became a reality when Japanese forces made landings in western Australia and New Zealand, necessitating the withdrawal of many Commonwealth troops from the warzone. In China, the Communists controlling much of the country turned their backs on the ineffectual Allied efforts to help them and aligned themselves fully with the USSR. The Sino-Soviet Union (SSU) was formed.
The Axis response was swift, their forces invading Nepal and Tibet in the mountainous Himalayas with a devastating surprise attack. Neither the Allies nor the SSU possessed any significant forces in the region with which to oppose the Axis, nor could they bring in reinforcements in time to change the outcome. As with the invasion of Madagascar, no satisfactory explanation could be found for how the Axis had moved forces so quickly and secretly halfway around the globe.
1946 saw increasing political instability in South America, culminating in a cascade of Marxist revolutions. Wherever these regimes sprang up, the SSU moved quickly to secure their acquiescence. The Allies, trapped in a grinding war of attrition in France, could spare little energy to stem the advance of the Red Menace. By May, this particular problem disappeared as the Allies were finally pushed out of France altogether. Allied forces withdrew to the British Isles to prepare for the inevitable Axis invasion. Winston Churchill began to push for a complete union of the Allies after the model of the Axis and the SSU, without which, he believed, the Allies were doomed.
In July, the SSU launched simultaneous attacks in Alaska and Florida, bringing the war to mainland USA. Desperate fighting halted the Soviets in Florida but couldn't prevent their forces seizing several lodgments along the Alaskan coast. Desperation soon swept away any remaining barriers to unity and the Allied bloc was formed behind the leadership of America.
In August, the Allies launched Operation Highjump, a long-planned offensive against the Axis VK mines in Antarctica. The Axis quickly responded by sending the revived Afrika Korps to reopen hostilities in Libya and the Gulf of Guinea, drawing off Allied reinforcements heading south. Even so, the Antarctica offensive made steady progress, opening several new VK sources up to the desperate Allies.
In December of 1946 the few surviving neutral nations met in Bangkok, Thailand, to form their own bloc, the Neutral Nations Organization (NNO), to protect their mutual interests.
1947…
At the opening of 1947, the Axis went onto the offensive on all fronts. Massed airborne landings in Great Britain heralded the opening of the long-feared invasion of the British Isles. The Eastern front was set aflame once more by Axis assaults on Leningrad and Moscow. Japanese attacks intensified in Australia and China. The Allies and the SSU did what they could to brace themselves against the breaking storm…
The Big Three
Almost every country in the world now belongs to one of the three great power blocs. The Allies, the SSU, and the Axis have gained control of more than 90% of the planet. The power struggle remains as intense as ever, with each bloc clawing for any advantage it can gain over the others. The only good news at the moment comes from the Allied scientists. They are making new walkers, new weapons, and new discoveries with VK technology every day. Despite the bravery of their soldiers, it is these men and women who are, for now, the Allies' only hope.
Only a few countries have managed to remain neutral, thanks to their geography, diplomacy, or powers of intrigue. This doesn't mean the neutral states are not dangerous. They have become home for spies, soldiers of fortune, traitors, and backstabbers. These are the places where dangerous deals are made and where death waits around every corner.
The Allies
As 1947 begins, the Allies have never been in such a dangerous situation. They now have to fight to protect their own lands, not just to free those of others. It is a bleak time for the Western Powers. The Allies are now geared for a total war economy. Nothing is produced that doesn't go directly into the war effort. Every young man of every nation among the Allies knows that he'll have to go to war one day. The Allies' military HQ is the Octagon, a formidable structure built in the heart of Kansas. There lies the High Command of the United Army of the Allies (UAA). It is also home to ASOCOM, Allied Special Operations Command, which controls the Rangers' deployment across the globe.
The United States of America — The United States bears a heavy burden, supplying the Allied bloc with the majority of its manpower and resources. After the USA was attacked on its own soil by SSU forces, President Truman gained full authority over the entire Allied bloc. Since taking office he has had to make some of the most difficult choices in his career, but the worst is yet to come.
The United Kingdom — Three years ago, British troops landed on Normandy to free Europe from the Axis' grasp. Now they must fight near Dover against German walkers and paratroopers that have besieged the city. If the Axis forces are not driven back quickly, the position of Great Britain will soon become precarious indeed. Prime Minister Winston Churchill is slowly recovering from the attempt made on his life 6 months ago. He is now once again ready to lead his people to victory. British troops are already stretched thin on every continent, fighting for the Crown. It has been centuries since Englishmen had to fight for the freedom of their own land. Now is the most dangerous time of all.
France — It's been seven years since the French Republic fell to the invading Wehrmacht. Now, the homeland seems lost for good, but it is every Frenchman's dream to be there on the day it's liberated. The capital city of the French Fourth Republic is now nominally Saigon in Indo-China. The real center of power is in Dakar, Senegal. This city is home to the Free French headquarters under General de Gaulle. Free French forces are integrated in the Allied Armies and fight from the African desert to Southeast Asia.
Brazil — Soon after the USA joined the Allies six years ago, Brazil chose to follow. This powerful South American nation now finds itself surrounded by many enemies. Deep in the Amazonian forest, Brazilian Marines fight a dirty war against SSU troops. This theater of operations is of the utmost importance for the Allies, as many scientists believe it holds huge VK reserves.
The Axis
1947 will be a crucial year for the Axis powers. They must conquer the rest of the world before the dire predictions of the Blutkreuz Korps materialize. Even though Axis armies have been decimated by years of war, the bloc believes it has enough resources remaining to win a definitive victory. Then the Axis can prepare the world for what's coming.
Germany — Germany is the Axis' central power. It's where all the discoveries that will win this war are made. It's where the Protector of the Axis rules over the bloc. There are some who say Germany is tiring of this endless war. They couldn't be more wrong. With its new walkers and weapons, the Wehrmacht has never been so powerful, and its resolve to win the war and conquer the planet has never been stronger.
Schloss Adler — This hidden Alpine fortress is the home to the Blutkreuz Korps, and is where the most advanced VK research on the planet happens. It holds many well guarded secrets that Allied and SSU scientists would give anything to get a hold of. All attempts to infiltrate spies or double agents into the Schloss Adler have met with complete failure.
Japan — With vast territories under its control, the Japanese Empire is one of the cornerstones of the Axis power. It has gained immense wealth with its conquests, as well as many new foes. The war in the Pacific and Southeast Asia has taken its toll on the army, though, and the proud Japanese still have trouble adjusting to the fact that a German is now leading them. With the powerful enemies that Japan has made, however, they know the Axis bloc offers their only path to victory.
Italy — Even with half of its territory in Allied hands, Italy is still a loyal member of the Axis. Northern Italy has been transformed into a fortress to stop the Allies. The concentration of troops there is extremely high. The Axis army must also face a strong resistance movement in Northern Italy. Some groups are backed by the Allies, others by the SSU, and both are inclined to fight each other as well as the Axis. In the South, the situation is similar. Here the Allies must deal with Axis and SSU-supported resistance movements instead.
The Sino-Soviet Union
As 1947 begins, the SSU is fully engaged, fighting off the deadliest offensive by the Axis in four years. Brave Soviet troops face endless assaults from Axis Panzer divisions. They must deal with Untertoten and Kampfaffen, often in close combat. Tons of artillery rounds fall on their defensive positions every day. It's an especially dangerous time for the SSU on its western front. Still, this bloc's resolve to win the "Great Patriotic War" is stronger than ever. New heavy tanks and walkers are joining the fight every day from great factories east of the Urals. Hundreds of new divisions are being raised in the Far East from the limitless manpower of Asia. Joseph Stalin's rule over the largest territory on Earth remains undisputed.
Chapter 1: Basic Training
"Wars may be fought with weapons, but they are won by men. It is the spirit of the men who follow and of the man who leads that gains the victory." – General George S. Patton
There are a number of common rules used throughout Dust Warfare – the basic mechanics that are the foundation of advanced rules of movement and combat. This section of the rulebook serves as an introduction that will prepare players with common terminology, basic rules, and other concepts. If a player is already experienced with tabletop games, much of this will be quite familiar. Such players may wish to skip ahead, or skim the concepts quickly, and may find it more convenient to refer back to this chapter later. Players who are already familiar with Dust Tactics will also find rules in this chapter which they recognize, such as weapon characteristics and the Combat Dice mechanics.
Required Components
Dust Warfare is a tactical miniatures game for two players. In addition to this rulebook, players will need several other items to play the game and begin experiencing battles with Dust miniatures.
- Two players.
- A playing surface, such as a tabletop or unobstructed floor.
- A selection of Dust miniatures.
- A tape measure.
- At least twelve Dust "Combat Dice."
- At least two colors of counters (there are counters available to photocopy in the back of this book).
Rolling Combat Dice
Dust Warfare uses just one kind of die – the Dust "Combat Die." These custom dice are included in the Dust Tactics Revised Core Set. Players will find it beneficial to have at least twelve of these custom dice on hand, as it greatly speeds up play. Combat Dice are six-sided dice with two hit faces and four blank faces. If players do not have access to these custom dice, they may use standard six-sided dice instead. When using standard dice, treat the results of 5 and 6 as hit results.
Rerolls — Some special situations may call for the rerolling of a number of dice. This simply means the player ignores the first result rolled and rolls the dice again. Sometimes the player must choose whether or not to reroll all of his dice and other times he may choose which dice to reroll. A player must always accept the result of the second roll, even if it is worse than the first, and may normally not reroll a die more than once. Rerolls can be used to get a player out of a tricky situation, but they are never a guarantee!
Miniatures & Units
Dust Warfare is a tabletop miniatures game. This means that players use miniatures to represent opposed forces on a tabletop battlefield. One of the greatest pleasures of a tabletop game is the shifting tapestry of superbly sculpted and painted armies in combat. This section of the book helps combine the game rules with the practicalities of using miniatures.
A miniature has two main parts, the figure and the base. The base has the practical purpose of allowing the miniature to stay standing despite the pose of the figure and possible bumping of the table. Mechanically, it serves to give a position for the miniature, helping the players determine which miniatures can see each other, and who is fighting in melee combat.
- Figure — The main part of a miniature is called the "figure." It is the character and his weapons. The figure tells us what kind of miniature this is (for example, an Allied Ranger armed with a bazooka).
- Base — The round disk on which the figure is mounted is called "the base." It helps the miniature remain standing, and has many mechanical functions, such as determining a miniature's distance from another miniature and measuring movement.
Dust miniatures come mounted on two sizes of bases. Soldier units are mounted on 30mm bases, while Vehicle units are mounted on 80mm bases. Some very large walkers are not mounted on bases at all, and they require additional rules (see "Heavy Walkers" on page 48).
A unit is a collection of miniatures that functions as a single fighting group, led by a Unit Leader. A unit can consist of a single miniature (like a Hero) or several miniatures.
Measuring
In Dust Warfare, the distance miniatures are from each other, or from where they began their movement, is important to the tactical decisions and abilities of the units. Measuring distances for movement and attacking is done using the miniature's base. In Dust Warfare, a number of elements depend on how far apart the miniatures are, and some critical circumstances may come down to fine judgment. For this reason the default rule is that players can pre-measure distances at all times.
Pre-Measuring — Miniatures can move by taking Move actions (see "Move Actions" on page 36) or as part of other actions, such as being forced to retreat. When a figure moves, no part of a miniature's base may travel beyond the allotted distance from its starting position. This measurement is done from any point on the base, and players use a measuring tape to make accurate measurements.
In the interest of promoting a more enjoyable experience, this "pre-measuring" is allowed in Dust Warfare. Being able to pre-measure ranges promotes confidence about where things are and lets both players get along more amicably, as they do not have to worry about "wasting" actions. As Dust Warfare involves a good deal of miniature movement, pre-measuring distances also means that everything tends to move decisively and accurately.
When measuring distance between two miniatures (such as during an Attack action, see page 40), players measure from the base as well. Players measure from the closest point on the attacking miniature's base to the closest point on the target miniature's base. When measuring distance between two units, players measure from the closest miniature in each unit. When a rule calls for a miniature to be "completely within" a range, all of the base must be within the distance.
In Dust Warfare, miniatures can find themselves at different elevations. Distances are always measured horizontally, and the elevation is not factored into the distance. The section on Move actions (see "Move Actions" on page 36) provides rules for moving up and down on terrain. When measuring movement, no part of the base may move more than the movement distance.
Movement and Firing Arcs
Soldier miniatures in Dust Warfare are capable of freely turning while they are moving. They are not concerned with what direction the figure is currently facing (soldiers can turn around pretty quickly) and they are able to see their surroundings despite what direction the miniature is facing.
Vehicle miniatures, however, have special rules that restrict movement to represent their size and slower turning speed. A vehicle has four distinct movement and firing arcs: Front, Rear, Left, and Right. These each cover a 90° arc, using the hull of the figure and not the turret (if it has one). The 90° facing arcs are Front (F), Rear (R), Left (Lt) and Right (Rt). Every vehicle has four arcs which are used for movement and firing.
Some miniatures or weapons are restricted to particular fields of fire, such as weapons built into a vehicle's hull. These are specifically noted with the corresponding arc of F, R, Lt, or Rt. Vehicle miniatures also have bases with rivets positioned in 15° increments, which help players visually define the firing arcs on the tabletop.
Turret Mounted Weapons — Many vehicles are equipped with turrets, allowing the weapons mounted in the turret to fire all around the miniature as if it were a Soldier unit. These weapons have a 360° firing arc.
Tip: Know Your Walkers! — The Axis and Allied forces use vehicles that may, on the surface, appear similar, but each force uses these walkers in very different ways. Players should consider carefully which vehicle is right to support the infantry they have selected.
Most light walkers, both Axis and Allied, mount a single primary gun in a Front firing arc. While the weapon usually has a range of between 24" and 36", the restricted fire arc makes them vulnerable against enemy units that are able to close that distance and circle to the sides or rear.
Medium walkers vary depending on the faction. While Axis walkers have many of the same fire arc limitations as their lighter counterparts, the Allied walkers make use of turrets. These turrets make the Allied walkers much more difficult to close with, as they can react to enemy movements with most of their fire power.
Heavy walkers are massive feats of engineering, and while Allied heavy walkers are equipped with anti-infantry machine guns, the primary weapon is mounted on a Front firing arc, just like the Axis heavy walkers. These weapons will be most effective if they can keep the enemy at range!
Unit Characteristics
Each miniature has unique abilities and attributes that grant it different properties from other miniatures. The effectiveness of miniatures in Dust Warfare is defined by their characteristics. There are three primary characteristics: Move, Damage Capacity, and Type. Additionally, many miniatures have special abilities, which allow them to act in unique ways. Unit characteristics are abbreviated with characteristic icons in each unit's entry (Move, Damage Capacity).
Move — The Move characteristic shows the distance, in inches, the miniature can travel during a Move action. For most miniatures, this will be 6". Vehicle miniatures have some restrictions during movement. For more on the Move action limitations of vehicles, see "Vertical Movement" on page 39.
Damage Capacity — The Damage Capacity characteristic represents how difficult a miniature is to take out of action. Weapon hits inflict damage, and if a miniature's Damage Capacity is equaled or exceeded by the damage inflicted by an attack, the miniature is removed as a casualty (see "Attack Actions" on page 40). In the unit entries presented in Chapters 5 and 6, this is abbreviated to "DC." If the damage inflicted is insufficient to destroy a miniature, the damage taken is tracked, and the next hit will need to do less damage to destroy the miniature. Typically, only Heroes or Vehicles will have a Damage Capacity greater than 1. Most Soldier miniatures are killed by a single point of damage, because they have a Damage Capacity of 1.
Type — In Dust Warfare, there are three types of miniatures: Soldiers, Vehicles, and Aircraft. Each type is further classified according to how heavily armored (or otherwise protected) it is.
Soldiers — Soldiers include the different kinds of infantrymen employed by the warring powers, armed with a wide variety of weaponry. Ten years of bitter warfare have raised the dirty business of infantry fighting to a high art, and Soldiers make dangerous opponents – particularly in close terrain. Soldiers are vital for taking and holding ground in support of vehicles. Soldiers generally work in units of five or more and have four armor classifications.
- Soldier 1: Unarmored infantry with only helmets and fatigues.
- Soldier 2: Infantry in light body armor.
- Soldier 3: Infantry in heavily armored suits.
- Soldier 4: Infantry with unearthly or extraordinary protection.
Vehicles — Vehicles encompass all kinds of units from jeeps and trucks to heavy assault walkers and land fortresses. Most commonly in Dust Warfare, this category has come to be dominated by walkers, although older wheeled and tracked vehicles still sometimes see service in rear areas. All vehicles are hard to damage by their very nature, even if they aren't heavily armored. Fully armored walkers are true behemoths that can only be stopped by specialized antitank weaponry. Vehicle miniatures normally constitute units on their own. Vehicles have seven armor classifications.
- Vehicle 1: Any light vehicle, including "softskins" like trucks.
- Vehicle 2: Vehicles with armored protection against bullets, but little else.
- Vehicle 3: True armored vehicles with protection against shrapnel and light anti-tank fire.
- Vehicle 4: Medium-armor battle vehicles expected to dish out and receive punishment.
- Vehicle 5: Heavily armored assault/breakthrough vehicles.
- Vehicle 6: Super-heavy armor; vehicles of this armor class first appeared in 1945.
- Vehicle 7: True land fortresses with armor that is virtually impossible to breach.
Aircraft — Aircraft can seldom boast the protection of land vehicles, but some types make a surprisingly strong attempt. Aircraft have three armor classifications that reflect a combination of armor and maneuverability. Aircraft are not a focus of the basic Dust Warfare rules, but their characteristics are included for future expansions.
- Aircraft 1: Standard aircraft and helicopters.
- Aircraft 2: Dedicated ground-attack craft.
- Aircraft 3: Heavily armored air vehicles.
Weapon Characteristics
Weapons in Dust Warfare are defined by their own characteristics. There are two weapon characteristics: Range and Combat Dice/Damage per hit. Certain weapons like flamethrowers and lasers have additional rules as detailed in the special weapon abilities section (see "Special Weapon Abilities" on page 57).
Some weapons will include a number in parentheses. This number indicates how many of that weapon the unit has equipped. It is common for a miniature to carry several weapons. By default, when a miniature attacks it may use all of its weapons in the attack, however not all miniatures in the unit must use the same weapon.
Combat Dice & Damage — Each weapon has a profile which shows the number of Combat Dice it rolls (the number before the slash) against different unit types, and the number after the slash indicates how many damage points each hit inflicts.
Example: The Rangers' standard armament, the M1 AR rifle, is rated 1/1 against Soldier 2 units. This means each miniature firing an M1 AR rolls one Combat Die, and will do one point of damage if that die rolls a hit.
Some weapons have a dash after the slash, instead of a number, for a unit type they cannot damage at all. Some weapons have a special symbol after the slash, instead of a number — these are typically weapons, such as flamethrowers, that spray a controlled area. For more information on Spray weapons, see page 58.
Range — This shows the range of the weapon in inches. For example, weapons with a range of 16" can fire on targets up to 16" away. Some weapons have a special type of Range characteristic designated by a letter as follows:
- (C) Close Combat Weapons — Close combat weapons are specialized for hand-to-hand combat and very close engagement ranges. When a unit is attacked with close combat weapons, it can only retaliate with close combat weapons of its own. For more on close combat weapons see the Close Combat weapon rules on page 57.
- Minimum Range Weapons — A few weapons have a minimum as well as a maximum range. These weapons will have their minimum range noted in the weapon description. Weapons with a minimum range cannot target miniatures that are closer than the distance indicated.
- (A) Artillery Range Weapons — Trajectory weapons like mortars, rockets, and howitzers may be rated as having "Artillery" range (A). Artillery range weapons firing directly at a target have a range of 36". Additionally, Artillery weapons can hit anywhere on the tabletop using the Artillery Strike special ability (see page 53). When firing indirectly, Artillery weapons have a minimum range of 12".
Units
While the rules for single miniatures are important, to expedite play (and better represent the player as a commander of his force), miniatures are grouped into units. A unit moves and attacks together, taking its actions at the same time. Chapters 5 and 6 detail the types of units players can choose for the Allies and the Axis forces. Most units consist of several miniatures and may have additional options listed in their unit entry.
In Dust Warfare, infantry and vehicles do not act on their own. Every unit has a Unit Leader in control, even units with a single miniature. Units that consist of only one miniature (such as vehicles and Heroes) typically treat that miniature as the Unit Leader. Players can easily see which miniature in a unit represents the Unit Leader. Not only is the Unit Leader miniature posed differently than other miniatures in the unit, but they are also noted in each unit's entry in Chapters 5 and 6.
Unit Formation — Each miniature in a unit must be close enough to the Unit Leader in order for the unit to function properly. This is referred to as a unit being in formation. While they are together, the unit functions as a cohesive whole making it a fighting force to be feared. Miniatures cannot stray too far from their Unit Leader (see Leadership Range).
When the rules make reference to a "unit," they mean all miniatures that are a part of the unit. In the text, the distinction between "unit" and "miniature" is used deliberately. A miniature is an individual combatant while a unit is the tactical element that miniatures create. In Dust Warfare, the terms are not interchangeable, even when the rules refer to a unit with a single miniature (such as a vehicle).
Leadership Range — Each miniature must stay within 6" of its Unit Leader. This is referred to as being within Leadership range or "in formation". All miniatures in a unit must always be within Leadership range of their Unit Leader in order to perform efficiently. Leadership range, unless stated otherwise, is 6". If a miniature is ever outside of the Unit Leader's Leadership range, the miniature must be moved back within range of the Unit Leader when it next activates.
Losing Unit Leaders — Unit Leaders in Dust Warfare coordinate the individual members of their squad. The rest of the unit looks to the Unit Leader for command in the heat of conflict. Units are based around a Unit Leader and almost always require one to function optimally. If a unit loses its Unit Leader, the unit must promote a new Unit Leader when next activated. If a unit that does not currently have a Unit Leader must use a Unit Leader for some reason (for instance an enemy action calls for players to check range to a Unit Leader) then the opposing player may nominate a miniature to act as a Unit Leader for the event. Afterwards the unit returns to having no Unit Leader.
Chapter 2: The Game
"In a man-to-man fight, the winner is he who has one more round in his magazine." – Erwin Rommel, The Desert Fox
Dust Warfare games represent battles between two evenly matched forces on a battlefield. Each player attempts to achieve an objective while his opponent stands in the way. Units and platoons fight for supremacy through tactical movement, planned attacks on priority targets, and reaction to ever-changing battlefield conditions.
To achieve their goals, the players each select a force of up to an agreed upon Army Point (AP) limit (see page 80 for more information on selecting an Allies force, and page 107 for selecting an Axis force). They then use those forces on the battlefield, taking turns acting and reacting to each other's decisions to achieve a scenario goal.
Dust Warfare is played over the course of several game turns. During the game turn, players activate units to perform actions that allow them to maneuver for position and unleash their firepower on the enemy. Battles last for a limited number of turns before players assess victory conditions to determine a winner.
Each game turn is divided into an Initiative phase, two Command phases, and two Unit phases (with each player receiving one Command and one Unit phase). During each turn's Initiative phase, the players roll dice to determine which player goes first. The player going first becomes the Initiating player for the game turn; his opponent becomes the Responding player.
The players then take alternating turns executing their Command phases, followed by their Unit phases, in the following sequence:
- Initiating player's Command phase
- Responding player's Command phase
- Initiating player's Unit phase
- Responding player's Unit phase
- End phase
Scenario victory conditions are used to determine who wins the battle. Normally, this will encompass a range of objectives like destroying enemy units, keeping forces intact, seizing a hill, or breaking through the enemy lines. To paraphrase General George S. Patton, killing more of the enemy than they manage to kill of you is always a good way to win. For more information on scenarios, see Chapter 4: Battles.
Command and Unit Phases
Players wishing to move or attack with their units must do so during the Command and Unit phases. During the Initiative phase, no units act; the players simply determine who is the Initiating player and who is the Responding player.
In the Command phase, players use Orders issued by Command Sections to take special actions. Command Sections are chosen as part of the force (see page 80 for Allies and page 107 for Axis force selection). This phase gives the player an opportunity to position units for an attack, lay down preparatory fire, or pull back before the Unit phase.
During the Unit phase, a player activates all of his units, but they are subject to enemy reactions. These reactions allow enemy units to respond during the Unit phase (see "Reactions" on page 34 for more on reactions).
Ending the Game
Battles normally proceed for a pre-set number of game turns before ending the scenario. The number of turns is either dictated by the scenario or decided by the players beforehand. The more game turns there are in a battle, the longer it will last. Four to six game turns is a typical length for most games. For more guidance on game length, see "Chapter 4: Battles" on page 62.
The Game Turn Summary
- Initiative Phase — Players roll to determine initiative (see "The Initiative Phase" on page 28). The player with the lowest number of hits becomes the Initiating Player.
- Initiating Player: Command Phase — Each hit scored by the Initiating player during the Initiative phase provides one Order to be issued in the Command phase. Enemy units do not make reactions.
- Responding Player: Command Phase — Each hit scored by the Responding player during the Initiative phase provides one Order to be issued in the Command phase. Enemy units do not make reactions.
- Initiating Player: Unit Phase — The Initiating player activates each of his units, including those that took an action in the Command phase. Enemy units are allowed to react to actions within 12".
- Responding Player: Unit Phase — The Responding player activates each of his units, including those that took an action in the Command phase. Enemy units are allowed to react to actions within 12".
- End Phase — Once all units have been activated, the game turn is over. Each unit removes a single Suppression marker and all of its Reaction markers.
The Initiative Phase
In the Initiative phase, the players roll their Command Pool to determine who has initiative, and is therefore going first in the game turn. That player is declared the "Initiating player" and the other player becomes the "Responding player." This decides the order in which the players take actions for the rest of the game turn.
In addition, the number of hits scored in the Initiative phase will determine how many Orders can be issued during the Command phase (to a minimum of one). The Initiating player goes first, but the Responding player typically has more Orders to issue.
The Command Pool — The Command Pool represents a force's battlefield ability, its resources, and its officer training. A player's Command Pool contains a number of Combat Dice equal to the number of units in the player's force that are currently on the table and not retreating. Heroes who have joined a unit become part of that unit, and do not themselves add to the Command Pool. The Command Pool has a minimum of one Combat Die in it.
Determining Initiative — To determine initiative, each player rolls his Command Pool and compares the number of hits rolled. In the event of a tie, players must reroll until there is no longer a tie. The player who has the fewest hits is now the Initiating player for the game turn. He also generates a number of Orders equal to the number of hits he scored. His opponent is now the Responding player, and generates Orders equal to the number of hits he scored. The player with the most Orders therefore goes second, but will have more options in the Command phase.
Example: Mack and Sam are determining initiative. It is a critical game turn and both players want to go first, so that they can move forward to take position in cover before the opponent has a chance to respond. The players count their units. Mack has five units on the table, giving him a Command Pool of 5. Sam has eight units, one of which includes a Hero. However, because the Hero is joined to a unit, it does not count as its own unit and does not provide an additional Combat Die to the Command Pool. This gives Sam a Command Pool of 8. Mack rolls five Combat Dice, scoring three hits, while Sam rolls eight Combat Dice and scores three hits. They are tied, so each player must reroll his dice. Sam scores four hits, and Mack scores two. At the end of the phase, Mack is the Initiating player and may issue two Orders in the Command phase. Sam is the Responding player, but he gets to issue four Orders in the Command phase.
Important Game Terms
- Activation — During a player's turn he will have a chance to move and attack with his units. This is known as activating the unit. During a unit's activation, it may perform up to two actions as explained on page 33.
- Order — Orders are issued during each player's Command phase and enable units to rally, maneuver, or attack out of the normal sequence, free from immediate enemy response. In the Command phase players do not activate their units, but may still perform actions with them by issuing the proper Order (see "The Command Phase" on page 30).
- Action — When units are activated they may perform actions, such as moving, attacking, and using other abilities. For more information on actions, see page 33.
- Reaction — Sometimes units will have the chance to react to enemy units without being activated themselves. This is known as a reaction and is tracked in the game by using Reaction markers (see "Reaction Markers" on page 35).
- Suppression — A unit can become suppressed during battle, usually from taking heavy fire. This represents the unit's morale failing and is tracked in the game by using Suppression markers (see "Suppression Markers" on page 46).
- Platoon — A platoon is a group of units that makes up part of a player's force. A player's force may contain several platoons.
- Command Section — A Command Section is a unit that commands a platoon. Each platoon has a Command Section assigned to it and the Command Section is used to issue orders to units during the Command phase (see page 30).
Example — Choosing to go first or second: Sigrid is in quite a bind. Her Laser Grenadiers might be able to hold off the Ranger Attack Squad, but only the Axis Zombies have a chance at damaging the Fireball. She wants to go first so that she can attack with full force. In this situation, Sigrid actually wants to go second instead. When the Allied infantry fires, several of her units are in range to react to the attack. This forces the Allies to choose their target carefully, while the Axis waits to take advantage once the Allies commit.
The Command Phase
The Command phase is a player's chance to issue Orders to units in an attempt to suppress enemy targets or maneuver into position for action without his opponent being able to react (see "Reactions" on page 34). During the Unit phase, a player may react to enemy actions, but during the Command phase he cannot. Each player may issue a number of Orders equal to the number of hits he rolled in the Initiative phase (with a minimum of one).
Command Sections — During the Command phase, units take actions when a Command Section issues an Order. Command Sections are units chosen as part of a platoon, but any Command Section may issue Orders to any friendly unit. A unit must normally have at least one of its miniatures within 12" of a Command Section's Unit Leader to receive an Order, but does not require line of sight. Note that this is not the same as the requirement that miniatures remain within 6" Leadership range of their Unit Leader. Miniatures must remain within Leadership range of their Unit Leader for the unit to function effectively; units only need to remain within 12" of a Command Section Unit Leader if a player wants to issue them an Order in the Command phase.
Two basic Orders are available — "Take Action" and "Regroup," but some units will make additional special Orders available. A unit may only be issued one Order during each Command phase.
- Take Action — The ordered unit executes a single action. This does not count as activating the unit (so the unit does not remove Suppression markers or retreat). It may always take one action, regardless of the number of Suppression or Reaction markers on the unit. When a unit is given a Take Action Order, it gains a Reaction marker at the end of its action, if it did not already have one. As a result, it will not be able to react during the Unit phase, and it will take one less action as well (see "Reactions" on page 34).
- Regroup — The ordered unit removes all of its Suppression and Reaction markers (see "Reaction Markers" on page 35 and "Suppression Markers" on page 46). It may then have a new Unit Leader designated. Lastly, every miniature that is not the Unit Leader may move up to 6", following normal movement rules.
Hero Command Sections — Some units have additional special abilities that extend their Command range. This extension could be situational, have certain requirements, or be a flat bonus extending their command distance. Some Heroes may lead a platoon and act as a Command Section. If they are selected as a Command Section for a platoon then they may issue orders as if they were a Command Section, with a normal 12" command radius. They are not granted this extra range if they become a Command Section mid-battle (they are still limited to 6" just as any other temporary Command Section).
Some Command Sections include a Radioman. This allows the Command Section to issue one Order per Command phase to a unit outside of Command range (for more on this, see "Radioman" on page 56). This includes any unit in the force, even those not on the table yet. However, it does not include units that have retreated off the table or those that have been killed, as radios that communicate with the dead are still not standard issue.
Extended Command Range Off-Table Units — Units that are off the table awaiting a chance to enter play (such as those that are using an Air Drop, or are Reserved) may only be issued Orders through a Radioman or another ability that allows them to disregard Command range, such as the Blutkreuz Ape special ability. They may still be activated during the Unit phase, however, following the rules presented in the special ability that allows them to be off the table.
Loss of Command Sections — If a player has lost the Unit Leaders of each of his Command Sections, he still rolls his Command Pool as normal during the Initiative phase. The player must spend one Order to promote a temporary Command Section – this represents higher command stepping in to give direction. This does not count as issuing the promoted unit an Order, so they may still be issued an Order during the Command phase. Any unit may be chosen as the temporary Command Section, and one miniature in that unit must be designated the temporary Command Section's Unit Leader and will remain as such until killed. The new Unit Leader of the temporary Command Section has a Command range of only 6". It is also highly unlikely that he will have access to a Radioman, so try to keep those officers safe!
Example: Disaster strikes Mack's force of Rangers as the Command Section is destroyed. The force now rolls only two dice (for the two units remaining). In the next Command phase, one Order must be spent to nominate a temporary Command Section – the force's cohesion is almost completely gone and Mack's Rangers will be lucky to issue any Orders at all in the coming Command phase.
The Unit Phase
In the Unit phase, every unit in a player's army attacks, moves, attempts to shrug off suppression, or is forced to retreat. The Unit phase is when the action happens, and all the planning and positioning of the Command phase is acted upon.
In the Unit phase, each of the player's units activates, one after another, normally in any order desired (some scenarios may dictate activation order for units). Each unit must complete its actions before the next unit activates. As with the Command phases, once the Initiating player has completed his Unit phase, the Responding player takes his Unit phase.
The important difference between the Unit phase and the Command phase is that enemy units can react to actions during the Unit phase. If an enemy unit is attacked by another unit within 12", or spots a unit moving within 12", it can make a Move or Attack action of its own in response.
Activation — When a unit is activated, it follows a series of steps to resolve its actions. A lot can happen to a unit, and there are several factors that can affect the battlefield prowess of the combatants from turn to turn. Each unit is activated once in the Unit phase. The game turn does not end until every unit has been activated, although the unit may choose to take no actions when activated.
When a unit is activated, it resolves the activation in the following steps:
- Replace lost Unit Leader
- Move out-of-formation miniatures
- Remove suppression
- Make Retreat moves
- Declare actions
- Resolve actions
1. Replace Lost Unit Leader — If the unit has lost its Unit Leader, the unit now nominates a new Unit Leader. This can be any miniature in the unit. If the unit replaces a missing Unit Leader in this way, it gains a Suppression marker (but may remove it as normal later in this activation). It can be helpful for a player to simply replace the new Unit Leader's miniature with that of the killed Unit Leader (if they both carry the same weapon) for easier recognition during play.
2. Move Out-of-Formation Miniatures — Dust Warfare miniatures represent highly trained soldiers who do not simply run away when left on their own. In the unlikely event that a miniature is not within Leadership range at the beginning of its activation, it is moved the minimum distance directly toward the Unit Leader to be within 6". This is not an action, does not trigger reactions, and does not count towards the unit's maximum movement.
3. Remove Suppression — The unit rolls to remove suppression, regaining some lost morale. Units that are suppressed lose a single action, so it can be vitally important for a unit to clear suppression to get the most out of its activation (see "Removing Suppression" on page 46).
4. Make Retreat Moves — Units that are suffering from too much suppression will attempt to retreat. If, after rolling to remove suppression, it still has too many Suppression markers, the unit will retreat (see "Retreat!" on page 47).
5. Declare Actions — It's important to note that units may sometimes be limited to taking only one action when they are activated – or may even be in such dire straits that they cannot take any actions! Such units are still activated, giving them a chance to shake off adverse effects or being forced to retreat, even if they can take no actions. The player declares what actions the unit will be executing. If the unit has two actions, it must declare what those actions are at this time. It does not have to declare targets, direction, or any other variables of the declared actions. The actions a unit can take are described in more detail on page 33.
6. Resolve Actions — The player then resolves the actions declared. The first action must be fully resolved before the unit can take a second action. All of the miniatures in the unit must perform the same action together at the same time – in other words, they act as a team.
Actions
There are two actions available to all units when activated: Move and Attack. Some units have additional special actions they may take instead of the standard Move and Attack actions.
- Move — The unit can move a distance equal to its Move characteristic in inches (terrain permitting).
- Attack — The unit can attack with its weapons.
A unit may complete its actions in any order it wishes; it can Move and then Attack, or Attack and then Move, take no actions or only one action, or take a double action.
Double Actions — Rather than taking two different actions, units may choose to spend twice the amount of time concentrating on a single action – this is referred to as executing a double action. When using a double action, the unit must declare that it is doing so, and spend both actions to perform one double action. If a unit opts to perform a double action, it gains additional benefits over a standard Move or Attack action.
- March Move (Double Move) — A unit taking a March Move action moves twice its Move characteristic. In addition, the unit may ignore difficult terrain (but not impassable terrain) during the movement. This does not affect soldiers often (as they rarely become slowed by terrain) but walkers are able to break through tough terrain with a March Move action.
- Sustained Attack (Double Attack) — The unit takes careful aim, attempting to do as much damage with its weapons as possible. A unit taking a Sustained Attack action may choose to reroll some or all of the Combat Dice during its Attack action (typically players will only want to reroll those dice that fail to succeed). Note that the number of Combat Dice is not increased, rather the attackers take their time and fire more accurately. The unit makes only one attack roll (not two consecutive rolls) during the activation.
Special Actions — Due to their weaponry or special abilities, some units have special actions they can take. Examples of special actions include Reload actions to reload certain heavy weapons and Repair actions to fix damage to a vehicle. See the Spec Ops chapter starting on page 52 for more about special actions.
Reactions
The opposing force isn't necessarily going to sit still and let a commander have it all his way! During the opposing player's Unit phase, units are allowed to react to enemy actions if they do not have a Suppression or Reaction marker. There are two circumstances in which a unit can react:
- Enemy miniatures make a Move action that begins or ends within 12" of any miniature in the unit.
- An enemy unit declares an Attack action that includes the unit as a target. The unit may only react if at least one miniature in the attacking unit is within 12" of one of the unit's miniatures.
The reacting unit can choose to take a single Attack or Move action immediately (or, in the case of Soldiers, "Hit the Dirt!" – see below). If a unit chooses to make a reaction, it gains a Reaction marker. When the unit is next activated it loses one of its actions if it still has a Reaction marker. Normally, a unit may only react once per game turn. Units with a miniature out of Leadership range of their Unit Leader cannot react.
Reaction Restrictions — A unit must declare its reaction either directly before, or directly after the enemy action is resolved (depending on the triggering action).
Units reacting to a Move action are subject to the following restrictions:
- The reacting unit must declare and execute its reaction either before the activating unit moves or after it has completely finished moving.
- Attack reactions may only target the activating unit; the reacting unit cannot divide its attacks among multiple units.
Units reacting to an Attack action are subject to the following restrictions:
- The reacting unit must declare its reaction before the activating unit rolls Combat Dice to resolve the attack.
- Attack reactions may only target the activating unit; the reacting unit cannot divide its attacks among multiple units.
- Attack reactions are resolved at the same time as the triggering Attack action.
Move reactions may move the unit into cover or potentially out of range or line of sight entirely; this would cause the Attack action that triggered the reaction to be wasted. The activating player must always give his opponent a chance to choose whether or not to react before he moves any miniatures or rolls the dice. Rolling or moving quickly to avoid reactions is against the rules, and very poor sportsmanship! Units cannot take a reaction in response to a reaction.
Multiple Reactions — It's possible for an enemy unit to provoke multiple reactions by moving close to several units at once or shooting at multiple targets. Each unit can opt to react differently, or not at all, at the discretion of the units' controlling player. The reacting player is free to choose the order in which his units react, resolving one reaction completely before moving on to the next.
Example: During the Unit phase, Sam's "Luther" takes a Move action that brings it within 12" of Mack's Combat Ranger unit and a two-man Observer Team. The Observer Team wisely reacts by moving away, and the Combat Ranger unit opts to react with an Attack action. Alternatively, the Combat Rangers could take a Move action, or elect not to react – saving their reaction for when the Luther fires on them or moves again, or in order to respond to the actions of a different enemy unit.
Reaction Markers — When a unit reacts it is marked with a Reaction marker. Units with a Reaction marker take one less action than normal when they activate. At the end of a game turn, both players remove all Reaction markers that are currently on their units. Units that are issued a Take Action Order in the Command phase gain a Reaction marker after they act. This causes them to lose an action during the next Unit phase and makes them unable to react to enemy actions.
Hit the Dirt! — Soldier units have a special reaction they can take when being shot at: "Hit the Dirt!" Unlike other reactions, which are restricted to units within 12", a "Hit the Dirt!" reaction can be taken regardless of the distance of the attacking unit. The reacting unit automatically receives a Suppression marker in addition to the normal Reaction marker, but this allows it to improve its cover as per the rules for having suppression on page 46. This is a potent defense for vulnerable soldiers, allowing them to elect to gain the benefits of being suppressed when they are caught in a tough spot.
The End Phase
Once both players have taken a Unit phase, activating all of their units, the turn is almost over. The End Phase is a time to assess the current situation and prepare for the next Initiative phase.
- If a scenario calls for actions to be taken during the End Phase, they are done first.
- Then, each unit on the table removes a single Suppression marker.
- Lastly, all Reaction markers are removed from all units.
Move Actions
Moving forces on the battlefield is a vital part of Dust Warfare. Often a force's objective will be to take ground from the enemy, and many Soldiers' weapons are most deadly at close quarters. Additionally, control over key terrain features is often vital to ultimate victory.
Miniatures performing a Move action can travel a distance across the tabletop of 1 inch for each point of their Move characteristic. Typically, miniatures have a Move characteristic of 6, so most miniatures travel up to 6" per Move action. Soldiers ignore Movement arcs and can turn freely during movement. Most Vehicles, however, can only move into their current Front arc and may rotate at the beginning or end of their movement.
Move Action Procedure — When a unit performs a Move action, the controlling player indicates the moving unit and checks the Move characteristic of its miniatures. He may then move any miniatures in the unit up to 1" per point of their Move characteristic. Most of the time, an entire unit will have the same Move characteristic, but in the rare event that a unit has multiple Move characteristics, each miniature may move up to its own Move characteristic.
A miniature cannot move within 1" of an enemy miniature during its movement, nor may it end its movement within 1" of any enemy miniature. A Soldier unit's base is slightly more than 1" in diameter and makes an excellent tool for judging this distance. Miniatures cannot move through friendly vehicles, but can move through friendly soldiers. Soldier units can travel in any direction, regardless of their facing.
When a unit takes a Move action, all miniatures in the unit move, and each miniature must end its movement within 6" of the Unit Leader. A miniature may move outside that range during the Move action, as long as it ends the Move action within Leadership range.
Vehicle Movement
A Vehicle unit can normally only move into its Front arc during a Move action. A vehicle may adjust its facing up to 90° either before or after it moves, but not both. It cannot adjust its facing during its movement.
Spot Turning — Instead of moving during a Move action, a vehicle may choose to adjust its facing completely. If it does, it may change its facing to any direction it wants but does not move.
Backing Up — Vehicles can elect to "back up" as a Move action instead of moving forward. While backing up, a Vehicle unit must move into its Rear arc. The maximum distance the Vehicle unit may move while backing up is limited to 3", but no further reduction is made for moving through difficult terrain. A vehicle taking a March Move action may move up to 6" when backing up.
Vehicle Overruns — Remember that vehicles cannot move through other Vehicle units (friendly or enemy). A Vehicle may move through enemy Soldier units. It is not required to maintain a distance of 1" during its movement, or at the end, from enemy Soldier units.
When a Vehicle moves through a unit of Soldiers (either friendly or enemy) it causes an overrun. If the vehicle would end its movement within 1" of any Soldier miniature, that miniature must move the minimum distance to be at least 1" away from the vehicle, by the shortest route possible.
Being overrun can cause a unit to become suppressed. The moving vehicle rolls a number of Combat Dice equal to its Vehicle type (so a Vehicle 3 would roll three Combat Dice). The unit that was overrun gains one Suppression marker for each hit scored by the vehicle. If a vehicle is able to overrun multiple units, each unit's suppression is rolled separately.
Terrain Effects on Movement
In Dust Warfare, terrain helps to define the tabletop battlefield and presents unique challenges and opportunities for both sides. Terrain can provide cover for units to protect themselves, or it can simply impede movement.
Open Terrain — Miniatures moving entirely in open terrain can travel a distance of 1" for each point of their Move characteristic. Miniatures moving in the open do not easily claim cover against enemy fire. For more on cover, see page 43.
Difficult Terrain — Difficult terrain is anything that impedes, but does not completely block, movement. Examples include forests, broken or rocky ground, craters, deep snow or soft sand, jungles, streams, steep hills, shallow rivers, rubble, swamp, marsh, and low walls and fences.
Soldiers are rarely affected by terrain and move their full Move characteristic through most terrain types. A miniature's move distance is reduced to 3" when it moves across any terrain that is rated difficult during a Move action. The move distance of miniatures that are Fast (or have another ability that increases their Move characteristic) is reduced to 3" as well. Terrain does not reduce a miniature's Move characteristic, it limits the maximum distance it can move.
A miniature's Move action is impeded if it moves through any difficult terrain, and it will be affected whether it moves into or over the terrain at the beginning, middle, or end of its move. This also means a miniature can't enter difficult terrain that is over 3" away at the start of its Move action. When a miniature makes a March Move action, it does not suffer from this restriction and may move twice its Move characteristic as normal for a March Move, even if it moves through difficult terrain.
Impassable Terrain — Impassable terrain blocks all basic movement and cannot be moved through at all, though it may be possible to move over or under it with the right form of special movement. Impassable terrain includes cliffs, high walls or fences, and deep water. A miniature that is confronted by a high concrete wall, for example, cannot move through the wall and must go around it instead.
Sometimes terrain counts as impassable to one type of miniature while being only difficult for another. Tank obstacles, for example, are impassable terrain to vehicles but open terrain to soldiers, while barbed wire entanglements may damage soldiers but are only difficult terrain to vehicles.
Declaring Terrain — It is important to note how vital it is for players to determine what the terrain effects will be before the game begins. This prevents any confusion. Before deployment areas are determined and units are placed, the players should briefly discuss each piece of terrain and come to a consensus on how it will affect different unit movements and what type of cover (if any) it will provide. Despite this precaution, debates are sure to arise. If the players fail to declare a piece of terrain's difficulty (and it is not readily apparent on the Terrain Movement Difficulty Table), they should lean toward the terrain being as difficult to pass as is reasonable. After all, it's a dangerous world out there and soldiers need to proceed carefully.
Defining Terrain Areas — It may be easy to determine the boundaries of terrain if the terrain is mounted on a base of its own, but some may be more complex. If the terrain does not have a base, the players should draw an imaginary line between the outer geometry of the terrain (from a top-down perspective) to determine where the terrain begins and ends.
One of the most difficult aspects of ruling on terrain can be deciding where it begins and ends. All terrain encompasses an area, and it is important to define where the terrain boundaries lie. Any miniature with its base touching, inside, or partially inside an area of terrain is affected by it, either for movement purposes or for the purposes of cover (see "Cover" on page 43).
Cover — Many terrain elements provide different types of cover in addition to affecting movement. The two types of cover provided by terrain are Soft cover and Hard cover. Miniatures benefiting from cover have a better chance of surviving enemy fire (see page 43). Players may decide that some terrain, such as walls, do not provide the benefits of cover unless it interferes with line of sight. This prevents a miniature standing against a wall from gaining the benefits of cover when attacked by enemies that have a clear shot.
Sample Terrain Table — The following table is intended as a guide; players should adapt it as appropriate for their available tabletop terrain.
| Terrain Type | Cover Type | Soldier Movement | Vehicle Movement |
|---|---|---|---|
| Craters | Soft | No Penalty | Difficult |
| Fences | Soft | Difficult | No Penalty |
| Forest/Jungle | Soft | No Penalty | Difficult |
| Hedges | Soft | No Penalty | No Penalty |
| Hills | Soft | No Penalty | Difficult |
| Barbed Wire | None | Difficult | Difficult |
| Rubble | Soft | No Penalty | Difficult |
| Stone/Brick Walls | Hard | Difficult | Difficult |
| Swamp | None | No Penalty | Difficult |
| Tank Obstacles | Hard | No Penalty | Impassable |
| Trenches | Hard | No Penalty | Difficult |
| Vehicle Wreckage | Hard | No Penalty | Difficult |
| Water (Deep) | Hard | Difficult | Impassable |
| Water (Shallow) | Soft | No Penalty | Difficult |
Partially Impassable Terrain — Some terrain may have only parts that are impassable, while the rest is clear, or difficult terrain. This is most common in buildings. A unit might be able to move through a doorway or window as open terrain, but the stone walls would be impassable.
Vertical Movement
Many pieces of terrain have a vertical component that a miniature might stand on or move across. Terrain such as buildings or the ruins of buildings may even have multiple stories, complete with floors (or what is left of them) for miniatures to position themselves on.
Normally a unit cannot move more than 3" vertically during its activation. Some units (such as those with the Climb ability) may vertically move more. This vertical movement is in addition to a miniature's normal movement; the miniature is simply restricted from ending its turn more than 3" above or below where it began.
A building with a floor is an exception to this vertical movement rule. If a floor is more than 3" above the floor below it, a unit may move up to that floor without a special move ability. Players may agree on additional exceptions for specific terrain. As always, it is important for the players to discuss the terrain before the game begins. Players might, for instance, declare that the ruins of a building do not allow miniatures to freely move up and down floors that are more than 3" separate, to add realism, or an interesting challenge.
Attack Actions
A miniature taking an Attack action fires its weapons at the enemy. Attacking miniatures can make use of all of the weapons they possess that remain functional and that can be brought to bear in the firing arc.
Attack Action Procedure — When a unit takes an Attack action, all of the miniatures in the unit strike as part of the same action. Some units may have miniatures equipped with different weapons and these miniatures should roll their Combat Dice separately, so that each different weapon's attack result can be determined. Close Combat Attack actions function differently than other Attack actions and are discussed in detail starting on page 57.
When a unit attacks, the controlling player declares what weapons are being fired at which targets. A player may choose to not fire certain weapons if he wishes. Each weapon being fired must roll all of its Combat Dice against one target unit. The player must also check for line of sight and range. Attacking miniatures without line of sight or range to at least one miniature in a target unit cannot contribute to the attack.
The player then resolves his attack by checking the unit's weapon characteristics against the target unit's armor type and making an Attack roll. The target unit then makes any Armor rolls and removes miniatures that have been killed.
Attack Restrictions — In order to attack, individual miniatures must have the target unit:
- Within range of each weapon they are using.
- Within the firing arc of each weapon they are using.
- Within their line of sight.
Step 1: Pick a Target — When a unit takes an Attack action, the controlling player declares the targets of the attack. The unit may split its attacks against several targets, but it must declare what weapons are firing at which targets before rolling any Combat Dice. Each individual weapon may be declared separately. For instance, a unit with 7 M1 ARs could fire each one at a different target. This may trigger reactions from multiple enemies.
Step 2: Determine Range and Line of Sight — Once targets have been declared, the unit must determine which miniatures are in range, checking to ensure the weapons can reach at least one visible miniature in the target unit. Any weapons from attacking miniatures that do not have range to at least one visible miniature in the target unit cannot participate in the attack.
Firing Arcs — Some miniatures (like vehicles) have firing arcs for the weapons noted on their unit descriptions. At least one miniature in the target unit must lie inside a weapon's firing arc for it to be able to fire during an Attack action. Only one miniature must be within the firing arc of the weapon for the entire unit to be within the arc.
Check Line of Sight — Terrain situated between the attacking miniature and the target may block line of sight, either partially or completely. Line of sight is used to determine if the miniatures in the target unit of the attack are entitled to cover rolls, which are very important to the defending unit! First, the player determines which miniatures have their line of sight completely blocked. The player then determines if the miniatures in the target unit are obscured and therefore entitled to a cover roll.
Attack Action Summary
- Pick target unit(s) and allocate unit weapon(s) firing.
- Check range and line of sight to the target unit(s). Determine cover quality (if any).
- Roll Combat Dice for weapons. Each hit deals damage to the target unit based on the Weapon Characteristics.
- The target unit's controlling player makes an Armor roll. Each hit negates one point of damage.
- The target unit's controlling player assigns remaining damage to the unit and removes casualties.
Obscured Line of Sight
Line of sight is determined miniature to miniature. To determine if a miniature has line of sight to another miniature, a player must look to see if any part of the target miniature's figure is visible to the attacking miniature. He does this from a viewpoint at the center of the attacker's base at the top of the miniature. If no part of the target miniature's figure can be seen, then line of sight is blocked.
Just because terrain doesn't completely block a miniature's vision, it doesn't mean that the shooter has a clean shot. Terrain that lies between two units might grant some form of protection. The enemy doesn't just stand in a static spot, and the terrain might take a hit for the target, or make an attacker miss.
Blocked Line of Sight — Blocked line of sight affects attacking in three ways:
- An attacking miniature that has its line of sight blocked to every miniature in the target unit cannot fire its weapons.
- If no miniatures in an attacking unit can draw line of sight to a target miniature, that miniature cannot be damaged by the attack.
- If even one miniature in the attacking unit has an unblocked line of sight to a target miniature, it may be assigned damage during Step 4: Assign Damage.
Unlike blocked line of sight, which is determined on a miniature to miniature basis, obscured line of sight is determined from the attacking unit's Unit Leader to the target unit. Because the Unit Leader is in charge of directing the fire of his unit, his position is very important when the unit attacks. Players draw an imaginary line between the center of the attacking Unit Leader's base and the center of each miniature's base in the target unit. If the line crosses any terrain area at all, then the target miniature is obscured (even if it is already blocked). This area of terrain does not have to be taller than either unit, the line simply has to pass through any area of terrain to be obscured. If at least half of the miniatures in the unit are obscured, then the unit is considered to be obscured and the unit will gain the benefits of the terrain's cover type.
A Unit Leader that has its base touching or within an area of terrain ignores that terrain for the purposes of obscured line of sight, but not blocked line of sight. The unit treats the area as open terrain. This includes terrain that both the target and the attacker are within.
Tip: Obscured vs. Blocked — Line of sight to a miniature is blocked if the figure isn't visible, but if any part is visible, then it can only be obscured. Miniatures only ignore the cover they are in for the purposes of obscured line of sight, not blocked, so they still can't shoot through a wall!
Vehicles and Line of Sight
Vehicles aren't as nimble as soldiers; they cannot duck out of the way quickly. Because of their size, it is rare for a vehicle figure to be blocked. Additionally, the vehicle has a difficult time claiming obscured line of sight, or gaining the benefit of cover, because of the following rule: if an attacking unit can draw a line of sight to any part of the target vehicle's base without intersecting terrain, then it is in the clear, and the vehicle gains no benefits from being in cover. It is very important to protect vehicles by having them completely within an area of terrain. Anything less and they may be denied the benefits of cover!
Miniatures in the Way — Miniatures can block or obscure line of sight in a variety of ways. Vehicles and Soldiers interfere with line of sight differently. A miniature never obscures other miniatures in its own unit.
Soldier miniatures do not obscure or block line of sight from a friendly attacking unit. Enemy soldiers obscure line of sight to other Soldiers out to the edge of their base and up to the figure's height as if they were an area of terrain. Vehicles obscure any unit (friend or foe), treating the base of the vehicle miniature as an area of terrain. When making an attack a Vehicle ignores enemy Soldier units when drawing line of sight.
Soldiers only obscure the shots of other soldiers. In addition, soldiers that are suppressed are keeping low to the ground. If a unit of soldiers has any Suppression markers, it does not obscure other Soldier units.
Units obscured by soldiers are granted Soft cover, while units obscured by vehicles are granted Hard cover. It is perfectly permissible (and often advisable) to arrange units so that they will protect one another from incoming fire by obscuring lines of sight. If a unit is being protected by another unit, it is often a good idea to suppress or destroy the unit in front before trying to take out the one in the back.
Step 3: Roll Combat Dice
Once the attacking unit has determined how well it can see the target, it's time to let bullets fly and resolve the attack. Every weapon has its own characteristics, which are compared against the target unit's Armor type to determine how many Combat Dice the weapon will roll. On the weapon profile, each weapon has a pair of numbers separated by a slash. The first number is the number of Combat Dice rolled, while the second number is the amount of damage dealt by each hit scored. Sometimes a weapon's profile will also contain a special spray symbol.
Example: Sam's unit of five Grenadiers fires its StG 47 assault rifles and MG 48 machinegun at a unit of Mack's Rangers (Soldier 2). The StG 47's have a rating of 1/1 against Soldier 2 Units, so each Grenadier with a rifle will roll one Combat Die that inflicts one point of damage if it rolls a hit. The MG 48 is 4/1 so the miniature using it rolls four Combat Dice. In total eight Combat Dice (four for rifles, plus four more for the MG) are rolled for the Grenadiers' Attack action.
A unit may have weapons capable of inflicting more than one point of damage; ensure that the Combat Dice for these weapons are rolled separately. Additionally, miniatures firing at a different unit should be rolled independently from any others.
Example: Mack's Ranger squad is firing its M9 bazooka and M1 rifles at an enemy truck (Vehicle 1). The M1 rifles are 1/1 against Vehicle 1 units, while the bazooka is 1/3 so its Combat Die is rolled separately as it will inflict three damage points if it scores a hit. The dice for the M1 rifles are rolled first, then the die for the bazooka. The four Rangers score two hits and the bazooka also rolls a hit for a total of five damage to the enemy truck.
Spray Weapons — Some weapons have a special symbol in their profile. These weapons do not roll Combat Dice like other weapons and are governed by special rules (see "Spray Weapons" on page 58).
Tip: Target Priority — It is important to know what kind of units a miniature's weapons can best damage, so that shots aren't wasted on a target that can't be hurt. Remember, units in Dust Warfare are free to split their fire any way they want. A unit may fire its M9 Bazooka at a vehicle, while the rest of the unit splits its M1 AR's amongst nearby infantry... just watch out for those reactions!
Step 4: Make Armor Rolls
Once the attacking unit has determined how well it can see the target, it's time to let bullets fly and resolve the attack. Soldiers know how to rely on their armor, and how to duck and cover, living to fight another day. Miniatures can make Armor rolls to avoid taking damage when they are attacked. Different terrain is rated for the protection it provides as either Soft or Hard cover, which can bolster this Armor roll. In addition, units that have one or more Suppression markers (see page 46) gain or improve cover, and can be more resilient targets.
Rolling the Dice — After damage has been inflicted by an attack, the defending player rolls a number of Combat Dice equal to the unit's Armor rating to defend against the damage. A Soldier 2 unit would therefore roll two dice. Each hit scored on the Armor roll will negate a single point of damage. Armor rolls are made by the unit and not individually by each miniature. The defending unit's controlling player then decides which miniatures suffer any damage not cancelled by the Armor roll.
Cover — Units can gain additional protection from enemy attacks by making good use of cover. There are two different types of cover in Dust Warfare: Soft cover and Hard cover. Units can only benefit from one type of cover at a time. If a unit would benefit from both Soft cover and Hard cover, the effects of Hard cover apply.
- Soft Cover — Soft cover is lightweight and offers more concealment than real bullet-stopping potential. Woods, jungles, trees and bushes, long grass or tall crops, wooden buildings, fences, crates, and barrels all count as Soft cover. When a unit benefiting from Soft cover makes its Armor roll, it is treated as having scored one additional hit.
- Hard Cover — Hard cover is something resistant to attack such as rocks, gullies, trenches, ruins, sandbags, brick walls, concrete buildings, and vehicles. When a unit benefiting from Hard cover makes its Armor roll, it is treated as having scored two additional hits.
Teams — Teams are Soldier units comprised of only two miniatures, the most common types being sniper teams and observer teams. Teams make extremely good use of cover and normally do little to betray their presence. To represent this, teams in Soft cover count as in Hard cover instead. Teams that are already in Hard cover gain no additional benefits.
Step 5: Assign Damage
After the Armor roll has determined how much damage the target unit has canceled, the remaining damage must be assigned to miniatures in the unit. The defending player assigns damage to any miniature in the unit as he sees fit with the following restrictions:
- No miniature may be assigned more damage than its remaining Damage Capacity. Miniatures with a Damage Capacity above 1 may already have some damage on them from previous attacks. A Hero with a Damage Capacity of 4 who has already taken two damage from a previous Attack action may only be assigned two more damage in this step.
- Miniatures that are not obscured must be assigned damage before miniatures that are obscured.
- Miniatures that are blocked to every miniature in the attacking unit cannot be assigned any damage.
The defending unit's controlling player must assign all of the damage he can. Any damage that cannot be assigned is ignored. Any miniature that has been assigned damage equal to or higher than its remaining Damage Capacity is considered a casualty. Casualties are removed from play; they no longer participate in this battle.
After damage is assigned, Soldier units gain a single Suppression marker. Any Soldier unit that was hit by an attack gains a Suppression marker, even if all the damage was negated by the Armor roll. It is only required that the attacking unit score one or more hits on the initial attack. Vehicles do not gain Suppression markers. Instead, vehicles suffer additional effects on the Vehicle Damage Table.
Rear Armor — Vehicles mass the bulk of their protective armor to their front, where most incoming fire comes from. The rear of the vehicle is considerably more vulnerable to enemy fire. To represent this, a vehicle cannot make an Armor roll when more than half of the attacking unit's miniatures have their bases completely within its Rear arc. Being in a vehicle's Rear arc only negates protection it has from its Armor rating, not from cover. The vehicle still benefits from the effects of cover, even when attacked in its Rear arc.
Vehicle Damage Table
| Result | Effect |
|---|---|
| (blank) | No additional effect. |
| 1 hit | Blinded: The vehicle's vision has been compromised. When taking a Sustained Attack action, the vehicle cannot reroll any Combat Dice for the rest of the game. |
| 2 hits | External Fire: Part of the vehicle's armor is on fire. As long as the fire is burning, the vehicle suffers 1 damage at the end of each of its activations (do not roll for this on the Vehicle Damage Table). While the vehicle is on fire, the vehicle will resolve a spray/1 Attack against any Soldier unit it Overruns. The vehicle must spend an action to put the fire out. |
| 3 hits | Weapon Damaged: One weapon may not be fired for the rest of the game. The vehicle is treated as if it did not have the weapon; any abilities conferred by the weapon (such as Repair) are lost. The attacker rolls a Combat Die. On a hit, he chooses the weapon; on a blank the defender chooses. |
| 4 hits | Drive System Damaged: The vehicle may not take Move actions for the rest of the game. |
| 5 hits | Ammunition Detonation: One weapon of the Attacker's choice is damaged and may not be fired for the rest of the game. In addition, all Soldier units with a miniature within 12" of the center of the vehicle (and any Soldier units embarked in the vehicle, see "Carry Capacity" on page 54) suffer a 5/1 Attack. |
| 6 hits | Hull Breach: There is a massive hole in the vehicle. It cannot make any Armor rolls, and all weapons with a "-" against the vehicle's type are instead treated as "1/1." |
Attacking Vehicles — Vehicles are heavily protected by their armor and are incredibly difficult to knock out even with specialized weaponry. Because of this, vehicles do not suffer suppression like Soldier units do. A vehicle is destroyed and removed as a casualty if it suffers damage equal to or higher than its remaining Damage Capacity.
When a vehicle suffers one or more damage, but is not destroyed, the attacking player rolls a number of Combat Dice on the Vehicle Damage Table equal to the amount of damage dealt to the vehicle before the Armor roll. Cover reduces the damage dealt, and therefore reduces the number of dice rolled. Add up the number of hits scored and reference the Vehicle Damage Table to see what effect the vehicle suffers. A unit may only suffer each effect once. If a vehicle is currently suffering from an effect that is generated again, the attacking player may choose any lesser effect from the table. If there are no lesser effects available, the roll is ignored.
Suppression & Retreat
Courage can't stop bullets, and even the most hardened veterans will duck for cover when death thunders down from the sky. The suppression rules replicate the effects of morale in Dust Warfare. Units may hesitate momentarily, or even pull back under heavy fire, but they rally quickly and return to the fight, especially with a Command Section present. Suppression plays an important role in Dust Warfare – it can pin down the enemy or stall an attack, so players should be aware of its effects and turn them to their advantage.
Suppression Markers — If a unit has one or more Suppression markers, it is considered to be suppressed. Suppression markers represent temporary disruption inflicted on a unit. This is most commonly caused by incoming fire, but exhaustion, confusion, and even low ammo can also suppress a unit. Suppression markers have the following effects on a unit:
- A unit with one or more Suppression markers takes one less action when it activates during the Unit phase. The unit only loses one action, regardless of the number of Suppression markers it has. This loss is cumulative with the effects of the unit having a Reaction marker.
- A unit with one or more Suppression markers cannot make reactions.
- A unit with more Suppression markers than it has remaining miniatures is retreating.
- A unit with one or more Suppression markers does not obscure other Soldier units.
- A unit with one or more Suppression markers improves its cover by one step. Units with no cover gain the benefits of Soft cover. Units in Soft cover gain the benefits of Hard cover. Units in Hard cover gain no additional benefit.
Vehicles and Suppression — Vehicles cannot gain Suppression markers. Instead, when a vehicle is attacked, it may suffer other negative effects (see "Vehicle Damage Table" above). If a situation arises in which a Suppression marker is to be placed on a Vehicle unit, it is ignored.
Removing Suppression — When a unit is activated, the controlling player rolls a Combat Die for each Suppression marker on the unit. For each hit scored, a Suppression marker is removed and has no further effect. If any Suppression markers are left, the unit takes one less action during its activation. During the End phase, each unit automatically removes one additional Suppression marker, and at the same time it removes all Reaction markers. Note that a unit may be suppressed over multiple game turns, as the effect lasts until the unit has no Suppression markers left on it.
Example: Sam's Recon Grenadiers come under heavy fire and are shot at by three enemy units. Each Attack action scores a hit, so three Suppression markers are placed on the Grenadiers during this phase. When the Grenadier unit next activates, it rolls three Combat Dice and scores one hit. The Grenadiers remove one Suppression marker. At the end of the turn, one more Suppression marker is removed, leaving one Suppression marker on the unit that will continue to restrict the actions of the Grenadiers.
Suppression Summary — Soldier units receive a single Suppression marker if they suffer any hits from the attack of an enemy unit, even if no damage is caused. Vehicles are never suppressed. Suppression markers are placed on the unit after the attack is completely resolved.
Soldiers and Suppression — Each time a Soldier unit is the target of an attack that scores one or more hits during its attack roll, place one Suppression marker on the unit after all damage is resolved. The attacking unit needs only to hit the target; damage may be completely negated. It doesn't matter if everyone survives, they are still being shot at and suppressed! Units with one or more Suppression markers have the following limitations:
- They take one less action when activated.
- They cannot make reactions.
- They retreat if they ever have more Suppression markers than miniatures remaining in the unit.
- They do not obscure other Soldier units.
- They improve their cover by one step.
Example: Mack's five-man Assault Ranger squad is shot at by Sam's Ludwig and suffers two points of damage. The Rangers are in Hard cover, and both damage points are negated by the Armor roll. The Assault Rangers still take one point of suppression, because they are coming under fire. When a unit activates, it rolls a die for each Suppression marker on it, removing one marker for each hit rolled. During the End phase, a unit removes one additional Suppression marker automatically.
Suppression and Reactions — Note: Losing actions because of both Reaction and Suppression markers is cumulative. So, if a unit has already reacted and is then suppressed, it's possible the unit might not get any actions at all when it is next activated, should it fail to remove its Suppression markers!
Example: Sam's Recon Grenadiers have a Reaction marker and a Suppression marker. When activated, the unit rolls a Combat Die to try to remove the Suppression marker but rolls a blank and fails. The Grenadiers take no actions for this activation.
Suppressed units cannot make reactions. If a unit is activated and becomes suppressed by a reaction from an enemy unit, it still completes its activation as normal. Units determine their number of actions at the beginning of the activation (after rolling to remove Suppression markers) and do not, therefore, lose an action if suppressed during their activation.
Retreat!
A Soldier unit is forced to retreat when it gains too many Suppression markers. Whenever a Soldier unit has more Suppression markers than it has miniatures left alive, it is retreating. This will restrict the actions a unit can take during the Unit phase.
When a retreating unit activates during the Unit phase, it rolls to remove Suppression markers as normal. This may reduce its suppression equal to or below the number of miniatures alive in the unit. If so, the unit immediately stops retreating and proceeds with the activation, with actions reduced by Suppression and Reaction markers as normal.
Example: Mack's Combat Ranger squad has been reduced to three miniatures and there are four Suppression markers on the unit, so it is considered to be retreating. When it activates, it must roll to remove Suppression markers as normal. If no hits are scored, it will still have more Suppression markers than miniatures and must immediately retreat.
If the unit is still retreating after attempting to clear suppression, it takes a Move action. Every miniature in the unit must move directly toward the table edge nearest to the Unit Leader by the shortest route possible. Any miniature that contacts a table edge during this movement is removed as a casualty.
The Regroup Order — Players shouldn't abandon hope for retreating and suppressed units! A clear order from headquarters can transform a unit from a leaderless rabble into a fighting team again. The best way to remove Suppression markers is with a Regroup Order issued in the Command phase. A unit that is given the order to regroup removes all of its Suppression and Reaction markers, and then may consolidate its position. A new Unit Leader can also be nominated as part of the Regroup Order, and the miniature acts as the Unit Leader for the rest of the game (or until he is killed). Generally, if a unit is carrying both Reaction and Suppression markers, a Regroup Order is probably a wise course of action.
Heavy Walkers
The largest walkers used in Dust Warfare do not have a base. These miniatures require special attention when drawing line of sight or moving the vehicle.
Range and Line of Sight — Heavy walkers treat their hull as the miniature's base. The hull includes the weapon mountings, legs, feet, and central body. It does not include the barrels of weapons or antenna that may extend out from the miniature. When drawing line of sight to a heavy walker, the line is drawn to any part of the hull. When drawing line of sight from a heavy walker, such as when it attacks, the line is drawn from the center of the figure.
Movement — Each walker has a center point shown on its diagram. When moving a heavy walker, measure from the center of the miniature, so that the center of the miniature moves no more than the movement rate and the entire hull moves into the vehicle's front arc. Miniatures that rotate do so from this same center point.
Arcs — Walkers have arcs derived from their center point and are treated like any other vehicle to determine weapon firing arcs and rear armor value. Each walker has its arcs shown on its diagram.
The Battle at the Mills
A worked example of play, illustrated across the following pages of the rulebook:
Mack and Sam are playing a medium-sized Skirmish scenario. Every game table is different, and it is vitally important for players to discuss the terrain beforehand. Mack and Sam have agreed that the mill and bridge are both Hard cover. The trees provide Soft cover to miniatures within 3" of a tree trunk. The board also has several rock ledges, which they have decided provide Hard cover to units obscured by them. The river is impassable to Soldiers, but only difficult terrain for walkers.
Mack's Pounder is in Command range of his Ranger Command Squad. This allows it to receive an order to fire during the Command phase, and then fire again when it's activated in the Unit phase. Sam's Axis Zombies make good use of the force's special "Blitzkrieg" order, and Sam uses his nearby Heinrich Light Panzer to suppress targets he wishes his Zombies to engage in melee. Sam's Ludwig dominates the firing lanes, forcing Mack to hold his Pounder back near the bridge – any advance will be met with a swift response.
With his Assault Rangers out in the open, Mack plans to use an order to get them into the safety of cover. Sam is confident that his Königsluther can deal heavy damage to Mack's Punisher, and knows that going first this turn will be a big advantage in this walker duel. Even with the 36" range of the PSG1, Sam's Sniper Grenadiers don't have a lot of target options; he considers using an order to move them into a better position, but decides to use their single shot against the Command Section currently holding the mill.
In later turns the Mill becomes a critical area of terrain. Mack moves his Assault Rangers into it in response to heavy fire. They are able to stop Sigrid and her Laser Grenadiers, but Mack loses "The Priest" and the Ranger Attack Squad in the process.
Chapter 3: Spec Ops
"The enemy must be annihilated before he reaches our main battlefield. We must stop him in the water, destroying all his equipment while it is still afloat." – Field Marshal Erwin Rommel
Many units have special rules and abilities, listed in the unit entry, that go beyond simple movement and attacking. These can come in the form of special weapons, abilities, or simply being heroic. In Dust Warfare, these are called special abilities. They are broken into three general categories: Special Abilities, Special Weapon Abilities, and Heroes.
Special Abilities
Whether due to training, veteran experiences, or science, some miniatures have special abilities beyond that of ordinary soldiers. This is especially true of the Heroes from both sides. Some special abilities are noted as "shared." If at least one miniature in the unit (including Heroes) has a shared ability, the entire unit is considered to have the ability. If all of the miniatures with a special ability in a unit are killed, it can no longer use that special ability.
Agile (Shared) — Miniatures with this ability are alert and quick to react to enemy attacks. An Agile unit moves an additional 6" when it makes a Move reaction.
Air Drop (Shared) — Some units are equipped with parachutes and are trained to use them to enter combat from above. A unit with Air Drop may choose not to deploy with the rest of the force and is instead kept off the table using the Reserved rules (see page 56). Instead of entering as normal per the Reserved rules, the unit is placed anywhere on the board more than 12" away from any enemy miniature.
All In One — This miniature knows how to lay down heavy and effective fire, blazing away until its gun barrels glow red-hot! Once per game, the unit is capable of doubling the number of Combat Dice it rolls in an Attack action. The strain on the guns and massive expenditure of ammunition means that a Suppression marker is placed on the unit when it completes its All In One action. An All In One attack stacks with the effects of a Sustained Attack, allowing the dice of an All In One attack to be rerolled. Since a miniature does not share this ability with its unit, only his own Combat Dice are doubled. However, the unit still gains a Suppression marker if at least one miniature uses the All In One ability.
Amphibious (Shared) — Most natural defenses in Europe and the Eastern Front rest upon river lines, and coastal landings are decisive. This has led to research into various amphibian technologies for both vehicles and men. Amphibious units are sufficiently waterproofed to float and propel themselves across rivers, lakes, seas, and other deep bodies of water. Amphibious miniatures treat areas of water as open terrain for movement purposes.
Artillery Strike — Miniatures with the Artillery Strike ability have the equipment necessary to accurately call in supporting fire. Other friendly units with weapons using Indirect Fire (such as Artillery weapons, see page 57) may draw line of sight from the Artillery Strike miniature instead of from themselves.
Assault (Shared) — A unit with the Assault ability is ready for rapid movement. When a unit with this ability declares a March Move action, enemy units may only react to the unit before it begins its movement, not after the unit has moved.
Badass (Shared) — A miniature with this ability keeps fighting, no matter the odds. If the unit has both Suppression and Reaction markers, it may still take a single action when activated, rather than being reduced to no actions.
Berserk (Shared) — Miniatures with the Berserk ability can lose control in combat. Overcome with berserk fury, they become exceptional, if unhinged, fighters. Once per game, when declaring targets for an Attack action, miniatures with Berserk may choose to reroll the Combat Dice of an Attack action as if they were taking a Sustained Attack action. This ability does not stack with the effects of a Sustained Attack action (the player cannot reroll the dice twice).
Black Ops — Miniatures with this ability are experienced in stealth, infiltration, and special operations. They know that speed is the key to success. During the Command phase, units with the Black Ops ability may be issued an order for free (the player does not spend an order). In addition, the unit may be issued an order regardless of its position on the battlefield.
Blutkreuz Ape — Blutkreuz Apes are spawned in the dreadful laboratories of the Blutkreuz Korps. These ferocious beasts gain the following abilities:
- Ignore all effects of Suppression markers; never place Suppression markers on a unit with the Blutkreuz Ape ability. This means that they do not gain the benefits of the "Hit the Dirt!" reaction (see page 35).
- The unit can be given Orders in the Command phase as if it were in Command range regardless of its position.
- The unit moves as if it had the Climb special ability.
A unit with the Blutkreuz Ape ability may only be joined by a Hero that has the Blutkreuz Ape ability. A Hero with the Blutkreuz Ape ability may only join units with the Blutkreuz Ape ability.
Blutkreuz Zombie Charge (Shared) — Blutkreuz Zombies are raised using the Wiederbelebungsserum. These "Untertoten" gain the following abilities:
- A unit with this ability is focused on getting into close quarters with the enemy before cutting loose. When the unit makes a March Move action, it can take a free Attack action at the end of the movement using only Range 6" or lower weaponry it possesses.
- Ignore all effects of Suppression markers; never place Suppression markers on a unit with the Blutkreuz Zombies ability. This means that they do not gain the benefits of the "Hit the Dirt!" reaction (see page 35).
- The unit reduces the effectiveness of any cover it is in, treating Hard cover as Soft cover, and Soft cover as no cover.
A unit with the Blutkreuz Zombie ability may only be joined by a Hero that has the Blutkreuz Zombie ability. A Hero with the Blutkreuz Zombie ability may only join units with the Blutkreuz Zombie ability.
Carry Capacity — A unit with the Carry Capacity ability is a transport that may have Soldier units embarked. These Soldier units are removed from the table until they disembark the vehicle. Soldier 3 and 4 miniatures require twice as much space, so a transport with a Carry Capacity 6 may only carry three Soldier 3 or 4 miniatures.
When a unit wishes to embark or disembark a transport, the unit must take an action to do so. This is not a Move action, and does not provoke reactions. To embark, the unit must have every miniature within 3" of the transport. The embarking unit is removed from the table and placed aside (until it disembarks). To disembark, the unit is placed so that every miniature is within 3" of the transport and within 6" of the Unit Leader.
Units embarked in a transport cannot take any action other than to disembark, although they may disembark and then take another action during the same activation. If a transport is destroyed, any embarked units immediately disembark and gain a Reaction marker.
Command Sections in a transport may still issue orders. The Command Section measures its Command range from the hull of the transport.
During deployment, a unit may deploy so that it is embarked in a transport. The unit (and any Hero joining the unit) is deployed at the same time as the transport, and must be embarked on the transport. If the transport has an ability that places it off the table (such as Reserved), the unit may be kept off table with it, embarked in the transport. The unit cannot disembark, or take any other action, until the transport enters play.
Climb (Shared) — Miniatures with the Climb ability are equipped with hooks, claws, lines, ladders, or other devices to enable them to climb over obstacles. Miniatures with the Climb ability may move freely over terrain (even Impassable terrain) that is up to 6" tall when they move. However, they cannot end their movement inside Impassable terrain. These units may also move 6" vertically (or two floors) when they move, rather than 3".
Command Squad — A unit with this ability is an experienced unit, trained to lead other units in battle. A force that includes one or more units with the Command Squad special ability in play may issue one additional order in the Command phase.
Rare Special Abilities — The special abilities presented here are those that are most common, or that players may see repeated on future units. Some Heroes or exceptional units may have special abilities listed in their unit profile that are not listed here. Units with a unique special rule are either truly exceptional, or really bizarre. "The Chef," for instance, is one of the Allies' most capable spies, and he has the "Spy" special ability, which is described in his unit entry.
Leader — Many Heroes have the Leader special ability. This ability allows them to lead a platoon as a Command Section, including issuing orders. Each Hero leads in a different way, so each Hero has the Leader ability described, as it pertains to him, in his unit entry.
Damage Resilient (Shared) — Miniatures that have the Damage Resilient ability are notably tough and hard to put down. Units with one or more miniatures with the Damage Resilient ability roll one additional Combat Die when making Armor rolls.
Dozer Blade — A vehicle with a Dozer Blade can move through difficult terrain without penalty. In addition, a vehicle with a Dozer Blade rolls one additional Combat Die when making Armor rolls against any attack made by units with more than half of their miniatures completely within the vehicle's Front arc.
Fast (Shared) — A unit with this ability is particularly swift and often lightly equipped. Its rapid rate of advance on the battlefield is apt to catch the enemy unawares. Once per turn a Fast unit may move an additional 6" when it takes a Move action. The unit must execute at least one Move action to gain this benefit (it would not gain free movement during a Sustained Attack). Even during a March Move action, the unit may only move an additional 6". The Fast ability cannot be used as part of a Move reaction.
Frenzy — The miniature is nearly crazed, but focused on dealing as much damage as possible. It is capable of using weapons in "highly creative" ways to deal more damage than normally possible when the weapon is wielded "traditionally." After rolling Combat Dice on an attack, roll an additional Combat Die for each hit scored. The miniature does not continue rolling more Combat Dice after this second roll. Only hits generated in the initial Attack action roll additional Combat Dice.
Heroic Stand (Shared) — A unit with this ability is marked as a true leader capable of the most incredible feats of daring. Once per game, during the Command phase, the unit may declare the use of Heroic Stand. For the rest of the game turn the unit inverts any Armor rolls it makes (blanks count as hits) and ignores the effects of any Suppression markers.
Jump — A miniature with the Jump ability is equipped with powerful servos or booster rockets that enable it to jump over impassable terrain. Miniatures with the Jump ability may move freely over any terrain (even Impassable terrain) that is up to 9" tall when they move. However, they cannot end their movement inside Impassable terrain. These units may also move 9" vertically (or three floors) when they move, rather than 3". Enemy units cannot react to Move actions made by a Soldier unit with the Jump special move ability. Normal rules on movement and facing must otherwise be followed. Vehicles that have the Jump ability are not permitted to rotate as part of the jump movement. The entire unit must have the Jump special ability to gain the benefits of Jump. If any miniature does not have the Jump special ability, the unit is treated as not having the ability.
Mechanic — A miniature with the Mechanic ability is knowledgeable about vehicles and the ways of armor. A unit with one or more mechanics may take a special Repair action to attempt field maintenance on a damaged vehicle. The Repair action requires that the target vehicle be within 6" of a Mechanic miniature in the acting unit, and that the same miniature has an unblocked line of sight to the vehicle. The player removes one effect from the Vehicle Damage Table that is affecting the target vehicle. In addition, roll a Combat Die. On a hit the target vehicle unit removes one point of damage. Destroyed vehicles cannot be repaired.
Medic — A miniature with the Medic ability is trained in the healing arts and equipped with medical supplies to save lives on the battlefield. A unit with one or more medics may take a special Heal action to attempt medical treatment on a target Soldier unit. The Heal action requires that the target unit has a miniature within 6" of a Medic miniature in the acting unit, and that the same medic has an unblocked line of sight to the same miniature in the target unit. The target unit removes one Suppression marker. In addition, roll a Combat Die. On a hit the target unit removes one point of damage from a miniature, or returns one miniature removed as a casualty to play with one damage capacity restored. Miniatures returned to a unit must be placed in formation (within 6" of the Unit Leader).
Radioman — A Radioman is equipped with a powerful two-way radio and all the right communication codes to relay orders from higher command to the troops. Once per Command phase, the Radioman may be used when his unit issues an order, allowing the order to affect a unit outside of Command range. A Radioman also has the Artillery Strike special ability (see page 53).
Reserved (Shared) — Some units are not committed to the battle during deployment. A unit with Reserved may choose not to deploy with the rest of the force and is instead kept off the table. When the unit would deploy, the controlling player declares that it will instead be placed off table, as a Reserved unit. While the unit is off the table, it must take a March Move action or take no actions at all. If it chooses a March Move action, instead of moving, each miniature is placed in base contact with any table edge, more than 12" away from enemy miniatures and within 6" of the unit's Unit Leader.
Scout Vehicle — Scout Vehicles are customarily used for reconnoitering enemy positions, moving ahead of heavier forces until contact is made. In its first activation of the game, a Scout Vehicle gains the Fast ability. Alternatively, the Scout Vehicle may be Reserved.
Self Repair — A vehicle with the Self Repair ability can make running repairs and quickly recover from damage in action. A unit with the Self Repair ability may take a special Self Repair action. This action is identical to the Repair action granted by the Mechanic special ability, but the unit may only repair itself (see "Mechanic" above).
Sniper — Snipers can grievously hinder an enemy's advance or provide pinpoint support in an attack. Assisted by telescopic sights and uncanny skill, Snipers are able to wreak havoc on an enemy force. An attack made by a unit with a Sniper miniature does not allow the target to make an Armor roll. In addition, cover cannot be used to reduce the damage caused by Attack actions made by a unit that includes a Sniper miniature.
Spotter — A Spotter is equipped with binoculars and accurate maps of the area, enabling him to direct fire with considerably enhanced accuracy. A Spotter is rarely found alone; he usually works with a Sniper. A miniature with this ability allows the unit it is with to invert its non-Close Combat Attack rolls (even the Spotter's own weapon may do this). It considers hits as blanks and blanks as hits.
Tank Head — A miniature with this ability is an expert on vehicles of all types and is sure to know many unorthodox ways to fix one in a hurry. The miniature functions as a Mechanic. In addition, when rolling to repair a vehicle with the Mechanic rule, the Tank Head inverts the roll, repairing a vehicle on a blank instead of a hit.
Tracks — Tracks were once the most common propulsion type for tanks. However, tracked tanks have been gradually overshadowed by walkers as first the Axis and then the Allies produced them in ever greater numbers. If a tracked miniature declares a Move action that begins, moves through, or ends in difficult terrain, roll a Combat Die for it. On a roll of a hit the miniature's movement is stopped when it first contacts any terrain. When a tracked miniature takes a March Move action it does not treat difficult terrain as open terrain.
Wheels — A miniature with Wheels moves well enough across open terrain, but can't traverse difficult terrain easily. If a wheeled miniature declares a Move action that begins, moves through, or ends in difficult terrain, roll a Combat Die for it. On a roll of blank the miniature's movement is stopped when it first contacts any terrain. When a wheeled miniature takes a March Move action it does not treat difficult terrain as open terrain. A miniature with Wheels cannot make a spot turn Move action.
Wiederbelebungsserum — A miniature with this ability has access to the frightening technologies of the Blutkreuz Korps. The combination of the serum and harvested "materials" from fallen soldiers allows the miniature to reconstruct himself in battle – regrowing limbs and repairing damage in moments! A miniature with Wiederbelebungsserum may take a special Regenerate action to attempt to heal damage he has taken. Roll a Combat Die for each point of Damage Capacity the miniature has lost; a point of damage is restored for each hit rolled. The miniature also functions as a Medic that is only able to heal units with the Blutkreuz Zombie special ability.
Special Weapon Abilities
Man's ingenuity in destroying his fellow man reached a horrifying new peak in the twentieth century. A new industrial age of warfare dawned with the invention of the machine gun and came of age with the howitzer shell, the air-dropped bomb, poison gas, flamethrowers and a thousand other "efficient means of killing." In the First World War the new industry sliced, pierced, and burned the bewildered youth of entire nations to death on the trench-scarred battlefields of Flanders. By the opening of the Second World War, just two decades later, new means to protect the soldiers became available. The walker rose to reclaim the role of armored knight in the days of yore. A new generation of weapons has emerged to challenge them, weapons fueled by Promethean fire stolen from beneath the Antarctic ice – weapons more terrible than anything the world had ever known before.
This section of the rules details the special traits of certain weapon types. Most common guns and rifles need no special rules, but the deadly traits of artillery, lasers, flamethrowers, and their ilk demand them. Full descriptions of the weapons deployed by the Allies can be found starting on page 83, and Axis weapons can be found starting on page 110.
Artillery Weapons — Artillery weapons lob their rounds upward in an arc so that they land on a distant target. Artillery weapons can fire in two modes, Direct Fire or Indirect Fire. Direct Fire is a standard Attack action with a range of 36" and a minimum range of 12". Indirect Fire can only be called down in conjunction with a miniature with the Artillery Strike ability. In order to fire indirectly, the unit with the Artillery weapon must take a Sustained Attack action.
When firing indirectly, an Artillery weapon does not gain the benefits of rerolling Combat Dice for a Sustained Attack; it must spend additional time aiming according to coordinates that are radioed in. For Indirect Fire, line of sight and range from the firing miniature is ignored. Line of sight is instead drawn from any miniature with the Artillery Strike special ability, and the weapon effectively has unlimited range. The attacking unit cannot attack a unit within 12" when using Indirect Fire. For more on Indirect Fire see the Artillery Strike special ability on page 53.
Burst Weapons — Burst weapons do not rely on direct attacks to deal their damage, instead exploding on contact with blasts of shrapnel, or filling the air with sprays of fire. Cover may not be used to reduce the damage of an Attack action that includes at least one Burst weapon.
Close Combat Weapons — Most soldiers carry Close Combat weapons, which include a wide variety of tools like simple bayonets, sharpened entrenching tools, or rocket fists. Close Combat weapons have a range of "C". They may be used to make an Attack action with an effective range of 3". Close Combat Attack actions have a few special properties:
- The unit may only use Close Combat weapons with other Close Combat weapons. Weapons with a range other than "C" cannot be used during the attack.
- Only one unit may be attacked during a Close Combat Attack action, the attacker may not split its attacks between multiple target units.
- Cover cannot negate the damage from an attack made with Close Combat weapons.
- The target unit cannot react with a Move reaction.
- Any Attack reaction to a Close Combat Attack action may only include Close Combat weapons.
Grenades — Grenades are small bombs designed to be lobbed onto a target either by hand or by some kind of launcher. Grenades are particularly useful for attacking enemies in cover as they can be pitched over walls, into trenches, and through windows. The most commonly used grenades are the under-barrel grenade launchers (UGLs) of the Allies, but many soldiers come equipped with knives and grenades for close combat. An Attack action that includes one or more Grenade weapons will always cause a Suppression marker to be placed on a target unit, even if they do not score a hit. In addition, like Burst weapons, cover cannot cancel damage from an attack that includes one or more Grenade weapons.
Penetrator Weapons — Either through the sheer velocity of the weapon's round, its composite alloys, or another trick of physics, a Penetrator weapon is incredibly adept at breaking through enemy armor. When attacking a target Vehicle within 24", a Penetrator weapon has additional power. Enemy vehicles halve the number of dice they use for their Armor roll (rounding up) against Attack actions that include a Penetrator weapon within 24". A Vehicle 7, for instance, would roll only four Combat Dice (seven divided by two, rounded up) when resolving its Armor roll against a Penetrator weapon within 24".
Lasers — One of the newly developed weapons of the Axis forces, lasers are able to cut through any armor in moments. After rolling Combat Dice during an Attack action using a Laser weapon, roll an additional Combat Die for each hit scored. The miniature does not continue rolling more Combat Dice after this second roll. Only hits generated in the initial Attack action roll additional Combat Dice.
Example: A unit of Laser Grenadiers shoots at a unit of Rangers. Four Laser Grenadiers are in range and get one Combat Die each against the Ranger's armor. The Grenadiers roll four Combat Dice and two hits are scored, so these two dice are rolled again to see if additional hits are scored by the Laser effect. One die rolls a hit and the other a blank, so the Ranger squad is struck by a total of three hits.
Lasers gain the normal benefits from Sustained Attack actions by rerolling any blanks and then rolling additional Combat Dice for each hit to try to score additional hits from the Laser effect. However, the reroll granted by the Sustained Attack only applies to the initial attack roll, it does not apply to additional rolls for the Laser effect.
Example: In the same situation as above, the Grenadiers are using a Sustained Attack. In the first roll, two hits are scored and two blanks are scored. In this case the two blanks are rerolled first for the Sustained Attack, and another hit is scored, for a total of 3 hits. The three hits are then rerolled because of the lasers rule, scoring an additional hit, for a total of 4 hits.
Phasers — Phaser weapons fire erratic payloads of exploding balls of energy. Armor rolls cannot be taken against an Attack action that includes a Phaser weapon. Cover may still reduce the damage from a Phaser weapon as normal.
Reload Weapons — Some weapons only get a single shot before they need to be reloaded. After the weapon is used in an Attack action, place an Out of Ammo marker beside the unit to show that its Reload weapons have been discharged. The unit may take a special Reload action in order to remove the Out of Ammo marker and prepare the weapon for firing again. The unit may not fire its Reload weapons until this marker is removed.
Spray Weapons — Flamethrowers and other spray weapons project a fiery torrent of ignited fuel that engulfs everything in its path or otherwise cover an area with an attack. Spray weapons have a special spray symbol in the weapon profile in place of a number. These weapons roll a number of Combat Dice equal to the number of miniatures in the target unit, dealing damage for each hit as normal. A weapon with a spray/2, for instance, rolls one Combat Die for each miniature in the target unit, dealing two damage for each hit.
Tank Killer Weapons — Some weapons are so destructive that they have a chance of knocking out even a heavily-armored vehicle with a single shot. Tank Killer weapons invert the Combat Dice rolled on the Vehicle Damage Table, treating blanks as hits, and hits as blanks.
Heroes
The Dust universe is populated by rare individuals with truly unique capabilities. Their abilities might be bestowed on them by experience, birthright, upbringing, training, or the effects of strange super-science, but they are very real and capable of turning the tide of battle. Some become propaganda darlings, always in the newsreels inspiring the public with their deeds. Others are enigmatic, spoken of only in rumors by soldiers returning from the front. All of these characters are known as Heroes and special rules apply to them in Dust Warfare.
Heroes as Units — Heroes function as units of a single miniature when they are operating independently. Just like normal units, when they are activated they get two actions. They can react to enemy actions in the Unit phase, and receive Orders in the Command phase. Solo Heroes are treated as their own Unit Leader in situations that call for one.
Heroes Leading Other Units — Heroes operating independently do not receive Suppression markers, for any reason. While a Hero is part of a unit, he is subject to suppression and the unit receives Suppression markers as per the normal rules. However, due to the Hero's leadership, the unit will never be forced to retreat, regardless of how many Suppression markers are on the unit. The unit's actions are reduced by Suppression markers as normal. If a Hero is the last miniature alive in a unit, he immediately removes all Suppression markers and is treated as operating independently for the rest of the game (or until a medic restores a member of his squad).
Heroes can always be issued orders in the Command phase even when outside of a Command Section's effective Command range. If the Hero has joined a unit, this ability is gained by the unit as well. During deployment, a Hero may become part of another unit. This is done when the unit deploys, and the controlling player must declare that the Hero is deploying with it, as part of that unit. Only one Hero may join any single unit, but any number of Heroes are free to join different units.
If a force has no Command Section, the troops will look to a Hero for leadership. A Hero can act as a temporary Command Section in the Command phase without expending an Order to make him one (see page 31). The Hero is treated as part of the unit for the entire game. The Hero always counts as the Unit Leader, unless he dies, in which case the normal Unit Leader automatically resumes his role (no Regroup Order is needed). If the rest of the unit is destroyed, the Hero reverts to being treated as a solo unit.
Heroic Inspiration (or Intimidation) — A unit being led by a Hero inverts the die roll when trying to remove Suppression markers when it activates, removing a Suppression marker for each blank instead of each hit.
Hero Special Abilities — A Hero may only join units that have the same Movement and armor classification as the Hero. For example, a Hero that is Soldier 3 may only join a unit that is also Soldier 3. A Hero who joins a unit counts as a member of that unit. If the Hero was chosen as a Command Section (see page 31) the unit is now treated as a Command Section.
Heroes usually have special abilities of some kind, many of which apply to units they are leading. Many Heroes have Special Abilities with the shared quality, which bestows the ability on the unit for as long as the Hero lives.
Wounding Heroes — One of the defining traits of most Heroes is their ability to survive. Heroes have an increased Damage Capacity over normal mortals, typically having a Damage Capacity of four or sometimes even more. A Hero operating independently suffers damage normally, tracking damage that has been dealt to him. When a Hero is part of a unit, the number of damage points allocated to the Hero is at the discretion of the owning player, within the limitations for assigning damage on page 44. When a Hero has suffered damage equal to or greater than the Hero's Damage Capacity, he is incapacitated and removed as a casualty as normal.
Chapter 4: Battles
"Our landings in the Cherbourg-Havre area have failed to gain a satisfactory foothold and I have withdrawn the troops. My decision to attack at this time and place was based on the best information available. The troops, the air and the Navy did all that bravery and devotion to duty could do. If any blame or fault attaches to the attempt, it is mine alone." – Dwight D. Eisenhower
Battles in Dust Warfare aren't always as simple as two enemies rushing at each other across an open field. The war fronts of 1947 are littered with battle-scarred towns, the tools of industry and combat, natural defense lines, and the wreckage of armies. Key geographical features provide critical positions to be held for tactical advantages that go beyond the conflict at hand. Often, it falls to platoons and their officers to take the fight to the enemy to secure superiority against any odds, and in far from optimal warfare conditions.
Lining two forces up and simply fighting is a fine way to have a battle. Variety is the spice of life, however, and this chapter provides two ways for players to make each battle unique. The Tournament Battles section is designed for use in a competitive environment, such as at a tournament, or between two opponents who want to test their skills against one another. Players will attempt to control the variables of the conflict at every turn, including selecting the overall mission parameters. The Campaign Battles section introduces asymmetrical battle scenarios intended for players who wish to play a more story-driven game. These scenarios can form the foundation of a long campaign, in which players tell a narrative version of their own war in the world of Dust. Heroes and platoons will create their own legend, and the spotlight of an entire war can be turned onto a single company of brave soldiers.
Game Setup
Setting up a game of Dust Warfare is broken into a series of steps to ensure that both sides have an equal chance at victory. Players should follow these steps when preparing a Dust Warfare battle:
- Determine Army Point Total — Players must agree on an Army Point total for the game. Each unit in Dust Warfare has a specific Army Point (AP) cost. These costs are added together until the agreed AP total for the game has been reached, to ensure that each player is fairly matched against the other.
- Choose Forces — Each player builds his force secretly and then the lists are revealed at the same time. Players should refer to Chapter 5: Allies and Chapter 6: Axis for information on building their forces.
- Determine Scenario — Players now determine which scenario they are playing. They can choose to either create a tournament scenario (see "Tournament Scenarios" on page 64) or choose a campaign scenario (see "Campaign Scenarios" on page 71).
- Place Terrain — Players must now set up the battlefield using the rules listed on page 67.
- Deploy Forces — With their armies chosen and the battlefield ready, players may now deploy their forces onto the battlefield as determined by the scenario.
- Play the Game — Players are now ready to begin playing Dust Warfare!
Determine Army Point Total — Players will need to agree upon an Army Point (or AP) total before the game begins. This ensures that the two forces are as equally matched as possible. In a competitive setting it is highly likely that the tournament organizer will determine the point total for each player's army in advance. Dust Warfare divides the game types into three point ranges: small, medium, and large.
- Small Force (200 AP or less) — A small force is generally an army list of one or two platoons fighting a skirmish or attempting to take vital locations. Small games are played on a board of 48" x 60".
- Medium Force (201 to 400 AP) — A medium (or Tournament Engagement) force is generally an army list of two to three platoons that are expected to achieve a wide variety of objectives. Medium games are played on a board of 48" x 72".
- Large Force (401 or more AP) — A large (or Battalion Engagement) force is generally an army list of four or more platoons attempting to achieve an objective important to the overall war effort. Large games are played on a board of 48" x 96", or possibly even larger!
Choose Forces — Each player must now construct a force to play the game. This selection is done in secret; players do not know what the enemy will be bringing, although they can probably make some good guesses. Once both players have decided on the units they will be fielding, the lists are revealed before determining the scenario. Each player has a number of Army Points to spend on his force as decided during the "Determine Army Point Total" step. The combined total of the units in a player's force cannot exceed this total.
Tournament Scenarios
Players can play Dust Warfare in either a story-driven game or a competitive game. This is not to say that a competitive game cannot also be story-driven. When playing a competitive game of Dust Warfare, such as in a tournament setting, players should use the Battle Builder to determine the scenario being played. In a more casual setting the players may simply select options they think they would enjoy, bid their Scenario Points secretly, or any other fun selection process the players agree upon.
Battle Builder — Designed for competitive play, the Battle Builder is used to create a scenario with a focus on balance and symmetry. Each player will have an opportunity to influence the game's three variables: Objective, Deployment, and Conditions. While the Battle Builder is designed for competitive play, it can also be used to create a large variety of scenarios for quick games. When using the Battle Builder, players should proceed as follows:
- Determine Army Point Total — Players agree on a point total and select platoons in secret from each other. In a tournament setting the point total will likely be decided by the tournament organizer, and players will need to have a single force list prepared in advance.
- Exchange Force Lists — Players should take a few minutes to look over each other's chosen units so that they are familiar with their opponent's capabilities.
- Build the Scenario — Use the Battle Builder to generate the unique conditions of the game.
- Set Up Terrain — Players should select enough terrain pieces to cover roughly one quarter of the table surface for use during the game. Players will reposition the terrain according to the Competitive Terrain placement rules on page 67.
- Deploy Forces — With their armies chosen and the battlefield ready, players may now deploy their forces onto the battlefield as determined by the scenario.
- Play the Game — Players are now ready to begin playing Dust Warfare!
Game Length — Tournament scenarios in Dust Warfare are played over the course of five game turns. The game ends after the fifth game turn. At the end of the game, players check to see who has completed their objective and determine the winner of the battle.
Generating the Scenario — A competent General doesn't just know how to pick the location of a battle, he also wishes to control all the variables of an engagement. Using the Battle Builder, a scenario is created by the players using Scenario Points to adjust the Objectives, Deployment, or Conditions.
Each player has two Scenario Points, and the players will take turns spending them on one of the three variables. The players randomly determine who will be spending the first point. The players each roll five Combat Dice, and whoever scores the fewest hits must spend the first point. Players reroll all ties until there is not a tie. The players then alternate spending a single point in either Objective, Deployment, or Conditions on the Battle Builder chart. Once each player has committed both of his Scenario Points, the players consult the following list to determine the engagement's Objective, Deployment, and Condition based on the total number of points committed to each category. A player must spend a point before the other player and both players must spend both of their points. No variable may have more than three Scenario Points allocated to it.
Example: Mack and Sam are ready to build the scenario for their game. Mack rolls the fewest hits and will be committing the first Scenario Point. He knows that Sam is running a full platoon of Gorillas, so he puts the first point into Deployment so that Sam will start further away. Sam sees that this will make "Break the Line" tough for him to achieve, so he puts his first point into Objective. Mack then gets to place his next point, and chooses to put it into Conditions, so that he doesn't have to worry about Limited Visibility. Sam gets to place the last point, and decides to put it into Conditions as well, shifting the scenario from "None" to "Off Target Shelling" which will hopefully work in his favor! The final scenario for the battle is now Eliminate The Enemy as an Objective, with a Force Collision Deployment, and the Off Target Shelling Condition.
Objectives — Each engagement has a unique objective that both sides are attempting to achieve. This is the game's victory condition, and will influence the way both players form their overall strategy.
- Break the Line (0 Scenario Points) — The forces are attempting to quickly cover ground, smashing through the enemy position, pushing the battle line forward as part of the larger war. Each player will score a Superiority Point for each friendly Soldier unit with at least one miniature completely within the enemy's deployment area at the end of the game. The player with the most Superiority Points wins.
- Eliminate the Enemy (1 Scenario Point) — Each detachment is attempting to halt the enemy offensive permanently, killing as many soldiers and destroying as many vehicles as possible. Each player will score a Superiority Point for each enemy unit completely destroyed. The player with the most Superiority Points wins. If a unit is led by a Hero, the Hero does not provide an additional Superiority Point if killed. He and the unit he joined are together worth one Superiority Point in total.
- Key Positions (2 Scenario Points) — Holding strategic terrain is key to victory on both sides. Each player secretly writes down two different pieces of terrain after both forces have deployed, but before the first turn. These will be the objectives they are fighting over. This declaration should be as unambiguous as possible; players may decide to number each area of terrain in advance to prevent confusion in cases where many pieces of terrain are similar. At the end of the game, these objectives are revealed, and each player earns one Superiority Point for each piece of objective terrain that he controls. If both players named the same piece of terrain as an objective, it is worth two Superiority Points. To control an area of terrain, a friendly Soldier unit must have its Unit Leader in base contact with the area of terrain. Units from either side may control the same area of terrain, but a player may only earn Superiority Points from each objective terrain once. The player with the most Superiority Points wins.
- Assassination (3 Scenario Points) — Whether it is to capture vital information or demoralize the enemy, one unit must be destroyed at all costs. Each player secretly writes down one of his own Command Section units after both forces have deployed, but before the first turn. This is the unit of secret importance that the enemy must destroy. If this unit is Reserved (or held for an Air Drop) the unit must enter play as soon as it is allowed (either on its first Activation, or at a time determined by the scenario). At the end of the game, the players reveal their hidden target. The player who destroys his enemy's nominated Command Section, while keeping his own alive, is the winner. If both are dead at the end of the game, the player who destroyed the nominated Command Section worth the most AP is the winner.
Breaking Ties — In a friendly game, it's fine if a tie happens. Both sides have fought their best, and it just so happens that neither is technically the victor. That won't always do, however, and sometimes players need to break a tie, such as during a tournament. If both players fail to win, then victory falls to whoever devastated the enemy the most! Both players total the AP value of each of the enemy units that were completely destroyed during the game. The player who destroyed the most AP value of enemy units is the winner. Players get credit for all enemy units destroyed at the end of the game, even if a battlefield condition killed them. In the unlikely event that this number is still a tie, players should simply accept that sometimes ties happen! In a tournament setting, the tournament organizer may wish to break the tie, such as with a coin flip.
Battle Builder Chart
| Scenario Points | Objective | Deployment | Condition |
|---|---|---|---|
| 0 | Break The Line | Advancing Lines | Limited Visibility |
| 1 | Eliminate The Enemy | Force Collision | None |
| 2 | Key Position | Close Engagement | Off Target Shelling |
| 3 | Assassination | Unprepared | Secured Area |
Deployment — Forces don't always begin an engagement in optimal positions. Deployment determines each force's starting position on the game table, and can greatly alter the way each player chooses to commit his units to the game. During the Deployment step units must be deployed completely within the player's deployment zone. Players alternate turns (starting with the player who chose his deployment area) deploying one unit at a time. Heroes joining a unit are deployed with that unit.
- Advancing Lines (0 Scenario Points) — Forces have broken away from their marching columns to establish a firing line. The player who spent the first Scenario Point selects a long table edge as his own at the beginning of the Deployment step. His opponent gets the opposite long table edge. Each player must deploy his units within 9" of his long table edge. This will create a bar-shaped deployment zone.
- Force Collision (1 Scenario Point) — Two forces rush to advance upon each other without time to deploy into strategic positions. The player who spent the first Scenario Point selects a table corner as his own at the beginning of the Deployment step. His opponent gets the opposite table corner. Each player must deploy his units within 24" of his corner. This will create a quarter circle-shaped deployment zone.
- Close Engagement (2 Scenario Points) — Advancing forces were caught unaware by each other's presence and must react quickly. The player who spent the first Scenario Point selects a long table edge as his own at the beginning of the Deployment step. His opponent gets the opposite long table edge. Each player must deploy his units in an area between 6" and 18" of his long table edge. This will create a bar-shaped deployment zone.
- Unprepared (3 Scenario Points) — The forces were completely unaware of each other's location and collide while en route to another battle. Marching columns must break quickly and prepare for combat. The player who spent the first Scenario Point selects a long table edge as his own at the beginning of the Deployment step. His opponent gets the opposite long table edge. No units begin on the table top; instead they move on from their own long table edge using a Move action when they are first activated. The Unit is considered to be "just barely" off the board, measuring from the board edge as if it were the edge of the miniature's base when moving onto the board. If a unit cannot move completely onto the board in a single Move action, it may instead be placed on the board in contact with the table edge.
Units are automatically activated to enter play on certain game turns based on the section of the platoon they are chosen from.
- Game Turn 1: Command Sections, 1st Sections and Solo Heroes.
- Game Turn 2: 2nd Sections, 3rd Sections and 4th Sections.
- Game Turn 3: Support Units.
Units must enter play on the game turn listed. Reserved units may enter play as described in their special rule (either through Airdrop, or entering from any board edge using Reserved) when they are activated, but they must enter play on the required turn. In the first turn (when no units are on the table) each player rolls one Combat Die as his Command Pool.
Conditions — It is a rare battle that takes place under optimal engagement parameters. Conditions represent some of the unique battlefield elements that can influence a fighting group's effectiveness.
- Limited Visibility (0 Scenario Points) — Whether it is due to low light conditions (such as at night) or high winds kicking up debris, the visibility on the battlefield is very limited. It is difficult to make out Soldier targets, but enemy Vehicles' silhouettes can still be discerned. Miniatures cannot draw line of sight to a Soldier miniature more than 16" away. Burst and Spray weapons are not affected by limited visibility.
- None (1 Scenario Point) — There are no additional battlefield conditions during this scenario.
- Off Target Shelling (2 Scenario Points) — Shelling from artillery or aircraft is off target and plasters this area randomly, rendering the battlefield a hell-storm of terrifying explosions. Soldiers are forced to take additional precautions to avoid a fiery death. Units do not remove Suppression markers during the End phase.
- Secured Area (3 Scenario Points) — The battle takes place in hastily prepared defensive positions. Each player receives 50 AP to be spent on any combination of the Camouflage, Dug-In, or Minefields Fortifications (see page 68).
Terrain
Dust Warfare benefits from having a lot of terrain on the battlefield. Soldiers in the open are vulnerable to enemy fire, so it's better to give them plenty of places to find cover if possible. Terrain is also particularly important in scenarios in which players are fighting for possession of key locations that will grant victory to the force able to secure them. Terrain can be many different features on the battlefield – buildings, hills, mangled wreckage, rocks, trees, craters, long grass, tank traps, gullies, streams – the list is endless. The only defining characteristic of terrain is that it isn't flat, open ground.
Placing Terrain — In the scenarios, the players work together in placing terrain to achieve a fairly distributed battlefield. In practice, terrain might be pre-placed by the player hosting the battle to save time or a previously used terrain setup may be available. Efforts should still be made to ensure a fairly balanced distribution of terrain for both players, except in scenarios like "Assault" in which the terrain placement is intentionally biased in favor of one side.
Competitive Terrain Placement — Another method is to have both players place terrain in such a way that they believe they will have an advantage. This represents high command on both sides attempting to choose the optimal location for combat.
The players fill a quarter of the table with terrain to distribute across the board. They choose some pieces that will block line of sight, and some that will simply provide cover for advancing forces. The players set aside an even number of terrain pieces that cover roughly a quarter of the playing surface. Each player rolls five Combat Dice and the player with the fewest hits places the first piece of terrain. The players then take turns placing a piece of terrain anywhere on the table, at least 4" from another piece of terrain. If terrain cannot be placed 4" away from another piece then the player may place it anywhere on the table as long as it is not touching another piece of terrain.
Fortifications
Field fortifications enable a force to keep a superior enemy in check and inflict disproportionate casualties on its attackers. The power of defensive positions so completely dominated the First World War that specialist techniques had to be developed to overcome them, culminating in the invention of the tank. In the Second World War, firepower and mobility have proven able to break the deadlock, but a defending force still digs in at the first opportunity. Long stretches of the front lines are marked by trenches, bunkers, and other permanent fortifications captured and recaptured endlessly by the opposing armies.
Fortifications are used in some scenarios to represent battlefield conditions that are more complicated than simple terrain. A fortification may provide additional protection, or even make attacks against miniatures. Fortifications are also placed by a player during deployment (see "Deployment" above).
Buying Fortifications — Fortifications are purchased as part of a specific scenario, and not typically as part of a force. Some platoons may purchase Company or Battalion upgrades (depending on the force) that give them access to a fortification, but for the most part an army cannot purchase fortifications unless allowed to by a scenario. The scenario will provide additional Army Points for a force to purchase fortifications. This shouldn't stop players from having fun, however, and it can be enjoyable to allow a player to purchase fortifications as part of their force to spice things up, or to simply bridge a small point gap between two players' collections.
Fortification AP Costs — The "Army Point" in Dust Warfare is used to determine the relative value of a unit or, in this section, a fortification. Army Points are spent when players choose what units they will bring to a battle; both players typically have the same number of Army Points to spend, creating relatively equal forces. This is described in detail on page 80 (Allies Forces) and page 107 (Axis Forces). When purchasing fortifications, the Battle scenario will determine how many extra Army Points each player has to spend.
Camouflage (10 AP per unit) — Armies commonly use foliage, camouflage nets, and dummy positions to conceal their whereabouts from enemy observers. Camouflage can seldom offer complete invisibility, but it is a key part of upsetting enemy calculations. Miniatures in a camouflaged unit are not placed on the table until the unit is revealed. Place a marker in an area of terrain during deployment to represent the approximate location of the unit on the tabletop. It is useful to deploy several units as camouflaged to prevent your opponent from using the process of elimination to determine the unit's identity. The players should write down in secret which unit each marker represents.
When a camouflaged unit is revealed, each of the unit's miniatures is placed anywhere within the piece of terrain containing the camouflage marker. If the unit cannot fit within the terrain, it must be placed so that the unit maintains formation and covers as much of the terrain area as possible. A camouflaged unit is revealed when it takes any action or an enemy unit moves within 12" of it. In addition, camouflaged units may be revealed if an enemy unit takes an Attack action against the camouflaged unit. When a unit attacks the camouflaged unit, the attacking unit does not roll Combat Dice as normal. The attacker rolls one Combat Die, and on a result of a hit the unit is revealed. Burst and Spray weapons automatically reveal a camouflaged unit.
Dug-In (10 AP per unit) — When soldiers dig in, they do what they can to enhance the ground they are holding for defense. This can be as simple as digging holes deep enough for men to hide in (called foxholes, slit trenches, or rifle pits by the troops) to using sand bags and logs to build more permanent emplacements. Dug-in soldiers are better protected from enemy fire and much harder to dislodge than ones in the open. They are also well-motivated to sit tight and shoot anything that comes within range.
All Soldier miniatures in a Dug-in unit count as being in Hard cover until they execute a Move action. While Dug-In, the unit can be issued Orders in the Command phase regardless of their distance from a Command Section. Once the unit moves, the benefits of being Dug-In are lost permanently.
Minefields (AP cost varies) — Mines are simply buried explosive charges triggered either remotely or by their own contact switches. Minefields are used to protect vulnerable areas of the front line, creating a veritable "devil's garden" for attackers. A minefield is designated by a marker placed face down on the tabletop. The owning player secretly notes the density of each minefield marker. Minefield markers always measure distances to the center of the marker; this is to enable players to make Minefield markers terrain pieces if they wish.
Detonation Procedure — Whenever a unit ends a Move action with a miniature within 6" of a Minefield marker, the minefield automatically attacks. The opposing player resolves the attack against the unit as a standard Attack action, rolling 1 Combat Die for each point of Density against the unit. Each hit rolled inflicts one point of damage. A minefield with a Density of 2, for instance, would be resolved as a 2/1 attack. Soldier units cannot make Armor rolls against this attack. Additionally, no unit can benefit from cover against a minefield attack. After the attack has been made, the minefield's Density is reduced by one. Place a Suppression marker on the minefield to indicate each point of Density lost in this way. A minefield reduced to 0 Density is removed.
Buying Minefields — A Minefield marker's cost depends on its Density value. For every point of Density a minefield costs 5 AP. A Density 4 minefield, therefore, would cost 20 AP. For every two Minefield markers purchased (rounding down) the player also receives a single "Dummy" marker. This is identical to other Minefield markers, but it has a Density of 0. Instead of making its first attack, it is simply revealed and removed.
Minefield Countermeasures — The early war "mine detector" has been rendered obsolete by the introduction of non-metallic mines and by the huge amounts of shrapnel and scrap metal buried on the battlefields of the Eastern and Western fronts. There are two remaining methods for disabling minefields in the heat of combat:
- Artillery — Bombardment with high explosives, or just shooting at the ground nearby, can trigger mines prematurely. If a Minefield marker is attacked, each hit scored against the Minefield reduces its Density by one. Place a Suppression marker to indicate each point of Density lost in this way. Dummy markers are simply removed automatically if at least one hit is scored.
- Vehicles — Vehicles can attempt to clear a path through mines by trusting to their armor and bulk to protect them. A vehicle that is attacked by a minefield will likely clear more of the mines' Density. After the minefield resolves its attack, roll one die for each point of the vehicle's armor; each hit further reduces the minefield's Density by 1.
Obstacles — A good defense uses man-made obstacles to limit enemy movements and channel them into prepared killing zones. In static warfare, entire mazes of obstacles spring up to enmesh the whole front. In smaller actions, a few well-placed obstacles can help split up tanks from their supporting infantry or deny access to a vital area of terrain.
Obstacles can be attacked in an effort to remove them. The armor types and Damage Capacities of different obstacles are listed below. An obstacle takes damage as if it were a vehicle, but it never generates results on the Vehicle Damage Table; it simply tracks damage until it is destroyed. Some weapons, notably demo charges and the kampfzange, are particularly effective for obstacle demolition and follow their own special rules.
Obstacles are placed in certain scenarios by a defending player according to the rules of the scenario. They can sometimes be used as a general terrain type when placed more neutrally to hinder both sides equally.
- Barricades — Barricades include sandbag walls, crates, drums, and other improvised measures. Barricades are usually placed to provide cover and rallying points for defenders. A standard section of barricade is 3" long, 1" wide, and 1" high. Barricades provide Hard cover to soldiers and Soft cover to vehicles. Barricades are difficult terrain for vehicles. Barricades can be completely destroyed as well, counting as Vehicle 3 armor with a Damage Capacity of 3. Barricade: AP 10, Hard cover. Difficult Terrain for vehicles. Vehicle 3 armor, Damage Capacity 2.
- Tank Traps — Tank Traps are heavily constructed steel or concrete tetrahedral shapes that tanks are unable to step over. A standard tank trap obstacle covers an area 3" in diameter. They provide Hard cover for Soldier miniatures. Tank Traps are impassable terrain for vehicles. A Tank Trap is extremely hard to destroy, counting as Vehicle 5 armor with a Damage Capacity of 4. Tank Trap: AP 10, Hard cover. Impassable Terrain for vehicles. Vehicle 5 armor, Damage Capacity 4.
- Barbed Wire — Barbed wire is one of a soldier's worst nightmares; an entanglement can fatally slow an advance and there's always a risk of being wounded in the midst of it, hung up in the wire where no rescue can reach them. Barbed wire provides no cover. Soldiers and Vehicles treat barbed wire as difficult terrain. A standard section of barbed wire is 12" long, 1" wide, and 1" high. Barbed wire is difficult to completely destroy, counting as Vehicle 2 armor with a Damage Capacity of 4. If one or more miniatures in a Soldier 1 or 2 unit move through a section of Barbed Wire, the unit suffers a spray/1 attack once the movement has been resolved. Barbed Wire: AP 10, No cover. Difficult Terrain for Soldiers and Vehicles. Vehicle 2 armor, Damage Capacity 4.
- Barbed Wire – Electrified — Electrified barbed wire entanglements were first conceived as an anti-cutting measure but proved most effective against tanks. Electrified barbed wire is identical to normal barbed wire, except that it resolves a double-spray/1 attack against Soldier units (even Soldier 3 or 4 units). In addition, any vehicle passing through is the target of a 1/2 attack. Electrified Barbed Wire: AP 20, No cover. Difficult Terrain for Soldiers and Vehicles. Vehicle 2 armor, Damage Capacity 4.
Trenches (AP cost varies) — The default "Dug-in" rules cover the simplest approach to digging in – that of temporary fox holes, hastily created by soldiers with the help of entrenchment tools. These trench rules represent permanent trench lines, often reinforced with stone, brick, wood, or concrete. Trenches can appear as single firing line positions dug into the ground, or an entire network of defensive points. Permanent fortifications grant the same benefits as Dug-in to any miniatures occupying them, friend or foe. Trenches are difficult terrain for vehicles.
Trench AP Costs — Trenches are purchased as a system, and have a variable AP cost depending on the number of trench sections purchased. Trench sections are 2" wide and are 12" long. For each 12" section the Trench system costs 5 AP. Firing positions are often added to Trench systems. These circular areas in the trench are 6" in diameter, and can be placed as part of a trench system at a cost of 10 AP.
Campaign Scenarios
Unlike tournament scenarios, campaign scenarios are designed for narrative game play. These scenarios are less symmetrical, and often have additional rules. These scenarios are not designed to be "fair" to both players. Often, players will alter much of the setup process when playing a campaign scenario.
Campaign scenarios differ drastically from tournament scenarios. Players select their forces knowing the scenario they wish to play. The placement of terrain and the way forces are deployed may be altered as well. Players may wish to string several battles together to create a campaign. A simple way to create a campaign is to have the winner of each game gain a small perk in determining the following scenario. Presented here are some simple rules for creating a two-player campaign.
- When creating a quick custom campaign, the players should begin by deciding how many games they wish to play. Between four and six games is usually best. The players will play this set number of games before determining a winner of the campaign.
- The players may wish to agree on a point total for the entire campaign, or simply decide the point total before each game so that the battle fits the time they have to play. Alternatively, each game can be worth an escalating value. The players could begin with 100 AP forces, and with each game they add an additional 50 AP to spend on their force. The players would not rebuild their list, instead they simply add an additional 50 AP worth of units (or save some of the AP to spend later on more expensive units).
Creating a Campaign
- The players begin by playing a standard tournament scenario. The winner of that game will be awarded one additional Scenario Point to spend when determining the next scenario (he will also automatically be the player starting to commit Scenario points). Alternatively, that player may instead choose one of the campaign scenarios to play.
- Each battle earns the victor Campaign Points. At the end of the campaign the player with the most Campaign Points wins. The first two battles are each worth one Campaign Point. The last battle is worth three Campaign Points, while all other battles are each worth two Campaign Points. The player with the fewest Campaign Points will earn one additional Campaign Point when he wins a battle.
Making Your Own Scenarios — The best scenarios are ones that weave a story tailored to your own players, forces, and terrain collection. Don't hesitate to adapt, modify, or invent scenarios suitable for raiding the U-boat pens players scratch-built out of shampoo bottles, or creating underground tunnels utilizing fantasy dungeon tiles. Variety is the spice of life and doubly so when it applies to making up scenarios.
March Battle
The force is on a flank march around an ongoing battle when an enemy force is reported nearby… and it's already deploying straight from the march into battle against them! Both sides race to form their firing lines and grab advantageous positions while more of their supporting units arrive. The advance must continue!
Setting Up the Battle — Players prepare for this battle in the normal way except for terrain placement. Players should use the "Placing Terrain" rules on page 67. However, no piece of terrain may be placed within 12" of the center of the table. This will create a large empty clearing 24" in diameter across. Terrain is deployed evenly on the board, but no piece of terrain is placed within 12" of the center of the board. The middle of the table will be a very dangerous location, but the sides will provide plenty of cover.
Fortifications — Neither player has access to additional fortifications.
Deployment — Players will deploy their forces using the "Unprepared" deployment rules on page 66. No forces begin on the table; instead the armies were on their way to another battlefield when they detected each other. They are not prepared to bring their might against the enemy and take ground quickly!
Initiative — Initiative is determined as normal during each game turn.
Game Length — The March Battle scenario will end on the fourth, fifth, or sixth turn. During the End phase of turn four, the Responding player rolls one Combat Die. If a hit is scored, the game ends. If there is a turn five, the Responding player rolls one Combat Die during the End phase. If a blank is scored, the game ends. If there is a turn six, it is the last turn of the game.
Victory Conditions — Victory in the March Battle goes to the player that best sustains his momentum and/or inflicts the most damage on the enemy. Each player earns Superiority Points equal to the AP value of all enemy units that have been completely destroyed or are retreating at the end of the scenario. In addition, each player earns Superiority Points equal to the AP value of all friendly units with every miniature completely within 24" of the opponent's table edge. The player with the most total Superiority Points is the winner.
Front Lines
Front Lines is a scenario designed for battles between medium or large forces. Both forces are occupying sections of a static front. Even though the fighting has bogged down, higher command still demands results and wants to see the enemy line pushed back.
Setting Up the Battle — Players prepare for this battle in the normal way except for terrain placement. Players should use the "Placing Terrain" rules on page 67. However, no piece of terrain may be placed more than 18" from the long table edges. This will create a large empty corridor 18" across along a line in the center of the table. No terrain was placed more than 18" from each long board edge. This creates a killing field in the center of the table… the front line is a dangerous place!
Fortifications — Each player may purchase minefields and obstacles. Each player has an additional 50 AP to spend in a medium game and 75 AP to spend in a large game. These fortifications must be placed more than 18" from the long table edges. Fortifications are deployed as if they were units during the Deployment phase. Fortifications are not worth any Superiority Points if destroyed. Each player has additional obstacles and minefields to place outside of either player's deployment areas, making the center field even more hazardous.
Deployment — Before the game, both players roll five Combat Dice. The player rolling the most hits chooses which long edge of the table to deploy along (reroll any ties). The opposing player deploys on the opposite table edge. Players alternate deploying their units starting with the player who chose his table edge. Units are deployed completely within 18" of the player's table edge.
The first unit that each player deploys must be placed completely within a single piece of terrain and is "Dug In" (see page 68). This piece of terrain serves as the player's "strongpoint." These ruins make excellent strongpoints where a tough unit can dig in and hold the line. Advancing is the only way to ensure victory! Note: It's wise to choose a strongpoint that isn't too exposed to enemy fire unless you're supremely confident.
Initiative — Initiative is determined as normal during each game turn.
Game Length — The Front Lines scenario lasts for six game turns. At the end of the scenario assess Superiority Points to determine the winner.
Victory Conditions — Victory in Front Lines goes to the player that can advance on the enemy position despite his strongpoint. Each player earns Superiority Points equal to the AP value of all friendly units that have at least one miniature completely within 12" of the opponent's table edge and are not retreating at the end of the scenario. The player with the most total Superiority Points is the winner.
Night Engagement
Two forces clash as they become entangled in a sudden night engagement. Chaos reigns as both sides attempt to claw some kind of victory out of the confused fighting.
Setting Up the Battle — Units are not always able to control the situations in which they fight a Night Engagement. Terrain should be placed using the rules for "Placing Terrain" on page 67.
Initiative — Initiative is determined as normal during each game turn.
Night Engagement Rules — Night vision aids like infrared have done much to mitigate the confusion of night fighting, but few infantry units have full access to them. Flares and gun flashes must guide most units to their targets. During a Night Engagement, the rules for Limited Visibility (see page 67) are in effect. Each player takes a marker for each of his units and shuffles them, keeping the markers face down to conceal their contents from both players. These markers will be used to deploy units pseudo-randomly during the deployment phase.
Tip: Using Dust Tactics Cards as Markers — Dust Tactics unit cards make great Night Fighting markers, as they can be used to randomly deploy units. Since every card shares the same back, they are perfect for keeping each unit hidden from the enemy... and yourself! They can be placed facedown, oriented to indicate which player owns the unit.
Game Length — The Night Engagement lasts for five game turns.
Victory — Victory in the Night Engagement scenario goes to the player that inflicts the most damage on the enemy. Each player earns Superiority Points equal to the AP value of all enemy units that have been completely destroyed or are retreating at the end of the scenario. Units that are not revealed at the end of the game are worth 50 AP to the controlling player. The player with the most total Superiority Points is the winner.
Fortifications — Neither player has access to additional fortifications.
Deployment — Both players roll five Combat Dice. The player scoring the most hits chooses whether to deploy first or not (reroll ties). Players alternate deploying their units starting with the player who rolled the most hits in the Planning phase. Units may deploy anywhere on the table. Players must declare which Heroes are joining units before any units are deployed. All units are deployed using the Camouflage rules (see page 68). A unit marker can be deployed facedown anywhere on the table as long as the center of the marker is not within 12" of the center of any unit markers.
Secret Mission
Two opposing forces probing into no-man's land clash with one another while in pursuit of their secret mission objectives. It's a game of cat and mouse as both sides attempt to frustrate their opponent while achieving their own goals.
Setting Up the Battle — Units are not always able to control the situations in which they pursue their Secret Mission. Terrain should be placed using the rules for "Placing Terrain" on page 67. Before starting the scenario, each player secretly chooses one scenario objective from the Secret Mission Objective List. This selection is done in secret, and should be written down to be revealed later.
Fortifications — Neither player has access to additional fortifications.
Deployment — After choosing a secret objective, both players roll five Combat Dice. The player rolling the most hits chooses which long edge of the table is his own (reroll any ties). The opposing player deploys on the opposite table edge. Players alternate deploying their units starting with the player who chose his table edge. Units must be deployed completely within 9" of the player's table edge. If a single miniature is too large to fit within the 9" deployment, it may be deployed touching the player's long table edge.
Initiative — Initiative is determined as normal during each game turn.
Game Length — The Secret Mission scenario lasts for five turns. At the end of the fifth turn the players both roll their Command Pool, rerolling ties. The player with the fewest hits may choose to end the game, or to play one additional Game Turn.
Victory — Victory in the Secret Mission scenario goes to the player that inflicts the most damage on the enemy. Each player earns Superiority Points equal to the AP value of all enemy units that have been completely destroyed or are retreating at the end of the scenario. Players also earn additional Superiority Points based on their own secret mission. The player with the most total Superiority Points is the winner.
Secret Mission Objective List
- Capture Prisoners — The force gains an additional 25 Superiority Points for each enemy unit forced to retreat off a table edge or retreating at the end of the game.
- Intel Gathering — The force scores 25 Superiority Points for each enemy unit with a miniature within 18" of a friendly Radioman.
- Capture Strategic Points — The force earns 50 Superiority Points if they control the center of the table. To control the center of the table the player must have at least one Soldier miniature completely within 6" of the table center, and no enemy miniature may be completely within 6" of the table center.
- Vehicle Capture — The force scores 5 Superiority Points for each destroyed enemy vehicle, and 25 Superiority Points for each enemy vehicle that is Immobilized but not destroyed.
- Breakthrough — At the end of the scenario the force gains an additional 25 Superiority Points for each friendly unit with every miniature completely within 6" of the opponent's table edge.
Assault
In this scenario, an assaulting force has been secretly mustered to take vital ground from the enemy. The defending force needs to keep the enemy at bay until reinforcements arrive to hold the line. The attackers must try to clear out the defensive strongpoints quickly enough to ready themselves for the inevitable counterattack.
Setting Up the Battle — Players do not follow the normal rules for setting up terrain. The players each roll five Combat Dice (rerolling ties), and the player with the most hits scored is the assaulting player. The other player is the defending player. The defending player divides the available pieces of terrain into two groups, as evenly as possible (if an odd number of terrain areas must be used, the attacker will probably choose the smaller one). The assaulting player then chooses one of the groups of terrain and must then deploy all of that group of terrain anywhere within 12" of the center of the table. Some may extend outside, but the center of each piece should be within 12" of the table center. The rest of the terrain is set aside; it will be deployed later by the defending player, however he wants.
Fortifications — The defending player may purchase up to 100 points of minefields, obstacles, and/or trenches after the assaulting player places his terrain.
Deployment — The defending player splits his units into two groups, representing their outpost group and reserves. If the number of units in each group is uneven, the larger group must be the reserve. The assaulting player secretly designates a piece of terrain from the terrain remaining for the defending player to place. This is his objective. The defending player chooses a long table edge as his own, and the assaulting player has the opposite table edge. The defending player then deploys the remaining terrain anywhere on the table, although he would be wise to deploy it all as close as possible to his own table edge. The defending player then deploys all of the units in his outpost group completely within 18" of his own table edge. The assaulting player then deploys his force with each Unit Leader touching his table edge. The defending player now deploys his fortifications. All of the defending player's units that are not part of the outpost line are "Reserved" as per the rules on page 56.
Initiative — Initiative is determined as normal during each game turn.
Game Length — The Assault scenario lasts for five turns. At the end of the fifth turn the players both roll their Command Pool, rerolling ties. The player with the fewest hits may choose to end the game, or to play one additional Game Turn.
Victory — The assaulting player wins by having sole possession of his chosen terrain at the end of the scenario. To claim possession, the force must have at least one Soldier miniature within the terrain and no enemy miniatures within 6" of it. If the assaulting player failed to capture his primary objective and the defending player can claim possession of it, the defending player wins outright. The chosen terrain is kept secret until the end of the game, however, so the defending player can't be certain which is the real objective! If neither player succeeded in claiming the primary objective, add up Superiority Points equal to the value of all enemy units destroyed or retreating at the end of the scenario. The player with the most Superiority Points is the winner.