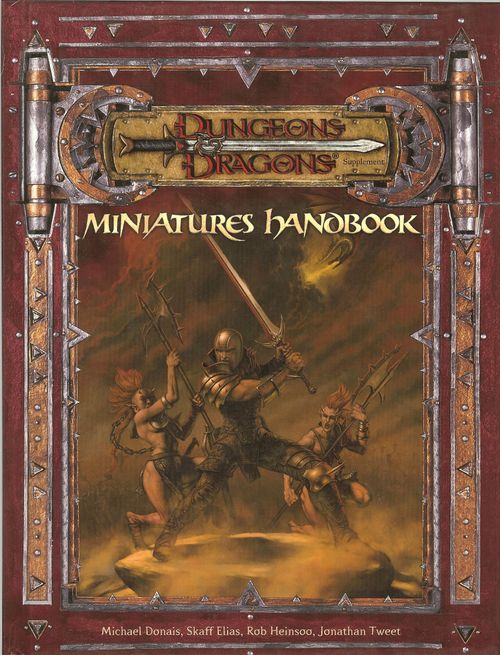
Dungeons & Dragons Miniatures Handbook
Dungeons & Dragons Miniatures Handbook Rulebook
Table of Contents
Table of Contents
Skirmish Rules
Building a Warband
In a skirmish, two or more competing warbands fight. Warbands are composed of creatures (these rules refer to both characters and monsters as "creatures").
When building a warband, first choose the faction (Lawful Good, Chaotic Good, Lawful Evil, or Chaotic Evil) the warband belongs to. Each creature's stat card gives its game statistics, including a faction symbol and abbreviation that show which faction or factions it can fight for. A creature's faction does not necessarily correspond to its alignment in the roleplaying game.
Warband Construction
After choosing a faction, start selecting creatures to fight in your warband. You can spend up to 100 points to build your warband.
- Cost: Each creature has a point cost, shown on the miniature's base and in the top right corner of its stat card.
- Creature Limit: No warband can contain more than twelve creatures.
- Factions: Your warband can contain creatures that possess your faction's symbol. Some creatures have symbols of two or four factions and can fight for any of those factions.
- Commanders: At least one of the creatures in your warband should have a Commander rating. Without a commander, your warband fights less effectively, your creatures are more likely to flee, and they don't have access to Commander Effects.
- Difficult Creatures: Be careful about creatures with the Difficult special ability. If a creature's Difficult rating is higher than your best commander's Commander rating, the creature will spend the whole skirmish out of command.
- Warband Building Abilities: Some commanders have special abilities that allow you to break the faction rules when building your warband. For example, you can have Orc creatures (including Half-Orcs) of any faction in your warband if there's a Cleric of Gruumsh in it.
Table 5-1: Sample Warband
| Creature | Cost |
|---|---|
| 1 Vadania, Half-Elf Druid (Cmdr 2) | 22 |
| 1 Jozan, Human Cleric | 4 |
| 1 Wild Elf Barbarian | 13 |
| 2 Wood Elf Skirmisher | 36 |
| 1 Crested Felldrake | 5 |
| 4 Wolf | 20 |
| Total cost | 100 |
Warband Etiquette
Construct your warband in secret, using the stat cards. Don't identify which creatures you're using yet; just keep your hand of stat cards ready.
You reveal your warband during the Terrain Initiative phase of setup, as described in the following section.
Setup
To prepare for battle, you'll need to define the contested ground.
Start with a battle grid, a map overlaid with 1-inch squares. Two published battle grids are available: in the D&D Miniatures Entry Pack (22 inches by 34 inches) and the Dungeon Master's Guide (19 inches by 28 inches). Any size will do, though, depending on how big a skirmish you want.
The edges of the battle grid are impassable walls. The only way off is through the exit squares. These are either the five squares in a corner (marked on the Entry Pack battle grid) or three squares along a side (for players not starting in a corner).
Seating
Arrange players around the battle grid according to how many are involved.
- Two Players: Players sit at opposite corners.
- Three Players: Two players choose corners at the opposite ends of the same long edge. The third player starts in the middle of the opposite long edge.
- Four Players: Each player chooses one of the four corners. To avoid crowding, put two battle grids together or use a bigger battle grid.
- Five or More Players: Players start evenly spaced around the perimeter. To avoid crowding, put two battle grids together or use a bigger battle grid.
- Contested Starting Area: If players don't agree about their seating around the battle grid, roll dice to see who chooses to sit where.
- Bigger Battle Grids: You can use a larger battle grid even for two- or three-player games, but doing so will change the balance of power. For example, creatures with ranged attacks are more powerful on larger battle grids, and creatures with low speed are less powerful.
Choose Terrain Tiles
Each player brings four terrain tiles to the skirmish. One terrain tile (but no more than one) must be an assembly tile (the words "Assembly Tile" are printed in one corner). The remaining three tiles are feature tiles; no single player can choose two of the same terrain tiles.
The appendix contains examples of various terrain; you can photocopy these and cut them out for use as terrain tiles in skirmishes.
If you are playing a two-player game, or a four-player game on a double-size battle grid, each player uses all four tiles. If you're playing a three-player game on a standard battle grid or a game with five or more players on a double-size battle grid, each player uses only three tiles: the assembly tile plus two feature tiles.
Terrain Initiative
Each player rolls 1d20 to determine who controls the terrain initiative.
Reveal your warband and add the Commander rating of your best commander to your roll. The player with the highest result places his or her assembly tile in his or her starting space; then the other players do the same one at a time, proceeding clockwise around the table.
Placing Terrain Tiles
Terrain tiles must be placed so that their squares line up with the squares of the battle grid.
The first tile you place must be your assembly tile. If you're starting in a corner, the square labeled "Exit Corner" goes in the corner square. If you're starting on an edge, lay three of the tile's "Exit" squares (including the "Exit Corner" square) on the three squares that define your starting place.
Each player places a terrain tile in order, one at a time, until everyone has run out of tiles or until there is no room for more terrain tiles on the battle grid. You can never place terrain tiles on top of other terrain tiles.
You can place a terrain tile anywhere on the battle grid as long as doing so does not create a 1-square gap between two walls. You can place a terrain tile so that its wall is adjacent to another wall only if the other wall forms the edge of the battle grid.
Two-Player Terrain Setup: Two players set up for a battle. First, each puts an assembly tile in his or her starting corner (tiles 1 and 2). Then they take turns placing tiles: 3 (Shrine), 4 (Rubble Room), 5 (Corridor), 6 (Abattoir), and 7 (Treasure Room). You can line walls up along the edges of the battle grid but not touching one another. Leave at least a 2-square gap so Large creatures can get through. Terrain tiles can touch as long as you leave a 2-square gap between walls. By the time six tiles have been placed, there are only two legal positions for the Treasure Room: where it is currently located or 2 squares to the left (up against the edge of the battle grid). The last tile (Statue Room) can't be placed because there's no legal place for it to fit on the battle grid.
Placing Creatures
After all terrain tiles are placed, the player who placed the first terrain tile sets up his warband on his assembly tile. Then the next player sets up her warband on her assembly tile, and so on.
Place each creature so that it occupies squares that are free of walls and statues. It's okay to set up on difficult terrain (indicated with a light-colored triangle).
Casual Setup Variant: If you and your friends prefer, you can just set up the map in interesting ways before each skirmish instead of using the competitive method of terrain setup described here. The setup rules presented here make sure that there are always 2 squares between walls, so that Large creatures can move through the space easily. Make sure your maps follow the same rule.
Skirmish Basics
Once you have chosen your warband and set up the battle grid, you and your opponents take turns activating the creatures in your warbands.
You win by destroying or driving off enemy creatures whose total cost equals or exceeds your warband's total cost. You also win by eliminating all the enemy creatures.
Initiative Check
To make an initiative check, roll 1d20 and add the highest Commander rating among the active commanders in your warband. Stunned, routing, confused, or helpless commanders don't improve an initiative check.
The player with the highest initiative check result chooses who goes first in the round. Play passes clockwise around the table from the player who goes first. (Sometimes you'll want to go first; other times you'll want to see what your opponents are up to before committing your forces.)
If two or more players tie for the highest initiative check result, the player with the highest Commander rating wins. If there's still a tie, the tied players reroll.
Example: Mike has the Half-Orc Fighter (Commander 3) in his warband and rolls a 4 on 1d20. His initiative check result for the round is 7 (4 + 3). Jennifer has the Elf Ranger (Commander 2) in her warband and rolls a 12. Her initiative check result is 14 (12 + 2), so she gets to decide who goes first in this round.
Rounds
A skirmish is played in rounds. Begin the round by making an initiative check. In each round, players complete phases in order. During each phase in which you act, you activate two creatures in your warband; one creature takes its turn, then the next does so. (You can activate a particular creature only once in a round.)
A round ends when all players have activated all their creatures once. (You might have to wait for your opponents if they have more creatures than you do.) Then a new round begins.
Phases
The first player completes a phase by activating two creatures in his or her warband, one at a time. (You can change the direction a creature is facing or flip over its stat card to indicate that it has been activated.)
Everybody completes phases in order until all creatures have been activated. Actions a specific creature takes during its activation are referred to as that creature's turn.
Activate Creatures
During each phase in the round, you activate two creatures, one at a time. An activated creature can perform one of the following activities.
- Move its speed and then make one attack, or make one attack and then move.
- Move up to double its speed.
- Not move and make multiple attacks, if it can do so.
- Charge.
Instead of making its attacks, a creature can cast a spell or use a special ability, such as Turn Undead.
Players each activate two creatures per phase until every creature on the battle grid has been activated once, ending the round. If you have an odd number of creatures in your warband, on your last phase you'll only have one creature to activate. If you have many more creatures than your opponents, you'll probably get to activate many creatures in a row at the end of the round.
Move and Make One Attack
A creature's speed is measured in squares. For example, a creature with a speed of 6 can move up to 6 squares in a single move. A creature that moves up to its speed can also make one attack or perform a standard action, such as casting a spell. It can move first and then attack, or attack first and then move.
Creatures that move at all on their turn can't make multiple attacks. If a moving creature has more than one attack listed on its stat card, and the attacks deal different amounts of damage, it can choose which attack to use.
Note: Creatures that are out of command when they start their turn have their speed reduced to 2.
Move up to Double Speed
A creature that doesn't do anything else can move up to double speed during its turn.
Not Move and Make Multiple Attacks
If a creature doesn't move during its turn, it can make multiple melee or ranged attacks if it has the capability (this is also called making a full attack). All its attacks must be of the same sort (melee or ranged).
A creature with multiple attacks can make one of its attacks and then move up to its speed instead of taking the rest of its attacks.
Not all creatures are capable of making more than one attack in a turn. See the rules for making attacks and dealing damage, below.
Charge
A creature can charge the nearest enemy that it can see, subject to certain conditions.
To charge, a creature moves at double speed directly toward the nearest enemy within line of sight and must finish its movement in the closest space adjacent to that enemy (including diagonally adjacent). If nothing slows it down and it moves at least 2 squares, that creature can make a single melee attack against that enemy with a +2 bonus on its attack roll.
Command
When you activate a creature, first determine whether it is under command. A creature is under command if it meets one or more of the following conditions.
- It is within 6 squares of one of the commanders in its warband.
- It has line of sight to one of the commanders in its warband.
- It is a commander.
If the creature does not meet any of these conditions, it is out of command. Creatures that are out of command are more restricted in what actions they can take.
Walls and Distance
When determining distance for command, count around walls, not through them. As with movement, do not trace diagonals across the corners of walls.
Example: The Sword of Heironeous is within 6 squares of the Dwarf Axefighter, so it can put the Dwarf Axefighter under command and bestow its Commander Effect on the Dwarf even though the wall blocks line of sight. The Sword of Heironeous can command the Dwarf Axefighter or the Man-at-Arms, but not the Halfling Veteran or the Sun Soul Initiate.
Command Range: A commander can command allies that it can see or that are within 6 squares.
Command and Movement
A creature under command can move using its listed speed, unless that creature is routing (see Morale) or helpless.
A creature that is out of command moves much slower; it is considered to have a speed of 2.
Exception: An out of command creature can rush toward the nearest enemy it can see if it can reach that enemy during its turn. It moves up to double its normal speed toward that enemy and can take any path, so long as it ends its movement adjacent to that enemy. (It can even charge if it's able to meet the conditions; see Charging, above.) Being out of command limits a creature's options: It's either really slow or it recklessly rushes into combat.
Movement While Out of Command: The Gnoll is out of command, so its speed is 2. It could move 2 squares to square A and attack the Dwarf Axefighter. It could move 4 squares along route B, to get away from the Elf Archer's ranged attack and from the Dwarf Axefighter.
The other option is to rush the nearest enemy it can see. The Man-at-Arms and the Elf Archer are each 8 squares away, so it can choose which of these two equidistant enemies it wishes to rush. It moves at up to double its normal speed, and it must end up adjacent to one of these creatures (as in route C, for example). It can even make a charge attack if its route is direct and its path is clear (as in route D).
If the Gnoll had started this turn under command, it could move in any direction, including up to 12 squares away from all these enemies.
Special Abilities that Influence Command
Some creatures are Difficult or Independent. These special abilities can influence whether a creature is under command. For details, see the glossary at the end of this chapter.
When Commanders Can't Command
Only active commanders can put other creatures under command. A commander who is routing, stunned, confused, or helpless can't put any creature under command, not even itself. Its Commander Effect also does not function under these circumstances.
Movement
During its turn, a creature can move up to its speed and attack, or attack and then move up to its speed. It can also decide not to attack and instead take a second move, moving up to double speed.
Out of Command: A creature that is out of command has its speed reduced to 2 unless it rushes the nearest enemy during that turn (see Command and Movement, above).
Diagonals: When moving or counting along a diagonal path, the first diagonal counts as 1 square, the second as 2 squares, the third as 1, and so on, as shown in the diagram on this page. If it helps, you can think of a diagonal as a distance of 1 1/2 squares. The Gnoll, with a speed of 6, can move 4 squares diagonally (counted as 6 squares of movement) and still attack the Man-at-Arms.
Other Creatures: A creature can move through a space occupied by an ally, but it can't end its move in an occupied square, and it can't charge through that square, either. A creature cannot move through a space occupied by an enemy.
Corners: A creature can't move diagonally past the corner or end of a wall. It costs a Small or Medium creature only 2 squares to move around the corner, while a Large creature such as the Minotaur has to use 3 squares of movement to do so.
Becoming Under or Out of Command
If a creature starts its turn under command, it moves as though under command for its entire turn, even if it winds up moving out of command during its turn. Conversely, a creature that starts its turn out of command moves as though out of command for its entire turn, even if it becomes under command during its turn.
However, a creature is subject to a commander's Commander Effect whenever it is within 6 squares of that commander, whether or not it started its turn under command.
Difficult Terrain
Rubble and other difficult terrain slows movement. It costs 2 squares to move into a square containing difficult terrain (3 squares if it's a diagonal move). All difficult terrain has the same game effect. Difficult terrain, or anything else that slows movement, prevents a creature from charging.
Difficult terrain, such as rubble, uneven cave floors, thick undergrowth, and so on, slows movement. Each square counts as 2 squares when moving into any difficult terrain. Each diagonal move counts as 3 squares (just as two diagonal moves normally do).
Large creatures occupy a space 2 squares wide and 2 squares long. They pay the extra costs for moving into difficult terrain if any part of their space moves into a square containing difficult terrain.
Minimum Move
A creature can always use its turn to move 1 square in any direction, even diagonally, regardless of how many squares the move counts as. (This rule doesn't allow a creature to move through impassable terrain or to move when all movement is prohibited, such as while paralyzed.)
Squeezing
If you follow the standard terrain setup rules, Large creatures will never have to squeeze into spaces smaller than their own, such as 1-square-wide corridors. When playing on terrain you've made yourself, or using alternative setup rules, you may encounter situations in which a Large creature needs to squeeze through a narrow passage.
A Large creature can squeeze through an opening that is at least half as wide as its normal space. For example, an Ogre occupies a space that is 2 squares wide, so it can squeeze into a 1-square-wide space. When a Large creature moves into a narrow space, it takes up two squares instead of four. Every square of movement, however, costs double (2 squares, or 3 squares diagonally). In addition, a creature that's squeezing into a narrow space also takes a –4 penalty on attack rolls and a –4 penalty to Armor Class.
You might even create custom terrain with corridors that are less than a full square wide. In this case, Small creatures can move through such a corridor normally, but Medium creatures have to squeeze, and Large creatures can't get through at all. You could also have doorways less than 1 square wide, which Small creatures pass through normally, Medium creatures spend 1 additional square of movement to pass through, and Large creatures can't fit through.
Squeezing Movement (example): The Minotaur can also move through its own ally (the Gnoll), but it cannot end its movement after 2 or 3 squares because it is not allowed to occupy a square containing another creature. Instead it has to continue moving until it passes the Gnoll, using all 4 squares of movement. The Minotaur could move 1 square toward the Dwarf Axefighter, but is not allowed to squeeze past or move through the Dwarf Axefighter to the open corridor beyond.
The Minotaur is out of command, so its speed is 2. The Minotaur can take a double move away from the Dwarf Fighter by squeezing into the 1-square-wide corridor. Each square it moves counts as 2 squares when squeezing, so it will have to stop after it has spent 3 squares of movement. (It only has 1 square of movement left, and squeezing another square would cost 2.)
Attacks and Damage
The rules for melee attacks and ranged attacks are similar. All creatures have a melee attack, but only some are able to make ranged attacks.
Melee Attacks
To make a melee attack, a creature must be in a square adjacent to the enemy it is attacking. This includes a diagonally adjacent square.
Target of Melee Attacks: An attacking creature can target any adjacent enemy. Some creatures have the Melee Reach special ability, which allows them to attack creatures that aren't adjacent to them. These creatures still choose targets freely; they don't have to attack the nearest enemy, as a creature making a ranged attack does.
Attack Rolls: When your creature attacks, you make an attack roll. Roll 1d20, add the creature's melee attack rating, and add any other modifiers that apply (see Table 5-2 for the list of melee attack modifiers). If the result of an attack roll equals or exceeds the enemy's Armor Class, the attack hits. The attacking creature deals its melee damage, which reduces the enemy's hit points.
Natural 20 Is a Critical Hit: If you roll a natural 20 when making an attack roll (a roll of 20 on the die, regardless of modifiers), the attack automatically hits, no matter how high the defender's AC. A critical hit deals double damage. Some creatures are immune to critical hits and do not take double damage, but a natural 20 still hits automatically.
Natural 1 Is an Automatic Miss: If you roll a natural 1 when making an attack roll (a roll of 1 on the die, regardless of modifiers), the attack automatically misses, no matter how low the defender's AC.
Extra Damage: Some attacks deal extra damage, shown by a "+" sign. For example, the Large Fire Elemental's melee attack deals "10 + 5 fire." Extra damage is not doubled on a critical hit.
Dealing Damage and Losing Hit Points
Attacks that hit deal damage which reduces an enemy's hit points. You can use counters to keep track of damage.
Reduced to Half Hit Points: You don't always have to kill enemy creatures to win. Sometimes a badly injured creature flees from battle. When a creature's hit points first drop to half its starting total or lower, it must make a morale save to keep from running away. See Morale, below, for more information.
Reduced to 0 Hit Points: When a creature's hit points drop to 0 or lower, it is destroyed and removed from the battle grid.
Special Abilities and Damage: Sometimes a special ability deals damage, or it adds to the damage dealt by an attack. See the description of the special ability in the glossary at the end of this chapter for its effects.
Attacks of Opportunity
A creature threatens the squares adjacent to it. With a few exceptions, if an enemy moves out of a square threatened by an active creature, the creature can make a single immediate melee attack against that enemy. This is called an attack of opportunity.
A creature can't make an attack of opportunity against a creature that has cover relative to it (for example, an adjacent creature around the corner of a wall), or against a creature that the attacker cannot see (such as one with the Invisible special ability).
There is no limit to the number of attacks of opportunity a creature can make in a round, but it can make only one during a given creature's turn.
A creature does not have to make an attack of opportunity when one is available.
Timing: A creature makes an attack of opportunity in response to an enemy's movement. The attack takes place when the enemy is about to leave the threatened square, but before it actually does. Pause the movement and make the attack; if the enemy survives, it continues moving. If creatures from several different warbands are able to make an attack of opportunity, resolve attacks in play order (acting player first, then clockwise around the table).
Choose Your Attack: An attack of opportunity is a single melee attack. If the attacking creature can make multiple melee attacks that deal different amounts or types of damage, it can choose which attack to use for its attack of opportunity.
Line of Sight: A creature can't make an attack of opportunity if it doesn't have line of sight to the enemy. No attacks of opportunity can be made through walls or against invisible enemies, for example.
Cover and Melee Combat: You can't make an attack of opportunity against an enemy that has cover. If an enemy creature is adjacent but around a corner or the end of a wall, that creature does not provoke attacks of opportunity when it moves away. (See below for full rules on cover.)
Attacking Allied Creatures
A creature may not make a melee attack or ranged attack against an allied creature.
This restriction doesn't prohibit the use of special abilities and spell effects that target or affect allies, only melee attacks and ranged attacks. If you happen to destroy or rout your own creature with a spell or special ability, your opponents score victory points, splitting up the creature's cost among them.
Flanking
When making a melee attack, a creature gets a +2 bonus on the attack roll if the creature being attacked is in a square threatened by an enemy on its opposite side or opposite corner.
When in doubt about whether two creatures flank a defender between them, trace an imaginary line between the two creatures' centers. If this line passes through opposite borders of the defender's space (including corners of those borders), then those creatures are flanking it.
Only a creature that threatens the defender's square can help an attacker get the bonus for flanking. Stunned or helpless creatures, for example, can't grant bonuses for flanking.
If a creature takes up more than one square, any square it occupies counts for flanking.
Your creature gains a bonus for flanking even if the creature on the opposite side of the creature being attacked isn't in your warband. In a three-player game, for example, your creature and another player's creature grant bonuses to each other when they're on opposite sides of a third player's creature.
Example (Flanking): Here, the Sword of Heironeous and the Halfling Veteran give each other flanking bonuses. The Man-at-Arms gets no bonus because there's no enemy of the Orc Berserker on the opposite side. The Sun Soul Initiate doesn't get the bonus because the Dwarf Axefighter is stunned (and therefore doesn't threaten the square that the Orc is in).
Example (Flanking, Large Creatures): The Dwarf Axefighter and Man-at-Arms A are flanking the Ogre. So are the Dwarf Axefighter and Man-at-Arms B. Man-at-Arms C, however, isn't flanking the Ogre. The line from its center to the Dwarf's center doesn't pass through opposite borders of the Ogre's space.
Cover in Melee
In melee, a defender has cover if any line from the attacker's space to the defender's space passes through a wall.
For example, the Orc Berserker has cover against the Dwarf Axefighter (and vice versa). The presence of the Gnoll, on the other hand, does not provide the Orc Berserker or the Man-at-Arms with cover from each other.
Charging
A creature might be able to charge the nearest enemy. To charge, a creature moves at double speed directly toward the nearest enemy it can see at the start of its turn. If two or more enemies are equally near, you choose which one your creature charges. If nothing slows it down and it moves at least 2 squares, that creature can make a single melee attack against that enemy with a +2 bonus on its attack roll.
The charging creature must move to the nearest space from which it can attack the nearest enemy. If this space is blocked or occupied, the creature can't charge.
If any line traced between the creature's starting space and ending space passes through a square that slows or prevents movement, or contains a creature (even an ally), the charge is not allowed.
A creature can't charge if it starts its turn in a square threatened by an enemy.
If anything prevents a creature from charging the nearest enemy, it can't charge at all.
Charging Blocked: The Dwarf Axefighter can't charge the Orc Berserker for any of three reasons.
- It can't end its movement in the closest space from which it could attack the Orc, because another creature (a Man-at-Arms) occupies that space.
- The path goes through a square containing a wall, which blocks movement.
- The path goes through a square occupied by an ally (a Man-at-Arms).
Any one of these obstacles by itself would keep the Dwarf from charging.
Charging: When charging, a creature moves up to double speed (and at least 2 squares) along the shortest path to the closest space from which it can attack the nearest enemy it can see. If any line traced between the creature's starting space and ending space passes through a square that slows or prevents movement, or contains an ally, the charge is not allowed. At the end of the charge, the creature makes one melee attack with a +2 bonus against the creature it was charging. Even though the Dwarf Axefighter's speed is 4, it can charge 5 spaces and attack the Orc Berserker. The charging Dwarf must move to the nearest square from which it could attack the Orc. In this case, the nearest square is occupied.
Full Attack
Some creatures are capable of making more than one melee attack during a single turn. This fact is noted on a creature's stat card (by the notation +12/+12, for example).
To attack more than once during its turn, a creature must make a full attack. When a creature makes a full attack, it can't move at all during that turn.
You don't have to decide on the target of all attacks ahead of time. You can wait to see the result of the first attack, then make the next attack against a different creature if you wish. You can even make one attack and then have the creature move rather than take the rest of its attacks.
Ranged Attacks
While melee attacks are always against enemies in adjacent squares, ranged attacks usually target enemies that are farther away.
Not all creatures can make ranged attacks. To make a ranged attack, a creature must have a ranged attack rating on its stat card. It must also be able to see its enemy. This is called having line of sight.
Some spells and special abilities behave like ranged attacks and follow the same rules.
A Ranged Attack's Range
Most ranged attacks can target enemies anywhere on the battle grid, provided the attacking creature has line of sight. A few creatures have ranged attacks that can only target an enemy up to 6 squares away.
A creature can't make a ranged attack if it is in a square threatened by an enemy.
Exceptions: If an attacker has cover in melee relative to an enemy creature (usually because it is around a corner or the end of a wall), it can make a ranged attack against that enemy. Usually that enemy will be the nearest enemy, so in this situation it is possible to make a ranged attack against an adjacent creature. Similarly, if an adjacent enemy creature cannot see the would-be ranged attacker (usually as a consequence of an invisibility or blindness spell), the attacker can use its ranged attack.
If you're playing on an exceptionally large battle grid, you can limit ranged attacks to a range of 24 squares.
Line of Sight
Two creatures can see each other if they can trace at least one unblocked straight line between any part of one creature's space to any part of the other creature's space. This line is unblocked if it does not intersect or even touch squares that block line of sight. (You'll usually want to try and "see" from the corners of your space because they have the best angles for full vision.)
Cover
Creatures and certain terrain features, such as walls, trees, and statues, provide cover against ranged attacks. Cover makes it harder to hit an enemy.
To determine whether a creature has cover against a ranged attack, the attacker chooses a corner of a square in its space. If any line from this corner to any part of the defender's space passes through a square or border that blocks line of sight or that provides cover, or through a square occupied by another creature, the defender has cover (+4 bonus to AC).
Cover against Ranged Attacks (example): The Orc has cover from the wall (+4 AC). The Gnoll gets cover (+4 AC) from the Ranger. (The Archer is also shooting into melee, so the Gnoll gets another +4 bonus to AC, for a total of +8 to its AC against this ranged attack.) If the Gnoll and the Elf Ranger switched places, the Gnoll would no longer have cover against the Elf Archer's shot (though it would still get the +4 bonus to AC because the Archer is shooting into melee).
Shooting around Corners
To determine whether a creature has cover from a ranged attack, the player who controls the attacking creature chooses a corner of a square in the attacking creature's space. If any line traced from this point to any part of the target's space passes through a square or border that provides cover, the target has cover. The target does not have cover if the line runs along or merely touches the edge of a wall or other square that would otherwise provide cover.
Cover grants a +4 bonus to the target's Armor Class. It's even possible to gain a cover bonus against a melee attack, if the defender is around a corner or the end of a wall. The defender has cover if any line from the attacker's space to the defender's space passes through a wall.
Since a ranged attack originates from the attacker's chosen corner, a creature can shoot around the corner of a wall at no penalty. The Orc Berserker has no cover against the Elf Archer's ranged attack because the sight lines from the Elf's chosen corner run along the border of the wall, not through it.
Example: The Elf Archer does have cover against the Orc Berserker, but the Orc could still charge 2 squares and attack the Elf. That attack would be across the corner, though, so the Elf would get a +4 bonus to AC from cover.
Cover, Large Creatures
In melee, a Large attacker can choose any square it occupies to determine if an opponent has cover against its melee attacks. Likewise, when making a melee attack against a Large creature, an attacker can pick any square the Large creature occupies to determine if it has cover.
Ranged attacks follow the standard cover rule. If any line from the attacker's chosen corner to any part of the defender's space passes through a square or border that blocks line of sight or that provides cover, or through a square occupied by another creature, the defender gets cover (+4 bonus to AC).
Example: The wall grants the Ogre cover. (The diagram also labels one other pairing of creatures "no cover either way.")
Line of Sight and Cover
A line that runs along a wall or that nicks the corner of a wall does not provide line of sight. But if some other line does provide line of sight, a line that runs along a wall or that nicks a corner also does not grant cover.
When determining line of sight or cover, don't count lines that run along walls or that nick their corners.
Targets of Ranged Attacks
A creature must make its ranged attack against the nearest enemy it can see. This frequently means taking a shot against an enemy that has cover when there is a clear target farther away. Wise players move their ranged attackers first to get clear shots against the nearest targets.
A creature with more than one ranged attack might be able to attack multiple targets. If its first attack destroys the nearest enemy or causes that creature to rout, it can make its next attack against the next nearest enemy.
Attack Modifiers
Special situations can modify a creature's attack rolls or affect a creature's Armor Class. These modifiers are summarized in the following two tables.
Table 5-2: Melee Attack Modifiers
| Situation | Modifier |
|---|---|
| Attacker charging | +2 bonus on attack roll |
| Attacker flanking (see diagrams) | +2 bonus on attack roll |
| Defender stunned | –2 penalty to AC |
| Defender unable to see attacker¹ | +2 bonus on attack roll |
| Defender paralyzed, asleep, or otherwise helpless | Automatic hit, double damage |
| Defender has cover (from a corner of a wall, usually) | +4 bonus to AC |
| Attacker unable to see defender | Defender temporarily has the Conceal 11 special ability (see glossary) |
Table 5-3: Ranged Attack Modifiers
| Situation | Modifier |
|---|---|
| Defender in melee² | +4 bonus to AC |
| Defender has cover | +4 bonus to AC |
| Defender stunned | –2 penalty to AC |
| Defender unable to see attacker¹ | +2 bonus on attack roll |
| Defender paralyzed, asleep, or otherwise helpless | +4 bonus on attack roll, normal damage |
¹ When a creature attacks another creature that does not have line of sight to it, the attacking creature gains a +2 bonus on its attack roll.
² If the target of a ranged attack threatens the square of the attacker's ally or is in a square threatened by the attacker's ally, that target creature gains a +4 bonus to AC. (This is slightly different from the rules in the roleplaying game.)
Morale
Damage, and the effects of some special abilities and spells, can force creatures to rout. When a creature routs, it breaks and runs, attempting to leave the battlefield.
To determine if a creature routs, make a morale save. Roll 1d20 and add the creature's level, then compare the result to the save's DC (morale saves always have a DC of 20). If the save result equals or exceeds the DC, the save succeeds.
Reduced to Half Hit Points
When a creature's hit points drop to half its starting total, it must succeed on a morale save to avoid routing. If a creature has already made a morale save (successful or not) for being reduced to half its hit points, it doesn't have to make another one.
Command and Morale Saves
Any creature that is under command can also add the commander's Commander rating to its morale save as a bonus. If a creature making a morale save is under the command of two or more commanders, use the highest Commander rating. A commander can use its own Commander rating or that of another commander, but not both.
A commander can always add its Commander Rating to its own morale saves, even when it's stunned or otherwise unable to command other creatures.
Failing a Morale Save
If a creature fails its morale save, it routs. It immediately moves at double speed along the quickest path toward its warband's exit corner (the square marked "Exit Corner" on the assembly tile its warband set up on).
What Routing Creatures Do
Routing creatures just run away. They can't attack, cast spells, threaten adjacent squares, make attacks of opportunity, grant a bonus for flanking, use special abilities that have to be activated or targeted, or put other creatures under command.
A routing creature's speed is not reduced for being out of command. (It runs away as fast as it can!)
A creature that starts its turn routing and does not rally (see below) spends its turn moving at double speed toward its exit corner.
Quickest Path
Move a routing creature along the most efficient path toward its exit corner. This could be a path that is not straight, as long as it gets the routing creature closer to the exit corner than other paths do. If an opponent shows you a path that gets the routing creature closer to the exit corner, it must take that path. (This might mean that it moves past adjacent enemies, which can make attacks of opportunity against it.)
If the routing creature's movement takes it off the battle grid, it is eliminated and out of the game. A Large creature occupies 4 squares; it exits when any one of those squares moves off the battle grid.
A routing creature's goal is to get off the battle grid safely. It does not have to leave by the exit corner itself. If a routing creature is on one of its warband's "Exit" squares and could move off the battle grid using its next square of movement, it does so instead of moving closer to the "Exit Corner" square.
Routing Commanders
A routing commander cannot put another creature under command or give another creature a bonus on its morale save. A commander's Commander Effect does not function while it is routing.
A routing commander can try to rally itself (see below). It adds its own Commander rating to its morale save. Alternatively, a routing commander that has line of sight to, or is within 6 squares of, another allied commander can instead use that creature's Commander rating.
Routing and Attacks of Opportunity
A routing creature is fleeing heedlessly, without enough control to avoid enemies. By taking the quickest path to the exit corner, routing creatures often move through squares adjacent to enemies and thus provoke attacks of opportunity.
A routing creature that moves out of a square threatened by an enemy provokes an attack of opportunity. However, an enemy that has just dealt damage to a creature and caused it to rout doesn't also get an attack of opportunity against that routing creature that turn.
Rallying
A creature that starts its turn routing can rally if it is under command. It attempts another morale save to rally. If the save succeeds, the creature does nothing else during that turn, but it is no longer routing. If the save fails, the creature continues to rout, spending its turn moving at double speed toward its exit corner.
Spells
Some creatures can cast spells to help their warband or to devastate an opponent's warband.
On its turn, a creature with the ability to cast spells can cast a single spell instead of attacking. In other words, it can move up to its speed and cast a spell, or cast a spell and then move. (Being able to make multiple attacks doesn't let a creature cast multiple spells.)
Unlike ranged attacks, which can only target the nearest enemy, ranged spells (and special abilities) can target either the nearest enemy or the nearest ally. With a touch-range spell, a creature can target any adjacent creature.
A creature can't cast a spell if an enemy threatens a square it occupies.
Exception: Spells that have a range of touch can be cast even when an enemy threatens the caster's square.
When a caster has cover in melee against an adjacent enemy, that enemy's presence doesn't keep it from casting spells. (That enemy is also likely to be the nearest enemy.)
Reading Spell Descriptions
Most spells (and some special abilities, such as Breath Weapons) are described on the stat cards using the following format.
Name [number of uses] (range; radius [if any]; effects and conditions; save DC [if any])
For example, the Elf Pyromancer can cast one fireball spell. The spell entry on its stat card looks like this:
fireball ❑ (sight; radius 4; 20 fire damage; DC 15)
Explanations of each component in a spell description follow.
General Spell Effects
Most spells that a creature can cast are described on that creature's stat card using keywords and shorthand terms explained below. Spells are listed by level, from lowest to highest. A few of the more complicated spells, such as summon monster, are fully explained in the glossary at the end of this chapter.
Spell Duration: Damage and Stun effects are instantaneous. Bonuses and abilities granted by spells, and other spell effects, last for the entire skirmish or until some condition described in the spell is met.
Spell Stacking: Different spells that grant bonuses to the same characteristic are usually cumulative. For example, casting magic weapon (touch; attack +1, ignore DR) and bless (your warband; attack +1) on the same creature gives that creature a cumulative +2 bonus on attack rolls.
No creature can benefit from two castings of the same spell; a second magic weapon spell cast on a creature already affected by an earlier casting of the spell does not provide any additional bonus.
Spells with the words "greater," "lesser," "legion," "mass," or "swift" as the first word in their title are simply derived from other spells. Their effects do not stack with the effects of their related varieties.
Spells that Don't Affect Specific Types of Creatures: Some spells don't work against certain creature types. If the nearest target happens to be a creature your spell can't affect, choose another spell or move the caster to a location where you can target the right creature type.
Example: The Hell Hound has the Immune Fire special ability, so the Elf Pyromancer's lesser fire orb spell has no effect on it. If the Hell Hound is the nearest enemy to the Pyromancer, the Pyromancer can't simply choose to ignore it and cast the spell on a different enemy. In order to cast lesser fire orb with any effect, the Pyromancer has to move so that some creature other than the Hell Hound is the nearest enemy.
Spells that Grant Bonuses: Bonuses that are simple additions to a creature's statistics use a "+" sign. For example, bear's endurance (touch; target living creature gains +10 hp) increases the target's hit points by 10. Similarly, magic weapon (touch; attack +1, ignore DR) increases a creature's melee attack rolls and ranged attack rolls by 1.
Gains: When a spell gives a creature a new special ability, or the effect is more complicated than a simple addition to a statistic, the description uses the word "gains." For example, blur (touch; target creature gains Conceal 6) grants its target the Conceal 6 special ability.
Hit Points: Spells that remove damage from wounded creatures or increase a creature's hit points use the expression "hp."
Spells that Deal Damage: Many spells deal damage to enemy creatures (or yours, if they're unlucky enough to be caught in the effect or you're crazy enough to blast your own creatures). Such spells use the word "damage." Damage-dealing spells may also allow the target to make a save to reduce their effect (see Save DC, below).
This section of a spell description details the spell's effect on the target and creatures in its area, if applicable. A few of the most common spell effects and keywords are discussed here. Others are explained in more detail in the glossary at the end of this chapter.
Number of Uses
Most spells can be cast a limited number of times in a skirmish. For many spellcasters, this fact is indicated by a number of check boxes (❑) after the spell's name, one box for each time the spell can be cast.
Special spellcasters, such as sorcerers and bards, instead have a selection of spells they can cast again and again, called "sorcerer spells." Their stat card instead lists the spells available and a separate series of check boxes for each level of spell they can cast. The caster can use any spell on its stat card, but each casting uses up one check box at the spell's level. When all the check boxes have been used up at a given level, the spellcaster can't cast any more spells of that level. (It's okay to use up a higher-level spell's box, if there is one available, to cast a lower-level spell.)
If a spell can be used any number of times, this fact is indicated on the stat card by the phrase "(unlimited uses)."
Range
A spell's range indicates how far from the spellcaster the effect can occur. There are eight standard ranges. In increasing order of range, they are: personal, touch, range 6, cone, line, sight, your warband, and any warband. See the glossary at the end of this chapter for complete descriptions of these types of ranges.
There are two cone templates printed in the appendix, representing two ways you can position cone effects. You can photocopy these templates and cut them out.
Radius
Some spells affect a roughly circular area on the battle grid. These spells' descriptions give the radius of their effect.
There are two radius templates printed in the appendix. You can photocopy these templates and cut them out to help position a spell's effect. Place the target of the spell inside the 4-square-wide cutout center of the template. If the target creature occupies 1 square, you can arrange the template any way you like around the target, so long as it is inside the center and the squares of the template align with those on the battle grid. If the target is a Large creature, position it completely inside the center of the template.
Radius 2: These spells affect all creatures within a 2-square radius.
Radius 4: These powerful spells affect all creatures within a 4-square radius.
Line of Sight and Area Effects
Terrain that blocks line of sight blocks area effects, including circles, cones, and lines. A square inside an area effect that has no line of sight to the origin of the effect is not affected by the spell or ability.
Save DC
Some spells allow a save to reduce or avoid their effect. This is indicated by a save DC number at the end of the spell's description. Each creature affected by a spell makes a saving throw.
Effects and Conditions
Roll 1d20 and add the affected creature's level to the result. If the result is equal to or greater than the given Difficulty Class, the save is successful. You don't add a Commander rating to the result unless it's a morale save. The save DC for a spell is usually 12 + the spell's level.
Damage-Dealing Spells: If a creature makes its save against a damage-dealing spell, the spell deals only half damage to the target, rounded down to the nearest multiple of 5. A successful save against a spell that deals 5 points of damage means the creature takes no damage instead.
Other Effects: Unless the spell description specifies otherwise, a creature avoids all effects of a spell by making a successful save against it.
Special Abilities
Some creatures have special abilities, such as Breath Weapon, that work much the way spells do. The descriptions of these abilities use a similar format and the same keywords as spell descriptions do. Like a spell, a special ability with a range can target either the nearest enemy or the nearest ally.
Many special abilities allow a creature to use them anytime during its turn, and the use doesn't prevent that creature from being able to attack during that turn. If using a special ability replaces a creature's attack, this fact is noted in the ability's description. Like attacks, special abilities that specify they replace a creature's attack can be used only on that creature's turn.
The glossary at the end of this chapter provides information about many special abilities.
Terrain
The D&D Miniatures Entry Pack contains six feature tiles that add several different types of terrain to the battle grid. (These terrain tiles are reproduced at the back of this book.) Some terrain slows or blocks movement, or provides obstacles and cover. Other terrain has special game effects.
You might be able to obtain different terrain tiles from other sources, or even make your own full-scale tactical maps that have a variety of terrain types.
Terrain Types
Described below are the terrain types that appear in the appendix of this book. You can photocopy these pages and cut them out to make terrain tiles.
Blood Rock: Any creature on blood rock scores a critical hit when its melee attack roll is a natural 19 or 20. The attack automatically hits no matter how high the defender's Armor Class, even if the defender is immune to double damage from critical hits. Ranged attacks are not affected by this terrain tile.
Blood rock is found on the Abattoir terrain tile. Other terrain tiles may have sections of blood rock rather than being entirely covered by this terrain type.
Difficult Terrain: Difficult terrain slows movement, preventing attackers from charging. Each square of difficult terrain costs 2 squares to move into (3 squares if it's a diagonal move). The terrain tiles in the appendix contain several different types of difficult terrain, each with identical game effects, including piles of ancient armor, damaged statues, and broken ground. You can identify difficult terrain by its icon (a light-colored triangle).
Difficult terrain always covers all or most of a square. Small objects in a square, such as scattered coins or bones, don't count as difficult terrain.
Difficult terrain is found on several terrain tiles.
Sacred Circle: A creature on any square containing a sacred circle gains a +2 bonus on attack rolls. (Candles have no game effect.) These attacks deal magic damage, which overcomes Damage Reduction (see the glossary at the end of this chapter for more information). Sacred circles have no effect on movement.
A sacred circle is found on the Shrine terrain tile.
Statues: Statues hinder movement. It costs 2 squares to move into a square containing a statue (or 3 squares if moving diagonally). A creature can't end its movement in a square containing a statue. Statues provide cover to creatures, which makes them harder to hit, but those creatures can still be seen.
Statues are found on various terrain tiles. Not all statues look the same; most are gray stone, but some are golden. All are mounted on a square base.
Walls: Walls and solid stone block movement and line of sight. You can't move or make a ranged attack through a wall. You also can't move diagonally past a corner or the end of a wall. Count around walls to see if commanders are close enough to influence the creatures in their warband. (See the diagram labeled Walls and Distance.)
Walls are found on every terrain tile provided in this book.
Other Terrain Types
Here are some ideas for unusual terrain. You can use these terrain types to design battle grids or terrain tiles for yourself.
Some of these terrain types have big effects on skirmishes, which aren't always obvious until the terrain is in play. Use the more unusual terrain types sparingly, at least until you have some experience with them.
Arrow Slit: An arrow slit is a narrow opening in a wall that an archer can shoot through. Use a thin wall (running along a gridline) and place the arrow slit at an intersection on the battle grid. A creature can use that intersection to aim a ranged attack (because line of sight for ranged attacks is drawn from a corner). Since the arrow slit is so small, a creature adjacent to it gets a +8 bonus to Armor Class for cover instead of +4, and a creature can't trace line of sight through the arrow slit unless it is adjacent to it. It's not possible to make a melee attack through an arrow slit.
Diagonal Wall: When creating a diagonal wall, don't draw through intersections on the battle grid. Cutting through intersections diagonally creates half-squares that don't work too well in play. Instead, draw the diagonal through points halfway along adjoining sides of the square. Squares that have a corner cut off by a diagonal wall count as normal squares. The corners that get cut off don't count as squares.
Entangling Vines: Thick vines creep across the ground, wrapping themselves around any creatures that stumble into them. The vines produce an area of difficult terrain that also has an Entangle effect (save DC 13).
Grease: A slick, magical substance covers the ground, making creatures slip and fall. The area of grease counts as difficult terrain. In addition, every time a creature enters a square or squares containing grease, it must succeed on a DC 13 save or stop moving.
Hallowed Sanctum: A hallowed sanctum usually has a statue or altar to a good deity in the center. Good creatures gain a +1 bonus on attack rolls and saves while in a hallowed sanctum.
Healing Stone: Embedded in the stone floor is a gem that heals wounds. Any wounded living creature that ends its turn on a square containing a healing stone heals 5 hit points. A healing stone has a healing capacity of 20 total hit points. Once that's used up, it can't heal any more damage until the next skirmish.
Illusory Terrain: When first viewed from a distance, this tile displays terrain that is an illusion. This illusory terrain affects line of sight normally but not line of effect. You can't see through it or target creatures through it, but the illusory terrain won't stop area effects such as burning hands. Once a creature steps onto the tile, all the terrain disappears (the creature has seen through the illusion, dispelling it for all other viewers as well).
Low Obstacle: Low walls, altars, and similar objects are collectively referred to as low obstacles. These terrain types provide cover, but they don't block line of sight. They provide cover only to creatures within 6 squares of the obstacle, and an attacker can deny the defender's bonus for cover if the attacker is closer to the obstacle than the defender is.
If a low obstacle occupies one or more squares, such as an altar, treat those squares as difficult terrain. If it's narrow, such as a low wall running along a gridline, then crossing it costs 1 additional square of movement. As with normal walls, a low wall can be thin (running along a gridline) or thick (filling up whole squares). A Large creature may end its movement on a narrow obstacle; for example, it can straddle a low, thin wall.
If a creature is completely on a low obstacle, it gains a +1 bonus on melee attack rolls for being on higher ground. If a Large creature is partially on a low obstacle (such as the narrow wall in the example above), it gains no benefit for being so positioned.
Magic Statue: In the ruins and dungeons where skirmishes take place, some statues have lingering magical auras. These statues affect movement and provide cover like normal statues, but they have additional magical effects. (For more details on magic statues, see the Magic Statues scenario, below.)
Narrow Corridor: You can create corridors that are only 1 square wide instead of 2 squares wide. Large creatures have to squeeze through such spaces, so this type of terrain makes them less powerful.
You can even make corridors that are narrower than 1 square wide. In this case, Small creatures can move through them normally, but Medium creatures have to squeeze, and Large creatures can't get through at all.
Narrow Doorway: You can make 1-square wide doorways in walls. Large creatures have to squeeze to get through them.
You can even make doorways that are narrower than 1 square. Small creatures pass through them normally, Medium creatures spend 1 additional square of movement to pass through, and Large creatures can't fit through.
Pit: A creature that ends its movement on a pit square falls into the pit and is destroyed. Slow creatures can't jump over pits. Reasonably fast creatures can jump over narrow pits but not wide ones. Truly fast creatures can jump over even wide pits.
A creature with a speed of 5 or more can move onto a pit square but then must be able to move immediately onto a square that does not contain a pit; it can't stop on the pit square itself (or else it falls into the pit and is destroyed). A creature with a speed of 10 or more can move onto two pit squares in a row during a single move but not onto a third.
Creatures that are moving over a pit can't change direction in "mid-jump." When moving off a pit square, a creature must move to a square that's farther away from the last square it was on that does not contain a pit.
Creatures without the Flight special ability that get moved onto a pit square by an effect such as Slide or Push/Pull (see the glossary at the end of this chapter) can make a DC 20 save if they are adjacent to a square in which they could legally end movement (and the square does not contain a pit). If the save succeeds, move the creature to that square. Failure destroys the creature. (Creatures with Flight that get moved onto a pit square by such an effect must move off on their next turn.)
Shadow: Some areas are perpetually shrouded in magical darkness, while walls of pure shadow yet stand in others. A square that's filled with shadow blocks line of sight but not line of effect. You can't see through it or target creatures through it, but the shadow won't stop area effects such as burning hands. A creature that's completely in an area of shadow is blinded, which slows it down in addition to other effects (see the Blinded entry in the glossary at the end of this chapter), and other creatures can't see it.
A thin wall of shadow (one running along a gridline) doesn't affect movement, but it does block line of sight.
Spike Stones: A square filled with spike stones counts as difficult terrain. In addition, every time a creature enters a square or squares containing spike stones, it takes 5 points of magic damage.
Stairs: Stairs can be freestanding (perhaps part of a ruined structure) or can connect areas of different elevation. Stairs affect movement as difficult terrain when a creature is ascending. A creature on higher ground than its enemy gains a +1 bonus on melee attack rolls.
Teleporter: Teleporters usually come in pairs. A teleporter is a square that immediately transfers a creature to another square (usually the other teleporter in the pair). A creature that moves onto one teleporter instantly appears on the other, and it can then continue moving.
A teleporter does not transport a creature if the corresponding teleporter square is occupied. A teleporter does not transport a Large creature if there's no legal way for it to occupy the corresponding teleporter's space.
Teleporters transport flying and incorporeal creatures normally. Being teleported does not provoke attacks of opportunity.
You can also use one-way teleporters or even random teleporters, which transport to any other teleporter space or even to a random spot on the battle grid. A teleporter can never transport a creature to a space it could normally not occupy.
See the Teleporter Statues scenario, below, for rules on teleporter statues.
Trap: When a creature moves onto a square containing a trap, roll 1d20. On a roll of 11 or higher, the trap is triggered, and the creature must make a DC 15 save. If the save is successful, the creature evades the trap. If the save fails, the trap deals 10 points of damage to the creature, typically from a scything blade or spring-loaded arrows. A trap has no further effect once it has been triggered.
A given creature has only one chance to trigger a trap during its turn. You can't send your Kobold Warrior back and forth over a trap trying to get the trap to go off (or at least, not more than once per turn).
Incorporeal, burrowing, and flying creatures do not trigger most traps, though a specific trap could be designed to affect burrowing or flying creatures. You can also create specialized traps that deal fire damage, produce a Poison or Paralysis effect, and so on.
Unhallowed Sanctum: An unhallowed sanctum usually has a statue or altar to an evil deity in the center. Evil creatures gain a +1 bonus on attack rolls and saves while in an unhallowed sanctum.
Wall of Force: Like a shadow wall, a wall of force is likely the remnant of some previous magical battle or defense. You can see through a wall of force but not move through one.
A wall of force is thin, running along a gridline, not thick like a 1-square-deep stone wall. It blocks line of effect for ranged attacks (including spells, breath weapons, and the like), but it does not block line of sight. A wall of force blocks movement, even for incorporeal creatures. It is a ranged warband's worst nightmare, because the nearest enemy in line of sight can be completely protected behind the wall of force.
Scenarios and Variants
The Standard scenario (detailed below) sets out the basic rules for setting up and fighting a skirmish battle. For variety, this section shows you several other types of skirmish scenarios.
Basic Scenarios: These scenarios have different victory conditions, special rules, or both.
Warband-Building Scenarios: In these scenarios, one player or all players alter their warbands in some way. In general, the process goes like this: First, the players decide how many points each warband should have (the default is 100 points), then all players design their warbands. Next, the players choose a scenario and set up the battle. Instead of choosing a scenario, you can roll randomly to determine which one you play. Since different scenarios favor different warbands, rolling randomly for scenarios can be more fair than choosing them.
Random Scenarios
If you want to play a random scenario but not one that requires altering your warband, roll on Table 5-4: Random Basic Scenarios. Each scenario is described in detail following the table.
Table 5-4: Random Basic Scenarios
| 2-Player (d%) | Multiplayer (d%) | Scenario |
|---|---|---|
| 01–05 | 01–05 | Standard. Score 100 pts. |
| 06–08 | 06–08 | Boar Hunt. Vie to bring down a dire boar. |
| 09–11 | 09–11 | Chambers of Dread. Attacks deal more damage, and attack rolls of 20 are lethal. |
| 12–16 | 12–15 | Contested Ground. Fight for control of the center. |
| 17–21 | 16–20 | Eternal Battle. Eliminated creatures return to fight again. |
| 22–24 | 21–25 | Halls of Decay. Wounded creatures lose hp. |
| 25–27 | 26–28 | Life Force. Creatures reduced to 0 or –5 hp might survive. |
| 28–30 | 29–31 | Magic Statues. Statues grant boons¹. |
| 31–33 | — | Marked for Death. Kill two enemy creatures. |
| 34–36 | 32–34 | Misty Ruins. Line of sight limited to 6 squares, scattered deployment². |
| 37–39 | — | Moral Victory. Scenario depends on factions. |
| 40–42 | 35–37 | Plunder Run. Search the treasure room for magic items. |
| 43–45 | 38–40 | Prowling Marauder. Owlbear on the loose. |
| 46–50 | 41–45 | Quick Boon. First warband to 20 pts. scores 20 pts. |
| 51–60 | 46–60 | Quick Strike. Win at 70 pts. (or one enemy creature left). |
| 61–64 | 61–64 | Random Terrain. Place terrain randomly. |
| 65–69 | 65–69 | Reconnaissance in Force. Score points for getting off the battle grid³. |
| 70–73 | 70–73 | Restless Dead. Zombies run amok. |
| 74–76 | 74–76 | Shattered Ruins. Lots of rubble. |
| 77–78 | 77–79 | Sparse Ruins. Fewer terrain tiles. |
| 79–83 | — | Split Warbands. Two warbands in four corners. |
| 84–86 | 80–84 | Statue Race. Players race to receive a boon from each statue on the battle grid. |
| 87–90 | 85–89 | Stragglers. Each player deploys 1d20 points of creatures/round. |
| 91–93 | 90–92 | Teleporter Statues. Use statues to teleport⁴. |
| 94–96 | 93–96 | Tide of Battle. Leading warband wins initiative. |
| 97–98 | 97–98 | Vampiric Catacombs. Killers get stronger. |
| 99–100 | 99–100 | Warlord's Tomb. Summon a wraith. |
¹ Reroll if there are no statues among the terrain tiles. ² Maximum of one player per two terrain tiles. ³ Reroll if number of players is other than two or four. ⁴ Reroll if there is only one statue among the terrain tiles.
Victory: Each creature is worth its cost in victory points to the player who eliminates it. Eliminating a creature can mean destroying it with your creatures or causing it to rout off the battle grid. You win when you have scored victory points equal to the cost of your own warband, or when all your opponents' creatures are eliminated.
Eliminating Your Own Creatures: Creatures may not make melee attacks or ranged attacks against allies. If you eliminate one of your own creatures (by using a spell or special ability that affects an area), or if one of your creatures is eliminated through no action of an enemy (such as a creature routing off the battle grid because of the Cowardly ability), your opponents split the victory points for that creature, rounding down. (In a two-player battle, your opponent would receive all the victory points.)
Tie-Breaker: If no creature has made an attack roll or saving throw for 5 consecutive rounds, the winner is the player with the most points from eliminating enemy creatures. If players are still tied, the winner is the player who has a creature closest to the center of the battle grid. (In the unlikely case that players are still tied, the player who controls the creature with the highest cost is the winner.)
Boar Hunt
The gods sometimes test their followers, conferring favor on those that excel. In this case, they have released three dire boars into the ruins. Warbands that draw the beasts' blood gain divine favor.
Special Rule—Divine Boar: Place a Dire Boar in the center of the battle grid after terrain has been set up. This Dire Boar (and others that follow it) has the Fearless special ability in addition to its normal abilities. At the end of each round, after all other creatures have been activated, players roll dice. The winner activates the Dire Boar at that time as if the Boar were a member of his or her warband.
At the end of a round in which the first or second divine Dire Boar has been eliminated, and after all other creatures have been activated, randomly choose a terrain tile on the battle grid. The player with the fewest victory points places a new Dire Boar on that terrain tile. Then determine which player controls during the current round by rolling dice as normal, with the winner activating the newly arrived Dire Boar immediately.
The battle ends when the third Dire Boar is eliminated.
Victory: Each player earns victory points equal to the points of damage his or her creatures dealt to all three of the Dire Boars. Damage in excess of that needed to destroy the Boar does not count. A player also earns the Dire Boar's cost in victory points (23) if his or her creature destroys the Boar. A player loses points for healing the Boar, equal to the number of hit points of healing granted.
Players score no victory points for killing enemy creatures, but they may find it expedient to do so anyway.
Variant: If players agree beforehand, use any dire animal miniature that costs at least 20 points instead of the Dire Boar.
Standard Scenario
Use these rules unless a variant scenario you are using specifies otherwise.
- Number of Players: Any.
- Warbands: The default warband size is 100 points, although warbands of 50 or 200 points also make for fun battles. In a 100-point warband, no creature can cost more than 70 points (or more than 30 points in a 50-point game, or more than 140 points in a 200-point game).
- Terrain Setup: As described under Setup at the start of this chapter.
Chambers of Dread
Whispers of death and destruction murmur through these ancient ruins. Here, even the mighty can fall to a single sword stroke.
Special Rule—Bonus Damage: All creatures deal an additional 5 points of damage on any melee or ranged attack.
Special Rule—Instant Kill: Any attack roll that is a natural 20 destroys the target outright. This is true even if the attack couldn't normally deal damage to the defender (for instance, because of Damage Reduction or an attack that is negated by the Conceal special ability).
Contested Ground
In this scenario, warbands vie to hold a strategically important piece of terrain.
Victory: The first feature tile placed on the battle grid must cover the center of the battle grid. (You can arrange this terrain tile any way you like, as long as it covers the center square and is legally placed.) Beginning on the fifth round, victory goes to the first player who both begins and ends a round as the only player whose creatures occupy that central terrain tile.
The creatures that end the round on the terrain tile don't have to be the same creatures that started the round there. You still win even if enemy creatures occupy the terrain tile during the round, so long as they're gone at the end of the round.
Eternal Battle
The whims of the gods sometimes sweep mortal warriors into battles in which they fight, die, and rise to fight again. In this scenario (casually known as "Death-o-Rama"), eliminated creatures return to play on the next round at a random location.
Special Rule—Resurrection: Creatures eliminated from the battle score points for the player who eliminated them, then return to the battle grid at the start of the next round.
Before a new round begins, each creature eliminated in the previous round returns to play. If more than one player has creatures that are due to be resurrected at the start of a round, the player with the highest victory point total resurrects creatures first, followed by the player with the second highest total, and so on. If there is a tie for victory points, randomly determine who resurrects creatures first.
To resurrect a creature, randomly pick a terrain tile. Then place your creature on that terrain tile. You may be able to place your creature adjacent to one or more enemies. If the chosen terrain tile does not have enough room for your creature, randomly pick a different tile.
Routing: Routing creatures are resurrected at the start of the round after they exit the battle grid.
Special Abilities and Spells: Resurrected creatures reenter play with all the special abilities, spells, and statistics on their stat cards (or otherwise possessed, in the case of a campaign). They lose any benefits previously granted by spells (except for those with a range of "your warband" or "any warband").
Victory: Victory goes to the first player to eliminate 150 points of enemy creatures. If your warbands aren't built with 100 points, victory goes to the player who eliminates enemy creatures worth 150% of his or her own warband's cost.
Halls of Decay
In these malignant ruins, life and hope slip away. Even golems and undead are subject to the pull of decay.
Special Rule—Decay: At the start of each round, roll 1d20 for each wounded creature. On a roll of 11 or higher, the creature immediately takes 5 points of damage. Victory points for creatures eliminated by this damage are split up among opponents, as usual.
Life Force
Just as some ruins are permeated by malignant energy, others sustain and protect those within.
Special Rule—Resilience: When a creature is reduced to 0 or –5 hit points, roll 1d20. On a roll of 11 or higher, the creature instead survives and now has 5 hit points. Creatures reduced to –10 hit points or below are destroyed, as usual.
Magic Statues
The statues in the dungeon grant magical gifts to creatures that invoke their powers.
Special Rule—Statue Gifts: Each statue on the battle grid can bestow a magical gift on a single creature from each competing warband. No warband has access to a statue's power until it has eliminated at least one enemy creature.
Once your warband has access to a statue's power, any creature that does not have the Difficult 20 ability can attempt to invoke the power of a statue that has not yet given your warband a gift. To receive a statue's gift, a creature must be adjacent to that statue, take a standard action (replacing its attacks) to invoke the statue's powers, and succeed on a DC 13 save. (A creature that ends its turn adjacent to more than one magic statue chooses only one.)
Failure has no effect unless you roll a natural 1, in which case the creature takes 5 points of damage. If the save succeeds, roll on the table below for a random gift. Any bonus bestowed affects that creature for the rest of the skirmish.
Your warband can receive only one gift from any given statue. However, the same statue can still grant a gift to each opposing warband. Different warbands are likely to get different gifts from the same statue.
Table: Magic Statue Gifts
| 1d20 | Statue Effect |
|---|---|
| 1 | Heal all damage (reroll if not wounded) |
| 2–3 | Speed +2 |
| 4–5 | AC +2 |
| 6–15 | Attack +2 |
| 16–18 | Melee and ranged damage +5 |
| 19–20 | Faction-specific gift (see below) |
Faction-Specific Gifts: On this result, the creature gets a powerful gift that depends on the faction of its warband, as follows.
- LG: AC +4.
- CG: Speed +4; Tactics. Activating this creature doesn't count against your limit of two creatures per phase. Thus, you can activate another creature during the turn you receive this gift, if you wish.
- LE: Attack +4.
- CE: Melee and ranged damage +10.
Marked for Death
This scenario hinges on eliminating key members of the opposition.
Victory: Before starting play, both players line up their warbands where they can be seen. Both of you secretly write down the name of a creature in your warband and one in your opponent's warband. Then you simultaneously reveal the names of the creatures you have chosen.
To win, you must eliminate both the enemy creature you chose and the enemy creature your opponent chose. If you both chose the same creature, you only have to eliminate that creature to win.
If your warband has multiple miniatures of a creature that's "marked for death," you must indicate which one of them you chose. If you and your opponent both name the same kind of creature, only the one you specified is marked for death. For example, if you have two Half-Orc Assassins in your warband, and you and your opponent each choose "Half-Orc Assassin," then you have to specify which one of them is marked, and the one to be eliminated is known to both of you throughout the skirmish.
Misty Ruins
Preternatural fog blankets the dungeon. Enemies stumble halfway through each other's patrols before recognizing the danger.
Setup: Warbands do not set up as usual on their assembly tiles but instead in smaller groups scattered on random terrain tiles. In a two-player battle, each player places one-third of his or her warband at a time in 3 rounds of deployment (round fractions down until the final round). In a three- or four-player battle, each places one-half of his or her warband at a time in 2 rounds of deployment.
During a player's deployment round, he or she selects the appropriate number of creatures and then randomly selects a terrain tile that does not already contain miniatures. The creatures are placed on that terrain tile.
Routing creatures still must move toward the exit corner of their warband's assembly tile.
Special Rule—Fog: Line of sight is limited to 6 squares. (Creatures with Blindsight can see normally.) Line of effect, however, extends through the fog normally. For example, a wizard can't target a creature 7 squares away with a lightning bolt, but the spell's effect still extends to the full 12 squares.
Special Rule—Scouts and Wandering Monsters: Ignore these special abilities during deployment.
Moral Victory
The way warbands fight each other depends on their alignments.
Special Rule—Concession (Good against Good): When two good warbands fight, combatants concede when they are injured rather than fighting to the death. Any creature that drops to half its hit points or lower retreats (retreating works exactly like routing, except that creatures with the Fearless ability retreat too). Retreating enemies do not provoke attacks of opportunity, and retreating creatures can't rally—they just hustle out of the way and off the battle grid. Creatures with the Difficult 20 ability, however, can't retreat. They can still rout normally, though, and commanders can rally them.
Victory: Use the rules for the Standard scenario, with the following modifications depending on the alignments of the competing warbands.
- Good against Good: Each player scores full victory points for enemy creatures that his or her creatures force to retreat or rout off the battle grid. However, destroyed enemies are worth only half their cost in victory points. The exception is creatures with the Difficult 20 special ability. Since they don't retreat, there's no disgrace in killing them, and they are worth full victory points.
- Good against Evil: Use the rules for the Standard scenario, with no adjustment to point value. Both sides are out for blood.
- Evil against Evil: You win by eliminating all enemy commanders. The commanders of each warband are just as happy to conquer and enslave the enemy warband as to massacre it. If two or more warbands' commanders are eliminated simultaneously, determine the winner as in the Standard scenario.
Plunder Run
Loot the treasure room in the center of the dungeon before your enemies find all the good stuff.
Setup: Each player starts with one fewer feature tile than he or she would ordinarily have.
Before rolling for terrain initiative, set up two Treasure Room tiles in the center of the battle grid. Place them adjacent to each other in the exact center of the board, lengthwise, so that the doorway on the long side of each tile matches the long-side doorway on the other tile.
Special Rule—Treasure: Any Humanoid or Monstrous Humanoid creature, or any commander, on a Treasure Room tile can search for a treasure by forgoing its attacks during its turn. Roll 1d20: On an unmodified roll of 16 or higher, the creature has found a magic item. Roll on Table 5–6: Random Magic Items to determine the treasure. That creature possesses the magic item for the rest of the battle but cannot give it to other members of its warband. (In campaigns, magic items gained from the Treasure Room go away at the end of the battle.)
Prowling Marauder
A rampaging owlbear is a boon to the lucky commander and ruin to others.
Special Rule—Owlbear Marauder: Place an Owlbear in the center of the battle grid after terrain has been set up. At the end of each round, after all other creatures have been activated, players roll dice. The winner activates the Owlbear at that time as if the Owlbear were a member of his or her warband. If the Owlbear routs, it heads for a random exit corner.
Victory: Use the rules for the Standard scenario. Points for creatures eliminated by the Owlbear are split up among opponents, as normal. Eliminating the Owlbear scores no points.
Variants: If players agree beforehand, use any high-cost Animal or Magical Beast with Difficult 20 instead of an Owlbear. For more fun, especially in multiplayer battles, use two or more marauders. The player who rolls highest in the first set of rolls picks one marauding creature and activates it before players roll dice for the next, and so on.
Quick Boon
This scenario rewards the warband that strikes quickly.
Victory: Use the rules for the Standard scenario, but the first player to score 20 victory points immediately gets 20 additional victory points.
Quick Strike
This scenario rewards early success, benefiting players who fight hard instead of hanging back.
Victory: If you are playing with 100-point warbands, you win by eliminating enemy creatures whose total cost is 70 points or more.
If you aren't playing with 100-point warbands, you win when you have eliminated enemies whose total cost is equal to 70% of your warband's point cost. For example, if your warband is worth 80 points and your opponent's is worth 110, you win if you eliminate 56 points' worth of creatures, while your opponent has to eliminate 77 points' worth of creatures.
Regardless of the total cost of the warbands in this scenario, you win immediately if each of your opponents has no more than one creature left on the battlefield.