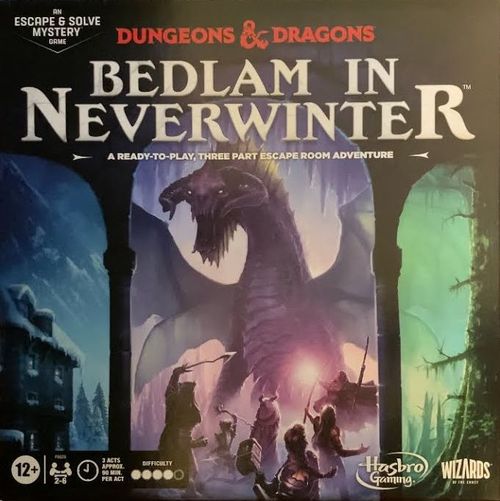
Dungeons & Dragons: Bedlam in Neverwinter
Dungeons & Dragons: Bedlam in Neverwinter Rulebook
Table of Contents
Table of Contents
Box Contents
6 plastic figures · 11 gameboards · 4 secret envelopes · 1 d20 · 1 d6 · 298 cards · 44 cardboard tokens · 1 mysterious object
Quick Start!
- Now that your hero is assembled and you've shared a bit about them, remember:
- Your Race and Class cards each list an ability: Constitution (CON), Charisma (CHA), Wisdom (WIS), Dexterity (DEX), Intelligence (INT), Strength (STR). You'll use these for Ability Checks in-game and while battling. You'll be prompted during play to read more about those when needed.
- The line of hearts along the bottom are your hit points (HP). Move a health token up and down the row to add or subtract HP as needed.
- You begin the game with your Starting Weapon and may collect more as you play. You may NOT trade away your Starting Weapon.
- Take out the board labelled ACT 1 BOARD A and lay it on the table. Place your figures anywhere on the board. Next, take out the ACT 1 deck from the first slot on the left side of the box and place it next to the board. Take out the Loot deck, shuffle it, and place it within reach of everyone.
DO NOT LOOK THROUGH THE CARDS.
-
The youngest player goes first. Move your figure to any numbered location on the board, then draw the card from the deck that has the same number on it. The numbers represent different points of interest in the room and the cards you draw will tell you something about what you find there.
-
READ YOUR CARDS TO THE PARTY.
- If it's a narrative card, it will give you information and directions to follow. There may be prompts on the bottom telling you what action to take next, don't miss them! When you're done with these cards, discard them to the lid of the box.
- If it's a puzzle card, it will be labelled with a puzzle piece icon in the bottom right corner and will tell you how many puzzle pieces you need to solve that puzzle along the bottom edge. If you don't have all the pieces to solve a puzzle, explore more numbered locations on the board and leave the unfinished puzzle face up on the table until you find more pieces.
THE ANSWER TO EVERY PUZZLE IN THE GAME WILL BE A NUMBER.
- When you think you've solved and gotten that number, draw the matching card from the deck. If the card you pulled says SOLVED, you're correct! If the number you're looking for doesn't have a corresponding card in the deck, or if the card you pulled doesn't say SOLVED on it, you're incorrect, try again!
-
When the first player has completed their turn, play moves to the left and the next player should move their pawn to an unexplored location and draw the card that has the matching number.
-
The goal of the first board is to locate the secret entrance you were told about.
STOP. PUT THE RULES AWAY AND BEGIN PLAY.
You will be prompted to return to the rules when needed. Good luck.
Lets Play!
The youngest player goes first, then play moves to the left.
On Your Turn
The only way to find the missing people and escape the obstacles in each Act is to explore rooms, reveal puzzles, and gather clues. To do this:
- Move your figure to an unexplored number on the gameboard. Take the card from the deck that has a matching number.
- Read your card aloud to the group and, if there are any actions listed on it, do what it says. If it's a puzzle, lay it on the table for all to see until you find all the pieces needed to solve it. For more information about the different types of cards you'll encounter, see Cards.
- If there are any available puzzles on the board, you may attempt to solve them.
- When there's nothing left to do, play passes to the player on your left.
Cards
Throughout the game, you'll encounter several different kinds of cards.
Narrative Cards
Most of the cards will be narrative cards that tell you pieces of the story and direct your actions while you play. Read these aloud and do what they say. If it has a discard icon, discard it to the lid of the box when you're done.
Puzzle Cards
Puzzles often consist of multiple cards that can be anything from word play problems to visual riddles that you have to piece together. Every puzzle card will have a puzzle piece graphic in the bottom right corner with the letter assigned to that puzzle, and a note about how many pieces are needed to solve it. These cards will unlock new items, locations, and clues and are the key to advancing through the game. Keep puzzles face up where everyone can see them and do not discard them until another card instructs you to.
REMEMBER ALL THE SOLUTIONS FOR PUZZLES ARE NUMBERS.
Puzzle Cards, Continued
When you think you've discovered the right number to solve the puzzle, look for that card in the deck.
- If you don't find the card in the deck, that means you were incorrect and you'll have to try again.
- If you do find it, you should see SOLVED at the top.
- If you DO NOT see SOLVED at the top, you've pulled the wrong card; put it back in the deck and attempt to solve again.
HINTS: If you get stuck on a puzzle and cannot move on, see Hints at the back of this booklet and find the hint that corresponds with the puzzle piece letter/number you're stuck on. The solutions can be found on the back of this booklet.
Clue Cards
Clue cards are kept for the entirety of each Act. These are not used to solve puzzles, but will be used to solve the final mystery at the end of each Act. Keep them face up on the table where everyone can see them.
Loot Cards
During your adventure, you may find Loot by exploring or by defeating an enemy in combat. Whenever you're instructed to take a Loot card, draw from the Loot deck and place the card beside your character. These items can be used at any time during the game. To use them, declare it to the group then perform the action listed at the bottom. When you're done, discard it.
Loot can be freely traded between players, except during combat. Remember this is a cooperative game!
Ability Checks
In this game, you will encounter cards showing an "Ability Check" that requires you to roll the d20. These represent your hero trying to overcome a challenge or obstacle. Sometimes you'll do this by yourself (SOLO CHECK), and sometimes you'll do it as a group (GROUP CHECK).
Ability Checks, Continued
ABILITY TYPE: If the ability on your Race or Class card matches the ability listed on the check, then you may roll the d6 bonus die in addition to the d20.
d6 BONUS DIE
Your Race and Class card each show an ability. Ability Check cards and Enemy cards also show abilities. If one of your abilities matches an ability listed on the Ability Check card or Enemy card (see Combat for more info) you've encountered, you get to roll the d6 bonus die in addition to the d20. If you have two abilities that match the Ability Check or Enemy card, you may roll the bonus die twice (this includes when your Race and Class share the same ability). Add all your rolls together for your final result.
DIFFICULTY: The number shown in the d20 icon represents what you must roll to pass the check. If you don't roll that number or higher, then you fail.
OUTCOME: After rolling the dice and discovering whether you passed or failed the check, read the corresponding outcome and do what it says. When you are finished with that, follow any prompts on the bottom of the card.
IMPORTANT:
- During a solo check, only the player who drew the card will roll the dice and be affected by the outcome.
- During a group check, all players take turns rolling. TO PASS, AT LEAST HALF OF THE PLAYERS MUST ROLL THE REQUIRED NUMBER. If less than half of the group roll the required number, the whole group fails. In either scenario, every player is affected by the outcome.
CRITICAL!
When you roll the d20, and it lands on 20, it's a critical success! In this game, whenever you roll a 20 you may heal 1 HP for yourself or someone else in your party OR, if you're in combat, deal one additional damage to an enemy. If you roll a 1, though, that's a critical failure. It doesn't have any consequences here, but feel free to have fun roleplaying your epic fail.
Combat!
Combat takes place when you draw a card that has an enemy on it. The battle begins immediately. You may not explore any numbered locations or solve any puzzles during combat. After all the enemies are defeated or removed, then combat has ended and players may return to exploring. Both players and enemies attack by rolling the d20.
Set Up the Battle
- Place the Enemy card(s) on the table where everyone can see.
An Enemy card shows: Health — the total hit points each enemy has. Attacks — the enemy's dice roll will determine which attack it gets to use each turn. Prompt — what you should do when the enemy is defeated. Enemy Name. Ability Type — see Ability Checks for more information. Difficulty — you must roll equal to or higher than this number to deal damage.
-
Next, put a pile of Health Tokens below each Enemy card based on the Health information on the top left of the card. The number in the heart is the enemy's base health. The number in the white circle is how many health tokens you should add for each player.
-
Place the Enemy Token to the left of the player who drew the card. This represents when the enemies will take their turn as combat passes clockwise around the table.
Enemy Attacks
-
The enemies always attack first. Declare which enemy is attacking, then roll the d20 (any player may roll for the enemies).
-
Compare the number rolled to the attacks listed on the card for the declared enemy. Is the roll within the range of one of the enemy's attacks?
- IF YES, the enemy makes the attack that matches the roll. Do what the card says for that attack. If the attack affects the player with highest/lowest HP, and multiple players fit that criteria, the damage is dealt to whichever player is next in the turn order.
- IF NO, the enemy misses and their turn is over.
-
If an enemy's attack takes a player's HP to 0, open the envelope that says "OPEN IN CASE OF DEATH".
-
Perform steps 1 & 2 for each card on the table. When all enemies have had an opportunity to attack, combat passes to the player to the left of the enemy token.
Player Attacks
- Choose which weapon you want to attack with (if you have more than one) and declare it.
- When using a weapon, your combined roll (if you are using the bonus die in addition to the d20) must be equal to or higher than the number in the d20 symbol in order to trigger the bonus action listed on that weapon.
-
Declare which enemy you're attacking, then roll the d20. If the ability on your Race or Class card matches the ability listed on the enemy, then you may roll the bonus die in addition to the d20. If both your Race and Class card have the same matching ability, you may roll the bonus die twice. Add all rolls together.
-
Compare your total roll to the difficulty shown in the red d20 symbol on the Enemy card.
- If your total roll is equal to or higher than the enemy's difficulty, your attack is a success! Remove one health token from that enemy.
- REMEMBER to check your weapon's roll requirement. See step 1 of this section.
- If your total roll is less than the enemy's difficulty, your attack fails.
- If you have a Combat Skill available, you may use it in addition to your attack. See Combat Skills for more information.
Battle Ends
Once every enemy on the table is defeated (when it has 0 health tokens), combat ends, or when you defeat the primary enemy and are instructed to discard the others, combat ends.
-
Look at the bottom of each Enemy card and do what it says. For example, it could instruct you to draw a new card or take a piece of loot.
-
When you've completed all the tasks listed, discard the Enemy card(s) and resume normal play.
Combat Skills
The card you placed under your Class card lists all of your Combat Skills. These are actions that you can perform during your turn in combat in addition to your attack.
- Combat Skills can only be used once per act! So be strategic with when you choose to use them.
- You may only use one skill per turn during combat. After you have used a skill place a token to mark it.
- During Act 1, you can only use your level 1 skills. During Act 2, you may use levels 1 and 2, etc.
- Whenever you begin a new act, slide your Combat Skills card down to show the next level available to you.
Building the Adventure!
The gameboard grows as you play and unlock new locations. When the game tells you to take a board out, find it in the box and place it beside the others. You can place your figures anywhere on the new board.
Sometimes, you will be directed to place a certain card on the board. Find the card in the deck and line up the art on the card with the art on the board. Any players that were at a location under the card can be placed on top and you lose access to any unexplored locations under the new card.
How to Win
At the end of each Act, you will have to decide as a team what the answer is to the mystery you've been tasked with solving. Use all of the clues and evidence you've gathered during your adventure to make a final decision. Once you're ready to make a decision, open the appropriate solve packet to find out if you were right.
Restorage
To save your character between play sessions, stack your Race, Class, Combat Skills, Starting Weapon, and any Loot cards you have into one pile and secure with a paper clip or rubber band. When you begin a new act, your health resets to max and you will unlock a new level of Combat Skills. You will be given directions in-game to do this.
To restore the game to pass on, sort the cards for each Act into numeric order and replace in the wells in the bottom of the box. Sort the Race, Class, Combat Skills, Starting Weapon, and Loot cards by type and replace in the wells. Sort the boards by Act and place them in descending order, along with all envelopes, underneath the buildup that says STOP at the top.
Hints
Act 1 Hints
| Puzzle Letter | First Hint | Second Hint | Third Hint |
|---|---|---|---|
| A | Remember, look at the bottom of each puzzle piece to see how many pieces are needed to solve this puzzle. Do you have all 3 pieces for this puzzle? | Which words are underlined? | The underlined words say "Knock number x stones." How many stones do you see with an "x"? When you have a solution to the puzzle, draw the card labeled with that number. |
| C | What metal is the door handle made from? | You'll need to combine two of these ingredients to melt the door handle. | The alchemist's note shows that bronze can be melted by combining dragon's acid and holy water. |
| D | Follow the path of the puzzle from the top to the center of the lock. | The path of the puzzle only goes over some of the dots. How many dots does the path go over in each color ring? | The bottom of the lock shows the colors in a certain order. |
| E | The scrap of parchment includes three rows of symbols. | Look at each row of symbols on the parchment, and trace the sequence of symbols on the front of the book. | As you trace each row of symbols onto the front of the book, your finger is tracing the shape of a number. |
Act 2 Hints
| Puzzle Letter | First Hint | Second Hint | Third Hint |
|---|---|---|---|
| A | As you look around at the shifting colors, you notice that not all the mushrooms are changing colors. | These mushrooms have different numbers of spots on them. | The etching on the door shows a small, medium, and large mushroom. |
| B | Remember what Thrun said - Petunia likes to be pet starting with his snout. | Starting from his head, Petunia likes to be pet down his back. | Petunia has three sets of spikes along his back - be careful! |
| C | The gears need to be placed one on top of the other to lower the drawbridge. | One gear has three cutouts. What could you see through there? | Make sure the top of the skull is pointing in the same direction for both gears. |
| D | You can start the puzzle on any outer strand, but only one of them will work successfully. | If you run into anything caught in the web, you're on the wrong path. Pick another strand and try again. | When you move along a strand towards the center, if you hit a crossing strand you MUST take it. |
| E |
Act 3 Hints
| Puzzle Letter | First Hint | Second Hint | Third Hint |
|---|---|---|---|
| A | You can start on any of the bottom tiles, but only one of the starting points will work successfully. | When your path forward is blocked, try going to the side. | You'll move up, to the side, then up to get across the bridge. |
| B | Trace your fingers along the knot, from symbol to symbol. | One knot can be laid on top of the other. | Count the number of red lines your fingers cross when tracing the knot between symbols. |
| C | All the traps need to be turned off so you can get safely down the hallway. | Turn off each trap by moving the lever to the right color. | Add up the numbers for all the traps to solve the puzzle. |
| D | This puzzle requires a unique piece to solve it. Look at everything that came with this game. Where could those gems fit? | The gems line up with the artwork on the outside of the box. | The artwork on the wall shows you which direction to count in. |
| E | The stairs can be disorienting! You'll need to align them properly, from bottom to top. |
Puzzle Solves
Act 1
| Puzzle Letter | Card Number |
|---|---|
| A | 8 |
| C | 138 |
| D | 124 |
| E | 219 |
| F | 134 |
| H | 285 |
| J | 272 |
| K | 321 |
Act 2
| Puzzle Letter | Card Number |
|---|---|
| A | 234 |
| B | 132 |
| C | 263 |
| D | 216 |
| E | 317 |
| F | 244 |
| G | 248 |
Act 2 Labyrinth Solves: 250, 260, 265, 270, 290
Act 3
| Puzzle Letter | Card Number |
|---|---|
| A | 422 |
| B | 142 |
| C | 253 |
| D | 269 |
| E | 335 |
| F | 313 |
| G | 432 |
| H | 463 |