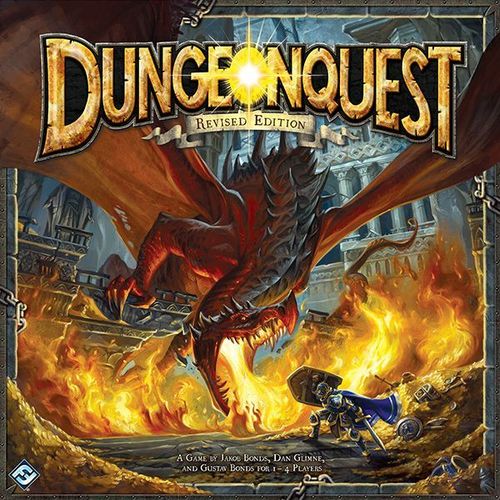
DungeonQuest: Revised Edition
DungeonQuest: Revised Edition Rulebook
Table of Contents
Table of Contents
Game Overview
In DungeonQuest, players explore Dragonfire Dungeon, collect loot, and battle fearsome monsters. Any player fortunate enough to enter the treasure chamber may attempt to plunder its riches. However, he must be careful not to wake Kalladra, the dragonlord who sleeps upon the treasure hoard. When players have looted their fill, they must exit before the sun sets or be forever entombed in Dragonfire Dungeon.
The object of DungeonQuest is to collect loot and exit Dragonfire Dungeon before the sun sets. The surviving player who exits with the most loot wins the game.
Components
- Game Board
- 6 Hero Sheets with Matching Travel Markers
- 6 Hero Figures
- 117 Chamber Tiles
- 50 Dungeon Cards
- 40 Catacomb Cards
- 15 Corpse Cards
- 15 Trap Cards
- 10 Catacomb Entrance Markers
- 10 Monster Tokens
- 65 Determination/Search Tokens
- 1 Sun Token
- 39 Wound Tokens
- 1 First Player Marker
- 4 Six-Sided Dice
- 15 Crypt Cards
- 15 Door Cards
- 30 Search Cards
- 32 Treasure Cards
- 6 Combat Cards (3 Hero, 3 Monster)
- 12 Rune Cards
- 20 Monster Cards
- 8 Dragon Cards
Using this Booklet
This Learn To Play booklet is written with the sole purpose of teaching new players how to play DungeonQuest. For this reason, this booklet omits a few rules exceptions and component interactions.
In addition to this booklet, this game also comes with a Rules Reference book. The Rules Reference book addresses rules questions and special exceptions that are not answered in this booklet. The Rules Reference book also includes optional rules for adjusting the game to your liking.
Setup
Before playing DungeonQuest for the first time, carefully punch the cardboard pieces out of their frames. Then, follow the steps below.
- Place Game Board: Unfold the game board and place it in the center of the play area.
- Prepare Chamber Stacks: Place all the chamber tiles in the game box lid and mix them together. Then, place them in any number of facedown stacks near the game board.
- Prepare Combat Cards: Place the monster combat cards and the hero combat cards near the board within reach of all players.
- Prepare Decks: Separate the remaining cards into their decks. Shuffle each deck and place it facedown on its designated place on the board. Place the rune deck and the monster deck near the board within reach of all players.
- Prepare Sun Track: Place the sun token on the first space of the sun track.
- Prepare Token Supply: Place the wound tokens, catacomb entrance tokens, monster tokens, and determination/search tokens in separate piles within reach of all players.
- Determine First Player: Each player rolls one die. Reroll ties. The high roller is the first player for the remainder of the game and takes the first player marker.
- Choose Heroes: Starting with the first player and proceeding clockwise, each player chooses one hero sheet and places it in his play area. Then, each player takes the plastic hero figure and travel marker that correspond to his hero. Return unused hero sheets and hero figures to the game box.
- Draw Rune Cards: Starting with the first player and proceeding clockwise, each player draws one rune card and places it faceup next to his hero sheet.
- Place Heroes: Starting with the first player and proceeding clockwise, each player places his hero figure in a tower chamber. A player cannot place his hero figure in a tower chamber that is already occupied by another hero figure.
Hero Sheets
Each hero sheet shows the hero's health (the number of wounds it takes to kill him), his four attributes (strength, agility, armor, and luck), his special ability or abilities, a determination token space, and flavor text.
- Special Abilities: Each hero has one or more special abilities printed on his hero sheet.
- Determination Token Space: Determination tokens a hero has acquired are placed on this space of his hero sheet.
- Attributes: A hero's strength, agility, armor, and luck attributes are each printed on his hero sheet, alongside a matching icon.
- Flavor Text: Flavor text gives the hero more personality but has no game effect.
Playing the Game
DungeonQuest is played over a series of turns beginning with the first player and proceeding clockwise. Each player completes his entire turn before the next player takes his turn.
A turn consists of two phases, which the player follows in this order:
- Status Phase: The player resolves abilities on cards in his play area that occur at the start of his turn. If it is the first player's turn, he advances the sun token one space on the sun track.
- Action Phase: The player chooses one of the following actions:
- Move: He moves his hero figure into an adjacent space.
- Search: He searches the chamber his hero figure currently occupies (if eligible).
- Enter the catacombs: He follows the instructions for entering the catacombs (if eligible).
After a player has completed both of these phases, his turn ends and the next player takes his turn.
Moving
The game board representing Dragonfire Dungeon is divided into a grid, and each space on that grid is either an explored space (also referred to as a chamber) or an unexplored space. At the start of the game, most of the dungeon is unexplored. The space a hero figure occupies is always an explored space.
Each chamber has one or more openings, called halls, that show which directions a hero can move. When a player performs a move action, he can move his hero figure to any adjacent space that is connected to his current chamber by a hall.
A hall on one dungeon tile can be blocked by the wall of an adjacent dungeon tile, or by the outer wall. A blocked hall of this nature cannot be moved through and is not considered connected to the adjacent chamber. Some halls have door or portcullis barriers attached to them that impede, but do not necessarily block, movement through them.
Moving into a Chamber
Each time a player enters a chamber, he resolves the effects of that chamber. A chamber's effects are determined by the image of its tile. For a complete description of all chamber effects, see "Chamber Effects."
A player cannot choose to enter a chamber that is already occupied by another hero figure, with the exception of the treasure chamber.
Moving into an Unexplored Space
A space on the game board that does not already contain a chamber is an unexplored space.
Each time a player moves into an unexplored space, he draws one chamber tile from any stack and places it faceup on the board so that the entry arrow on the tile he drew is adjacent to the chamber from which he moved. That space is now explored. Then, he places his hero figure in that chamber and resolves the chamber's effects.
Example of Moving: Lindel may only move into spaces D or E from the center chamber where he starts his turn (A). He cannot move into spaces B or C because walls block his path. If he chooses to move through the hall to space E, he draws a new chamber tile, places it faceup in the space, places his figure on the chamber, and resolves the new chamber's effects. If he chooses to move through the hall to the explored chamber (D), he would then draw and resolve a dungeon card.
Searching
By searching a chamber, players can discover loot, secret doors, monsters, and other elements of Dragonfire Dungeon.
In order for a chamber to be searched, it must fulfill all three of the following criteria:
- It must have a torch icon.
- It cannot have monster tokens on it.
- It cannot have a search token on it.
If a player chooses to search, he draws the top card from the search deck and places one search token on his current chamber. If a chamber has a search token on it, that chamber has already been searched and cannot be searched again by any player.
Attribute Tests
Some card and chamber effects require players to test an attribute. There are four different attributes that a player can test: strength, agility, armor, and luck. The hero sheets contain information about each hero's attributes and special abilities.
When a card, a rule, or a chamber effect instructs a player to test an attribute, he rolls two dice and adds their results. If the sum is equal to or less than the attribute being tested, he succeeds. If the sum is greater than the attribute being tested, he fails. Each time a player fails an attribute test, he places one determination token on his hero sheet.
Determination Tokens
Players acquire determination tokens by failing attribute tests. After a player rolls his dice during an attribute test, he may spend any number of his determination tokens by removing them from his hero sheet and returning them to the supply. Each determination token he spends subtracts one point from the total value of his dice roll.
The opposite side of determination tokens are used as search tokens.
The Sun Track
The sun token and the sun track measure the passage of time during a game of DungeonQuest. During each of the first player's status phases, he advances the sun token one space on the sun track.
Each time the sun token advances to one of the numbered spaces near the end of the sun track, the first player immediately rolls one die. If the number he rolls is higher than the number on the space, the game continues. If the number he rolls is equal to or less than the number on the space, the sun sets, the doors to the dungeon are sealed, and the game immediately ends.
Each player who has not exited the dungeon when the sun sets immediately dies.
If the game continues after the sun token reaches the last space on the sun track, the first player no longer advances the sun token at the start of his turns, but he still rolls one die as per the instructions above.
Wounds
Many rules and card effects instruct players to suffer wounds. Place wound tokens on a hero's sheet to track the wounds he suffers. If the total value of all wound tokens on a player's hero sheet equals or exceeds his health at any time, he dies.
Some card effects and abilities allow players to heal, which is the only way to remove wound tokens from a hero sheet. Each time a player heals, he removes a specified value of wound tokens from his hero sheet and returns them to the supply. If the value specified is greater than the number of wound tokens on his hero sheet, ignore any extra wounds healed.
Death
A player can die in several different ways. A player dies if:
- he has wound tokens with a total value equal to or greater than his health;
- the instructions on a card cause him to die;
- the sun sets while he is still in the dungeon; or
- he has reached a dead end.
When a player dies, his turn immediately ends; he removes his hero figure from the game board, places all of his cards in their respective discard piles, and returns all his tokens to their respective supply. Then, he returns his hero sheet to the game box. He no longer takes his turn, and he cannot win the game. However, he continues taking the role of the monster player as normal during another player's combat.
Dead Ends
If, on his turn, a player not in the catacombs cannot move, search, or enter the catacombs during his action phase, he has reached a dead end. If a player reaches a dead end, he immediately dies.
Winning the Game
The game ends when the sun sets or when each player has either exited the dungeon or died.
When the game ends, each surviving player checks his loot cards for end-of-game instructions. If any of his loot cards have end-of-game instructions, he follows them now. The player with the highest total gold value on all his loot cards wins the game.
If two or more players tie for the highest total gold value, the tied player who has the single loot card with the highest gold value wins the game. If there is still a tie, the tied player with the greatest number of loot cards wins the game. If there is still a tie, all tied players win the game.
If there are no surviving players, then all players lose the game.
Loot Cards
Cards with the "Loot" keyword are found in many different decks. Each time a player draws a Loot card he places it faceup on the table in his play area. Loot cards often have a gold value. When the game ends, the surviving player with the highest total gold value wins.
Loot cards without a gold value are worth zero gold unless otherwise indicated by the loot card's instructions.
Rune Cards
Each rune card can only be used once during the game. Each rune card specifies its conditions and effects. When a player wishes to use a rune, he follows the rune card's instructions. Then, he returns the rune card to the game box.
Encountering Monsters
There are two ways players can encounter monsters: by drawing various cards that instruct them to "encounter a monster" or by entering a chamber that contains a monster token. When a player enters a chamber with a monster token, he does not resolve the chamber's effect.
Each time a player encounters a monster, the player taking his turn is the hero player, and the player to his left is the monster player. The monster player draws one card from the monster deck, announces only the name of the monster, and places a monster token in the hero player's chamber (if one does not already exist there). Then, the hero player takes the three hero combat cards and the monster player takes the three monster combat cards. Both players now enter into a combat.
Combat
Combat takes place over a series of rounds which continues until the hero player escapes, or until either the hero player or the monster dies.
At the start of each round, the hero player and the monster player each secretly select one combat card from their hands and reveal them simultaneously. Each player consults his card's damage table, and suffers a number of wounds indicated in the "Wounds Suffered" section. The hero player places his wound tokens on his hero sheet; the monster player places his wound tokens in front of him.
If the hero player dies, the encounter immediately ends. The monster player discards his monster card.
If the number of wound tokens in front of the monster player equals or exceeds the life value on his monster card, he announces that the monster has died and the encounter immediately ends; the monster player discards the monster card and the monster token, and the hero player ends his turn.
If neither the hero player nor monster player dies after a round of combat, the hero player has an opportunity to escape. If he declines, or if he attempts to escape and fails, both players return the combat cards they played to their hands and begin another round of combat.
Combat Example: Brother Gherinn has encountered a Golem. Each player selects and reveals one combat card. The hero player reveals the "Hero Ranged" card, and the monster player reveals the "Monster Magic" card. Next, the hero player consults the row of his card matching the card played by the monster player. He suffers one wound and places one wound token on his hero sheet. The monster player then consults the row of his card matching the card played by the hero player and suffers zero wounds.
Combat Card Results Diagram: On a combat card's damage table, the number in a white box indicates how many wounds are suffered by the hero player. The number in a gray box indicates how many wounds are suffered by the monster player. Boxes that are split in half with a white side and a gray side indicate the number of wounds suffered by both the hero player and the monster player.
Escape
At the end of each round of combat, the hero player can attempt to escape. If the hero player chooses to escape, he tests agility. If he succeeds, the encounter ends. The monster player reveals his monster card and the hero suffers a number of wounds equal to the monster's escape penalty. Then, the hero player moves to an adjacent explored chamber ignoring any doors or portcullises. If there are no adjacent explored chambers, the hero player cannot attempt to escape combat.
The Catacombs
The catacombs are a labyrinth of vaults and passageways that twist beneath the dungeon, full of priceless loot and unspeakable foes.
Entering the Catacombs
Some chamber tiles and cards give a player the option to enter the catacombs voluntarily; others force him to enter the catacombs against his will.
If a player begins his action phase in a chamber that has a catacomb entrance either printed on its tile or on a catacomb entrance marker, he may choose to enter the catacombs during his action phase instead of moving or searching.
In either case, when a player enters the catacombs, he places his travel marker on the chamber that his hero figure currently occupies and points the travel marker in the direction of his choice. Then, he removes his hero figure from the game board, places it on his hero sheet, and ends his turn. The player's travel marker remains in its current chamber until he exits the catacombs.
Exploring the Catacombs
While a player is in the catacombs, he cannot move or search as he normally would during the action phase. Instead, he draws one catacomb card, follows its instructions, and places the catacomb card faceup next to his hero sheet.
Exiting the Catacombs
Some catacomb cards give players the option to exit the catacombs. If a player chooses to exit the catacombs at that time, he counts the number of catacomb cards he has next to his hero sheet (including the card just drawn) and moves his travel marker that number of spaces in the direction his travel marker is pointing. If this would move his travel marker past the outer wall of the dungeon, he moves his travel marker up to the wall and ignores any remaining movement allowed by his catacomb cards.
Then, he rotates his travel marker 90° in the direction of his choice, rolls one die, and moves his travel marker in the direction the travel marker is facing a number of spaces equal to the die result. If this would move the travel marker past the outer wall of the dungeon, he moves his travel marker up to the wall and suffers one wound for each remaining movement afforded by his roll.
Lastly, he places all loot catacomb cards with his other loot cards, discards his other catacomb cards, and resurfaces in the dungeon by replacing his travel marker with his hero figure.
Exiting the Catacombs Example: Tatianna previously accumulated two catacomb cards. On this turn, she draws an "Exit" card and chooses to exit the catacombs. Tatianna now has a total of three catacomb cards, so she moves her travel marker forward three spaces. Tatianna rotates her travel marker 90° to the left. She then rolls one die, obtaining a "2", and moves her travel marker two spaces in that direction. She discards three catacomb cards and replaces her travel marker with her hero figure. She did not find any loot cards in the catacombs. The space is unexplored, so Tatianna draws a chamber tile, places it in the space in any orientation, and places her figure in that chamber. Then, she resolves that chamber's effects.
Resurfacing in an Explored Space
Each time a player resurfaces from the catacombs into an explored space, he resolves the effects of that chamber (or encounters a monster if one is present). A player can resurface in a chamber that is occupied by one or more other players.
Resurfacing in an Unexplored Space
Each time a player resurfaces from the catacombs into an unexplored space, he immediately draws a chamber tile and places it on that space, orienting it however he likes within the space. Then, he resolves the effects of that chamber.
Doors and Portcullises
Some chambers feature closed doors. If a player attempts to move through a door, he draws one door card and follows its instructions.
Some chambers feature portcullises. If a player attempts to move through a portcullis, he must first test strength. If he succeeds, he continues his movement as normal. If he fails, his turn ends.
If there is a door or a portcullis in the hall between the hero and the space he wishes to enter, he must first overcome the barriers before he can move. If there are multiple doors and/or portcullises in the hall between the hero and the space he wishes to enter, he must overcome each of them in order before he can move.
Chamber Effects
The following is a comprehensive list of every chamber effect. If a chamber description says "Upon Entering," the effect that follows applies each time a hero enters the chamber regardless of whether the hero voluntarily moved into the chamber, was forced to move into that chamber by a card effect, or entered the chamber by exiting the catacombs. Some chamber effects function slightly differently depending on how a hero enters the chamber; these differences are specified in the chamber's description.
Dungeon Room
There is a wide variety of dungeon rooms. They often include one or more chamber features including catacomb entrances, doors, and portcullises.
Upon Entering: Draw a dungeon card.
Beginning Your Turn Here: If there is no search token in this chamber, you may perform a search action.
Bridge
Upon Entering from a Hall: Choose to either cross the bridge (see below) or end your turn.
Upon Entering from the Catacombs: Choose which side of the bridge you are on. Then, choose to either cross the bridge or end your turn.
When Exiting: Choose to either exit the chamber through the hall in which you entered this chamber, or cross the bridge.
Crossing the Bridge: Test agility and add 1 to your dice roll for each Loot card you have. You may discard any number of your Loot cards before you test agility.
- Success: Exit the chamber through the hall on the other side of the bridge.
- Failure: You fall off the bridge. Roll one die and suffer a number of wounds equal to the result. Then, enter the catacombs.
Bottomless Pit
Upon Entering: Test luck.
- Success: End your turn.
- Failure: You die.
Cave-In
Upon Entering from a Hall: Draw a dungeon card.
Upon Entering from the Catacombs: Choose which side of the cave-in you are on. Then, draw a dungeon card.
When Exiting: If you choose to exit through any hall that is on the other side of the cave-in, test agility.
- Success: Exit the chamber normally.
- Failure: End your turn.
Chamber of Darkness
Upon Entering: Immediately move again, ignoring doors and portcullises.
When Exiting: Roll a die; you must exit through the hall marked by the number that matches the result. If the hall you must exit through is blocked, reroll the die.
Chasm
The chasm in the center of this chamber cannot be crossed.
Upon Entering from a Hall: Draw a dungeon card.
Upon Entering from the Catacombs: Choose which side of the chasm you are on. Then, draw a dungeon card.
When Exiting: You can only exit the chamber through a hall that is on the same side of the chasm as the side you entered.
Corridor
There is a wide variety of corridors, but they all function the same.
Upon Entering: Immediately move again, ignoring doors and portcullises.
When Exiting: You cannot exit the chamber through the hall by which you entered unless all other halls are blocked.
Rotating Chamber
This chamber can create a dead end that traps a hero.
Upon Entering: Rotate the chamber 180° and end your turn.
Spider Web
Upon Entering from a Hall: Immediately move again, ignoring doors and portcullises. If you choose to exit through any hall other than the one by which you entered, you must struggle through the webs (see below).
Upon Entering from the Catacombs: Choose which side of the webs you are on. Then, immediately move again, ignoring doors and portcullises. If you choose to exit through any hall other than the one by which you entered, you must struggle through the webs.
Beginning Your Turn Here: Before you can move, you must struggle through the webs.
Struggling Through the Webs: Test strength.
- Success: Exit the chamber normally.
- Failure: End your turn.
Trap Chamber
Upon Entering: Draw a trap card.
Tower Chamber
All four tower chambers are explored spaces.
Upon Entering: Choose one of the following.
- If you have one or more Loot cards, you may exit the dungeon.
- Immediately move again to an adjacent chamber or adjacent unexplored space.
- Move directly to any other tower chamber not occupied by a hero and continue your turn.
After a player exits the dungeon, he no longer takes turns and cannot reenter the dungeon. He must wait until the game ends and the surviving players determine the winner.
Treasure Chamber
Any number of heroes can be in the treasure chamber at the same time. Although the treasure chamber takes up two spaces on the game board, it counts as a single chamber. The treasure chamber is an explored space.
Upon Entering: Draw a dragon card.
Beginning Your Turn Here: Choose one of the following.
- Draw a dragon card.
- Exit the chamber through any hall that is not blocked by a wall or another hero.
Cards
- Each card type forms its own deck. A card's type is determined by the image on its back.
- Cards of the same name sometimes appear in more than one deck by design.
- When a player is instructed to draw a card, he draws the top card of the designated deck, follows the card's instructions, then normally discards it.
- There are, however, some cards that are not discarded after being drawn. Loot cards and cards that instruct a player to keep it are placed faceup in a hero's play area near his hero sheet instead of being discarded.
- Each deck has its own discard pile, located somewhere near it.
- Cards are always discarded faceup.
- If a deck runs out of cards, shuffle its discard pile and place it facedown to reform the deck.
When a player discards a token, he returns it to the supply.
Component Limitations
Players are not limited by the number of determination/search tokens, catacomb entrance tokens, monster tokens, or wound tokens found in the game. If players run out of any of these components, they may use coins, beads, or any other suitable replacements. All other component types are finite and cannot be substituted for.
Timing Conflicts
In the event of a timing conflict between two or more players attempting to use abilities that arise simultaneously, the player who is currently taking his turn chooses the order in which the abilities are resolved.
Optional Rules
The following entries describe optional game rules that players can use during a game of DungeonQuest. If all players agree, they can implement any number of these rules before playing a game.
Death Can Wait
This optional rule allows players to respawn after death and continue playing the game.
When a player dies, he returns all cards in his play area (including loot and rune cards) to their respective discard piles and returns all his wound and determination tokens to the token supply. Then, the player to his left places his hero figure on the tower chamber of his choice. The respawned player begins his next turn as if he were taking his first turn of the game.
Torchlight
This optional rule allows players to see a few chambers ahead after entering a chamber.
Immediately after a player enters a chamber, be it on an explored space or after placing a chamber tile when moving into an unexplored space, he chooses a hall on the chamber he entered that leads to an unexplored space and is not blocked by a door. Then, he draws one tile and places it so that its entry arrow is adjacent to the hall he chose. He does this for each hall in the chamber he occupies that is not blocked by a door. Then, he resolves the effects of the chamber he occupies.
When using this rule, each player places tiles adjacent to the tower chamber his hero figure occupies during step 10 of setup. The first hero to enter the treasure chamber places a chamber tile at each of the treasure chamber's halls that do not yet have an adjacent chamber tile.
Torchlight Example: Krutzbeck has entered a corridor chamber with two exit halls (A). He chooses a hall (B), draws a tile, and places it so the entry arrow is adjacent to the hall he chose. Then, he does the same for the other hall (C). Finally, Krutzbeck must resolve the effects of the corridor chamber he entered.
Solo Play
This optional rule allows a player to play DungeonQuest alone.
All the rules previously explained in this booklet apply to a solo game of DungeonQuest, except for those governing exiting the dungeon and encountering monsters.
In order to exit the dungeon while playing solo, a player must obtain at least one treasure card (not just a loot card).
If you encounter a monster, first draw a monster card without revealing it and place it facedown near your hero sheet. Then proceed to either attempt an escape or fight a combat.
Attempting an Escape: You have only one chance to escape and that is before combat.
If you choose to escape, test agility. If you succeed, discard the monster card, place a monster token in your current chamber, and exit the chamber through any unblocked hall, ignoring doors and portcullises.
If you fail, reveal the monster card you drew and suffer a number of wounds equal to that monster's escape penalty. Then, proceed to fight in combat.
Fighting in Combat: At the start of each round of combat, roll one die and consult the chart below.
- 1–2: You suffer one wound.
- 3–4: You and the monster each suffer one wound.
- 5: The monster suffers one wound.
- 6: The monster suffers two wounds.