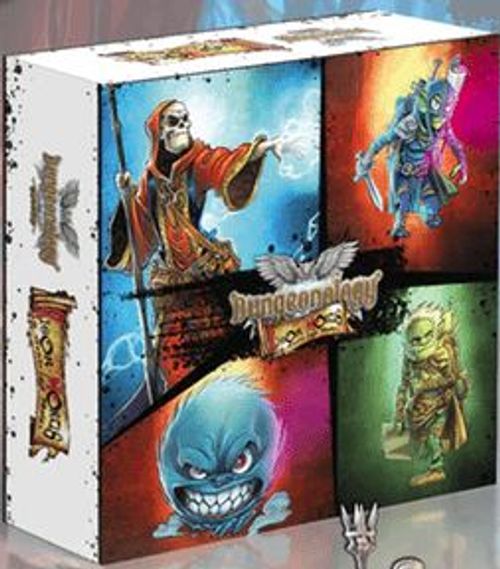
Dungeonology: Rigor Mortis
Dungeonology: Rigor Mortis Rulebook
Table of Contents
Table of Contents
Overview
Rigor Mortis, the expansion for Dungeonology: The Expedition, adds the special Kragmortha tiles to the base game, allowing the Dark Lord and his minions to pour into your world of Scholars to raid from them and steal as much information as possible.
By adding the material from this box to the base game, Scholars will be able to face Rigor Mortis in two new game modes: Dark Lord and Kragmortha.
In Dark Lord Mode, Rigor will summon part of his castle along with his minion followers, who will begin to explore the dungeon. They will hinder you, the Scholars, in any way they can.
In Kragmortha Mode, all the Zones of the various Dungeonology boxes can be used to create new and amazing dungeons separated into 4 Areas. In this mode, the Scholars will be represented by the same minions of the Dark Lord who, starting from the castle of their master, will travel to other realities to acquire knowledge and secrets for him, your new master.
Much of the material in this box can also be used in Standard Games of Dungeonology, as explained below.
Game Components
- Scholar / Minion Miniatures (4)
- Miniature of the Boss Rigor Mortis
- Boss Card
- Scholar Cards (4)
- Kragmortha Zones (6)
- Clan Cards (4)
- Sorcery Cards (16)
- Panic Cards (3)
- Planar Portal Room Token (8)
- Kragmortha Stack Tokens (4)
- Universal Information Cubes (6)
- Reference Card (1)
New Material and Rules
Kragmortha Zones
These new Zones represent the multiplanar castle of Rigor Mortis, which may appear in other worlds or connect to them via dimensional portals. They are placed following the rules described in the two modes of the game featured in this expansion: Dark Lord Mode (see p. 6) and Kragmortha Mode (see p. 8).
When a Kragmortha Zone is placed in Dark Lord Mode (or in a standard game), all Dark spaces for the Information Cubes (A) remain empty, whereas in the Clear spaces (B) a Universal Information Cube is placed.
Standard Games: The Kragmortha Zones can be added to a Standard Game of Dungeonology using the following modifications:
- They are usable as if they were Level IV. During Game Setup they must be mixed to form a fourth Pile.
- The Minion Zone Effects (C) present in four of these Zones do apply to the game and are ignored.
Transcriber's note: the last bullet is printed exactly as above in the source; it reads as self-contradictory ("apply" and "are ignored"). Transcribed as printed; check against the publisher's errata.
Universal Information Cubes
The white cubes featured in this expansion are a new type of Information, called Universal Information. A Universal Information Cube follows the normal rules of the base game which are collected by Scholars, but once obtained, they can be placed on your own Note Board in any of the five columns. A Universal Information Cube (and its point value) counts as an Information Cube of the color appropriate to the column in which it is placed as long as it is placed on one Note Board (exception: in the Kragmortha Mode, the Universal Information Cubes are each worth 7 points).
Panic Cards
These new Panic Cards are used when Rigor Mortis is selected as the Boss of the game. Check which of these cards to include in the deck of Panic Cards during Game Setup as based on the restrictions indicated on them.
Come Back to Me! (Dark Lord Mode only)
Now my faithful Minions, return to Kragmortha and bring me everything you have raided!
Empty the University Bag and ...
Final Raid (Dark Lord Mode only)
This world bores me, try to squeeze your inhabitants to the bone and let's go back to Kragmortha!
Empty the University Bag and ...
Aye, Dark Lord! (Only Rigor Mortis)
Soon you too will be my faithful minions!
Empty the University Bag and ...
Transcriber's note: the three cards overlap in the manual's art, and the lower halves of the cards (the rule bullets) are partly hidden under the adjacent card. The bullets below are reproduced in the order they appear in the printed text layer. The printed layout does not let them be reliably assigned to individual cards, so the assignment is left unverified here. Check against the physical Panic Cards before relying on it.
- Whenever a Minion must perform an Action, instead, the current player moves it by one Zone toward the Kragmortha Zone containing its respective Zone Effect.
- At the start of each player's turn, including whoever finished the game, the player moves two Minions of his choice toward the Kragmortha Zones which contains their respective Zone Effect.
- The game ends immediately if all the Minions are in the Kragmortha Zone containing their respecting Zone Effect.
- Discard Rigor's Boss Card.
- Each player, at the start of their turn, including whoever finished the game, moves Rigor Mortis and each of the Minions up to a maximum of two Zones.
- Whenever a Scholar enters a Zone containing Rigor or a Minion, one of its Information Cubes is Raided.
- The game ends immediately if an Information Cube is Raided and there are no spaces left to insert it.
- Each player, at the start of their turn, must scream out loud, "Aye, Dark Lord"; if they do not, or if the other players do not think they screamed loud enough, the game ends immediately and that Scholar is removed from the game.
- If a player has to play the second consecutive round, the game ends immediately.
Clan Cards
These new Clan Cards may be added to the Clan Card deck provided in the original base game as desired.
Boss Card
Rigor Mortis is the new Boss featured in this expansion. This Boss Card has two profiles, which use the deck of Sorcery Cards to hinder the progress of the Scholars:
- Rigor Mortis - Dark Lord (A): this profile is used exclusively to play the game in Dark Lord Mode (see p. 6).
- Rigor Mortis (B): This profile is used to play the game in Kragmortha Mode (see p. 8) but can also be used in Standard Games of Dungeonology as a normal Boss.
Rigor Mortis - Dark Lord (A)
- Sighting: Rigor appears in the Zone where the Boss Zone Effect was activated and executes Activation.
- Activation:
- If available, place a Kragmortha Zone where you prefer by following standard rules.
- Randomize a Scholar. Place Rigor in the Zone where the randomized Scholar is located.
- Draw and apply the effects of a Sorcery Card.
Rigor Mortis (B)
- Sighting: Rigor appears in the Zone where the Boss Zone Effect was activated and executes Activation.
- Activation: Move Rigor to the Zone where the Boss was activated and then draw and apply the effects of a Sorcery Card without resolving the Minion Actions.
Scholar Cards
Four new Scholars, goblin minions of Rigor Mortis, are added to the aspiring Dungeonologists of Rocca Civetta: Fluffy, the hungry puppy of the Dark Lord; Zbugbok, the treasure hunter and skilled explorer; Lex-A, the loyal left hand of Rigor Mortis; and Matita, the frail but very intelligent scribe of Kragmortha Castle.
These new Scholars can be used in all Dungeonology games except in Kragmortha Mode.
Fluffy - The Puppy
- Puppy: Get the following benefits:
- You can decide not to activate the "Boss" Zone Effect.
- The Boss Alert Modifier does not apply when doing Stealth Tests.
- Glutton: When you get SUCCESS in a Study Test: Sacrifice a Student to choose the Information Cube to collect (instead of the leftmost).
Zbugbok - The Treasure Hunter
- Compass: As soon as you place a new Zone, you can decide to discard it to the bottom of its pile and place the next Zone in the same pile.
- Great Explorer: The Bonus Value of the Exploration Trick Cards you play from your hand are worth double.
Lex-A - The Thief
- O the Bag...: Get 1 Stun Token (you cannot avoid this effect by Sacrificing a Student) to target a Scholar in your same Zone that was not targeted by this ability during this turn; the target chooses an effect:
- The Scholar gives you one of his Information Cubes.
- Look at the Scholar's Hand and take one of the Trick Cards for yourself.
Matita - The Scribe
- Copyist: Once during each other Scholar's turn, add a Trick Card just resolved by that Scholar to your hand.
- Amanuensis: Get 1 Stun Token (you cannot avoid this effect by Sacrificing a Student): Double the Bonus Value of a Trick Card you played this turn.
Sorcery Cards
Whenever you are playing with the Rigor Mortis Boss Card, create a deck with these Sorcery Cards and place it next to the Boss Card. When the Activation Effects of the Boss Card instructs you to draw and apply the Effects of one of these Sorcery Cards, a player reveals the first card of the deck and applies what is indicated starting from the top of the card and proceeding downward.
Tip: For convenience, you may choose a player who will take and manage this deck throughout the game.
Minion Actions: These Effects are only applied if you are playing the game in Dark Lord Mode (see p. 6).
Raiding Information Cubes
The Rigor Mortis Expansion introduces a new way to interact with Information Cubes: Raid.
Raiding Cubes from a Zone: When an effect instructs you to Raid a certain number of Information Cubes from a Zone, these cubes must be picked up one at a time starting from the cube on the far right in that Zone. The cubes must then be placed (one at a time) in the first free rightmost space of a Kragmortha Zone (the Kragmortha Zone from which the cubes were taken cannot be chosen as the destination Zone.) The player whose turn it is decides which Kragmortha Zone is chosen to place the Information Cube.
If there is at least one Kragmortha Zone in the Dungeon with an empty space within that Zone, whenever an Information Cube is Dropped or Eliminated, it is Raided instead.
Example: Raiding from a Zone
Valerio enters the Zone with the Boss Effect (A) and triggers the Activation Effect of the Boss Rigor Mortis (B), who forces the player to draw and resolve a Sorcery Card.
The Magic Gate (C) is drawn, and the first Effect to be resolved (starting from the top of the card) is Raid 2 (therefore, the two rightmost cubes in this Zone will be Raided).
The Information Cube furthest to the right in the Zone occupied by Rigor (A) is taken and moved to a Kragmortha Zone (Note: if this happened within a Kragmortha Zone, the cubes would need to be moved to a different Kragmortha Zone than the starting one, if present in the Dungeon; If this Kragmortha Zone is the only one present in the dungeon at this time, it may not be raided. Valerio is the player who activated Rigor (by entering this Zone with the Boss Effect) and he can choose which Kragmortha Zone to place these Raided cubes in. In this case the player chooses a Zone that has no Information Cubes (or other players in it) to move the Riches cube (D) into it. After doing so, the procedure is repeated a second time, since the Magic Gate Card indicates a Raid 2 effect, choosing to move the Militia Cube (E) to the Kragmortha Zone that Rebecca is in, specifically to make it more difficult for her to acquire the precious Universal Information Cube that she had her eye on.
The Magic Gate Sorcery Card also contains Minion Actions (F), which are only triggered in Dark Lord Mode (see p. 6).
Transcriber's note: the example names the card "Magic Gate", while the card shown in its illustration (panel C) is printed "Magic Door". Transcribed as printed in both places.
Zone Effect - Minion
This new Zone Effect is present in four of the Kragmortha Zones, and their operation changes according to the game mode being played:
- Standard Game: This Effect is ignored (not used).
- Dark Lord Mode: When this Zone is placed, the miniature of the Minion represented in the Effect is placed inside that Zone (see p. 6).
- Kragmortha Mode: Each of these Effects indicates the Starting Zone of one of the Scholars participating in the game (see p. 9).
Kragmortha Stack Tokens and Planar Portals
These tokens are used in the Kragmortha Mode to manage the Planar Portals (see p. 8).
Example: Raiding a Dropped Cube
Valerio uses his Headbutt Skill on Vincenzo, forcing him to Drop a randomized Information Cube (Caste). Normally, the cube would end up in a free space of the Zone it is currently in, or in an adjacent and connected Zone if there were no free spaces in its current Zone.
However, in the Dungeon there is a Kragmortha Zone with free spaces. When this occurs, any Information Cube Dropped or Eliminated by any effect in the game is Raided instead. The current player, who controls Valerio, decides in which Kragmortha Zone among those present in the dungeon to place the cube Vincenzo left behind. So, in this case he prefers the Zone without any other Scholars, leaving Sofia empty handed ... because she had her own need for that Caste Cube!
Dark Lord Mode
In this game mode Rigor Mortis, along with his minion goblins, will exploit the powerful spells that he infused into his castle to make it magically appear inside the Dungeon being explored by the Scholars.
To play a game in Dark Lord Mode, perform the normal Setup of the Game, and play it as a standard game with the following modifications:
Game Setup (Changes)
- Boss: The Boss Rigor Mortis must be used with the Dark Lord profile. He will be the one to place the Kragmortha Zones during the game (see Boss Card).
- Panic Cards: Create a deck of Panic Cards using only the three provided in this expansion; draw the secret Panic Card to use during the game from this deck.
- Kragmortha Zones: Shuffle these Zones and place them in a nearby stack; in this mode, these Zones are placed exclusively by the Boss when his Activation effect instructs you to do so (they are not initially set up).
- Scholars: The Fluffy, Zbugbok, Lex-A and Matita Scholars cannot be chosen by players in this mode.
Special Rules
The following rules are used in this mode in addition to the rules described in the base game rulebook.
Zone Effect - Minion
When a Zone with one of these Effects is placed, the player whose turn it is must place the Minion miniature represented in the Effect into it.
Sorcery Cards and Minion Actions
In this mode, when a Sorcery Card is drawn, the card must be resolved, including the Actions of the Minions shown on it and that are currently present in the Dungeon (their Miniature is located in a Dungeon Zone).
Resolve the effect of the card shown above (A, in the example), then resolve the remainder, one after the other, moving downward from the top of the card, including the Actions of the Minions (B, in the example).
Some may require you to resolve two Actions.
To resolve a Minion Action, follow these rules, repeating these steps for every single Action the Minion must perform:
- The Minion must perform the indicated Action by the player who activated Rigor Mortis, placing it in the Target Zone (as indicated by the description of the Action, see box opposite).
- To determine the closest Target Zone, the distance between two Zones must be calculated in steps, considering any Zone Effects to reduce the distance (such as Secret Passage, Teleportation or Portal).
- The Minion's move is not an actual Move. It doesn't move Zone-to-Zone, but once the Target Zone is determined, the Minion is taken directly from its current Zone and placed inside the selected Zone to perform the Action.
- If the Minion is in a situation where it can resolve its Action in multiple ways (for example by moving to two Zones at equal distance), or must decide about a game element (for example, the Explore Action), the Scholar who activated Rigor Mortis makes the choice for the Minion.
Actions of Minions
Raid N:
- Target Zone: place the Minion in the Zone closest to this Minion which contains at least one Information Cube.
- Effect: the Minion Raids the indicated number of Information Cubes (see p. 4).
Explore:
- Target Zone: place the Minion in a newly placed Zone adjacent and connected to this Minion's location.
- Effect: the Minion reveals and places a new Zone exactly as if it were a Scholar. After placing it, the Minion moves into it and if present, activates the Stairs Effect.
Draw Student:
- Target Zone: place the Minion in the Zone closest to this Minion which contains at least one Scholar.
- Effect: each Scholar in the same Zone as the Minion, in turn order, draws a Student from the University and places it at the Bonfire.
Discard N:
- Target Zone: place the Minion in the Zone closest to this Minion which contains at least one Scholar.
- Effect: each Scholar in the same Zone as the Minion, in turn order, discards the indicated number of Trick Cards from their Hand.
Stun N:
- Target Zone: place the Minion in the Zone closest to this Minion which contains at least one Scholar.
- Effect: each Scholar in the same Zone as the Minion, in turn order, obtains the indicated number of Stun Tokens.
Gift:
- Target Zone: place the Minion in the Zone closest to this Minion which contains at least one Scholar.
- Effect: each Scholar in the same Zone as the Minion, in turn order, Collects an Information Cube (the leftmost one) from the Kragmortha Zone that contain the Zone Effect of that Minion.
Example: Action of Minions
The activation effect of the Boss Dark Lord Rigor Mortis makes you draw and resolve a Sorcery Card at the player who activated the Boss.
Magic Gate (A) is drawn, and after resolving the Effect Raid 2 (see example p. 4), it must be activated in sequence, starting from the top, for the Minions indicated on the card whose miniatures are present inside the Dungeon.
Fluffy is not in the Dungeon, hence his Action is skipped.
Matita is present and must be moved to the Zone closest to her in which she can perform her two Actions: Gift and Draw Student (B).
Gift is resolved first. To perform this Action, Matita targets the closest Zone containing at least one Scholar. Sofia and Rebecca are 2 "steps" away, while Vincenzo and Valerio, thanks to the Secret Passage Zone Effect A (C), are only one "step" away.
The player whose turn it is moves the Matita figure to Vincenzo's and Valerio's Zone.
In turn order, Vincenzo comes before Valerio. So the Action falls on Vincenzo, who must take the first Information Cube present in the Zone with the Matita Minion Zone Effect (D) which is a Worship Cube (E). Not bad! Then it's up to Valerio, who is luckier, because in the Zone with the Minion Effect of Matita, there is only a Universal Cube (F) remaining. He takes it gladly... what luck!
Now we need to resolve the Draw Student Matita Action. Matita does not move, because the closest Target Zone happens to be the same Zone Matita is currently in.
In turn order, Vincenzo draws first, who breathes a sigh of relief while drawing and obtains a standard Student, placing it at the Bonfire.
Then, it's up to Valerio, who draws an Omega Student, what a shame!
Kragmortha Mode
In this mode, each player will take control of one of the goblin Minions of Rigor Mortis (fighting on his side) intent on raiding the dungeons of the other worlds in search of information for their master. The Minions will depart from the Dark Lord's castle from the lands of Kragmortha. Using the castle portals, they will be able to reveal small dungeons independently using any Zones in possession of the players (from the base game or other Dungeonology expansions).
Game Setup (Changes)
A. Each player takes a Note Board and sets the Study Bonus (the top right numbered wheel) to 0.
B. Place Kragmortha Castle as shown on the right, without placing any Information Cubes in their Zones.
C. You can play this mode with 2, 3 or 4 players. Each player chooses one of the goblin Minions as their Scholar, and places this miniature in the Castle Zone that displays that Minion Effect.
D. Each player takes from the Reserve a number of Students equal to the value of Initial Students of his or her Scholar.
E. Shuffle the deck of Trick Cards and deal as many cards as determined by turn order (for example, in a game with four players: one card to the first player, two to the second, three to the third, and four to the fourth player). Shuffle the Intern Deck and place it on the table.
F. Place the Campus board on the table.
G. Use the Rigor Mortis Boss with the standard profile and place his card next to the Campus.
H. Place in the University a number of Students multiplied by the number of players, and an Omega Roster as indicated on the Alert Card.
I. Draw a Clan Card from those available and place it face down, without revealing it, on the Campus.
J. Shuffle the deck of Jinx Cards and place it on the table.
K. In each Zone that contains the Minion Effect, place the Portal Token of the same color as that Effect as well as the miniature of the indicated Scholar (Minion) chosen by the players at point C indicated in that Zone Effect.
L. Dungeon Zone Piles:
- Group by Floor (I, II and III) all the Zones you own, or any you select to use (regardless of the game box they come from) and shuffle each Floor individually. Then create four stacks composed as follows:
- 2 Floor III Zones, 1 Floor II Zone, 2 Floor I Zones
- 2 Floor III Zones, 2 Floor II Zones, 1 Floor I Zone
- 1 Floor III Zone, 1 Floor II Zone, 2 Floor I Zones
- 1 Floor III Zone, 2 Floor II Zones, 1 Floor I Zone
- If you have Floor IV Zones (from other expansions) place one or two of them at the bottom of each of the four piles, until they all contain the same number of Zones.
- Shuffle four Kragmortha Stack Tokens of different colors by concealing the colored faces and randomly placing one face down on each pile.
- Uncover the Kragmortha Stack Tokens present in each of the four Zone Piles at the start of the first round of the game.
M. The player who yells "Yes, Dark Lord!" loudest in the goblin language becomes the first player.
Special Rules
For a game in Kragmortha Mode, the following special rules are used which differ and take precedence over the rules of a standard Dungeonology game.
Planar Portal
The Start Zones contain the Planar Portal Zone Effect.
Matching tokens add the same effect to the Zones in which they are placed.
Two Zones that contain a Planar Portal of the same color are considered related; a Scholar that is on one of them can spend a point of their own speed to move to the other, and vice versa. The Boss can also use Planar Portals to move.
Starting Zones
Each of the four Kragmortha Zones containing the Effect of a Minion acts as a Starting Zone for the Scholar / Minion represented by it. All the rules of the Starting Zones described in the core game rulebook apply exclusively for the Scholar represented in the Zone and it is here that the Scholar returns when taking a Rest. An opposing Scholar can pass into and through the Starting Zone of another Scholar, because for that Scholar, it is considered a normal Zone (where it gets no immunity effect).
Kragmortha Zones
In this mode, Kragmortha's Zones work differently compared to the standard rules described on p. 3. In the Kragmortha Zones, it is not possible in any way to collect or remove Information Cubes placed in their spaces except through Raid (for Rigor Mortis) and Archive (for Scholars in their Starting Zone).
Areas
The four stacks created during Game Setup represent the four Dungeons which Scholars can reach from Kragmortha Castle. Each of the stacks is considered an independent Area, separate from the others. During the game, the Zones of the same stack can connect to each other regardless of their Floor, and without taking into account the Stairs, Passage and Portal Zone Effects (not used in this mode, see below). The Zones of a given stack / Area are all considered part of the same Floor.
The first time a player uses a placed Planar Portal Zone Effect in one of the Starting Zones, the corresponding Area is created:
- Take the first Zone from the Pile that has been assigned the same color as the Portal.
- Place the Zone on the game table so that it is separated from all other Areas.
- Place the Planar Portal Zone Effect marker of the color on the Zone corresponding to that Pile.
What are Areas? An Area is a group of Adjacent Zones in its entirety, regardless of the Floor belonging to the Zones that compose it; in Kragmortha Mode there are four Areas that act as four distinct Dungeons. Some Game Effects, such as the Main Effect of the Trick Card Secret Passage, work exclusively within the same Area.
Zone Effects not to be considered
Any Zone Effects of Stairs, Passages and Portals printed on the Zones used during the game are not taken into account while playing this mode. During the game, the Zones of the same pile can be linked regardless of their level, therefore, these three Zone Effects are not necessary. So, for example, a Floor Level I Zone may be connected to a Floor Level III (or IV) Zone.
Designer's note: when using Zones from other expansions, some Zone Effects could be tied to the mechanics of that expansion and are not pertinent to the current game. The first time during the game where such effects are revealed, the players can decide by mutual agreement to declare them void for the rest of the game.
Panic Cards
Panic Cards are not used in Kragmortha mode. Place the Alert Card on the Campus, but no Panic Card is placed below it.
Universal Information
If during the game, when placing a Zone and there are not enough in-Reserve Information Cubes to fill in all the spaces, proceed as follows:
- Fill in all spaces for which there are suitable Information Cubes in Reserve; if at least one space remains blank, proceed with the next step.
- Add a Universal Information Cube (and only one, regardless of the remaining empty spaces), and arrange the group of cubes into that Zone so that the Universal Information Cube is the one on the far right (see figure), and that any empty space(s) are those furthest to the left.
- If there are still empty spaces, they remain empty.
In this mode, the Universal Information Cubes will be worth 7 points each for the calculations of End of the game.
Figure caption (as printed): While placing in this Zone, there are not enough Information Cubes in Reserve for Riches and Caste to fill it completely. A single Universal Information Cube is then added in this Zone as the last cube to the right, and the group of cubes are rearranged by filling the spaces furthest to the right.
Rigor Mortis Raiding Information Cubes
All Information Cubes Raided by Rigor Mortis must be placed in one of his home Zones, represented by the two Zones with the Boss Zone Effect. The player who activated the Boss chooses which of the two Zones to place the Raided cubes, one at a time, following these two rules:
- The Raided cube is placed in the Zone of the two containing fewest Information Cubes. In case of a tie, the player chooses.
- If all spaces in the Zones are occupied by cubes, the Raided cube must replace the lowest value cube (in victory points) of the 10 present in the two Zones, as long as the Raided cube has a higher value than the one to be replaced. In case of a tie, the player chooses.
If it is not possible to place the Raided cube (because all cubes present in the Zone have a higher point value), then the Raided cube is placed in the Reserve.
Exalted
Unlike in a standard game, a Scholar becomes and remains Exalted once it has achieved at least two Stars with the Information Cubes collected on their Note Board, regardless of the Stars reached by their opponents. A Scholar only loses Exalted status if they fall below 2 stars.
Archive
In this game mode, Scholars can interact with Information Cubes collected on your Note Board in a new way: Archiving.
During the game, the Scholars will need to Archive their collected cubes by placing them in the spaces of their own Starting Zone to prove to the Dark Lord that they are the best Minions. To archive cubes, these rules must be followed:
- A Scholar may Archive once per turn, during their turn, if at any moment of the turn the Scholar is in their Starting Zone.
- The Scholar chooses from 1 to 4 Information Cubes from their Note Board.
- The Scholar moves the chosen cubes by placing them in the spaces of their Starting Zone. If spaces are occupied in your Starting Zone by previously Archived cubes, you can discard them to the Reserve to make room for the newly chosen cubes. Note that any remaining Information Cubes on the player's Note Board do not affect scoring in this mode.
End Game
In Kragmortha mode you will never get to the Maximum Alert phase of the game (Panic Cards are not used).
The game ends at the start of the player's next turn who placed an Omega Student in the last (lowest) space on the Alert Card (A).
When this happens, proceed as follows:
- Reveal the Clan Card.
- Player Points: Add the point values of the Information Cubes present in the Starting Zone of each Scholar (in this mode, Universal Information Cubes are worth 7 points for these calculations, and are never modified by Clan Cards), applying the Modifiers indicated on the Clan Card to each of the cubes. Add or subtract any bonus points due to other game items such as Jinx Cards or Intern Cards. Note that the Information Cubes still present on the Scholar's Note Board do not influence the calculation of points in Kragmortha mode (they are lost).
- Punishment Threshold: Add the point values of the Information Cubes (in this mode, the Universal Information Cubes are worth 7 points for calculations) present in each of the two Rigor Mortis Zones (A and B) by applying the Modifiers indicated on the Clan Card to each of the cubes. You will obtain two results (one from each Rigor Mortis Zone): ignore the lower result, while the higher result, called the Punishment Threshold, is noted.
- Wrath of the Dark Lord: All Scholars who have achieved a result equal to or greater than the Punishment Threshold have angered Rigor with their impudence! How dare they think they are remotely better than the One Dark Lord! These Scholars are eliminated from Rigor's legions and lose the game. So always monitor how well Rigor Mortis is doing and be sure to Archive your Information Cubes carefully.
Among the remaining Scholars still in Rigor's favor, the one with the highest score wins the game!
Tie: In case of a tie, the Scholars will check to see who among them has the most Information Cubes in their Starting Zone of the following types in this order: checking for Universal first, then Caste, then Riches, then Worship, then Militia, and finally checking for Civilization.
If there is still a tie, this means that all the Scholars plagiarized each other's work! Rigor Mortis is infuriated, and he punishes everyone. Nobody wins the game!