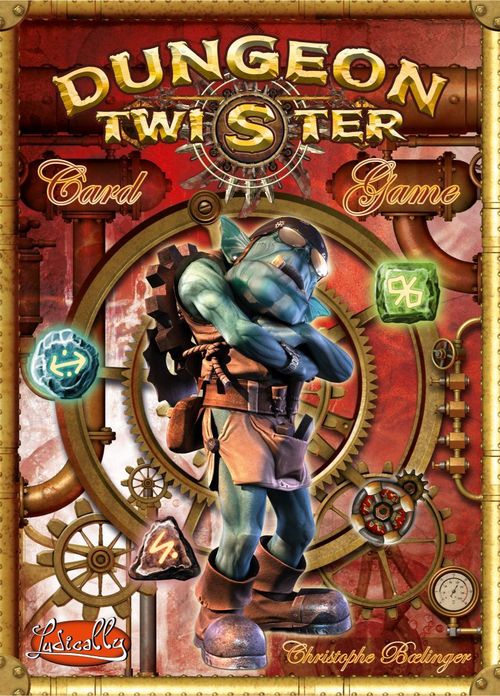
Dungeon Twister: The Card Game
Dungeon Twister: The Card Game Rulebook
Table of Contents
Table of Contents
- Game Components
- Introduction
- Tutorial 1
- Game Turn
- Room Zones
- Revealing a Room
- Moving a Character
- Using a Character's Special Ability
- Using Objects
- Rotating a Room
- Moving a Character Out of the Labyrinth
- Jump Cards
- Finishing the Game
- Tutorial 2
- Wounded Characters
- Group Combat
- Combat in a Starting Zone
- Additional Jump Cards
- Victory Points (VP)
- Finishing the Game (Tutorial 2)
- Tutorial 3
- Initiating Ranged Combat
- Full Game
- Optional Rules
- Characters
- Objects
Game Components
This rulebook and 128 cards, including:
- 3 Scenario cards, double-sided, 5 scenarios in total
- 12 Room cards: 6 pairs of rooms, each room containing 4 zones
- 9 Open/Broken portcullis cards, double-sided
For each player:
- 1 Action wheel card: 0-3 actions on one side, 4-7 actions on the other side (reaching 7 actions is impossible with the current game — reserved for future use)
- 25 Character cards
- 13 Object cards
- 9 Combat cards
- 3 Jump cards
- 1 Broken wall card
Introduction
You control a group of adventurers entrapped by the Arch-Mage in his Dungeon. They were teleported into his catacombs to amuse him as he watches them struggle to escape his diabolical mechanical maze. But they will also need to fight for survival against your opponent's characters who are competing with them to exit the labyrinth.
Tutorial 1
Use the following scenario:
Objective: Earn 2 victory points (2VP)
Game duration: 2 pairs of rooms (4 rooms total). Initial placement: 1 object is placed in each room. 2 characters per player, 2 objects per player.
In this tutorial, you earn 1 victory point (1VP) whenever one of your characters escapes the labyrinth through your opponent's starting zone, so the winner is the first player who manages to have both his characters escape.
Game setup (Tutorial 1)
The scenario specifies 2 pairs of rooms (4 rooms). For this tutorial, use the pairs of rooms with the blue and green circular arrows.
Shuffle the 4 Room cards and, without looking at them, place them facedown to assemble a square board consisting of 2 rooms by 2 rooms.
Each player chooses a color and places the action wheel of his color before him, with the 0-3 actions face showing, and the 0-side pointing towards the board.
Each player also takes the 3 Jump cards in his color. Do not use the Combat cards in this tutorial.
Character placement. For this tutorial, each player takes the following Character cards in his color: Mechanork and Naga (see Characters). Each player places his Character cards facedown in his starting zone, in the order of his choice.
Object placement. For this tutorial, each player takes the following Object cards in his color: Rope and Key (see Objects).
Randomly determine who will go first in this phase. Starting with the first player, players take turns placing one of their Object cards facedown to the outer side of the room of their choice, indicating that the object will appear in the corresponding room when the room is revealed. Place one object per room, as indicated by the Scenario card. It is forbidden to look at previously placed objects, even your own.
Game areas. The board is made up of the blue starting zone, the 4 rooms (Room 1, Room 2, Room 3, and Room 4, arranged 2 by 2), and the yellow starting zone. Characters not yet placed in a room sit on their owner's starting zone outside the labyrinth, waiting to enter it. When a character enters a room, its card moves to sit against the outer border of that room; likewise for objects and the room they are found in.
Reveal the characters. Once all the objects have been placed, players simultaneously reveal their starting team by turning over the two Character cards placed in their respective starting zone, choosing their initial orientation as they wish.
Once again, randomly determine who will go first. Player turns alternate for the rest of the game.
Game Turn
Each player's turn consists of the following 2 phases in this order:
- Earn action points
- Use all or some of his actions
The player currently playing his turn is called the active player. Once his turn is over, the other player then becomes the active player.
Phase 1: Earning action points
During the first turn, the first player adds 2 action points (2AP) to his action wheel, rotating his action wheel such that the number 2 points towards the board.
During the second player's turn and in each subsequent turn, 3AP are added to the active player's action wheel. If the total number of action points exceeds 3, turn the action wheel to its 4-7 face and use it to show the total number of action points available to the player.
Example: Mike goes first and gets 2 action points on his action wheel. Allison goes next and gets 3 action points on her action wheel. At the beginning of Mike's next turn, he gets an additional 3 action points. If he only used 1 action point in his first turn, he now has 4 actions points available to him.
Phase 2: Using all or some of your actions
The active player may carry out as many actions as are indicated on his action wheel. He is not required to use all of them. Up to 3 unused actions can be saved for use in later turns. Therefore, at the end of the turn, the action wheel must be back on its 0-3 face.
To perform an action, rotate the action wheel down by 1AP and perform the action. Action points can be split between different characters or all used on one character.
In this first tutorial, you can spend 1AP to:
- Reveal a room
- Move a character
- Rotate a room
- Jump over a pit trap
- Use a character's special ability
Room Zones
Zone icons
Each room contains 4 zones identified by the following zone icons: triangle zone, square zone, circle zone, and rotation gear zone.
Room zone indication of characters and objects
To indicate in which zone of a room a character or object is located, place its card to the outer border of the room, orienting it so that the corresponding zone icon points towards the room.
Example: The Rope is in the triangle zone. The yellow Mechanork is in the rotation gear zone.
Facing a room from the starting zone
The blue Naga is in his starting zone, so he is not in any room yet. However, his card orientation indicates that he is facing the circle zone, ready to enter the room through that zone.
Entering the labyrinth
Once the blue Naga actually enters the room's circle zone, his card will move here, with its circle icon pointing left towards the room.
Revealing a Room
For 1AP, a room can be revealed (turned face-up) if one of your characters has direct access to it before it is revealed. Each character in the starting zone has direct access to the room nearest to him and may therefore reveal it for 1AP each. Once inside the labyrinth, to have direct access to an unrevealed room, a character must be in a zone adjacent to one of the room's edges, and not be separated from it by a wall, closed portcullis or even an arrow-slit.
Who can reveal a room?
Example: The yellow Mechanork is in Room 1's triangle zone so he is adjacent to both Rooms 2 and 3 and can reveal either. The yellow Naga is in his starting zone. He has direct access to Room 2 and can therefore reveal it. The blue Naga is in Room 4's rotation gear zone, but he is not adjacent to Room 2 (no access through arrow-slit), so he cannot reveal it. From the starting zone, the blue Mechanork cannot reveal any other room. He has direct access to Room 4, but that room is already revealed.
Adjacent zones
Two zones are said to be adjacent if they share a common edge and are not separated by a wall, arrow-slit, closed portcullis, or pit trap.
Revealing the room
Slide the room to the side from the board's structure and replace it in the structure face-up.
Note: The character does not immediately enter the room. To enter the room, he will need to perform a separate movement action after the room reveal action.
Revealing and placing the room's object
Reveal the object. If it is yellow, the blue player places it in the revealed room in a zone of his choice, and vice-versa if the object is blue.
Look at the revealed room and choose a zone in which to place the object, placing the Object card next to the revealed room, and orienting it so that the desired zone icon on the Object card points towards the room.
Example: The blue player places the yellow Rope in the triangle zone.
Moving a Character
Spend 1AP to move one of your characters. The number in white next to the movement icon on the Character card shows how many zones this character can move through for 1AP (for example, the Naga can move through 3 zones for 1AP).
You are never obligated to use up all of your character's movement points. In addition, you may spend additional AP on a given character to allow him to move more than once, although one movement must be fully completed before starting any other action.
Golden rule: any action must be fully resolved before starting a new one.
During his movement, a character may:
- Move to an adjacent zone (see Adjacent zones)
- Move through an open portcullis
- Enter and move through a zone containing a friendly character
- Enter a zone containing an enemy character. However, he cannot move through that zone this turn. He can either stay in the zone for one turn and move through it in a later turn, or he can exit the zone through the same entrance he used to enter it.
- Move through the starting zone (see Moving on the starting zone)
A character may not:
- Move through a pit trap
- Move through a closed portcullis
- Move through a wall or an arrow-slit
At the end of his movement: Once a character arrives at his final destination room and zone, place the Character card next to the room, orienting it so that the appropriate zone icon on the Character card points towards the room (see Room zones).
Golden rule: at the end of any action, there can never be more than 3 characters (wounded characters, introduced in Tutorial 2, count towards this limit) controlled by the same player in the same zone.
Legal vs. illegal moves
Example: The blue Mechanork is in the green rotation gear zone. The yellow Mechanork can enter the green rotation gear zone, but cannot move through it because that zone contains the blue Mechanork — illegal. The yellow Mechanork is in the circle zone; moving to the rotation gear zone is legal. The Rope is in the red rotation gear zone.
The blue Naga is in his starting zone, facing the inaccessible triangle zone. The blue Naga has 3 movement points: 1. Naga changes orientation to face the accessible rotation gear zone. 2. Naga enters the rotation gear zone and picks up the Rope (see Using objects), also located in the rotation gear zone. 3. Naga uses the Rope to cross the pit trap and enters the triangle zone.
After the move: both Mechanorks are in the green rotation gear zone. The blue Naga is in the triangle zone, carrying the Rope.
Note: The yellow Mechanork will be able to move through the green rotation gear zone next turn.
Moving on the starting zone
When a character on a starting zone reveals a room, the orientation of the Character card determines which zone of the revealed room he is facing (zone icon on the Character card that points towards the room). To be able to enter the room, the character must face an adjacent zone.
Changing the facing on the starting zone. To change which zone the character is facing, use one of the character's movement points and change the orientation of the Character card so that the icon corresponding to the chosen zone points towards the room.
Example: only the square zone is accessible. The rotation gear zone is accessible only if the portcullis can be opened. The other two zones are too far and inaccessible. The character in the starting zone is facing the triangle zone, which is impossible, since the revealed room's triangle zone is not adjacent to the starting zone. Spend one movement point and rotate the Character card so that its square zone icon points towards the room.
Moving to face other room on starting zone. For one movement point, a character may also move on the starting zone so that he faces the other room. Move the Character card below the other room and choose a zone to face by orienting the card so that the chosen zone icon points towards the room.
Example: The Naga moves to face the other room on the starting zone, pointing towards the adjacent square zone.
Using a Character's Special Ability
Each character has one or more special abilities. Some are permanent and do not require spending any AP to use them; others require spending AP, as shown by the AP-cost icon next to their ability icon. Your first adventure starts with the Naga and the Mechanork (see the Characters section for details).
Using Objects
A character can pick up an object from a zone during a movement action. This does not require the player to spend any AP as it is considered part of the character's movement.
A character can also drop an object in a zone while carrying out a movement. This also does not require spending any AP. Characters may carry objects of either color.
Object cards are placed underneath the characters carrying them. At any time, any player may look at a card underneath any character, friend or foe.
During a movement action, if one of your characters moves through a zone containing another character of the same color, you can take, give, or trade objects as you wish between the two characters. This does not cost any AP. However, at the end of any action, the golden rules must be respected.
Picking up an object. Place the Naga card over the Rope card to indicate that the Naga is carrying the Rope.
Dropping an object. To drop the Rope, simply move the Naga card off the Rope card, while maintaining card orientation.
Golden rule: each character can carry at most one object or wounded character (wounded character to be introduced in Tutorial 2) at any given time.
Trading objects
Example: The blue Naga is carrying a Key. The blue Mechanork is carrying a Rope. The blue player spends 1AP to move his Naga 3 zones. The Naga moves through the zone containing the blue Mechanork. As the Naga passes by, he can give the Mechanork the Key and take the Rope without spending any additional AP. These actions are considered part of his movement. The Naga then uses the Rope to cross over the pit trap.
Using an object's special ability
Some objects have permanent effects that do not require the player to spend AP to use them; others require spending AP, as shown by the AP-cost icon next to their ability icon. Some must be discarded after one use, while others may be kept and reused. Your first adventure uses the Key and the Rope (see the Objects section for details).
Rotating a Room
Each room in the labyrinth is equipped with a complex system of wheels and gears allowing it to rotate around its center. The rotation gear which triggers this movement is represented by a colored spinning arrow.
For 1AP, a character in a rotation gear zone can rotate the room ¼ of a turn in the arrow's direction. He can spend 2AP to rotate it a ½ turn, or 3AP to rotate ¾ of a turn, etc. Simply rotate the Room card by the corresponding number of ¼ turns.
Rooms function in color pairs. If a character is in a rotation gear zone in one room, he may decide to rotate just this room, or alternatively the other room of the same color, or both rooms in turn, by spending 1AP per each ¼ turn of any given room. 1AP only allows you to rotate one room at a time! You cannot rotate two rooms with the same 1AP.
Rooms in a pair turn in opposite directions from one another. Each targeted room will turn in the direction of the arrow printed on its own card, not necessarily the direction of the rotation gear in the zone where the character is located. So to know the direction of the rotation for a room, look at the direction of the arrow printed on that room.
When a player rotates the room, he is not allowed to change his mind if the new game situation is not to his liking. None of the Object or Character cards in the room change orientation during a rotation: they stay in the same icon zone.
Moving a Character Out of the Labyrinth
As soon as one of your characters moves into your opponent's starting zone, he is teleported off the Dungeon Twister by the Arch-Mage. The Arch-Mage's applause earns you 1VP. Place the Character card in front of you to symbolize this VP.
It is not possible to stay or move around on your opponent's starting zone. On the other hand, your characters may stay or move around on your own starting zone, and even return to it if they so wish.
If a character exits the labyrinth while carrying an object, that object is discarded.
Blocking an exit
A character located on a starting zone blocks the exit corresponding to the zone he is facing.
Example: The Naga is facing the triangle zone, therefore exit is blocked through that zone. However, characters can freely exit through the circle zone.
Jump Cards
Play a Jump card on one of your characters to jump over a pit trap. That character may then land in any zone adjacent to the pit trap, as long as that zone is free of any unwounded enemy characters. Playing a Jump card costs 1AP. Played Jump cards are removed from the game.
Example legal vs. illegal jumps: a jump with no adjacent zone (double pit-trap) is illegal. A jump into a zone occupied by an unwounded enemy character is illegal. A jump into an empty adjacent zone, or one containing only a wounded character, is legal.
Finishing the Game
The game is over as soon as one player has moved both his characters out the labyrinth through the opponent's starting zone. That player scores 2VP and is declared the winner.
Tutorial 2
Use the following scenario:
Objective: Earn 3 victory points (3VP)
Game setup: 3 pairs of rooms (6 rooms total), 4 characters per player, 2 objects per player
Initial placement: 1 or 2 Object and/or Character cards per room as shown on Scenario card
Game setup (Tutorial 2)
Choose 3 room pairs at random. Make sure that if a room is chosen, its twin room of the same color is also chosen.
Shuffle the 6 Room cards and, without looking at them, place them facedown so as to assemble a rectangular board consisting of 3 rooms by 2 rooms.
Each player selects a color and takes the following 4 Character cards in his color: Naga, Warrior, Colossus, and Backstabber. Each player also takes the following 2 Object cards in his color: Rope and Key.
Finally, each player takes the action wheel, with the 0-side pointing towards the board, as well as the Jump cards and Combat cards of his color.
Starting positions. Both players choose and simultaneously place 2 of their Character cards facedown in their starting zone, in the order of their choice.
Placing the remaining cards. Place the Object cards and remaining Character cards in the rooms using the same method as in Tutorial 1's Object placement, except that now there are Character cards to place as well as Object cards, and some rooms will contain two cards.
When every room contains the maximum number of cards allowed, setup is completed. Players simultaneously reveal their starting team by turning over the two Character cards placed in their respective starting zone, choosing their initial orientation as they wish to indicate the zone they will be facing when the room in front of them is revealed.
Randomly select the first player to start the game and proceed with the game as before. In this tutorial, the following action now becomes available for 1AP:
- Initiate close combat
Revealing a room
When the active player reveals a room, it may now contain Character cards as well as objects. Object and Character cards in the room are revealed. The active player decides in which zone to place each character and object, with the exception of the objects of his own color. Objects of his color are placed by the opponent, after all other cards have been placed. Place at most one card per zone whether it is an object or a character. Use the card's orientation to indicate its zone placement as before when placing objects (see Revealing and placing the room's object).
Initiating close combat
A character can initiate close combat against any enemy character in the same zone, by spending 1AP.
Each player selects a Combat card from his hand and places it facedown in front of him. Both cards are then revealed simultaneously. Each player adds his Combat card's value to his character's combat value (the red number next to the sword icon on the Character card).
The player with the highest total wins the combat and the opponent's character becomes wounded. The wounded character's card is flipped over to its backside to symbolize its wounded status. Make sure to correctly orient the backside of the card to show the zone in which the wounded character is located.
In case of a tie, nothing happens. The active player may spend an additional 1AP to initiate another combat if he so wishes.
With the exception of the "Combat +0" card, all other Combat cards are discarded once used. Place them in a single face-down pile. Players are not allowed to look back at these cards. The "Combat +0" card returns to its owner's hand after use.
The active player cannot initiate combat against a character that just became wounded in the current turn, regardless of how he was wounded.
You may initiate combat against an enemy character located in his starting zone, as long as your attacking character is still in a room and has not left the labyrinth (see Combat in a starting zone).
Wounded Characters
A wounded character loses his special abilities, unless otherwise specified, and may not perform any action. Most importantly, he cannot initiate combat. He can only defend if attacked directly. His combat value is 0, but he still must play a Combat card whenever attacked.
Eliminating a wounded character
If a wounded character loses a combat, he is eliminated. His card is given to the player who won the combat to symbolize 1VP earned. If a wounded character wins a combat, his attacker becomes wounded.
At any time, any player may look at a wounded character's card to be reminded of which character it is. Make sure not to change the orientation of the card while doing so.
Objects
When a character becomes wounded, he keeps any object he was carrying. Any character, whether friend or foe, passing through that zone during a movement action, may take the object carried by the wounded character, or exchange objects with him without asking permission from his owner!
When a wounded character is killed, any object he was carrying remains in the same zone.
Moving through zones with wounded characters
A character may move in or out of a zone containing a wounded character, whether friendly or enemy.
A character may exit the labyrinth through a starting zone containing a wounded enemy character.
Carrying the wounded
Wounded characters may be carried like objects by friendly characters. All rules applicable to objects are also applicable to wounded characters, unless otherwise specified.
If a character carrying a wounded character loses a combat, the wounded character is eliminated and the character that was carrying him, in turn, becomes wounded.
Group Combat
Group combat is combat that involves 3 or more characters.
If a blue character initiates combat against a yellow character (whether wounded or not), then all blue characters and all yellow characters that are in the same zone must participate in the combat. All involved blue characters are considered attackers and all involved yellow characters are considered defenders.
The attacker adds up the combat value of all his involved characters, and the defender does the same. Only one Combat card is played by each player. All of the loser's characters involved with the combat automatically become wounded.
Wounded characters in group combat
Wounded characters are only involved in group combat in which they are the initial target. They do not otherwise participate in group combat. However, if characters friendly to an attacked wounded character are in the same zone, they do help defend the wounded and participate in the group combat, following the standard rules outlined above.
If a wounded character loses a group combat, he is eliminated, and his card is given to the player who won the combat; all defending characters become wounded. If he wins, his attackers all become wounded.
Group combat example
Example: Yellow wounded Mechanork, Blue Naga, Blue Backstabber, Yellow Colossus, and Blue Cleric are on the board. The blue player spends 1AP and declares that his Naga is attacking the Colossus. Since the blue Backstabber is also in the same zone, she must also participate in the combat. Since there is group combat involving a friendly character, the Backstabber's special ability gives her +2 in combat value (see Backstabber in Characters section). The blue player adds up the combat values of his Naga and Backstabber (or 2+(2+2) = 6). The blue Cleric cannot participate in the combat because he is in a different zone. Only the yellow player's Colossus can participate because his Mechanork is wounded. Yellow player's combat value = 5. The blue player, confident in his victory, plays a "Combat +3" card. The yellow player plays a "Combat +5" card. The yellow player wins with a score of 10 against 9. The blue player's Naga and Backstabber characters are wounded and their Character cards are flipped facedown.
If the blue Naga had instead attacked the yellow wounded Mechanork, the group combat would have involved both yellow characters, with the wounded bringing a combat value of zero. In this type of situation, it would often be in the blue player's interest to initiate combat against the wounded Mechanork. If the blue player were to win the combat, the yellow Colossus would then become wounded and the yellow Mechanork would be eliminated and be awarded to the blue player for 1VP.
Combat in a Starting Zone
It is possible to initiate combat against an enemy character located in a starting zone. This is particularly useful if a character is blocking an exit. The character located in the starting zone must be facing the room zone containing the attacking character and must not be separated from him by a wall, arrow-slit, pit trap, or closed portcullis.
Similarly, a character in a starting zone can initiate combat against an enemy character located in the room zone he is facing.
Group combat in a starting zone
If more than one character is present in either zone, and if the characters on the starting zone are all facing the same room zone in the labyrinth, then all characters are involved in a group combat as if they were in the same zone. The special rule for Wounded characters in group combat also applies.
Additional Jump Cards
If you are out of Jump cards, you may discard a Combat card other than "Combat +0" in lieu of playing a Jump card. Show the discarded card to your opponent. You still must pay the 1AP.
Victory Points (VP)
Moving a character out of the labyrinth
As in Tutorial 1, any character that exits the labyrinth earns his owner 1VP.
If a character exits the labyrinth while carrying a wounded, the wounded character is rescued (removed from the game) and therefore cannot be killed by the opponent, but he does not earn the player any VP.
As before, if a character exits the labyrinth while carrying an object, that object is discarded.
Eliminating an enemy character
If a wounded character loses a combat, he is eliminated. His card is given to the player who won the combat to symbolize 1VP earned.
Finishing the Game (Tutorial 2)
As soon as a player has scored 3VP, he is declared the winner and the game is over.
Tutorial 3
Use the following scenario:
Objective: As soon as a player has scored 4VP, he is declared the winner and the game is over.
Game setup: 4 pairs of rooms (8 rooms total), 6 characters per player, 4 objects per player
Initial placement: 2 Object and/or Character cards per room as shown on Scenario card
Game setup
Choose 4 room pairs at random. Make sure that if a room is chosen, its twin room of the same color is also chosen.
Each player takes the following 6 Character cards: Crossbowman, Wizard, Naga, Mechanork, Warrior, and Cleric.
Each player also takes the following 4 Object cards of his color: Rope, Key, Bow, and Large shield.
Proceed with game setup, and play the game as before. In this tutorial, the following additional action now becomes available for 1AP:
- Initiate ranged combat
Line of Sight
A line of sight is a straight horizontal or vertical line between two zones (no diagonals). Choose the starting point in the first zone and the ending point in the target zone as you wish to get the best possible line of sight.
Lines of sight do not pass through walls, closed portcullises, or zones containing characters (wounded or not). Lines of sight do pass through zones containing objects, rotation gears, and pit traps. If a character is in a zone adjacent to an arrow-slit, his line of sight extends beyond the arrow-slit.
Examples of line of sight
Example: The Crossbowman can see the Wizard over the pit trap, but he cannot see the Warrior because the Wizard is blocking his line of sight.
The Mechanork can see the Naga through the arrow-slit. The Rope does not obstruct his view. However, the Naga cannot see the Mechanork because he is not in the zone adjacent to the arrow-slit.
The Cleric and Warrior can see each other through the arrow-slit. But the Cleric cannot see the Naga because of the closed portcullis. Nor can he see the Naga over the pit trap because diagonals are not allowed.
Initiating Ranged Combat
The Crossbowman, as well as characters carrying a Bow, can initiate ranged combat. Spend 1AP to initiate ranged combat as with normal combat. The attacking character is called the shooter. He targets a character located in a zone within line of sight, without any range limitation.
The combat is resolved with the usual rules, each player playing one Combat card facedown, except that the shooter may not become wounded as a result of the combat if he loses.
The combat value used for ranged combat is sometimes different from the normal combat value and is specified in the character or object's description. No modifiers may be applied to this combat value, whether because of a character's special ability, object, or floor element. Special abilities applicable to close combat are not applicable in the case of ranged combat (for example, the Telepath's ability does not apply).
A character cannot initiate ranged combat if he is in the same zone as his target or any enemy character.
Ranged combat is otherwise regulated by the same rules as close combat. In particular, you may not shoot at a character that was wounded in the same turn, whether by another ranged combat or through close combat.
Group combat (ranged)
The following characters join in the combat:
- characters on the attacking side in the same zone as the target and, if there are any such attackers, other defending characters in that zone
- other shooters on the attacking side with line of sight to the target
The following characters may not join in the combat:
- shooters on the defensive side
- other characters on the defending side if there are no attacking characters in the same zone
The cost for the group combat is still 1AP overall, including the participation of the shooter or shooters, who are counted as part of the group combat. Each player adds up the combat value of his participating characters, using the ranged combat value in the case of the shooter(s), then plays a Combat card.
Note: The Crossbowman and characters carrying a Bow can be involved in close combat. In this case: close combat rules apply; their normal combat value is used; they are not considered shooters.
Ranged combat on a starting zone
It is possible to initiate ranged combat against an enemy character located in a starting zone. The character located in the starting zone must be facing a zone that has line of sight to the attacking character.
Examples of ranged combat
Example, during the blue player's turn: The blue Crossbowman can shoot at the yellow Mechanork, which will trigger group combat involving the blue Backstabber. The blue Cleric, who is carrying a Bow, also has line of sight to the Mechanork through the arrow-slit and so can participate in the group combat, being on the attacking side. The yellow Wizard has line of sight but may not participate in the group combat because he is on the defensive side. The yellow Warrior cannot participate in the group combat because he is in a different zone from the Mechanork (blue combat value = 3+(2+2)+1 = 8, yellow combat value = 2). For another AP, the blue Cleric can shoot at the yellow Goblin. However, he cannot shoot at the yellow Wizard, since the Goblin is blocking the line of sight.
Example, during the yellow player's turn: The yellow Wizard can shoot at the blue Backstabber through the arrow-slit, thus triggering group combat involving the Mechanork in close combat (yellow combat value = 3 against a combat value of 2 for the blue Backstabber). The blue Cleric, who is carrying a Bow, and the blue Crossbowman cannot participate in the group combat, because they are on the defensive side.
Full Game
At the beginning of each game, players choose a Scenario card that determines the objective, game setup and initial placement.
Examples of scenarios
As soon as a player has scored the number of VP specified in the scenario, he is declared the winner and the game is over. Scenario cards range from a standard full game up to an advanced scenario.
Game setup (Full Game)
Pick, at random, the number of room pairs specified by the scenario. Then select a color, take the cards in that color, and make a selection using one of the following three game modes. When done, return all unused cards back to the box, proceed with the remaining steps of game setup, and play the game as before.
Mutual choice (equal forces). Randomly select the first player. The first player chooses one of his Character cards and places it before him so that his opponent can see it. The opponent must take the same Character card from his deck of Character cards and place it before him. He then selects another Character card and places it. The first player must then select the matching Character card from his deck.
Players continue taking turns selecting characters in this way until both players have the number of characters specified by the scenario.
Switch the first player and proceed in the same way to select the objects.
Full frontal (secret forces). Players secretly select the Character and Object cards which they will use for the game.
Draft. Players lay out all their Character cards on the table. Randomly select the first player. Each player in turn, starting with the first player, selects one of his characters from the table and adds him to his team. For every character selected, he removes the same character in his opponent's color. This means that if the blue player has selected the Colossus, the yellow player will no longer have access to his Colossus.
Switch the first player and proceed in the same way to select the objects.
Optional Rules
Playing with a timer
Each game of Dungeon Twister offers tremendous combinations of choices and possibilities. Luck is practically non-existent. Therefore, some players like to spend a great deal of time thinking through their options and optimizing their strategy each turn.
After a few games, we strongly advise that you limit play time to 2 minutes per turn. In organized play, Dungeon Twister tournaments generally impose this time limit. When the timer runs out, any unused actions above 3 are lost.
When revealing a room, once you have placed all the characters and objects you are required to place in this room, your opponent has a maximum of 5 seconds to place the objects of your color. After five seconds, you may place the objects yourself if your opponent has not done so.
In combat, once you have played your Combat card facedown, your opponent has a maximum of 5 seconds to play his own card. If he has not played a card within the 5 seconds, the combat is resolved as if he had played his "Combat +0" card.
Secret objects
In this variant, players cannot look at an Object card carried by an enemy character, and cannot flip over an enemy wounded Character card to be reminded of which character it is.
Handicap play
Since Dungeon Twister is not a game based on luck, it can be truly difficult for a beginner to win against an experienced player. It is strongly recommended that the more experienced player be given a handicap, as is often done in the game of Go (see Handicap Table). Handicap play is only possible when playing a scenario with an objective of at least 5VP.
Character handicap. The more experienced player's handicap may consist of playing with fewer characters, depending on the estimated skill difference between the two players.
In this case, game setup still requires the placement of 2 characters in the starting zone. However, it is possible for some of the rooms not to reach their maximum card capacity.
Combat handicap. For a greater handicap, you may need to remove some of the higher value Combat cards from the more experienced player's initial hand.
Game modes. Any of the available game modes can be played with a handicap. The player with the handicap secretly removes the appropriate number of Character cards from his team after selection. So his opponent does not know which characters will be absent from his team.
Handicap Table
Very experienced player against:
| Player levels | Number of characters removed | Combat cards removed |
|---|---|---|
| experienced player | 2 | — |
| good player | 3 | — |
| beginner | 2 | +5 and +6 |
| newbie | 3 | +5 and +6 |
Experienced player against:
| Player levels | Number of characters removed | Combat cards removed |
|---|---|---|
| good player | 2 | — |
| beginner | 3 | +6 |
| newbie | 4 | +6 |
Good player against:
| Player levels | Number of characters removed | Combat cards removed |
|---|---|---|
| beginner | 2 | — |
| newbie | 2 | +6 |
Example: Lisa, an experienced player, plays with her friend John, a beginner. In the 'experienced player against' section, look up the 'beginner' row: Lisa will remove 3 characters from her team and her "Combat +6" card. John will play with the number of characters specified in the scenario and with all his Combat cards.
Characters
Note: the AP-cost icon next to an ability means that ability costs 1AP to use.
Assassin
Movement = 2, Combat = 2
Fatal blow. If the Assassin wins a close combat, whether one-on-one combat or group combat, every enemy character involved in the combat and located in the same zone is instantly killed, bypassing the wounded state entirely.
Backstabber
Movement = 2, Combat = 2
Stab. The Backstabber has a +2 bonus in combat value in attack and defense if she is engaged in close group combat involving at least one other friendly character.
Lock-picking (1AP). The Backstabber can open or close an adjacent portcullis for 1AP as if carrying a Key (see Key in Objects section).
Berserker
Movement = 2, Combat = 3
Killer rage. When attacking in a one-on-one close combat, the Berserker can play two Combat cards. Both cards are discarded after combat, except for the "Combat +0" card, which she keeps as usual. The player must announce first how many cards he wishes to play before his opponent chooses his own Combat card.
One-on-one combat: combat that involves only the attacking character and a single enemy character, as opposed to group combat which involves at least three characters.
This ability cannot be used when defending, in group combat, or in ranged combat. When facing a Weapon Master, the Berserker must show both Combat cards.
Cleric
Movement = 2, Combat = 2
Healing (1AP). The Cleric can heal a wounded in the same zone for 1AP. Flip over the wounded character's card to show he is no longer wounded, making sure to correctly orient the card to show in which zone the character is located. The healed character cannot do anything else during this turn.
The Cleric cannot heal himself. Also, he cannot heal any wounded he may be carrying: he must first drop the wounded in the zone where he is located, during a movement action, before being able to heal him.
The Cleric cannot heal a wounded through a closed portcullis or an arrow-slit.
Colossus
Movement = 1, Combat = 5
Breaks portcullis (1AP). A Colossus adjacent to a closed portcullis can break it for 1AP. An adjacent portcullis is a portcullis sitting on one of the edges of the zone where the character is located. Place a Broken portcullis card next to the room. The two zones connected by the portcullis are now considered adjacent, just like in the case of an open portcullis.
A broken portcullis can never be repaired. All characters may move through a broken portcullis during their movement.
Giant. Characters with a combat value equal to or less than 1 (value as indicated on the Character card before applying any modifier) may pass between the legs of an enemy Colossus and thus move through his zone during their movement.
Crossbowman
Movement = 2, Combat = 3
Ranged combat. The Crossbowman can initiate ranged combat. He can only fire his crossbow once per turn (reloading a steam-crossbow takes time). The crossbow's combat value is 3.
Dark Angel
Movement = 3, Combat = 2
Flying. The Dark angel has the permanent special ability to fly, which allows her to move through zones containing enemy characters and across pit traps during her movement, for no additional cost. She must still obey the 3-character-maximum golden rule.
Undead. The Dark Angel is an undead character.
Elf Scout
Movement = 4, Combat = 1
Acrobatics. The Elf Scout can move over pit traps during his movement.
General
Movement = 2, Combat = 2
Charismatic. All friendly characters located in the same room as the General get a +1 bonus in combat in both attack and defense. Wounded characters also get this bonus. This bonus is not applicable to ranged combat. The General himself doesn't get this bonus. This ability is not applicable if the General is wounded or if he is in the starting zone (since it is not a room).
Ghost
Movement = 2, Combat = 0
Incorporeal. During his movement, the Ghost can pass through any obstacle of any kind: wall, pit trap, zone containing enemy characters, etc. He must end his movement within a zone and is subject to the 3-character-maximum golden rule. He can activate rotation gears for 1AP per ¼ turn.
No transport. The Ghost cannot transport or use any objects (he cannot carry wounded characters either).
Undead. The Ghost is an undead character.
Goblin
Movement = 2, Combat = 1
Underdog. The Goblin does not have any special ability, but he is worth 2VP for his owner when he escapes from the labyrinth.
Golem
Movement = 1, Combat = 4
Breaks walls (1AP). The Golem can break all the walls in the room where it is located for 1AP. Place the Broken wall card next to the room to indicate that all the walls in the room are broken. The portcullis in the room is also considered broken since it is no longer attached to any wall.
Broken walls are treated like open or broken portcullises for purposes of movement and line of sight.
The Golem can use its special ability only once during the entire game.
Mechanork
Movement = 2, Combat = 2
Craftmanship. A Mechanork in a rotation gear zone can rotate the room in either direction by using 1AP per ¼ of a turn. For 1AP, he can also rotate the twin room (same color) in either direction. The Mechanork only takes into account room colors. He may choose to ignore the direction of the arrows printed on the rooms.
Naga
Movement = 3, Combat = 2
Contortionist. The Naga can pass through arrow-slits during his movement, even while carrying an object or a wounded character. He may not, however, reveal a room through an arrow-slit.
Paladin
Movement = 2, Combat = 3
Strong. The Paladin can carry 2 objects. It is an exception to the golden rule limiting the transport of objects. He can carry 1 object and 1 wounded character, 2 objects, or 2 wounded characters. If a Paladin is killed while carrying 2 objects, the 2 objects are left in the zone where he was killed. If a Paladin is wounded while carrying 2 wounded, the wounded are eliminated and the opponent earns 2VP. A Paladin carrying two identical objects combines their effect. The Paladin does not lose his special ability when wounded.
Undead hunter. The Paladin earns 1 extra VP whenever he eliminates an undead character. This ability also applies in group or ranged combat as long as the Paladin is involved in the combat.
Pickpocket
Movement = 3, Combat = 2
Lifter (1AP). The Pickpocket can steal an object from an enemy character located in the same zone for 1AP. Take the stolen object and place it underneath the Pickpocket.
In accordance with the golden rules, if the Pickpocket is already carrying an object, he must first drop it in the zone where he is located, during a movement action, before being able to steal another object.
A wounded character is not an object, therefore the Pickpocket cannot steal a wounded character being carried by an enemy character.
Samurai
Movement = 2, Combat = 3
Expert fighter. Once per turn, the Samurai can initiate close combat for 0AP. This ability is also applicable to group combat, but not to ranged combat.
Wizard
Movement = 2, Combat = 1
Levitation. The Wizard has the permanent special ability to levitate, which allows him to move through zones containing enemy characters and across pit traps during his movement, for no additional cost. He must still obey the 3-character-maximum golden rule. This magical ability makes him a flying character.
Magic user. The Wizard can use scroll objects restricted to magic users, as indicated by the magic-user icon on the Object card. Example: the Fireball scroll.
Telekineticist
Movement = 3, Combat = 1
Psychokinesis (1AP). For 1AP, the Telekineticist can remotely move an object. She can target any object located in any zone of the room where she is located. She can also target an object she is carrying, but not an object carried by another character.
The object can be moved up to 3 zones as if the object were levitating. This means that the object can pass over pit traps, through zones containing characters, and through any obstacles that a flying character could normally fly over.
The Telekineticist drops the object in the destination zone. If there are friendly or enemy characters in that zone, she may choose to give the object to one of them, provided that character is not already carrying an object or wounded.
The object can end its movement in another room, out of the Telekineticist's reach. In this case, the Telekineticist cannot move the object again unless she enters that room.
The Telekineticist cannot levitate a wounded character since it is not an object.
A levitating object can pass over or stop on the starting zone, using the same rules as characters moving on the starting zone (see Moving on the starting zone).
Magic user. The Telekineticist can use scroll objects restricted to magic users, as indicated by the magic-user icon on the Object card. Example: the Fireball scroll.
Telepath
Movement = 2, Combat = 0
Mind control. When engaged in one-on-one close combat, the Telepath can announce a Combat card other than +0 and force the opponent to play it if he has it in his hand.
If the opponent no longer has that card in his hand, he must show his remaining Combat cards to the player controlling the Telepath. Then, he is free to play secretly the Combat card of his choice, having trumped the Telepath's attempt at mind control.
One-on-one combat: combat that involves only the attacking character and a single enemy character, as opposed to group combat which involves at least three characters. The Telepath's special ability does not apply in group combat or ranged combat.
If two Telepaths are engaged in combat, their abilities cancel one another. Each player plays his Combat card using the normal rules.
Thief
Movement = 3, Combat = 2
Acrobatics. The Thief can move over pit traps during her movement.
Lock-picking (1AP). The Thief can open or close an adjacent portcullis for 1AP as if carrying a Key (see Key in Objects section).
Troll
Movement = 1, Combat = 4
Regeneration (1AP). When wounded, the Troll can regenerate for 1AP. Flip his card faceup. A Troll cannot regenerate during the turn he was wounded. During the turn he regenerates, the Troll cannot carry out any additional action.
Note: The Fireball scroll immediately destroys the Troll, wounded or not.
Wall-walker
Movement = 2, Combat = 1
Walks through walls (1AP). The Wall-walker can walk through a wall for 1AP, reappearing in the zone on the other side of the wall from the zone where she was initially located. This does not count as a movement, but is considered a separate action. This special ability does not allow her to reveal a new room from the other side of a wall. Nor does it allow her to cross a closed portcullis.
The Wall-walker can pick up, drop or exchange an object or wounded before and/or after crossing a wall. She can also cross a wall while carrying a wounded or object.
A double wall separating two zones is treated as a single wall and can be crossed using the Wall-walker's special ability for 1AP.
Warrior
Movement = 2, Combat = 3
Breaks portcullis (1AP). A Warrior adjacent to a closed portcullis can break it for 1AP. An adjacent portcullis is a portcullis sitting on one of the edges of the zone where the character is located. Place a Broken portcullis card next to the room. The two zones connected by the portcullis are now considered adjacent, just like in the case of an open portcullis.
A broken portcullis can never be repaired. All characters may move through a broken portcullis during their movement.
Weapon Master
Movement = 2, Combat = 3
Combat skills. When the Weapon master is engaged in a combat, the player who controls her can look at the Combat card played by his opponent before playing his own Combat card. This ability also works when the Weapon master is engaged in a group combat, but not in a ranged combat.
If multiple Weapon masters are engaged in the same combat, their abilities cancel each other and combat proceeds as normal.
Objects
Note: the AP-cost icon next to an ability means that ability costs 1AP to use.
Armor
The combat value of a character wearing an Armor is increased by 1 point (for defense only). This means that he can only use this bonus when he is attacked. A wounded character that is wearing an Armor receives the bonus when attacked.
Bow
For 1AP, a character carrying a Bow can initiate ranged combat (see Ranged combat). The Bow can be used multiple times per turn.
The Bow's combat value is 1. The character's normal combat value is ignored.
Key
A character carrying a Key may open or close an adjacent portcullis for 1AP. An adjacent portcullis is a portcullis sitting on one of the edges of the zone where the character is located. To indicate that the portcullis is now open, place an Open portcullis card next to the room where the portcullis is located. All characters may move through an open portcullis during their movement. To indicate that a portcullis is closed, simply remove the Open portcullis card from the room.
The same Key can be used over and over on different portcullises during the game.
Fireball Scroll
For 1AP, a magic user can use the Fireball scroll to shoot a fireball.
Target a character, friend or foe, within line of sight of the magic user (see Line of sight). That character is directly eliminated. Alternatively, the magic user can use the Fireball scroll to eliminate a character in his same zone.
The Fireball scroll is ineffective against objects. If it is fired at a character carrying a wounded, both are eliminated.
A scroll can only be used by a magic user (a character possessing the magic user special ability); although it can be carried by other characters.
The scroll can only be used once, and is discarded after use.
The Fireball scroll is a magical object, as indicated by a magical rune on the card.
Large Shield
A character carrying a Large shield cannot be the target of ranged combat.
Note: The Large shield affords no protection against the Fireball scroll (not a ranged combat).
Rope
A character carrying a Rope can move across a pit trap.
The same Rope can be used over and over to move across different pit traps during the game.
Note: Unlike in Dungeon Twister the Board Game, it is not possible for a character to stand on a pit trap or for a Rope to be left on a pit trap.
Scroll of Inversion
For 1AP, a magic user can use the Scroll of inversion to switch the room where he is located with an adjacent room (no diagonals).
The rooms don't rotate. They simply switch places in the labyrinth. All Object, Character, and marker cards (Open/Broken portcullis, Broken wall) move with the rooms, staying in the same zone within the room.
A scroll can only be used by a magic user (a character possessing the magic user special ability); although it can be carried by other characters.
The scroll can only be used once, and is discarded after use.
The Scroll of inversion is a magical object, as indicated by a magical rune on the card.
Sword
The combat value of a character carrying a Sword is increased by 1 point (for attack only). He cannot use this bonus when on the defending side.
Treasure
A Treasure earns a player 1 extra VP if one of his characters is carrying it when he leaves the labyrinth. When he does, place the Treasure in front of the player to record this VP.
Telescoping Spear
The character carrying the Telescoping spear can initiate close combat against a character in another zone if the two zones share a common edge and are not separated by a closed portcullis or a wall and if the character has line of sight to the other zone (no diagonals). In particular, the Telescoping spear can be used over a pit trap (no diagonals) or through an arrow-slit.
The character using the Telescoping spear is not affected by the outcome of the combat. However, in case of defeat, the Telescoping spear is broken and discarded.
In case of victory, the Telescoping spear remains intact and the enemy becomes wounded or, if it was already wounded, the enemy is eliminated, as in normal combat. In case of a tie, nothing happens.
The Telescoping spear may not be used to initiate close combat against characters in the same zone, or in defense. A character in the same zone as an enemy character may not use his Telescoping spear to attack another character in another zone.
However, if the Telescoping spear is used to attack a zone containing multiple characters, group combat ensues. The opponent adds up the combat values of all involved characters as in normal group combat, and the Telescoping spear is broken in case of defeat.
Example: The blue Colossus is using a Telescoping spear. He may attack the yellow Naga over the pit trap or the yellow Backstabber in an adjacent zone, but not both at once. However, he may not attack the yellow Wizard because he has no line of sight to him (diagonal).
The blue Cleric is also carrying a Telescoping spear. He can attack the yellow Naga through the arrow-slit. He cannot attack the Mechanork (closed portcullis).
The yellow Naga has no Telescoping spear, and thus cannot attack either the Cleric or the Colossus.