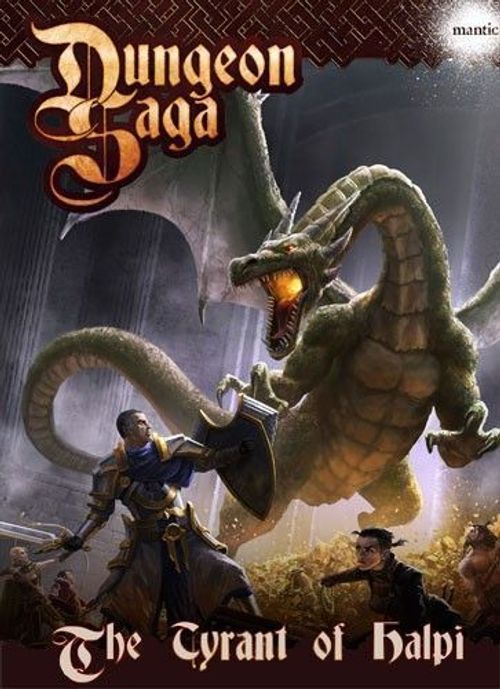
Dungeon Saga: The Tyrant of Halpi
Dungeon Saga: The Tyrant of Halpi Rulebook
Table of Contents
Table of Contents
Adventures
Only the Overlord player should read further. He will set up each adventure to preserve the element of surprise and tension. Obviously this only really works the first time a Hero player undertakes a particular adventure, but that extra tension and the element of the unknown is well worth the effort. It's far more exciting to explore a dungeon when you really don't know what lurks around the next corner!
Each adventure in this book is described in a standard format - putting all of the information needed to prepare the dungeon, the Heroes and the Overlord within easy reach.
Be sure to familiarise yourself with the victory conditions and special rules for each adventure before starting, and make sure these are also clear to the Hero players.
When you are ready to start, set the scene by reading the story text aloud, and let the adventure begin!
IMPORTANT: While playing, only reveal information to the Heroes where noted on the adventure page. Otherwise, any special rules should be kept secret.
Zones
When setting up an adventure, do not lay out the entire map at once!
Some maps are divided into one or more zones by the doors. When the Overlord lays out the tiles to start with they will only lay out the tiles with the Heroes on, and from there up to and including the first door(s). This is the first zone. Each subsequent area that is separated off by one or more doors is a new zone.
When a door is opened the Overlord lays down the tiles for the adjacent zone, but no further. Depending on the adventure, this may be the remainder of the map, or there may be still more for the Heroes to discover. Only models that are on zones that have been laid down take any part in the adventure.
When the Overlord places any part of the board, all doors and chests must have a counter placed next to them to show what type of lock they have, and the Overlord must make the Heroes aware if one particular door is the exit for the adventure.
Overlord Command Cards
This lists the number of cards available to the Overlord player in the game, as detailed in the Rulebook.
Note that this expansion uses a different deck composition to the main game. You will need to remove the Necromancer cards from your Overlord Command deck, and replace them with the Dragon cards from this expansion. This is then shuffled to create your draw pile for each game.
Time Limits
In some adventures (noted in the Victory section), the Overlord wins if he can hold off the Heroes for long enough. At the end of a Round when the Overlord draws the last Command card from his draw pile, the Heroes have one turn remaining to complete their objectives. When the Overlord goes to take a new card from his deck and there are none remaining, the game ends with an Overlord victory. He has held off the Heroes' assault for long enough - reinforcements will arrive any second and the Heroes must abandon the attempt.
Upgrading Your Heroes
As Heroes adventure through the dungeon they will gain experience and equipment. These bonuses are shown on cards, whether they are new abilities, spells or items. Each adventure tells you which Heroes have gained experience by that point in the story, and what that experience gives them. Simply place the relevant card beside the Hero Card as a reminder.
Legendary Heroes
There will come a time in your adventure when your Heroes have accomplished great feats and learned new skills that will aid them in the battle against Karrathor. This will be noted in the adventures. When your Heroes become legendary, you may turn over their Hero Card and use their new, enhanced versions instead!
Locks
In the Tyrant of Halpi adventures, all mundane locks have two sets of values instead of one. The first is the pair of numbers that you have seen on previous maps. These are still used to show how hard the lock is to smash. The extra value is a single number that shows the difficulty of picking that lock. This works in a similar way to magical wards and the Break Ward spell. There will be an additional counter to place next to the locks as a reminder of this number.
For example, a lock might look like this. This would resist an attack with 3 dice and have an Armour of 3. Alternatively, it would take 2 Lockpicking attempts to open.
Dragons
The Tyrant has a Boss card like any other, with the following special rules.
Huge Creatures
Dragons use a 3x3 base in the game, which classifies them as Huge. However, use the rules for Large creatures to govern dragons, found on page 22 of the Rulebook.
Tyrant Wounds
Unlike other Heroes, the Tyrant has 10 wounds instead of 5. This is due to his enormous size and toughness. Apart from this, the Tyrant is wounded as normal.
Unfortunately for the Tyrant, he does not heal as normal. Dragons live for millennia and only heal very slowly. Any wounds inflicted on the Dragon in one adventure carry on to the subsequent ones (unless they have been healed by the Tough ability). Keep a note of how badly damaged he gets when he appears. If the Heroes lose an adventure and play it again, the Dragon will be restored to the number of wounds he had at the start of the previous attempt.
Tyrant Attacks
The Tyrant has 3 different special attack cards: Bite, Swipe, and Breathe Fire. Each Turn he may move, and then either roll attack dice normally to Fight one adjacent opponent, or choose one of these special attacks as his action. The only limitations are the range listed on the card, plus the fact that the Tyrant cannot use the same card two Turns in a row. Rotate the attack cards as if they were a major spell to help you remember.
Tyrant Magic
The Dragon does not cast spells in the same way as other, lesser, creatures. Instead they are included as part of the Overlord deck. This allows the Dragon to use magic without any pause in the biting, clawing and roasting of Heroes with its fiery breath. Simply follow the instructions on the Overlord cards as normal.
Thralls
The army of minions that serves the Tyrant are enslaved to the crown borne on the Tyrant's tooth. They will do anything to remain close to it, even beyond death itself. The very need that they have for it is a bone-deep ache, and will sustain them past the point of nourishment or even old age.
As these Thralls could be any race or profession and from any time in the long history of the Tyrant, we've left you to choose which models to use for them. You could use the Undead models from the core set, or any other Mantic figures you have to hand. The only important thing is that you can tell each of the three types apart. See the Tyrant's reference sheet for their game values.
The three Thrall types are:
- Thralls
- Ancient Thralls
- Armoured Thralls
The Adventurer's Companion
For those of you that play Dungeon Saga with the Adventurer's Companion rules, this pack includes a number of exciting additions. Firstly, there is the campaign itself. This can be played with your own Heroes by using the levels given in the table below, and the rules from the Adventurer's Companion.
| Adventure | Level Total |
|---|---|
| 1 | 8 |
| 2 | 10 |
| 3 | 12 |
| 4 | 14 |
| 5 | 16 |
| 6 | 18 |
Secondly, there are a number of new cards in this set. These add to the existing spells, location cards and so on and can be shuffled into your decks when you play this or any other adventure.
Finally there are the new tiles. You will find that the art style of these mixes in with many of the tiles in the core set and can be used to build new layouts and different designs for your own adventures. We have also included tiles that merge from one set's art style to another so that you can build really big dungeons. Uncharted Dungeon cards using these new tiles have been included so that they can be used as new zones when building your own dungeon.
Don't forget that you can of course use the dragon as the Overlord in a dungeon of your own devising!
Adventure 1: Abandon Hope, All Ye Who Enter...
Heroes
In addition to your Hero Cards, take the following:
- Ibrahim, Human Paladin: 1 Healing Potion. Available spells: Healing, Steady Recovery.
- Brellin, Human Wizard: 2 Power 1 Energy Crystals and 1 Power 2 Energy Crystal. Available spells: Crystallise, Break Ward, Slippery When Wet, Tortured Steps, Tornado.
Overlord
- Overlord Command Cards: 9
- Actions per Turn: 2
Victory
- Heroes: Get the key from the chest marked Z, and keep all four Heroes alive until the timer runs out.
- Overlord: Cripple one of the Heroes or stop them from opening the chest before the time runs out.
Special Rules
Actions: On the first Overlord Turn after their models are put on the board, every Minion gets to act. After that, they get 2 actions per Turn.
Chests: Chests A and B each contain a single Battle Potion. Chest Z contains a key to a secret door (not marked on the map). Even with the key this will take Ally a few minutes to find and open. It leads to adventure 2.
Doors: Doors marked Y cannot be opened by the Heroes - do not place lock counters next to them. When the door marked X is opened, all the doors marked Y open as well.
Tactical Thoughts
The Heroes cannot avoid springing this trap as the whole set of rooms are built around it. However, they can decide where to stand when it happens. A more serious problem for the Heroes are the armoured Thralls in the final room, which can form a serious blockade to the chest marked Z if they are given some time to organise themselves. The Heroes need to ensure that this doesn't happen. Once the Heroes have grabbed the key they can choose where best to make their stand.
Adventure 2: Distraction
Heroes
In addition to your Hero Cards, take the following:
- Ibrahim, Human Paladin: 1 Healing Potion. Available spells: Healing, Steady Recovery.
- Ally, Halfling Thief: 1 Haste Potion.
- Tharn, Dwarf Fighter: 1 Battle Potion, Slam.
- Brellin, Human Wizard: 3 Power 2 Energy Crystals. Available spells: Crystallise, Break Ward, Slippery When Wet, Tortured Steps, Tornado.
Overlord
- Overlord Command Cards: 12
- Actions per Turn: 3
Victory
- Heroes: Open the final door marked X.
- Overlord: Cripple one of the Heroes or stop the Heroes from winning before the time runs out.
Special Rules
Unending Waves: At the end of each Round, the Overlord may choose to place up to 2 new Thralls on the board. Each one must be placed on one of the unoccupied squares marked Y on the map, provided these zones have been placed on the table. Roll a dice to decide the type of Thrall available once you have chosen the square:
- 1-3: Thrall.
- 4-5: Armoured Thrall.
- 6: Ancient Thrall.
Chests: When you open a chest, roll a dice. On a 1-3 it contains a Healing Potion, on a 4-6 it contains a Haste Potion.
Tactical Thoughts
There is no end to the Heroes' enemies in this adventure, so speed has to be the main aim. The Heroes need to balance when they open a new door (and potentially add a new source of Thralls) with the need to keep together and work as a team. The adventure is won if the final door can be opened so there is a temptation for a lone Hero to rush on ahead. On the other hand, those left behind may get swamped without his aid, and the adventure is lost if a single Hero is crippled.
Adventure 3: Close Encounter
Heroes
In addition to your Hero Cards, take the following:
- Ibrahim, Human Paladin: 1 Battle Potion, Hammer Time. Available spells: Healing, Steady Recovery.
- Ally, Halfling Thief: 1 Haste Potion, Nimble.
- Tharn, Dwarf Fighter: 1 Battle Potion, Slam.
- Brellin, Human Wizard: 1 Power 1 Energy Crystal, 1 Power 2 Energy Crystal and 1 Power 3 Energy Crystal. Available spells: Crystallise, Break Ward, Slippery When Wet, Tortured Steps, Tornado.
Overlord
- Overlord Command Cards: 12
- Actions per Turn: 2
Victory
- Heroes: Open the final door marked X.
- Overlord: Cripple one of the Heroes or stop the Heroes from winning before the time runs out.
Special Rules
Chest: The chest contains a single Healing Potion.
Can't Stay: The Tyrant will only stay long enough to roast the Heroes a little. At the end of each Round after the Tyrant is placed on the board, roll a dice. On a 1 or 2 he rises majestically into the air and flies off into the blackness. This happens regardless of whether he is adjacent to any Heroes or not. However, if he would normally have had to Break Away to move, then the Heroes will get a Free Strike as he leaves, as normal.
Tactical Thoughts
The potential problems for the Heroes depend on what the Dragon does. If Karrathor stays for a long time then he can be a major obstacle. If he allows his Thralls to do his fighting then he can generally be ignored (though it is worth attacking him as his wounds do carry over into later adventures - see his rules on page 7). What usually happens is that the Dragon roasts a lot of his own minions in an effort to get at the Heroes, and this is impossible to avoid. The key here is for the Heroes to spread out as much as they can so that his fiery breath only hurts some of them. This is where the side passages come in.
Adventure 4: Temptation
Heroes
In addition to your Hero Cards, take the following:
- Ibrahim, Human Paladin: Hammer Time. Available spells: Healing, Steady Recovery.
- Ally, Halfling Thief: 1 Haste potion, Nimble.
- Tharn, Dwarf Fighter: Slam, Stalwart (1).
- Brellin, Human Wizard: 1 Healing Potion. Available spells: Crystallise, Break Ward, Slippery When Wet, Tortured Steps, Tornado.
Overlord
- Overlord Command Cards: 12
- Actions per Turn: 2
Victory
- Heroes: Open the final door marked X.
- Overlord: Cripple one of the Heroes or stop the Heroes from winning before the time runs out.
Special Rules
Loot: Each time the Heroes open a chest, take all the remaining magic item cards (except the Book of Valandor) from the core set and this expansion, shuffle them together and drawn one at random. That is what is inside.
Campaign: If you play this as part of a campaign, the wounds a Hero takes in this adventure will carry on into the next one (although the Heroes will be reset to full health if the adventure is failed). Also, any magic items you find in this adventure can be used in adventures 5 and 6.
Tactical Thoughts
The Heroes should be able to complete the core objective here without any trouble. However, if you are playing a campaign then you really want to open as many chests as you can because you are likely to need some help when you come up against Karrathor again. As wounds on the Heroes carry over as well as treasure, judging when to grab more loot and when to cut and run is the key decision.
Adventure 5: The Numberless Horde
Use the Legendary side of the Hero Cards.
Heroes
In addition to your Hero Cards, take the following:
- Ibrahim, Human Paladin: Available spells: Healing, Steady Recovery, Transfusion.
- Ally, Halfling Thief: 1 Healing Potion.
- Brellin, Human Wizard: 2 Power 1 Energy Crystals and 1 Power 2 Energy Crystal. Available spells: Crystallise, Break Ward, Slippery When Wet, Tortured Steps, Tornado, Protection.
Overlord
- Overlord Command Cards: 11
- Actions per Turn: 2
Victory
- Heroes: Open the final door marked X.
- Overlord: Cripple one of the Heroes or stop the Heroes from winning before the time runs out.
Special Rules
Hurry, Hurry, Hurry: There is no time to waste treating scrapes and bumps - the Heroes are trying to get to the Tyrant before he can flee for good. If you are playing this as a campaign, the Heroes retain any wounds they suffered in adventure 4 (although the Heroes will be reset to full health if the adventure is failed). If you are playing this as a one-off adventure, then each Hero starts the adventure with 1 wound already on his card.
The Heroes will also retain any magic items found in the previous adventure. If playing this as a one-off, shuffle all of the magic items together and draw two at random to distribute amongst the Heroes as they see fit.
Just Visiting: The Tyrant only stays a single Round, before leaving the fight to his Thralls. At the end of the Round in which the Tyrant is placed, he flies off into the blackness again. This happens regardless of whether he is adjacent to any Heroes or not. However, if he would normally have had to Break Away to move, then the Heroes will get a Free Strike as he leaves, as normal.
Chest: The chest contains 3 Healing Potions and 1 Battle Potion.
Tactical Thoughts
The time is quite tight here for the Heroes, and even a brief appearance by Karrathor can slow them down. However, this appearance is also a blessing in disguise and the Heroes shouldn't just try to hide. If you are playing a campaign, then wounds caused on Karrathor carry over into the final battle, and you'll be glad for any help you can get. Also, think about whether it is worth getting the heroic Spellcasters into a fight with the Dragon. It's very dangerous, but it does give them an additional powerful crystal to use in the next adventure. It's for the Hero players to decide if this trade-off is worth it.
Adventure 6: Terrible to Behold
Use the Legendary side of the Hero Cards.
Heroes
In addition to your Hero Cards, take the following:
- Ibrahim, Human Paladin: 2 Healing Potions, Tough. Available spells: Healing, Steady Recovery, Transfusion.
- Ally, Halfling Thief: 2 Haste Potions and 1 Healing Potion.
- Tharn, Dwarf Fighter: 2 Battle Potions, Hammer Time.
- Brellin, Human Wizard: 2 Power 2 Energy Crystals and 1 Power 3 Energy Crystal. Available spells: Crystallise, Break Ward, Slippery When Wet, Tortured Steps, Tornado, Protection, Steelskin.
Overlord
- Overlord Command Cards: 22
- Actions per Turn: 3
Victory
- Heroes: Kill Karrathor.
- Overlord: Cripple all of the Heroes.
Special Rules
Soldiering On: Unlike all the other adventures, the game does not stop when one Hero is Crippled, or when the card deck runs out. This is the final battle and no time can be spent on dealing with the injured. Either the Tyrant of Halpi or the Heroes must fall.
There is no time to waste treating scrapes and bumps - the Heroes are trying to get to the Tyrant before he can flee for good. If you are playing this as a campaign, the Heroes retain any wounds they suffered in adventure 4 and 5. If you are playing this as a one-off adventure, then each Hero starts adventure 6 with 1 wound already on his card.
Also, if you are playing this as a one-off adventure, then Karrathor starts with 2 wounds on his card.
Loot: Each time the Heroes open a chest, take all the remaining magic item cards (except the Book of Valandor) from the core set and this expansion, shuffle them together and drawn one at random. That is what is inside.
Tactical Thoughts
This is a simple adventure, with a simple goal. A lot will depend on how badly hurt the Heroes and Karrathor are at the start of this adventure. Whatever happens, it is usually a close fight, and can go either way. The Heroes should not forget that even at this late stage they can open chests and use the treasures they find within. If they're lucky a single item can turn the tide.
Experience
The Heroes are ever refining their skills, and as they destroy more enemies they will pick up new fighting techniques that will make their onward journey ever easier.
To represent this in the game, every time a Hero destroys an enemy place an experience counter on their Hero card. Once a Hero has reached 5 points of experience, remove the experience counters and replace them with a single dice. This bonus dice can be used once only, and can be added to any roll (Fight, Shoot, Cast Spell, or Defence) made by the Hero.
Optional Rules
Some people may have a particular dungeon crawling itch they'd like to scratch, or you may decide you want to tweak some of the adventures to suit your particular group. Below you will find a few alternate ways to play - feel free to pick and choose from these, use all of them, or even come up with your own!
We'd recommend having a couple of tries through each adventure before you make any changes, as the best tactics aren't always obvious the first time out.
Campaigns
Dungeon Saga is more about having fun and telling a good story with your friends than it is about winning at all costs. However, it's always good to know if you've saved/conquered the world or not, and so if you want to play through all of the adventures one after the other you can use the following system to determine whether the Heroes arrive in time to reach Karrathor.
Allow the Heroes 10 "hours" to reach Karrathor. Each time you play an adventure costs them 1 "hour" of this time, so the Heroes can lose a few adventures and reset to try again, but they can't do this forever. If they are not on the final adventure when it comes to the 10th hour then they won't get there in time and Karrathor automatically wins the campaign. If the Heroes complete the final adventure on or before the 10th hour then they win.
Individual adventures can be played as many times as you like within this time constraint, though each adventure must be won by the Heroes before they can play the next. Note that these game "hours" aren't the same as the real hours you take to play. Each adventure costs 1 campaign game hour regardless of whether it takes 30 or 90 real minutes to play.
Campaign Goals
To give the Heroes a little more to think about when playing a campaign, each adventure has some additional optional objectives. You still win or lose an adventure as normal. However, the Heroes may be able to gain a further bonus if they win.
Listed below you will find two campaign goals for each adventure except the last, one timed, one task:
-
Timed Goals: These list a number of cards. If the Heroes win the adventure, count the cards remaining in the Overlord's draw pile. If there are at least as many cards remaining as listed in the timed task then the Heroes have been successful.
If the Heroes achieve a Timed task then do not count that adventure towards their 10 hour campaign total. Karrathor hasn't slowed them down at all.
-
Task Goals: Tasks come in several formats, and each adventure explains what you need to do in order to achieve it, and what you get if you do. In order to get a reward you must complete the task before you win the adventure. You do not get the reward if you do not win.
Rewards will generally be in the form of extra items to take in the following adventure. These will be in addition to whatever is listed for that adventure, and can be divided between any Hero(es) of your choice. You must use them in the following adventure or they will be lost.
The Task goals will generally take you more time to complete, so the Heroes will usually have a choice to make...
Adventure 1
- Timed: N/A
- Task: If both chest A and B are opened, then the second contains an extra Haste potion in a secret compartment in the bottom.
Adventure 2
- Timed: 3 cards.
- Task: If you open a chest, in addition to the contents you find a lever. This closes off one of the entrance points for new Thralls. Take the lid of the chest and place it on any unoccupied square marked Y to show that this square is no longer usable as an entry point.
Adventure 3
- Timed: 3 Cards.
- Task: If the chest is opened while Karrathor is on the board, then it also contains a Piece of Coal. Take that item card.
Adventure 4
- Timed: 3 Cards.
- Task: Open all four chests. If you do this you will have completely scoured this area of the vaults and can draw a further random Magic Item from the remaining cards to give to a Hero of your choice.
Adventure 5
- Timed: 2 Cards.
- Task: If a Spellcaster attacks Karrathor then they automatically get a drop of blood from the Dragon, even if it is not wounded. This can be made into a power 4 energy crystal in time for adventure 6. Each Spellcaster can do this only once as they have to be careful with their prize.