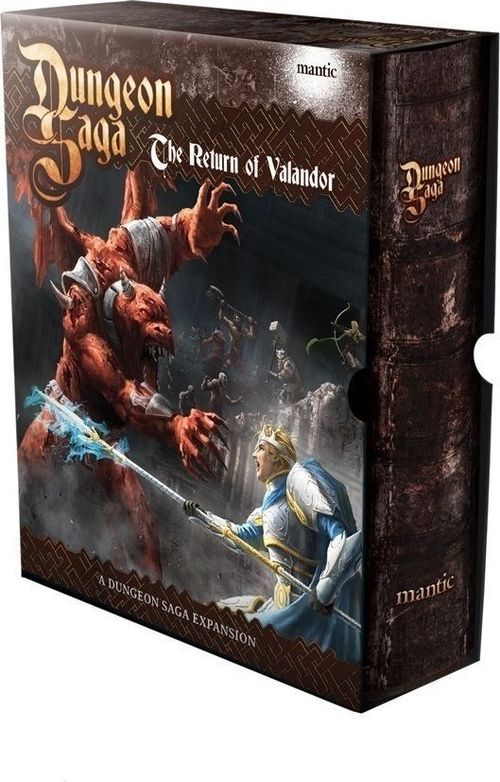
Dungeon Saga: The Return of Valandor
Dungeon Saga: The Return of Valandor Rulebook
Table of Contents
Table of Contents
- Introduction
- Playing with the Adventurer's Companion
- Adventures
- Setting Up an Adventure
- His Power Grows
- Time Limits
- Legendary Heroes
- Upgrading Your Heroes
- Map Key
- New Undead Minions
- Adventure 1: It Begins Again
- Adventure 2: A Wicked Surprise
- Adventure 3: Needle in a Haystack
- Adventure 4: God in Mortal Flesh Once More
- Adventure 5: New Friends, Old Enemies
- Adventure 6: Reckoning
- Optional Rules
Introduction
This Dungeon Saga Quest Book follows on from the adventures in the core game, with six new adventures that the four Heroes undertake on their quest to track down the evil Necromancer Lord Mortibris, who escaped their clutches at the end of the first book.
The Return of Valandor pack assumes that you already have the core Dungeon Saga set and will use some of the original components. All of the other tiles, cards, models and reference sheets you need to play these adventures are included in this pack.
You can either play through the adventures from number 1 to 6 in order, or you can pick and choose to play your favourites.
Stringing the adventures together to make a bigger story is called a campaign, and adds a whole new dimension to the game. Each adventure takes off where the previous one ended, with the Heroes having learned a few new tricks and gained an item or two. If the Heroes lose an adventure then simply reset it back to the beginning of that adventure and try again. Think of it like a video game with your last save point being the start of that adventure.
Alternatively, you can play one of the adventures on its own. This is a good option if you don't have time to play more than one, or perhaps you've already played through the whole campaign.
If you are feeling really ambitious, you could play through the scenarios in the original Dungeon Saga boxed game and this supplement in order, in one giant campaign, following the adventures of our heroes as they strive to stop Mortibris and his terrifying schemes or indeed taking on the role of Mortibris himself and seeing if you could bring about the end of civilisation once and for all!
You may also want to try your hand at a different role to see how you can do. Maybe you're a natural Barbarian, or even a natural Necromancer! You won't know until you've tried.
Playing with the Adventurer's Companion
For those of you that play Dungeon Saga with the Adventurer's Companion rules, this pack includes a number of exciting additions. Firstly, there is the campaign itself. This can be played with your own Heroes by using the levels given in the table below, and the rules from the Adventurer's Companion.
| Adventure | Level Totals |
|---|---|
| 1 | 20 |
| 2 | 22 |
| 3 | 24 |
| 4 | 26 |
| 5 | 28 |
| 6 | 30 |
Secondly, there are a number of new cards in this set. These add to the existing spells, location cards and so on and can be shuffled into your decks when you play this or any other adventures.
Finally there are the new tiles. You will find that the art style of these mixes in with many of the tiles in the core set and can be used to build new layouts and different designs for your own adventures. We have also included tiles that merge from one set's art style to another so that you can build really big dungeons. Uncharted Dungeon cards using these new tiles have been included so that they can be used as new zones when building your own dungeon.
Adventures
Each adventure in this book is described in a standard format - putting all of the information needed to prepare the dungeon, the Heroes and the Overlord within easy reach.
IF YOU ARE GOING TO PLAY THIS AS A MIGHTY HERO, STOP READING NOW!
Only the Overlord player should read further. He will set up each adventure to preserve the element of surprise and tension. Obviously this only really works the first time a Hero player undertakes a particular adventure, but that extra tension and the element of the unknown is well worth the effort. It's far more exciting to explore a dungeon when you really don't know what lurks around the next corner!
Be sure to familiarise yourself with the victory conditions and special rules for each adventure before starting, and make sure these are also clear to the Hero players.
When you are ready to start, set the scene by reading the story text aloud, and let the adventure begin!
IMPORTANT: While playing, only reveal information to the Heroes where noted on the adventure page. Otherwise, any special rules should be kept secret.
Setting Up an Adventure
Zones
When setting up an adventure, do not lay out the entire map at once!
Some maps are divided into one or more zones by the doors. When the Overlord lays out the tiles to start with they will only lay out the tiles with the Heroes on, and from there up to and including the first door(s). This is the first zone. Each subsequent area that is separated off by one or more doors is a new zone.
When a door is opened the Overlord lays down the tiles for the adjacent zone, but no further. Depending on the adventure, this may be the remainder of the map, or there may be still more for the Heroes to discover. Only models that are on zones that have been laid down take any part in the adventure.
When the Overlord places any part of the board, all doors and chests must have a counter placed next to them to show what type of lock they have, and the Overlord must make the Heroes aware if one particular door is the exit for the adventure.
If a newly placed zone includes models that would take the Overlord over the limit allowed in the adventure (because they had previously been raised from Piles of Bones and are still on the board), place Piles of Bones in their starting positions instead.
Overlord Column Key
Overlord Command Cards: This lists the number of cards available to the Overlord player in the game, as detailed in the Rulebook.
Actions per Turn: The number shown beside "Actions per Turn" on each adventure page.
Deck: This expansion uses the same set of cards as the boxed game to build the deck.
Raise Dead
This lists the type(s) of undead that Mortibris can resurrect with a Raise Dead Spell. If more than one type is listed then the Overlord player may choose which one appears.
Mortibris can only maintain a certain number of reanimated followers at any one time. The number in brackets after each type is the maximum number of that type of undead which can be on the board at any one time. For example, if the entry for that adventure said "Skeleton Warriors (max 4), Skeleton Archers (max 2)" each use of Raise Dead brings back either a Skeleton Warrior or a Skeleton Archer. If there are already 4 Skeleton Warriors on the table then no more may be raised until one has been reduced to a Pile of Bones or destroyed. Similarly, no more Skeleton Archers can be raised if 2 are already in play.
As long as you have Piles of Bones on the board and models left to raise you can keep raising new followers.
These limits only restrict what can be in play at one time, not what you can summon in total.
His Power Grows
During his previous encounters with the Heroes, Mortibris was rather distracted. He had the Book of Valandor in his hands and was focused on extracting its deepest secrets. The Heroes were merely a distraction.
In game terms this means that Mortibris now uses the Legendary side of his Boss Card. It also gives him two new special abilities that apply to every adventure, whether he is present in person or not.
Keep Them Coming
Once per Round, Mortibris may cast Raise Dead on one Pile of Bones counter for free. This may be done as if it were using an Interrupt card, and therefore can be done between Hero Turns.
Fields of Bones
At the end of each Round, the Overlord may place 1 additional Piles of Bones in an empty square anywhere on the board.
Time Limits
In some adventures (noted in the Victory section), the Overlord wins if he can hold off the Heroes for long enough.
At the end of a Round when the Overlord draws the last Command card from his draw pile, the Heroes have one turn remaining to complete their objectives. When the Overlord goes to take a new card from his deck and there are none remaining, the game ends with an Overlord victory. He has held off the Heroes' assault for long enough - reinforcements will arrive any second and the Heroes must abandon the attempt.
Legendary Heroes
The time for minor heroes and minor deeds has passed. All of the Heroes use the Legendary sides of their Hero Cards in this expansion.
Upgrading Your Heroes
As heroes adventure through the dungeon they will gain experience and equipment. These bonuses are shown on cards, whether they are new abilities, spells or items. Each scenario tells you which heroes have gained experience by that point in the story, and what that experience gives them. Simply place the relevant card beside the hero card as a reminder.
Map Key
Starting Positions: Hero Starting Position, Minion Starting Position, Boss Starting Position. Note: Arrows denote facing.
Heroes: Orlaf (Human Barbarian), Rordin (Dwarf Fighter), Danor (Human Wizard), Madriga (Elf Ranger).
Bosses: Mortibris (Necromancer), Ba'el.
Minions: Skeleton Warriors, Skeleton Archer, Zombie, Armoured Zombie, Ghost, Dwarf Revenant, Zombie Troll.
Counters: Pile of Bones, Standing Stones.
Furniture: Throne, Bookcase.
Doors: Single Door (Mundane Lock); Single Door (Magical Ward); Double Door (Mundane Lock); Double Door (Magical Ward). Note: Place a ward/lock counter with the corresponding numbers from the map next to each door.
Chests: Mundane Lock; Magical Ward. Note: Place a ward/lock counter with the corresponding numbers from the map next to each chest.
New Undead Minions
The dead do not always rest easy in Mantica. Mortibris surrounds himself with an entourage of expendable troops wherever he goes, and the ruins of the Du'Lan Var are no exception, ripe as they are with the corpses and restless spirits of countless long-dead souls.
Skeletons
The simplest forms of undead, these are the long dead remains of the rank and file of various mortal soldiers, commoners and even children killed through the ages. Numbering men, elves and others amongst their ranks, they are largely mindless and easy to outwit individually. They are however dangerous in packs, where their weight of numbers and single mindedness can drag down an unwary foe.
Skeleton Archers
Resurrected from the dead, Skeleton Archers are a deadly shot. Their affinity with a bow and arrow make them a formidable ranged foe, and difficult to handle in packs. Though almost as mindless as their brethren, they are still a worthy enemy for any party in their line of sight.
Take cover, or better still, take them out before they have a chance to rain death!
Zombies
Formed from fresher (or at least better preserved) corpses than those of skeleton warriors, zombies nonetheless have much the same level of awareness as their bonier cousins. Like skeletons, they are also vastly more dangerous in numbers, and their ranks will often be swelled by those they have just killed.
Mortibris has obtained a whole horde of fresh zombies on his journey from Diffeth to Ba'el's prison.
Ghosts
A place which has seen much death will often be cursed with a surplus of restless spirits - those whose remains are too scattered or too decayed by the passage of time to hold them to any one spot. These spirits manifest themselves as ghosts - spectral beings composed of light and bitterness, who will jealously attack any who are lucky enough to still draw breath. Mortibris has left these spirits to wander freely through the labyrinth of Ba'el's prison, knowing their value as guardians and sentinels.
Armoured Zombies
Adding to the ranks of Zombies that Mortibris brought with him are a patrol of Basilean soldiers who encountered him when he was making his escape from Diffeth. Having vanquished them all, Mortibris chose to raise them, reasoning that they may come in useful to him later.
Revenants
Sometimes, the spirit of a mighty hero or warrior is strong enough that it will form an indelible mark on his very bones. When raised by necromantic magics, these individuals will take much the same role as they did in life, leading from the front and fighting with no little skill and ferociousness. They represent some of the most dangerous footsoldiers in an Undead horde, and a wise adventurer will show them proper respect and ensure that they are put down at the earliest opportunity.
Zombie Trolls
After his nasty experience with the death of Hoggar, which very nearly killed him, Mortibris has elected not to risk joining himself so closely to another being again. Therefore, when he encountered a band of Trolls on his way to the ruins of the Du'Lan Var civilisation, he simply killed them and raised them again as Zombies. They are driven by the need to feast on flesh, much as they were in life.
Adventure 1: It Begins Again
Heroes
Use the Legendary side of the Hero Cards. In addition to your Hero Cards, take the following:
- Rordin, Dwarf Fighter: Forgebreaker
- Orlaf, Human Barbarian: Frenzy (3), 1 Healing Potion
- Madriga, Elf Ranger: Spidersilk Armour, Sure Shot (2)
- Danor, Human Wizard: Magus, 1 Power 1 Energy Crystal and 1 Power 2 Energy Crystal. Available spells: Flamebolt, Break Ward, Burn, Feet of Stone, Brisk Work, Shield, Steelskin, Crystallise, Corrode, Rot.
Overlord
- Overlord Command Cards: 10
- Actions per Turn: 4
- Raise the Dead: Skeleton Warriors (max 6), Skeleton Archers (max 3), or Dwarf Revenants (max 3)
Victory
- Heroes: Open the final door marked X by removing the wards on all four standing stones.
- Overlord: Cripple one of the Heroes or stop the Heroes from winning before the time runs out.
Special Rule - Final Door
The door can only be opened by removing the wards on all four standing stones. The door itself has no ward directly on it.
Tactical Thoughts
The challenge here is to keep Danor moving. He has to get round all the wards as quickly as possible, and hasn't got many spare turns. If he gets blocked in by the minions then the Heroes won't get anywhere. The others need to both protect Danor and clear the path for him to the next ward. However, you can't kill all the minions quickly enough, so the Heroes will need to make a clear bubble of space around Danor, and move this about as necessary.
Adventure 2: A Wicked Surprise
Heroes
Use the Legendary side of the Hero Cards. In addition to your Hero Cards, take the following:
- Rordin, Dwarf Fighter: Forgebreaker, 1 Battle Potion
- Orlaf, Human Barbarian: Frenzy (3), 1 Healing Potion, 2 Battle Potions
- Madriga, Elf Ranger: Spidersilk Armour, Sure Shot (2), 1 Haste Potion
- Danor, Human Wizard: Magus, 3 Power 2 Energy Crystals. Available spells: Flamebolt, Break Ward, Burn, Feet of Stone, Brisk Work, Shield, Steelskin, Crystallise, Corrode, Rot.
Overlord
- Overlord Command Cards: 9
- Actions per Turn: 4
- Raise the Dead: Skeleton Warriors (max 6), Skeleton Archers (max 3), or Dwarf Revenants (max 3)
- Ba'el: Available spells: Blink, Burn, Malevolence, Summonation, Battle Fury
Victory
- Heroes: The Heroes are all in the final room marked X and all still alive when the time runs out.
- Overlord: Cripple one of the Heroes or stop the Heroes from winning before the time runs out.
Special Rule - Chests
Each chest contains a single Haste potion.
Special Rule - Ba'el
Ba'el is only here to test the mettle of the Heroes rather than to fight to the death. He isn't impressed with the Heroes, and will leave it to the lesser minions to deal with. At the end of each Round, roll a dice. On a 1 or 2 he blinks out of existence. He can disappear regardless of whether he is adjacent to any Heroes or not, and the Heroes do not get a free strike when he does so.
Tactical Thoughts
The Heroes aren't powerful enough yet to go toe-to-toe with Ba'el with any hope of success. Luckily they don't need to kill him in this adventure. Try to focus on one Troll at a time. The less efficient you are and the longer you take, the more the smaller minions will start to build up, and you don't want to have them nibbling the odd wound away while you're still fighting Trolls. The distance to cover is not great, but it can be deceptive. As soon as Ba'el has gone, make your way to the final room and make your stand there.
Adventure 3: Needle in a Haystack
Heroes
Use the Legendary side of the Hero Cards. In addition to your Hero Cards, take the following:
- Rordin, Dwarf Fighter: Forgebreaker, 2 Battle Potions
- Orlaf, Human Barbarian: Frenzy (3), 2 Battle Potions
- Madriga, Elf Ranger: Spidersilk Armour, Sure Shot (2)
- Danor, Human Wizard: Magus, 2 Power 1 Energy Crystals and 1 Power 3 Energy Crystal. Available spells: Flamebolt, Break Ward, Burn, Feet of Stone, Brisk Work, Shield, Steelskin, Crystallise, Corrode, Rot.
Overlord
- Overlord Command Cards: 12
- Actions per Turn: 3
- Raise the Dead: Skeleton Warriors (max 6), Skeleton Archers (max 3), or Dwarf Revenants (max 3)
Victory
- Heroes: Find the Spirit of Valandor.
- Overlord: Cripple one of the Heroes or stop the Heroes from winning before the time runs out.
Special Rule - Chests
At the start of the game the Overlord gets to choose which of the chests contains the Spirit of Valandor. All the others are empty. Place one of the counters provided face-down under each chest when you set them up.
Tactical Thoughts
This adventure is a textbook case of getting through a door effectively in the middle of a fight. How you go through the first door is critical to your time. Make sure you open it with the first of the Heroes' actions, so that the others can rush through and engage the Zombies before they blockade the door. In some ways the tactics you need here are similar to adventure 1. However, not all the locks need to be opened by magic, so Orlaf and Rordin can open some too.
Adventure 4: God in Mortal Flesh Once More
Heroes
Use the Legendary side of the Hero Cards. As described in the special rules (see below) one of the Heroes will not be present in his normal form as he has been possessed by the spirit of Valandor. The items listed for their normal form are ignored.
In addition to your Hero Cards, take the following:
- Spirit of Valandor: Demon Slayer, Armour of Valandor. Available spells: Greater Healing.
- Rordin, Dwarf Fighter: Forgebreaker
- Orlaf, Human Barbarian: Frenzy (3), 1 Battle Potion
- Madriga, Elf Ranger: Spidersilk Armour, Sure Shot (2), 1 Healing Potion
- Danor, Human Wizard: Magus, 1 Power 1 Energy Crystal, 1 Power 2 Energy Crystal, 2 Healing Potions. Available spells: Flamebolt, Break Ward, Burn, Feet of Stone, Brisk Work, Shield, Steelskin, Crystallise, Corrode, Rot.
Overlord
- Overlord Command Cards: 13
- Actions per Turn: 2
- Raise the Dead: Skeleton Warriors (max 6), Skeleton Archers (max 3), or Dwarf Revenants (max 3)
Victory
- Heroes: Open the final door marked X.
- Overlord: Cripple one of the Heroes or stop the Heroes from winning before the time runs out.
Special Rule - The Spirit of Valandor
Before this adventure, the Heroes must choose which of them will put on the amulet known as the spirit of Valandor. As soon as that Hero dons the amulet they are possessed by the noble spirit, and their appearance changes to his. They are not dead, merely channelling his spirit into the material world. When he leaves they will return to normal. However, until he does leave, use the Spirit of Valandor model and Hero card for that Hero.
Tactical Thoughts
The most important thing for the Heroes is not to get bogged down in a protracted fight anywhere. The undead are much slower than the Heroes and have a hard time bringing their numbers to bear if the Heroes keep moving. On the other hand, if the minions can block a corridor then the Heroes' power can be easily nullified. Also note that it will take a while to get used to how the balance of power and ability among the Heroes has changed. Exactly how this will change depends on which one Valandor replaces.
Adventure 5: New Friends, Old Enemies
Heroes
Use the Legendary side of the Hero Cards. As described in the special rules (see below) one of the Heroes will not be present in his normal form as he has been possessed by the spirit of Valandor. The items listed for their normal form are ignored.
In addition to your Hero Cards, take the following:
- Spirit of Valandor: Demon Slayer, Armour of Valandor. Available spell: Greater Healing.
- Rordin, Dwarf Fighter: Forgebreaker, 1 Haste Potion
- Orlaf, Human Barbarian: Frenzy (3), 1 Healing Potion
- Madriga, Elf Ranger: Spidersilk Armour, Sure Shot (2), 1 Healing Potion
- Danor, Human Wizard: Magus, 3 Power 2 Energy Crystals. Available spells: Flamebolt, Break Ward, Burn, Feet of Stone, Brisk Work, Shield, Steelskin, Crystallise, Corrode, Rot.
Overlord
- Overlord Command Cards: 15
- Actions per Turn: 3
- Raise the Dead: Skeleton Warriors (max 6), Skeleton Archers (max 3), or Dwarf Revenants (max 3)
- Ba'el: Available spells: Blink, Burn, Malevolence, Summonation, Battle Fury
Victory
- Heroes: Kill Ba'el.
- Overlord: Cripple one of the Heroes or stop the Heroes from winning before the time runs out.
Special Rule - The Spirit of Valandor
One of the Heroes remains possessed by the Spirit of Valandor for this adventure. Use the Spirit of Valandor miniature and Hero card for that Hero.
Special Rule - Cave-In
This adventure uses the Cave In rules detailed on page 20 of the Dwarf King's Quest Boxed Game Quest Book. [Editorial note: the Cave-In rules themselves are not reproduced in this quest book; they are in the Dwarf King's Quest Quest Book, page 20.]
Special Rule - Chests
Each chest contains 2 Battle Potions.
Tactical Thoughts
Running out of time should not be an issue here, but running out of Heroes might. Swarms of Zombies are almost as dangerous as Ba'el himself. The Heroes need to watch their positioning carefully, and be aware of the possibilities of being surrounded by several Zombies at once. Both sides may be able to use the cave-ins to their advantage by clever positioning. Valandor can kill Ba'el far more easily than any of the other Heroes, and arranging this combat must be the Heroes' main focus.
Adventure 6: Reckoning
Heroes
Use the Legendary side of the Hero Cards. In addition to your Hero Cards, take the following:
- Rordin, Dwarf Fighter: Forgebreaker, 2 Battle Potions
- Orlaf, Human Barbarian: Frenzy (3), 1 Healing Potion, 1 Battle Potion
- Madriga, Elf Ranger: Spidersilk Armour, Sure Shot (2), 1 Haste Potion, 1 Healing Potion
- Danor, Human Wizard: Magus, 1 Power 1 Energy Crystal, 1 Power 2 Energy Crystal and 1 Power 3 Energy Crystal. Available spells: Flamebolt, Break Ward, Burn, Feet of Stone, Brisk Work, Shield, Steelskin, Crystallise, Corrode, Rot.
Overlord
- Overlord Command Cards: 18
- Actions per Turn: 3
- Raise the Dead: Skeleton Warriors (max 6), Skeleton Archers (max 3), or Dwarf Revenants (max 3)
- Mortibris: Use the Legendary side of Mortibris' Boss Card. Available spells: Raise Dead, Death Surge, Soul Burn, Unspeakable Fear, Darkness.
Victory
- Heroes: Kill Mortibris.
- Overlord: Cripple all of the Heroes.
Special Rule - The Spirit of Valandor
Valandor may be gone, but the Heroes still feel his presence. This blesses them with an extra dice to their defence rolls. This lasts until they take a hit, when the effect dissipates for that Hero. Keep track of whether the effect remains for each Hero separately.
Special Rule - Final Battle
Unlike all the other adventures, the game does not stop when one Hero is Crippled or the deck runs out. This is the final battle and no time can be spent on dealing with the injured. Either Mortibris or the Heroes must fall.
Tactical Thoughts
Unlike most foes the Heroes have met, Mortibris has room to manoeuver. He will probably hide behind his minions and snipe at the Heroes with magic, and the Heroes should return the favour. Pinning him down in one place will be the first challenge. After that it is just a straight fight to the death, as losses no longer matter. The Heroes should try to engage Mortibris in a Fight as he is far less dangerous an opponent close up.
Optional Rules
Some people may have a particular dungeon crawling itch they'd like to scratch, or you may decide you want to tweak some of the adventures to suit your particular group. Below you will find a few alternate ways to play - feel free to pick and choose from these, use all of them, or even come up with your own!
We'd recommend having a couple of tries through each adventure before you make any changes, as the best tactics aren't always obvious the first time out.
Campaigns
Dungeon Saga is more about having fun and telling a good story with your friends than it is about winning at all costs. However, it's always good to know if you've saved/ conquered the world or not, and so if you want to play through all of the adventures one after the other you can use the following system to determine whether the Heroes arrive in time to stop Mortibris.
Allow the Heroes 10 "hours" to stop Mortibris. Each time you play an adventure costs them 1 "hour" of this time, so the Heroes can lose a few adventures and reset to try again, but they can't do this forever. If they are not on the final adventure when it comes to the 10th hour then they won't get there in time and Mortibris automatically wins the campaign. If the Heroes complete the final adventure on or before the 10th hour then they win.
Individual adventures can be played as many times as you like within this time constraint, though each adventure must be won by the Heroes before they can play the next.
Campaign Goals
To give the Heroes a little more to think about when playing a campaign, each adventure has some additional optional objectives. You still win or lose an adventure as normal. However, the Heroes may be able to gain a further bonus if they win.
Listed below you will find two campaign goals for each adventure except the last, one timed, one task:
TIMED GOALS: These list a number of cards. If the Heroes win the adventure, count the cards remaining in the Overlord's draw pile. If there are at least as many cards remaining as listed in the timed task then the Heroes have been successful.
If the Heroes achieve a Timed task then do not count that adventure towards their 10 hour campaign total. Mortibris hasn't slowed them down at all.
TASK GOALS: Tasks come in several formats, and each adventure explains what you need to do in order to achieve it, and what you get if you do. In order to get a reward you must complete the task before you win the adventure. You do not get the reward if you do not win.
Rewards will generally be in the form of extra items to take in the following adventure. These will be in addition to whatever is listed for that adventure, and can be divided between any Hero(es) of your choice. You must use them in the following adventure or they will be lost.
The Task goals will generally take you more time to complete, so the Heroes will usually have a choice to make...
Adventure 1
Timed: 2 cards.
Task: Destroy every enemy model, or reduce it to a Pile of Bones, before opening the final door. If the heroes fail to do this, the Overlord may place 2 Piles of Bones anywhere under the starting positions of the Heroes in Adventure 2 to represent the Undead chasing them into the dungeon.
Adventure 2
Timed: N/A
Task: Wound Ba'el. Each hero that wounds Ba'el before he disappears immediately gains an Experience dice (see below).
Adventure 3
Timed: 3 cards.
Task: Destroy both Armoured Zombies. The Hero that destroys the second Armoured Zombie finds a Battle Potion amongst the remains.
Adventure 4
Timed: 2 cards.
Task: Destroy both Zombie Trolls. If one Hero destroys both Trolls then they are so spattered in Troll blood that they gain Regenerate (see Necromancer Overlord Panel) for the remainder of this adventure.
Adventure 5
Timed: 4 cards.
Task: If a single Hero destroys 3 Zombies (of any type) in this adventure, then they have learned how they fight and how to avoid the worst of it. Mob Rule (see Necromancer Overlord Panel) no longer applies when fighting against this Hero for the rest of this campaign.
[Editorial note: Mob Rule and Regenerate are defined on the Necromancer Overlord Panel in the core game, which is not part of this pack.]
Experience
The Heroes are ever refining their skills, and as they destroy more enemies they will pick up new fighting techniques that will make their onward journey ever easier.
To represent this in the game, every time a Hero destroys an enemy (not including reducing them to Piles of Bones) place an experience counter on their Hero card. Once a Hero has reached 5 points of experience, remove the experience counters and replace them with a single dice.
This bonus dice can be used once only, and can be added to any roll (Fight, Shoot, Cast Spell, or Defence) made by the Hero.