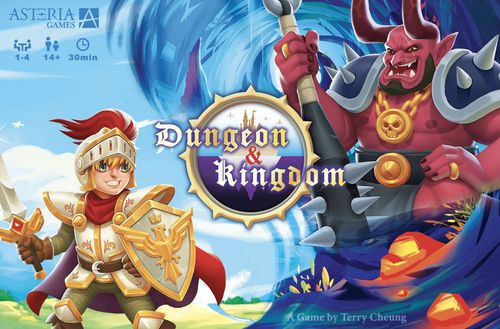
Dungeon & Kingdom
Dungeon & Kingdom Rulebook
Table of Contents
Table of Contents
Components
18 Monster Cards (3 cards for each Monster. Each of the 3 cards is printed with a 4, 7 or 12 Victory Point symbol respectively)
70 Adventurer Cards (x3, x10 per Adventurer type)
52 Victory Point Tokens (x16 of 1 point, x16 of 2 points, x12 of 3 points, x10 of 10 points)
Setup
The Common Area
A. Put all Victory Point Tokens in a pile accessible for everyone.
B. Shuffle all the Monster Cards and Adventurer Cards together to form a single draw deck.
C. Draw 9 cards from the deck to create a 3 x 3 card matrix in the middle of the table.
Common area components: A. Victory Point Supply (supposed to be unlimited). B. Draw Deck & Discard Space (discarded cards go face up here, everyone can check). C. The Card Matrix.
Each Player's Personal Area
D, E, F are empty space you reserve for cards. No cards are there at the beginning of the game.
G is the starting Victory Points in your Reserve (prepared for the potential need in the Aftermath Phase): 6 Victory Points.
D. Your Array (7 slots for queueing cards from left to right).
E. Monster Graveyard.
F. Treasury.
Card Layout
Adventurer Card
B. Color of the card.
C. Name of the character.
D. Name and iconic description of the card's ability.
Monster Card
B. Color of the card (orange and grey here).
C. Name of the character.
D. Name and iconic description of the card's ability.
E. Adventurers required to defeat the Monster.
F. The Victory Points you gain when you defeat this Monster.
G. A reminder of the color of Gem this Adventurer will discover.
H. A reminder that you need a "controlling Adventurer" to activate this Monster's ability.
The Princess is one of the Adventurer Cards, but she is different. Briefly speaking, her color is considered wild in Cut Array and Discover Gems. She also can turn a Combating Adventurer Card into a wild card. Learn more in the appendix (see Characters' Abilities below).
The Flow of the Game
Start from a randomly chosen start player, in clockwise direction, each player takes one turn after another, until the end game trigger happens.
Each Turn:
Refill, then Action (Queue Up (End Turn), Cut Array, or Dismiss (End Turn)), then Dungeon & Kingdom Phase (only if you chose Cut Array), then Aftermath (End Turn).
Refill Phase
(Mandatory but not always needed.) Examine the Card Matrix. If any rows or columns in it are empty, draw cards and refill them (only the empty rows / columns, not the whole matrix).
Action Phase
(Mandatory.) Take 1 card from the Card Matrix, and then, with this new card, take one of the following three actions:
A. Queue Up
Prerequisite: there are already 0-6 cards in your Array.
To queue up, add the new card to your Array, in the leftmost empty slot.
Remarks:
-
You do this to build up your substance for the "Cut Array" action.
-
7 cards is the upper limit in your Array in the Action Phase. In the Dungeon & Kingdom Phase, this limit does not apply (e.g. some card abilities may add cards to your Kingdom or Dungeon).
B. Cut Array
Prerequisite: there are already 1-7 cards in your Array.
Use the new card to "cut" your Array. This is explained in the "Cut Array in Detail" section below.
Remark: this action is the "main dish" of the game. It triggers Victory Points scoring and other effects.
C. Dismiss
Prerequisite: there are already 7 cards in your Array.
If unfortunately there are already 7 cards in your Array, but you are unable to Cut Array, you'll need to discard the new card together with all 7 cards in your Array.
Remark: this action is disadvantageous to you and should be avoided.
Cut Array in Detail
The Cut Array action divides your Array of cards into left and right, Kingdom and Dungeon. Then you will resolve the Kingdom and Dungeon each in their own way.
Every card has a color. A color matching between the new card and an existing card in your Array determines the point at which your Array is divided.
Colors: White (Wild Color), Red, Orange, Yellow, Green, Blue, Purple, Grey (All Monsters are Grey).
When you cut your Array:
B. Look at the color of your new card.
C. Choose a card in your Array that is in the same color as the new card.
D. Decide the cutting line - either on the left or right of the chosen card in your Array.
E. Now, for visual distinction, move the cards on the left and the right apart to divide them into Kingdom and Dungeon, each of which will be resolved in their own way in the next phase.
F. If the new card is an Adventurer Card, put it into your Treasury to become a Gem (face up, tapped sideways). If it is a Monster Card, put it in your Monster Graveyard.
Remark: if the new card cannot match the color with any of your existing cards, you cannot perform the Cut Array action.
Dungeon & Kingdom Phase
(Only if you choose the Cut Array action. If so, this phase is mandatory.)
Now you have divided your Array into left and right, Kingdom and Dungeon.
In the Kingdom, your Adventurers will fight the Monsters and defeat them to gain Victory Points. In the Dungeon, your Adventurers can choose to 1) use their own abilities, or 2) control and activate the ability of the Monsters there.
You can resolve the cards in the Kingdom or Dungeon in any order (e.g. you can resolve some cards in the Dungeon, then some in the Kingdom, then back to the Dungeon, then the Kingdom...).
In most cases resolving the Dungeon first is more smooth in operation, but in some cases, to maximize the advantage, you may need to go back and forth.
Resolving the Kingdom
In the Kingdom the Adventurers fight Monsters!
On the left of each Monster Card, there is a column of Adventurer icons. They represent the Adventurer Cards you need to discard in order to defeat the Monster.
If there are copies of the depicted Adventurer Cards in your hand and/or Kingdom, you are capable of, and may decide on, defeating that Monster.
Steps for defeating a Monster:
B. For each icon on the Monster Card, discard one Adventurer Card that matches it (either from your hand or Kingdom).
C. Take the Victory Points depicted on the Monster Card's top-right corner, plus any Victory Points on this card (they were placed there last turn when the Monster was not defeated; this is explained later in the Aftermath Phase).
D. Put the defeated Monster in your Monster Graveyard.
You can defeat multiple Monsters in your Kingdom in a turn, as long as you have the Adventurer Cards required.
Reminder:
-
Cards in the Dungeon do not participate in this step.
-
In defeating Monsters, you can discard a Princess Card in your hand or Kingdom to make the color of an Adventurer Card being used wild (i.e. use it as any color). The number of Princess Cards allowed to be used is unlimited.
Example (Kingdom): B. This Monster requires 2 Knights and 1 Amazon to defeat it. C. The Knight in your Kingdom and the Amazon in your hand can be used. D. Cards in the Dungeon cannot be used for defeating Monsters. E. You can discard this Princess Card to make any 1 Adventurer Card's color in your hand or Kingdom wild. F. So you discard the Princess to use the (orange) Angel as a (red) Knight. Discard all these 4 Adventurer Cards. The Monster is defeated. G. You gain 9 points for the Monster just defeated, and also take the 2-point Victory Point Token on it. H. Finally, the Monster Card goes to your Monster Graveyard.
Resolving the Dungeon
Each card in the Dungeon may take one of the following actions:
If it is an Adventurer Card: Perform Heroic Deed. Discard this Adventurer Card, and use its ability (represented iconographically at the lower part of the card).
If it is a Monster Card: Control Monster. Choose 1 Adventurer Card in your hand or in your Dungeon, discard it together with this Monster Card (if there are any Victory Point Tokens on the Monster Card, take them into your Reserve). Then, use the Monster's ability (represented iconographically at the lower part of the card).
Remarks:
-
The Adventurer icons on the left of the Monster Card are irrelevant when resolving the Dungeon.
-
The Princess Card's wild color attribute is irrelevant when resolving the Dungeon.
Example (Dungeon): B. First, the active player discards the green card to Perform Heroic Deed, which lets him move 2 cards, each from the Dungeon to the Kingdom, or vice versa. C. First he moves the blue card from the Kingdom to the Dungeon. Then he moves the Undead Reaper from the Dungeon to the Kingdom. D. Then he discards the blue card to Perform Heroic Deed, which lets him draw 5 cards from the deck, choose 1, and add it to his Dungeon or Kingdom. E. One of the cards drawn is an orange card. He adds it to the Dungeon. F. Now he discards the orange card to Perform Heroic Deed, which lets him choose a card from his hand, use its ability (optional), then put it into his Treasury. G. He picks a purple card from his hand to his Treasury (tapped sideways and face up). It becomes a purple Gem. H. And then he uses the Princess in his hand to Control Monster. He discards both the Princess and the 2-head Monster, and uses the Monster's ability "Use the controlling Adventurer's ability twice". In this case, the Princess' ability is "scoring up to 3 Gems of the same color in the Treasury", and this is going to be done twice. I. First, he discards the 3 purple Gems and gains 9 Victory Points. J. Second, he takes the wild Gem (the tapped Princess Card) as a yellow Gem. So he can discard the remaining 3 Gems and gain another 9 Victory Points.
Aftermath Phase
Now the Dungeon and the Kingdom have been resolved. Some Adventurers or Monsters may still remain in your Array. They will be dealt with in this phase. All the following steps are mandatory:
Adventurers' Return
Adventurers' Return
B. The Adventurer Cards in the Kingdom move to your hand. After that, if there are more than 7 cards in your hand, discard down to 7.
C. The Adventurer Cards in your Dungeon move to your Treasury (tapped sideways, face up). Your Treasury is open information; all your opponents can see them.
Monsters Leaving
Now, the boundary between Dungeon and Kingdom disappears.
In your Array, identify all the Monster Cards with Victory Point Tokens on them (which were captured from your Reserve last turn when you did not defeat them). Discard all of them (cards and tokens together).
Example (Monsters Leaving): D. Discard the 2-Head Monster and the 2 Victory Points on it.
Monsters Raiding
Now every remaining Monster in your Array will capture 2 Victory Points from you. Take Victory Point Tokens from your own Reserve, place 2 points on each of these Monster Cards (you are always free to exchange Victory Point Tokens with the general supply). These points will return to you if you successfully defeat the Monsters in your next turn.
In case you do not have enough Victory Points to be captured, you decide the Monster Cards to which the Victory Points are assigned. Discard those that have not been assigned Victory Points.
Example (Monsters Raiding): E. Put 2 Victory Points from your Reserve on each of the Bird Monster and the Reaper Monster.
Finally, slide all the remaining Monster Cards in your Array to the left, keeping their relative position in the queue, so that there is no empty space between them. They become your normal Array now. Your turn is over.
Example (Finally): F. Slide all the remaining Monster Cards to the left, keeping their relative position. Now your turn ends.
Refill Phase Diagram Captions
The source page illustrates the refill cases with four diagrams. Their printed captions, in order, are: "Refill", "Refill", "No Refill - diagonal does not count", "No Refill - no empty row or column". (The diagrams themselves are not reproduced here; the rule is in the Refill Phase section above.)
End Game
End Game Trigger
In the Refill Phase of any player's turn, if the draw deck is depleted, the end game is triggered. At this point it is likely that there will not be enough cards to refill all the necessary slots in the Matrix. If so, just refill as many as possible.
Then the game continues as usual, except from the next turn on, skip the Refill Phase.
In any player's turn, if the last card in the Matrix is drawn, it is the last turn of the game. After this turn, everyone proceeds to End Game Scoring.
In case any card's ability (e.g. the Wizard or the Captain's ability) calls for interactions with the draw deck, shuffle the discard pile to form a new deck for use (but this new deck will not be used to refill).
End Game Scoring
Each player sums up the number of remaining cards in their hand, Array and Treasury. Gain 1 Victory Point for every 2 of these cards.
Each player then adds up all their Victory Points. The one with the most points wins. If there is a tie, all the tied players share the victory.
Characters' Abilities
Princess - Happiness
Discard 1, 2 or 3 Gems in your Treasury, and gain 2, 5 or 9 Victory Points. A white Gem (tapped Princess Card) in the Treasury is taken as any color you want.
The Princess is one of the Adventurer Cards, but she is different in some ways:
B. In Cutting Array, she can be seen as any color, either when being used to cut the Array, or when being cut.
C. When she is tapped face up in the Treasury as a Gem, she can be seen as any color at the moment of scoring.
D. In Defeating Monsters, in your hand or Kingdom, you can discard a Princess Card and use an Adventurer Card (this card can even be another Princess Card) as any color. The number of Princess Cards allowed to be used in a turn is unlimited.
Except as above, the Princess works exactly the same as other Adventurers.
The Princess was born to love beautiful things, in particular the glamourous gems.
Knight - Valor
Gain 2 more Victory Points for one of the Monsters you defeated this turn. 1 defeated Monster can only be the target of 1 Demon King's or 1 Knight's effect.
The Knight is renowned for his devotion to the Kingdom. Folk songs are sung across the realm praising his bravery and righteousness.
Angel - Navigate
Choose a card from your hand, Kingdom or Dungeon, use its power (optional), and then put it in your Treasury (it becomes a Gem).
The Angel uses her flying talent to help adventurers get to mysterious places with powerful magic, enabling them to use their special powers or take precious Gems back to the Kingdom.
Captain - Battle Call
Draw 3 cards from the deck to your hand (they cannot be Monster Cards. If a Monster Card is drawn, put it back into the deck, shuffle briefly, and draw a new one). You can immediately use these cards as usual.
The Captain blows his giant horn to call upon heroes from all around the universe to the castle to combat the Monsters.
Warrior - Gallop
Perform up to twice: Move a card from your Kingdom to your Dungeon, or vice versa.
The Amazon Warrior rides on a fierce battling boar to take heroes back and forth between the Kingdom and the Dungeon.
Wizard - Summon
Draw 5 cards from the deck, look at them secretly and choose 1. Put it in your Kingdom or Dungeon and immediately use it as usual (the 7-card limit in the Action Phase does not apply in this phase).
Important: Put the 4 unchosen cards to the bottom of the draw deck.
The Wizard uses his magical powers to summon powerful support from other planes with a flash of lightning.
Ninja - Kidnap
From the hand of an opponent with the largest hand size (yourself not included, and if multiple opponents tie for largest hand size, you choose one), secretly look at them and take 1 card into your hand. You can immediately use this newly acquired card as usual.
The Ninja from the Orient infiltrates into the fortresses of other kingdoms unnoticed and "invites" their heroes to assist you.
Harpy - Grapple
Take an Adventurer Card from any opponent's Array, and put it in your Kingdom or Dungeon. You can immediately use it to attack Monsters or activate its ability as usual. (The 7-card limit in the Action Phase does not apply in this phase.) If this causes an empty slot in your opponent's Array, he has to slide his cards to fill up the slot.
The Harpy is ferocious and agile. However, if you manage to ride on his back to grab him by the throat, he will be at your mercy. You can then order him to use his powerful claws to capture heroes from afar to assist you.
Giant Robot - Conquer
Use your Adventurers (as usual, from your Kingdom or hand) to attack a Monster in any opponent's Array. Use one fewer Adventurer than required. You gain Victory Points from the defeated Monster and take any Victory Point Tokens on it. Put the Monster Card in your Monster Graveyard.
If this causes an empty slot in your opponent's Array, he has to slide his cards to fill up the slot.
The Giant Robot is a steel warrior of unknown origin, powered by magical energy. Step into its cockpit and you can control this gigantic castle-like machine as it speeds towards your allies' lands to fight off monsters for them.
Undead Reaper - Requiem
Discard any Monster Cards in your Monster Graveyard (including those defeated this turn), gain 1 Victory Point for each of these cards.
The Undead Reaper is the ruler of the Monsters' destiny. Even the mightiest monsters cannot escape the Reaper's call. If you can persuade him to sing a requiem for the defeated monsters, their unsettled souls will be dispelled and finally rest in peace.
Orthos - Double Power
Use the Controlling Adventurer's ability twice. Whenever the ability of an Adventurer Card being doubled up calls for discarding cards for effects (e.g. discard Gems to gain Victory Points), the cards discarded in the first activation are not deemed available for the second activation.
The Orthos is a pair of conjoined twin monsters. They look stupid but in fact are smart and fast in replicating the abilities of the heroes they encounter, twice!
Demon King - Dark Glory
Gain 4 more Victory Points for one of the Monsters you defeated this turn. 1 defeated Monster can only be the target of 1 Demon King's or 1 Knight's effect.
The Demon King is absolutely evil and arrogant. However, if you can impress him with your power, he will recognise your valor and strength even if you defeat his men.
Hungry Dragon - Devour
Choose a color of Gem. Discard all the Gems of this color in every player's Treasury (including yours), and you score 1 Victory Point for each of these Gems. You can decide to take the wild Gems (the tapped Princess Cards) as the chosen color or not. This decision applies to everyone's Treasury (including yours).
The Hungry Dragon is obese and greedy. He plunders around, keeps his loot in a pouch on his belly and eats non-stoppingly. He loves to gobble up gems, and often devours the treasure's owners along obliviously.
Icon Key
The icon key on the last page lists these icons (the icon images are not reproduced here):
- Move a card from A to B (Your Kingdom & Dungeon)
- Your Array
- A Card
- Secretly look at 5 cards
- The Draw Deck
- Using a card's ability
- Your Kingdom
- An opponent's Array
- Your Dungeon
- Your hand of cards
- An Adventurer Card
- A Monster Card
- Defeating Monster
- Your Monster Graveyard
- A controlling Adventurer (this card cannot be a Monster Card)
- An opponent's hand of cards
- Multiple Adventurer Cards
- The hand of cards with the largest size among opponents
- A Gem (i.e. a tapped Adventurer Card in the Treasury)
- Your Treasury
- Discard different number of items for scoring: gain Victory Points according to number of items discarded