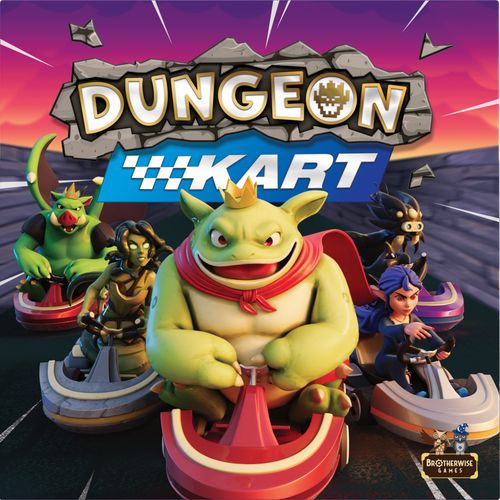
Dungeon Kart
Dungeon Kart Rulebook
Table of Contents
Table of Contents
Game Components
- A — 15 Double-Sided Map Tiles
- B — 8 Spell Markers
- C — 10 Acrylic Racers and one Ghost Kart standee
- D — 10 Racer Cards, with Placement Tokens
- E — First Player, Freeze, Grass, Bomb, Zombie, Coin, Hazard (Hero, Tar Spill, Fangroot, Smashinator, Lava Puddle, Boost and Gravestone), Crystal, and Smoke Bomb Tokens
- F — 8 Dashboards, with Stands (Assembly Required)
- G — 11 Epic Hero Tokens and Cards
- H — 3 decks of Spell Cards
- I — 3 Placement tracking boards and finish lines (2D and 3D)
- J — 2 Dice (Smashinator and Boost)
- K — 8 Reference Cards
- L — 8 red and blue Team Markers
- M — Token Bag
- N — Rulebook and Racing Guide
Game Setup
1. Randomly choose a first player and give them the First Player marker.
2. Take the deck of Racer cards and randomly select a number equal to the number of players plus one (in a 3-player game, randomly select 4 Racer cards). Lay the selected cards out on the table. Starting with the first player and proceeding clockwise around the table, each player chooses any of the available Racer cards, taking the Racer's matching acrylic standee and Placement token.
3. Randomly select the same number of dashboards, laying them out on the table. Then, starting with the last player to choose a Racer, and proceeding counter-clockwise, each player chooses a dashboard, placing it in front of them. Put the unchosen Racer card and dashboard back in the box.
4. Decide on a prebuilt race track from the Racing Guide, or build your own using the tiles available. For your first game, we recommend using the Beginner Track, but if you would like to build your own track instead, follow these steps:
- A. Start with either side of the Starting Line tile (Tile 1A/1B).
- B. Place any tile connected to the starting tile in any orientation, as long as the roads connect.
- C. Continue placing as many tiles as you'd like this way, taking care not to create any dead ends.
- D. If you're creating a connected track, make sure the last tile placed connects back to the original tile. If you're not creating a connected track, place the Finish Line at the end of the last tile you place.
5. When setting up for the first time, place any token with a tan background into the hazard bag (the Heroes, Epic Heroes, Fangroots, Smashinators, Lava Pits, Gravestones, Boosts and Tar Spills). These tokens may be stored in the hazard bag between plays. Place a random hazard from the hazard bag on each hazard Hex, denoted by three red corners. There can be no more than one Epic Hero per tile; if you draw a second one for the tile, return it to the bag. For each Epic Hero you reveal, find the matching Epic Hero card and place it near the board. If that Hero has any additional setup steps listed on its card, complete those now. Refer to Page 12 of the Racing Guide for more info on Epic Heroes.
6. The First Player places their standee on the 1st position hex on the starting tile. Continuing clockwise, the second player takes the 2nd position, and so on. Anyone whose Placement is 4th or higher gains one coin.
7. Place all other tokens within easy reach of all players: Coins, spell markers, Zombies, Bombs, and the Freeze token.
8. Shuffle the three decks of spell Cards (A, B, and C) separately and place them within reach of all players.
9. Select the right Placement Track based on the number of players and place it within sight of all players, near the spell Cards. (In a 2-player game, use the 3-Player Placement track, only using the first and second spots.) Place the First Player's Placement token on the first spot, and each subsequent player's token on the next spot on the Placement track, matching their position on the track.
Dashboard & Racers
Each player in a game of Dungeon Kart has a kart (represented by their dashboard) and Racer (represented by their Racer card and standee). Your dashboard controls your speed and the actions you can take, while your Racer provides a set of unique powers that are activated by spending coins.
Most of the important concepts in the game are represented on your dashboard and Racer card.
1. The speed setting determines how many Movement Points (abbreviated as MP) you get each turn. At the beginning of your player turn, you must use the Speed Setting to adjust your speed up or down one level. The number of MP you begin your turn with is shown within the frame of the Speed Setting.
2. MOVEMENT POINTS (MP) are spent on actions. The more MP you have, the more hexes you can maneuver on the race track.
3. TERRAIN is represented on the race track with different art. Movement through a terrain hex costs 1 MP for each pip shown on that hex. Terrain is also shown on each dashboard. At the end of each player's turn, they must reduce their Speed Setting down to the "slowest" terrain on their dashboard they traveled through that turn (e.g., if you travel through dirt, grass, and mud on your turn, you must lower your Speed Setting down to the "Mud" marker on your dashboard). This rule only applies if you're going faster than that lowest level.
4. ACTIONS are the Moving, Turning, Drifting, and Bumping you do as you navigate the race track (see pages 7-9). All actions cost MP, and generally, they cost more MP if you're doing that action in more difficult terrain.
A. Each dashboard has two abilities. Abilities represent the aspects of your kart that are unique. Some provide extra maneuverability. Some make Bumping other Racers easier. Some affect your acceleration and top speed. All of the abilities are explained to the right (on the dashboard diagram).
B. Each Racer card has two powers. Powers are activated by spending the coins you gather as you race around the track, and they allow you to make extra maneuvers, or to pull off spectacular maneuvers that can affect the outcome of the game.
C. Coins are used to activate Racer powers. You gain a Coin token(s) whenever your Racer travels through a Coin hex on the race track.
Kart Special Abilities
ACCELERATION — The starting speeds (second and third settings on the dial) are higher than those on other dashboards.
TOP SPEED — The higher speeds (fourth, fifth, and sixth settings on the dial) are higher than those on other dashboards.
OFF-ROAD — The terrain penalty for traveling through grass is on the fourth speed setting instead of the third. There is no terrain penalty for traveling through dirt. See Types of Terrain on page 10.
HANDLING — The one Turn each round granted by the dashboard costs 0 MP instead of the standard 1 MP. Any extra Turns received from Racer powers still cost 1 MP. See Turning on page 8.
HEAVY — The kart's one Bump per opponent per round costs 0 MP instead of the standard 1 MP. See Bumping on page 9.
TRACTION — The kart's one Drift each turn costs 1 MP, regardless of the terrain cost for the terrain Drifted into. Drifting abilities granted by Racer Powers are unaffected by the Traction ability and will cost MP equal to the terrain cost of the hex Drifted into. See Drifting on page 9.
Gameplay
Every game of Dungeon Kart is a race to the finish line. This race takes place over a series of Rounds where each player gets a Player Turn. On each player's turn, they:
1. Set their speed and gain MP.
2. Spend MP to Move and take other actions.
3. Adjust their speed due to terrain, obstacles, and braking.
4. End their turn and pass to the next player.
Set Speed
At the beginning of each player's turn, the active player must adjust their Speed Setting on their dashboard up or down one level. Racers do not have to change their speed if they are at the lowest or highest speeds on their boards, and they cannot do so if a Freeze spell is in effect.
Players then gain MP equal to the number now shown in the window of their Speed Setting. MP are a virtual currency tracked by memory.
Example: King Croak raises his speed by adjusting his Speed Setting one place to the right. He now has 9 MP to begin his turn.
Spend MP on Actions
MP are spent on actions to maneuver on the board. Throughout their turn, players Move, Turn, and perform other maneuvers, paying MP for each maneuver along the way. All MP must be spent during a player's turn, or the Racer Crashes (see Page 10), so plan your route accordingly! If a Racer is going to have a complicated movement, they can mark their starting location with the Ghost Kart standee as they count out their movements.
A Racer can occupy the same hex space as another Racer as long as they do not end their movement in the same hex space.
Driving Lessons: Passing through other Racers is key to maneuvering and Bumping other Racers. Don't be afraid to drive right through someone. You just can't end your turn on top of them!
Actions
There are four basic actions that you can take on your turn. Some may be taken multiple times, some only once. Each of these actions, and their costs in MP, are listed on your dashboard.
MOVE: Moving is the basic Action of the game, and just moves the standee forward one hex while maintaining the direction it is facing. It can be done an unlimited amount of times, as long as the Racer has the MP to spend.
The MP cost for Driving depends on the terrain being entered. A terrain hex with one pip costs one MP, two pips costs two MP, and three pips costs three MP. Road and dirt are always one pip terrains, grass is always two pips, and mud and water are always three pips!
Important Note: On Racer cards, the hex icon means "a hex's terrain cost."
Example: These Racers will pay 2 and 3 MP to Move into these hexes. This Racer must pay 1 MP to Move into this hex. This Racer only has one MP left to spend in their turn. They may use it to Move into this 2 pip hex even though they don't have enough MP to pay the full cost. If they had zero MP left, they could not enter the hex.
Important Note: At the end of your movement, as long as you have at least one MP left, you can enter one more hex, even if the MP cost of that hex is more than the MP you have remaining. If you do, end your movement in that hex. You cannot gain MP or complete any other actions, even 0 MP actions.
TURN: Once per turn, you may rotate your Racer by 60 Degrees to the left or right (so you're facing the next side of the hex) within the hex you are currently in.
Important Note: During a Turn, your Racer does not leave the hex they are in!
This Action always costs 1 MP, regardless of what terrain your Racer is on, unless your kart has Handling, in which case it costs 0 MP. The correct cost for your kart will be shown on your dashboard.
Example: Belladonna needs to Turn. Because she isn't in a kart with the Handling ability, she pays 1 MP to do so and rotates her Racer one hex facing to the right. This Action only costs 1 MP, even though she is in a 3 pip hex. Racer Turn cost is independent of terrain difficulty.
DRIFT: Once per turn, you may move your standee forward and to the side one hex, without changing the direction you're facing. This can be done to either side of the hex you are currently in, as long as the destination hex is passable.
Drifting costs MP equal to the number of pips in the tile you are Drifting into, unless your kart has Traction, in which case it costs 1 MP, regardless of terrain type.
Example: Both Croak and Belladonna are going to collide with a rock if they don't move around it. On his turn, Croak Drifts right. His Kart has Traction, so he only pays 1 MP to do so, even though the terrain would normally cost him 2 MP to Drift into. On her turn, Belladonna Drifts left, paying 1 MP to do so, as she is Drifting into a road hex.
BUMP: If your Racer is in the same hex space as an opponent's Racer, you may spend 1 MP to move the opponent 1 hex forward, or 1 hex diagonally forward in either direction. If your kart has the Heavy ability, the Bump costs 0 MP. Note: The active Racer determines the Placement of the Racer who has been Bumped!
As long as you have the MP to spend, there is no limit on how many opponents you can Bump in a turn. However, you may only Bump each opponent once. No double Bumping! A Bump can be the last action you take on your turn if it frees up the hex you will end your turn in by sending the opponent to an adjacent hex.
You can Bump opponents' karts into an adjacent wall, obstacle, or even off the track into lava or a pit. If you do, they remain in their current hex, but Crash, reducing their speed to its lowest level. You may not Bump an opponent into a wall or obstacle unless you have enough MP to fully exit their current hex.
Example: Croak gets his revenge by Driving through Belladonna's hex and Bumping her into the barrier to their left, Crashing her. Croak continues on, while Belladonna stays in her hex, reducing her speed down to its lowest setting because she Crashed.
You can (and should!) Bump karts into hazards or other terrain types. If a kart gets Bumped into difficult terrain, they set their speed down to that terrain setting immediately. If they get Bumped into a hazard, that hazard is activated immediately, even if its effects might negatively affect you, the Bumper. Be careful Bumping someone into a bomb!
Lastly, you cannot Bump karts into other karts, and a Bump counts as a movement for the kart Bumped (this matters for terrain and some hazards).
BRAKE: Once per turn, you may spend 1 MP to adjust your speed down two settings. This setting change does not affect your MP for your current round.
This is a rarely used Action and is therefore not on the dashboard. In a race, you generally don't want to be stepping on the Brakes, but it can save you from Crashing in a tight moment when used cleverly.
Racer Powers
Certain Racers have additional maneuver options available to them via the Powers on their Racer cards. Powers are covered in more detail on Page 15 of the Racing Guide.
Crashing & Spinning Out
Racing karts is a risky business, especially against other Bosses, so you can count on Crashing or spinning out many times during the game. When you CRASH or SPIN OUT, the following happens:
SPIN OUT: End your movement and adjust your speed to the second-lowest setting. You may not cast spells or use Racer powers after spinning out.
CRASH: End your movement and adjust your speed to its lowest setting. At the start of your next player turn, you can change your facing to any direction. You can lay your Racer on its side to indicate that it is Crashed, or just remember. You may not cast spells or use Racer powers after crashing.
The Racetrack
Types of Terrain
There are 5 kinds of driveable terrain on the base game track tiles: Road, Dirt, Grass, Mud, and Water. There are also two deadly terrains – Lava and the Pit – that will Crash you if you fall into them. Expansion tracks have their own terrains. If there is any terrain not listed here, like the carpets in the Haunted Library, treat them as Road. Road and Grass both have two variants. Road appears as asphalt on most tiles and as cracked red stone on Volcano tiles. Grass appears as green grass on most tiles and as dead, purplish grass on graveyard tiles.
TERRAIN COST: The cost for entering a hex is determined by the terrain, indicated by the number of hexagonal pips on the hex: 1 (Dirt and Road), 2 (Grass), or 3 (Mud and Water). A kart is always able to enter one last hex as long as it has at least 1 MP remaining (even if the Terrain Cost there is 2 or 3 MP), but it can only do this as its last Move that turn.
TERRAIN PENALTY: At the end of each player's movement, they must set their speed setting down to the most difficult terrain they entered into that turn, as marked on their player board. (If their speed setting is already lower than the terrain setting, they do not change it.) This penalty does not take effect during their turn, only at the end. A Kart's offroad ability only affects the Terrain Penalty, not the Terrain Cost. Note: in hexes with two or more types of terrain, the terrain cost pips will be placed on the type of terrain that applies its penalty to Racers entering the hex.
DEADLY TERRAIN: If a Racer ever enters a Pit or Lava hex (or any hex without a pip), they Crash and return to the previous hex they were in. If they enter a Lava Hex, they also lose 1 coin, if they have one to lose.
Example: Croak decided to take a shortcut and cut across the mud, but he only had 4 MP left. The first mud hex cost him 3 MP, and then the second one would cost him an additional 3 MP. Even though he only had 1 MP left, he can still enter the second mud hex, but his turn is done, and he has to set his speed down to the mud speed setting on his dashboard. Belladonna chose to take a safer route this turn, though she entered the mud last turn. She Moves out of the mud onto the road and doesn't have to pay any Terrain Cost for the mud she was in, and at the end of the round, she doesn't have to adjust her speed down.
Coins
Coins, the currency of Arcadia, can be used to activate Racer powers. If a player enters a hex with a coin on it, they gain a Coin. If the hex has multiple coins shown on it, they gain that many coins.
Coins are gained instantly, and may be used immediately after being gained. Coins are also used as a tiebreaker in the case of a tie at the end of the game.
Coin tiles are a permanent resource and always give coins to any Racer driving over them.
Hazards
Hazards litter the raceway, seeking to stop the Bosses in their tracks.
Each kind of hazard has a different effect, which can be found in more detail on Page 11 of the Racing Guide. Running into a hazard, whether on your turn or by being Bumped, almost always means ending movement and Crashing or Spinning Out.
If a Racer occupies the same space as a hazard, that hex is considered an obstacle for movement purposes, and may not be entered by any other Racer.
- If you hit a Hero, you Crash and remove the Hero.
- If you end your movement adjacent to a Fangroot, you Spin out. If you hit a Fangroot, you Crash but do not remove the Fangroot.
- If you hit a Tar Spill, you set your speed down one setting, then end your turn. Do not remove the Tar Spill.
- If you hit a Smashinator, roll the Smash Die and gain the reward or punishment. Do not remove the Smashinator.
- If you hit a Boost, roll the Boost Die and travel that many hexes (ignore terrain costs) straight forward. Do not remove the Boost.
- If you hit the Lava Puddle, Crash and lose 1 coin. Return your kart to the hex it was in before hitting the Lava Puddle. Do not remove the Lava Pit.
- The Gravestone acts as an obstacle, you cannot enter its hex and your Racer Crashes if you attempt to.
- If you hit a Bomb, you Crash and all hexes adjacent to the Bomb Crash. Hazards get destroyed, along with the Bomb. Bombs automatically explode at the end of the round.
- If you hit a Zombie, you Spin out and remove the Zombie.
Driving Lessons: It doesn't matter how you hit a hazard. Whether you drive into one, or get Bumped into one you immediately activate its effect, even if it is another player's turn.
Walls and Obstacles
Walls surround the perimeter of the racetrack, marked by a black line. Obstacles are part of a racetrack and have a black line wall around them as well.
If a kart would be forced to move through a wall or obstacle by being Bumped or having too much MP, they stop their movement immediately and Crash.
Some hexes are partially cut off by walls and have no pips. Those hexes are not passable, and if a kart attempts to enter one, it Crashes.
Example: Croak wasn't paying attention to his surroundings and increased his MP too high on a tight turn. He hit the wall with 3 MP left and no other options, so he Crashed. He sets his speed down to the lowest setting, and on his next turn can readjust to be facing any direction.
Driving Lessons: Crashing into a wall isn't the end of the world. A clever Racer will be able to use the readjustment to be perfectly lined up for a great turn!
Spells
Spell hexes litter the racetrack; driving through one can give a Racer a powerful ability. If a kart enters a hex with a spellbook, and they do not have a spell or spell marker, they gain a spell marker. Players may only have one spell and/or spell marker at a time (with some rare exceptions).
A player must enter the hex to gain a spell marker. If they use a spell while already in a hex with a spellbook in it, they do not gain a spell marker. At the end of the round, each player gets a spell card based on what position they're in.
Example: Croak and Belladonna each entered a spell hex on their turn, but Belladonna already has a spell card in her hand (Zombie Attack), so only Croak gets a spell marker.
Special Actions
There are a few special actions Racers can take in addition to the regular actions they have.
SPELL CARDS: Play a spell card from your hand, completing its special effect immediately. Spells will be played at the start of the round or the start of a player turn if indicated on the card, or at any point during a player turn otherwise. Spell cards include:
1. The name of the spell.
2. The spell's ability text. See Page 19 of the Racing Guide for a more detailed explanation of all the abilities.
3. When the spell can be played. Some can be played anytime during a turn, others at the very beginning of the turn, and one at the very beginning of the round! If there's nothing here, you can play the spell at any time on your turn.
RACER POWER: Each Racer has two powers: One Upper Power costing 2 coins and one Lower Power costing 3 coins (except for Klonos, who has more expensive abilities). Each ability can only be activated once per round, on the Racer's player turn, but both can be activated as long as the Racer is able to pay the coins.
A Racer can activate their powers at any point during their turn, unless otherwise stated (like Croak's Lower Power). Certain abilities give special actions and movements. If those movements have an MP cost, it will be indicated on the card. More details on the Racer Powers can be found on Page 15 of the Racing Guide.
Example: Belladonna has the perfect opportunity to gain the lead. She plays the Fireball card she drew last turn and Crashes Croak! She's confident this will make him fall far behind. The Fireball definitely hurt Croak, but he has a backup plan. On his turn, he pays 3 coins to use his Lower Power and increase his speed a second time. Belladonna won't see it coming when he zooms past her!
Ending the Round
After every player has taken their player turn, the Round is over, and the following end of round effects are resolved in order:
1. End-of-Round Hazards Trigger — Any hazards that trigger at the End of Round trigger now (certain Epic Heroes and any Bombs that weren't triggered during player turns).
2. Player Position on the Placement Track is Changed — For each Racer, count the number of hexes (not factoring terrain cost or Turning cost) it would take to reach the end of the tile they're in, in the shortest line (ignore hazards, but not walls). Count full-hexes as 1, and half-hexes as 1/2. Whichever Racer is the closest to the end of the tile closest to the finish line is in first place, and so on. For a detailed breakdown of calculating Racer position, see page 7 of the Racing Guide.
If two or more Racers are tied, they share the same spot on the Placement track. Skip the Placement location(s) after that one.
Example: King Croak and Belladonna are tied for 1st Place, and Porkus is next. Porkus would get placed in 3rd Place while the 2nd place spot would stay empty.
3. Gain Spells — Any Racer who has a spell token must turn it in now and receive a spell Card based on what position they're in, as indicated on the Placement Track.
Example: After adjusting player position on the Placement track, players with spell tokens turn them in for spells. Belladonna and Gorgona both crossed spell hexes and have spell tokens to turn in. Belladonna gets a Level A spell, while Gorgona gets a powerful Level C spell!
4. Change First Player — The First Player marker passes clockwise to the next player and the next round begins! The new First Player takes their turn.
Ending the Game
As soon as someone crosses the Finish Line after traveling on every tile on the track, even if just by half a hex, the game is in its final round. All players whose turns occur after the player who crossed the finish line get to take their final turn. Anyone who took their turn in this round before the player who crossed the finish line does NOT get another turn. This is the final round.
For each player who passes the finish line, count their remaining MP (including half-MPs if they exited on a half-hex). Whoever has the most MP remaining after crossing the finish line wins the game! If there is a tie, whichever player in the tie has the most coins wins the game. If there is still a tie, those tied players share the victory.
Card/Board Icon Guide
- Kart Icon = Racer/Racer's standee
- Explosion symbol = Kart Crashes
- Boss icon in circle = Coin
- Swirly icon = Kart spins out
- Zombie icon = Zombie token
- Exclamation point in hex = A hazard/hazard token
- Bomb icon = Bomb token
- A hex terrain-cost icon (hexagon with pips) = A hex's terrain cost, equal to the number of pips in that hex.
Track Icon Guide
- Coin hex = Gain the number of coin tokens shown
- Hazard hex = Place a hazard from the hazard bag here during game setup.
- Spell hex = Gain a spellbook token
- Obstacle hex = Black borders are impassable. Any Racer trying to enter this hex Crashes in their current hex.
Round Order
1. Cast Freeze spells (if any).
2. Starting with the first player, everyone takes their turns.
3. Apply end of round effects.
4. Update rankings and receive spells.
5. Pass First Player marker to the left.
Turn Order
1. Set your speed up or down one.
2. Spend MPs to move your kart. Cast spells. Spend coins to use Racer powers.
3. Set Terrain Penalty on dashboard.