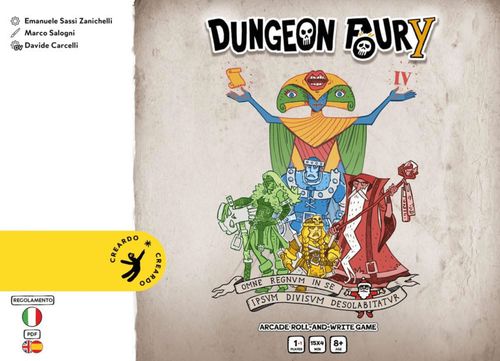
Dungeon Foury
Dungeon Foury Rulebook
Table of Contents
Table of Contents
- What Is Needed to Play
- Game Objective
- The 4 Rounds of the Game
- Available Resources
- Elements on the Map
- Let's Start!
- Game Flow
- When You Reach the Oracle's Room
- Market
- End of Game
- Final Score (optional)
- 2 Players Mode
- Enemies
- Heroes
- Stretch Goal: The Slaughter of Monsters
- Stretch Goal: Santa Crash'n Foury
- Stretch Goal: In and Out with Your Strength
- Blank Maps to Customize
- Stretch Goal: Discovering the Kraken
- Simplified Sequence of Turn Actions
- Summary of the Elements on the Map
What Is Needed to Play
A pencil, an eraser, and a six-sided die (1d6). (If you have 2 in different colors, even better!) A printed copy of Dungeon Foury. Keep your favorite book nearby: the Oracle will speak through it.
Dungeon Foury is a Dungeon Crawler Roll and Write for 1 player in 4 rounds. (See also the 2-player Mode.)
Game Objective
Awaken the Oracle at the center of the Foury Kingdom and reach it through 4 different paths. Enter and exit the Dungeon 4 times to bring peace to the Kingdom and uncover the Oracle's answer.
Each sheet/map of Dungeon Foury consists of two parts that need to be detached. The LEFT side contains the 4 ADVENTURES, i.e., the 4 Rounds of the game that make up the objective of Dungeon Foury, and the RIGHT side includes the Character sheet, Counters, and a summary of the Game Events. The sheets may slightly change depending on the chosen adventure, but they follow the same logic.
The sheet shows: Life Points, Shield, Weapon, Chest Counter, Surprise Resources, Events of the Round (with the Requirement of each round), Four-Leaf Clover, Shovel, Counter of Monsters Defeated and their Strength, Cornucopias as a prize, the Oracle Question and Answers, and a Turn Counter (only for certain adventures). In beige, the extras usable by certain heroes.
The 4 Rounds of the Game
Each time you start a Round, you must meet the specific Requirement. This AWAKENS the Oracle in that Round. You can find the Requirement on the RIGHT side of the A-B-C-D sheet section dedicated to the round you are playing.
- A. The Temple: stand in front of 3 statues.
- B. The Palace Rooms: kill 3 monsters.
- C. The Castel Cliff: reach 2 levers.
- D. The Waterways: obtain 1 Cornucopia, BUT do not redeem it. Deliver it to the Oracle to awaken it. Use the flooded tunnels to swim freely from one room to another without rolling the die.
Example: here we are considering Round A named THE TEMPLE. The Requirement (indicated on the right) is to stand before 3 statues. Each time you fulfill a part of the Requirement, cross off one space until it is completed.
Each time you start a new round:
- Remember to update the strength of the Monsters (which increases by 1 with each new round) as well as the value of the Accumulated Chests. You will find the round indicator next to TREASURES and MONSTERS (chests x1, x2, x3, x4; monsters +0, +1, +2, +3).
- Reset the Monster Kills Counter.
Available Resources
(In beige, the boxes for the Heroes.)
- Heart: How much life you have: when it runs out, you're dead.
- Shield: Blocks the hit, meaning you consume 1 Shield to negate the damage received in combat.
- Four-leaf clover: Reroll a die. Feeling lucky? Consume 1 Four-leaf clover to reroll a die of your choice.
- Weapon: Allows you to enhance your die roll. Roll a combat die and decide whether to add the full Weapon Value to the roll. After the combat, reduce the Weapon Value by 1.
- Shovel: Cross a collapsed wall without rolling dice. Consume a Shovel to erase a collapsed wall. Note: The shovel does not allow you to cross a collapsed room. If you get stuck... uh, you're dead.
Elements on the Map
On the map, you can encounter foes and find items; collect them. (Unless otherwise specified, all icons are removed once collected or defeated.)
- CHEST: acquire 1 chest, which you can convert at the market at the end of the turn. They have an increasing value depending on the turn, from x1 to x4. (Draw a circle on the space when it appears with 1d6.)
- POTION: drink the potion to heal yourself. Gain 1 life point.
- SHOVEL: When you use it, erase 1 collapsed wall.
- WEAPON: Increase your Weapon's strength by 1. Add it to your die roll in combat.
- SHIELD: When you use it, you dodge a received hit.
- FOUR-LEAF CLOVER: When you use it, you can re-roll a die.
- CORNUCOPIA: acquire 1 Resource of your choice.
- Attention: in THE WATERWAYS, you must keep 1 UNUSED CORNUCOPIA to Awaken the Oracle. Mark it in the requirement space.
- DIE: You can obtain various things. Roll 1D6 and compare it with the DIE table. Be careful what you wish for.
- MAGIC CIRCLE: you can move to any other Magic Circle on the map. It is not removed after use.
- STONE STAIRCASE: if you are in a room with a staircase, you can climb to the UPPER LEVEL and TRAVEL THROUGH it to reach the LEVERS. This allows you to pass over collapsed walls and fallen rooms. It is not removed after use. If the wall of the staircase collapses, treat it as a collapsed wall.
Let's Start!
"Think or write down the question you are seeking an answer to; the Oracle will grant it." You can note it in the designated THE ORACLE space along with the answers you gather. Some players have used AI to interpret the answer, achieving a very original effect.
Game Flow
-
On your character sheet, freely mark 12 traits from those listed. If you are using a Hero or a Special Character, record their traits.
-
Select one of the available Rounds from those indicated on the map A-B-C-D and... GO! Until the exit, you will collect ONLY the requirements of the chosen Round.
-
Color the entry arrow of the chosen Round (for example, A). This is where you start. Remember: you can no longer exit or enter through this space. You can black it out.
-
Draw a line from the starting space to the destination space (this is the direction) and a small black circle in the room you are entering. Along already explored spaces, you can move freely without a limit on steps and without the need to roll dice. If you encounter a statue or an active monster, you must face them.
-
Roll 1d6 and compare the result with the 6 events of the space you are moving from, then apply the indicated outcome (see the Round events below).
Attention: the arrows indicate your direction of movement. Take it into account when drawing the walls.
Round Events
A. The Temple (Green spaces)
- You encounter a monster.
- The walls to the right and left collapse.
- The walls to the left and in front collapse.
- The walls to the right and in front collapse.
- The walls in front and behind collapse.
- Resolve the room, then move one additional space without rolling the die.
B. The Palace Rooms
- The room you came from collapses.
- The wall behind you collapses, and you encounter a monster.
- The walls to the left collapses.
- The wall to the right collapses.
- The wall in front collapses.
- You find a chest, mark it on the chest counter.
C. The Castle Cliff (events are not listed separately in the rulebook; see the character sheet)
D. The Waterways
- The room you came from floods.
- You encounter a monster.
- The walls to the left and in front collapse.
- The walls to the right and in front collapse.
- The wall behind you collapses.
- Resolve the room, then move one additional space without rolling the die.
Example: Look at the image in the rulebook. Draw a straight line indicating the DIRECTION of movement between two adjacent rooms, then a CIRCLE in the room you are entering. You roll 1d6 and get a 5. Compare the result with the Events of the Round you are playing. In this case, you start from a Green space, so compare with "A" "THE TEMPLE". Draw the room according to the icon indicated in "5": collapse of the wall behind you and in front of you. If there are multiple openings, as in this case, all of them will be sealed. If a wall is already present, it will not be marked.
Below, the EVENTS related to 2 other ROUNDS are presented (B and D). The Events of THE CASTLE CLIFF are omitted because they are already included in the other examples. Always consider your direction of movement. We recommend rotating the map to align your direction with the ones indicated by the arrows.
Example: Imagine you have traveled a certain path and are now drawing the movement in Red. The line indicates the direction, and the dot marks the room you are entering. You roll the die and get another 5, meaning the walls in front of and behind you collapse. Considering the direction of movement, the walls to collapse are those indicated in Red. If you had rolled a 4, meaning the walls to the Right and in front of you collapse, you would have had to mark the walls in Blue. Since the right wall is already present, you only mark the one in front of you.
- First, face the EVENTS, meaning any possible ENCOUNTERS with Monsters or Statues.
Facing a Statue
That is: roll one die for yourself and one for the Statue.
The Statue is a trap that activates when you reach its space. The trap triggers and shoots a poisoned dart. Combat begins. Roll 1D6 for your character and then choose whether to add the value of your Weapons to the roll. Now roll 1D6 for the Statue to determine the dart's strength. Compare the results of the two rolls:
- If the values are equal: Nothing happens. Try again or flee, resuming the game flow from point "8."
- If your result is higher than the Statue's: You've defeated it! Erase the Statue from the map. It will no longer pose a threat on future passes.
- If your result is lower than the Statue's: Alas, you've been hit by the dart. Remove from your character sheet a number of Hearts equal to the difference between the two values.
- UNLESS: You decide to use a four-leaf clover to reroll 1 of the dice. In that case, compare the new results as described above. Remove the clover from your inventory.
- OR: You decide to use ONE SHIELD to block the hit. In that case, you take no damage. Remove one shield from your inventory. The Statue remains active, and you can choose to continue the fight or flee to point "8."
Attention: If you are playing Round A "THE TEMPLE," it is enough to have faced the statue to mark it in the Requirement space.
Facing a Monster
That is: roll one die for yourself and one die for the monster. What changes compared to the statues? Monsters gain a +1 in Strength with each New Round (see the Round Counter in the Monster space). Roll 1D6 for your character, then choose whether to add the value of your Weapons to your roll. (Example: you have a Weapon value of 2.) Now roll 1D6 for the opponent and add their potential strength for the Round. Compare the values of the two rolls.
- If your result is higher than the opponent's: You've defeated it! Erase the Monster from the map and mark it on the Monster Kill Counter. The Counter resets at the end of the Round, that is, when exiting the Dungeon.
- If the values are equal: Nothing happens. Try again or flee, resuming the game flow at point "8."
- If your result is lower: alas, you've been hit. You must remove from your character sheet a number of Hearts equal to the difference between the two values,
- UNLESS you decide to use a four-leaf clover and reroll any one die. In that case, compare the new results as described above. Remove the clover from your inventory.
- OR you decide to use ONE SHIELD to block the hit. In that case, you take no damage, but the monster remains on the map. Remove one shield from your list.
If you used the Weapon, at the end of the Combat you must decrease the Weapon value on the list. If the Monster is still alive, you can decide to continue the combat or flee, resuming from point "8."
Example: I face a Monster. I roll 1D6 for my character and get a 2. I have a Weapon value of 3 and decide to use it. The value with which I attack the monster will therefore be 5. Now I roll 1D6 for the Monster, which gets a 6. Its value is higher than mine by 1 POINT. I therefore lose 1 Heart from my sheet. Alternatively, I can use a SHIELD to block the hit or use a FOUR-LEAF CLOVER to reroll any die, even the monster's. In any case, I have used the Weapon, so my Weapon value decreases by 1.
-
If you succeeded in the previous step, you can now Collect/Use the ELEMENTS present on the map (see the section ELEMENTS ON THE MAP); otherwise, proceed to the next step.
-
If you have a Shovel, you can now use it to cross a collapsed wall during the game. Erase it and move to the new space without rolling the die. Remove one shovel from your inventory.
-
Follow the same game flow from point 4.
If you reach the Awakened Oracle, read the corresponding section. If "You are dead," stop and read the END OF GAME section.
When You Reach the Oracle's Room
Do not roll the dice. If you have awakened the Oracle, first gain 1 CHEST; mark it in the corresponding space on your character sheet. But... you're not here for that, are you? You're here to find the answer to YOUR INITIAL QUESTION.
Take a book from the shelf. Open it randomly and read the LAST TWO COMPLETE WORDS at the bottom right of the page. If you wish, write them down in the designated space on your sheet. The Oracle speaks in fragments and they are not always in order.
AFTER VISITING THE ORACLE, continue the Round and EXIT THE MAP!
Attention: the Round is not over. It's time to return, but now you must exit through a DIFFERENT SIDE of the map, that is, through a door located in a DIFFERENT ZONE (color). You do not collect Requirements when exiting.
PLACE YOURSELF outside the Oracle's room in an accessible adjacent space. Repeat steps "4" to "9" and play turns until you reach an EXIT space or "Die." (See the END OF GAME section).
Exit Space
If you end your movement on an unused Entry/Exit space, treat it like any other space: roll 1D6, compare it to the Events, and resolve any encounters. Have you survived? CONGRATULATIONS, YOU HAVE COMPLETED THIS ROUND! It's Market Time!
Market
Between Rounds, if you wish, SPEND the chests you've collected to acquire any RESOURCE. Chests kept have an increasing value Round after Round. Check the value next to the chest symbol on the character sheet. ALTERNATIVELY, you can exchange your resources for others. Once the MARKET is over, you can start a New Round: resume the game flow from point (2).
Example: You are at the end of the Second Round. You have accumulated 2 Chests (since it is the Second Round, each chest is worth x2). You decide to use 1 Chest to gain 2 Hearts. You choose to save the other Chest for a future turn. Additionally, you have accumulated 3 Swords. You decide to trade 2 of them to gain 2 Shovels.
End of Game
If this is the fourth time you finish a Round, then CONGRATULATIONS, YOU HAVE FULLY AWAKENED THE ORACLE! But, most importantly... you still have your life. What do the 4 Oracle phrase fragments tell you? Listen to your heart for the answer.
OH, I ALMOST FORGOT... you might have reached this point even if DEAD. In that case... try again on a new sheet or look for the "INSERT COIN" mark. What's it for? Perform a Good Deed for someone, then check the INSERT COIN box. This is your last chance to continue the game, starting again from point (1). The initial question does not change!
Final Score (optional)
The goal of this game is to complete all 4 Rounds by entering and exiting the Dungeon 4 times. If you want to include a scoring system, you could create a small ranking that takes into account:
- The points you've accumulated at the end of the 4 Rounds: count every remaining element (Hearts, Luck, Sword, Shield, Treasures, Shovel, and Monsters defeated) on the player board. Remember that in the market, treasures are worth 4 in this final turn.
- Additionally, you could track how many turns you've played in each Round using the TIME TRACKER (hourglass at the bottom of the sheet).
2 Players Mode
Necessary to play: 1 Map of Dungeon Foury and 2 Player Sheets. Find a multi-sheet page to print and create additional Character Sheets. Each person will also need 1D6, a pencil, and an eraser.
Game objective: Collect at least 5 treasures and then exit the Dungeon in fewer turns than your opponent, or survive longer than your opponent.
Gameplay: From a gameplay perspective, nothing changes compared to the standard game: The Ancient Story. Each player starts from a different side of the Map. The youngest player chooses first.
- At the end of the Turn, mark 1 space on the hourglass counter.
- If your path intersects with your opponent's, you can move freely along their line and try to reach them to face them.
- If you encounter events (statues or monsters) along the way, you must face them as usual before proceeding.
- You still have the option to fulfill the requirement of the Round you are playing and visit the Oracle to gain an extra treasure.
- The exit must be through one of the 3 remaining zones.
Enemies
GOBLIN: Small and sneaky, goblins are certainly not known for their combat skills. The Goblin does not benefit from the Attack boost given to monsters by the adventure. They always roll only 1D6 without adding the Round's additional strength.
ORC: Strong, mean, slightly dull, and very smelly, orcs are considered by many adventurers a classic of exploration. They have no special abilities, which, to be fair, isn't such a bad thing for you.
IMP: These funny little demons love to play tricks, but mostly to be hated. If there is a Resource in the room where an Imp appears, erase it: the Imp destroys it while staring into the adventurer's eyes. Then, the fight begins.
BANDIT: It seems the Dungeon is an excellent place for scoundrels to hide. If the character takes damage from them, they also lose 1 of any other resource: they've been robbed. On the other hand, victory allows looting the Bandits' camp and gaining a Cornucopia.
TROLL: Big and stubborn, Trolls regenerate quickly. Write the number 3 in a corner of the space: if defeated, it will reappear at the end of the adventure (round), ready to fight in the next adventure... and the one after that, and the one after that too. Whenever you return to this space, you will always find a Troll.
MINOTAUR: Bigger, more muscular, dumber, and meaner, Minotaurs are even more. For this reason, they double the Attack boost given to monsters in the Round. You can only hope to encounter them at the beginning of the adventure.
Heroes
Each Hero has a pre-filled character sheet (shown as an image in the rulebook). Copy the technical sheet. The red squares must be blacked out. Characters will not be able to acquire specific resources beyond that level.
- Kael - The Guardian of Virtues - EASY. Specific Action: when he enters a space with an enemy, he does not roll the die to determine the room.
- Melyra - The Chosen of the Wind - INTERMEDIATE. Specific Action: when she uses the four-leaf clover, she chooses the die result instead of rolling it.
- Thalindra - The Brave Barbarian - INTERMEDIATE. Specific Action: every time she gains cornucopias for killing monsters, she gains one additional.
- Elydion - The Wizard of the Bond - DIFFICULT. Specific Action: Once per Round, he can access the market to trade at the value of the next Round.
Stretch Goal: The Slaughter of Monsters
Something didn't go as it should have. All the entrances and exits have collapsed, leaving you alone inside the Dungeon. You feel the Fury rising; you're not afraid: they're the ones who should be.
Necessary to play: 1 Map of "The Slaughter of Monsters," 1D6, pencil, and eraser.
Game objective: Kill as many monsters as possible before dying. You can also play using the Enemies described above, of course. Defeated enemies must be marked in the designated space. For every three enemies, you gain a cornucopia, which, as usual, will allow you to choose any resource.
Game play: Prepare the character sheet by freely distributing 12 traits. If you are using a Hero, copy their sheet. As you may notice, the Life Points line has the Fury Symbol at the far right (a white skull on a black background). Each time you are forced to sacrifice one or more resources you possess but do not want to, you can black out an equal number of Fury boxes, starting from the right and moving to the left.
Example 1: I face a combat and lose, taking 3 damage. I can either remove 3 Life Points or black out 3 Fury spaces.
Example 2: I face a combat and use the Weapon. Whether I win or lose doesn't matter. At the end of the turn, I must remove 1 Weapon for having used it in combat. Instead of removing the Weapon, I black out one Fury space.
Attention: Once the FURY squares are blacked out, they can no longer be erased. When the line is completely blacked out, your life points will be gone, and Fury will have prevailed. You are Furious! As happened to Orlando Furioso, roam the sector (i.e., the colored area) you are in and erase every monster. Mark them on the counter. Rest assured, we will meet again... in a future Dungeon Foury.
Start: The path starts at the center of the Map, where you find the Black Start triangle. Read the motivational phrases at the bottom of the sheet and begin. The game flow follows that of the base game: take a step and roll the die to determine the room's layout, face any encounters, collect items, and finally, if you wish, use the shovel. Easy.
As you can see from the character sheet, in this Campaign, rolling the die will no longer lead to encountering enemies but instead to finding useful items to keep Fury in check. The same happens when rolling dice to determine the placement of walls in sectors. The maximum number of enemies you can encounter is 48.
There is one upgraded resource: the YELLOW POTION, also known as Cicisbeo Juice. It has a label with 2 DOTS, meaning it will heal you for 2 Life Points. Additionally, when CONSUMED, YOU CAN MOVE 1 STEP WITHOUT ROLLING DICE.
End of game: When your Life Points run out or Fury reaches its peak, the game ends. Count the monsters you've killed. That is your score. A tip: make use of the Fury's final effect ;)
Stretch Goal: Santa Crash'n Foury
On the night of December 24th, a clumsy maneuver causes Rudolph's nose to go out, and Santa crashes into the Foury maze, scattering packages, candy canes, reindeer, and the sleigh everywhere. Even the Yeti and the Grinch, who had snuck aboard, end up in the maze. Will you be able to help Santa piece everything together and gather enough presents to save Christmas?
Necessary to play: 1 Map of "Santa Crash'n Foury," 1D6, pencil, and eraser.
Game objective: Within the maximum number of turns (i.e., the white hourglass spaces), recover at least 6 Reindeer, 1 Sleigh, 10 Green Packages, and 10 Blue Packages, or reach the XMas Safe Zone.
Gameplay: Prepare the character sheet by freely distributing 12 traits. When you encounter a Yeti or a Grinch, you can give them a candy cane to distract them. If you use it, remove them from the map; they'll be off in a remote corner of the Dungeon sucking on it and won't bother you anymore. However, you haven't defeated them, so don't mark them in the monster kill table.
Start: Begin in the center. Draw your starting triangle in one of the colored accessible spaces next to Santa Claus's Room. The game flow follows that of the base game: take a step and roll the die to determine the room layout, face any encounters, collect items, and finally, if you wish, use the shovel. Easy. At the end of the turn, you must mark one of the hourglass spaces. If no spaces remain, the game is over.
New symbols:
- Star: If you land on a star or roll a star with the die, you can move freely for 4 additional spaces without rolling more dice to determine the rooms, marking only 1 turn of gameplay in the hourglass space. If you encounter an enemy, you must face it.
- Grinch: If you land on a Grinch space or roll it on the die, you must face him as usual or give him a candy cane to get rid of him. If you defeat him, mark it in the corresponding defeated monsters space and collect any cornucopias. If he wins the fight, besides recording the damage in the life points space, he will destroy a GREEN package you have collected. Remove it from the package track.
- Yeti: Similar to the Grinch. If you defeat him, mark it in the corresponding defeated monsters space and collect any cornucopias. If he wins, besides recording the damage in the life points space, he will destroy a BLUE package you have collected. Remove it from the package track.
- Green Reindeer, Rudolph in red, Packages, and the Sleigh are collected like any other object, meaning after resolving the encounters.
End of game: If the available time runs out, meaning all the hourglass spaces are marked, the campaign ends. Check if you meet the minimum requirement for victory, which is reaching the XMAS Safe ZONE. If you managed to complete the collection grid, meaning 8 reindeer, 1 Rudolph, 16 Green Packages, and 16 Blue Packages, WOW, you are the true Hero of Christmas! Make a wish to Santa; he will grant it.
Mmm... If you didn't reach the XMAS Safe ZONE, prepare for Santa's Wrath. You will have to endure 10 turns of Santa's attack and lose the corresponding Life Points. Santa is immortal. This Christmas will be without presents.
Stretch Goal: In and Out with Your Strength
A version of the game Dungeon Foury with a different balance of resources will force you to rely solely on your own strength. In this Campaign, we have also removed resource limitations by eliminating the Extra slots previously reserved for heroes. You can now accumulate resources up to the maximum scale for each.
Necessary to play: 1 Map of "In and Out with your Strength," 1D6, pencil, and eraser.
Game flow: The game is played in the same way as the standard version: The Ancient Story. The goal of the game is also the same. Refer to the main rulebook if you have any doubts about the gameplay. In this campaign, we've added a few small elements, and the gameplay feeling changes. You'll find far fewer resources, so you'll need to rely more on your physical strength. At the end of each turn, you can always purchase additional resources at the market.
To help you, we've scattered new Elixir potions along the path. In addition to red potions, you'll also find:
- The Yellow Potion, also known as Cicisbeo Juice. It has a label with 2 DOTS, meaning it heals you for 2 Life Points. Additionally, YOU CAN MOVE 1 STEP WITHOUT ROLLING DICE.
- The Purple Potion, also known as Dragon's Blood. Very rare in the Dungeon. It has a label with 3 DOTS, meaning it heals you for 3 Life Points. Additionally, YOU CAN MOVE 1 STEP WITHOUT ROLLING DICE.
Use them wisely.
Blank Maps to Customize
Draw the icons on the map, create your story, and write a TITLE in the strip below DUNGEON FOURY. After playing it thoroughly, send a scanned, playable copy to the publisher telling why it's a great campaign; it might be selected to become one of the maps in the next edition. Icons are included in the rulebook so you can cut them out or copy them.
Stretch Goal: Discovering the Kraken
Close the gates before the Legendary Ancient Kraken is released outside the Dungeon, and save the world from catastrophe. No time to waste; it's just you in a race against time.
Required to play: 1 map of "Discovering the Kraken", 1D6, pencil and eraser.
Game objective: Just like in the base game, complete the requirements of the 4 game areas (3 statues, 3 Monsters, 2 levers, 1 Cornucopia) and exit from the side opposite to the area where you completed the last requirement. And don't die.
Gameplay: This scenario follows the base game rules from character creation or hero selection through to setup and gameplay, with a few exceptions listed below. The Kraken is located at the center of the map in place of the Oracle, and it is immortal (meaning that even if defeated, it is not removed).
Each turn, cross off one Hourglass box (at the bottom of the sheet). Every 5 turns, starting from each flooded space connected to the Kraken, flood one adjacent space. You'll find the Kr counter to help you keep track. If the water reaches you or if you swim through flooded spaces, you'll have to face the Kraken. (A light blue crayon might come in handy here.)
In this scenario there are no cave-ins, only floods. If these floods connect with other water already on the map, they expand the Kraken's influence.
Backtracking: in this scenario, you cannot retrace your steps or swim through flooded terrain using any movement value you choose. Both actions are limited to a maximum of 5 spaces. Swimming beyond 5 spaces means death. (See End of game.)
Warning: Can I still access the Market phase? Absolutely, but only once, by reaching an exit. At what exchange rate? It depends on the turn you're in: if you've completed 1 requirement, x1; if you've completed 2, x2; and so on.
Start: The path starts from an entrance of your choice. The game flow follows the same structure as the base game, with the addition of the hourglass: Mark one hourglass time, take a step and roll the die to determine the room layout, face any encounters, collect items, and finally, if you wish, use the shovel. Easy.
End of game: The game ends in victory when all requirements have been fulfilled and your character has exited from the side opposite to the area where the last requirement was completed. The Legendary Ancient Kraken has been sealed inside the Dungeon, and you weren't its snack. The game also ends if your character dies. In that case, you failed to save the world, and the dreadful Kraken (Legendary and Ancient) will destroy everything.
New potions: To help you, you'll always find various resources and different potions, including:
- The Yellow Potion, also known as Cicisbeo Juice. It has a label with 2 DOTS, meaning it heals you for 2 Life Points. Additionally, you may MOVE 1 STEP WITHOUT ROLLING DICE.
- The Purple Potion, also known as Dragon Blood. Very rare in the Dungeon. It has a label with 3 DOTS, meaning it heals you for 3 Life Points. Additionally, you may MOVE 1 STEP WITHOUT ROLLING DICE.
Tip: focus on getting out; don't waste too much time wandering through the tunnels. Time matters in this scenario.
Simplified Sequence of Turn Actions
- MOVE TO AN ADJACENT AND CONNECTED SPACE.
- ROLL A DIE AND COMPARE IT TO THE TABLE OF THE SECTOR YOU CAME FROM, meaning DETERMINE WHAT HAPPENS IN THE ROOM YOU ARE IN.
- FACE ANY PRESENT ENEMIES. IF YOU LOSE, PROCEED TO STEP 4. IF YOU SUCCEED, COLLECT ANY PRESENT ITEMS AND CLIMB ANY STAIRS.
- USE THE SHOVEL TO OPEN A COLLAPSED WALL AND MOVE BEYOND THE WALL YOU JUST CLEARED WITHOUT ROLLING THE DIE.
- RESUME THE SEQUENCE FROM THE BEGINNING.
Remember!
A. To AWAKEN the Oracle, you must first fulfill the REQUIREMENTS of the Round you are playing. B. Once the Oracle is Awakened and Reached, you must exit through a door located in a different sector from the one you entered. C. The Market phase takes place at the end of the Round you are playing, and you can trade items you own or buy new ones.
Summary of the Elements on the Map
- CHEST: Gain 1 chest and trade it at the market. They have increasing values.
- POTION: Gain 1 life point. With other potions, gain 2 or 3 Life Points and move 1 space.
- SHOVEL, WEAPON, SHIELD, FOUR-LEAF CLOVER, PACKAGES, REINDEER, SLEIGH, and CANDY CANE: Gain 1. They are removed.
- CORNUCOPIA: Gain 1 resource of your choice.
- DIE: Roll 1D6 and obtain the result indicated in the table.
- MAGIC CIRCLE: Move to any other Magic Circle. It does not get removed.
- STONE STAIRS: You can move to the UPPER LEVEL, passing over collapsed walls and fallen rooms to reach the levers. Does not get removed.
- LEVERS: Activate them by climbing the stairs.
- STATUES (Traps): Statues fire poisoned darts at anyone entering the room. Defend yourself.
- MONSTER: Monsters must be fought. Their Strength increases with each Round you face.
- KRAKEN: Moves through the flooded tunnels connected to it. It has Strength 6.
- STAR: You can take 4 steps without rolling dice to determine the room.