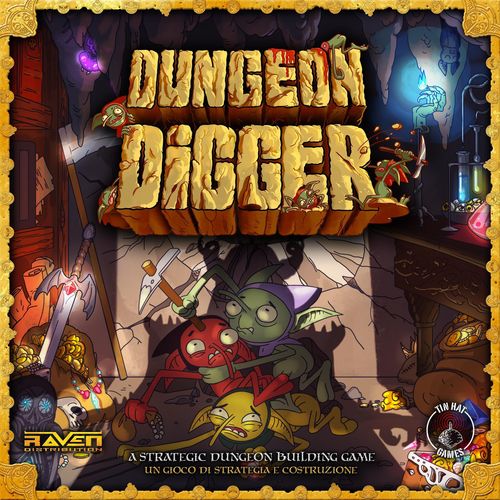
Dungeon Digger
Dungeon Digger Rulebook
Table of Contents
Table of Contents
- Components
- Setup
- Players' Turns and Tyranny Points
- Orders
- Conquered Rooms
- Construction
- Combat
- Gold Pieces
- Coins
- Final Phase
- Construction Tiles
- Construction Tips
- Tiles List
- Advanced Rules
- Scenario: The Monster Hunt
- Scenario: The Trapped Adventurers
- Scenario: The Sands of Time
- Scenario: The Dwarven Citadel
- Scenario: The Dragon's Lair
- Scenario: Total Battle
- Putting the Game Away
- Glossary
Components
- 1x Rulebook
- 1x Dungeon Board
- 1x Coins Bag
- 6x Tiles Bags
- 6x Dungeon Lord Cards
- 252x Construction Tiles
- 36x Coin Tokens
- 90x Stooge Tokens/Stooges
- 12x Collapse Tokens
- 6x Summary Cards
- 6x Rock Tiles
- 6x Monster Tiles
- 6x Ruins Tiles
- 6x Adventurer Tokens
- 2x Sands of Time Tiles
- 1x Dwarven Citadel Tile
- 2x Eggs Tiles
- 3x Cave Tiles
- 1x Dragon Tile
- 1x Treasure Tile
- 1x Dragon Token
- 1x Treasure Token
- 1x Troll Token
- 1x Observer Token
- 1x Giant Bug Token
- 1x Corruptor Token
- 1x Guardian Token
- 1x Elemental Token
Once you open the Dungeon Digger box, you will need to take out all the Construction Tiles and the Stooge tokens, which will have to be divided by colour and then placed inside the corresponding Tiles Bag.
Coin Tokens must be placed in the Coins Bag.
Dungeon Lord cards and special tiles and tokens will only be used with the Advanced Rules setting.
The Summary Cards will be useful to players to remind them of the rules during the first games.
Setup
-
Place the Game Board in the middle of the table.
-
All players pick a Tiles Bag of a colour of their choice, then take the corresponding Stooge tokens and place them in front of themselves. This is called the Reserve.
-
Coin Tokens must be placed in the Coins Bag.
-
Collapse Tokens (2 per player) must be piled up on their specific area of the Game Board.
-
Each player looks for his/her Portal Tile (marked by the portal symbol and by a different back) among those in the Tiles Bag and keeps it aside. It will be placed later on the starting area, as described below.
-
The gaming area dimension varies based on the number of players (as shown on the Game Board; see example). Each player has:
- Stooges (Reserve): 15 – the workforce that will live and sacrifice itself to build and conquer.
- Construction Tiles: 42 – the group of tiles from which players will pick to compose their hand.
-
A random player takes a Stooge token from each player's Reserve and, after mixing them together, draws a random one which will determine who is the first player.
-
The first player chooses where, on the board, to place his/her Portal Tile. Then each other player, taking turns clockwise, does the same. Portal Tiles can only be placed on areas of the board marked with numbers (players can only choose among numbered areas corresponding to the number of players).
-
Each player places one Stooge on his/her Portal Tile and two more Stooges on the scorekeeping area on the board's side, marking 0 points on both the tens and the units columns.
The first player starts erecting his/her dungeon starting from his/her Portal Tile, then the other players do the same clockwise, Turn after Turn.
The printed examples show the gaming area for 2, 3, 4 and 5-6 players.
If you have ogre's hands or you simply hate picking tiles from their bags (crafted by master wizards), you can always choose to displace your Construction Tiles upside down in front of you on 2 or 3 columns and proceed to randomly pick from these piles when required.
Similarly, you can choose to determine the first player in a different way than the one proposed above. You can choose by rolling a die or by flipping a coin, or the first player can also be the last one winning a Dungeon Digger game, the one who owns more TinHatGames products, or simply the player who has most knowledge about exploitation and generic evilness!
Players' Turns and Tyranny Points
Players must collect as much Gold Pieces (GP) as they can. To do so, a player has to build complete Corridors, build Rooms, gain Coins, or Conquer the creations of their opponents.
A Turn represents the time during which a single player can play. It ends whenever a player does not have any more Tyranny Points to use, or when he/she chooses to pass. Then the game proceeds with the next player's Turn in clockwise order.
At the beginning of his/her Turn, a player receives as many Tyranny Points as his/her Tyranny value (which is usually 2). He/she can use them to give Orders to his/her Stooges, depending on how many and how he/she uses them, as shown below. Orders must be resolved immediately when a player spends one Tyranny Point, and it is always possible to give the same Order more than once each Turn. Unused Tyranny Points are lost at the end of the Turn, and at the beginning of each subsequent Turn the player receives as many Tyranny Points as his/her Tyranny value once again.
Moreover, at the end of each of his/her Turns every player must draw a number of tiles from his/her Tiles Bag and place them in front of him/her, so that his/her Projects number matches his/her Craft value. Uncovered tiles in front of each player must always match their Craft value.
Example: Player A performs two Work! Orders during his/her Turn and ends up having only 1 Project. Since his/her Craft value is 3, he/she draws 2 Construction Tiles at the end of his/her Turn and adds them to his/her Projects.
Orders
Orders must be resolved as soon as Tyranny Points are spent to issue them. It is always possible to give the same Order more than once during the same Turn. The Orders that a player can fulfil by exploiting his/her Stooges and spending Tyranny Points are:
MOVE! = 1 Tyranny Point: lets your Stooges perform up to 3 shifts (you can select the same Stooge more than once; resolve all the shifts one by one). Every shift consists of moving one single Stooge (or a Party of Stooges) from any one tile to another door-containing tile, which must also be connected and adjacent, or connected through a Corridor path which must not be interrupted by doors. Paths that do not contain any door on Corridor tiles make no obstacle for the Stooges to move through such tiles (see example): you can always stop the Stooges' movement in any of these Corridor tiles, even one not containing a door.
Shift examples are printed with this Order.
If you order a Stooge to perform a shift and choose to displace it on another allied Stooge-containing tile, they form a Party (any group of two or more Stooges); pile up their tokens to represent it. You can always split a Party by ordering one or more Stooges who are part of it to move upon another tile by using one shift. You can only order one or more Stooges to stop in an opponent's Stooge-containing tile if the unit number of your Stooges is higher than the opponent's; if not, the shift cannot be performed (see the Combat section below).
Finally, if you order a Stooge or a Party to move onto an opponent-controlled tile, they will only proceed one tile per shift. Stooges cannot move upon spaces which do not contain any tile at any moment, nor can they cross through walls or earth edges (see the Construction section below).
THINK! = 1 Tyranny Point: you can choose any number of tiles among your Projects and put them aside, then draw an equal number of Construction Tiles which will fill up the vacant spaces. You must then put back in the bag every tile you previously put aside.
SABOTAGE! = 1 Tyranny Point: you can place a Collapse tile (if available) in any empty space on the board. To complete this Order you must sacrifice one of your Stooges (you must remove it from the game and put it back into your Reserve).
RISE! = 1 Tyranny Point: you can summon a Stooge from your Reserve on your Portal or in a Dorm Room. You can only resolve this Order if your Resources value is higher than the number of Stooges you control.
CONQUER! = 1 Tyranny Point: you can sacrifice one of your Stooges to use it as a Conquer token (just flip the token of the selected Stooge upside down; see example) on an opponent Room. The sacrificed Stooge must be on the desired Room tile. You must draw 1 Coin from the Coin Bag, or you can choose to steal 1 (randomly chosen) of your opponent's Coins if he/she has any.
Conquer! example is printed with this Order.
DEMOLISH! = 2 Tyranny Points: you can remove a Collapse tile from the board. To do so, one or more of your Stooges must stand on a tile adjacent to and connected to the Collapse-containing slot.
WORK! = 1 Tyranny Point: you can place a Construction Tile from those among your Projects on an empty slot on the board so that it connects to your dungeon. To complete this Order, one or more of your Stooges must stand on a tile adjacent to and connected to the slot where you intend to build (see example). All tiles must be built legally (see the Construction section below). You can never build Construction Tiles starting from an opponent's tile, even if you conquered that tile, but you can always connect your dungeon to another player's one.
Work! example is printed with this Order.
In order to balance luck, we suggest an extra rule: each player is entitled to resolve a free Think! Order before the game starts. The first player may resolve it first and then all the other players may do the same in clockwise order.
Conquered Rooms
Players may suffer extra consequences when their Rooms get conquered:
- Throne Room: its controller skips his/her next Turn.
- Treasure Room: the player who conquered this Room can collect all the Coins which eventually lie on this tile (or 1 from the Room controller's total) plus 1 random Coin from the Coin Bag.
- Kitchen: when its controller builds a Room, the number of his/her Kitchens is decreased by 1.
- Library: when its controller builds a Corridor, the number of his/her Libraries is decreased by 1.
- Dorm: its controller can't summon Stooges on this Room anymore.
- Portal: cannot be conquered.
- Sacrifice Pit: cannot be conquered.
The Conquer! Order alternatively allows you to remove an opponent's Conquer token from your Dungeon: one of your Stooges or a Party must be on the conquered Room, and you will have to spend 1 Tyranny Point to remove the opponent's Conquer token. Differently from when you issue a normal Conquer! Order, you don't have to sacrifice one of your Stooges.
It is not possible to conquer the opponents' Corridors.
If you order one or more Stooges to Conquer an opponent's Room already occupied by another opponent's Conquer token, remove it and place your own in its place.
A Stooge who has been flipped over to become a Conquer token cannot move or be exploited as a Stooge token anymore.
Construction
When you order your Stooges to build Rooms and Corridors to expand your dungeon starting from the Portal tile, all tiles must be built legally as explained below:
- Corridor: you can connect it with Doors or other Corridors.
- Door: you can connect it with other Doors or Corridors. You can find Doors on the Rooms' edges or in Corridors' crossroads.
- Earth: you can connect it only with other Earth-containing edges.
- Collapse Tile: you can link it to whatever sides.
It is perfectly legal to build near the edge of the board, even though any Corridor whose end is adjacent to a border can never be completed.
Here are some terms used during the construction phase:
- Adjacent: a tile is adjacent to another when two of their edges touch each other (see example).
- Legal: respecting construction rules (see example).
- Connected: a tile is connected to another one when they are adjacent and two Doors, two Corridors or a Door and a Corridor touch each other (see example).
- Complete Corridor: a Corridor is complete when all of its ends are closed by Doors (see example). It is perfectly possible for a single tile to contain more than one part of different complete Corridors. A Complete Corridor's length is calculated by counting the number of tiles on whose path it is drawn.
Printed examples show Adjacent Tiles, Connected Tiles, a Legal Tile, a Complete Corridor of 2 tiles, a Complete Corridor of 5 tiles, and the Door, Earth, Corridor and Collapse Tile edges.
When the construction of a dungeon leads to two dungeons being connected, Stooges can move freely between one another. Doors built in another player's dungeon will not help in completing Corridors.
Some situations may cause you to accumulate bonus Orders, like the special abilities granted by Kitchens, Libraries, and Torture Rooms. They must be resolved and chosen immediately (or you can always choose to give up on them). If you gain more than one bonus Order at one time (for example, if you control 4 Kitchens and you build a Room, you will receive 2 bonus Orders), you will choose the order of resolution and then proceed to fulfil them.
Example: Player A controls 2 Kitchens and builds a Torture Room executing the Work! Order. The latter, being the first one of that kind controlled by Player A, grants him/her a bonus Think! or Move! Order. Since the Torture Room is also a Room, Player A obtains another bonus Order at the same time, which can be chosen among Rise!, Sabotage!, Think! and Move! thanks to the Kitchen's special ability. It will be up to Player A to choose which bonus Order (which has to be determined as soon as received) to resolve first, and then proceed with the other one.
If the resolution of a bonus Order grants you more bonus Orders, they have to be determined immediately and then resolved afterwards along with the others.
Example: Player A controls 4 Kitchens, executes the Work! Order and builds a Dorm Room. This activates the special ability granted by the Kitchens and grants Player A 2 bonus Orders, which have to be chosen among Think!, Move!, Sabotage!, Rise!, Work! and Demolish!. Player A chooses Rise! and Work! and, thanks to the latter (which he/she resolves first), builds another Room, which makes the Kitchens' special ability activate once more. He/she then receives 2 more bonus Orders right after finishing placing the Room tile on the board, and chooses Move! and Work! once again. At this point Player A has 3 Orders left (Rise!, Move! and Work!). If their resolution causes him/her to accumulate more bonus Orders, he/she will only need to add them to the previous ones.
It is never allowed to interrupt the resolution of an Order, for example by using Tyranny Points or by activating Dungeon Lords' special abilities (see Advanced Rules below). Before passing on to other activities you will always be required to resolve your Orders, or renounce them.
A suggested practical way to keep record of bonus Orders is to use Stooge tokens taken from your Reserve and pile them on the corresponding Order symbols printed on the back of the Dungeon Lord cards whenever you gain one. As you resolve an Order, remove one token from the corresponding pile and put it back into your Reserve, until every single one is removed from the Dungeon Lord card, before proceeding to perform other actions. You are always allowed to give up on your Orders.
Combat
Whenever two Stooges (or Parties) belonging to different players are in adjacent positions and a player orders his/her troop to move onto the occupied tile, the two groups of Stooges start a fight. Count the units number on every side:
- If the number of Stooges is the SAME on both sides, none will be able to perform a shift onto the opponent Stooge's tile.
- If a player has MORE Stooges than his/her opponent, they are able to perform a shift and the opponent player's Stooges are defeated (removed from the board and returned to his/her controller's Reserve).
- If a player has LESS Stooges than his/her opponent, they are not able to perform a shift onto the opponent Stooge's tile.
The printed combat diagram illustrates the Tie, Inferiority and Superiority cases.
If a Party or a single Stooge is moving onto a tile containing both an opponent Stooge (or a Party) and a Trap (see below), you must resolve the fight first, and the effect of the Trap next. After a fight, the winning Party will be placed on the selected tile, and the losing Party (or single Stooge) will be removed from the game and returned to his/her controller's Reserve.
Gold Pieces
Whenever a player gains Gold Pieces (the points needed to win the game), he/she must immediately mark them on the scorekeeping area by moving the corresponding Stooge tokens on the tens and units columns.
You can gain GPs in the following ways:
- 3 GP when you build a Room connected to a Room of the same type.
- 1 GP when you build the Throne Room, +1 GP for every Room built adjacent to the Throne Room.
- 1 GP when you complete a 1-tile-long Corridor.
- 3 GP when you complete a 2-tile-long Corridor.
- 5 GP when you complete a 3-tile-long Corridor.
- 7 GP when you complete a 4-tile-long Corridor.
- 9 GP when you complete a 5+-tile-long Corridor.
Coins
Coins have different values, ranging from 1 to 3, representing their GP value. They must be placed into the Coins Bag so that nobody can see them. When a player draws a Coin, he/she must keep its value hidden from other players, placing the Coin upside down on the table in front of him/her. When a player has to take a Coin from another player's stack (for example when he/she Conquers an opponent's Room), he/she must draw it randomly.
If the Coin Bag runs out of Coins, it will simply not be possible to draw Coins anymore.
Final Phase
Whenever a player reaches 20 GP, at the end of his/her Turn, the game is over. Now players must calculate their final score to determine who is the winner. If a player reaches one of the following goals, he/she gains 5 GP for each one (if more than one player reached the same goal, nobody gains the 5 GP prize).
Prizes:
- Tunnelmaker Lord (the longest Corridor): the player who owns the complete Corridor composed by the highest number of tiles among complete Corridors.
- Crafter Lord (the largest Room complex): the player who owns the single largest complex composed by Rooms connected to each other than everybody else.
- Conqueror Lord (highest number of Conquer tokens): the player who owns the highest number of Conquer tokens on the board.
The Crafter Lord sentence is printed this way in the source, with a word missing before "than everybody else"; it is transcribed as printed.
At the end of that phase, players must reveal their Coins to determine their final score. Every Coin token has a number representing how many GP it is worth; add these values to your GP score in the scorekeeping area.
Victory: the player with the higher number of GP wins the game and the Lord of the Lords of the Dungeons title!
Construction Tiles
Each player has 42 Construction Tiles (same number and type for each player). This section describes the symbols and related special abilities found on these tiles.
-
4x Torture Rooms: when a Torture Room comes into play, you gain bonus Orders depending on the number of Torture Rooms you control (including the one that just came into play):
- Move! or Think!
- Rise!, Sabotage! or any previous option
- Work!, Demolish! or any previous option
- Two from the previous options
If you choose a Move! bonus Order, you will only be entitled to make 1 shift, and if you choose a Sabotage! bonus Order, you do not have to sacrifice one of your Stooges. You can always receive bonus Orders as if you are controlling fewer Torture Rooms than you actually are.
-
4x Dorm Rooms: you can summon Stooges in these Rooms. Whenever a Dorm Room comes into play, you can summon a Stooge on that tile for free (only if your Resources value allows it).
-
4x Kitchens: each Kitchen you own increases your Resources value by 2. Whenever a Room comes into play, you gain bonus Orders depending on the number of Kitchens you control:
- Move! or Think!
- Rise!, Sabotage! or any previous option
- Work!, Demolish! or any previous option
- Two from the previous options
If you choose a Move! bonus Order, you will only be entitled to make 1 shift, and if you choose a Sabotage! bonus Order, you do not have to sacrifice one of your Stooges. You can always receive bonus Orders as if you are controlling fewer Kitchens than you actually are.
-
4x Libraries: each Library you own increases your Craft value by 1. Whenever a Corridor comes into play, you gain bonus Orders depending on the number of Libraries you control:
Example: a Corridor with Trap, shown with a worked example in the source.
Construction Tips
Here are some useful construction tips that will help you develop a winning strategy since your very first games:
- Dorm Rooms let you summon Stooges far away from the Portal Tile, so it is important to build them in strategic positions.
- It is better to build Treasure Rooms near the Portal Tile so that they are better defended from opponents' invasions.
- Use the bonus Orders granted by Kitchens, Libraries and Torture Rooms to move your Stooges to strategic positions.
- Look out for even the smallest Corridor arms: by completing them you will gain those few GPs that could lead you to victory!
- Use Collapses when one of your opponents is about to complete a long Corridor or to achieve an important task.
Tiles List
Summary of the tiles, as printed on the final page.
- 4x Torture Rooms: when a Torture Room comes into play, you gain bonus Orders depending on the number of Torture Rooms you control (including the one that just came into play).*
- 4x Dorm Rooms: you can summon Stooges in these Rooms. Whenever a Dorm Room comes into play, you can summon a Stooge on that tile for free (only if your Resources value allows it).
- 4x Kitchens: each Kitchen you own increases your Resources value by 2. Whenever a Room comes into play, you gain bonus Orders depending on the number of Kitchens you control.*
- 4x Libraries: each Library you own increases your Craft value by 1. Whenever a Corridor comes into play, you gain bonus Orders depending on the number of Libraries you control.*
- 1x Throne Room: you gain 1 GP when it comes into play, +1 GP for each Room built adjacent to it. You gain GPs even if Rooms get built in adjacent positions after the Throne Room has come into play or during following Turns.
- 4x Treasure Rooms: when it comes into play, you may draw one random Coin from the Coin Bag. At the start of each of your Turns you can place one Coin you own on one of your Treasure Room tiles; that Coin can thereafter be stolen only by directly conquering that tile.
- 1x Sacrifice Pit: whenever you move a Stooge into this Room, it will be sacrificed and you will be able to draw a random Coin from the Coin Bag or to build one Construction Tile in a legal position. This tile can't be Conquered.
- 1x Portal: this is the starting point for each dungeon. From the Portal tile you can summon your Stooges. Opponents' Stooges can't move on this tile. This tile can't be Conquered.
- 7x Corridors: these are the junctions in between a dungeon's Rooms. The longer the Corridor, the more you gain GPs. Corridors can be used by Stooges for faster movements.
*: 1) Move! or Think! 2) Rise!, Sabotage! or any previous option 3) Work!, Demolish! or any previous option 4) Two from the previous options. If you choose a Move! bonus Order, you will only be entitled to make 1 shift, and if you choose a Sabotage! bonus Order, you do not have to sacrifice one of your Stooges. You can always receive bonus Orders as if you are controlling fewer of that tile than you actually are.
Advanced Rules
This advanced rules set gives players two more options experienced players may enjoy during a Dungeon Digger game: 6 Dungeon Lords cards will let you become a specific underground tyrant and use its unique special abilities; 6 Scenarios will introduce new game elements and different endings inspired by classic fantasy story types.
Dungeon Lords: at the beginning of the game, each player must randomly (or by mutual agreement) choose a Dungeon Lord card, which grants him/her a Standard Ability and a Special Ability.
- Standard Ability: an ongoing bonus the player may use for the entire game during his/her Turns.
- Special Ability: a once-per-game ability that the player can unleash during one of his/her Turns. The Dungeon Lord card should be flipped horizontally to show it has been used.
The printed rulebook shows an example card with its Standard Ability, Special Ability, and its Craft, Resources and Tyranny starting values. The individual abilities of the six Dungeon Lord cards are printed on the cards themselves and are not reproduced in the rulebook text.
Scenarios: before the beginning of the game, players can choose (randomly or by mutual agreement) one of the 6 different Scenarios and add it to the game. Each Scenario determines new winning conditions and new goals, and needs some extra elements and rules which are added to the Standard set. The 6 Scenarios are described below.
Tips: there are many ways experienced players may customize their Dungeon Digger games. For example, you can choose, according to other players, to turn your Projects upside down so that your opponents can't see them (it will be harder to calculate what an opponent will do during his/her Turn); this will increase the difficulty level and decrease the duration of the game. Scenarios are the fastest and most balanced way to add variations to the Standard Rules: you can also mix up rules from different Scenarios, when possible, or use just part of them in order to create new unique ones.
Scenario: The Monster Hunt
Components: 6x Rock Tiles, 6x Monster Tiles, 6x Ruins Tiles.
Set up: each player takes a Rock, a Monster and a Ruins tile and shuffles them. After each player chooses where to start, placing his/her Portal on the board, the first player starts placing a random tile face down on the board (this tile must be placed at least 2 spaces away from any Portal tile). Each other player does the same afterwards, until every tile has been placed.
The printed example marks the areas where it is not possible to place the special tiles.
Rules: here is a description of the three different tiles' effects:
- Rock: these tiles represent blocks of stone. You can't build where they are, and they function just as a Collapse Tile: they can be removed using a Demolish! Order.
- Monster: to enter this Tile you must have a Party of at least 3 Stooges; if you want to pass through it, the Party must be composed of 4 or more Stooges. If you use a Conquer! Order on it, you'll receive 4 GPs, and from then on your Stooges will be able to pass through this tile freely. Conquer Tokens on this tile cannot be removed. It is possible to use these tiles' doors to complete Corridors.
- Ruins: Stooges can freely cross this type of tile. If you Conquer one, you will immediately receive 1 Coin from the Coin Bag and 1 extra Tyranny Point that you can use until the end of your current Turn. If you want to Conquer a Ruins tile already conquered by an opponent player to remove his/her Conquer token and put your own, you must use a Conquer! Order to do so and sacrifice a Stooge as usual; you will receive the extra Tyranny Point and you will be able to take a random Coin from the previous conqueror's stack (if the previous conqueror doesn't have any Coins, you can draw one from the Coin Bag).
End of the Game: the first player who reaches 25 GPs will end the game. Then you will need to calculate the final score and determine the winner as described in the Standard Rules.
Tips: in order to make a Monster Hunt game more unpredictable, we suggest not flipping over the special tiles once you have placed all of them on the board. Only when a player builds a Corridor or Room directly connected to this Room will he/she have the possibility to flip the tile and reveal its content. Ruins and Monster Tiles count as Collapses tiles for construction purposes (you do not have to respect legal parameters when building next to these tiles).
Scenario: The Trapped Adventurers
Components: 6x Adventurer Tokens.
Set up: each player draws a random Adventurer Token, then puts every token in the middle of the board.
Rules: during each player's Turn, the active player may move the drawn Adventurer to stop or slow down his/her opponents. Adventurers' stats are:
- Movement (M): represents how many tiles an Adventurer can move. Adventurers can move both onto empty spaces and tiles, but when they enter a Dungeon they are blocked by walls just like the Stooges. Moving costs a shift (see example). If an Adventurer moves onto a Room tile, it cancels that Room's special ability for everyone until it leaves, just as if it had been conquered by an opponent Stooge. If an Adventurer reaches an opponent's Portal Tile, it will be removed from the game, and that Portal's controller will lose 5 GPs at the end of the game.
The printed example shows Adventurer movement for the Thief (Movement 2) and the Wizard (Movement 1).
If you want an Adventurer to move through a Trap-containing Corridor, you will need to give 1 Coin to that Trap's controller to complete the action (if you do not have any, it will not be possible to complete such movement).
- Life (L): represents how many Stooge units an Adventurer equals to for fighting purposes. If you kill an opponent-controlled Adventurer, you may draw 1 random Coin from the Coin Bag.
- Special: each Adventurer has a unique special ability described below.
- Combat: Adventurers act like Parties of Stooges for combat purposes (their Life value corresponds to Stooge units), and they move, fight and die just like them (see the Combat section in the Standard Rules).
Whenever an Adventurer is killed, the controller of the Stooges who killed it will keep its token and will immediately receive 5 GPs.
Adventurers: here is a list of the 6 Adventurers you can find in this Scenario:
- Barbarian: M:1 L:3 Fury (once per Turn the Barbarian can move onto a tile occupied by one or more Stooges, no matter how many they are: one of these Stooges will be killed. If at the end of a Turn the Barbarian token lies on a Stooge-occupied tile, you will need to move it onto an adjacent and connected tile).
- Priest: M:1 L:2 Conversion (if the Priest moves onto a tile containing a number of Stooges inferior to its Life value, such creatures will follow him instead of dying, increasing the Life value of the Priest so that it will be able to convert larger Parties afterwards. Put the Stooge tokens under the Priest one when this happens).
- Thief: M:2 L:1 Hide (the Thief can pass through any number of Stooges and can't be killed when it is inside a Corridor tile. The Thief is also immune to Traps).
- Warrior: M:1 L:2 Leader (he is considered to have +1M as long as another Adventurer is within 5 spaces from him, and +1L as long as 2 or more Stooges are within 3 spaces from him).
- Wizard: M:1 L:1 Flameblast (once per Turn, when the Wizard completes a movement inside another player's Dungeon, it kills all the Stooges in a straight line (a line not interrupted by doors or walls) of his controller's choice. After doing that, it will not be possible to move it for the rest of the current Turn).
- Bard: M:2 L:1 Charme (it's possible to kill the Bard only if 2 or more allied Stooges are within 2 spaces from those who are actually trying to defeat him).
End of the Game: the first player who reaches 20 GPs will end the game. Then you will need to calculate the final score and determine the winner as described in the Standard Rules.
Scenario: The Sands of Time
Components: 2x Sands of Time Tiles.
Set up: when playing this Scenario, you place the Sands of Time tiles on the scorekeeping area instead of the Stooge tokens: one of them on the tens column marking 0, and the other on the units column marking 1. The total duration of the game will be 10 Turns per player.
Rules: when playing this Scenario, players won't keep track of GPs. Instead, they will move forward the Sands of Time tiles placed on the scorekeeping area every time a new Turn begins. Moreover, every time a player ends his/her Turn without having performed any Work! Order during it, the next player will have to draw a Coin from the Coin Bag and move the Sands of Time tiles forward as many steps as the number shown on the Coin (then the Coin must be placed back into the Coins Bag).
End of the Game: the game ends after a total of 10 Turns per player. Then you will need to calculate the final score and determine the winner as described in the Standard Rules.
Tips: to give a characteristic touch to this Scenario, we suggest limiting the duration of each player's Turn to 1-5 minutes; use an hourglass or a chronometer to measure time, and if at the end of a Turn's duration a player still has unused Tyranny Points... they'll be lost! Worse for him!
Scenario: The Dwarven Citadel
Components: 1x Dwarven Citadel Tile.
Set up: place the Dwarven Citadel tile in the middle of the board. Players may try to connect to this tile during the game (building legally). Stooges cannot cross this tile, but its doors can be used to complete Corridors.
Rules: the Dwarven Citadel tile can contain as many Stooges as twice the number of players +1. Every time a player moves one or more Stooges into the Citadel tile, he/she may draw 1 Coin. Such Stooges cannot be moved away from that tile, but they will still count when determining the Resources limit. Stooges inside the Citadel do not fight each other, so it is possible that such tile contains Stooge tokens from different players (which will pile up until the maximum limit is reached).
End of the Game: whenever a player reaches 25 GPs, or whenever all the spots inside the Dwarven Citadel tile are occupied, the game will end. Then you will need to calculate the final score and determine the winner as described in the Standard Rules.
Scenario: The Dragon's Lair
Components: 2x Eggs Tiles, 1x Dragon Tile, 1x Dragon Token, 3x Cave Tiles, 1x Treasure Tile, 1x Treasure Token.
Set up: before starting, the players must randomly place the special tiles for this Scenario upon the 7 central spaces, upside down so that nobody knows their positions. The gaming area for this Scenario needs to be calculated as if you were playing with one more player (if possible). Moreover, you will need to create a stack of randomly drawn Coins, which will be the Treasure Stack (see below).
The printed placement example shows the Dragon's Lair tiles in the central spaces.
Rules: players may build their Dungeons trying to connect to the central tiles (each one is considered a 6-doors Room, and it will require building legally to connect to them; building connected Corridor tiles will eventually let you complete them). These tiles will be flipped, and their contents (explained below) revealed, only when a Stooge is ordered to enter them.
-
Cave Tiles: these tiles contain nothing and are simply considered regular empty 6-doors Rooms, which the Stooges may use as passages for any other purpose.
-
Egg Tiles: whenever one or more of your Stooges would like to move out of this tile, you will need to use 1 Tyranny Point to do it safely and place them on a connected tile. If you use a shift to move them instead (like those gained by using the Move! Order), you will first have to take the Dragon Token and place it on this tile, then the Stooges can complete their movement, which will be lost (you will be able to save them by spending Coins though; see below).
-
Dragon Tile: whenever one or more Stooges enter this tile, you will have to place the Dragon Token on it (see below). The tile is for all other purposes considered a regular 6-doors Room which Stooges can use as passage.
-
Treasure Tile: whenever one or more Stooges enter this tile, you will have to place the Treasure Token upon one of them, which will need to carry it now (see below). The tile is for all other purposes considered a regular 6-doors Room which Stooges can use as passage.
-
Dragon Token: whenever the Dragon Token is placed on the board, it kills every Stooge token which is on the same tile as the one where it appears (the Stooges will be removed from the board and placed back into their corresponding player's Reserve).
It is possible to save them from the Dragon's killing by spending a Coin for each Stooge. If you do so, you will have to move each saved Stooge onto an adjacent and connected tile (if this is not possible, it will not be possible to save the Stooges). It is possible to spend any number of Coins and save only some of the Stooges. All Coins spent this way have to be placed into the Treasure Stack.
The Dragon cannot be defeated. Whenever the Treasure is carried by a Stooge, any player whose Stooges are not carrying the Treasure will be able to spend 1 Tyranny Point during their Turn to move the Dragon 1 space in any direction (even those with no tiles; see example). Each time it moves onto a Stooge-occupied tile, it will kill every Stooge present (as above, they can be saved by spending Coins; otherwise they will be removed from the board and placed back into their corresponding player's Reserve).
End of the Game: whenever a player reaches 30 GPs, or whenever a player brings the Treasure back to his/her Portal Tile, the game ends. Then you will need to calculate the final score and determine the winner as described in the Standard Rules.
Scenario: Total Battle
Components: 6x Creature Tokens.
Set up: players follow the regular set up rules, but the gaming area will be smaller and calculated as if playing with one less player (if possible).
Rules: Dungeon Lords will be closer than normal to each other and will come into contact more easily while playing this Scenario. Moreover, they will be able to summon deadly Creatures to serve them. To do so, they must follow the special rules described below in their specific descriptions.
Creatures act in a very similar way to how Stooges act, but they are not able to perform the Work! Order (they can still perform the Sabotage!, Conquer! and Demolish! Orders normally). They can also stop into allied Creature- or Stooge-containing tiles. Each player can control any number of Creatures at the same time, but if a specific Creature has been summoned by a player, his/her opponents will not be able to summon it as well.
Their stats are:
- Movement (M): represents how many tiles you can move a Creature when using a shift to do so (as those granted by the Move! Order; see example). Creatures have the same legality limits as the Stooges have when it comes to movement (they cannot pass through walls or in spaces with no tiles). If a Creature moves onto an opponent Corridor tile which contains a Trap, it will die (it will be removed from the board) unless its controller gives 1 Coin to the Trap's controller.
The printed example shows Creature movement for the Guardian (Movement 2) and the Troll (Movement 1).
- Life (L): represents how many Stooge units a Creature equals for fighting purposes. If you kill an opponent-controlled Adventurer, you may draw 1 random Coin from those that player owns (if he/she owns any). (The source prints "Adventurer" here; transcribed as printed.)
- Resources (R): tells you how many available Resource points you need to have if you want to summon that Creature, and how many it will cost to have it in play.
- Summoning (S): tells you what you need to spend and own in order to summon that Creature. You will always have to spend a certain amount of Tyranny Points and to control at least one each of the Rooms listed here. Each Creature can either be summoned upon your Portal Tile or upon one of the Rooms listed in its Summoning section.
- Special: each Creature has a unique special ability, described below.
- Combat: Creatures act like Parties of Stooges for combat purposes (their Life value corresponds to the number of Stooges in the Party), and they move, fight and die just like them (see the Combat section in the Standard Rules). Creatures can perform the Conquer! Order, but you will have to pick one of your Stooges on the board (wherever it is), flip it into a Conquer Token and place it on the Creature's tile instead of sacrificing the Creature itself (if you have no Stooges, it will not be possible to fulfil the Conquer! Order with a Creature).
Creatures: here are the descriptions of the 6 Creature types you can summon while playing this Scenario:
- Troll: L:3 M:1 R:3 S: (1x Tyranny Point + Torture Room). Special: whenever the Troll wins a combat, it can perform a free extra shift.
- Guardian: L:1 M:2 R:1 S: (1x Tyranny Point + Treasure Room). Special: only a Party of 3 or more Stooges (or other Creatures with a Life value of 3 or more) can defeat the Guardian in combat.
- Giant Bug: L:2 M:3 R:2 S: (1x Tyranny Point + Dorm Room). Special: the Giant Bug cannot perform the Conquer! Order.
- Observer: L:3 M:3 R:2 S: (1x Tyranny Point + Library + Treasure Room). Special: immune to Traps, and its movement is never blocked by Parties of exactly 3 Stooges, or by the Troll.
- Elemental: L:4 M:1 R:1 S: (1x Tyranny Point + Torture Room + Kitchen). Special: whenever it performs the Conquer! Order and you have to draw a Coin, you can choose to put the Coin back and draw a new one (only once per Coin).
- Corruptor: L:5 M:2 R:4 S: (2x Tyranny Points + Throne Room + Sacrifice Pit). Special: when the Corruptor is summoned, you gain a free extra shift for each of your Stooge tokens and for each Creature you control.
Moreover, during this Scenario players may try to eliminate their opponents permanently. A player's Portal tile can be occupied by opponents' Stooges and Creatures, and it will be possible to perform the Conquer! Order on it. Every time a player does so, he/she may randomly draw 1 Coin among those the Portal's controller owns, or from the Coins Bag if that player has none.
Additionally, once a Portal tile accumulates 3 Conquer Tokens, its controller will be defeated and he/she will no longer be able to take his/her Turns. His/her scorekeeping Coin is removed from the Game Board, and so are his/her Stooge and Creature tokens. The player who has the highest number of Conquer Tokens on that Portal when it is finally conquered will be able to pick one Coin from that Portal controller's stack (he/she will be able to choose among those owned by that Portal controller; if that player has none, he/she can draw a random one from the Coin Bag) and discard the rest. If the highest number of Conquer Tokens placed on a Portal Tile by a player is the same for more than one player, nobody will draw any extra Coin. A defeated player's Rooms cannot be conquered anymore, but his/her tiles can still be used as passages.
End of the Game: the game ends whenever a player reaches 30 GPs. Then, you will need to calculate the final score and determine the winner as described in the Standard Rules. The game also ends if a player is the last undefeated player at the table: in this case he/she is automatically the winner!
Putting the Game Away
Whenever a game is over and it is time to put it back in its box, we suggest placing every Construction Tile and Coin in its own Bag and tying them up so that they don't spread inside the box, then placing them in the side spaces. Special Tiles and Tokens shall be placed into plastic bags, and so shall be done with the Stooge tokens.
Finally, before closing the box, place first the Game Board (carefully closed), then the Dungeon Lord cards, and then the Rulebook you are holding right now on top of everything.
The printed example shows the box layout: Box (top), Rulebook, Dungeon Lord cards, Game Board, and Bags.
Glossary
- Adjacent: a tile is adjacent to another when two of their edges touch each other.
- Coins: each Coin token has a GP value that ranges from 1 to 3, and they can be gained by completing Corridors with Gold Nuggets, by Conquering opponents' Rooms and by building Treasure Rooms. Their GP value is calculated after the game ends.
- Coin Bag: the cotton pouch which contains Coin tokens.
- Combat: a Combat happens when a Party of Stooges moves onto a tile occupied by an inferior number of opponent Stooges, and it destroys them.
- Complete (Corridor): a Corridor is complete when all of its arms are closed by Doors. Whenever a player completes a Corridor, he/she gains GP according to the Corridor's length.
- Connected: a tile is connected to another one when they are adjacent and two Doors, two Corridors or a Door and a Corridor touch each other.
- Conquer Token: whenever one or more Stooges perform a Conquer! Order, one of such tokens must be flipped upside down and transforms into a Conquer Token, which will deactivate Rooms' abilities and grant one Coin.
- Construction Tiles: there are 42 Construction Tiles in each player's Tiles Bag (Rooms and Corridors). Players draw these tiles to form their Projects set.
- Corridor: one of the two types of Construction Tiles. Corridors can be easily crossed by Stooges and grant GP when completed.
- Craft: represents the number of Projects each player must have at the end of each Turn (if a player does not have enough, he/she will draw up to this value at the end of each Turn).